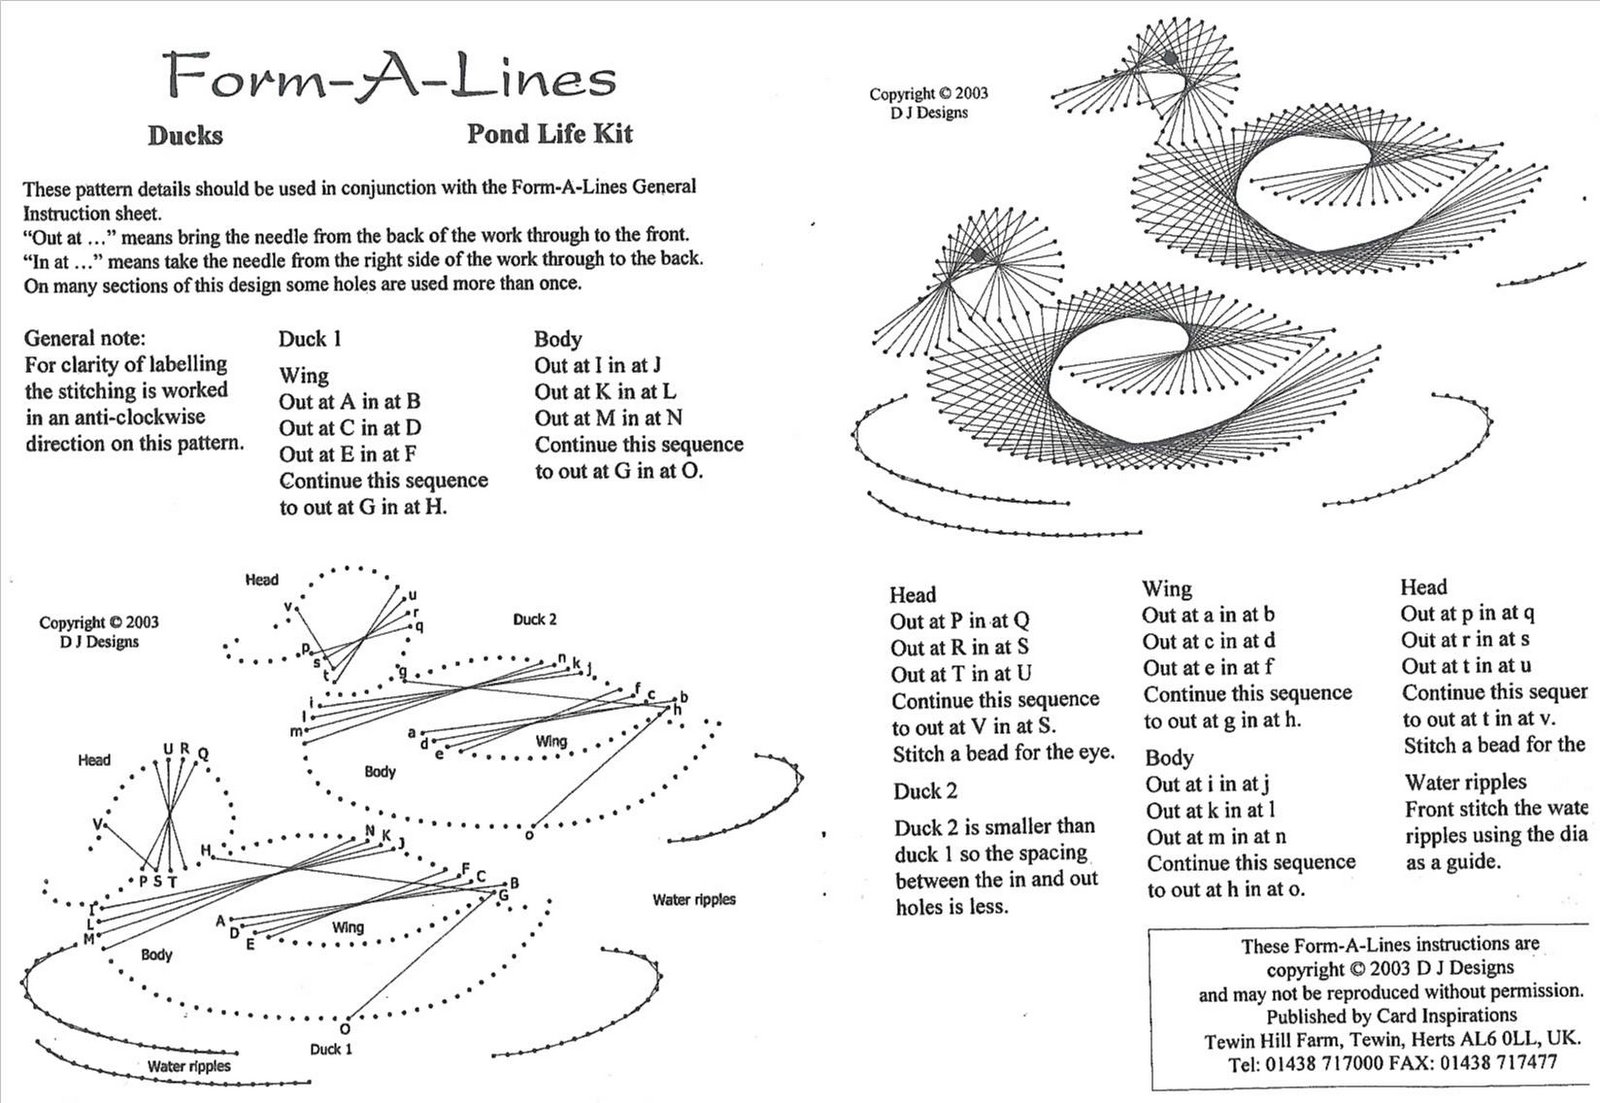
Pond Life Kit Ducks

l^o^m-yA-JLines
Ducks Pond Life Kit
These pattem details should be used in conjunction with the Form-A-Lines General Instruction sheet.
“Out at...” means bring the needle from the back of the work througli to the front. “In at...” means take the needle from the right side of the work through to the back. On many sections of this design some holes are used morę than once.
General notę:
For clarity of labelling the stitching is worked in an anti-clockwise direction on this pattem.
Duck 1 Wing
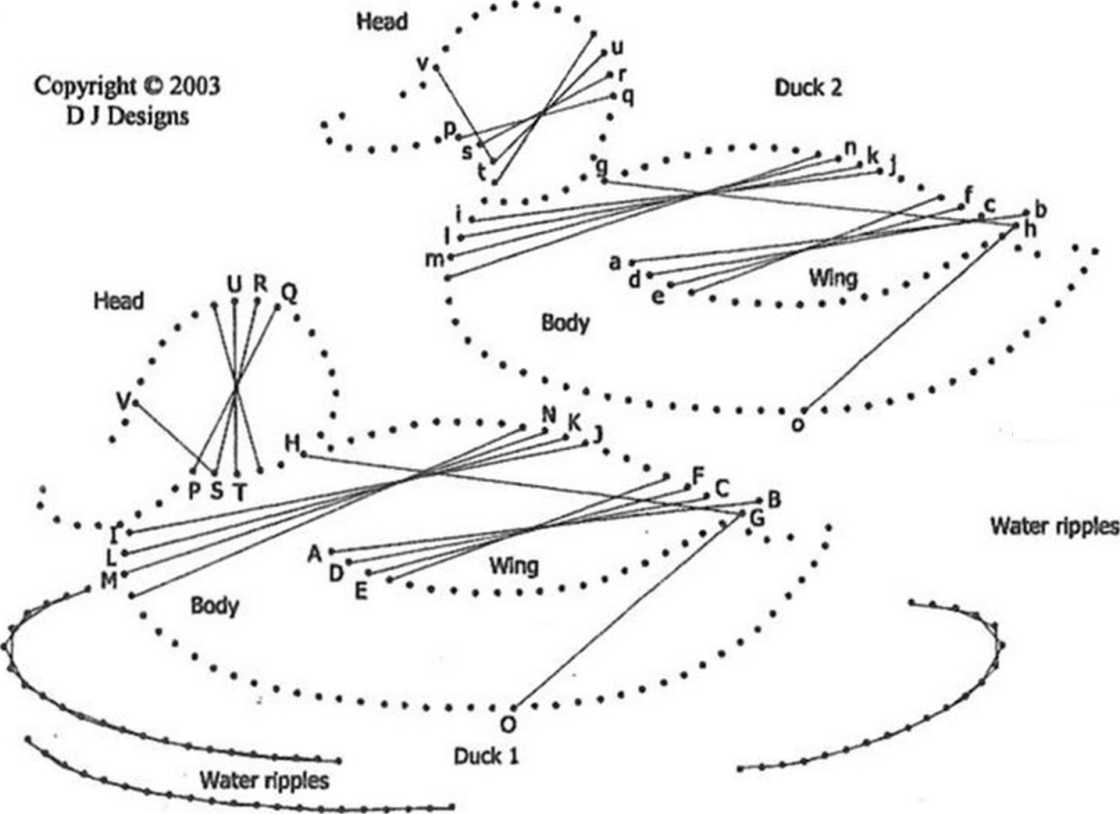
Out at A in at B Out at C in at D Out at E in at F Continue this sequence to out at G in at H.
Body
Out at I in at J Out at K in at L Out at M in at N Continue this seąuence to out at G in at O.

Copyright O 2003 D J Designs

Head
Out at P in at Q Out at R in at S Out at T in at U Continue this sequence to out at V in at S.
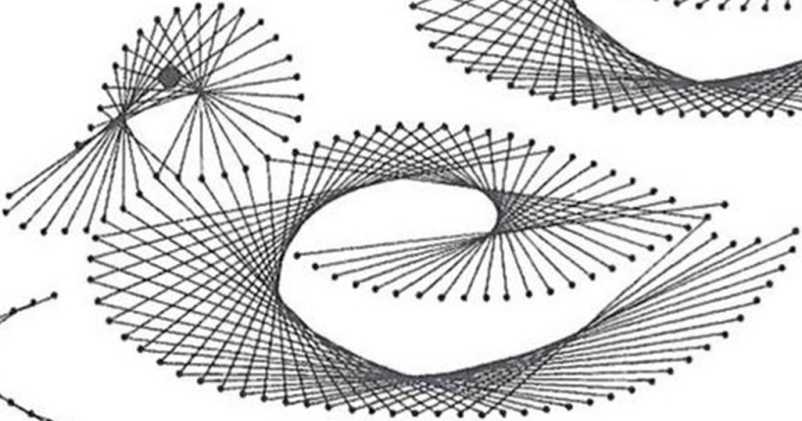
Stitch a bead for the eye.
Duck 2
Duck 2 is smaller than duck 1 so the spacing between the in and out holes is less.
Wing
Out at a in at b Out at c in at d Out at e in at f Continue this sequence to out at g in at h.
Body
Out at i in at j Out at k in at 1 Out at m in at n Continue this sequence to out at h in at o.
Head
Out at p in at q Out at r in at s Out at t in at u Continue this sequer to out at t in at v. Stitch a bead for the
Water ripples Front stitch the watę ripples using the dia as a guide.
These Form-A-Lines instructions are copyright © 2003 D J Designs and may not be reproduced without permission.
Published by Card Inspirations Tewin Hill Farm, Tewin, Herts AL6 OLL, UK. Tel: 01438 717000 FAX: 01438 717477
Wyszukiwarka
Podobne podstrony:
Pond Life Kit Frogs Ho rm-jA-i-i nesFrogs Pond Life Kit These pattem details shoul
Christmas tree instructions mesPo rm-y-P Christmas TreeChristmas Kit 3 These pattem details should b
Angel instructions Fo^m-A-Li nesAngel Christmas Kit 3 These pattem details should
Pond Life Kit Water Snails mes Water snailsPond Life Kit These pattem details should be used in conj
Girl?by Kit Hoi^m-yK-L-iryesGirl Baby Kit These pattera details should be used in
House (12) Po^m-^A-J-Pes HouseWillow Pattern Kit These pattern details should be used in conjunction
Cat Window Kit Horm-yK-LinesCat Window Kit These pattern details should be used in
56c T^orm-^-L irvesTree Christmas Bcads Kit These pattem details should be used in
67b Form-yA-Li nesNew Home Flower Borders These pattem details should be used in c
16a o r m - ;A - ]_ i e sDaffodil Garden Flower Kit These pattem details should be
Boat Page 1 Ho ne.s BoatWillow Pattern Kit These pattern details should be used in
Table Window Kit Troi^m-;A-lJrvesTable Window Kit These patiem details should be u
35635 Two Puppies Two Puppies Puppy Kit These pattern details should be used in co
więcej podobnych podstron