2 (1040)

3853 THUNDER RIDGE
This design has been created especially for you. If youre cm exf>erienced stitcher, you can sort your colors, then stan right in with the instrnctions next to the chart. If you want morę Information, take just a hit of time to read all the instructions before you begin.

GET Ready
• Rcfcr to the package label for a list of the kit contents. Make surę you have everything you need before you start.
• Your fabric is called Aida cloth. It is an unprinted, evenweave fabric especially madę for cross stitch. The count on the package label indicates the number of fabric squarcs per inch.
• Prevent your fabric from fraying at the edges by wrapping the edges with narrow masking tape.
• In counted cross stitch, it’s best to start the design at the center and work out to the edges. That way you’11 know that your design is propcrly ccntercd on the fabric.
• To find the center, fold your fabric in half vertically, then horizontally. Whcrc the folds meet is the center point. Mark the center with a pin or piece of thread.
• Your stitching will look best if your fabric is held taut as you stitch. You can use either of the following methods:
Scroll Bars: Scroll bars can be found in a varicty of sizes. We recommend the kind with the slotted dowels to eliminatc the need for lacing or stąpiing.
Just slide the fabric into the slot and attach the side bars. Roli the fabric around the dowel to exposc the desired area.
When stitching, you can either lean the bars against a table or place them in a purchased stand, leaving both your hands free to stitch. With one hand on top of the fabric and one below it, you can stitch morę quickly. This takes a little practicc, but it’s well worth it. Just think — morę time for morę kits! Embroidery Hoop: Choosc a size that suits the way you stitch — a smaller hoop if you like to carry your stitching with you or a larger one which exposes the entire design. To prevent the hoop from marking the fabric, place a strip of tissue paper between the fabric and the outer hoop.
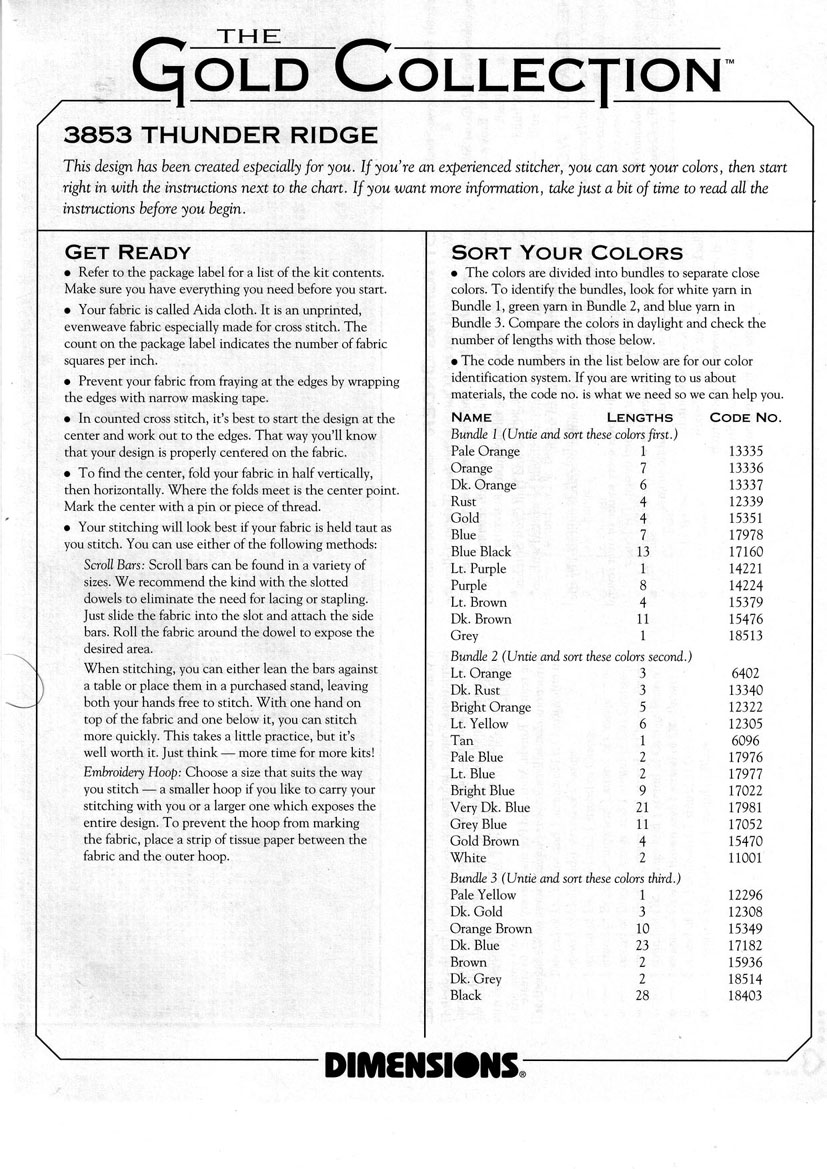
SORT YOUR COLORS
• The colors are divided into bundles to separate close colors. To identify the bundles, look for white yarn in Bundle 1, green yarn in Bundlc 2, and bluc yarn in Bundle 3. Comparc the colors in daylight and check the number of Iengths with those below.
• The codę numbers in the list below are for our color identification system. If you are writing to us about materials, the codę no. is what we need so we can help you.
|
Name |
Lengths |
CODĘ NO. |
|
Bundle l (Umie and sort these colors first.) | ||
|
Pale Orange |
1 |
13335 |
|
Orange |
7 |
13336 |
|
Dk. Orange |
6 |
13337 |
|
Rust |
4 |
12339 |
|
Gold |
4 |
15351 |
|
Blue |
7 |
17978 |
|
Blue Black |
13 |
17160 |
|
Lt. Purple |
1 |
14221 |
|
Purple |
8 |
14224 |
|
Lt. Brown |
4 |
15379 |
|
Dk. Brown |
11 |
15476 |
|
Grey |
1 |
18513 |
|
Bundle 2 (Umie atul sort these colors second.) | ||
|
Lt. Orange |
3 |
6402 |
|
Dk. Rust |
3 |
13340 |
|
Bright Orange |
5 |
12322 |
|
Lt. Yellow |
6 |
12305 |
|
Tan |
1 |
6096 |
|
Pale Blue |
2 |
17976 |
|
Lr. Blue |
2 |
17977 |
|
Bright Blue |
9 |
17022 |
|
Very Dk. Blue |
21 |
17981 |
|
Grey Blue |
11 |
17052 |
|
Gold Brown |
4 |
15470 |
|
White |
2 |
11001 |
|
Bundle 3 (Umie and sort these colors third.) | ||
|
Pale Yellow |
1 |
12296 |
|
Dk. Gold |
3 |
12308 |
|
Orange Brown |
10 |
15349 |
|
Dk. Blue |
23 |
17182 |
|
Brown |
2 |
15936 |
|
Dk. Grey |
2 |
18514 |
|
Black |
28 |
18403 |
DIMENSIONS

Wyszukiwarka
Podobne podstrony:
Crochet Borders!7 #80STITCHES & NOTES Notę: This design offers lots of opportunities for whimsic
pll do Veronica NRG KITS PLL-PRO 2Although this model has been replaced with the superieor PLL-PRO 3
18707 kotek 2 REFLF CTION (78w x 118h) Work whiskers and eyebrows in long, loose stitches after desi
pll do Veronica NRG KITS PLL-PRO 2Although this model has been replaced with the superieor PLL-PRO 3
Certificate of R This certificate has been awarded toKalcit s.r.o. Lom Brno - Liśe
Certificate of Registration This certificate has been awarded toKalcit s.r.o. Triskalova 902/1 Oa, L
SAFETY PRECAUTIONSFederal Communications Commission (FCC) Statement This Equipment has been tested 3
Best PracticeGuide Guide for teachers This project has been funded with suppoit from the European Co
1 (364) This announcemenl has been coming for a while, but I hoped the sad harbinger would
this device has been previously characterized experimentally by optical holographic techniques. Thes
DIPLOMA Centre of Rehabilitation^ intermedicus This course has been approved by Polish Society of
Copyright statement This presentation has been prepared for a university lecture. thus for a non-pro
62302 New Forms Taschen 079 California architect Frank O. Gehry this trend has been a source of some
obieg duży tętnice tif upload. wikimedia. org/wikipedia/commons/9/97/Arterial_system _pl . svg This
I Int roduction This bibliography has been compiled by the slaff of Informatics Inc. in response to
więcej podobnych podstron