31 (261)

3nstrurtimta for dattimt

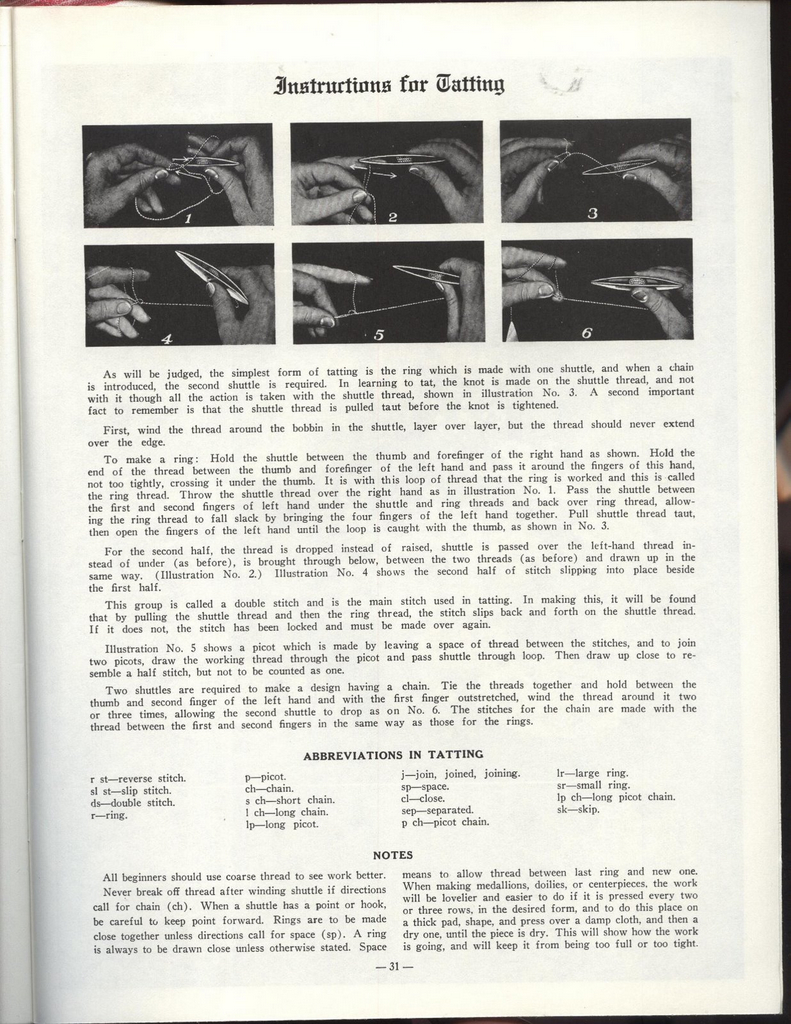
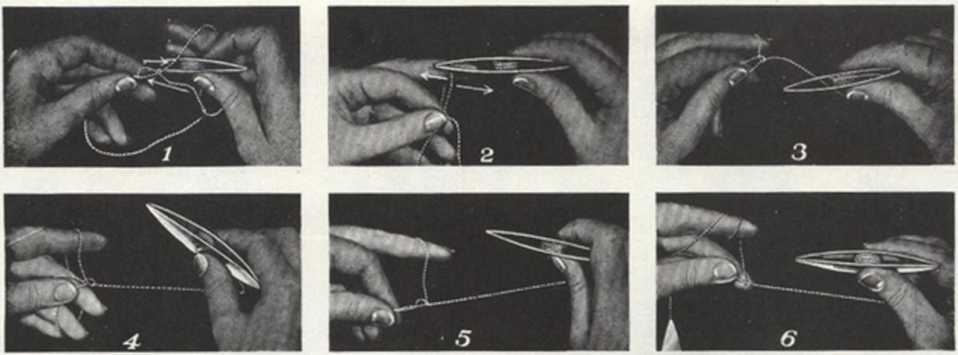
As will be judgcd, thc simplest form of tatting is the ring which is madc with one shuttle, and when a chain is introduccd, the sccond shuttle is requircd. In learning to tat, the knot is madę on thc shuttle thread, and not with it though all thc action is taken with thc shuttle thread, shown in illustration No. 3. A sccond important fact to rcmember is that the shuttle thread is pullcd taut bcforc thc knot is tightened.
First, wind thc thread around thc bobbin in thc shuttle, layer over laycr, but the thread should nevcr cxtend over thc edge.
To make a ring: Hołd thc shuttle between thc thumb and forefinger of thc right hand as shown. Hołd thc
end of thc thread between the thumb and forefinger of the left hand and pass it around thc fingers of this hand, not too tightly, Crossing it under thc thumb. It is with this loop of thread that thc ring is worked and this is callcd the ring thread. Throw thc shuttle thread over thc right hand as in illustration No. I. Pass thc shuttle between the first and second fingers of left hand under thc shuttle and ring threads and back ovcr ring thread, allow-ing the ring thread to fali slack by bringing thc four fingers of the left hand together. Puli shuttle thread taut. then o pen thc fingers of thc left hand until thc loop is caught with the thumb, as shown in No. 3.
For thc sccond half, thc thread is dropped instead of raiscd, shuttle is passed over the left-hand thread in-
stead of under (as bcforc), is brottght through bclow, between the two threads (as before) and drawn up in the same way. (Illustration No. 2.) Illustration No. A shows thc second half of stitch slipping into place beside
thc first half.
This group is callcd a double stitch and is the main stitch uscd in tatting. In making this, it will be found that by pulling thc shuttle thread and then the ring thread. the stitch slips back and forth on the shuttle thread. If it does not, thc stitch has bcen loeked and must bc madę ovcr again.
Illustration No. 5 shows a picot which is madę by lcaving a spacc of thread between thc stitches, and to join
two picots, draw thc working thread through the picot and pass shuttle through loop. Then draw up close to re-
scmblc a half stitch, but not to bc countcd as one.
Two shuttles arc requircd to make a design having a chain. Tie thc threads together and hołd between thc
thumb and second finger of thc left hand and with the first finger outstrctched. wind the thread around it two
or threc times, allowing thc second shuttle to drop as on No. 6. The stitches for the chain arc madc with thc
thread between the first and second fingers in thc same way as thosc for thc rings.
ABBREYIATIONS IN TATTING
r st—revcrsc stitch. sl st—slip stitch. ds—double stitch. r—ring.
p—picot. ch—chain. s ch—short chain. 1 ch—long chain. lp—long picot.
j—join, joincd, joining. sp—space. cl—close. sep—separated. p ch—picot chain.
Ir—large ring. sr—smali ring.
Ip ch—long picot chain. sk—skip.
NOTES
All beginners should usc coarsc thread to sce work better.
Ncver break off thread after winding shuttle if dircctions cali for chain (ch). When a shuttle has a point or hook, bc carcful to keep point forward. Rings arc to be madc close together unlcss dircctions cali for space (sp). A ring is always to be drawn close unless otherwise stated. Spacc mcans to allow thread between last ring and ncw one. When making mcdallions. doilics. or centcrpicccs. the work will be lovelier and easier to do if it is pressed cvery two or three rows. in the desired form. and to do this place on a thick pad, shape, and press ovcr a damp cloth. and then a dry one. until thc piece is dry. This will show how the work is going, and will keep it from bcing too fuli or too tight.
— 31 —
Wyszukiwarka
Podobne podstrony:
tions one of two modds for bubble dynamics will be employed: the Gilmore-Akulichcv formulation with
*THIS IS FOR A GRADE. *THIS WILL BE YOUR LAST DAILY GRADE ASSIGNMENT Name_ Period World History Seco
51918 skanowanie0034 (11) 6.4. The construction of tests In this part generał procedures for test co
voting cards will be available to persons entitled to participate in the Ordinary General Meeting in
FOOTBALL 1914 The football season of 1914 will be remembered in tbe history of Salem High School in
%LETTER CARD lf onyfhinc, “nclosed (his *_a< J will be stoi by ofdinary mail. • łt- Whcn foldsel
Complete thc dialogues bclow with thc correct form of thc verb to be (być) in thc Present Simple Kus
image008 ANALOG will be avaiiabłe a? a special educational ralo for a subsortption des.gned to fit m
The second year of the seminar will be devoted to the actual writing of the MA theses. Students will
J 01 page (22) 1 1 WILL BE BRANPEP 1 1 A 8ETRAYER FOR I I ITSASMALL A
leg1 Copyright © 1998 BME. Ali rights reserved. Copyright will be protected and damages sought for i
As every year the presentation of scientific abstracts (orał and posters presentations) will be the
200 Arquivos de Zoologia but the same reasoning as for character 113 can be applied here. Aphaly is
assignments from other courses or semesters is a violation of the academic honesty guidelines and wi
więcej podobnych podstron