Copyright Interweave Press LLC. Not to be reprinted. All rights reserved.
page
project
library
R R R R R R R R R R R R R R R R R R R R R R R
publishers of Easy Wire magazine…join the online beading community at
BeadingDaily.com
An
n
Sw
an
so
n
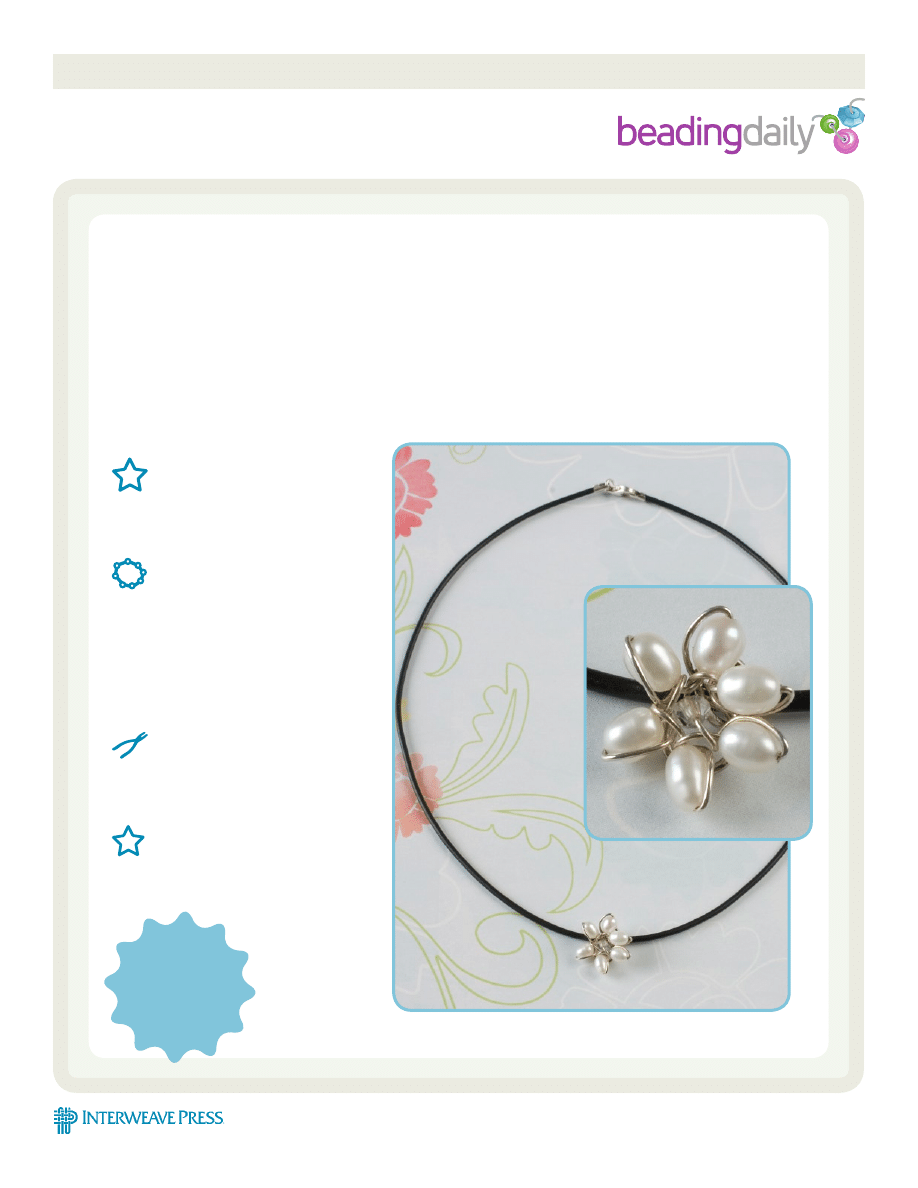
Lotus Blossom
by Sandi Wiseheart
Six pearls, a crystal, a bit of wire, and less than half an hour--that’s all it takes to
make this simply elegant blossom pendant. Instant bead gratification!
FiniSheD Size:
Finished Size of Pendant: About ½”
Length of necklace depends on
length of neckwire or chain chosen
materiaLS:
6 white 5x3mm rice pearls
crystal AB 2mm Swarovski bicone
crystal
silver 4mm jump ring
8” 24-gauge sterling silver wire
Purchased neckwire or chain
tooLS:
Round nose pliers
Chain nose pliers
Wire cutters
techniqueS
Wirework
a
Beading
Daily
exclusive
!
Copyright Interweave Press LLC. Not to be reprinted. All rights reserved.
page 2
publishers of Easy Wire magazine…join the online beading community at
BeadingDaily.com
Lotus Blossom
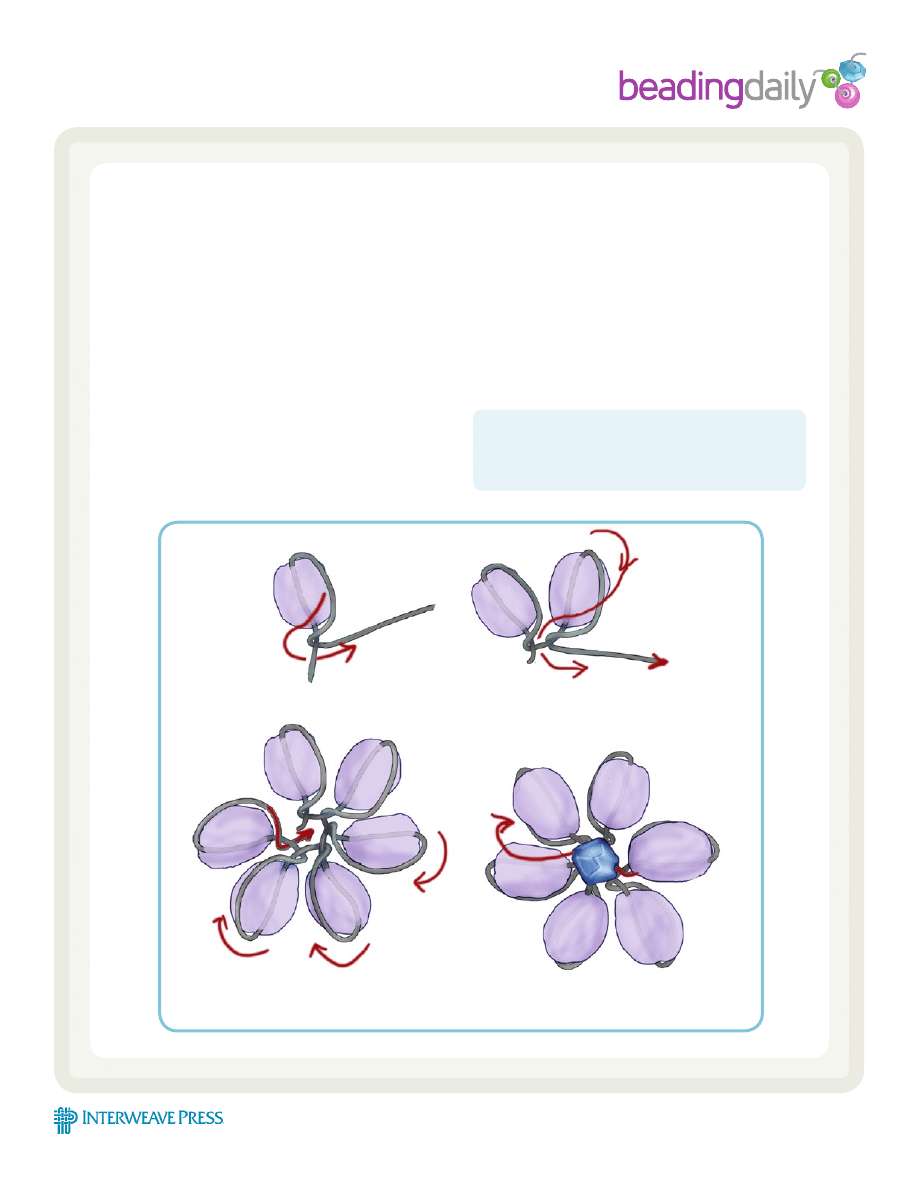
Step 1: Use 8” of wire to string pearl, leaving a ” tail;
bend the long end sharply down to the right then
wrap it once around the wire at the base of the
pearl so that it points to the right (Figure ).
Note: The petals are worked from the backside of
the finished flower.
Step 2: String pearl to about 3/8” from the previous
wrap. Bend the long end sharply down to the
right and wrap it once around the wire at the base
of the pearl just strung (Figure 2).
Step 3: Repeat Step 2 four times for a total of 6 pearl
petals, leaving the long end of the wire pointing
away from you between the fifth and sixth pearls
(Figure 3)
Step 4: Turn the work over so that the working wire is
pointing up and the tail wire is to the back.
String the crystal and push it into the center of
the circle of pearls. Pass between the opposite
two pearls and to the back (Figure 4); secure by
twisting the long and tail wires together; trim
ends and flatten against back of pendant so that
they do not show.
Step 5: Open the jump ring and gently thread it through
one or two of the wires at the back of the flower;
close the ring. String the neckwire through the
jump ring and enjoy!
R
SanDi WiSeheart lives in Colorado with her
very patient husband, a three-legged dog named
Buddy, and several cats who carefully supervise her
beadwork.
Figure 1
Figure 2
Figure 3
Figure 4
Ill
us
tr
at
io
n
by
D
us
tin
W
ed
ek
in
d
Wyszukiwarka
Podobne podstrony:
Bizuteria kurs Jewellery handmade jewelery jevelery kolczyki bransoletki naszyjniki koraliki(CRAFTS)
Bizuteria kurs Jewellery handmade jewelery jevelery kolczyki bransoletki naszyjniki koraliki(CRAFTS)
Bizuteria kurs Jewellery handmade jewelery jevelery kolczyki bransoletki naszyjniki koraliki(CRAFTS)
Bizuteria kurs Jewellery handmade jewelery jevelery kolczyki bransoletki naszyjniki koraliki(CRAFTS)
Bizuteria kurs Jewellery handmade jewelery jevelery kolczyki bransoletki naszyjniki koraliki(CRAFTS)
Bizuteria kurs Jewellery handmade jewelery jevelery kolczyki bransoletki naszyjniki koraliki(CRAFTS)
Bizuteria kurs Jewellery handmade jewelery jevelery kolczyki bransoletki naszyjniki koraliki(CRAFTS)
Bizuteria kurs Jewellery handmade jewelery jevelery kolczyki bransoletki naszyjniki koraliki(CRAFTS)
landrynkowe bransoletki, Inne ంం, koraliki bizuteria
jak zrobić kolczyki, Inne ంం, koraliki bizuteria
Kolczyki pędzelki, Biżuteria - WZORY
01 Biżuteria z drobnych koralików kolczyki
więcej podobnych podstron