Copyright Interweave Press LLC. Not to be reprinted. All rights reserved.
page 1
project
library
R R R R R R R R R R R R R R R R R R R R R R R
publishers of Step by Step Wire Jewelry…join the online beading community at
BeadingDaily.com
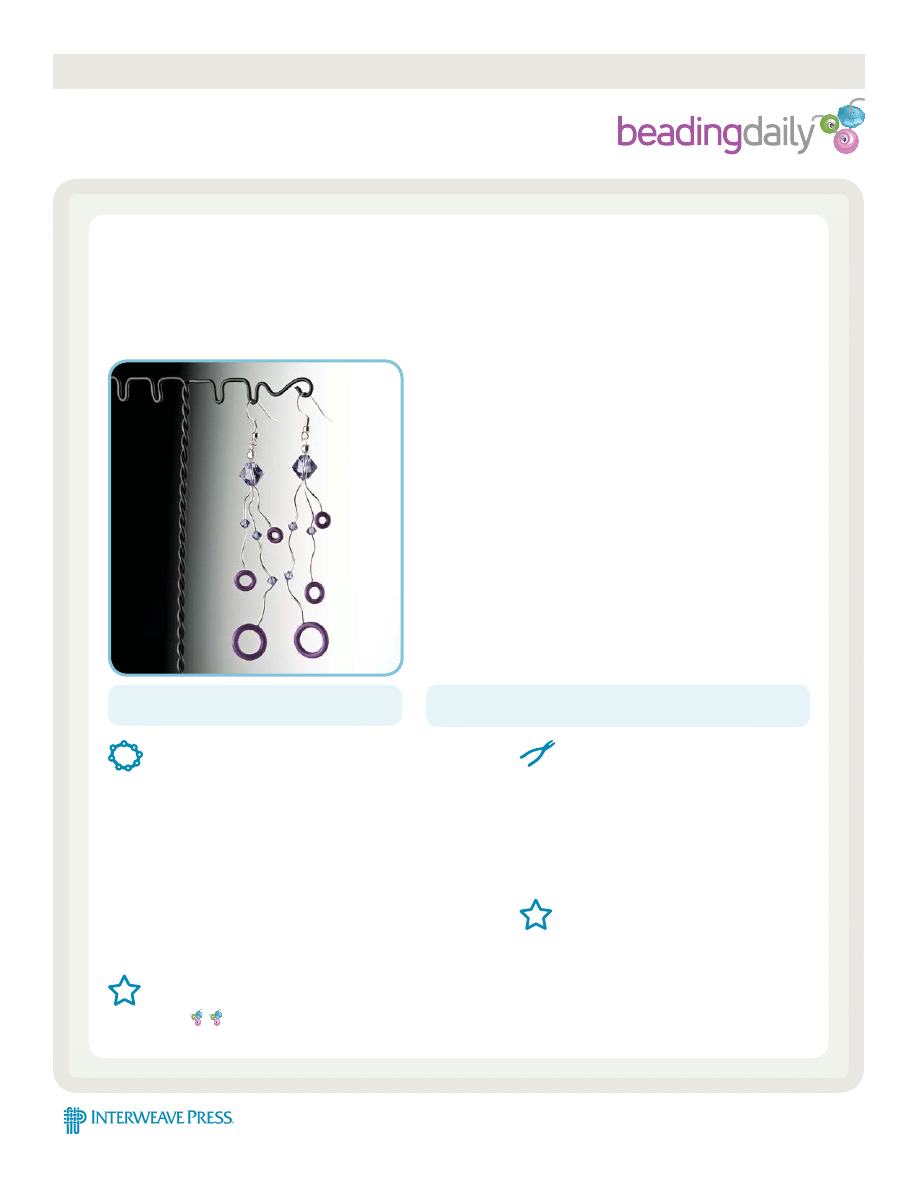
O-Ring Earrings
by Charlene Anderson
MATERIALS:
2 earwires (Fire Mountain #H20-1415FN)
28-gauge craft wire
2 bead tips (Fire Mountain #H20-6672FD)
2”x 2” crimp beads, 2 (Fire Mountain #H20-6257FN)
15mm rubber O-rings, 2 (Fire Mountain #8474FD)
9mm rubber O-rings, 2 (Fire Mountain #8435FD)
7mm rubber O-rings, 2 (Fire Mountain #8422FD)
4mm bicone Swarovski crystals, Tanzanite, 6
8mm bicone Swarovski crystals, Tanzanite, 2
12 spiral tube 1mm x 17.5mm sterling beads
(Fire Mountain #H20-6580MB)
SKILL LEVEL
Easy
Rubber rings paired with Swarovski crystal and silver.
I love to combine traditional jewelry materials,
such as silver and Swarovski crystals, with
slightly edgy materials such as the rubber
O-rings in these earrings. I had an idea of
the finished look I wanted, but the sticking
point seemed to be with attaching the
O-rings to the ends of the crystal and silver
elements. The solution came to me as I was
just drifting off to sleep one night...use craft
wire to sew through the O-rings and use
a good glue to keep the wire from pulling
through the O-rings.
Photo of finished piece by Jim Lawson; all
other photos courtesy of the author.
Resources: Fire Mountain Gems and Beads, firemountain.
com; craft wire from Michaels, michaels.com.
TOOLS:
Loctite 409 Glue
Embroidery needle (sharp) with eye large
enough to thread wire through
Crimping pliers
Side cut pliers
Flat nose pliers
Round nose pliers
TECHNIQUES
Wirework
Copyright Interweave Press LLC. Not to be reprinted. All rights reserved.
page 2
O-RING EARRINGS
publishers of Step by Step Wire Jewelry…join the online beading community at
BeadingDaily.com
Step 1
Step 2
Step 4
Step 3
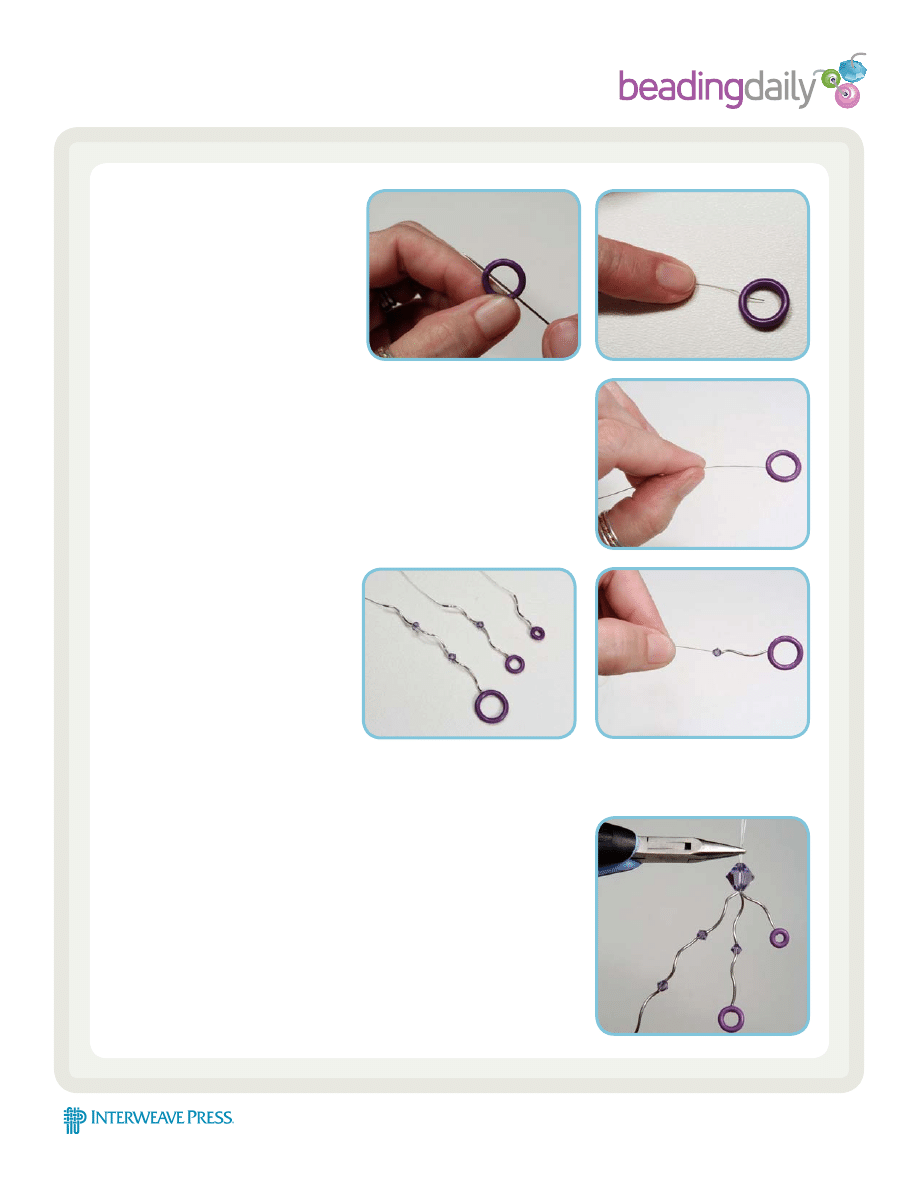
Cut the craft wire into six 1’
lengths. With an embroidery needle
threaded with one length of wire, sew
through one side of an O-ring from
the inside to the outside. Stop before
pulling the wire all the way through
the O-ring.
Place a dab of Loctite 409 glue in the end of the wire. Carefully pull the
wire until the end of the wire just disappears into the O-ring. The glue will be
pulled in behind the wire into the O-ring. If any glue remains on the outside
of the O-ring, carefully wipe it off. Set it aside to dry thoroughly. Repeat Steps
1-2 with the remaining O-rings and wire. Let all six pieces (three for each
earring) dry thoroughly.
Gather together the three component wires for each earring and thread
through an 8mm bicone.
On the wire that contains the
largest O-ring, thread a spiral tube,
4mm bicone, spiral tube, 4mm bicone,
and a spiral tube. The wire is a
tight fit in the tubes so carefully
feed it into the tubes little by little
with pliers. This keeps the wire from
bending back onto itself while you are
feeding it through the tube.
The second largest O-ring/wire
combination gets a spiral tube, a 4mm bicone, and another spiral tube. The smallest O-ring gets a spiral tube. Repeat
these three components for the other earring. When you have threaded all the components you will have three wires
for each earring.
Copyright Interweave Press LLC. Not to be reprinted. All rights reserved.
page 3
O-RING EARRINGS
publishers of Step by Step Wire Jewelry…join the online beading community at
BeadingDaily.com
Step 5
Step 6
Step 7
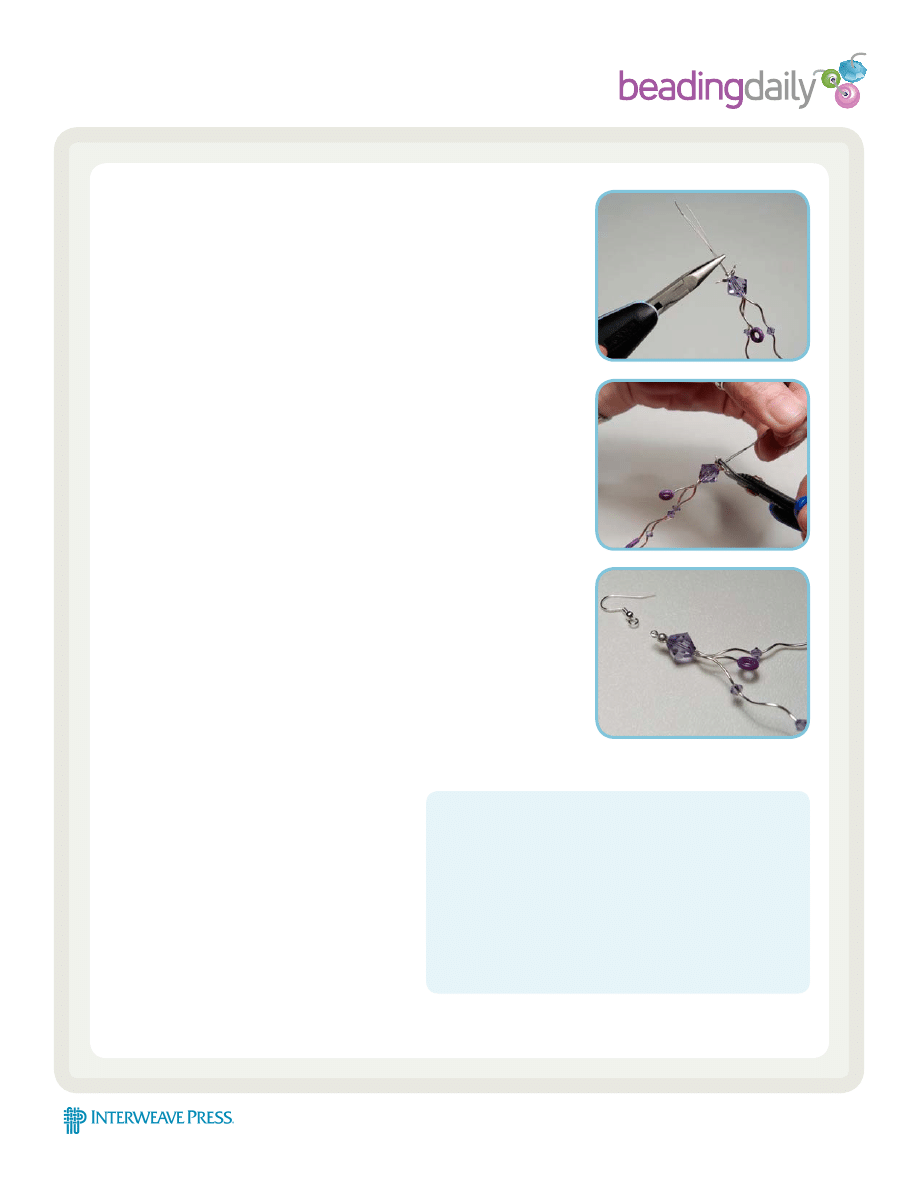
Use a dab of Loctite 409 glue to make sure the crimp bead stays
secure. Set aside to dry. When the glue is thoroughly dry, clip off the excess
wire. Attach an earwire to the bead tip.
Making sure all the silver tubes are pulled up firmly against the 8mm
crystal, crimp the crimp bead firmly.
Thread a bead tip on all three wires. Thread a crimp bead on all three
wires.
CHARLENE ANDERSON grew up in Hemet, Calif., on a
Thoroughbred horse ranch. She then lived Hawaii for 20
years before finally moving to Jackson Hole, Wyo. Being
fortunate enough to extensively travel the world, her time
exploring the cultures, architecture, and artwork in over 100
countries has given Charlene an international perspective to
design. She borrows inspiration from different cultures and
continents, and combines them in original and eclectic ways
to make it a hallmark of her work. Charlene still lives at the
base of a mountain with her imported British husband Ron,
and her Hungarian Vizsla, Arazi the Wonder Dog.
Wyszukiwarka
Podobne podstrony:
Bizuteria kurs Jewellery handmade jewelery jevelery kolczyki bransoletki naszyjniki koraliki(CRAFTS)
Bizuteria kurs Jewellery handmade jewelery jevelery kolczyki bransoletki naszyjniki koraliki(CRAFTS)
Bizuteria kurs Jewellery handmade jewelery jevelery kolczyki bransoletki naszyjniki koraliki(CRAFTS)
Bizuteria kurs Jewellery handmade jewelery jevelery kolczyki bransoletki naszyjniki koraliki(CRAFTS)
Bizuteria kurs Jewellery handmade jewelery jevelery kolczyki bransoletki naszyjniki koraliki(CRAFTS)
Bizuteria kurs Jewellery handmade jewelery jevelery kolczyki bransoletki naszyjniki koraliki(CRAFTS)
Bizuteria kurs Jewellery handmade jewelery jevelery kolczyki bransoletki naszyjniki koraliki(CRAFTS)
Bizuteria kurs Jewellery handmade jewelery jevelery kolczyki bransoletki naszyjniki koraliki(CRAFTS)
landrynkowe bransoletki, Inne ంం, koraliki bizuteria
jak zrobić kolczyki, Inne ంం, koraliki bizuteria
Kolczyki pędzelki, Biżuteria - WZORY
01 Biżuteria z drobnych koralików kolczyki
więcej podobnych podstron