publishers of Step by Step Wire Jewelry magazine . . . join the online beading community at www.BeadingDaily.com
In the Summer Preview 2008 issue of
Step by Step
Wire Jewelry you learned how to make the Round in
Circles bracelet. Here you can learn to make Nicola
Ryan's earrings to match.
by Nicola Ryan
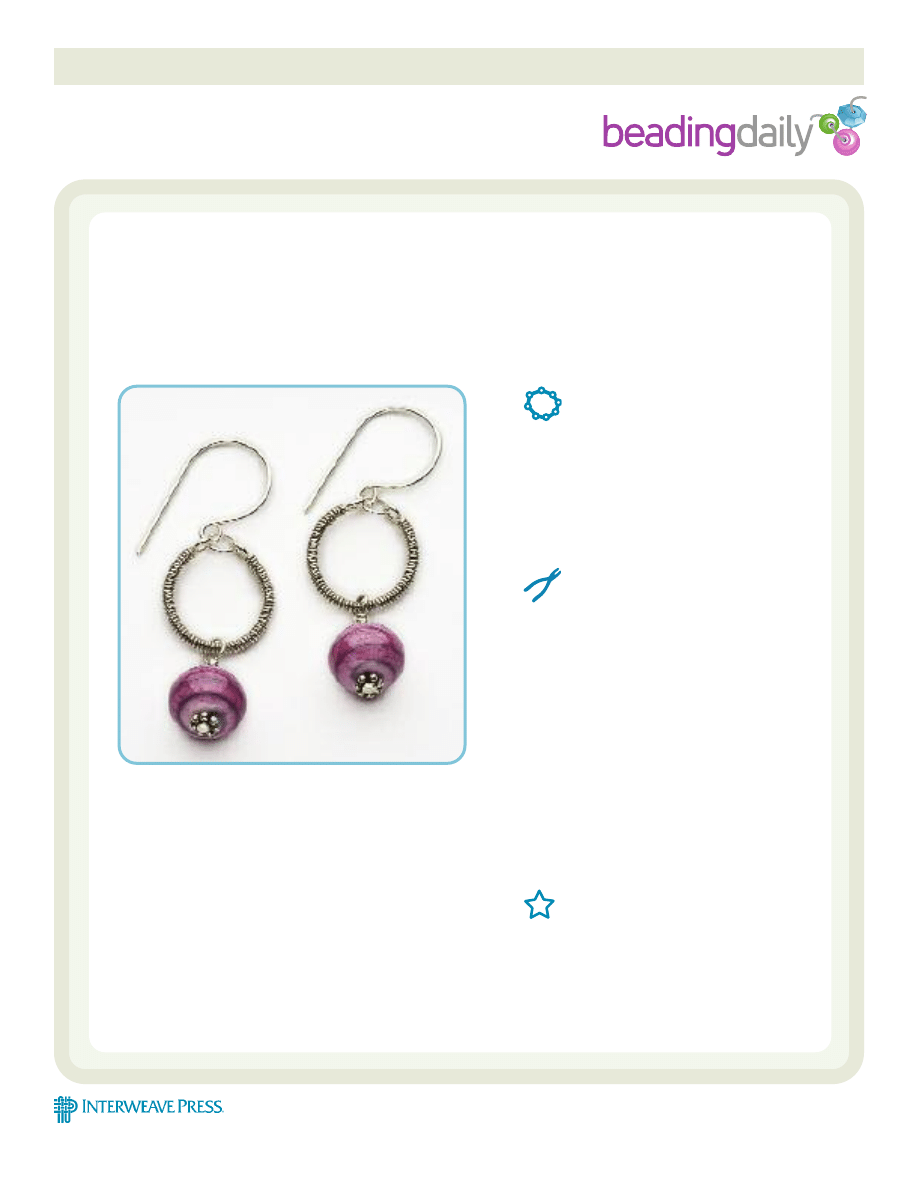
Coiled wire circles with lampwork beads.
Round in Circles Earrings
MATERIALS:
20-gauge dead soft wire, 9"
24-gauge dead soft wire, 26"
5mm OD jump rings, 22-gauge, 4
2 lampwork beads
2" headpins, 22-gauge, 2
2 daisy spacer beads
TOOLS:
Round nose pliers
Long round nose pliers
Chain nose pliers
Bent nose pliers
Flush cutters
Polishing cloth
Calipers
15mm mandrel or thick marker
Ruler
Pen
Tumbler (optional)
Hammer
Bench block
R
Reesso
ou
urrccee:: LLa
am
mp
pw
wo
orrk
k b
beea
ad
dss b
by
y LLa
au
urra
a
S
Sp
pa
arrlliin
ng
g,, b
beea
ad
dssb
by
ylla
au
urra
a..cco
o..u
uk
k
TECHNIQUES:
Wirework, coiling, beads and wire.
RRRRRRRRRRRRRRRRRRRRRRRRRRR
project
library
Copyright Interweave Not to be reprinted. All rights reserved.
page 1
P
h
o
to
o
f
fi
n
is
h
ed
p
ie
ce
b
y
Ji
m
L
aw
so
n
;
al
l
o
th
er
p
h
o
to
s
co
u
rt
es
y
of
t
h
e
au
th
o
r.

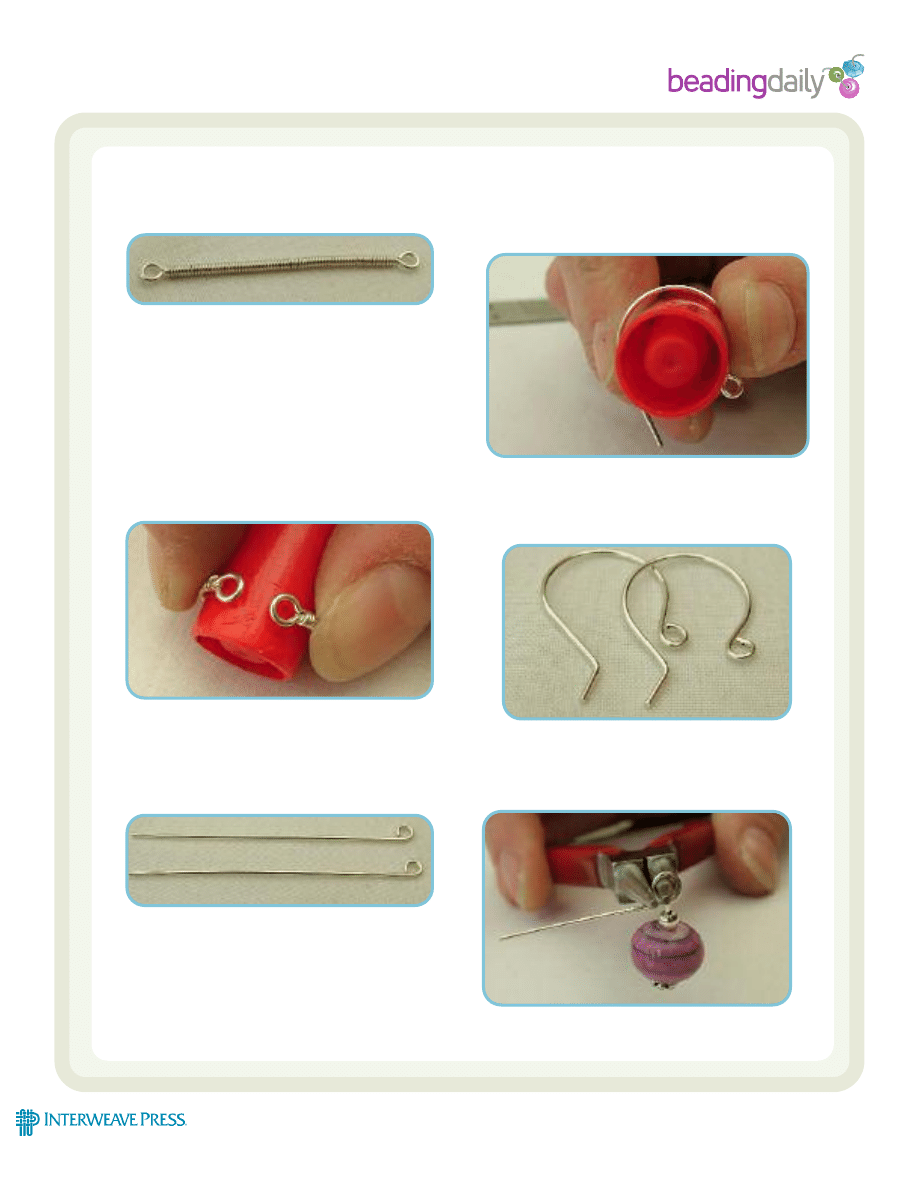
Step 1: Using a polishing cloth, straighten out a length
of 20g wire, to remove kinks and harden the
wire. Cut it into two 2 1/4" lengths with your
flush cutters.
Step 2: With a pair of calipers, measure the round nose
pliers at 1.8mm wide, and make a mark on the
pliers with a pen or tape. Place the tip of the
wire at this mark, and with your thumb bend it
around until it forms a P shape.
Step 3: Put the chain nose pliers into the base of the
P, and bend the tail of the wire back to form a
right angle. Place the round nose pliers back
into the loop, and bend the wire back a little
to form an eyepin.
Step 4: Repeat the same method to form a loop at the
other end of the wire, but make sure the loop is
going in the opposite direction of the first to
create a double eyepin.
Repeat with all the lengths of the wire, and set
them aside.
Step 5: Take the 24g wire, cut into two 13" lengths,
and straighten with the cloth. Take one length,
and fold it in half.
Step 6: Place the bend in the middle, and while
holding one end, wrap the other around the
body of the eyepin. Keep your wire taut and
straight, to help keep your coils even.
Round in Circles Earrings
Copyright Interweave. Not to be reprinted. All rights reserved.
page 2
publishers of Step by Step Wire Jewelry magazine . . . join the online beading community at www.BeadingDaily.com
Step 1
Step 3
Step 2
Step 5
Step 4
Step 6
publishers of Step by Step Wire Jewelry magazine . . . join the online beading community at www.BeadingDaily.com
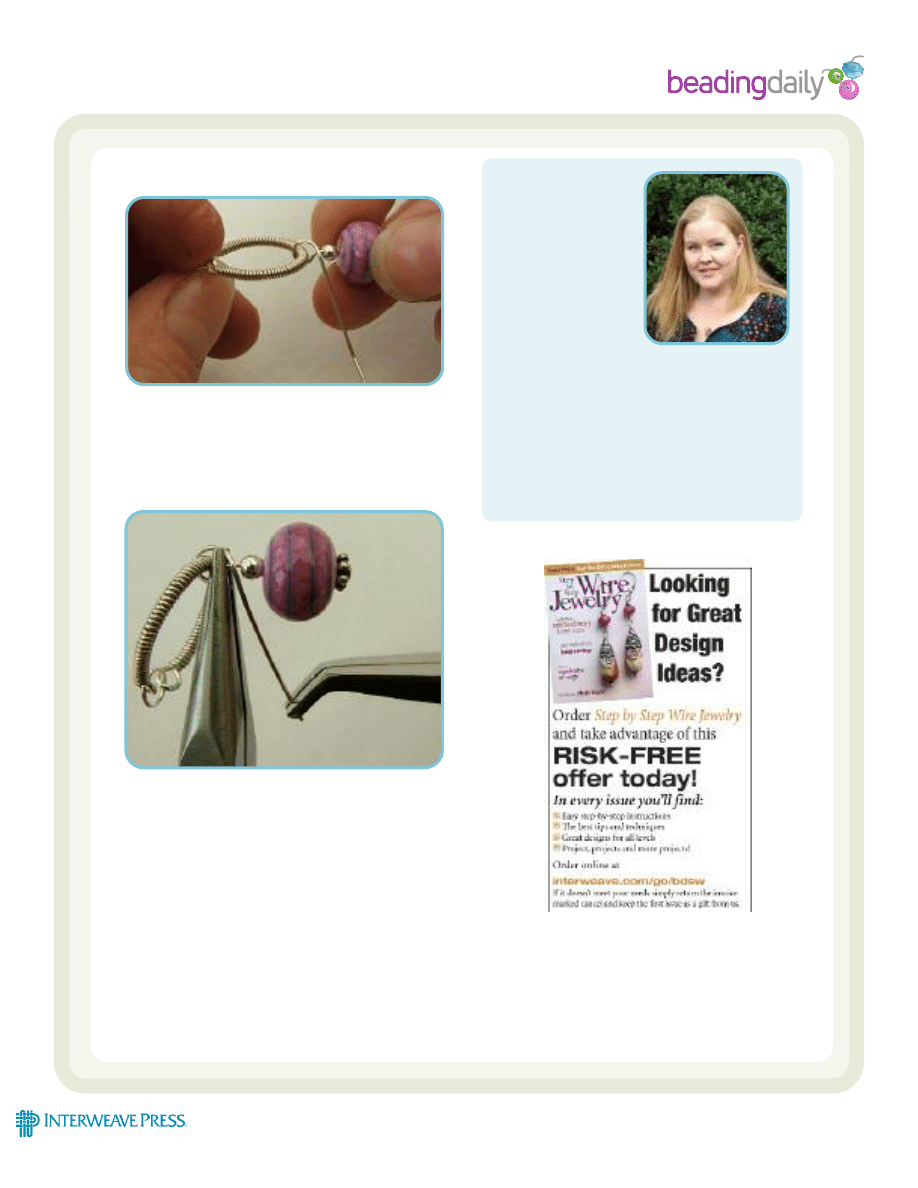
Step 7: Continue wrapping to the end, and turn it
around to coil the remaining wire. Trim any
excess with flush cutters and flatten any tails
with chain nose pliers.
Repeat with the other double eyepin, and set
them aside.
Step 8: Take one of the wrapped eyepins, and using
either a 15mm mandrel or thick marker, bend it
around to form a circle. It should be just short
of meeting in the middle. Make sure you push
the loops down flat against the mandrel.
Repeat with the other eyepin. Connect the
eyepins with a jump ring.
Step 9: Polish and straighten a length of 20g wire, and
cut two 2 1/4" pieces. Make both pieces into
single eyepins by turning a loop using the 1.8"
mark on the round nose pliers. Do not bend the
wire back.
Step 10: Take one of your eyepins and hold it against
the mandrel, with the loop proud. With your
thumb just above the loop, use your other
thumb to bend the wire around the mandrel as
far as it will go. Repeat with the other eyepin.
Step 11: Hold the tails level in between your thumb and
forefinger, and with bent nose pliers, bend
approximately 5mm of the tails upward.
Step 12: Thread a daisy spacer, a lampwork bead, and
another spacer onto a 22g headpin. Form a
loop on top of the second spacer bead.
Round in Circles Earrings
Copyright Interweave. Not to be reprinted. All rights reserved.
page 3
Step 7
Step 8
Step 9
Step 10
Step 11
Step 12
publishers of Step by Step Wire Jewelry magazine . . . join the online beading community at www.BeadingDaily.com
Open the loop up to the side, and slip the
whole piece onto the circle connectors.
Step 13: Using chain nose pliers, hold the loop still.
Wire wrap the base of the loop. You might find
it easier to turn the bead around and do this
in small steps, rather than doing it all at once.
You should get at least two or three wraps.
Snip the leftover wire as close as you can. Use
the bent nose pliers to tuck in any wire that
may be sticking up. Take the earwire and open
up the loop, slip the circle connector onto it,
and close. Repeat for the other earring.
NICOLA RYAN
has been designing and
making jewelry since
2004. Living in
Southampton, England
with her husband and
two children, she
successfully juggles her
love of jewelry design
with her family life. With
no formal training but a long love of art and craft,
she first started making jewelry as a means of
relaxing. She now creates unique pieces using
sterling, gemstones, and artisan lampwork that are
exhibited in local galleries. She also sells her
creations via outlets and on her Web site
sparklytreasures.co.uk.
Round in Circles Earrings
Copyright Interweave. Not to be reprinted. All rights reserved.
page 4
Step 13
Step 12
Wyszukiwarka
Podobne podstrony:
Bizuteria kurs Jewellery handmade jewelery jevelery kolczyki bransoletki naszyjniki koraliki(CRAFTS)
Bizuteria kurs Jewellery handmade jewelery jevelery kolczyki bransoletki naszyjniki koraliki(CRAFTS)
Bizuteria kurs Jewellery handmade jewelery jevelery kolczyki bransoletki naszyjniki koraliki(CRAFTS)
Bizuteria kurs Jewellery handmade jewelery jevelery kolczyki bransoletki naszyjniki koraliki(CRAFTS)
Bizuteria kurs Jewellery handmade jewelery jevelery kolczyki bransoletki naszyjniki koraliki(CRAFTS)
Bizuteria kurs Jewellery handmade jewelery jevelery kolczyki bransoletki naszyjniki koraliki(CRAFTS)
Bizuteria kurs Jewellery handmade jewelery jevelery kolczyki bransoletki naszyjniki koraliki(CRAFTS)
Bizuteria kurs Jewellery handmade jewelery jevelery kolczyki bransoletki naszyjniki koraliki(CRAFTS)
landrynkowe bransoletki, Inne ంం, koraliki bizuteria
jak zrobić kolczyki, Inne ంం, koraliki bizuteria
Kolczyki pędzelki, Biżuteria - WZORY
01 Biżuteria z drobnych koralików kolczyki
więcej podobnych podstron