
GitHub for Windows
or
“The easier way to maintain your ProcessWire Modules”
Version 1 – 30 July 2012
by Pete
Introduction
This document is intended as a quick overview of GitHub for Windows to enable anyone new to
GitHub to get started with their first repository and commit some code.
It is by no means an exhaustive list of instructions, and it is advisable that you check out the help
topics on the GitHub website for more information:
Instructions
1. Download & Install GitHub for Windows
You can grab GitHub for Windows at the following URL:
When you are prompted to open the file, click Run (or possibly Open depending on your browser),
and then Install. The installation process may take a few minutes while it downloads the program
files from the server.
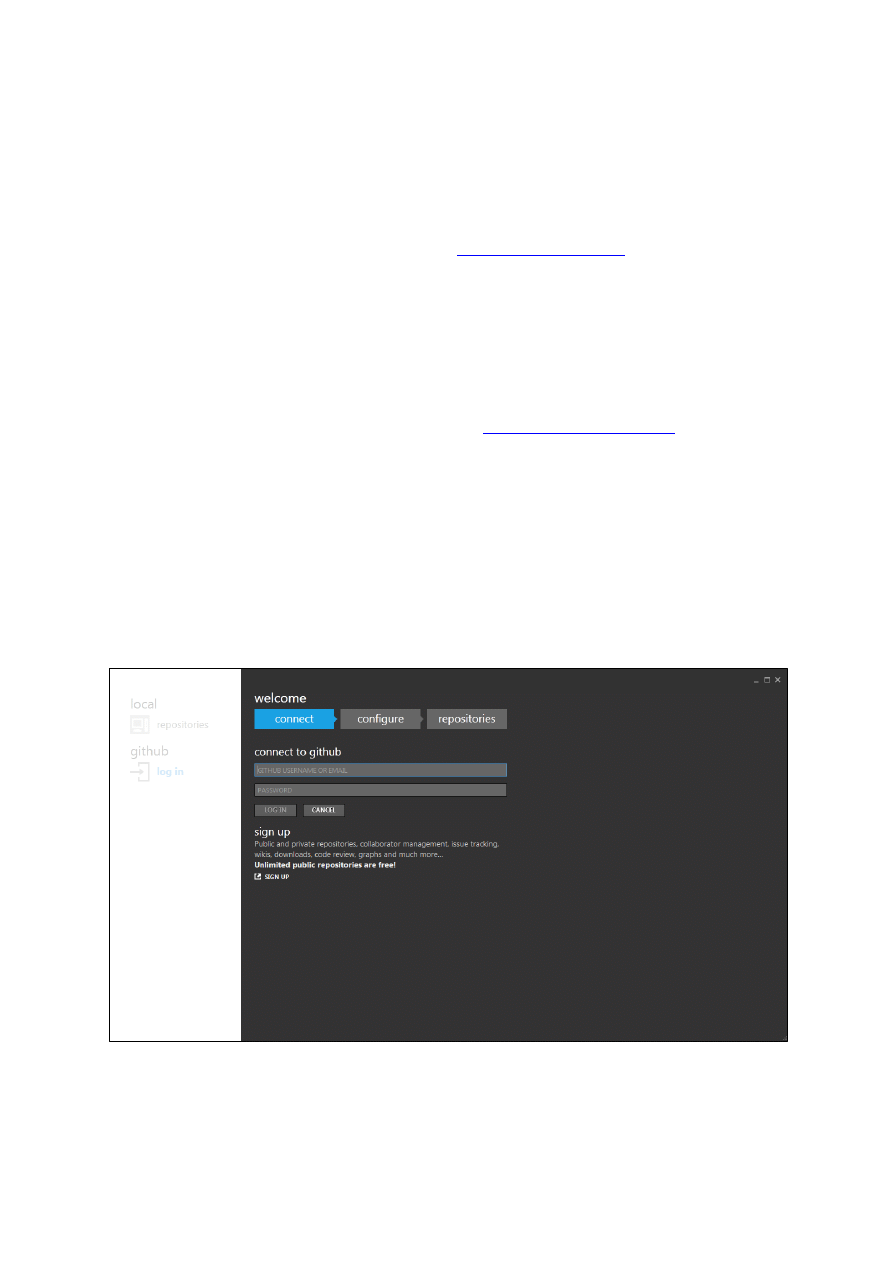
2. Connecting to GitHub
Once installed, load up GitHub for Windows and you will be prompted for your username and
password. If you do not already have an account on GitHub, you can click the Sign Up link at the
bottom of the screen to do so.
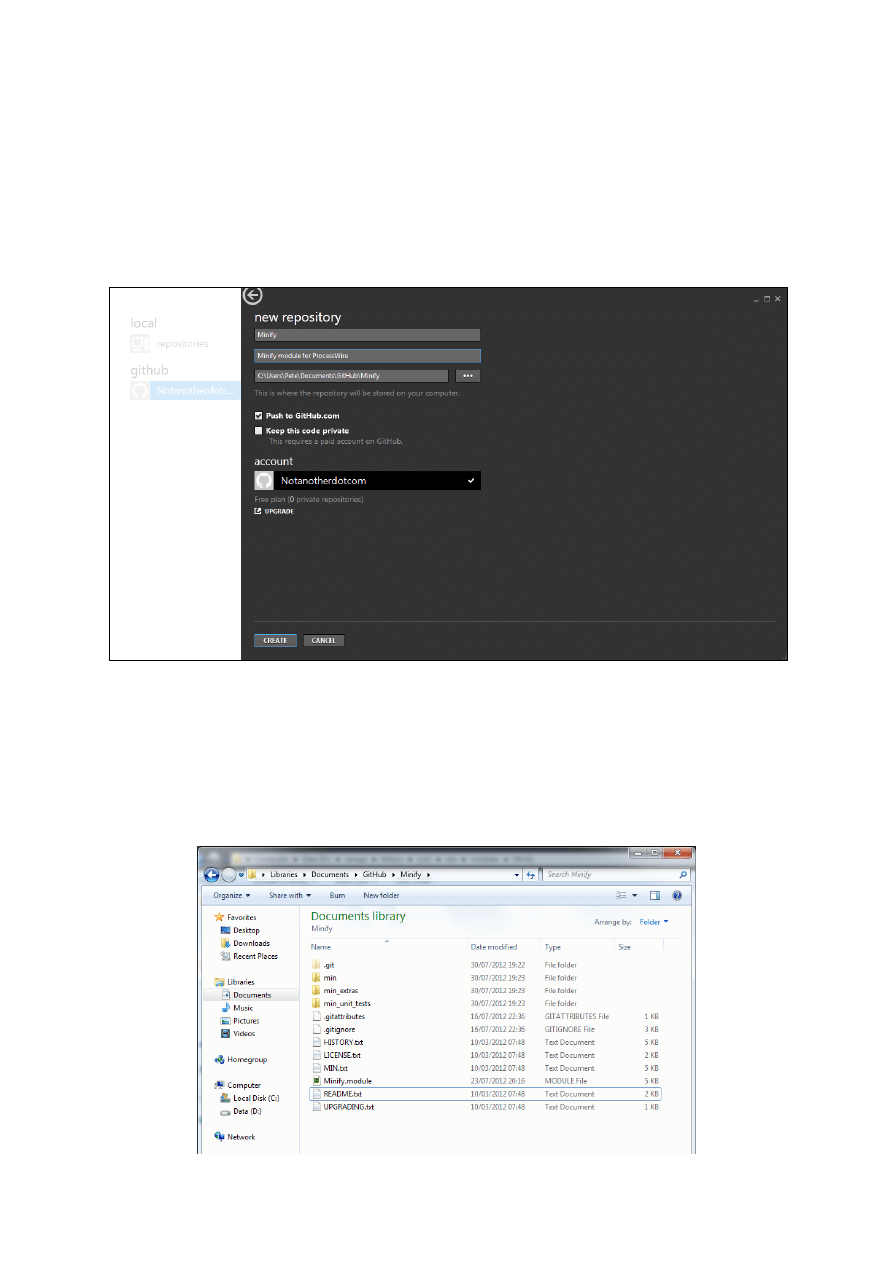
3. Adding a Repository
After signing in, GitHub for Windows will ask if you want to add a repository (repo). If you already
have repositories created via GitHub’s website or the command line, you can skip this step and
download local copies (clone) your existing repos.
If this is your first time using GitHub, name your repo the same name as your ProcessWire module or
theme (or something sensible at least) and click Create.
4. Repo Location and Adding Files
GitHub for Windows will have created a folder for your repo – usually in
C:\Users\<YourUserName>\GitHub\<RepoName>
You should place your code inside this folder and it is also best practice to create an optional readme
file containing any relevant instructions.
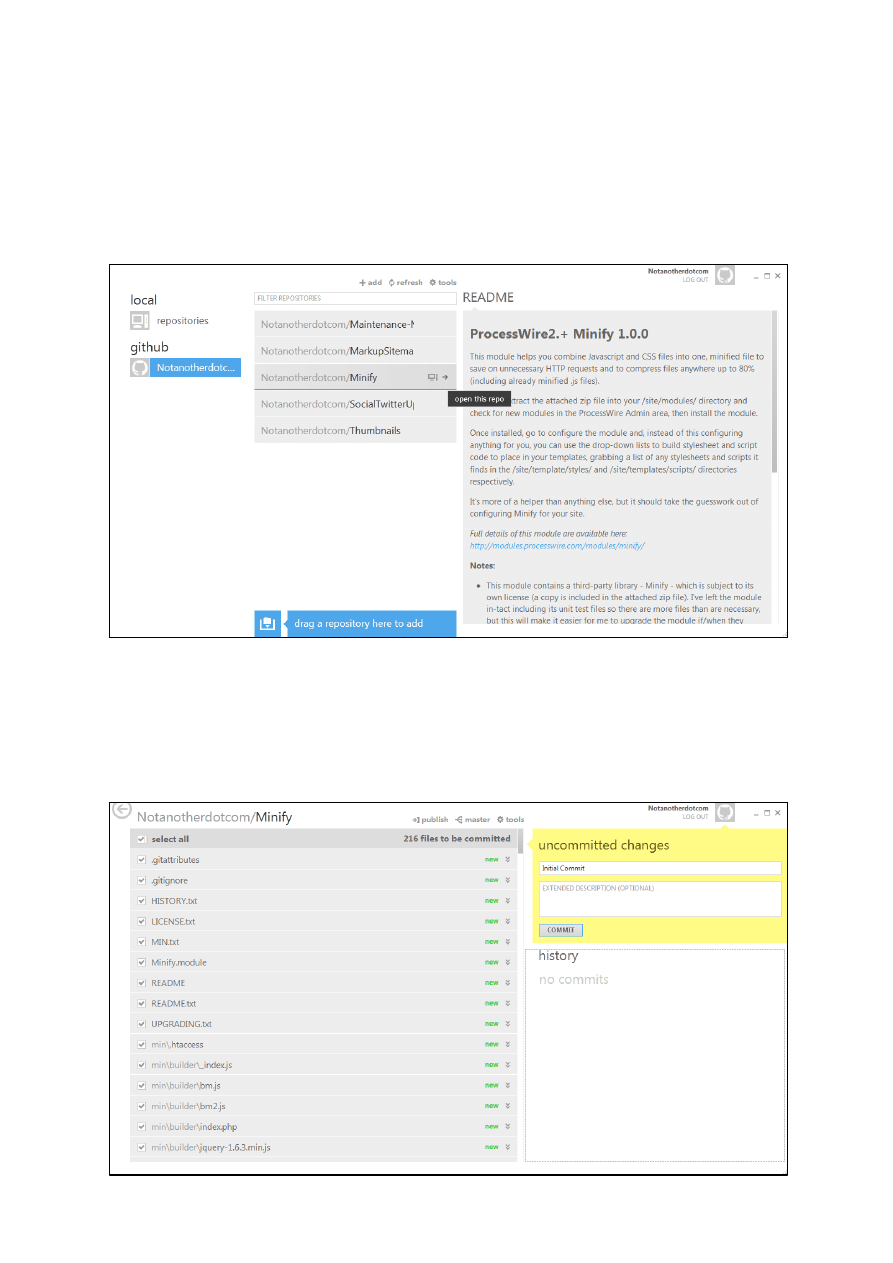
5. Opening your Repo
Once you have finished adding your files to your repo folder, switch back into GitHub for Windows
and click on your repo name.
You will see two icons appear; the first is a PC and simply shows that you have a local copy of the
repo on your machine, whilst the second is an arrow - you will need to click on this to open the repo.
6. Committing your Changes
Once you have opened the repo, you will see a list of files to be committed. You should enter a title
for the commit, and optionally a description.
When you are ready, click on the Commit button.
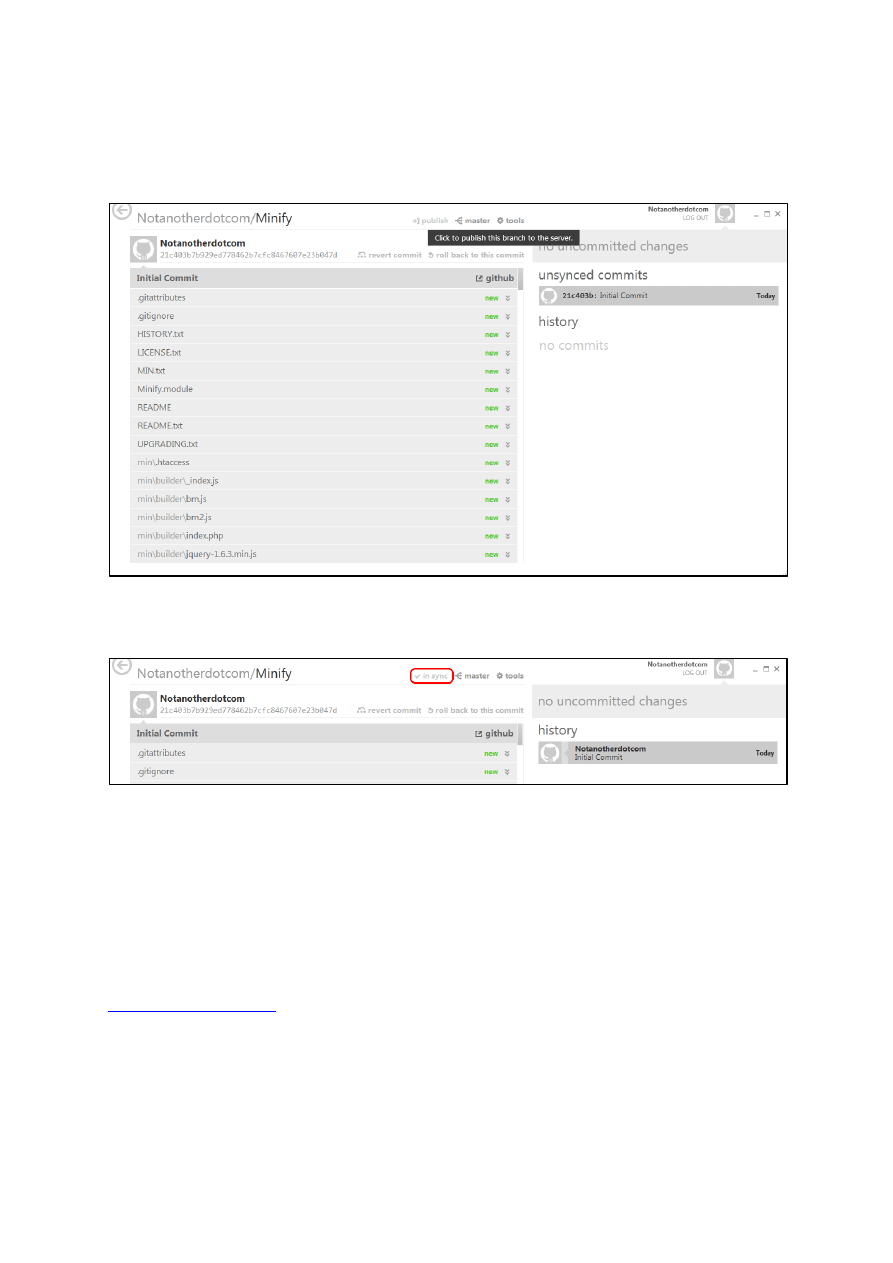
7. Publishing your Commit
Publishing your commit to GitHub is simply a case of clicking Publish at the top of the page – click it
and voila! You’ve submitted your first GitHub commit!
You will also notice now that the Publish button changes to “In Sync” to confirm that the repo is up
to date on your local machine and GitHub.
Conclusion
GitHub for Windows makes committing changes really easy if you’re new to GitHub, but there are
many more useful features that are worth reading up on.
To be able to perform actions such as merging other users’ changes, forking repos from other
projects and more, please check out the help documents on the GitHub website:
Wyszukiwarka
Podobne podstrony:
Debbuging Tools for Windows sposób analizowania błędów
Installation Guide for WindowsXP
Pakiet komputerowy Bliss for Windows(1)
Płyta ratunkowa dla Windows XP Ultimate Boot CD for Windows UBCD4 Win
Victoria for Windows v4
free excel editor for windows 7 download
driver printer brother dcp 195c for windows 7
Bluetooth OBDII for Windows
instrukcja Mobiola Web Camera for Windows Mobile v3 1 8
6623 Getting started with the Power BI mobile app for Windows 10 WSG 2
Installation Guide for WindowsVISTA
Yamaha Expansion Manager V2 5 2 for Windows 10 8
MS Control Panel Aplet for Windows
więcej podobnych podstron