Michael Miller Fabrics LLC.
www.makingitfun.blogspot.com
1
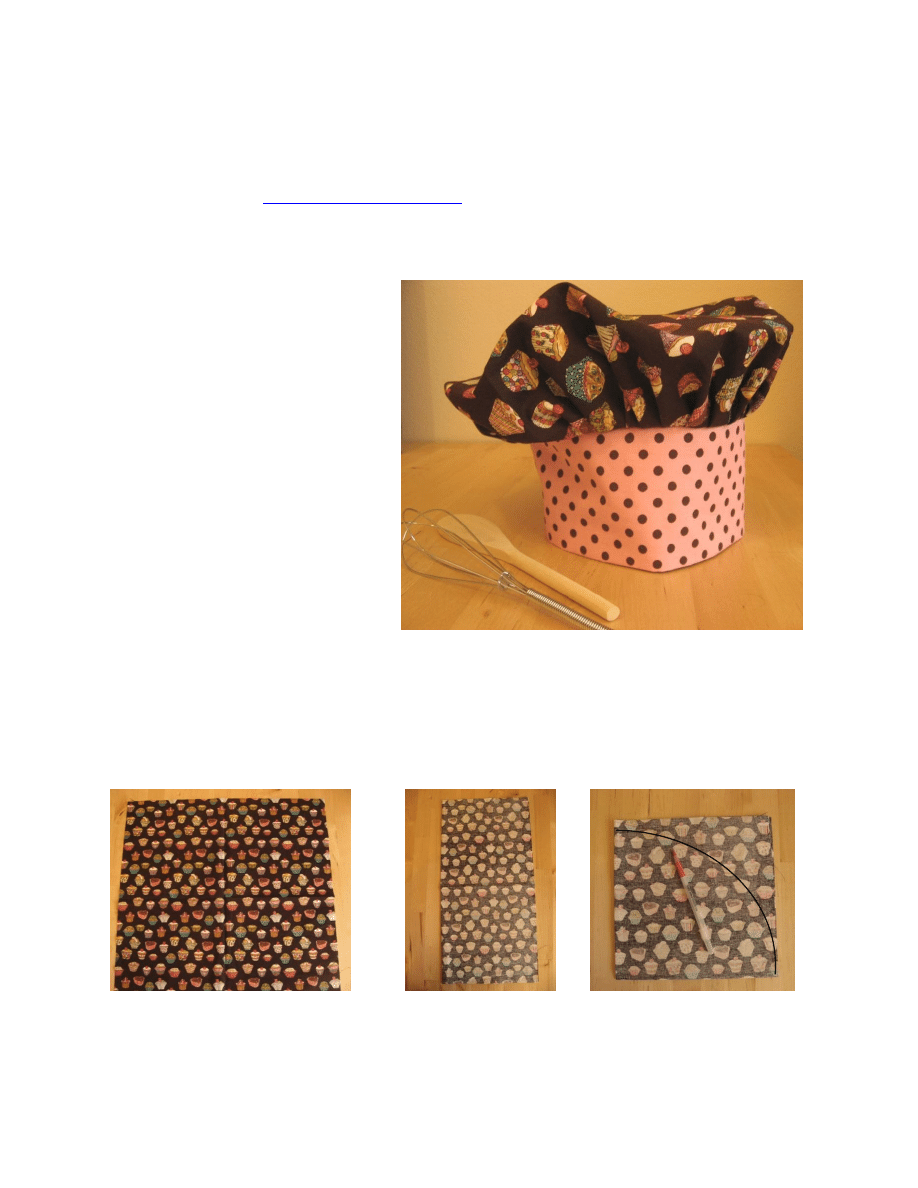
Chef’s Hat
(adjustable—one size fits most)
Prepared by Joanna Armour (
www.stardustshoes.blogspot.com
) For personal use only.
All seam allowances are ¼” unless otherwise noted.
Materials needed:
One 20” x 20” piece of fabric for
the top
One 8” x 24” piece of fabric for
the band
One 8” x 24” piece of
lightweight fusible interfacing
for the band
One 1” x 2” piece of hook and
loop tape
Pins (at least 35)
This apron features Michael Miller fabric:
Chocolate Cupcakes (CX2917) for the top
and Pink Dumb Dot (C2490) for the band.
Create the Top:
Fold the 20” x 20” fabric in half and iron to make a crease. Fold it in half again and iron. Mark a
smooth curve as shown below. Cut along the curve.
fold
fold
Michael Miller Fabrics LLC.
www.makingitfun.blogspot.com
2
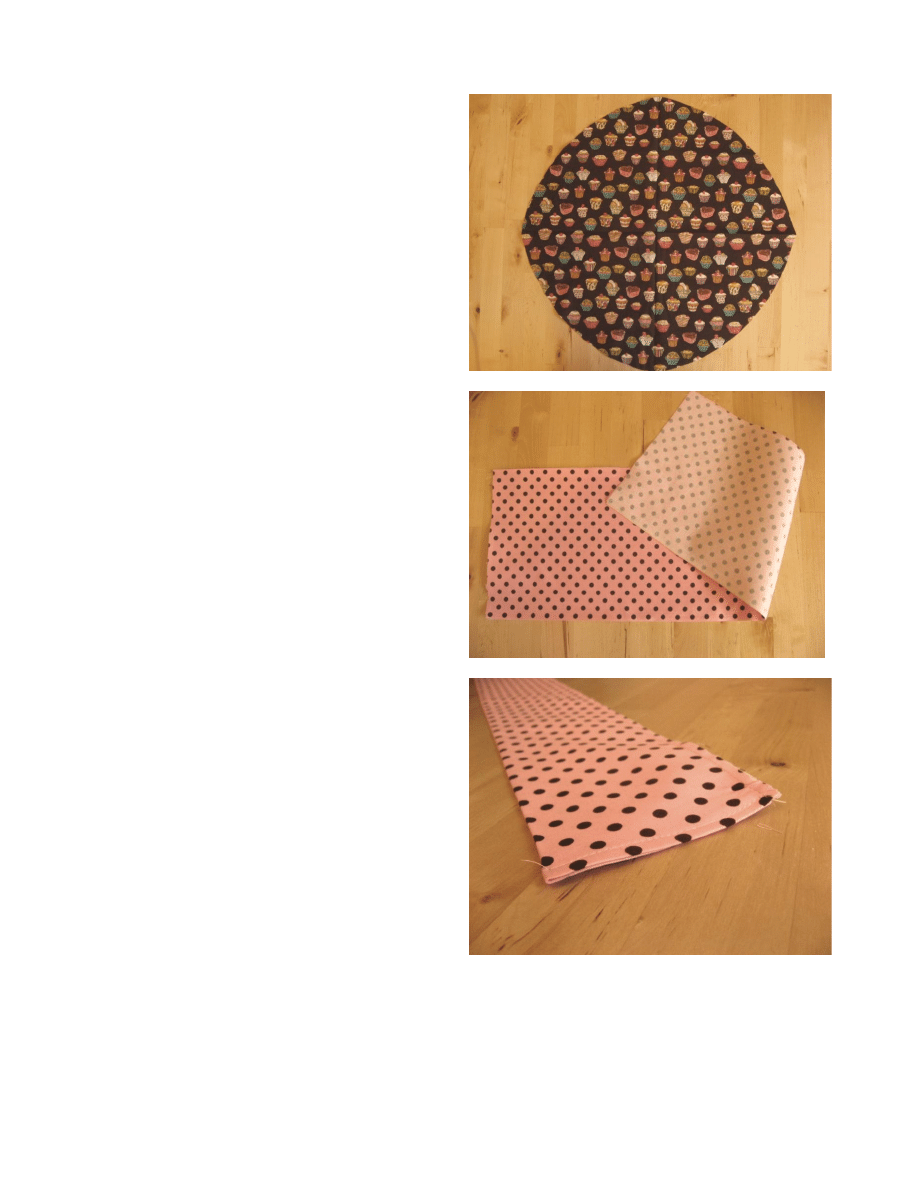
Open up the fabric to find a circle. Do not iron
out the creases—you’ll need them later.
Make the Band:
Using the package directions, iron the interfacing
to the back of the fabric.
Fold the fabric in half lengthwise and iron to form
a crease down the center so that the band now
measures 4” x 24”.
Finish off the raw edges on both ends by opening
up the band, folding down ½” and ironing flat.
Close the band and sew it shut. Do this on both
sides.
Michael Miller Fabrics LLC.
www.makingitfun.blogspot.com
3
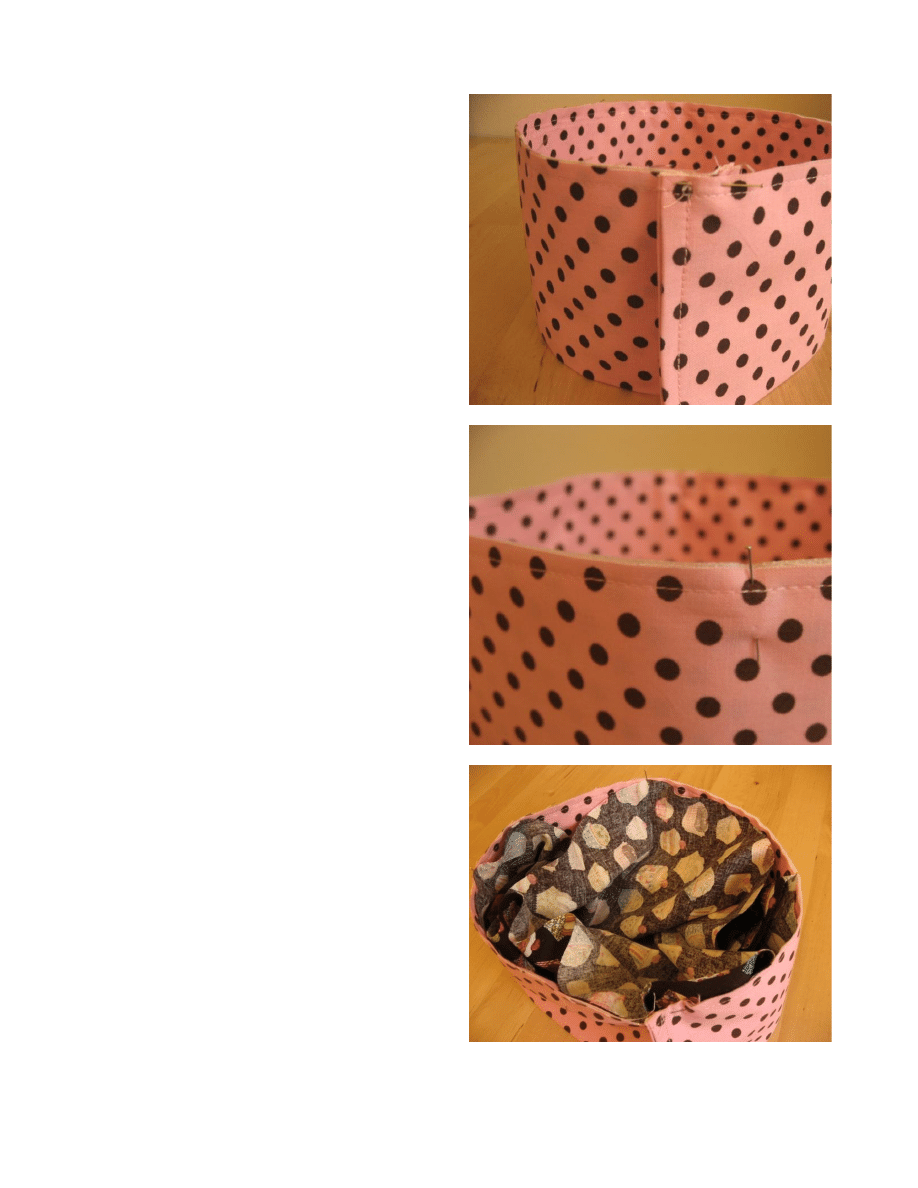
Overlap the ends of the band by 1” and pin in
place. For this and the following steps, pins will
be placed on the raw edge of the band.
Divide the band into four equal parts and place
pins to mark the divisions.
Attach the Top to the Band:
The creases in the top of the hat already mark
four equal parts. With the fabric right side down,
line up the creases with the pins and pin in place.
Michael Miller Fabrics LLC.
www.makingitfun.blogspot.com
4
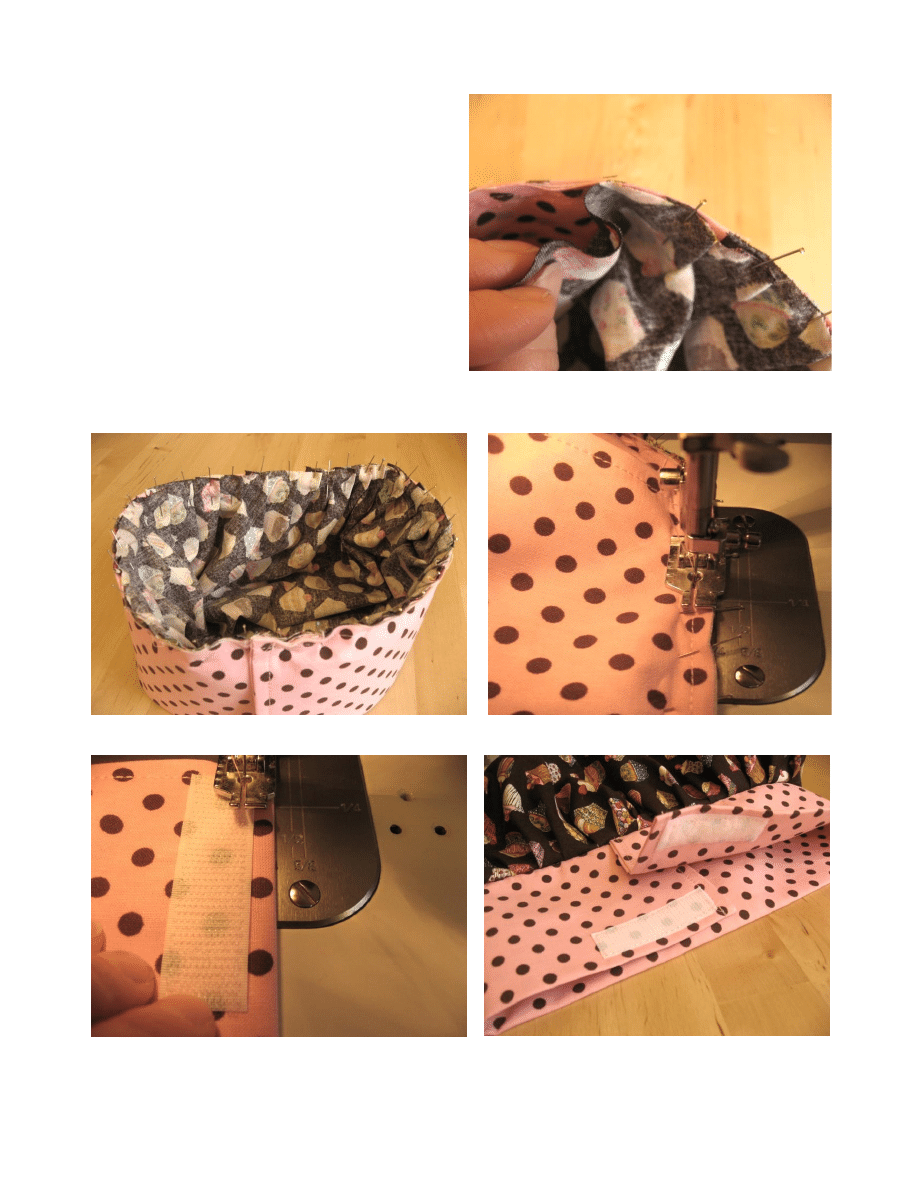
Make evenly spaced gathers by working in one
direction around the hat.
When all the gathers have been created, sew slowly around the band. When you’ve sewn all the
way around, remove the pins.
Attach the hook and loop tape to the bottom of the band as pictured.
Michael Miller Fabrics LLC.
www.makingitfun.blogspot.com
5
Technically, you could turn the chef’s hat right side out and it would be complete. However, if raw
edges bother you (as they do me), you can either serge them or encase them in binding (instructions
below).
Create the Binding:
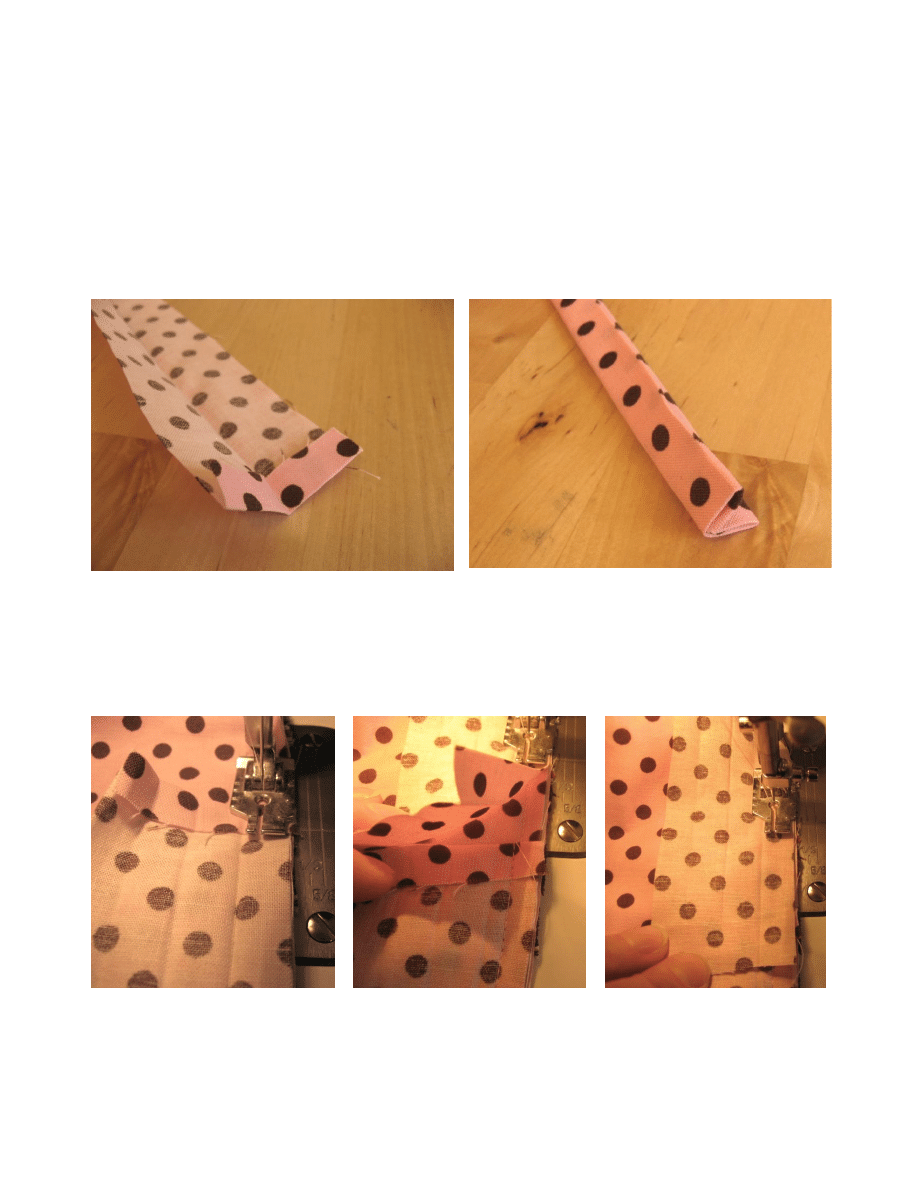
This binding is made from a straight (not bias) cut of fabric 1 ½” x 24”. Fold it in half lengthwise
and iron a crease down the middle. Fold one end in 1/3” and iron flat. Fold down both sides of the
strip to meet the crease, and iron flat. Then, fold the binding along the center crease.
Open the binding and line it up along the raw edge of the band. Starting with the finished end of the
binding, sew around the perimeter of the hat. When you make it back to the start, lay the unfinished
end on top of the finished end, as pictured. This will allow the unfinished end to be “tucked in” to the
finished one later on (refer to the last picture in this tutorial). Trim the unfinished end to remove bulk if
it seems long.

Michael Miller Fabrics LLC.
www.makingitfun.blogspot.com
6
Fold the binding over using the creases as your guide. Pin as necessary to keep them in place.
The following pictures show the view from the other side as well as how the unfinished end of the
binding tucks into the finished end. Attach the binding by sewing closely to the inside edge. ♦
Wyszukiwarka
Podobne podstrony:
pirate hat 2
2001 12 Red Hat 7 2 on Test in the Linux Labs
pirate hat
A cat with a hat
niemiec- hat, Szkoła- pomoce naukowe ;P, Ściągi;)
2010 04 Red Hat i wirtualizacja [Rozwiazania]
hat girls w url
chef bio
der reporter alles klar hat jugendliche aus ver Y54GYJEDQHSE35GDG6LVXC5O2HB7WVANU6V73MY
firstword hat
Hat Trick
pirate hat 2
Fredric Brown The Hat Trick
Red Hat Linux 8 Biblia rhl8bi
Football Hat
Red Hat Linux 8 cwiczenia praktyczne 2
Scaling Oracle 10g in a Red Hat Enterprise Linux 5 4 KVM environment
W2 6therawchef com the raw chef Whipped Cream
więcej podobnych podstron