Everything Auto: Replacing Ball Joints
http://www.extremehowto.com/xh/printpage.asp?article_id=60227
1 of 5
17/09/2006 12:48 PM
Everything Auto: Replacing Ball Joints
Tom Morr
As people as diverse as Liz Taylor and
Eddie Van Halen can attest, joints wear
out. In cars, ball-in-socket joints degrade
over time (similar to their human
counterparts). Lack of lubrication and dirt
inside moving parts will accelerate the
demise of a vehicle's joints.
Balljoints are the vital connectors between
the steering linkage and axle assembly. Just
as when baseball pitchers need rotator-cuff
surgery, use and abuse can wear down
balljoints, requiring replacement.
Unfortunately for the do-it-yourselfer,
many automotive manufacturers rivet the
balljoints to the control arms in newer vehicles. As a result, removing original-equipment balljoints can
require finesse and patience.
Shown here is a balljoint removal-and-replacement job on a typical front-wheel-drive car that has one
joint per side. Trucks and older vehicles often have both upper and lower balljoints on each side; a
hydraulic press is often required to service the uppers.
Installation Tips
• Refer to a service manual for fastener torque specifications and for any procedures that are unique to
your vehicle.
• Unlock the steering wheel before jacking up the vehicle. This allows the steering linkage to be
positioned for the best possible access to the balljoints. Grab one of the axle hubs to move the linkage.
• Secure the vehicle on jackstands before removing the tires and wheels.
• Buy name-brand balljoints (for safety's sake).
• If the balljoints' mounting socket is “egged,” replace the control arm also.
• Have the vehicle professionally aligned afterward.
Signs of Failure
• Front-end shimmy, shake or vibration
Everything Auto: Replacing Ball Joints
http://www.extremehowto.com/xh/printpage.asp?article_id=60227
2 of 5
17/09/2006 12:48 PM
• Abnormal front-end noise
• Hard steering
• Steering wheel doesn't return to center properly
• Vehicle wanders
• Cupped tires
• Steering feels unstable.
Check the joints' rubber boots for cuts, deterioration and leaking grease. Replace them if any of the above
conditions exist.
With the vehicle raised and secured, have a friend hold the tire and move the top of the tire in and out
while you feel for looseness on the castellated nut that secures the balljoint's stud.
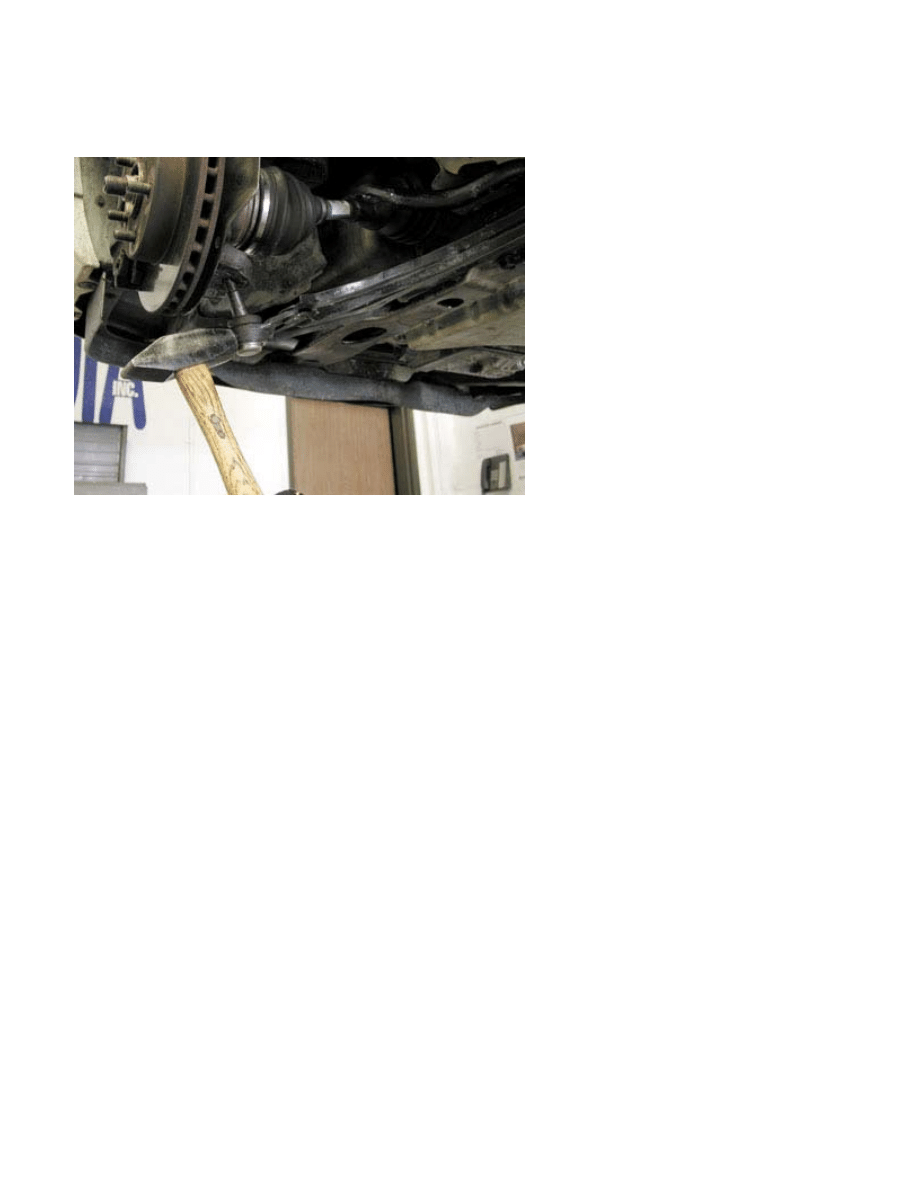
Using a prybar or large screwdriver under the balljoint, pry upward and look for looseness between the
balljoint and steering knuckle. Place the prybar between the steering knuckle and balljoint and attempt to
pry downward and check for any play.
With the balljoint and control arm separated from the steering knuckle, attempt to twist the joint's stud in
its socket with your fingers.
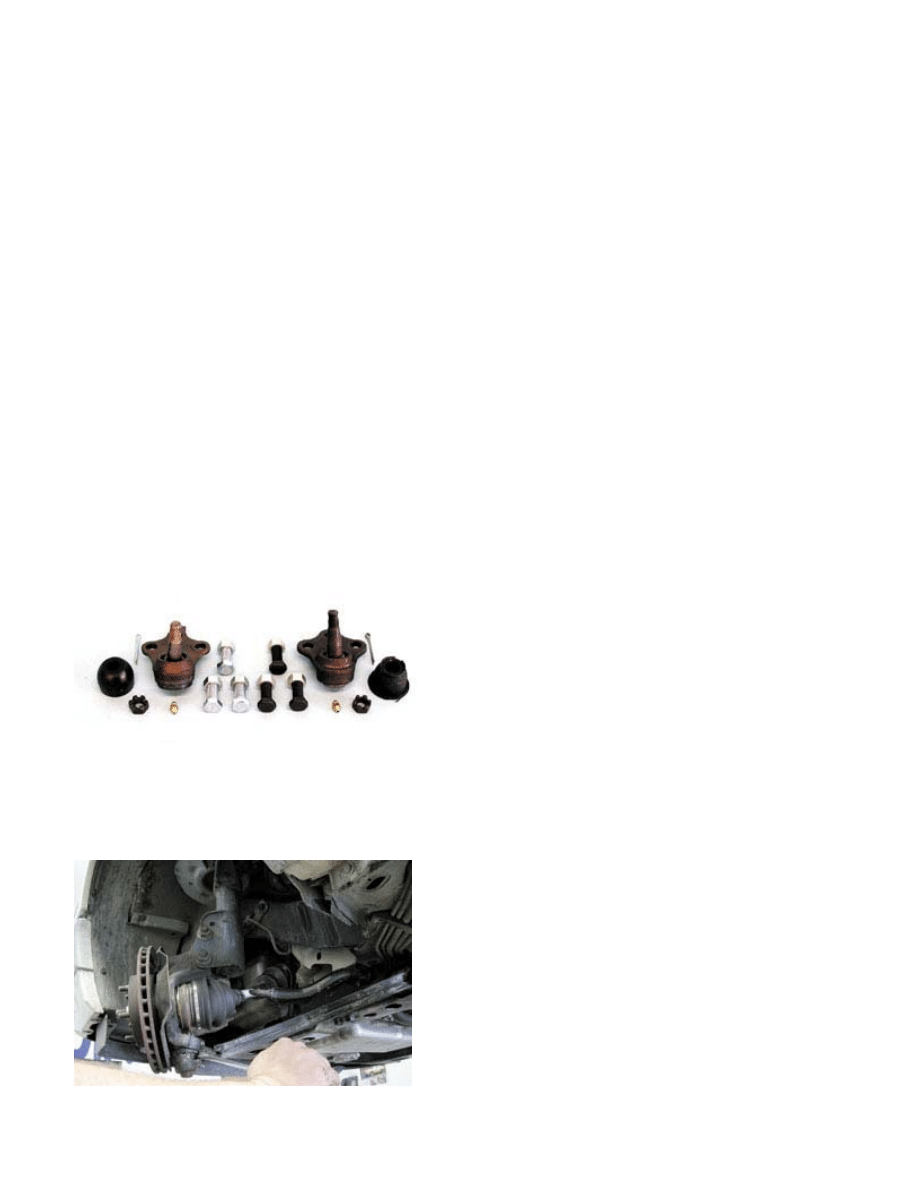
Step 1: Always buy name-brand steering components. These balljoints are from different manufacturers,
but both are made in the good old USA.
Everything Auto: Replacing Ball Joints
http://www.extremehowto.com/xh/printpage.asp?article_id=60227
3 of 5
17/09/2006 12:48 PM
Step 2: To diagnose a balljoint's health, perform the inspection tips listed above. If any problem is
discovered, replace the joint.
Step 3: Loosen the swaybar endlink (if applicable).
Step 4: Remove the old joint's cotter pin and castellated nut.

Everything Auto: Replacing Ball Joints
http://www.extremehowto.com/xh/printpage.asp?article_id=60227
4 of 5
17/09/2006 12:48 PM
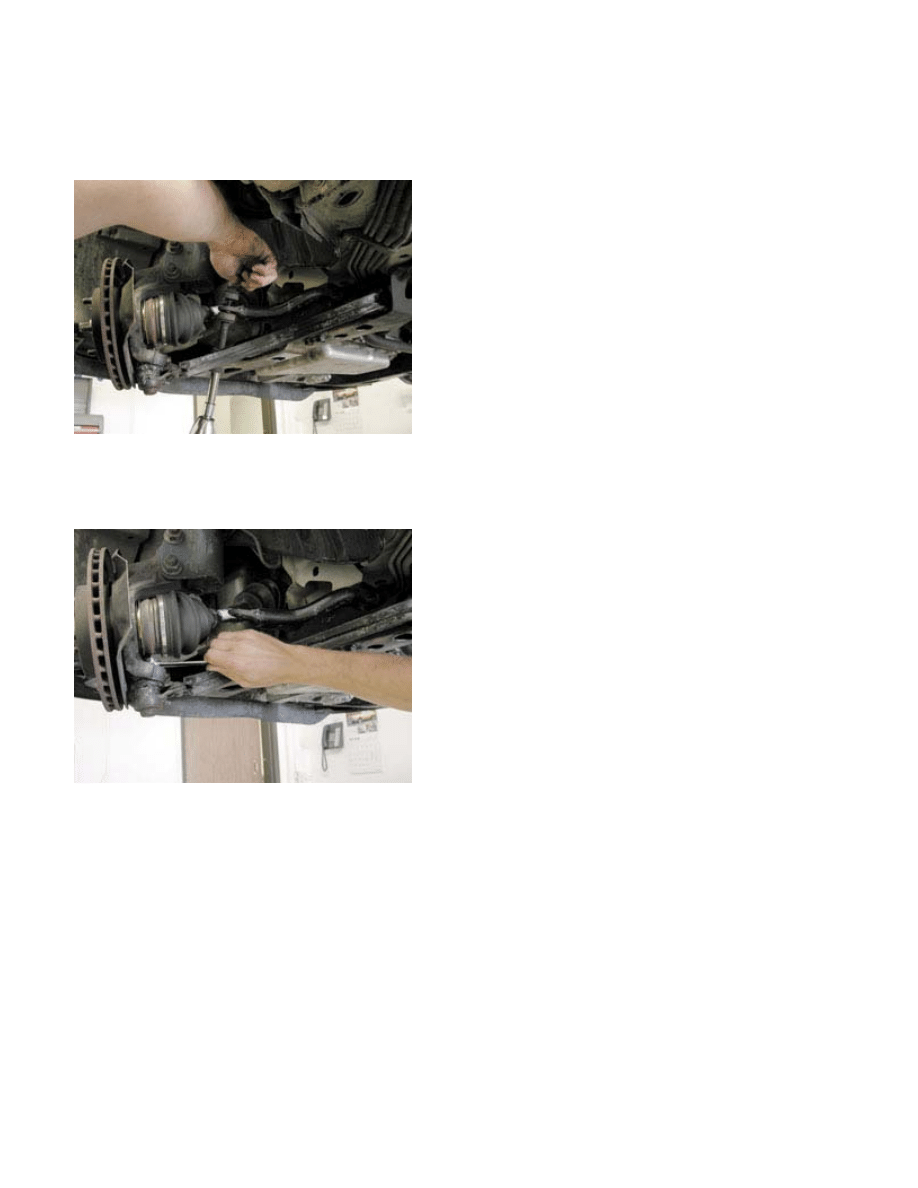
Step 5: Separate the balljoint using a prybar or pickle fork. Then loosely reinsert the stud in the knuckle.
Step 6: Many shops use air chisels to remove balljoint rivets, but the do-it-yourselfer is better served with
a drill. Service manuals normally give bit sizes appropriate for drilling out balljoint rivets without
damaging the control arm.
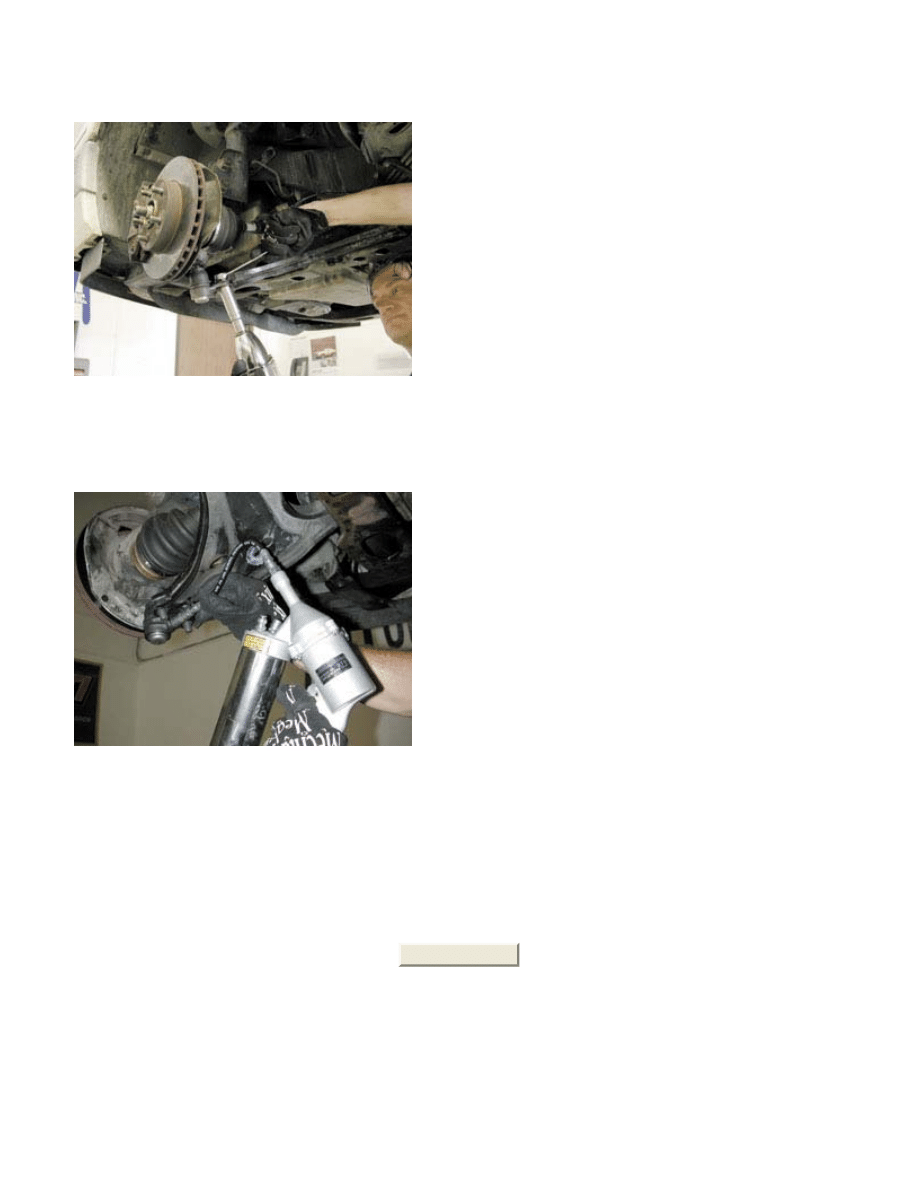
Step 7: Remove the balljoint, pulling down on the control arm for clearance if necessary.
Everything Auto: Replacing Ball Joints
http://www.extremehowto.com/xh/printpage.asp?article_id=60227
5 of 5
17/09/2006 12:48 PM
Step 8: Install the new balljoint — complete with grease fitting, rubber boot, castellated nut and cotter pin
— using the hardware that came with it. Torque it to factory spec.
Step 9: Lube the balljoint, wiping off any grease that spews out around the boot.
Close Window
Wyszukiwarka
Podobne podstrony:
Front End Replacing Tie Rod Ends
3353 Checking front axle ball joints
Front End Alignment Basics
Front End Alignment Tests For
Front End
M39r Body Front End
Brakes Front Brakes Replacement
FRONT END 28072004
FT 221 FT 225 Mutek Front end
BODY FRONT END SECTION 9R 14
3355 Checking ball joints using special tool
2002 09 Creating Virtual Worlds with Pov Ray and the Right Front End
Front End
więcej podobnych podstron