46
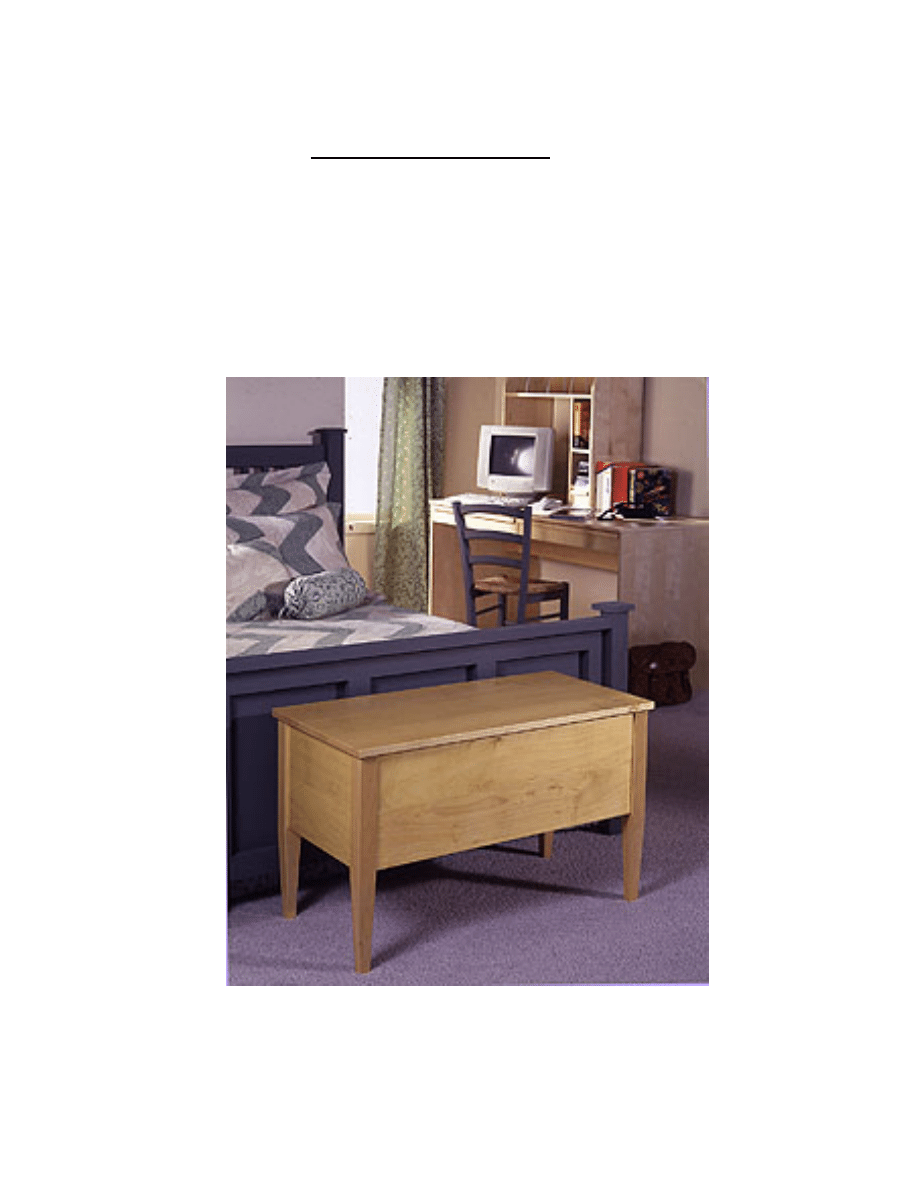
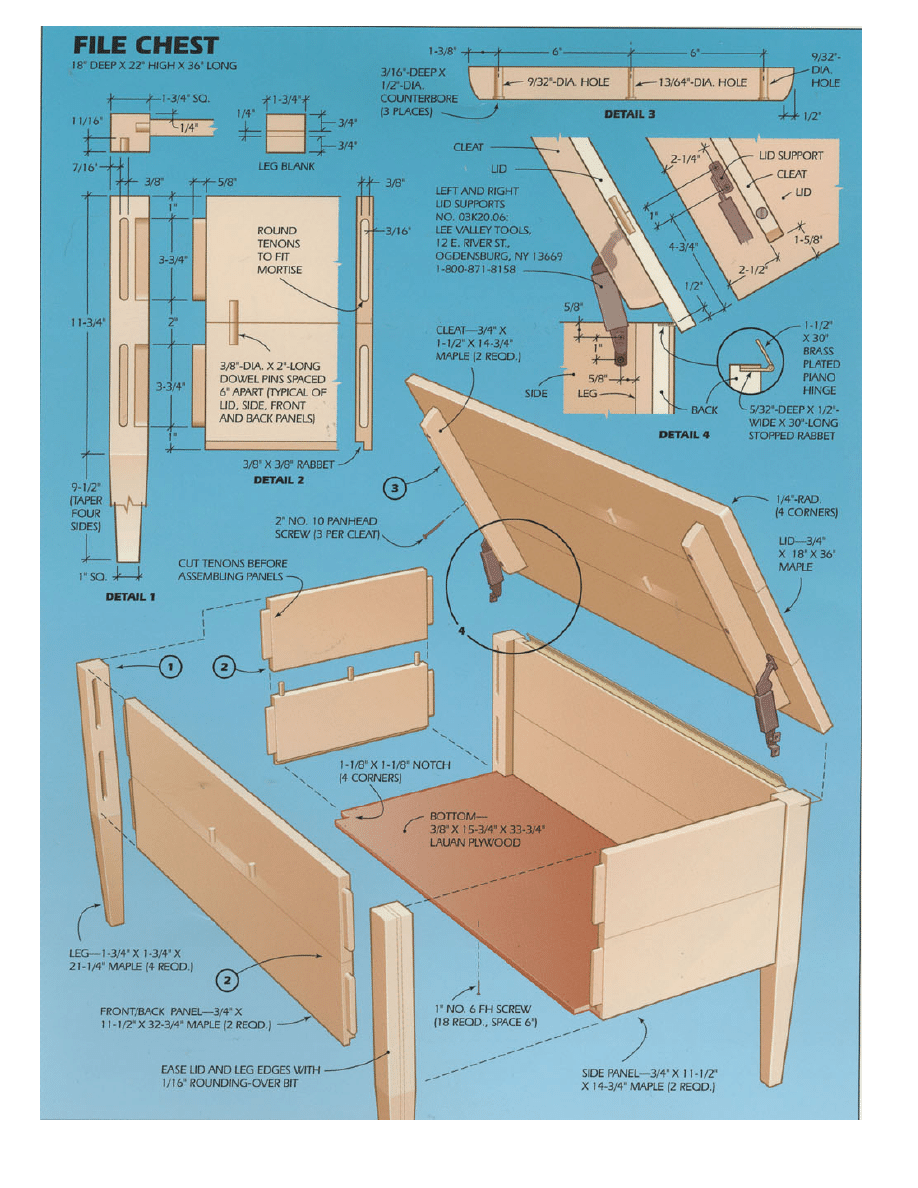
FILE CHEST
Copyright 2004 Martian Auctions
210
Copyright 2004 Martian Auctions
211
Making Panels
To get started, rip and crosscut the stock
for the front, back and side panels to the
sizes indicated in the accompanying
drawing. For the top, cut all three boards
about 1 in. oversize in length. The two
outside boards are cut about 1/2 in.
oversize in width while the center board is
cut to the 6-in. finished width. This allows
for trimming the top to size.
Arrange the boards back to back in a vise
and, using a square, mark the dowel
centerlines across both edges. Then,
always working the same side of a
doweling jig to the face of the workpieces,
bore the dowel holes.
The end tenons on the side panels must
be cut before the paired boards are edge
glued. For best results, add an auxiliary
fence to the saw’s miter gauge, and clamp
a stop block to the fence to ensure that the
rabbet cuts are of uniform size. Using a
dado blade, make a cut on the face of the
workpieces. Then raise the blade to
project 1 in., and pass each board over
the blade on edge to form the tenon.
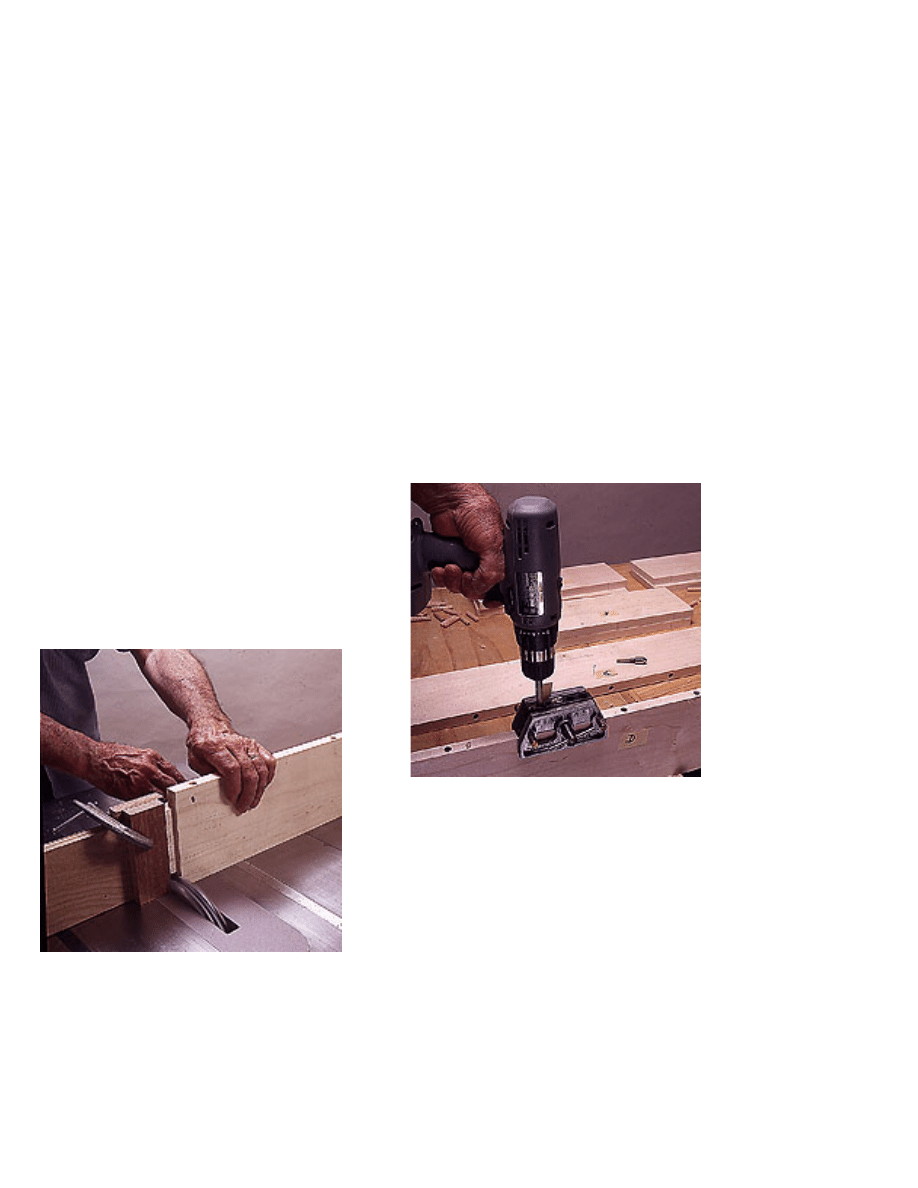
Prepare for edge gluing by readying three
bar or pipe clamps, four small clamps and
four cauls. Apply paste wax to the cauls
so they don’t get glued to the panel. Tap
the dowel pins into their holes and then
apply glue to the panel edges (Photo 3).
Join the pieces. Then alternately apply
pressure to the bar clamps and to the caul
clamps to close the joint and to keep the
panel from buckling.
Use a belt and finish sander to dress the
panel faces. Then use a 4-in. hand file or
a chisel to round the tenons.
To complete the panels, cut the rabbets
for the bottom Next, use a router with a
straight bit to cut the hinge rabbet. Then
switch to a 1/16-in. rounding-over bit to
ease the panels’ exposed edges.
Making The Legs
Make the legs from two 45-in.-long blanks,
which you’ll later cut into four finished
Mark each leg mortise with centerlines 3/8
in. apart, and then bore the mortise holes.
Trim the mortise to finished dimension.
Copyright 2004 Martian Auctions
212

lengths. The legs require that three pieces
of wood be glued together. The center
piece is sawed from a thicker piece. Be
sure to use a smooth cutting blade, the
saw’s antikickback splitter, a feather board
and a pushstick for this operation.
Glue and clamp the leg pieces (Photo 8).
To keep the pieces from sliding out of
alignment during clamping, bore two 3/32-
in. holes in the ends of the blanks, and
use 2-in.-long finishing nails as alignment
pins. The pins are inserted in an area to
be cut off.
Mark the mortise locations on each leg,
and be sure to arrange the legs so that the
surfaces showing the glue joint face the
chest’s ends.
Use a jig to cut the leg tapers. Place the
leg between the rear stop and the front
notched block, and make two cuts. The
notched block is tack nailed so it projects
1 in. from the guide board. Make a taper
cut on two adjacent faces, and then
reposition the block so the notch projects
1-3/8 in. Cut the remaining tapers.
Then use a router to ease their corners
Assembly
Before gluing the parts together, make a
dry assembly to prepare the necessary
cauls. Check the clamp adjustments and
the fit of parts.
Do the gluing in two stages. Apply glue
only on the short end panels and legs.
Then make a temporary complete
assembly. When the glue has dried,
remove the clamps. Then glue and clamp
the long side panels to the preglued end
subassemblies.
Cut the bottom panel to size and attach it
with screws.
Trim the top to size. Rip and crosscut its
cleats, and bore the holes in them. The
two outside holes are oversize to permit
the lid to move with changing humidity.
Bore the pilot holes for the hinge, lid
supports and cleats. First, install the hinge
at the back, then lay the table on its back
to join the second leaf of the hinge to the
lid. Attach the lid support in the same
manner (Photo 14). Attach the cleat with
screws only, not glue.
After finish sanding, we applied three
coats of clear satin polyurethane. The first
coat was tinted with yellow ochre universal
color, available at art supply stores.
Copyright 2004 Martian Auctions
213
Wyszukiwarka
Podobne podstrony:
File Chest
file d download polki%20 %20wirtualna%20polska1 3JUIGJJKBHF6PWSVCCWO57SYW3RTCEHUV4WUZUY
file 56287 id 170024 Nieznany
Podlogi scan z podrecznika File Nieznany
Practice File
file
file 272251
file download
file d download polki%20 %20wirtualna%20polska8 ZE52Y4WMZ6R2PAUC5PVZZECJLUI7LYILYKJXVMY
file d download polki%20 %20wirtualna%20polska7 WVZK57NPKAQIESVZKFZUDRVRQZTB377RCBY4FKY
Effect of File Sharing on Record Sales March2004
file (2)
http, www vbm edu pl UserFiles vbm File art e finance 02 09 08
file add 198 karta katalogowa
file 63455
file(10)
Manh Tu TrongC79 assignsubmission file zad 4 (2)
chest i dolg vmeste s rossiej 3
więcej podobnych podstron