128
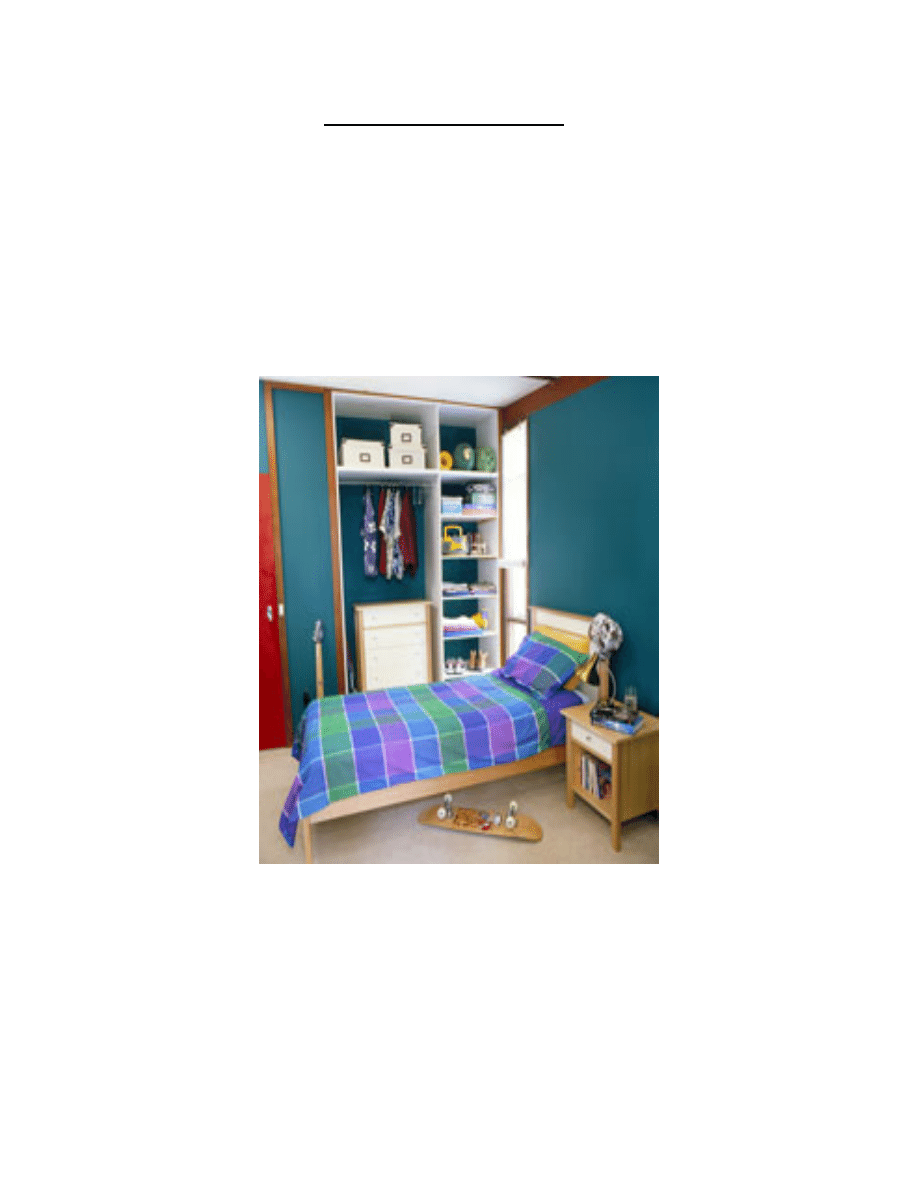
OPEN WARDROBE
Copyright 2004 Martian Auctions
576
Copyright 2004 Martian Auctions
577

You'll need:
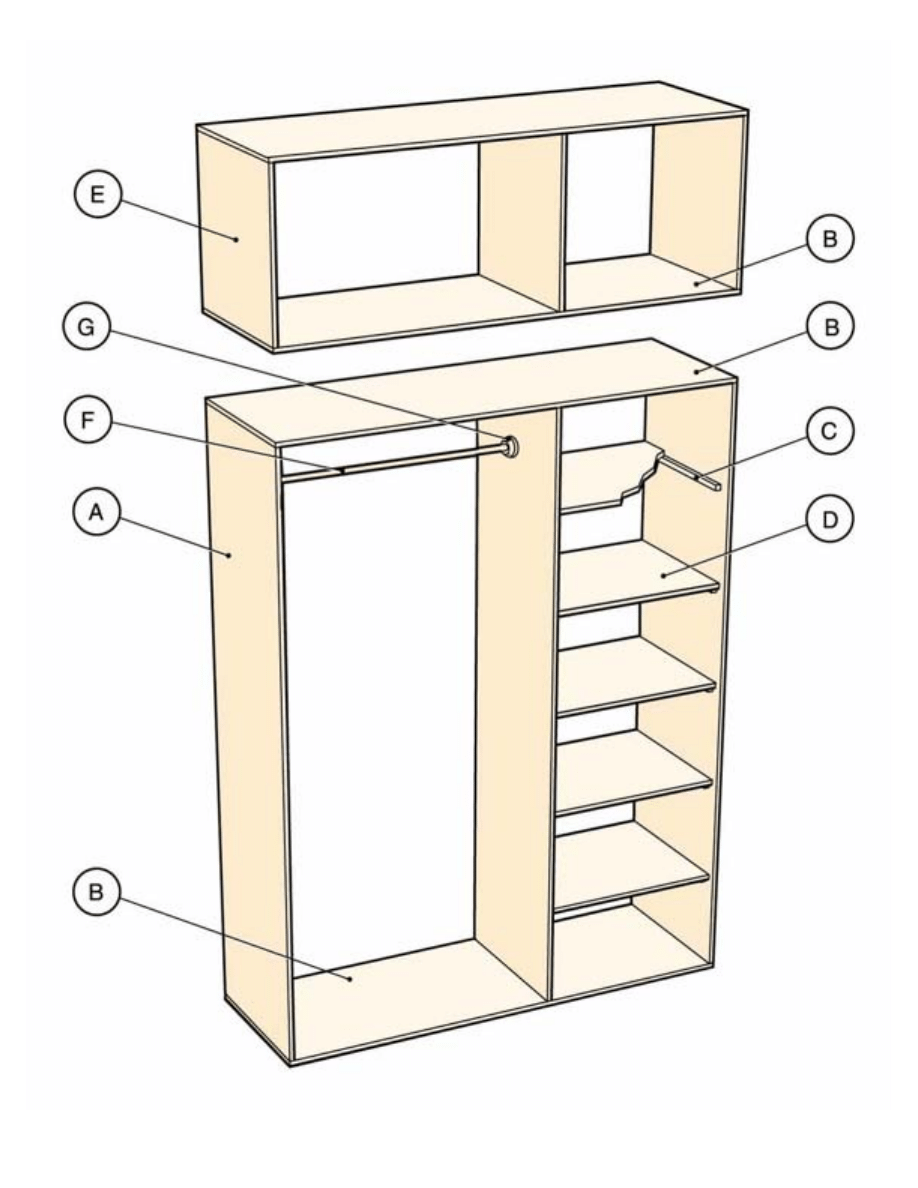
Materials
Item
Part
Size
Material
A
Tall sides/divider (3)
2068 x 550 x 16mm
Melamine board
B
Bases/tops (4)
1630 x 550 x 16mm
Melamine board
C
Cleats (10)
19 x 19 x 500mm
pine
D
Shelves (5)
632 x 540 x 16mm
Melamine board
E
Short sides/divider (3)
518 x 550 x 16mm
Melamine board
F
Hanging rail
940 x 19mm diameter
chrome steel rod
G
Rod sockets (2)
19 internal diameter
chrome steel
H
Trim – optional (total)
19 x 19 x 7200mm
pine/maple
You'll also need contact adhesive for gluing, 30mm and 45mm cross-head screws, wet & dry sandpaper and
white snap caps. Standard, 16mm thick x 600mm wide, Melamine-coated particleboard shelving is available
in sheet lengths of 1.8m and 2.4m. Our unit used 8 x 2.4m sheets.
Here's how:
1. The crucial measurements are the opening where the unit will be built and the size of the chest of drawers
you will use. Often walls aren't quite square, so subtract about 20mm all around – this also allows for the
thickness of skirtings. Leave enough space above the chest of drawers to hang clothes. We made our unit in
two sections for easy installation in a room with a ceiling height of 2.7m. Our two units were 2100mm and
550mm high, by 1630mm wide and 550mm deep, with an opening of 950mm for the drawers.
2. Cut the three tall sides (A) and a base (B). Use a power saw for the cuts, setting the blade just deep
enough to cut the panels. Work with the good side (the one most likely to be seen) face down, as there is
likely to be some minor chipping of the Melamine on the saw side.
3. To fix bottom and top to two sides, pre-drill for four screws per joint and countersink for the screw heads.
Working with panels on their back edge, apply a small amount of contact adhesive, then screw together,
making sure front edges are flush. It's best to get someone to help hold the panels.
4. From the inside edge of one side, measure 950mm along the top and bottom of carcass. Square a line
across the board and use this as a guide to pre-drill and countersink the top and bottom. Glue and screw
divider in place.
5. From the top, measure down both sides of the narrow opening at increments of 346mm – that is, 346mm,
692mm, 1038mm, 1384mm and 1730mm. Square a line from the back to within 50mm of the front. Cut the
cleats (C) with an optional 45° mitre on the front ends, and paint them to match if you wish. Glue and screw
the cleats to the sides with the top edges on the lines and the back flush with the rear of the panels. Use the
shorter 30mm screws.
6. Cut the shelving (D) to suit. Ours is set back 10mm from the front. After pre-drilling, screw shelves to
battens with two 30mm screws per cleat.
7. Get help to stand the unit in place – it will be quite floppy - and check the fit. Check with the spirit level to
make sure the sides are vertical. Measure the gaps between the sides and the wall; measure the wall in
three places and mark these positions. Lay down the unit, and cut offcuts of shelving or plywood to make up
the thickness of packing required, and nail to wall studs or plug into masonry. Carefully slide the unit back in
Copyright 2004 Martian Auctions
578

place and screw the sides into the packers to hold it in place.
8. Make the top unit the same way as the bottom one by screwing the top and bottom (B) to the sides and
the divider (E). Fit packing pieces to the wall near where the top of the unit will be, then slide the unit in
place. Screw the top unit into the top of the bottom one with 30mm screws, as well as to the packers.
9. Cut the chrome hanging rail (F) with a hacksaw so it fits the wide opening. Smooth the ends with wet &
dry sandpaper and loosely fit on the rod sockets (G). Centre and space the rail from the underside of the top
to allow easy removal of clothes hangers and mark screw holes at both ends. Pre-drill holes for the sockets,
then install with screws provided. Finish off by pressing small snap caps into any exposed screw heads.
Slide in the chest of drawers and your open robe is finished.
Copyright 2004 Martian Auctions
579
Wyszukiwarka
Podobne podstrony:
System open source NauDoc (1)
get open&r7 prn
open
Open Access and Academic Journal Quality
A Łozowska, Technologie informacyjne Między DOI a Open Access
Open GL Pierwszy program
get open&68
Open GL Podstawy
Migracja do Open Source
Open VPN
doc open with
All That Glisters Investigating Collective Funding Mechanisms for Gold Open Access in Humanities Dis
External Combustion Engine With Stirling Open Cycle
Open LDAP wyk id 336186 Nieznany
M 5213 The light open dress
dm7407 Hex Buffer Driver with High Voltage Open Collector Outputs
Ćwiczenia do powtórzenia w klasach piątych o Grecji Rzymie nowe(Open Office), Dla klas piątych
Germany & Austria open labour borders What next
więcej podobnych podstron