
SmartWire-Darwin
The System
Switching
Controlling
Protecting
Drives
HMI
06/10 MN05006002Z-EN
User Manual

All brand and product names are trademarks or regis-
tered trademarks of the owner concerned.
Emergency On Call Service
Please call your local representative:
http://www.eaton.com/moeller/aftersales
or
Hotline of the After Sales Service:
+49 (0) 180 5 223822 (de, en)
AfterSalesEGBonn@eaton.com
1
st
edition 2009, edition date 03/09
2
nd
edition 2010, edition date 06/09
3
rd
edition 2010, edition date 06/10
© 2009 by Eaton Industries GmbH, 53105 Bonn
See revision protocol in the “About this manual“
chapter
Author:
Arno Dielmann, Reinhard Raetz
Editor:
Thomas Lastring, Thomas Kracht
Translator: globaldocs GmbH
All rights reserved, including those of the translation.
No part of this manual may be reproduced in any form
(printed, photocopy, microfilm or any other process) or
processed, duplicated or distributed by means of elect-
ronic systems without written permission of Eaton
Industries GmbH, Bonn.
Subject to alteration without notice.
h
Caution!
The manual AWB2723-1617en is renamed from edition
06/10 in MN05006002Z-EN.
Rückenbreite festlegen! (1 Blatt = 0,106 mm, gilt nur für XBS)
(1 Blatt = 0,080 mm für Eberwein Digitaldruck bei 80 g/m
2
)

I
Before commencing the installation
• Disconnect the power supply of the device.
• Ensure that devices cannot be accidentally
restarted.
• Verify isolation from the supply.
• Earth and short circuit.
• Cover or enclose neighbouring units that
are live.
• Follow the engineering instructions (AWA)
of the device concerned.
• Only suitably qualified personnel in
accordance with EN 50110-1/-2
(VDE 0105 Part 100) may work on this
device/system.
• Before installation and before touching
the device ensure that you are free of
electrostatic charge.
• The functional earth (FE) must be
connected to the protective earth (PE) or
to the potential equalisation. The system
installer is responsible for implementing
this connection.
• Connecting cables and signal lines should
be installed so that inductive or capacitive
interference does not impair the
automation functions.
• Install automation devices and related
operating elements in such a way that they
are well protected against unintentional
operation.
• Suitable safety hardware and software
measures should be implemented for the
I/O interface so that a line or wire breakage
on the signal side does not result in
undefined states in the automation
devices.
• Ensure a reliable electrical isolation of the
low voltage for the 24 volt supply. Only
use power supply units complying with
IEC 60364-4-41 (VDE 0100 Part 410) or
HD 384.4.41 S2.
• Deviations of the mains voltage from the
rated value must not exceed the tolerance
limits given in the specifications, otherwise
this may cause malfunction and dangerous
operation.
• Emergency stop devices complying with
IEC/EN 60204-1 must be effective in all
operating modes of the automation
devices. Unlatching the emergency-stop
devices must not cause restart.
• Devices that are designed for mounting in
housings or control cabinets must only be
operated and controlled after they have
been installed with the housing closed.
Desktop or portable units must only be
operated and controlled in enclosed
housings.
Eato
n In
dust
ries
GmbH
Safety in
struc
tion
s
Danger!
Dangerous electrical voltage!

II
• Measures should be taken to ensure the
proper restart of programs interrupted
after a voltage dip or failure. This should
not cause dangerous operating states even
for a short time. If necessary, emergency-
stop devices should be implemented.
• Wherever faults in the automation system
may cause damage to persons or property,
external measures must be implemented to
ensure a safe operating state in the event
of a fault or malfunction (for example, by
means of separate limit switches,
mechanical interlocks etc.).

1
MN05006002Z-EN
System overview,
SmartWire-Darwin
System description SmartWire-Darwin
– SWD-Assist 12
Components of the SWD system
– Automatic addressing of the SWD slaves
– Organization of the SWD slave data
– Physical properties of the SWD network
How do I configure my gateway?
– Fieldbus 28
– SWD PROFIBUS-DP Gateway EU5C-SWD-DP
– SWD CANopen gateway EU5C-SWD-CAN
How do I dimension the power supply of my
SWD topology?
How do I position my SWD slaves?
Contents

2
MN05006002Z-EN
– Potential conditions between the components
– Connecting power feeder module
– Connecting the SWD I/O module
– Connecting SWD contactor modules
– Connecting M22-SWD… function elements
– Connecting a switch cabinet bushing
– Connecting the enclosure bushing
Connecting the SWD connection cable
– Connecting the SWD ribbon cable
– Connect round socket to SWD round cable
– Connect round plug to the SWD round cable
– Fitting SWD ribbon cable with plugs
– Fitting the blade terminal SWD4-8MF2
– Fitting external device plugs SWD4-8SF2-5
– Coupling for an 8-pole blade terminal
– Using the ribbon/round cable adapter
Electromagnetic compatibility (EMC)
SWD system for safety-related applications
Initial switch-on of the SWD network
– Status messages of the SWD gateway after
– Status messages of the SWD slaves after
Creating a target configuration
– Status messages of the SWD gateway after

Contents
3
MN05006002Z-EN
Creating a project configuration of the
SWD network
Switching on when there are configuration
changes
– Switch-on in case of a changed actual
– Retriggering on in the case of an unchanged
– POW-LED 113
– DP-LED 114
– CAN-LED 115
– Config.-LED 116
– SWD-LED 117
Behavior of the SWD power feeder modules
Behavior of the SWD inputs/outputs modules
Behavior of the SWD module DIL-SWD-32-…
Behavior of the SWD function elements
M22-SWD…
– Current consumption 15 V SWD supply voltage
– Power consumption/current consumption
AUX
124
– Gateways, Power Feeder Modules
– Network termination, switch cabinet bushings 135
– Enclosure bushings plug, socket

4
MN05006002Z-EN

5
MN05006002Z-EN
About This Manual
List of revisions
The following significant amendments have been introduced
since previous issue:
System overview,
SmartWire-Darwin
This manual describes the technical overview, installation,
commissioning and diagnostics of the SmartWire-Darwin
intelligent connection system.
Specialist electrical training is needed for commissioning and
creating circuit diagrams.
The user must also be aware of
and adhere to all valid occupational safety and accident
prevention guidelines, standards and regulations.
Publication
date
Page
Subject
New
Change
06/09
Notes
j
PROFIBUS DP data volume per slave
j
Figure with terminal designation
j
Warning about missing strain relief
j
LED orange l red
j
j
Danger!
If active components are controlled, such as motors or
pressurized cylinders, plant parts may become damaged or
persons endangered, provided SmartWire-Darwin compo-
nents are connected up incorrectly, or configured and
programmed incorrectly.

About This Manual
6
MN05006002Z-EN
Exclusion of liability
We have provided all the information in this manual to the
best of our knowledge and belief and in accordance with the
latest state of the art. However, this does not exclude the
possibility of inaccuracies so that we cannot accept any
liability for the accuracy and completeness of the informa-
tion. In particular, this information does not guarantee any
particular properties.
The SmartWire-Darwin components specified in this manual
may be set up and operated only in connection with the
corresponding manual and instructional leaflet installation
instructions enclosed with the device. Installation, commis-
sioning, operation, maintenance and retrofitting of the
SmartWire-Darwin components may be performed only by
qualified personnel. The SmartWire-Darwin components
may be used only in the areas recommended by us and only
in conjunction with third-party devices and components that
have been approved by us. Their use is allowed fundamen-
tally only in technically faultless condition. Fault-free and
safe operation of the system requires proper transport,
storage, installation and commissioning as well as careful
operation and maintenance.If the aforementioned safety-
related instructions are not observed, in particular if the
commissioning or maintenance of the devices is performed
by insufficiently qualified personnel and/or the devices are
used improperly, it cannot be excluded that the SmartWire-
Darwin components will present sources of danger. We
cannot accept any liability for any resulting injury or damage.

Additional documentation
7
MN05006002Z-EN
Additional documentation At various points in this manual reference is made to more
detailed descriptions in other documentations. These are
available in the form of PDF files for download from our FTP
server.
ftp://ftp.moeller.net/DOCUMENTATION/AWB_MANUALS/
The current edition of this manual in other languages can be
obtained from the Internet.
Writing conventions
Symbols used in this manual have the following meanings:
X
indicates actions to be taken.
For greater clarity, the name of the current chapter is shown
in the headline of the left-hand page and the name of the
current section in the header of the right-hand page. This
does not apply to pages at the start of a chapter and empty
pages at the end of a chapter.
h
Caution!
Debounced inputs may not be used in the safety
circuit diagram.
Warns of the risk of material damage.
i
Warning!
Warns of the possibility of serious damage and slight
injury.
j
Danger!
Warns of the possibility of serious damage and slight
injury or death.
h
Draws your attention to interesting tips and supplemen-
tary information.

8
MN05006002Z-EN

9
MN05006002Z-EN
1
System description SmartWire-
Darwin
Target group
This manual is aimed particularly at planners, developers
and operators in the fields of electrical, control and mechan-
ical engineering who want to use the connection system
SmartWire-Darwin, with its reduced project planning and
wiring costs, for operation in the switch cabinet, in the
periphery, directly on the machine or in service buildings.
The SmartWire-Darwin components must only be installed
and connected up by trained electricians or other persons
who are familiar with the installation of electrical equip-
ment.
j
Danger!
A specialist knowledge of electrical engineering is needed
for configuration and commissioning. Plant sections and
persons are at risk if a SmartWire-Darwin element is incor-
rectly connected or configured and active components
such as motors or pressure cylinders are controlled.

System description SmartWire-
Darwin
10
MN05006002Z-EN
Proper use
Several components of the SmartWire-Darwin connection
system, referred to in the following as SWD, comply with the
protection type IP20 and therefore have to be installed in an
enclosure, switch cabinet or wiring distribution board. This
does not apply to the SWD round cable with a connected
round plug-in connector with screw-type locking, which
complies with protection type IP67.
Power supply and signal terminals must be protected against
accidental contact and covered.
An SWD topology may only be operated, if it has been prop-
erly fitted and connected by a qualified skilled electrician.
The installation must comply with regulations for electro-
magnetic compatibility (EMC) (a "Electromagnetic
compatibility (EMC)", page 99).
Improper use
The connection system SWD must not be used as a replace-
ment for safety-related controllers such as burner control-
lers, crane controllers or two-hand safety controllers.
To find out how the SWD contactor modules can be used for
safety-related switching off despite this, please read the
manual “SmartWire Darwin Slaves” (MN05006001Z-EN,
previously AWB2723-1613en).
j
Danger!
The power up of the SWD topology must not cause any
dangers arising from activated devices, such as unex-
pected motor startups or power ups.

The SWD system
11
MN05006002Z-EN
The SWD system
This manual describes the intelligent SmartWire-Darwin
connection system, referred to below as SWD. The backbone
of the SWD system is the self-configuring SWD network in
which data are exchanged with the SWD slaves via an 8-
conductor SWD network cable (a section “The SWD
network”, page 19). The SWD slaves are provided with a
voltage via the SWD network cable at the same time.
You can connect up to 99 SWD slaves, e.g. switching
devices, pilot devices and I/O modules to the SWD network
cable.
As the SWD slaves are located on-site in the installation the
SWD system reduces your wiring costs.
You create your SWD topology with the system components
available (a section “Components of the SWD system”,
page 13) according to the motto “plug & work”.
At the beginning of the SWD network you always connect an
SWD gateway via the SWD flat band conductor.
The SWD gateway controls the data interchange via the SWD
network as a master function. At the same time, as a slave
function, it exchanges data with the overriding controller via
a field bus system. At present you can choose between the
field bus systems PROFIBUS DP and CANopen.

System description SmartWire-
Darwin
12
MN05006002Z-EN
SWD-Assist
The planning and ordering help system SWD-Assist provides
valuable assistance with the project planning of your SWD
topology. SWD-Assist is software that runs on
Windows 2000 (SP 4), XP or Vista (32-bit) and relieves you
of the planning work required for an SWD topology. The
software is available free of charge at:
http://downloadcenter.moeller.net
X
On this web site you have to first of all select the language
and then the software package “SWD-Assist” in the field
“Select your”.
X
Load SWD-Assist as an update or full version.

Components of the SWD
system
13
MN05006002Z-EN
Components of the SWD
system
Figure 1:
The SWD-networked switch cabinet
a SWD gateway
b M22-SWD… function element for pilot devices in surface
mounting enclosure
c Switch cabinet bushing
d SWD input/output module
e SWD contactor module
f Network terminator
g SWD round cable
h M22-SWD… function element for pilot devices
i SWD ribbon cable
j Coupling for blade terminal
k Power feeder module
l Planning and ordering help, SWD-Assist
9
8
11
4
5
1
3
3
3
3
5
2
6
6
4
10
12
7
9
8
11
4
5
1
3
3
3
3
5
2
6
6
4
10
12
7

System description SmartWire-
Darwin
14
MN05006002Z-EN
With the SWD components a differentiation is made
between SWD slaves and SWD elements.
SWD slaves are all SWD components that respond to a
request from the SWD gateway, i.e. can exchange data. They
are given an SWD slave address.
SWD elements are passive SWD components that do not
exchange any data, but are necessary for operation of the
SWD network. SWD elements are, for example, the power
feeder modules, SWD cables, adapters etc. SWD elements
are not given an SWD slave address.
SWD station
The most important SWD slave in the SWD network is the
PROFIBUS DP or CANopen gateway with its coordinator
function.
SWD gateways for PROFIBUS-DP or CANopen
For a short description of how you install and plan your SWD
gateway please refer to Chapter “Engineering”, page 27
and Chapter “Installation”, page 45.
For a detailed description of the SWD gateway please refer
to the manual MN05013002Z-EN (previously AWB2723-
1612en).
Below you will find a short report of the SWD slaves that are
currently available:
SWD contactor modules
The SWD modules DIL-SWD-32-001 (automatic) and DIL-
SWD-32-002 (automatic/manual) can be combined with the
contactors DILM7 to DILM38. Thus motor starters, consisting
of a motor protective circuit breaker PKZ and a contactors
DILM, can also be combined with the SWD system. Besides
the device supply voltage a 24 V DC control voltage is
supplied to the DIL-SWD-32… modules for the contactors.
For a detailed description of the SWD modules DIL-SWD-
32… please refer to the manual “SmartWire-Darwin Slaves”
(MN05006001Z-EN, previously AWB2723-1613en).

Components of the SWD
system
15
MN05006002Z-EN
SWD I/O modules
The SWD I/O modules are digital inputs and outputs for the
connection of sensors and actuators that can be accessed via
the SWD network. These can be, for example, auxiliary
contacts of additional switchgears that do not have inte-
grated SWD technology. The modules are placed in the
immediate vicinity of the sensors/actuators, due to which the
remaining wiring is markedly reduced. Diverse modules with
digital inputs and outputs in the form of transistors and
relays are available.
For a short description of how you install your SWD I/O
modules please refer to Section “Connecting the SWD I/O
module”, page 55.
For a detailed description of the SWD I/O modules please
refer to the manual MN05006001Z-EN, section
“Input/output modules EU5E-SWD-…”.
SWD function elements M22-SWD…
The M22-SWD… function elements are treated in the same
way as RMQ Titan pilot devices, but can be connected easily
to the SWD network without any further wiring. The SWD
function elements are combined as usual with the front
elements of the RMQ Titan system.
SWD function elements are available for front mounting or
for base fixing.
For a short description of how you install your M22-SWD…
function elements please refer to Section “Connecting M22-
SWD… function elements”, page 59.
For a detailed description of the SWD function elements
M22-SWD… please refer to the manual MN05006001Z-EN
(previously AWB2723-1613en), section “Pilot devices
M22-SWD”.

System description SmartWire-
Darwin
16
MN05006002Z-EN
Figure 2:
The SWD topology
a SWD gateway
b SWD blade terminal
c SWD flat band conductor
d SWD station
e SWD external device plug
f Power feeder module
g SWD round cable
h SWD switch cabinet bushing
i Network terminator
SWD elements
The SWD elements complete the SWD system:
• Powerfeed Modules
• SWD flat band conductors and round cables
• Network terminator for flat band conductor
• Adapter for blade terminal/round cable
• PCB for surface mounting enclosure for plugging in
M22-SWD… function elements
• Switch cabinet bushing socket/plug, POW
• Enclosure bushing socket/plug
• Link for device plug, bottom and front
• Coupling for blade terminal
• SWD accessories
a
f
h
h
d
i
g
e
d
c
d
b
b
b

Components of the SWD
system
17
MN05006002Z-EN
A short functional description of the passive SWD compo-
nents follows.
Powerfeed Modules
Power feeder modules are power supply units that are
connected additionally to the SWD network when there is an
increased current consumption or increased voltage drop.
Being a passive SWD element, a power feeder module does
not have a slave address.
The power feeder module EU5C-SWD-PF1 feeds the 24 V DC
control voltage for contactors back onto the SWD ribbon
cable.
The power feeder module EU5C-SWD-PF2 feeds both the
24 V DC control voltage for contactors and the supply
voltage of approx. 15 V DC for the devices back onto the
SWD ribbon cable (a "Connecting power feeder module",
page 51).
For a short description of how you install power feeder
modules please refer to Section “Connecting power feeder
module”, page 51.
For a detailed description of the power feeder modules
please refer to the manual MN05006001Z-EN (previously
AWB2723-1613en).
SWD flat band conductors and round cables
You connect SWD elements via 8-conductor SWD ribbon
cable or round cable, via which both the data and the supply
voltages are transmitted (a "Connecting the SWD connec-
tion cable", page 82).
Network terminator for flat band conductor
The SWD network requires termination at the beginning and
end of the network (a "Using network termination",
page 97).
Adapter for blade terminal/round cable
This adapter (part no. SWD4-8FRF-10) is for the purpose of
adapting from ribbon cable to round cable and vice versa
(a "Using the ribbon/round cable adapter", page 96).

System description SmartWire-
Darwin
18
MN05006002Z-EN
PCB for surface mounting enclosure M22-I…
The M22-I… surface mounting enclosures (protection type
IP67) are for the purpose of accommodating up to 6 M22
SWD base function elements. The M22 SWD base function
elements are plugged onto an M22-SWD-I1…6-LP01
printed circuit board, which is inserted into the surface
mounting enclosure. The connection with the SWD network
is created via this printed circuit board.
The standard RMQ Titan surface mounting enclosure
M22-I1…6 in conjunction with standard M22 front
elements are used (a "M22-SWD base fixing", page 64).
Socket/plug switch cabinet bushings
You use switch cabinet bushings with an M18 x 0.75 mm
screw fixing for external connection of the SWD network to
a switch cabinet or enclosure.
You use the switch cabinet bushing, for example, to connect
to a operating panel with M22 SWD… function elements or
to connect to another switch cabinet and in the process to
supply in addition the 24 V DC control voltage for contactors
(a "Connecting a switch cabinet bushing", page 72).
Enclosure bushing socket/plug
Use enclosure bushings with an M20 x 1.5 mm screw fixing
of protection type IP67, for example, in the surface mounting
enclosure or switch cabinet for pluggable connection of the
8-conductor SWD round cable (a "Connecting the enclo-
sure bushing", page 79).
Link for device plug, bottom/front
This link connects an interrupted select cable (SEL cable).
The select cable must be functional for automatic addressing
of the SWD slaves.
SWD accessories
Further accessories such as blade terminals, connectors,
round plugs/round sockets with screw-type locking in
straight or angled finish and pliers for fitting the plug are
available.

The SWD network
19
MN05006002Z-EN
The SWD network
The relevant SWD gateway operates on the SWD network as
a coordinator that assumes the network management and
controls the data transfer procedure. The special SWD
protocol is used for this purpose.
Features of the SWD network
Table 1:
Features of the SWD network
Physics of the data cable
RS485
Network length [m]
at present up to 100
Number of slaves (max.)
99 (automatic addressing)
Data transfer rate [Kbits/s]
automatic detection, at present 125
User data bytes per telegram
variable, up to a maximum of 1000
Cycle time of one complete polling
cycle
1)
[ms]
2 + (number of user data bytes x 0.1)
Access type
central coordinator (polling)
Data transfer protocol
SWD, character-orientated, fixed frame length, variable
data field
Data backup process
CRC32 verification polynom
Alarm acquisition
acyclic data transfer
SWD system dependability
error-tolerant system, (time monitoring
2)
, slave replace-
ment, telegram repetition etc.)
Scope of application
Connection via field bus systems to PLC, production
controller and process controller, energy management
1) The difference in the typical polling cycle time for one or 99 planned SWD slaves is only
approx. 2 ms (a figure , page 20).
2) Time monitoring for the SWD slave and for the coordinator, default watchdog timeout 300 ms.
If an SWD slave receives no valid data from the coordinator after expiry of the timeout period, it
sets its outputs to the safe status 0. The coordinator also sets the receive data of a missing SWD
slave to “0” after expiry of the timeout period.

System description SmartWire-
Darwin
20
MN05006002Z-EN
Figure 3:
Polling cycle time, dependent on the SWD user data
bytes transferred at 125 Kbit/s
n = number of user data bytes
t
P
= polling cycle time [ms]
a 1 SWD slaves with n user data bytes
b 99 SWD slaves with n user data bytes
12
20
28
36
44
52
60
68
76
84
10
18
26
34
42
50
58
66
74
82
0
10
20
30
40
50
60
70
80
90
100
200
300
400
500
600
700
800
900
1000
n
tp
b
a

The SWD network
21
MN05006002Z-EN
Automatic addressing of the SWD slaves
Prerequisite: the SWD gateway is connected properly to
the SWD network.
After initial switch-on of the supply voltage the SWD
gateway determines the SWD slaves that are present on the
SWD network. It commences communication with them and
first of all sets all SWD slaves to the same data transfer rate.
In this phase, in which SWD slaves can still be added or
removed, the SWD gateway waits for the “Config.” push-
button to be pressed to start the automatic addressing. The
SWD gateway reports the status with the following LED indi-
cation:
Table 2:
LED indication of the SWD gateway after switching on
with a new number of SWD slaves
The SWD gateway creates the actual configuration from the
configuration found by the “Config.” pushbutton being
pressed for at least 2 seconds. In the process it checks which
and how many SWD slaves are connected to the SWD
network. In accordance with their positioning in the SWD
network it assigns slave addresses to these in uninterrupted
ascending order. The SWD gateway starts with the SWD
slave closest to it, assigning the slave address 1 up to a
maximum of 99.
During this process the SWD LED flashes orange.
h
Pressing the Config pushbutton actuator when the
gateway is switched on will switch it to firmware update
mode. An update is currently not available. Leave the
mode by switching the device on again.
LED
Status
SWD
Red flashing
Config.
Off (no planned configuration is available)

System description SmartWire-
Darwin
22
MN05006002Z-EN
The SWD gateway stores the actual configuration as a valid
target configuration and is now in the SWD mode “Fail-
safe”. This stored target configuration serves as a reference
for each switch-on after this.
The SWD gateway signals the end of this automatic config-
uration with address assignment with the following LED
indication:
Table 3:
LED indication of the SWD gateway after creation of a
new target configuration
The SWD gateway now waits for the parameters of the
project configuration from the field bus master.
If the configuration for the overriding field bus master (the
project configuration) in terms of the number and part no. of
SWD slaves agrees with the target configuration in the SWD
gateway and has been transferred to the SWD gateway, the
data interchange can already commence.
This is valid for each field bus master.
The SWD gateway is now in the SWD mode “Normal”.
Table 4:
LED indication of the SWD gateway after changeover
to the SWD mode “Normal”
LED
Status
SWD
green continuous light
Config.
Off (no planned configuration is available)
LED
Status
SWD
green continuous light
Config.
green continuous light
CAN or DP
green continuous light when data is being
exchanged on the field bus.
POW
yellow continuous light

The SWD network
23
MN05006002Z-EN
For a brief description of how an SWD gateway is put into
operation for the first time with a new actual configuration
please refer to Section “Initial switch-on of the SWD
network”, page 105.
In the manual "SmartWire-Darwin Gateways"
(MN05013002Z-EN, previously AWB2723-1612en) you can
find out how to configure an SWD gateway with its SWD
slaves in the configuration software for the PLC.
Addressing when SWD slaves have been changed
After each subsequent switch-on of the supply voltage the
SWD gateway first of all determines the actual configura-
tion and compares it with the stored target configuration. In
the process the SWD gateway checks which and how many
SWD slaves are connected to the SWD network.
If the configuration has changed, it has to be differentiated
whether the change has been effected in the SWD network,
see „Switch-on in case of a changed actual configuration“,
page 109 or whether the change has been effected in the
configuration software of the PLC, see „Switching on in the
case of a changed project configuration“, page 111.

System description SmartWire-
Darwin
24
MN05006002Z-EN
Organization of the SWD slave data
The SWD network is organized in the same way as a binary
data storage in which the memory space required for the
input/output bytes of a slave is reserved for each SWD slave
detected. The data area comprises a maximum of
1000 bytes.
This reserved data area is transferred completely in the SWD
network. Each SWD slave reads the receive data intended for
it (input byte) and writes its send data (output bytes) to the
memory location reserved for it.
The data are declared valid at the end of the transfer cycle,
after error-free completion of the telegram verification.
Each SWD slave can now accept the new receive data at the
same point in time and prepare its send data for the next
transfer cycle.

The SWD network
25
MN05006002Z-EN
Physical properties of the SWD network
An SWD network is designed for a line structure. It must be
terminated at the beginning and at the end with a network
termination. The network termination at the beginning is
integrated into the SWD gateway so that only at the end of
the line does a termination still have to be switched on or
connected (a "Using network termination", page 97).
SWD network cables
Use SWD ribbon cable or SWD round cable as the SWD
network cable. 2 conductors “Data A” and “Data B” are
used for the data transfer.
Flat band conductor
Each ribbon cable conductor has a cross-section of
0.23 mm
2
(AWG 24). You will find the configuration of the
ribbon cable conductors below.
Table 5:
Configuration of the SWD flat band conductor
Meaning
+24 V DC
Contactor control voltage
Chassis
ground
Contactor control voltage
GND
for device supply voltage and data
Data B
Data A
GND
for device supply voltage and data
SEL
Select cable
+15 V DC
Device supply voltage

System description SmartWire-
Darwin
26
MN05006002Z-EN
Round conductor
Round cables are suitable among other things for the
bridging of large distances. The conductors for the supply of
the device supply voltage and contactor control voltage have
a cross-section of 0.5 mm
2
, the other conductors 0.22 mm
2
each. See below for the configuration of the round cable
conductors.
Table 6:
Configuration of the SWD round cable
Core
Cross-
section
[mm
2
]
Conduct
or
color
Meaning
1
0.5
brown
+15 V DC
Device supply voltage
2
0.22
gray
SEL
Select cable for automatic addressing of the
SWD slaves
3
0.22
pink
GND
for device supply voltage and data
4
0.22
red
Data A
5
0.22
blue
Data B
6
0.5
white
GND
for device supply voltage and data
7
0.5
yellow
Chassis
ground
Contactor control voltage
8
0.5
green
+24 V DC
Contactor control voltage

27
MN05006002Z-EN
2
Engineering
How do I plan a SWD
topology?
This chapter will help you to plan the SWD topology of an
installation. Before you plan the SWD topology, if possible:-
• The automation task should be clearly defined.
• The field bus system via which the SWD gateway commu-
nicates with the overriding controller should be defined.
• The number and the types of SWD slaves should be
known.
• The positions of the SWD slaves in the installation should
be determined so that the total length of the SWD ribbon
cable and round cable is known.
The planning of the SWD topology extends to:
• Selection of the SWD gateway, depending on the field bus
system used, which at present is PROFIBUS-DP or
CANopen.
• Selection and positioning of the SWD slaves, e.g. SWD
modules DIL-SWD-32-…, SWD I/O modules etc. The
number and the types of SWD slaves determine the
volume of data to be transferred and the electrical load
(a "Calculation of the electrical load in the device
supply“, page 32, a "Calculation of the electrical load
in the contactor supply“, page 35).
• Determination of the cable length from the gateway to the
end of cable. On the basis of this length, the line resistance
and the electrical load you then calculate the voltage drop
on the line and check whether an additional power unit
h
You can also perform the entire engineering conveniently
with SWD-Assist, which can be downloaded via the
following link:

Engineering
28
MN05006002Z-EN
(power feeder module) is required (a "Voltage Drop“,
page 36).
• Positioning of the SWD slaves with the drafting of a device
mounting plan for the SWD cables (a "How do I position
my SWD slaves?“, page 44).
• Definition of what type of network termination will be
used at the end of the network (a "Using network termi-
nation“, page 97).
How do I configure my
gateway?
The SWD gateway configures the SWD network automati-
cally. So after installation and during commissioning of all
the SWD slaves you only have to press the “Config.” push-
button to create a valid target configuration (a "Auto-
matic addressing of the SWD slaves“, page 21).
In the process an SWD gateway determines how many and
which SWD slaves are present on the SWD network and how
many user data bytes have to be transferred. A maximum of
1000 user data bytes can be transferred on the SWD
network.
Fieldbus
You configure the field bus side or the field bus master in the
controller configuration of the overriding controller. The
important thing is that the project configuration of the SWD
slaves created there complies with the target configuration
and is downloaded to the SWD gateway.
For a detailed description of how to configure your
PROFIBUS DP or CANopen SWD gateway please refer to the
manual MN05013002Z-EN (previously AWB2723-1612en).

How do I configure my
gateway?
29
MN05006002Z-EN
SWD PROFIBUS-DP Gateway EU5C-SWD-DP
The PROFIBUS DP gateway functions as a modular slave on
the PROFIBUS DP in conjunction with the configured SWD
slaves. Each SWD slave has to be considered as an indepen-
dent module.
Tabelle 7:
Features of the SWD PROFIBUS DP gateway
PROFIBUS-DP transfer rate [Mbit/s] (max.)
12, automatic adaptation
Number of PROFIBUS DP slaves (max.)
124
Valid PROFIBUS DP slave addresses
1 - 125
PROFIBUS DP data volume per slave (max.)
480 I/O byte (240 I/240 O byte)
SWD data transfer rate [Kbit/s]
at present 125
Number of SWD slaves on the PROFIBUS DP gateway
(max.), limitation on account of the data volume
1)
58
Rated operational current I
G
in the device supply [A]
0.7
Rated operational current I
S
in the contactor supply
[A]
3
1) Due to the internal memory structure of the PROFIBUS DP master a maximum of 58 SWD slaves
can be served operated via an SWD PROFIBUS DP gateway.

Engineering
30
MN05006002Z-EN
SWD CANopen gateway EU5C-SWD-CAN
In connection with the SWD slaves the gateway functions on
the CANopen bus as a modular slave in accordance with
profile DS301.4, each SWD slave being an own module.
Tabelle 8:
Features of the SWD CANopen gateway
CANopen transfer rate [Mbit/s] (max.)
12, automatic adaptation
Number of CANopen slaves (max.)
124
Valid CANopen slave addresses (node addresses)
2 - 32
CANopen data volume per slave (max.)
256 I/O Byte (128 I/128 O Byte)
SWD data transfer rate [Kbit/s]
at present 125
Number of SWD slaves on the CANopen gateway
(max.)
99
Rated operational current I
G
in the device supply [A]
0.7
Rated operational current I
S
in the contactor supply
[A]
3

How do I dimension the power
supply of my SWD topology?
31
MN05006002Z-EN
How do I dimension the
power supply of my SWD
topology?
Besides its function as a coordinator the SWD gateway also
assumes the power supply of the SWD topology.
In addition it has a built-in power supply unit which provides
2 separate supply voltages within the SWD network:
• The 15 V DC device supply voltage UVP (device supply)
for its own supply and for the electronics of the down-
stream SWD slaves.
The SWD gateway (or an SWD power feeder module)
generates this 15 V DC supply voltage from the 24 V DC
supply voltage that you apply to the spring-loaded
terminal connection POW.
• The 24 V DC control voltage U
AUX
for the contactor coils
(contactor supply) that are activated via an SWD
module DIL-SWD -32-…
Only if the SWD topology comprises contactors or motor
starters do you supply in addition to the SWD gateway (or
SWD power feeder module) the control voltage via the
spring-loaded terminal “AUX”.
The calculations of the electrical load and the voltage drop
have to be made separately for devices and contactor supply.
Connection of the SWD network to the SWD gateway and to
the SWD power feeder module is always performed via the
8-conductor SWD ribbon cable. With a cross-sectional area
of 0.23 mm² (AWG 24) per ribbon cable conductor the
maximum current-carrying capacity is:
• 3 A, according to IEC/EN.
• 2 A, according to UL 508.
Not until you are in the subsequent SWD topology, e.g. in
the case of a surface mounting enclosure, can you use the
SWD round cable, which has a cross-section of 0.5 mm
²
for
the conductors of the device supply voltage and contactor
supply.

Engineering
32
MN05006002Z-EN
Device supply
The SWD gateway supplies the 15 V DC device supply
voltage (U
VP
) via conductor 1 (+15 V) and the conductors 3
and 6 (each GND) (a "Configuration of the SWD flat band
conductor“, page 25).
Calculation of the electrical load in the device supply
The total power consumption of all SWD slaves connected to
the SWD gateway must not exceed 0.7 A in the device
supply. Otherwise a power feeder module EU5C-SWD-PF2-1
has to be used before the SWD slave as of which the 0.7 A
has been exceeded.
In the device supply the current consumption of the various
SWD elements contains a constant proportion that is always
consumed and a variable proportion, for example, caused by
switching on an LED.
h
For the dimensioning of the power supply the following
points have to be taken into account:
• In the device supply (15 V DC):
– the total power consumption (a "Device supply“,
– the voltage drop (a "Voltage Drop“, page 36).
• The following are optional in the contactor supply
(24 V DC):
– The total power consumption (a "Contactor
– the voltage drop (a "Voltage Drop“, page 36).
h
Please note the total current consumption of your SWD
topology into and, if necessary, plan for (an) additional
supply unit(s), e.g. the SWD power feeder module(s) or
SWD switch cabinet bushing(s).

How do I dimension the power
supply of my SWD topology?
33
MN05006002Z-EN
For the purpose of simplification calculate with the current
consumption values of the following table “Maximum
current consumption of the individual function elements in
the device supply”, which contains both proportions. For
further simplification calculate with a simultaneity factor of
1, for example all LEDs are activated simultaneously.
X
Add together the currents of all SWD slaves plus the
current that flows through the network termination,
making a total current I
G
.
Tabelle 9:
Maximum current consumption of the individual func-
tion elements in the device supply
I
G
= I
1
+ I
2
+ … + I
n
+ IRB
Function element
Maximum current consump-
tion of SWD slaves
M22-SWD-K11
7
M22-SWD-K22
7
M22-SWD-LED-W
19
M22-SWD-LED-B
19
M22-SWD-LED-G
19
M22-SWD-LED-R
19
M22-SWD-K11LED-W
19
M22-SWD-K11LED-B
19
M22-SWD-K11LED-G
19
M22-SWD-K11LED-R
19
M22-SWD-K22LED-W
19
M22-SWD-K22LED-B
19
M22-SWD-K22LED-G
19
M22-SWD-K22LED-R
19
M22-SWD-KC11
7
M22-SWD-KC22
7
M22-SWD-LEDC-W
19

Engineering
34
MN05006002Z-EN
Contactor supply
A contactor receives the control voltage U
AUX
via conductors
8 (+24 V) and 7 (earth) of the 8-conductor ribbon cable (a
"Configuration of the SWD flat band conductor“, page 25)
and further via the SWD module DIL-SWD-32-…
Each contactor is equipped with its own SWD module
DIL-SWD-32-…
M22-SWD-LEDC-B
19
M22-SWD-LEDC-G
19
M22-SWD-LEDC-R
19
M22-SWD-K11LEDC-W
19
M22-SWD-K11LEDC-B
19
M22-SWD-K11LEDC-G
19
M22-SWD-K11LEDC-WR
19
M22-SWD-K22LEDC-W
19
M22-SWD-K22LEDC-B
19
M22-SWD-K22LEDC-G
19
M22-SWD-K22LEDC-R
19
DIL-SWD-32-001
40
DIL-SWD-32-002
40
EU5E-SWD-8DX
12
EU5E-SWD-4D4D
45
EU5E-SWD-4D2R
55
SWD4-RC8-10
17
M22-SWD-IL…LP (with
the network termination
switched on)
17

How do I dimension the power
supply of my SWD topology?
35
MN05006002Z-EN
Calculation of the electrical load in the contactor
supply
If the SWD modules DIL-SWD-32-… are combined with
contactors that on account of the type or quantity cause a
total wattage/total current consumption > 72 W/3 A, a
power feeder module EU5C-SWD-PF1-1, EU5C-SWD-PF2-1
or a switch cabinet bushing has to be inserted before the
SWD slave as of which the 3 A have been exceeded.
Please refer to the following table for the current consump-
tion of the various contactors.
Tabelle 10: Wattage/current consumption of the contactor coils at
a voltage of 24 V DC
X
Add the currents I
n
of all SWD slaves to the total current I
G
.
Take into account in the calculation the utilization factor “k”
of the complete installation.
Example:
With an utilization factor k = 0.6, 10 contactors of the part
no. DIL38 can be supplied by an SWD gateway or an SWD
power feeder module.
Contactor
Pull-in power
Pick-up
current at
24 V DC
Sealing power
Holding
current with
24 V
[W]
[mA]
[W]
[mA]
DIL7 - DIL9
3
125
3
125
DIL12 - DIL15
4.5
188
4.5
188
DIL17 - DIL38
12
500
0.5
21
I
G
= k x (I
1
+ I
2
+ … + I
n
)

Engineering
36
MN05006002Z-EN
Voltage Drop
Extensive SWD networks with long line lengths (up to
100 m) and the line resistance resulting from these lead to a
corresponding voltage drop on the device and contactor
supply lines.
For the planned network position of an SWD slave it there-
fore has to be checked whether sufficient supply voltages are
available there.
If the sum of all voltage drops is so large that the device elec-
tronics no longer function stably or a contactor no longer
switches definitely, you must paste an additional supply unit
before this network position.
Tabelle 11: Line resistance of the SWD ribbon cable and round
cable
On account of the different line resistances you must deter-
mine the the voltage drop for the SWD ribbon cable and
SWD round cable separately.
R
L
line resistance/
m, calculated from
the supply and
return line
1)
[Ohms/m] for the
15 V DC device
supply
[Ohms/m] for the
24 V DC
contactor supply
Flat band
conductor
0.131
0.174
Round conductor
0.06
0.07
1) The line resistance/m is valid for a line temperature of 70 °C.

How do I dimension the power
supply of my SWD topology?
37
MN05006002Z-EN
Figure 4:
Line resistance of SWD ribbon cable and SWD round
cable in the device and contactor supplies
a Round cable in the device supply
b Round cable in the contactor supply
c Ribbon cable in the device supply
d Ribbon cable in the contactor supply
L[m]
R
L
[O]
0.5
5 10
20
30
40
50
60
70
80
90
100
1
2
3
4
5
6
7
8
9
10
12
14
18
16
a
c
d
b

Engineering
38
MN05006002Z-EN
Calculation of the voltage drop in the device supply
The operability of an SWD slave is guaranteed at a supply
voltage for the devices U
VP
in the range of +15 V DC
(tolerance range -30 %/+20 %), i.e. +10.50 - +18.0 V DC.
The following is valid: U
VPmin
= 10.5 V DC
For safety reasons assume a supply voltage U
VP
= 14.5 V
DC on the supply unit for the calculation of the voltage drop.
Maximum value for the voltage drop U
Lmax
:
In the following calculation of the supply voltage a maximum
electrical load with an utilization factor of 1 is assumed.
Figure 5:
Power supply in the SWD network
a Supply unit: SWD gateway or SWD power feeder module
The following is valid in accordance with Figure5:
i
Warning!
If the voltage drops below the minimum voltage, the safe
operation of an SWD slave is no longer guaranteed.
U
Lmax
= U
VP
- U
VPmin
= 14.5 V - 10.5 V = 4.0 V DC
h
Rule-of-thumb value: if you use only ribbon cables and
the maximum current of 0.7 A is consumed, the maximum
voltage drop in the device supply is achieved at a line
length of approx. 43 m, even with an unfavourable layout.
An unfavourable layout exists, if the first SWD slave is
switched on after 43 m of ribbon cable.
I
G
I
n
I
RB
U
L1
U
V
U
1
U
2
U
3
U
n
U
L2
U
L3
U
Ln
R
L1
R
L2
R
L3
R
Ln
R
B
SWD
(1)
SWD
(2)
SWD
(3)
SWD
(n)
a
L1

How do I dimension the power
supply of my SWD topology?
39
MN05006002Z-EN
X
First of all determine the total current by adding together
the current consumption of all SWD slaves in accordance
with the table „Maximum current consumption of the
individual function elements in the device supply“,
page 33, including the current consumption of the
network termination (17 mA).
X
Refer to the figure „Line resistance of SWD ribbon cable
and SWD round cable in the device and contactor
supplies“, page 37 or the table „Line resistance of the
SWD ribbon cable and round cable“ page 36 for the total
line resistance subject to consideration of the length of the
various SWD line types.
X
Calculate the supply voltage at the SWD slave “Slave n”
using the formula:
U
V
= U
VP
= 14.5 V DC
U
1
= U
V
- R
L1
x (I
1
+ I
2
+ I
3
+ … + I
n
+ I
RB
)
U
2
= U
1
- R
L2
x (I
2
+ I
3
+…+ I
n
+ I
RB
)
U
n
= U
n-1
- R
Ln
x (I
n
+ I
RB
)
h
Caution!
Debounced inputs may not be used in the safety
circuit diagram.
In the case of this simplified formula the current limitation
due to the line resistance remains unconsidered and the
rated operational current of the individual SWD stations is
assumed at all times. The result is valid at a supply voltage
U
n
f of 10.5 V DC.
U
n
= U
n-1
- R
Ln
x (I
n
+ I
RB
)
h
Only if this rough calculation yields an excessively low
supply voltage at an SWD slave “n” does it have to be
calculated as of what network position the minimum
supply voltage U
VPmin
= 10.5 V DC is achieved. An addi-
tional power feeder module EU5C-SWD-PF2-1 has to be
inserted into the SWD network before this position.

Engineering
40
MN05006002Z-EN
If your calculation has yielded an excessively low supply
voltage at “Slave n” using the above formula:
X
Calculate the supply voltage step by step to the individual
SWD slaves with the aid of the table „Step-by-step calcu-
lation of the supply voltage“, page 40.
Tabelle 12: Step-by-step calculation of the supply voltage
• I
G
= Total current in the SWD network that is supplied by
a supply unit.
• I
RB
= The current that flows through the network termina-
tion can be assumed as being 17 mA.
• U
V
= 14.5 V = Supply voltage in the device supply.
• U
n
= Supply voltage for the SWD slave “(n)”
• U
Ln
= Voltage drop in the line segment “n”.
• R
L
= Line resistance per metre, calculated from the supply
and return line.
• L
n
= Length of the line segment “n” as of the preceding
SWD slave. The preceding slave is the supply unit for SWD
slave 1.
SWD slave
(slave
address)
Step 1:
Determining the
current in the
line segment
Step 2:
Determining the
resistance of the
line segment as
of the previous
slave
Step 3:
Determining the
voltage drop in
the line segment
Step 4:
Determining
the supply
voltage of
the current
slave
SWD (1)
I
G
= I
1
+ I
2
+ …
I
n
+ I
RB
R
L1
= R
L
x
L
1
U
L1
= I
G
x R
L1
U
1
= U
V
- U
L1
SWD (2)
I
2
= I
G
- I
1
R
L2
= R
L
x (L
2
- L
1
)
U
L2
= I
2
x
R
L2
U
2
= U
1
- U
L2
SWD (3)
I
3
= I
G
- I
2
R
L3
= R
L
x (L
3
- L
2
)
U
L3
= I
3
x
R
L3
U
3
= U
2
- U
L3
…
…
…
…
…
SWD (n)
I
n
= I
G
-
(I
1
+ I
2
+ … I
n
+
I
RB
)
R
Ln
=
R
L
x (L
n
- L
n-1
)
U
Ln
= I
n
x
R
Ln
U
n
=
U
n-1
- U
Ln

How do I dimension the power
supply of my SWD topology?
41
MN05006002Z-EN
Example for calculation of the voltage drop in the
device supply
Figure 6:
Example for calculation of the voltage drop in the
device supply
a 6 contactors DILM38 (with DIL-SWD-032-002), simultaneity
factor k = 0.8
b 2 SWD I/O modules (EU5E-SWD-4D4D)
c 3 function elements M22-SWD-K11LEDC-W
d Network termination (SWD4-RC8-10)
Total length of the ribbon cable 8 m
Example of calculation using the formula:
EU5C-SWD-DP
I
G
1
2
3
4
5
6
7
8
9
10
11
a
a
a
a
a
a
b
b
c
c
c
d
1 m
10 cm
10 cm
10 cm
10 cm
10 cm
2.1 m
10 cm
4 m
10 cm
10 cm
10 cm
U
VP
= 14.3 V
U
AUX
= 22.5 V
I
VP
= 0.37 A
I
AUX
= 2.4 A
U
n
= U
n-1
- R
Ln
x (I
n
+ I
RB
)
Result of calculation
Total current in the device supply I
VP
0.364 A
Total current in the contactor supply I
AUX
2.4 A
Voltage drop in the device supply U
VP
0.38 V
Voltage drop in the contactor supply U
AUX
2.52 V

Engineering
42
MN05006002Z-EN
The SWD gateway is supplying the SWD topology suffi-
ciently.
Calculation of the voltage drop in the contactor
supply
DC actuated contactors with the control voltage U
AUX
+24 V DC switch dependably in the range +24 V DC (-20 %/
+10 %), i.e. from +19.2 to +26.4 V DC.
For safety reasons assume that the supply voltage U
AUX
=
23.5 V DC on the supply unit for calculation of the voltage
drop.
The following is valid: U
AUXmin
= 19.2 V DC
Maximum value for the voltage drop U
Lmax
:
Calculation of the voltage drop in the contactor supply is the
same as that for the device supply, with the exception that
no current flow due to a network termination has to be taken
into consideration. A higher electricity consumption has to
be assumed, so the simultaneity factor also has to be taken
into account more intensely in the calculation.
The following is valid in accordance with Figure5, page 38:
i
Warning!
If the voltage drops below the minimum voltage, depend-
able operation of a contactor is no longer guaranteed.
U
Lmax
= U
AUX
- U
AUXmin
= 23.5 V - 19.2 V = 4.3 V DC
h
Rule of thumb value: If you are only using ribbon cables
and the maximum current of 3.0 A is consumed, the
maximum voltage drop in the contactor supply is achieved
at a line length of approx. 8.4 m.
U
V
= U
AUX
= 23.5 V DC
U
1
= U
V
- R
L1
x k x (I
1
+ I
2
+ I
3
+ … + I
n
)
U
2
= U
1
- R
L2
x (I
2
+ I
3
+ … + I
n
)
U
n
= U
n-1
- R
Ln
x I
n

How do I dimension the power
supply of my SWD topology?
43
MN05006002Z-EN
Please refer to the table „Wattage/current consumption of
the contactor coils at a voltage of 24 V DC“, page 35 for the
current consumption of the contactor coils (I
1
…I
n
).
Example of the calculation of the voltage drop in
the contactor supply
Figure 7:
Example of the calculation of the voltage drop in
the contactor supply
SWD topology:
This is based on the example of the calculation of the voltage
drop in the device supply and should be expanded by
another 3 contactors DILM38 (DIL-SWD-032-002) where the
simultaneity factor k = 0.8.
a 9 contactors DILM38 (with DIL-SWD-032-002), simultaneity
factor k = 0.8
b 2 SWD I/O modules (EU5E-SWD-4D4D)
EU5C-SWD-DP
I
G
1
2
3
4
5
6
7
8
9
10
11
12
13
14
a
a
a
a
a
a
a
a
e
a
b
b
c
c
c
d
1 m
10 cm
10 cm
10 cm
10 cm
10 cm
10 cm
10 cm
10 cm
2m
10 cm
4 m
10 cm
10 cm
10 cm
U
VP
= 14.4 V
U
AUX
= 22.4 V
I
VP
= 0.37 A
I
AUX
= 3.2 A

Engineering
44
MN05006002Z-EN
c 3 function elements M22-SWD-K11LEDC-W
d Network termination (SWD4-RC8-10)
e Position for an additional power feeder module
(EU5C-SWD-PF1-1)
Total length of the ribbon cable 8.2 m
Example of calculation using the formula:
The SWD gateway does not supply the contactor coils with
sufficient current. An additional power feeder module
EU5C-SWD-PF1-1 must be inserted after the contactor with
the SWD slave address 7.
The voltage drop in the device supply is non-critical.
How do I position my SWD
slaves?
There are no restrictions to the positioning. However, the
following recommendations gained from everyday practice
should be heeded:
X
Arrange the SWD slaves of a device group as far as
possible in groups on the SWD network.
If, for example, the functional elements M22-SWD… or SWD
I/O modules are arranged next to each other, installation of
the external device plugs or later replacement of the SWD
slaves will be easier.
U
n
= U
n-1
- R
Ln
x (I
n
+ I
RB
)
Result of calculation
Total current in the device supply I
VP
0.469 A
Total current in the contactor supply I
AUX
3.6 A
Voltage drop in the device supply U
VP
0.49 V
Voltage drop in the contactor supply U
AUX
3.77 V
h
A minimum clearance of approx. 30 cm has to be main-
tained between SWD network lines and power cables
running in parallel.

45
MN05006002Z-EN
3
Installation
The SmartWire-Darwin (SWD) components must only be
installed and connected up by trained electricians or other
persons who are familiar with the mounting of electrical
equipment.
The SWD components are installed in the following order:
• Mechanical mounting of the SWD elements.
• Mechanical mounting of the SWD cables and field bus
cable (PROFIBUS-DP or CANopen).
• Electrical installation of the supply voltages.
• Electrical installation of the sensors and actuators on the
SWD I/O module.
If contactors are used:
• Electrical installation of the control voltage for the contac-
tors.
j
Danger of electric shock!
Never carry out electrical work on the device while the
power supply is switched on.
Always follow the safety rules:
• Switch off and isolate.
• Verify isolation from the supply.
• Secure against retriggering.
• Short-circuit and ground.
• Cover adjacent live parts.

Installation
46
MN05006002Z-EN
Mechanical Mounting
SWD gateways, SWD I/O modules and SWD power feeder
modules are suitable for mounting on a top hat rail in accor-
dance with IEC/EN 60715, 35 mm.
X
First of all set the field bus slave address. This is set on the
SWD gateway by means of the DIP switches (switches
2 - 8) on the right-hand side of the SWD gateway.
X
Install the above mentioned SWD components in a vertical
position on a top hat rail or on a plate with the device feet
ZB4-101-GF1 that are available as additional equipment.

Electrical Installation
47
MN05006002Z-EN
Electrical Installation
Potential conditions between the components
The entire SWD topology operates with a common device
supply voltage. The field bus and the SWD topology are elec-
trically isolated from one another.
SWD gateway connection
Figure 8:
SWD gateway
a POW: Supply voltage 24 V DC
b Field bus interface
c Diagnosis interface, only for diagnostic purposes in case of
service
d Config. pushbutton actuator
e Status LEDs
f AUX: control voltage for contactors 24 V DC
g SWD network output (SWD OUT)
h DIP switch for setting the field bus address
f
g
e
d
c
b
a
h

Installation
48
MN05006002Z-EN
Connecting the POW supply voltage
The device supply voltage for the electronics of all SWD
slaves (15 V DC) is generated from the 24 V DC supply
voltage that you apply to the spring-loaded terminal connec-
tion POW.
Connecting the supply voltage AUX
If there are any contactors or motor starters in the SWD
topology, a 24 V DC voltage AUX must be additionally
supplied as a control voltage for the contactor coils.
Terminal capacities of the cables for the POW and
AUX supply voltages
• solid: 0.2 - 1.5 mm
2
(AWG 24-16).
• flexible 0.25 - 1.5 mm
2
with appropriate isolated ferrules
with plastic collars in accordance with DIN 46228, Part 4,
minimum length 8 mm.
h
Caution!
EMERGENCY SWITCHING OFF switching has to be
performed by switching off the 24 V DC control voltage of
the contactor coils. See manual MN05006001Z-EN (previ-
ously AWB2723-1613en).

Electrical Installation
49
MN05006002Z-EN
Cable protection for the POW and AUX supply volt-
ages
Figure 9:
Cable protection for the POW and AUX supply volt-
ages
X
On the SWD gateway connect the POW and AUX supply
voltages via separate miniature circuit-breakers:
• Miniature circuit-breaker 24 V DC for POW
– Cable protection in accordance with DIN VDE 0641
Part 11, IEC/EN 60898:
– Miniature circuit-breaker 24 V DC rated operational
current 3 A; trip type C or
– Fuse 3 A, utilization class gL/gG
– Cable protection for cable AWG 24
in accordance with
UL 508 and CSA-22.2 no. 14:
– Miniature circuit-breaker 24 V DC rated operational
current 2 A; tripping characteristic C or
– Fuse 2 A.
• Miniature circuit-breaker 24 V DC for AUX
24V
0V
24 V DC
F1
F2
0 V
POW
AUX
24V
0V

Installation
50
MN05006002Z-EN
– Cable protection in accordance with DIN VDE 0641
Part 11, IEC/EN 60898:
– Miniature circuit-breaker 24 V DC rated operational
current 3 A; trip type Z or
– Fuse 3 A, utilization class gL/gG
– Cable protection for cable AWG 24
in accordance with
UL 508 and CSA-22.2 no. 14:
– Miniature circuit-breaker 24 V DC rated operational
current 2 A; tripping characteristic Z or
– Fuse 2 A.
Connecting the SWD network
Connection of the SWD gateway is performed via the SWD
ribbon cable with a fitted blade terminal (beginning of the
cable).
Connect PROFIBUS-DP bus
Connect the PROFIBUS DP cable by means of the PROFIBUS
DP plug to the field bus interface of the SWD gateway.
Connecting the CANopen network
For connection to the CANopen cable you require a 9-pole
SUB-D socket. (e.g. PS416-ZBS-411)
X
Connect the CANopen cable by means of the CANopen
plug to the field bus interface of the gateway.
h
Caution!
Debounced inputs may not be used in the safety
circuit diagram.
The POW power supply behaves capacitively when first
switched on, an increased inrush current (12.5 A/6 ms)
flows in comparison with the rated input current. The
switching device and the power supply unit for switching
on the supply voltage must be suitable for this briefly
increased inrush current.
h
Caution!
Make SWD network connections only in voltage-free
condition!

Electrical Installation
51
MN05006002Z-EN
For a detailed description of the field bus connection, refer
to the manual MN05013002Z-EN (previously AWB2723-
1612en).
Connecting power feeder module
Figure 10:
Connections of the power feeder module, shown
here by way of the example of the EU5C-SWD-PF2
a POW: supply voltage 24 V DC
b Status LED
c AUX: control voltage for contactors 24 V DC
d SWD network input (SWD IN)
e SWD network output (SWD OUT)
d
c
b
a
e
h
Caution!
EMERGENCY SWITCHING OFF switching has to be
performed by switching off the 24 V DC control voltage of
the contactor coils. See manual MN05006001Z-EN (previ-
ously AWB2723-1613en).

Installation
52
MN05006002Z-EN
Connecting the supply voltage AUX
If there are any contactors or motor starters in the SWD
topology, a 24 V DC voltage AUX has to be supplied as a
control voltage for the contactor coils.
You will find a description of the terminal capacities and
cable protection in the following section.
Connecting the POW supply voltage
EU5C-SWD-PF2: the device supply voltage for the electronics
of all SWD slaves (15 V DC) is generated from the 24 V DC
supply voltage that you apply to the spring-loaded terminal
connection POW.
Terminal capacities of the cables for the POW and
AUX supply voltages
• solid: 0.2 - 1.5 mm
2
(AWG 24-16).
• flexible 0.25 - 1.5 mm
2
with appropriate isolated ferrules
with plastic collars in accordance with DIN 46228, Part 4,
minimum length 8 mm.

Electrical Installation
53
MN05006002Z-EN
Cable protection for the POW and AUX supply volt-
ages
Figure 11:
Cable protection for the POW and AUX supply volt-
ages
X
On the SWD gateway connect the POW and AUX supply
voltages via separate miniature circuit-breakers or fuses:
• Miniature circuit-breaker 24 V DC for POW
– Cable protection in accordance with DIN VDE 0641
Part 11, IEC/EN 60898:
– Miniature circuit-breaker 24 V DC rated operational
current 3 A; trip type C or
– Fuse 3 A, utilization class gL/gG
– Cable protection for cable AWG 24
in accordance with
UL 508 and CSA-22.2 no. 14:
– Miniature circuit-breaker 24 V DC rated operational
current 2 A; tripping characteristic C or
– Fuse 2 A.
• Miniature circuit-breaker 24 V DC for AUX
24V
0V
POW
AUX
24V
0V
AUX
24V
0V
3 A
24 V DC
0 V
F1
F2
F2

Installation
54
MN05006002Z-EN
– Cable protection in accordance with DIN VDE 0641
Part 11, IEC/EN 60898:
– Miniature circuit-breaker 24 V DC rated operational
current 3 A; trip type Z or
– Fuse 3 A, utilization class gL/gG
– Cable protection for cable AWG 24
in accordance with
UL 508 and CSA-22.2 no. 14:
– Miniature circuit-breaker 24 V DC rated operational
current 2 A; tripping characteristic Z or
– Fuse 2 A.
Connecting the SWD network
Connection of the SWD gateway is performed via the SWD
ribbon cable with a fitted blade terminal.
X
Insert the SWD ribbon cable (end of cable) coming from
the SWD gateway face into the socket SWD IN.
X
Insert the SWD ribbon cable (start of cable) leading to the
next SWD slave line into the socket SWD OUT.
For a detailed description of the connection of the power
feeder modules, refer to the manual MN05006001Z-EN
(previously AWB2723-1613en).
h
Caution!
Debounced inputs may not be used in the safety
circuit diagram.
The POW power supply behaves capacitively when first
switched on, an increased inrush current (12.5 A/6 ms)
flows in comparison with the rated input current. The
switching device and the power supply unit for switching
on the supply voltage must be suitable for this briefly
increased inrush current.
h
Caution!
Debounced inputs may not be used in the safety
circuit diagram.
Make SWD network connections only in voltage-free
condition!

Electrical Installation
55
MN05006002Z-EN
Connecting the SWD I/O module
Figure 12:
Connections of the SWD I/O module
a SWD ribbon cable with external device plug
b SWD status LED
c Status LEDs of the inputs and/or outputs
d Digital inputs and/or outputs
e 0 V connection and/or 0 V/24 V connection with a combined
input/output module EU5E-SWD-4D4D
a
b
c
d
e

Installation
56
MN05006002Z-EN
Figure 13:
Wiring of the I/O modules
Protect the relay outputs of the I/O module EU5E-SWD-4D2R
(example of value 4 A in the above illustration) in compli-
ance with the utilization category, a "Technical data“,
page 131.
Connecting digital inputs and/or outputs
SWD I/O module EU5E-SWD-8DX
X
Connect the sensors to the corresponding input I0 to I7.
X
Connect the reference potential 0 V DC of the inputs to
the 0 V connection.
SWD I/O module EU5E-SWD-4D4D
X
Connect the sensors to the corresponding input I0 to I3.
X
Connect the joint reference potential 0 V DC of the inputs
and of the supply voltage for the output to the 0 V connec-
tion.
X
Connect the actuators to the corresponding output Q0 to
Q3.
X
Connect the 24 V DC supply voltage for the output voltage
to the 24 V connection terminal.
EU5E-SWD-8DX
EU5E-SWD-4D4D
EU5E-SWD-4D2R
0 V
24 V DC
0 V
0 V
0 V
0 V
24 V
0 V
L
N
4 A
4 A

Electrical Installation
57
MN05006002Z-EN
SWD I/O module EU5E-SWD-4D2R
X
Connect the sensors to the corresponding input I0 to I7.
X
Connect the reference potential 0 V DC of the inputs to
the 0 V connection.
X
Wire the first relay output via Q0 and the second one via
Q1.
For details on terminal capacity for the wiring of the digital
inputs/outputs and of the output supply please refer to the
Appendix (a "Technical data“, page 130).
Connecting the SWD network
Connection of the SWD gateway is performed via the SWD
ribbon cable with a fitted external device plug, which you
insert into the SWD socket on the top side of the device.
For a detailed description of the connection of the SWD I/O
module please refer to the manual MN05006001Z-EN
(previously AWB2723-1613en).

Installation
58
MN05006002Z-EN
Connecting SWD contactor modules
Figure 14:
Structure of the SWD modules DIL-SWD-32-001 and
DIL-SWD-32-002 for DILM
a Connection of SmartWire-Darwin external device plug
b Mechanical switching position indicator
c Diagnostics LED
d Catch slider
e Connection pins
f Adjusting slide for contactor size
g Connection terminal X0-X1-X2
h Connection terminal electrical enable X3-X4
i Selector switch 1-0-A
For a description of the “Contactor connection DIL-SWD-32-
001/002” please refer to the manual MN05006001Z-EN
(previously AWB2723-1613en).
DIL-SWD-32-001
DIL-SWD-32-002
a
c
b
d
g
f
e
h
a
c
b
d
g
f
e
h
i

Electrical Installation
59
MN05006002Z-EN
Connecting M22-SWD… function elements
For a detailed description of “Connecting M22-SWD… func-
tion elements” please refer to the manual MN05006001Z-
EN (previously AWB2723-1613en).
The M22-SWD… function elements are combined together
with front elements of the RMQ Titan system to form control
circuit devices that communicate via the SWD network. The
M22-SWD… function elements are each available in two
versions for front or base fixing.

Installation
60
MN05006002Z-EN
Figure 15:
M22-SWD… function elements
17
18
17
18
26
27
28
29
30
33
34
35
31
6
4
3
5
2
8
5
9
19
19
7
7
11
12
13
14
15
16
2
1
25
10
32
24
23
22
21
20

Electrical Installation
61
MN05006002Z-EN
1
4-way selector switch actuator
18
Cable adapter plug/socket
2
Labels with label mounts
19
SWD round cable
3
4-way adapter
20
Link for base slots
4
Fixing adapters
21
Function element with 3 positions
and LED for base fixing
5
Function element with 3 positions for
front mount
22
Function element with 3 positions for
base fixing
6
LED element for front mount
23
Function element with 2 positions
and LED for base fixing
7
M22 contact elements
24
Function element with 2 positions for
base fixing
8
Function element with 2 positions for
front mount
25
LED element for base fixing
9
Function element with 3 positions and
LED for front mount
26
Bezels
10
Link for external device plug
27
Indicator lights
11
SWD external device plug
28
Key-operated buttons
12
SWD ribbon cable
29
Selector switch actuators
13
Planning and ordering help, SWD-Assist
30
Pushbutton actuators
14
M22 surface mounting enclosure
31
Button plates/Button lenses
15
Surface mounting enclosure with PCB
32
Label mounts
16
Enclosure bushing for round cable
33
Emergency-Stop actuator
17
Enclosure bushing plug/socket
34
Joystick

Installation
62
MN05006002Z-EN
M22-SWD front mount
M22-SWD front function elements are used in connection
with the M22-A adapter and M22 front elements for instal-
lation in consoles or switch cabinet doors. The M22 SWD
front function elements are used just like the already known
M22-K10-/K01 contact elements and M22 LED indication
elements. On the front panel the previous elements for the
control circuit function are used.
surface mounting
Figure 16:
Layout of the M22 SWD front mount
One M22 SWD front function element is used per M22-A
adapter. Mounting is always performed in the middle posi-
tion. Correspondingly more efficient function elements are
used for the combined functions of a luminous control circuit
device or for the realization of a multi-step switch. A lumi-
nous pushbutton, which previously had to be realized as a
combination of several elements, can now be realized simply
by means of one combination element (LED indicator +
contact element = M22-SWD-K11LED). The M22 SWD front
function elements are snapped onto the M22-A adapter in
the middle position.
M22-SWD-K…
M22-SWD-LED…
SWD-8SF2-5
M22…
SWD4-…LF…

Electrical Installation
63
MN05006002Z-EN
Installation
Figure 17:
Connection of the function element to the SWD flat
ribbon cable
X
Fit the external device plug to the ribbon cable
X
Plug the M22 SWD front function element onto the
external device plug.
X
Wire an SWD contact element.
X
Fit the M22 front element.
1
2
SWD4-8SF2
SWD4-8SF2
SWD4-8SF2-5
+ 15V
SWD4-100LF8-24
SWD4-3LF8-24-2S
SWD4-5LF8-24-2S
SWD4-10LF8-24S
SWD4-8SF2-5
SWD4-8SF2-5
+ 15V
M22-SWD-K...
M22-SWD-LED

Installation
64
MN05006002Z-EN
M22-SWD base fixing
M22 SWD base function elements are inserted into the
M22-I… surface mounting enclosure with a PCB and
M22 front elements.
surface mounting
Figure 18:
Surface mounting enclosure with PCB and M22
SWD base function element
The M22 SWD base function elements are used just like the
already known M22-K10-/K01 contact elements and M22
LED indicator elements. On the front panel the previous
elements for the control circuit function are used. The
connection with the SWD network is made via the printed
circuit board. It has a switchable network termination.
Installation of the surface mounting enclosure
The PCB in the surface mounting enclosure is connected via
the SWD round cable to the SWD network.
1
3
2
1
3
2
1
3
2
IN
OUT
OFF
ON
CLICK
!
IN
OUT

Electrical Installation
65
MN05006002Z-EN
The SWD round cable can be connected directly by means of
V-M20 x 1.5 mm (metric cable gland with integrated strain
relief) or plugged in (a "Direct connection of the SWD
round cable“, page 66).
8-pole enclosure bushings with a screw fixing M20 x 1.5 mm
as plug/socket versions are used for the plug-in version (a
"Pluggable connection of the SWD round cable“, page 67).
Connection on the printed circuit board is performed via 8
numbered and colour-coded spring-loaded terminal clamps.
This applies to the incoming SWD cable on the PCB side
marked IN and to the outgoing SWD cable on the OUT side.
The SWD round cable and SWD enclosure bushings have the
same wire colours.

Installation
66
MN05006002Z-EN
• Direct connection of the SWD round cable
Figure 19:
Direct connection with a cable gland
X
Jacket and insulate the SWD round cable to a suitable
length.
X
Fit the individual wires with insulated ferrules with plastic
collars in accordance with DIN 46228, Part 4, of suitable
cross-section and a length of at least 8 mm.
X
Introduce the SWD round cable that comes from the
gateway face through the fitted cable gland and into the
surface mounting enclosure.
X
If further SWD slaves follow this surface mounting enclo-
sure, introduce the second SWD round cable fitted with
wire-end sleeves through another cable gland and into the
surface mounting enclosure.
X
Then connect the wires to the PCB (a "Connection to
the printed circuit board“, page 69).
1
3
2
2
IN
V-M20
i
Warning!
Ensure the secure seating of the cable and safe operation
by using the integrated strain relief for the cable gland.

Electrical Installation
67
MN05006002Z-EN
• Pluggable connection of the SWD round cable
Figure 20:
Pluggable connection with enclosure bushings
– Incoming SWD round cable
Fitted to the SWD round cable with the live conductors
coming from the gateway is a cable socket (type
SWD4-SF8-67 straight or part no. SWD4-SF8-67W angled at
90°) (a "Housing bushing with plug“, page 79).
X
So fasten the enclosure bushing plugs (part no.
SWD4-SM8-20) in the surface mounting enclosure on the
incoming side (IN).
– Outgoing SWD round cable
If further SWD slaves follow this surface mounting enclosure
with SWD slaves, a cable plug (part no. SWD4-SM8-67
straight or type SWD4-SM8-67W angled at 90°) is fitted to
the outgoing SWD round cable (a "Housing bushing with
socket“, page 80).
X
So fasten the enclosure bushing socket (part no.
SWD4-SF8-20) in the surface mounting enclosure on the
outgoing side (OUT).
Please refer to the following illustration for the incoming and
outgoing SWD round cables (arrow direction) with different
installation positions of the surface mounting enclosure.
1
3
2
1
3
2
1
3
2
IN
OUT
OFF
ON
SWD4-SF8-20
SWD4-SM8-20
IN
OUT

Installation
68
MN05006002Z-EN
Figure 21:
Incoming and outgoing SWD round cables with
different installation positions
1
3
2
1
3
2
1
3
2
IN
OUT
OFF
ON
ON
OFF
M22-SWD4-SF8-20
M22-SWD4-SM8-20
M22-I…
1
3
2
1
3
2
IN
OUT
OFF
ON
ON
OFF
M22-SWD4-SF8-20
M22-SWD4-SM8-20
M22-I…

Electrical Installation
69
MN05006002Z-EN
• Connection to the printed circuit board
Figure 22:
Printed circuit board
X
Place the PCB in the mounting of the surface mounting
enclosure so that the terminal strip is lying with the
marking IN on the side of the incoming SWD round cable.
Ensure that the PCB is pointing in the correct direction. The
direction of the arrow defines the arrangement of the SWD
slaves. The SWD gateway is positioned to the left of the IN
marking code.
X
Clamp all incoming wires according to colour in the
spring-cage terminals marked with the same colours on
the IN side.
IN
OUT
OFF
ON

Installation
70
MN05006002Z-EN
Figure 23:
PCB with terminal strip for the incoming connection
(IN)
a brown, +15 V DC: device supply voltage
b grey, SEL: select cable for automatic addressing of the SWD
slaves
c pink, GND: device supply voltage
d red, data A
e blue, data B
f white, GND: device supply voltage
g yellow, earth: contactor control voltage
h green, +24 V DC: contactor control voltage
If further SWD slaves follow this surface mounting enclosure
with SWD slaves:
X
Clamp all outgoing wires according to colour in the spring-
cage terminals marked with the same colours on the OUT
side.
1
3
2
IN
a
b
c
d
e
f
g
h

Electrical Installation
71
MN05006002Z-EN
Figure 24:
PCB with outgoing connection (OUT)
X
Equip the PCB slots with the M22 SWD…C… function
elements. Ensure that the mounting position is correct.
The status LED is at the top.
X
Switch the network termination to the position ON, if this
surface mounting enclosure houses the last SWD slave.
OUT
OFF
ON
ON
OFF
a
b
c
d
e
f
g
h
h
Each plugged-in M22 SWD base function element is given
its own SWD slave address in the automatic addressing.
h
Caution!
Debounced inputs may not be used in the safety
circuit diagram.
Equip unused slots with the link M22-SWD-SEL8-10.
h
Caution!
Debounced inputs may not be used in the safety
circuit diagram.
The network termination must be switched without fail to
the position OFF, if further SWD slaves follow the surface
mounting enclosure with SWD slaves.

Installation
72
MN05006002Z-EN
Connecting a switch cabinet bushing
Use the switch cabinet bushing for external connection of
the SWD network to a switch cabinet or enclosure. This is not
given a slave address. There is voltage reversal and EMC
protection for an externally supplied 24 V DC control
voltage. The device is screwed into a switch cabinet boring
with an mounting diameter of 18.5 mm.
Use the SWD round cable for connection outside of the
switch cabinet. So that the connection can be made easily
made and disconnected, the switch cabinet bushing has a
connection for round connectors with a screw fixing
M18 x 0.75 mm, protection type IP67.
A switch cabinet bushing with a round socket (type
SWD4-SFL8-20) and with a round plug (part no.
SWD4-SML8-20) is available for supply.
h
Switch cabinet bushings provide the possibility of
supplying the 24 V DC control voltage for contactors.
i
Warning!
The protection type specified in the appendix is guaran-
teed only if it is correctly mounted! Use connections only
within the switch cabinet (the connection for round
connectors with a screwing fastening is accessible outside
of the switch cabinet).

Electrical Installation
73
MN05006002Z-EN
Switch cabinet bushing with a round socket
Figure 25:
Switch cabinet bushing with a round socket
Use the switch cabinet bushing with an integrated round
socket (type SWD4-SFL8-20), if you would like leave the
switch cabinet in the direction of the SWD network end and
the round socket is therefore carrying a live voltage.
o 18.5
F
4
SWD4-SFL8-20
+ 15 V

Installation
74
MN05006002Z-EN
You lead the SWD network further via the SWD round cable
with a fitted round plug (part no. SWD4-SM8-67 straight or
part no. SWD4-SM8-67W angled at 90°).
How you connect a round plug to the SWD round cable is
described on page 84.
Switch cabinet bushing with round plug
Figure 26:
Switch cabinet bushing with round plug
o 18.5
F
4
SWD4-SML8
-20
+ 15 V

Electrical Installation
75
MN05006002Z-EN
Use the switch cabinet with an integrated round plug (part
no. SWD4-SML8-20), if, coming from the gateway face, you
are conducting the SWD network with the live conductors to
the switch cabinet.
The supply is performed via the SWD round cable with a
fitted round socket (part no. SWD4-SF8-67 flat or part no.
SWD4-SF8-67W, angled at 90°).
How you connect a round socket to the SWD round cable is
described on page 83.
The ribbon cable with an attached blade terminal used
within the switch cabinet is plugged into the socket of the
switch cabinet bushing.
.
Figure 27:
Connections of the switch cabinet bushing
+ 15 V
DIN46228-E 0.5 - 8: 0.5 mm²/AWG20

Installation
76
MN05006002Z-EN
Supply of the 24 V DC control voltage for contactor
Within the switch cabinet routing the conductors (earth and
24 V DC) are connected from the ribbon cable connection to
the spring-loaded terminals B and the corresponding wires
of the round cable connection to the spring-loaded terminals
A.
Table 13:
Configuration of the spring-loaded terminals A and B
The following three cases are possible for the feeding of the
24 V DC control voltage for contactors:
i
Warning!
The switch cabinet bushing interrupts the two conductors
for the contactor control voltage (earth and 24 V DC) and
conducts them to the spring-loaded terminals A and B.
The remaining conductors between the SWD ribbon cable
and round cable connection are connected throughout.
Ribbon cable conductor
Spring-cage terminal
Chassis ground
B: 0 V
24 V DC
B: 24 V
Round cable conductor
Chassis ground
A: 0 V
24 V DC
A: 24 V

Electrical Installation
77
MN05006002Z-EN
Possible cases
Part no. of switch
cabinet bushing
Measures
The current requirement of
the connected contactors is
covered by the connected
supply unit (SWD gateway or
SWD power feeder module).
with a round socket (part
no. SWD4-SFL8-20) or
with a round plug (part
no. SWD4-SML8-20).
Connect spring-cage terminal A: 0 V to B:
0 V and A: 24 V to B: 24 V, as shown in the
above illustration, “Connections of the
switch cabinet bushing”.
The 24 V DC control voltage of the supply
unit is conducted further.
An additional 24 V DC
voltage supply in the switch
cabinet supplies the contac-
tors outside of the switch
cabinet.
with a round socket (part
no. SWD4-SFL8-20).
The control voltage intro-
duced via the ribbon
cable to the spring-cage
terminals B is not trans-
mitted any further.
Connect the 0 V connection of the additional
24 V DC power supply to the spring-cage
terminal A: 0 V and the 24 V connection to
the spring-cage terminal A: 24 V.
An additional 24 V DC
voltage supply in the switch
cabinet supplies the contac-
tors in the switch cabinet.
with a round plug (part
no. SWD4-SML8-20).
The control voltage intro-
duced via the ribbon
cable to the spring-cage
terminals A is not trans-
mitted any further.
Connect the 0 V connection of the additional
24 V DC power supply to the spring-cage
terminal B: 0 V and the 24 V connection to
the spring-cage terminal B: 24 V.
SWD4-SFL8-20
+ 15
V
SWD4-SML8-20
+ 15 V

Installation
78
MN05006002Z-EN
Terminal capacities of the cables for the 24 V DC
external power supply
• solid: 0.2 - 1.5 mm
2
(AWG 24-16).
• flexible 0.25 - 1.5 mm
2
with appropriate isolated ferrules
with plastic collars in accordance with DIN 46228, Part 4,
minimum length 8 mm.
Cable protection for the cables of the 24 V DC
external power supply
X
Connect the 24 V DC external power supply via a minia-
ture circuit-breaker or a fuse.
• Cable protection in accordance with DIN VDE 0641
Part 11, IEC/EN 60898:
– Miniature circuit-breaker 24 V DC rated operational
current 3 A; trip type Z.
– Fuse 3 A, utilization class gL/gG
• Cable protection for cable AWG 24
in accordance with
UL 508 and CSA-22.2 no. 14:
– Miniature circuit-breaker 24 V DC rated operational
current 2 A; trip type Z.
– Fuse: 2 A, utilization class gL/gG)

Electrical Installation
79
MN05006002Z-EN
Connecting the enclosure bushing
Figure 28:
Enclosure bushings in a surface mounting enclosure
Use enclosure bushings with an M20 x 1.5 mm screw fixing
of protection type IP67, for example, in the surface mounting
enclosure, for the pluggable connection of the 8-conductor
SWD round cable.
Enclosure bushings with an M20 x 1.5 mm screw fixing are
available as plug and socket versions.
Housing bushing with plug
Use the enclosure bushing with an integrated plug (part no.
SWD4-SML8-20), if, coming from the gateway face, you are
leading the SWD network with the live conductors to the
enclosure.
You lead the SWD network via the SWD round cable with a
fitted round socket (part no. SWD4-SF8-67 straight or part
no. SWD4-SF8-67W angled at 90°).
How you connect a round socket to the SWD round cable is
described on page 83.
1
3
2
1
3
2
1
3
2
IN
OUT
OFF
ON
SWD4-SF8-20
SWD4-SM8-20
IN
OUT

Installation
80
MN05006002Z-EN
Housing bushing with socket
Use the enclosure bushing with an integrated socket (part
no. SWD4-SFL8-20), if you would like leave the enclosure in
the direction of the SWD network end and the round socket
is therefore carrying a live voltage. You lead the SWD
network further via the SWD round cable with a connected
round plug (part no. SWD4-SM8-67 straight or part no.
SWD4-SM8-67W angled at 90°).
How you connect a round plug to the SWD round cable is
described on page 84.
Link for PCB base/device plug front
This link connects an interrupted select cable (SEL cable) that
is required for automatic addressing of the SWD slaves.
The link (device plug front SWD4-SEL8-10) connects the
interrupted SEL cable on an unused device plug
(SWD4-8SF2-5).
Figure 29:
Link for device plug front
The link for the PCB base (M22-SWD-SEL8-10) for a PCB
(M22-SWD-I1…6-LP01) in the surface mounting enclosure
is plugged onto each unused socket strip.
SWD4-SEL8-10
SWD4-8SF2-5
SWD4-SEL8-10

Electrical Installation
81
MN05006002Z-EN
Figure 30:
Link for PCB base
1
3
2
1
3
2
1
3
2
IN
OUT
OFF
ON
CLICK
!
h
Caution!
Debounced inputs may not be used in the safety
circuit diagram.
Unused slots must be equipped with the link
SWD4-SEL8-10 or M22-SWD-SEL8-10.

Installation
82
MN05006002Z-EN
Connecting the SWD
connection cable
SWD elements are connected via 8-conductor SWD ribbon
cable or round cables. For DIY construction you can order
SWD ribbon cables and round cables by the metre without
plugs:
• Ribbon cable, length 100 m, part no. SWD4-100LF8-24
• Round cable, length 50 m, part no. SWD4-100LR8-24
Connecting the SWD ribbon cable
SWD slaves and some other SWD elements are connected via
an SWD ribbon cable. At the beginning and end of the ribbon
cable there is always a blade terminal (part no.
SWD4-8MF2).
Several ready-made SWD ribbon cables are available to you,
e.g. part no. SWD4-5LF8-24-2S, these already having been
provided with blade terminals at the beginning and end.
Alternatively you can make the SWD ribbon cable line by
fitting the blade terminal yourself (a "Fitting the blade
terminal SWD4-8MF2“, page 85).
You make the connection to the SWD slaves via external
device plugs (part no. SWD4-8SF2-5). You fit the external
device plug to the ribbon cable according to the position of
the SWD slave (a "Fitting external device plugs SWD4-
8SF2-5“, page 91).
Connecting SWD round cables
Some SWD elements, e.g. surface mounting enclosures with
an inlaid PCB for RMQ Titan function elements or switch
cabinet bushings are connected via an SWD round cable.
You can introduce SWD round cables via a V-M20 cable
gland and wire them directly or screw them on via fitted
cable plugs and cable sockets. The configuration of the
round socket and round plug is shown below.

Connecting the SWD connec-
tion cable
83
MN05006002Z-EN
Connect round socket to SWD round cable
Figure 31:
Straight round socket with screw locking for the
SWD round cable
X
Fit (solder) the round socket to the SWD round cable.
Figure 32:
Configuration of the round socket, view onto the
solder face
a brown, +15 V DC: device supply voltage
b grey, SEL: select cable for automatic addressing of the SWD
slaves
c pink, GND: device supply voltage
d red, data A
e blue, data B
f white, GND: device supply voltage
g yellow, earth: contactor control voltage
h green, +24 V DC: contactor control voltage
i
Warning!
Connection of the movable soldering lugs on the round
socket may be performed only with the use of shrink
sleeve insulation on the individual conductors.
3
2
1
5
4
7
6
8
a
b
c
d
e
f
g
h

Installation
84
MN05006002Z-EN
Connect round plug to the SWD round cable
Figure 33:
Straight round plug with screw locking for the
SWD round cable
X
Fit (solder) the round plug to the SWD round cable.
Figure 34:
Solder view of the round plug
a brown, +15 V DC: device supply voltage
b grey, SEL: select cable for automatic addressing of the
SWD slaves
c pink, GND: device supply voltage
d red, data A
e blue, data B
f white, GND: device supply voltage
g yellow, earth: contactor control voltage
h green, +24 V DC: contactor control voltage
1
2
3
4
5
6
7
8
c
b
a
e
d
g
f
h
i
Warning!
Ensure the secure seating of the cable and safe operation
by using the integrated strain relief for round socket and
plug.

Connecting the SWD connec-
tion cable
85
MN05006002Z-EN
Fitting SWD ribbon cable with plugs
Depending on the purpose fit a blade terminal or external
device plug to the SWD ribbon cable. The plugs are
connected firmly and permanently to the SWD ribbon cable
by means of a suitable crimper.
Fitting the blade terminal SWD4-8MF2
Figure 35:
SWD blade terminal
A blade terminal (part no. SWD4-8MF2) must be fitted at the
beginning and end of each SWD ribbon cable.
Figure 36:
SWD ribbon cable with blade terminal at the begin-
ning and end
h
Caution!
When fitting the plug make sure that the polarity of the
ribbon cable is correct (a "Fitting the blade terminal
SWD4-8MF2“, page 85).
SWD4-8SF2
SWD4-8SF2
SWD4-8SF2
SWD4-8SF2
SWD4-8SF2

Installation
86
MN05006002Z-EN
X
Make sure that the cut edge of the 8-pole SWD ribbon
cable is flat and right-angled.
X
Push the open blade terminal, with the transparent top
part of the plug pointing upwards, into the crimper guide
up to the stop pin (part no. SWD4-CRP-2).
Figure 37:
Push the blade terminal into the crimper up to the
stop
SWD4-8SF2
SWD4-8SF2

Connecting the SWD connec-
tion cable
87
MN05006002Z-EN
The introduction hole on the blade terminal is then acces-
sible from the front in the crimper.
X
Push the ribbon cable up to the stop via the guide in the
bottom part of the crimper between the blade contacts of
the black bottom part of the plug and the transparent,
movable top part of the plug.
Figure 38:
Push the SWD ribbon cable into the blade terminal
SWD4-8SF2
SWD4-8SF2
i
Warning!
For correct polarity the black conductor of the ribbon cable
must be lying next to the white stripe on the bottom part
of the crimper. This applies to plug fitting at the beginning
and end of the ribbon cable.

Installation
88
MN05006002Z-EN
Fitting the blade terminal to the beginning of the
cable
Figure 39:
SWD ribbon cable with a blade terminal at the
beginning of the cable
h
When the ribbon cable is introduced into the plug for the
beginning of the ribbon cable the ribbon cable imprint is
located non-visibly on the underside.
SWD4-8SF
2

Connecting the SWD connec-
tion cable
89
MN05006002Z-EN
Fitting the blade terminal to the end of the cable
Figure 40:
SWD ribbon cable with a blade terminal at the end
of the cable
X
Then crimp this blade terminal by pressing the crimper
once until you feel a clear stopping point.
In state of delivery the distance between the top and bottom
parts of the crimper is set optimally to 5 + 0.2 mm. The pres-
ence of undamaged locking compound on the knurled wheel
indicates that the default setting is unchanged.
SWD4-8SF2
SWD4-8SF2
SWD4-8SF2
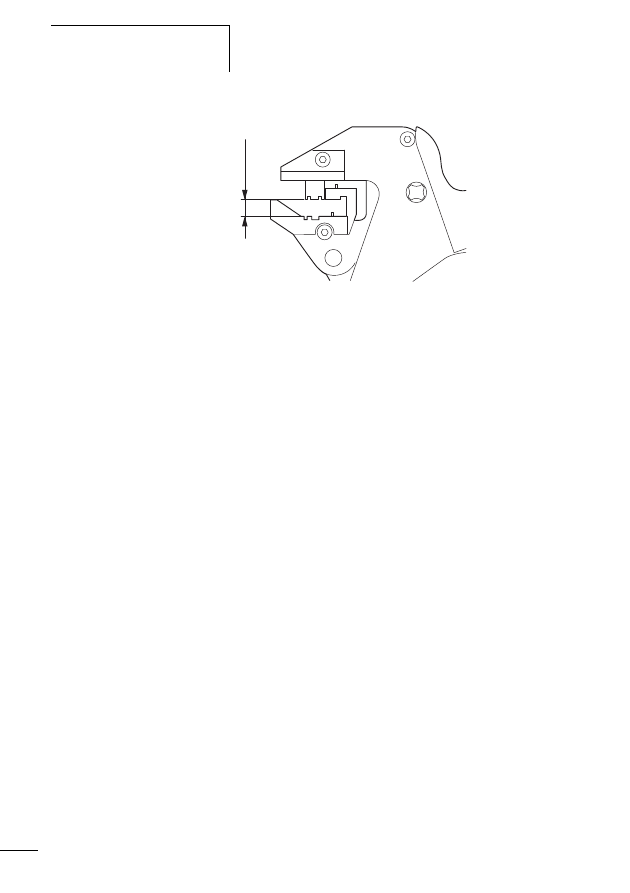
Installation
90
MN05006002Z-EN
Figure 41:
Crimper for SWD blade terminals
Corresponding inserts are available on request for the use of
toggle lever presses.
4.6
g0.18
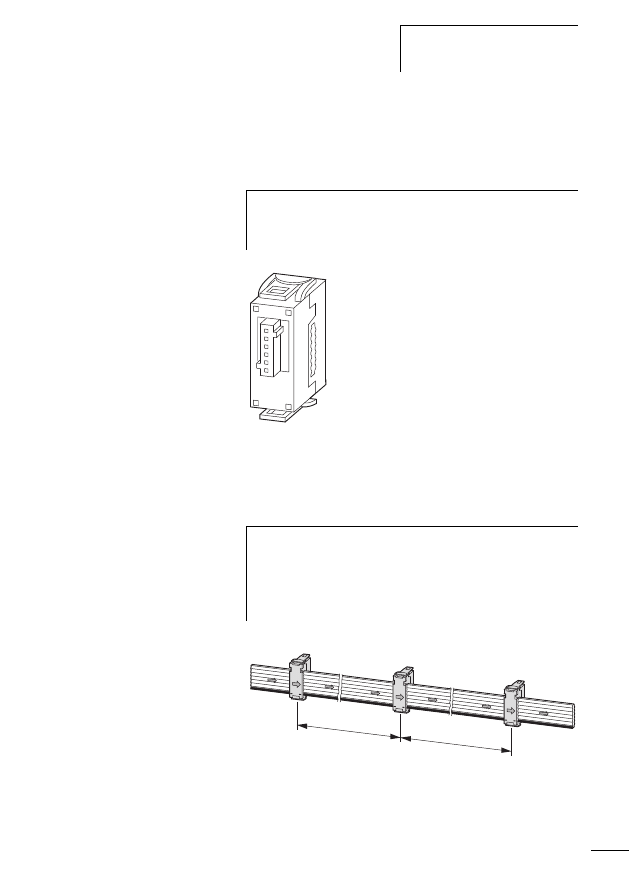
Connecting the SWD connec-
tion cable
91
MN05006002Z-EN
Fitting external device plugs SWD4-8SF2-5
The device plugs for the SWD ribbon cables are for the
purpose of connecting SWD slaves.
Figure 42:
SWD external device plug
X
On the basis of the position of the SWD slave determine
where the first device plug has to be fastened to the
ribbon cable.
Figure 43:
SWD device plug with sufficient cable length
h
Unused slots must be fitted with the link for the device
plug front (M22-SWD-SEL8-10), otherwise the SWD
network will be interrupted.
h
Add at least 100 mm in length to the measured cable
length before, between and after the device plugs. Due to
the cable loop thus created the later dismantling of an
SWD slave will be simplified and the cable will remain
tension-free.
100
100
SWD4-8SF2
SWD4-8SF2-5
+ 15V
SWD4-8SF2
SWD4-8SF2
SWD4-8SF2-5
+ 15V
SWD4-8SF2
SWD4-8SF2
SWD4-8SF2
SWD4-8SF2
SWD4-8SF2-5
+ 15V
SWD4-8SF2
SWD4-8SF2
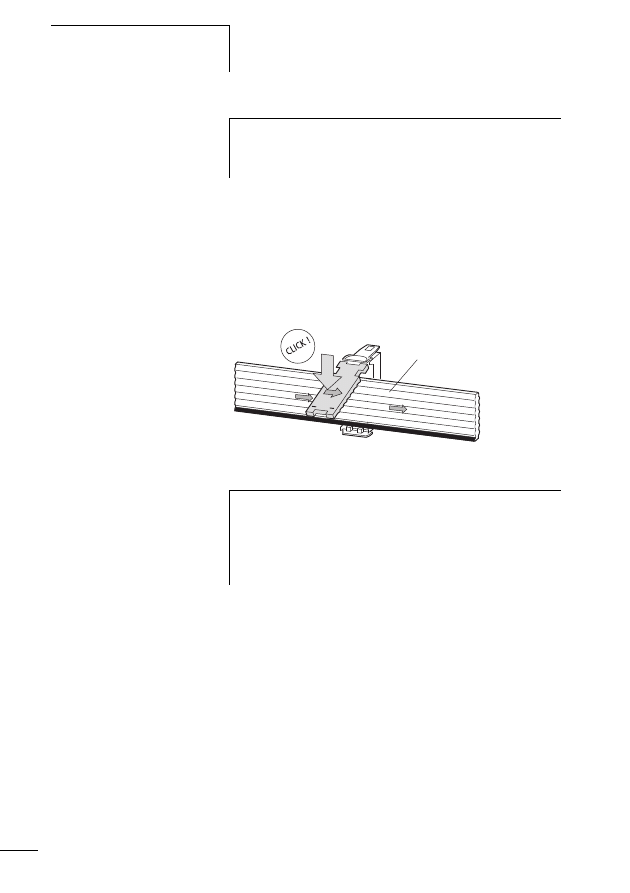
Installation
92
MN05006002Z-EN
X
Align the ribbon cable and the external device plug so that
the imprints on both parts are visible.
X
Insert the ribbon cable in the external device plug guide so
that the black arrow on the ribbon cable is pointing in the
same direction as the black arrow on the movable top part
of the plug.
Figure 44:
SWD external device plug with correct polarity
X
Fix the ribbon cable to the device plug by hanging down
and pressing in the centre of the top part of the plug until
it audibly engages into the bottom part.
Corrections to the plug are now still possible by pushing it
sideways.
If the catch has to be released again, introduce a screwdriver
between the top part of the plug near to the black line and
the catch of the bottom part of the plug and then lift up the
top part.
When the plug position has been determined:
h
Caution!
When fitting the plug make sure that the polarity of the
ribbon cable is correct.
SWD4-8SF2
SWD4-8SF2
SWD4-8SF2
SWD4-8SF2
SWD4-8SF2-5
+ 15V
SWD4-...LF-...
h
Caution!
Correct polarity is ensured with this arrangement. The
black conductor of the ribbon cable lies under the cable
with the designation +15 V shown black on the top part
of the plug.
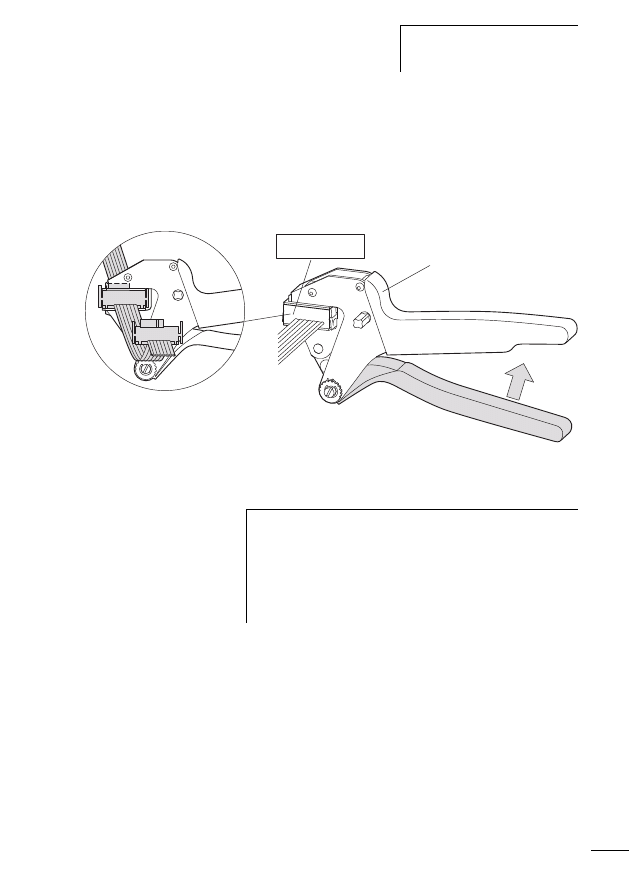
Connecting the SWD connec-
tion cable
93
MN05006002Z-EN
X
Put the fixed external device plug in the crimper (part no.
SWD4-CRP-1) so that the actual socket is lying in the
recess in the top part of the crimper.
X
Then crimp this external device plug by pressing the
crimper once until you feel a clear stopping point.
Figure 45:
Crimping the SWD external device plug in the
crimper
X
Fit the other external device plugs in each case with the
additional cable length of 100 mm as described above.
In state of delivery the distance between the top and bottom
parts of the crimper is set optimally to 12.5 + 0.3 mm. The
presence of undamaged locking compound on the knurled
wheel indicates that the default setting is unchanged.
SWD4-CRP-1
a
max. 1 x
h
The position of the crimped external device plug cannot be
altered, and an unused plug must also not be discon-
nected! Should the topology change and no more SWD
slaves are to be connected here, this plug is replaced by an
SWD link element (part no. SWD4-SEL8-10), a section
“Link for PCB base/device plug front”, page 80.
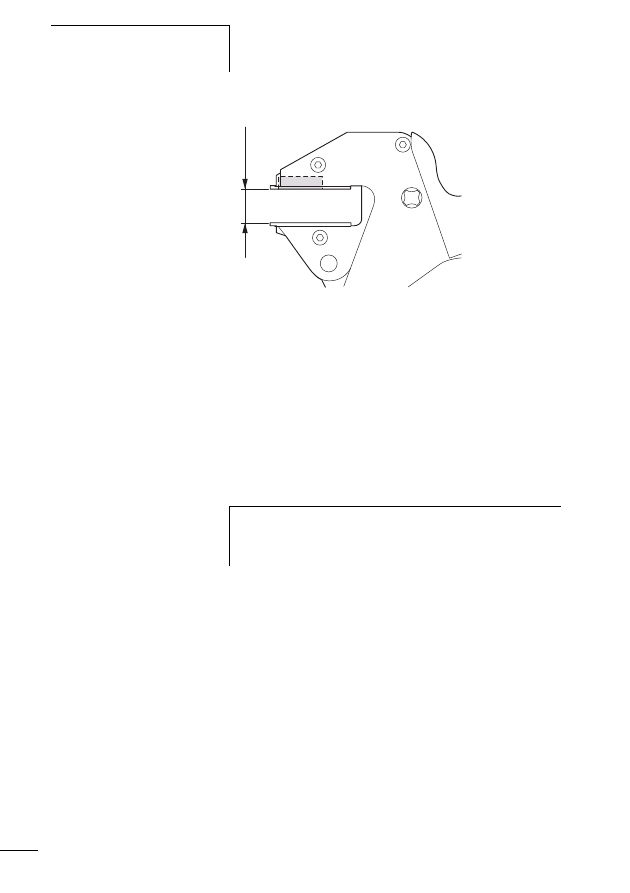
Installation
94
MN05006002Z-EN
Figure 46:
Crimper for SWD external device plugs
Once all external device plug have been crimped the blade
terminal still has to be attached to the end of the ribbon
cable.
X
Cut off the 8-pole SWD ribbon cable with the additional
length mentioned of 100 mm straight and right-angled.
X
Fit the blade terminal to the cable end as described above
for the beginning of the ribbon cable, ensuring correct
polarity.
Mounting may be necessary to fit further blade terminals, if :
• on account of an expansion of the SWD network a new
cable segment is to be connected by means of an SWD
coupling (a "Coupling for an 8-pole blade terminal“,
page 95).
• due to an increased current consumption or a greater
voltage drop an additional power supply unit (a power
feeder module) is to be inserted into the SWD network
(a "Connecting power feeder module“, page 51).
12.5
g0.
3
h
When the ribbon cable is introduced into the plug for the
end of the ribbon cable the ribbon cable imprint is located
visibly on the upper side.
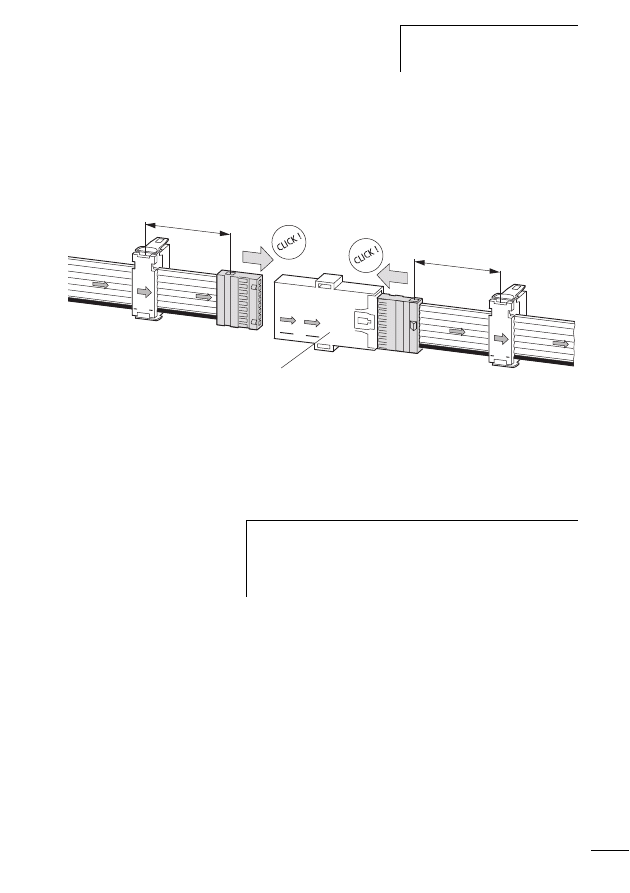
Connecting the SWD connec-
tion cable
95
MN05006002Z-EN
Coupling for an 8-pole blade terminal
Use the coupling for an 8-pole blade terminal (part no.
SWD4-8SFF2-5) to connect two ribbon cables that are fitted
with blade terminals at the beginning and end of the cable.
Figure 47:
Connect SWD ribbon cables with a coupling for an
8-pole blade terminal
X
Insert the ribbon cable into the coupling guide so that the
black arrow on the ribbon cable is pointing in the same
direction as the black arrow on the coupling.
100
100
SWD4-8SF2
SWD4-8SF2-5
+ 15V
SWD4-8SF2
SWD4-8SF2
SWD4-8SF2-5
+ 15V
SWD4-8SF2
SWD4-8SFF2-5
+ 15V
SWD4-8SFF2-5
i
Warning!
For correct polarity the black conductor of the ribbon cable
must be inserted into the coupling so that it is lying next
to the line shown in black with the designation +15 V.
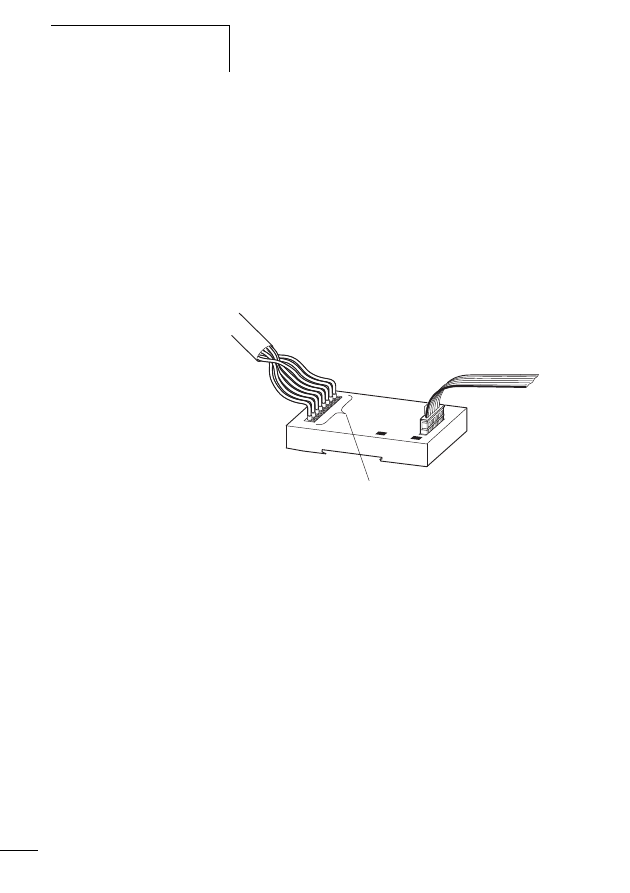
Installation
96
MN05006002Z-EN
Using the ribbon/round cable adapter
This adapter (part no. SWD4-8FRF-10) is for the purpose of
changing from ribbon cable to round cable and vice versa. It
is is fastened to a top hat rail or by means of the device feet
ZB4-101-GF1 that are available as accessories to a plate.
For connection of the round cable the adapter has an 8-pole
numbered and colour coded spring-loaded terminal connec-
tion. The ribbon cable with an attached blade terminal is
plugged into the socket.
Figure 48:
SWD blade terminal/round cable adapter with
configuration of the spring-loaded terminal connec-
tion
a brown, +15 V DC: device supply voltage
b grey, SEL: select cable for automatic addressing of the
SWD slaves
c pink, GND: device supply voltage
d red, data A
e blue, data B
f white, GND: device supply voltage
g yellow, earth: contactor control voltage
h green, +24 V DC: contactor control voltage
X
Connect the 8 conductors of the round cable in accor-
dance with their colour to the spring-cage terminals of the
same colour.
1 2
3 4 5 6 7
8
+ 15 V
a b c d e f g h
SWD4-8SF2
SWD4-8SF2
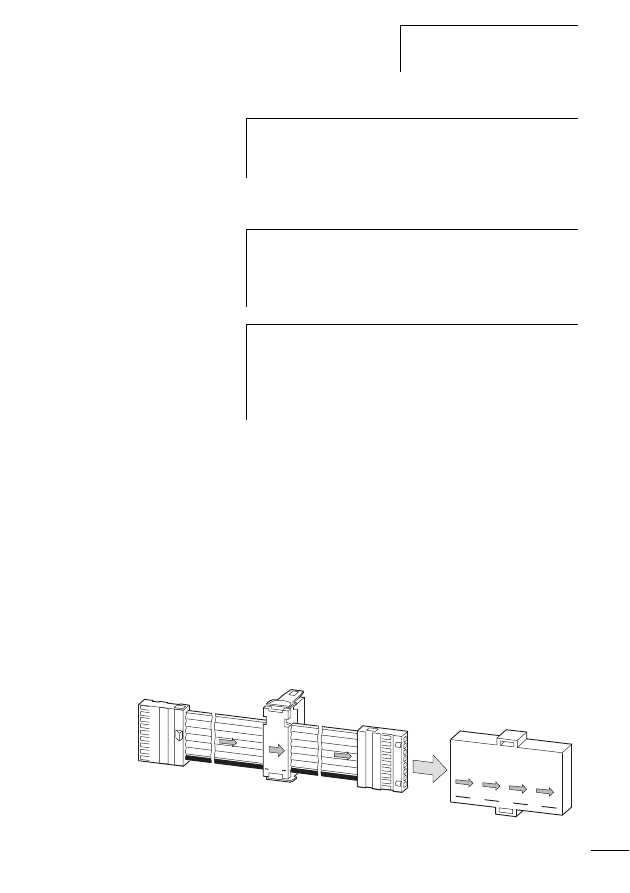
Connecting the SWD connec-
tion cable
97
MN05006002Z-EN
X
Insert the ribbon cable into the adapter socket.
Using network termination
The SWD network must be terminated at the beginning and
at the end with a network termination. The network termi-
nation at the network beginning is always integrated into
the SWD gateway.
Network termination for an installed ribbon cable
If the SWD network ends with a ribbon cable, a ribbon cable
plug must be connected there.
X
Insert the ribbon cable into the SWD network termination
(part no. SWD4-RC8-10).
Figure 49:
SWD network termination for ribbon cable
i
Warning!
Ensure the secure seating of the round cable and safe
operation by using cable binders for strain relief.
i
Warning!
For correct polarity the black conductor of the ribbon cable
must be inserted into the adapter so that it is lying next to
the line shown in black with the designation +15 V.
h
If you want to supply the 24 V DC contactor control
voltage in addition when changing from ribbon cable to
round cable, use the adapter for the switch cabinet
bushing (a "Connecting a switch cabinet bushing“,
page 72).
SWD4 8SF2
SWD4-RC8-10
SWD4-8SF2-5
+ 15V
SWD4-8S
+ 15V
+ 15V
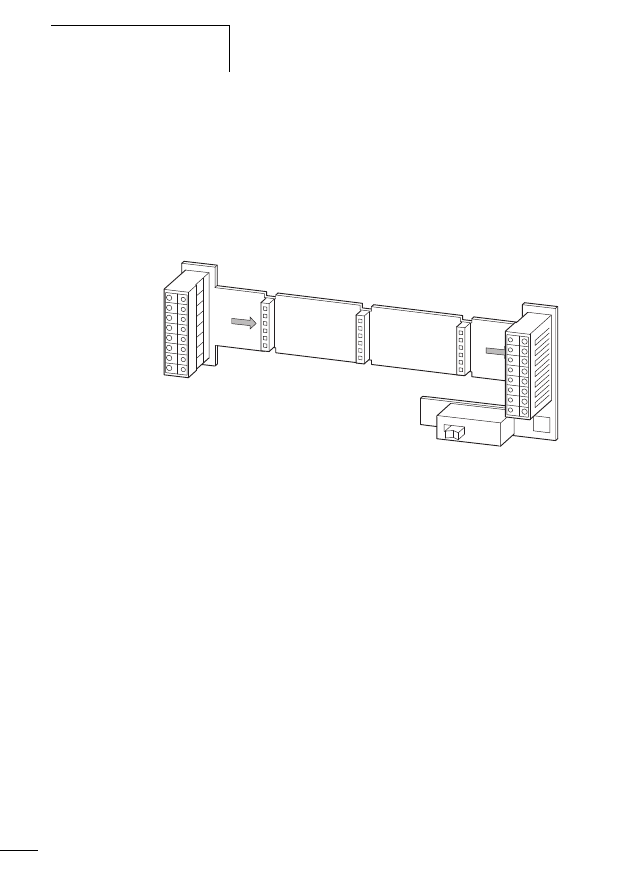
Installation
98
MN05006002Z-EN
Network termination for an installed round cable
If you are using as the last SWD element on the SWD
network a surface mounting enclosure with an inlaid PCB
(M22-SWD-I…-LP01) that is connected via a round cable,
use the integrated network termination.
X
Switch the switch on the PCB to the position ON.
Figure 50:
Network termination on the PCB in position ON.
IN
OUT
OFF
ON

Electromagnetic compatibility
(EMC)
99
MN05006002Z-EN
Electromagnetic compati-
bility (EMC)
The SWD system conforms to the requirements of the EMC
Directive. However, EMC planning is required prior to instal-
lation. All potential interference sources, such as galvanic,
inductive and capacitive couplings as well as radiation
couplings should be taken into consideration.
The EMC of the SWD system is protected, if the following
rules are adhered to:
• Proper and extensive earthing of the inactive metal parts.
• Proper cable routing and wiring.
• The creation of a uniform reference potential and the
earthing of all electrical resources.
• Special EMC measures for special applications.
Earthing of inactive parts
All inactive metal parts (e.g. switch cabinets, switch cabinet
doors, support struts, mounting plates, top-hat rails etc.)
must be extensively interconnected with a low impedance
(earthing). This ensures a uniform reference potential for all
control elements. The influence of coupled interference is
decreased.
• With painted, anodized or insulated metal parts the insu-
lating layer must be removed in the screw connection
area. The connection point must be protected against
corrosion.
• Any moving earthed parts (cabinet doors, separate
mounting plates etc.) must be connected with short earth
straps with a large surface area.
• The use of aluminium should be avoided where possible as
aluminium oxidizes and is then not suitable for earthing.
j
Danger!
The earth must never – not even in the case of a malfunc-
tion – have a dangerous touch voltage. The earth must
therefore be connected to a protective conductor.

Installation
100
MN05006002Z-EN
PE connection
The earth and the PE (protective earth) connection must be
centrally connected to each other.
Earth-free Operation
With earth-free operation the relevant safety standards must
be observed.
Mounting rails
All mounting rails must be fixed with low impedance to the
mounting plate and correctly earthed. The use of corrosion
protected mounting rails is recommended.
The extensive low-impedance fixing of the mounting rails in
contact with the mounting system using screws or rivets is
recommended. With painted, anodized or insulated metal
parts the insulating layer must be removed in the connection
area. The connection points must be protected against corro-
sion (e.g. by greasing).
h
Caution!
Debounced inputs may not be used in the safety
circuit diagram.
Use only grease that is specifically suited for this purpose.

SWD system for safety-related
applications
101
MN05006002Z-EN
SWD system for safety-
related applications
For many applications of the SWD contactor modules (DIL-
SWD-32-…), apart from normal operational switching,
switching off in an emergency or switching off due to the
opening of guard doors is required.
The SWD system is not designed for the transfer of safety-
related signals.
To find out how the SWD contactor modules can be used for
safety-related switching off despite this, please refer to the
manual MN05006001Z-EN (previously AWB2723-1613en).

102
MN05006002Z-EN

103
MN05006002Z-EN
4
Placing into operation
The commissioning of an SWD network always takes place
in connection with the SWD gateway and the overriding
controller (PLC) with its field bus connection.
Commissioning of the various SWD gateways and controllers
are described in separate manuals.
• MN05013002Z-EN (previously AWB2723-1612)
– PROFIBUS-DP: chapter "SWD-PROFIBUS-DP Gateway
EU5C-SWD-DP“ or
– CANopen: chapter "SWD-CANopen Gateway EU5C-
SWD-CAN“
• AWB2724-1491
– Modular PLC XC-CPU201… (among other things with
the connection for the CANopen field bus)
• AWB2725-1452
– XI/OC signal modules (among other things with the
connection for the PROFIBUS DP field bus).
The manuals are available for download on the Internet as
PDF files. They can be quickly located at
http://www.eaton.com/moeller/support
by entering the document number as the search term.
j
Danger!
Before the commissioning the SWD system must be
completely mounted and wired.

Placing into operation
104
MN05006002Z-EN
Switch-on
X
Before switching on check whether the following supply
voltages are available:
• Supply voltage for PLC,
• the 24 V DC device supply voltage on the POW terminal of
the SWD gateway and on an optionally used power feed
module,
• the 24 V DC control voltage for contactors on the AUX
terminal of the SWD gateway and on an optionally used
power feed module,
• the external 24 V DC control voltage for contactors, in
case you are using a switch cabinet bushing SWD4-SFL8-
20/SWD4-SML8-20 with a 24 V DC external supply.
Check whether:
• All plugs on the SWD cable are correct, i. e. are connected
in accordance with the installation instructions in the
subsection „Fitting SWD ribbon cable with plugs“,
page 85.
• The plugs for all SWD slaves are plugged in.
• The sensor/actuator connections for the SWD I/O modules
are connected correctly.
• The field bus connection between the SWD gateway and
the controller is plugged in.
h
Caution!
Connect spring-cage terminals “A” and “B” in accor-
dance with the figure “Connections of the switch cabinet
bushing”, page 75, if you would like to use the switch
cabinet bushing without an external power supply. In this
case you will work with the 24 V DC control voltage of the
connected SWD gateway or power feed module.
j
Danger!
If you have already integrated an SWD slave into a system,
secure the endangered operating ranges.

Initial switch-on of the SWD
network
105
MN05006002Z-EN
With the aid of the status LEDs described below you can
recognize the respective operating state of the different SWD
slaves.
Initial switch-on of the
SWD network
After initial switch-on of the supply voltage the SWD
gateway determines which and how many SWD slaves are
connected to the SWD network. As yet no configuration
exists in the SWD gateway.
Status messages of the SWD gateway after the initial
switch-on
Prerequisite: the SWD network is connected properly to the
SWD gateway.
Table 14:
LED display of the SWD gateway for a new actual
configuration
Status messages of the SWD slaves after the initial
switch-on
For the connected SWD slaves the status LED for diagnostics
of the SWD network flashes in the colour green, frequency
(1 Hz).
LED
Status
SWD
Red flashing
Config.
Off (no planned configuration is available)

Placing into operation
106
MN05006002Z-EN
Creating a target configu-
ration
Before the SWD gateway can exchange data with the PLC, it
must store the found configuration of the SWD slaves inter-
nally as a target configuration.
X
Press the “Config.” pushbutton actuator for at least
2 seconds.
The SWD gateway stores the found configuration internally
as a target configuration and is in the SWD mode “Failsafe”.
It exchanges so-called zero data with the SWD slaves. All
SWD slaves are operated in “safe status” i.e. their digital
outputs are switched off.
With the aid of this target configuration the SWD coupling
unit checks each time the voltage supply is retriggered on
whether the number and part no. of SWD slaves present on
the SWD network are unchanged and whether the SWD
topology is functional with these.
h
The function of the “Config.” pushbutton is disabled as
long as communication with the field bus master is active.
If necessary, interrupt communication by pulling out the
field bus plug. While the SWD coupling unit is determining
the configuration, the SWD LED flashes in the colour
orange, frequency (1 Hz). For the connected SWD stations
the status LED for diagnosis of the SWD network flashes in
the colour green, frequency (1 Hz).
Creating a target configuration
107
MN05006002Z-EN
Status messages of the SWD gateway after creating
the target configuration
Table 15:
LED indication of the SWD gateway after creating the
target configuration
For the connected SWD slaves the status LED for diagnostics
of the SWD network lights up continuously green.
LED
Status
SWD
green continuous light
Config.
Off (no planned configuration is available)

Placing into operation
108
MN05006002Z-EN
Creating a project config-
uration of the SWD
network
Create the project configuration in the PLC control configu-
ration. Among other things define the number, part no. and
sequence of SWD slaves and which SWD coupling unit is
being operated (PROFIBUS-DP slave or CAN device).
The following files are used for integration of the SWD
gateway into the control configuration:
• For CANopen: an EDS description file (EDS = Electronic
Data Sheet) that contains the standardized descriptions of
the CANopen slaves. For the CANopen gateway
EU5C-SWD-CAN this is the file EU5C-SWD-CAN.eds.
• For PROFIBUS-DP: a device master file (GSD file) which
contains a standardized description of the SWD gateway.
After the project configuration has been transferred to the
SWD gateway and it agrees with the target configuration
stored there, data interchange can already be commenced.
The SWD gateway is now in the SWD mode “Normal”,
a Table 18 on page 112.
In the manual MN05013002Z-EN (previously AWB 2723-
1612en) you can find out how to configure an SWD coupling
unit with its SWD slaves in the configuration software for the
PLC.
h
The SWD-Assist function generates and saves a project-
specific GSD file that can be imported by PROFIBUS-DP
configuration tools if these are provided with the neces-
sary import function.
Switching on when there are
configuration changes
109
MN05006002Z-EN
Switching on when there
are configuration changes
If an SWD configuration that is already in operation is
switched on again, the SWD coupling unit checks first
whether the actual and target configurations agree. If so, it
is checked whether the project and target configurations
agree. If the result of a check is negative, the SWD gateway
changes over to the corresponding error mode, shows the
error by means of the SWD and Config. LED and awaits oper-
ator actions.
The behavior of the SWD network depends on the parameter
settings of the SWD slaves in the PLC control configuration.
If certain SWD slaves are mandatory for operation, you can
define that the complete SWD network will not go into oper-
ation, if one of these essential slaves is missing.
Table 16:
LED indication of the SWD gateway in the case of a
changed actual configuration
Switch-on in case of a changed actual configuration
If. after switching on, the SWD coupling unit ascertains a
deviation in the number or part no. of SWD slaves between
the actual and target configurations, it reacts as follows:
• Change to error mode.
• For error reporting by means of LED indication please refer
to the table “LED indication in the case of a new or
changed actual configuration”.
In the case of a changed actual configuration the continued
behavior of the operator is governed by whether the change
has been created deliberately or by an unwanted influencing
of the SWD topology. In any case the following is valid:
X
Prior to reconfiguration interrupt the connection to the
field bus master by pulling out the field bus plug.
LED
Status
SWD
Red flashing
Config.
Off (no planned configuration is available)

Placing into operation
110
MN05006002Z-EN
Switching on in the case of a deliberately changed
actual configuration
In this case the changed actual configuration must be saved
as a new target configuration.
X
Press the “Config.” pushbutton actuator for at least
2 seconds.
Please refer to the table “LED indication after creating a new
target configuration”.
X
Change the project configuration for the field bus master
in the configuration software for the PLC in accordance
with the changed actual configuration.
X
Reconnect to the field bus master.
The SWD gateway is then in the SWD mode “Normal” and
is ready for data interchange (a "LED indication of the
SWD gateway after changeover to the SWD mode
“Normal”“, page 112).
Remedy:
With the aid of the status LED ascertain which of the SWD
slaves is no longer being found by the SWD gateway. Then
check where there is a possible damage to the SWD cable or
an SEL link is missing.
h
Caution!
First of all check whether your actual configuration has
been changed unintentionally, e.g. by unclamping an
external device plug. In this case the changed actual
configuration must not be saved as a new target configu-
ration because an SWD slave that can no longer be found
would thereby be removed permanently from the target
configuration.
h
If an SWD slave is no longer connected, the SWD LED is
switched off.
Switching on when there are
configuration changes
111
MN05006002Z-EN
Switching on in the case of a changed project config-
uration
Basic requirements:
• Target configuration = Actual configuration,
• A connection to the field bus master is available.
If, after the switch-on and initialisation process, the SWD
gateway ascertains a difference between the stored target
configuration and the project configuration, it indicates this
error with the following LED combination.
Table 17:
LED indication of the SWD gateway in the case of a
project configuration deviation
Remedy, if the project configuration has been changed:
X
Retrace the change on the SWD network.
X
Interrupt the connection to the field bus master by pulling
out the field bus plug.
X
Press the “Config.” pushbutton actuator for at least
2 seconds.
The SWD gateway stores the changed actual configuration
as a new target configuration a Table 16 on page 109.
X
Reconnect to the field bus master.
X
If necessary load the project configuration into the SWD
gateway again.
LED
Status
SWD
green continuous light
Config.
red continuous light
h
The SWD LEDs of the SWD slaves light up continuously
green after the creation of a new target configuration
Placing into operation
112
MN05006002Z-EN
Retriggering on in the case of an unchanged configu-
ration
Normally , if the actual, target and project configurations
agree, the SWD gateway changes over to the SWD mode
“Normal” and is ready for data interchange.
Table 18:
LED indication of the SWD gateway after changeover
to the SWD mode “Normal”
LED
Status
SWD
green continuous light
Config.
green continuous light
CAN or DP
green continuous light when data is being
exchanged on the field bus.
POW
yellow continuous light
113
MN05006002Z-EN
5
What Happens If …?
Check the condition of the SWD gateway and of the SWD
slaves by means of the status LEDs and diagnostic bits. The
diagnoses of the various SWD components and controllers
are described in separate manuals.
Behavior of the SWD
gateway
The status of the SWD gateway is signalled optically via 4
front LEDs:
• POW,
• DP or CAN,
• Config.
• SWD.
POW-LED
Table 19:
Diagnostics with the POW-LED
Event
Explanation
Remedy
LED off
• No supply voltage POW avail-
able,
• SWD gateway is faulty or
• The SWD gateway is in firmware
update mode if the three other
gateway LEDs are continuously
lit orange or red.
• Check the supply voltage POW,
• Check the SWD gateway or
• the firmware update mode can be
left by switching on the supply
voltage again.
LED yellow continuous
light
Fault-free operation, the SWD
gateway is ready for operation.
-
LED yellow flashing
The SWD gateway has ascertained
an irregularity in the self-test.
Consult the Eaton branch office that
is responsible for you or replace the
device.
What Happens If …?
114
MN05006002Z-EN
DP-LED
The DP LED reports to the PROFIBUS DP gateway EU5C-
SWD-DP the status on the field bus face.
Table 20:
Diagnostics with DP-LED
Event
Explanation
Remedy
LED off
No communication with PROFIBUS-DP master.
Check Profibus-DP
master connection.
LED green
continuous
light
The project configuration of the controller agrees with
the target configuration of the SWD gateway. Cyclical
data exchange takes place via the PROFIBUS DP.
–
LED green
flashing (1 Hz)
The PROFIBUS DP master has been recognized. No
cyclical data exchange takes place yet via the field bus.
The project configuration of the controller does not
agree with the target configuration of the SWD
gateway, but the deviation allows data exchange with
the relevant SWD slaves.
Check your target
configuration and, if
necessary, update the
project configuration.
LED orange
continuous
light
At least one SWD slave requests a diagnosis test,
because, e.g. SWD slaves are invalid or essential slaves
are missing or an SWD slave is missing that has been
configured in the control configuration as mandatory.
Check your target
configuration and, if
necessary, update the
project configuration.
LED orange l
red
The gateway is in firmware update mode when the
POW LED is off.
Firmware update not yet
available. Close the
mode by switching the
gateway off and on.
Behavior of the SWD gateway
115
MN05006002Z-EN
CAN-LED
The CAN LED reports to the CANopen gateway EU5C-SWD-
CAN the status on the field bus face.
Table 21:
Diagnosis with the aid of the CAN LED
Event
Explanation
Remedy
LED off
No communication takes place on the CAN-Bus.
Check the connec-
tion to the
CANopen master.
LED red strobe light
Baud rate detection on the CAN bus is active. No data
exchange takes place on the CAN bus.
–
LED orange contin-
uous light
CAN baud rate detected. Waiting for a valid target
configuration. No data exchange takes place on the
CAN bus.
–
LED orange l red
The gateway is in firmware update mode when the
POW LED is off.
Firmware update
not yet available.
Close the mode by
switching the
gateway off and on.
LED flashing red
(single flash)
Communication error on the CAN bus. (Error warning
level reached.) Data exchange takes place with the
CAN bus.
–
LED flashing red
(double flash)
Monitoring error (node guarding/heartbeat). SDOs are
transferred to the CAN Bus.
–
LED red continuous
light
Communication error on the CAN bus. (Bus off.). No
data exchange takes place on the CAN bus.
–
LED green flashing
Status Pre-operational initialisation mode , communi-
cation is only possible via SDOs.
LED flashing green
(single flash)
Status Stopped: no data exchange
LED green contin-
uous light
Status Operational: the project configuration of the
controller agrees with the target configuration of the
SWD gateway. Cyclical data exchange takes place via
the CAN bus.
–
What Happens If …?
116
MN05006002Z-EN
Config.-LED
Table 22:
Diagnostics with the Config-LED
Event
Explanation
Remedy
LED off
No communication with the field bus
master or the SWD coupling unit does
not contain a project configuration, e.g.
after retriggering.
Check the connection to the field
bus master or transfer the project
configuration into the SWD
gateway.
LED green contin-
uous light
The project configuration of the
controller agrees with the target config-
uration of the SWD gateway.
Data exchange with the field bus
OK.
LED green
flashing (1 Hz)
The target configuration does not agree
with the project configuration of the
controller, but the parameter “Compat-
ible devices allowed” has been acti-
vated. The deviation allows data
exchange with the SWD slave in ques-
tion. You can find a list of the types that
are compatible with one another in the
manual MN05013002Z-EN (previously
AWB2723-1612en).
The SWD gateway is ready for data
exchange with the SWD slaves.
Check your target configuration
and, if necessary, update the
project configuration.
LED orange l red
The gateway is in firmware update mode
when the POW LED is off.
Firmware update not yet available.
Close the mode by switching the
gateway off and on.
LED red contin-
uous light
The target configuration does not agree
with the project configuration of the
controller, the parameter “Compatible
devices allowed” has not been acti-
vated.
The SWD gateway is not ready for
data exchange with the SWD
slaves. Correct your target or
project configuration.
Behavior of the SWD gateway
117
MN05006002Z-EN
SWD-LED
Table 23:
Diagnostics with the SWD-LED
Event
Explanation
Remedy
LED off
No power supply
Check the power supply.
LED red contin-
uous light
No connection of SWD gateway with
the SWD network or there is a short-
circuit of the 15 V DC device voltage
Check the spade connection on the
SWD gateway or the crimp connec-
tions of the plugs on the SWD ribbon
cable.
LED red flashing
(1 Hz)
After initial switch-on:
the SWD gateway has detected SWD
slaves on the SWD network, no actual
or target configuration exists yet.
After retriggering with the existence
of a target configuration: at least one
SWD slave too many or too few has
been found in comparison with the
target configuration.
No data exchange with the SWD
gateway
LED orange
flashing (1 Hz)
Transient state while the SWD
gateway is determining the target
configuration.
–
LED orange l red
The gateway is in firmware update
mode when the POW LED is off.
Firmware update not yet available.
Close the mode by switching the
gateway off and on.
LED green
flashing
(1 Hz)
Transient state until the actual
configuration found has been stored
internally as a target configuration.
–
LED green contin-
uous light
All SWD slaves stored in the target
configuration are available.
The SWD gateway is in the SWD mode
“Normal”, data exchange with the
SWD slaves is taking place on the
SWD network.
What Happens If …?
118
MN05006002Z-EN
Behavior of the SWD
power feeder modules
The status of an SWD power feed module EU5C-SWD-PF1-1
or EU5C-SWD-PF2-1 is signalled optically via the front panel
LED POW.
Behavior of the SWD
inputs/outputs modules
The status of an SWD I/O module is signalled optically via the
green front panel LED SWD.
Table 24:
Diagnostics of an SWD I/O module with the aid of the
green SWD LED
The I/O module indicates the statuses of its input and/or
outputs with yellow LEDs.
Event
Explanation
Remedy
LED off
No 15 V DC device voltage available
or the LED is defective.
Check the POW power supply or the
SWD power feed module
LED yellow
continuous
light
15 V DC device voltage OK.
–
Event
Explanation
Remedy
LED off
No 15 V DC device voltage via the
SWD network or the I/O module or
the LED is defective.
Check the power supply or I/O module.
LED green
continuous
light
Fault-free operation, data exchange
OK.
–
LED green
flashing
(1 Hz)
No data exchange with the SWD
gateway.
The I/O module may not be in the target
configuration or the SWD gateway is just
creating a target configuration.
LED green fast
flashing (3 Hz)
Error in the I/O module, e.g. overload.
Determine or evaluate the defect by
means of a detailed slave diagnostics in
the control program.

Behavior of the SWD module
DIL-SWD-32-…
119
MN05006002Z-EN
Behavior of the SWD
module DIL-SWD-32-…
The status of an SWD module DIL-SWD-32-001/DIL-SWD-
32-002 is signalled optically via the front panel LED Ready.
The Ready LED can assume the colours green or yellow. It
indicates the statuses that are influenced via the SWD
network, i.e. the communication status and the switching
command from the controller. On the DIL-SWD-32-002 the
communication status is indicated only when the 1-0-A
selector switch has been switched to position A (Automatic).
You can obtain feedback on the switch position of the DILM
contactor combination by evaluating the input bit 0
(C = contactor) in the overriding controller.
h
If the DILM module DIL-SWD-32-002 is switched over to
manual mode (position 0 or 1), a switching command from
the controller remains without any effect. As the LED indi-
cator indicates the switching command of the controller,
on the DIL-SWD-32-002 in manual mode the actual switch
position of the contactor can deviate from the LED indi-
cator. The mechanical switch position indicator of a DIL-
SWD-32-… shows unambiguously the actual switch posi-
tion.
What Happens If …?
120
MN05006002Z-EN
Table 25:
Diagnostics with the
Ready-LED
Switching on Contactors with DIL-SWD-32-001
The DIL-SWD-32-001 has no selector switch, thus the status
indicated by the Ready LED represents the actual switch
position of the contactor.
Switching on Contactors with DIL-SWD-32-002
The 1-0-A selector switch of the DIL-SWD-32-002 makes it
possible for the operator to electrically switch the contactor
on (position 1, confirm ON) and off (position 0, confirm OFF)
by hand. To activate the contactor via the SWD network the
selector switch must be in position A (Automatic).
Event
Explanation
Remedy
LED off
No 15 V DC device voltage via the
SWD network or the DIL-SWD-32-…
or LED is defective.
Check the power supply or
DIL-SWD-32-…
LED green
continuous
light
1)
Fault-free operation, data exchange
OK.
The DIL-SWD-32-… has received the
switching command Off for the
contactor.
LED orange
continuous
light
1)
Fault-free operation, data exchange
OK.
The DIL-SWD-32-… has received the
switching command On for the
contactor.
LED green
flashing (1 Hz)
No data exchange with the SWD
gateway.
The DIL-SWD-32-… may not be in the
target configuration or the SWD gateway
is just creating a target configuration.
1) On the DILM module DIL-SWD-32-002 in manual mode (position 0 or 1) the actual switch position
of the contactor can deviate from the indicated switching command of the controller. Only in posi-
tion A and with a functioning SWD network does the status indicated by the Ready LED on the
DIL-SWD-32-002 comply with the actual switch position of the contactor. In the case of the DILM
module DIL-SWD-32-001 the switch position of the contactor also complies with the indicated
switching command of the controller. An exception to this is the “Defect in the case of an insuffi-
cient contactor supply”, see below.
Behavior of the SWD function
elements M22-SWD…
121
MN05006002Z-EN
Defect in the case of an insufficient contactor supply.
In the contactor supply if the 24 V DC control voltage drops
below the minimum voltage of 19.2 V DC or exceeds the
maximum current of 3 A, the secure switching of a contactor
is no longer guaranteed. The switching command from the
controller may remain without any effect. The mechanical
switch position indicator of a DIL-SWD-32-… shows unam-
biguously the actual switch position.
Behavior of the SWD func-
tion elements M22-SWD…
The status of an SWD function element M22-SWD… is
signalled optically via the green SWD LED with a diameter of
3 mm on the rear panel.
Table 26:
Diagnostics with the aid of the green SWD LED on the
rear panel
Event
Explanation
Remedy
LED off
No 15 V DC device voltage via the
SWD network or the M22-SWD… or
LED is defective.
Check the power supply or M22-SWD…
LED green
continuous
light
Fault-free operation, data exchange
OK.
–
LED green
flashing (1 Hz)
No data exchange with the SWD
gateway.
The M22-SWD… may not be in the
target configuration or the SWD gateway
is just creating a target configuration.
LED green fast
flashing (3 Hz)
Defect in the M22-SWD…
Determine or evaluate the defect by
means of a detailed slave diagnostics in
the control program.

122
MN05006002Z-EN
123
MN05006002Z-EN
Appendix
Technical data
Current consumption 15 V SWD supply voltage
(device supply)
Part no.
Article no.
Current consumption [mA] Instructions
M22-SWD-K11
115964
7
–
M22-SWD-K22
115965
7
–
M22-SWD-LED-W
115966
19
–
M22-SWD-LED-B
115967
19
–
M22-SWD-LED-G
115968
19
–
M22-SWD-LED-R
115969
19
–
M22-SWD-K11LED-W
115972
19
–
M22-SWD-K11LED-B
115973
19
–
M22-SWD-K11LED-G
115974
19
–
M22-SWD-K11LED-R
115975
19
–
M22-SWD-K22LED-W
115978
19
–
M22-SWD-K22LED-B
115979
19
–
M22-SWD-K22LED-G
115980
19
–
M22-SWD-K22LED-R
115981
19
–
M22-SWD-KC11
115995
7
–
M22-SWD-KC22
115996
7
–
M22-SWD-LEDC-W
115997
19
–
M22-SWD-LEDC-B
115998
19
–
M22-SWD-LEDC-G
115999
19
–
M22-SWD-LEDC-R
116000
19
–
M22-SWD-K11LEDC-W
116003
19
–
M22-SWD-K11LEDC-B
116004
19
–
M22-SWD-K11LEDC-G
116005
19
–
M22-SWD-K11LEDC-R
116006
19
–
M22-SWD-K22LEDC-W
116009
19
–
M22-SWD-K22LEDC-B
116010
19
–
M22-SWD-K22LEDC-G
116011
19
–
M22-SWD-K22LEDC-R
116012
19
–
DIL-SWD-32-001
118560
40
–
DIL-SWD-32-002
118561
40
–
EU5E-SWD-8DX
116381
12
–
EU5E-SWD-4D4D
116382
45
–
EU5E-SWD-4D2R
116383
45
–
M22-SWD-I1-LP01
115990
17
with terminating
resistor switched on
M22-SWD-I2-LP01
115991
17
M22-SWD-I3-LP01
115992
17
M22-SWD-I4-LP01
115993
17
M22-SWD-I6-LP01
115994
17
SWD4-RC8-10
116020
17
–
Appendix
124
MN05006002Z-EN
Power consumption/current consumption 24 V SWD
control voltage U
AUX
DIL-SWD-32-…
Pull-in power
for DILM 7-9
W
3
for DILM 12-15
W
4.5
for DILM 17-38
W
12
Pick-up current
for DILM 7-9
mA
125
for DILM 12-15
mA
188
for DILM 17-38
mA
500
Sealing power
for DILM 7-9
W
3
for DILM 12-15
W
4.5
for DILM 17-3
W
0.5
Holding current
for DILM 7-9
mA
125
for DILM 12-15
mA
188
for DILM 17-38
mA
21
Technical data
125
MN05006002Z-EN
Ga
te
ways,
Po
we
r
Feed
er Mod
u
le
s
EU5C-
SWD
-D
P
EU5C-S
W
D
-CAN
EU5C-SWD-PF1-1
EU5C-SWD-PF2-1
Gener
al
Standar
ds
IEC/EN 61131-2,
EN 50178
IEC/EN 61131-2
, EN 50178
Dimensions (W
x
H
x
D)
mm
35
X
90
X
127
35
X
90
X
124
Weight
kg
0.
16
0.16
0.11
0.17
Mounting
To
p-hat
ra
il IEC/EN 60715,
35 mm
Top-hat r
ail
IEC/EN 60715,
35
mm
Mounting position
Vertical
Vertica
l
Ambient me
chanical condit
ions
Prot
ection
type
(IEC/EN 60529)
IP
20
IP20
IP20
IP20
Vibrations (IEC/
EN
61131-2:2008)
constant amplit
ude 3.
5 mm
Hz
5 …
8.
4
5 … 8.
4
5 …
8.4
5 …
8.4
constant acceler
at
ion 1
g
H
z
8.
4 …
150
8.4 …
150
8.4 …
150
8.4 …
150
Mechani
cal sho
ck
re
sistance (IEC/EN 60068-2-27)
semi-sinusoidal 15
g/11 ms
Shoc
ks
9
9
9
9
Drop
to IEC/EN 60068-2-31
Drop
height
mm
50
50
50
50
Free fall, packag
ed
(IEC/
EN 60068-2-32)
m
0.
3
0.3
0.3
0.3
Electrom
ag
neti
c co
m
p
atibili
ty
(E
MC)
Over
voltage categ
ory
II
II
II
II
Pollution
degr
ee
2
2
2
2
Elect
rostatic discha
rge (IEC/EN 61131-2:2
008)
Air d
isc
har
ge (Leve
l 3)
kV
8
8
8
8
Cont
ac
t discharg
e (Level
2)
kV
4
4
4
4
Elect
romagnet
ic fields (IEC/
EN 6
1131-2:2008)
80-1000 MHz
V
/m
10
10
10
10
1.4 -
2 GHz
V
/m
3
3
3
3
2 - 2.
7 GHz
V
/m
1
1
1
1
Appendix
126
MN05006002Z-EN
Rad
io int
erference
su
ppression (SWD)
EN 55
011 Class A
EN
55011 Class A
Burst (IEC/EN
61131-2:
2008, L
evel 3)
Supply cab
les
kV
2
2
2
2
CAN/DP
fieldbus cable
kV
1
1
–
–
SWD cables
kV
1
1
1
1
Surge (IEC/EN
61131-2:
2008, L
evel 1)
Supply cab
les//CAN/DP bus
cable
Su
pply c
abl
es
0.5 kV,
CAN/DP b
us
cable 1
kV
Supply cab
les 0.5 kV
Rad
iat
ed
RFI (IEC/EN
61131-2:
2008, L
evel 3)
V
10
10
10
10
Ambient climatic
condi
tions
Operating
am
bient
temper
at
ure (IEC 60068-2)
°C
–25 …
+55
–25 …
+55
–25 …
+55
–25 …
+55
Cond
ensation
pr
event w
ith
suitable measures
prevent with
suit
able measur
es
Storage
°C
–40…70
–40…70
–40…70
–40…70
relative humidit
y,
non-cond
ensin
g (IEC/EN 600
68-2-30)
%
5 …
95
5 … 95
5 …
95
5 …
95
Sup
p
ly voltag
e U
AU
X
Rat
ed op
erational voltage
V
24 DC
-15% +20%
24 DC -15%
+20%
Inpu
t volta
ge residual ripp
le
%
F
5
F
5
F
5
F
5
Prot
ection ag
ainst polar
ity reversal
Yes
Yes
Yes
Yes
max. curr
ent
I
max
A
3
1)
3
1)
3
3
Sh
or
t-
ci
rc
ui
t ra
ting
no
, exter
nal fu
se FAZ
Z
3
no,
ex
ter
nal fus
e
FA
Z Z3
Heat
dissipat
ion
W
N
ormally 1
Normally 1
Normally 1
Normally 1
Potential is
olation
no
no
no
no
Rat
ed op
erating
volt
ag
e of 24-V-DC slaves
V
pa
rt
no.
U
Aux
-
0.2
par
t no
. U
Aux
-
0.2
par
t n
o. U
Aux
-
0.2
pa
rt
n
o.
U
Aux
-
0.2
EU5C-
SWD
-D
P
EU5C-S
W
D
-CAN
EU5C-SWD-PF1-1
EU5C-SWD-PF2-1
Technical data
127
MN05006002Z-EN
Sup
p
ly voltag
e U
Pow
Supply volt
ag
e
V
24 DC
-15 % + 20
%
24
DC
-15 % + 20
%
–
24
DC
-15 % + 20 %
Inpu
t volta
ge residual ripp
le
%
F
5
F
5
–
F
5
Prot
ection ag
ainst polar
ity reversal
Yes
Yes
–
Yes
Rat
ed op
erational cur
rent
I
A
0.
7
0.7
–
0.7
Over
load
pr
oof
Yes
Yes
–
Yes
In
ru
sh
c
ur
re
nt
a
nd
le
ng
th
A
12.
5 A/6
ms
12.5 A/6
ms
–
12.5 A/
6
ms
Heat
dissipat
ion at
24 V DC
W
3.
8
3.8
–
3.8
Potential
is
olation
betw
een
U
Pow
and
U
VP
15 V SWD
supply
volt
ag
e (device supply
)
no
no
–
Yes
Bridg
ing voltage
dips
ms
10
10
–
10
Re
pe
at
ra
te
s
1
1
–
1
St
at
us indica
to
r
LED
Yes
Yes
–
Yes
SW
D s
upp
ly voltag
e (d
evice sup
p
ly
)
Rat
ed op
erational voltage
U
e
V
14.
5
g
3 %
14.5
g
3 %
14.5
g
3
%
14.5
g
3
%
max. curr
ent
I
max
A
0.
7
2)
0.7
2)
0.7
0.7
Short
-Cir
cuit Rat
ing
Yes
Yes
–
Yes
Connect
ion s
upply vol
tages
Conne
ction Type
Pu
sh
in
terminals
Push in t
ermina
ls
so
lid
mm
2
0.
2 -
1.5 (AWG
24 -
16)
0.2 -
1.5
(AWG
24 -
16)
flexible with
ferr
ule
m
m
2
0.
25 -
1.5
0.25 -
1.5
0.25 -
1.5
0.25 -
1.5
EU5C-
SWD
-D
P
EU5C-S
W
D
-CAN
EU5C-SWD-PF1-1
EU5C-SWD-PF2-1
Appendix
128
MN05006002Z-EN
SW
D ne
tw
o
rk
Station t
ype
SW
D coor
dinator
(m
aster
)
–
–
Number of
SWD st
at
ions
58
99
–
–
Transfer rate
Kb
it/s
at present
125
at present
125
–
–
Addres
s setting
au
tom
atic
aut
omat
ic
–
–
Sta
tus indic
ato
r
SW
D-LED:
gre
en
Config.-
LE
D: red
–
–
Conne
ctions
Pl
ug, 8-pole
2
x
plu
g, 8
pole
Plug c
onnect
ors
Bl
ade ter
m
inal SWD4-8MF2
2 blade t
erminals SWD4-8MF2
Field b
us inte
rface
Funct
ion
PR
OFIBUS-DP slave
CANop
en s
lav
e
Bus pr
otocol
PR
OFIBUS-DP
CANop
en
Transfer rate
up
to
12 Mbit
/s
up t
o 1 Mbit
/s
Setting
tr
ansfer
rat
e
au
tom
atic
aut
omat
ic
Station addr
ess
2 …
125
2 … 32
Addres
s setting
DI
P swit
ches
DIP swit
ches
Status display field
bus inter
face
LED
Two-c
oloured
red
/
gr
een
Tw
o-
coloured
red
/
green
Terminating resistor field
bus
switc
hable via
pl
ug
DIP swit
ches
Terminal ty
pe field
bus
1
x
SUB-D,
9-pole,
socket
1
x
SUB-D plug, 9-
pole
potential is
olation
Yes
Yes
In
st
ru
ct
ion
s
1) If
contacto
rs with
a
total po
w
er co
nsump
tion
> 3
A are c
onnect
ed, a p
ower feeder
modu
le EU5C-SWD-PF
1/2 has
to
be used.
2) If
contacto
rs with
a
total po
w
er co
nsump
tion
> 0.
7 A
are
connec
ted,
a
power
fee
der m
odule EU5C-SWD
-PF2
has t
o be
use
d.
EU5C-
SWD
-D
P
EU5C-S
W
D
-CAN
EU5C-SWD-PF1-1
EU5C-SWD-PF2-1
Technical data
129
MN05006002Z-EN
I/O modules
EU5E-SWD-8DX
EU5E-SWD-4D4D
EU5E-SWD-4D2R
General
Standards
IEC/EN 61131-2, EN 50178
Dimensions (W x H x D)
mm
35 X 90 X 101
Weight
kg
0.1
0.1
0.11
Mounting
Top-hat rail IEC/EN 60715, 35 mm
Mounting position
Vertical
Ambient mechanical conditions
Protection type (IEC/EN 60529)
IP20
IP20
IP20
Vibrations (IEC/EN 61131-2:2008)
constant amplitude 3.5 mm
Hz
5 - 8.4
5 - 8.4
5 - 8.4
constant acceleration 1 g
Hz
8.4 - 150
8.4 - 150
8.4 - 150
Mechanical shock resistance
(IEC/EN 60068-2-27)
semi-sinusoidal 15 g/11 ms
Shocks
9
9
9
Drop to
IEC/EN 60068-2-31
Drop
height
mm
50
50
50
Free fall, packaged
(IEC/EN 60068-2-32)
m
0.3
0.3
0.3
Electromagnetic compatibility (EMC)
Overvoltage category
II
II
II
Pollution degree
2
2
2
Electrostatic discharge (IEC/EN 61131-2:2008)
Air discharge (Level 3)
kV
8
8
8
Contact discharge (Level 2)
kV
4
4
4
Electromagnetic fields (IEC/EN 61131-2:2008)
80-1000 MHz
V/m
10
10
10
1.4 - 2 GHz
V/m
3
3
3
2 - 2.7 GHz
V/m
1
1
1
Radio interference suppression (SWD)
EN 55011 Class A
Burst (IEC/EN 61131-2:2008, Level 3)
Supply cables
kV
2
2
2
Signal cables
kV
1
1
1
SWD cables
kV
1
1
1
Surge (IEC/EN 61131-2:2008, Level 1)
–
Supply cables 0.5 kV
–
Radiated RFI (IEC/EN 61131-2:2008,
Level 3)
V
10
10
10
Appendix
130
MN05006002Z-EN
Ambient climatic conditions
Operating ambient temperature
(IEC 60068-2)
°C
–25 - +55
–25 - +55
–25 - +55
Condensation
prevent with suitable measures
Storage
°C
–40 - +70
–40 - +70
–40 - +70
relative humidity, non-condensing
(IEC/EN 60068-2-30)
%
5 - 95
5 - 95
5 - 95
SWD Interface
Station type
SWD station (slave)
Setting transfer rate
automatic
Status SWD
LED
green
Connection
Plug, 8-pole
Connection plug: External device plug SWD4-8SF2-5
Current consumption (15 V SWD supply)
Connection supply and I/O
Connection Type
Push-In
solid
mm
2
0.2 - 1.5 (AWG 24 - 16)
flexible with ferrule
1)
mm
2
0.25 - 1.5
0.25 - 1.5
0.25 - 1.5
24 V DC supply for output supply
Rated operational voltage
U
e
V
–
24 DC
-15 % / +20 %
–
Input voltage residual ripple
%
–
5
–
Protection against polarity reversal
–
Yes
–
Digital inputs
Number
8
4
4
Input current
mA
Normally 4 at 24 V DC
Voltage level to IEC/EN 61131-2
Limit value type 1
Low < 5 V DC; High > 15 V DC
Input delay
High r Low part no. < 0.2 ms
Low r High part no. < 0.2 ms
Status display inputs
LED
yellow
EU5E-SWD-8DX
EU5E-SWD-4D4D
EU5E-SWD-4D2R
Technical data
131
MN05006002Z-EN
Digital semiconductor outputs
Number
–
4
–
Output current
A
–
Normally 0.5 at
24 V DC
–
Short-circuit tripping current
A
–
max. 1.2 over 3 ms
–
Lamp load
R
LL
W
–
3
–
Overload proof
–
yes, with diagnostics
–
Switching capacity
–
EN 60947-5-1 utiliza-
tion category DC-13
–
Relay outputs
Number
–
–
2
Contact type
–
–
N/O
Operations
Utilization category AC-1, 250 V, 6 A
–
–
> 6 x 10
4
Utilization category AC-15, 250 V, 3 A
–
–
> 5 x 10
4
Utilization category DC-13, 24 V, 1 A
–
–
> 2 x 10
5
Safe isolation
V AC
–
–
230
minimum load current
mA
–
–
100 mA , 12 V DC
Response/reset time
ms
–
–
5/2.5
Bounce duration
ms
–
–
Normally 1.5
Short-circuit protection
–
–
external 4 A gL/gG
Status display outputs
LED
–
yellow
yellow
Potential isolation
Inputs for SWD network
Yes
Yes
Yes
Semi-conductor output for SWD network
–
Yes
–
Semi-conductor outputs for inputs
–
no
–
Relays for SWD network
–
–
Yes
Relays for inputs
–
–
Yes
Relays for relays
–
–
Yes
Instructions
1) Minimum length 8 mm.
EU5E-SWD-8DX
EU5E-SWD-4D4D
EU5E-SWD-4D2R
Appendix
132
MN05006002Z-EN
M22-SWD co
nn
ecti
on
s
M22-SWD-K11
/
M22-SWD-KC11
M22-
SWD
-LE
D-
…/
M22-
SWD-LEDC-
…
M22-
SWD-K1
1LED-
…
/
M22-
SWD-K1
1LEDC-…
M22-
SWD-K
22/
M22-
SWD-K
C
2
2
M22-SW
D
-K22LED
-…
/
M22-SW
D
-K22LED
C-…
Gener
al
Standar
ds
IEC/EN 61131-2, EN 50178
Dimensions (W
x
H
x
D)
m
m
12
X
42
X
39/
12
X
45
X
37
10
X
42
X
45/
10
X
45
X
42
12
X
42
X
45/
12
X
45
X
42
17
X
42
X
39/
17
X
45
X
37
17
X
42
X
45/
17
X
45
X
42
Weight
g
10
10
10
14
14
Mounting position
any
Ambient me
chanical condit
ions
Prot
ection
type
(IEC/EN 60529)
IP
20
IP
20
IP
20
IP20
IP20
Vibrations (IEC/
EN
61131-2:2008)
constant amplit
ude 3.
5 mm
H
z
5 …
8.4
5 …
8.4
5 …
8.4
5 …
8.4
5 … 8.
4
constant acceler
at
ion 1
g
H
z
8.4 …
150
8.4 …
150
8.4 …
150
8.4 …
150
8.4 …
150
Mecha
ni
ca
l shock resistance (I
EC
/EN
60068-2-27)
semi-sinusoidal 15
g/11 ms
Shocks
9
9
9
9
9
Drop (IEC/EN
60068-2-31); drop
height
mm
50
50
50
50
50
Free fall, packag
ed
(IEC/
EN 60068-
2-32)
m
0.3
0.3
0.3
0.3
0.3
Technical data
133
MN05006002Z-EN
Electrom
ag
neti
c co
m
p
atibili
ty
(E
MC)
Over
voltage categ
ory
Not applicable
Pollution
degr
ee
2
2
2
2
2
Elect
rostatic discha
rge (IEC/EN 61131-2:2
008)
Air d
isc
har
ge (Leve
l 3)
kV
8
8
8
8
8
Cont
ac
t discharg
e (Level
2)
kV
4
4
4
4
4
Elect
romagnet
ic fields (IEC/
EN 6
1131-2:2008)
80-1000 MHz
V
/m
10
10
10
10
10
1.4 -
2 GHz
V
/m
3
3
3
3
3
2 - 2.
7 GHz
V
/m
1
1
1
1
1
Rad
io int
erference
su
ppression (SWD)
EN
55011 Class A
Burst (IEC/EN
61131-2:
2008, L
evel 3)
Supply cab
les
kV
2
2
2
2
2
SWD cables
kV
1
1
1
1
1
Rad
iat
ed R
FI (IEC/EN
61131-2:
2008,
Le
ve
l 3
)
V
10
10
10
10
10
Ambient climatic
condi
tions
Operating
amb
ient t
emperatur
e (IEC
60068-2)
°C
–3
0 … +
55
–30 …
+55
–30 …
+55
–30 …
+55
–30 …
+55
Cond
ensation
pr
event
with
suitable measures
Storage
°C
–4
0…80
–40…
80
–40…8
0
–40…80
–40…80
relative humidit
y,
non-cond
ensin
g
(IEC/EN
60068-2-30)
%
9 …
95
9 …
95
9 …
95
5 …
95
5 … 95
M22-SWD-K11
/
M22-SWD-KC11
M22-
SWD
-LE
D-
…/
M22-
SWD-LEDC-
…
M22-
SWD-K1
1LED-
…
/
M22-
SWD-K1
1LEDC-…
M22-
SWD-K
22/
M22-
SWD-K
C
2
2
M22-SW
D
-K22LED
-…
/
M22-SW
D
-K22LED
C-…
Appendix
134
MN05006002Z-EN
SW
D ne
tw
o
rk
Station t
ype
SWD st
at
ion
(slave)
Bau
d ra
te
set
ting
automatic
SWD-LED
gr
een
Conne
ctions
Plug
, 8-p
ole
Plug c
onnect
ors
SWD4-8SF2-5/
M22-SWD-I…LP
SWD4-8SF2-5/
M22-SWD-I…LP
SWD4-8SF2-5/
M22-SWD-I…LP
SWD4-8SF2-
5/
M22-SWD-I…
LP
SWD4-8SF2-5/
M
22-
SWD-I…
LP
Number
of insert
ion cyc
les
50
50
50
50
50
Cur
rent
consumpt
ion (15 V
SWD supply
)
Functi
o
n elem
en
t
Cont
ac
ts
1 ch
an
ge
ov
er
cont
ac
t
–
1 changeover
cont
act
2 changeover
contact
2 changeover
contact
Lifespan mech
anical/elect
rical
(op
era
tions)
1
X
10
6
–
1
X
10
6
1
X
10
6
1
X
10
6
LE
D
d
isp
la
y
no
Yes
Yes
no
Yes
Diagn
ost
ics
Yes
no
Yes
Yes
Yes
Fix
ing
front
mount
ing/
bas
e fix
ing
front mount
/
bas
e fix
ing
fr
ont mount/
bas
e fix
ing
fr
ont mount/
base fixi
ng
fr
ont m
ount/
base fixi
ng
M22-SWD-K11
/
M22-SWD-KC11
M22-
SWD
-LE
D-
…/
M22-
SWD-LEDC-
…
M22-
SWD-K1
1LED-
…
/
M22-
SWD-K1
1LEDC-…
M22-
SWD-K
22/
M22-
SWD-K
C
2
2
M22-SW
D
-K22LED
-…
/
M22-SW
D
-K22LED
C-…
Technical data
135
MN05006002Z-EN
Network termination, switch cabinet bushings
SWD4-RC8-10
SWD4-SFL8-20
SWD4-SML8-20
General
Standards
IEC/EN 61131-2, EN 50178
Dimensions (W x H x D)
mm
48.5 x 34.5 x 10 35 x 83 x 40
35 x 83 x 46
Weight
g
10
50
50
Mounting position
any
any
any
Ambient mechanical conditions
Protection type (IEC/EN 60529)
IP20
IP67
IP67
Vibrations (IEC/EN 61131-2:2008)
constant amplitude 3.5 mm
Hz
5 - 8.4
5 - 8.4
5 - 8.4
constant acceleration 1 g
Hz
8.4 - 150
8.4 - 150
8.4 - 150
Mechanical shock resistance (IEC/EN 60068-2-
27)
semi-sinusoidal 15 g/11 ms
Shocks
9
9
9
Drop to IEC/EN 60068-2-31
Drop
height
mm
50
–
–
Free fall, packaged (IEC/EN 60068-2-32)
m
0.3
–
–
Electromagnetic compatibility (EMC)
Overvoltage category
II
–
–
Pollution degree
2
–
–
Electrostatic discharge (IEC/EN 61131-2:2008)
Air discharge (Level 3)
kV
8
8
8
Contact discharge (Level 2)
kV
4
4
4
Electromagnetic fields (IEC/EN 61131-2:2008)
80-1000 MHz
V/m
10
10
10
1.4 - 2 GHz
V/m
3
3
3
2 - 2.7 GHz
V/m
1
1
1
Radio interference suppression (SWD)
EN 55011 Class A
–
–
Burst (IEC/EN 61131-2:2008, Level 3)
–
–
SWD cables
kV
1
–
–
Radiated RFI (IEC/EN 61131-2:2008, Level 3)
V
10
10
10
Appendix
136
MN05006002Z-EN
Enclosure bushings plug, socket
Ambient climatic conditions
Operating ambient temperature (IEC 60068-2) °C
–25 - +55
–25 - +55
–25 - +55
Condensation
prevent with suitable measures
Storage
°C
–40 - +70
–40 - +70
–40 - +70
Relative humidity, no condensation
(IEC/EN 60068-2-30)
%
5 … 95
5 … 95
5 … 95
Connection options
SWD-In
Socket, 8-pole
Plug, 8-pole
Plug, 8-pole
Number of insertion cycles
200
200
500
SWD-Out
–
Socket, 8-pole
Socket, 8-pole
Number of insertion cycles
–
500
200
Current consumption (15 V SWD supply)
SWD4-RC8-10
SWD4-SFL8-20
SWD4-SML8-20
SWD4-SF8-20
SWD4-SM8-20
General
Standards
IEC/EN 61131-2
EN 50178
IEC/EN 61131-2
EN 50178
Dimensions (W x H x D)
mm
24 x 26 x 162
24 x 26 x 170
Weight
g
20
22.5
Mounting position
any
any
Ambient mechanical conditions
Protection type (IEC/EN 60529)
IP67
IP67
Ambient climatic conditions
Operating ambient temperature (IEC 60068-2)
°C
–25 - +55
–25 - +55
Condensation
prevent with suitable measures
Storage
°C
–40 - +70
–40 - +70
relative humidity, non-condensing (IEC/EN 60068-2-30)
%
5 - 95
5 - 95
Connection options
SWD-In
–
Plug, 8-pole
Number of insertion cycles
–
500
SWD-Out
Socket, 8-pole
–
Number of insertion cycles
500
–
Current consumption (15 V SWD supply)
Technical data
137
MN05006002Z-EN
Coupling, plug
SWD4-8SFF2-5
SWD4-8SF2-5
SWD4-8FRF-10
General
Standards
IEC/EN 61131-2
EN 50178
IEC/EN 61131-2
EN 50178
IEC/EN 61131-2
EN 50178
Dimensions (W x H x D)
mm
48.5 x 34.5 x
10
15 x 36.5 x
17.5
35 x 90 x 35
Weight
g
4.5
5.5
42
Mounting position
any
any
any
Ambient mechanical conditions
Protection type (IEC/EN 60529)
IP20
IP20
IP20
Vibrations (IEC/EN 61131-2:2008)
constant amplitude 3.5 mm
Hz
5 - 8.4
5 - 8.4
5 - 8.4
constant acceleration 1 g
Hz
8.4 - 150
8.4 - 150
8.4 - 150
Mechanical shock resistance (IEC/EN 60068-2-27)
semi-sinusoidal 15 g/11 ms
Shocks
9
9
9
Electromagnetic compatibility (EMC)
Electrostatic discharge (IEC/EN 61131-2:2008)
Air discharge (Level 3)
kV
8
–
–
Contact discharge (Level 2)
kV
4
–
–
Ambient climatic conditions
Operating ambient temperature (IEC 60068-2)
°C
–25 - +55
–25 - +55
–25 - +55
Condensation
prevent with suitable measures
Storage
°C
–40 - +70
–40 - +70
–40 - +70
relative humidity, non-condensing
(IEC/EN 60068-2-30)
%
5 - 95
5 - 95
5 - 95
Connection options
SWD-In
Plug, 8-pole
Plug connector
Plug, 8-pole
Number of insertion cycles
200
1
200
SWD-Out
Plug, 8-pole
Socket, 8-pole
Push in terminals
Number of insertion cycles
200
200
–
Current consumption (15 V SWD supply)
Appendix
138
MN05006002Z-EN
DIL contactor modules
DIL-SWD-32-001
DIL-SWD-32-002
General
Standards
IEC/EN 61131-2, EN 50178, IEC/EN 60947
Dimensions (W x H x D)
mm
45 X 38 X 76
45 X 38 X 76
Weight
kg
0.04
0.04
Mounting
on DILM7 … DILM38
Mounting position
as DILM7 … DILM38
Ambient mechanical conditions
Protection type (IEC/EN 60529)
IP20
IP20
Vibrations (IEC/EN 61131-2:2008)
constant amplitude 3.5 mm
Hz
5 - 8.4
5 - 8.4
constant acceleration 1 g
Hz
8.4 - 150
8.4 - 150
Mechanical shock resistance (IEC/EN 60068-2-
27)
semi-sinusoidal 15 g/11 ms
Shocks
9
9
Drop to IEC/EN 60068-2-31
Drop
height
mm
50
50
Free fall, packaged (IEC/EN 60068-2-32)
m
0.3
0.3
Electromagnetic compatibility (EMC)
Overvoltage category
II
II
Pollution degree
2
2
Electrostatic discharge (IEC/EN 61131-2:2008)
Air discharge (Level 3)
kV
8
8
Contact discharge (Level 2)
kV
4
4
Electromagnetic fields (IEC/EN 61131-2:2008)
80-1000 MHz
V/m
10
10
1.4 - 2 GHz
V/m
3
3
2 - 2.7 GHz
V/m
1
1
Radio interference suppression (SWD)
EN 55011 Class A
EN 55011 Class A
Burst (IEC/EN 61131-2:2008, Level 3)
CAN/DP bus cable
kV
1
1
SWD cables
kV
1
1
Radiated RFI (IEC/EN 61131-2:2008, Level 3)
10
10
Technical data
139
MN05006002Z-EN
Ambient climatic conditions
Operating ambient temperature (IEC 60068-2)
°C
–25 - +60
–25 - +60
Condensation
prevent with suitable measures
Storage
°C
–30 - 0
–30 - 70
relative humidity, non-condensing (IEC/EN 60068-2-30)
%
5 - 95
5 - 95
SWD network
Station type
SWD station (slave)
Setting transfer rate
automatic
SWD status (Ready-LED)
LED
green/orange
Connections
Plug, 8-pole
Plug connectors
External device plug SWD4-8SF2-5
Current consumption (15 V SWD supply)
Operating Mode
Manual/automatic mode
no
Yes
Setting
–
Rotary switch
Connection auxiliary contact
Number
2
2
Rated voltage
1)
U
e
V DC
15
15
Input current at 1 signal, typical
mA
3
3
Potential isolation
no
no
Cable length
m
F 2.8
F 2.8
Connection Type
Push-In
Push-In
Terminal capacity
solid
mm
2
0.2 - 1.5 (AWG 24 - 16)
flexible with ferrule
2)
mm
2
0.25 - 1.5
0.25 - 1.5
Instructions
1) Own supply.
2) Minimum length 8 mm.
DIL-SWD-32-001
DIL-SWD-32-002

140
MN05006002Z-EN

MN05006002Z-EN
141
Index
Actuators ............................................................15
AUX supply voltage
Cable protection .....................................49, 53
Miniature circuit-breaker 24 V DC ..........49, 53
Terminal capacities of the cables ..................48
B
Blade terminal
Figure ...........................................................85
Fitting to the beginning of the cable .............88
Fitting to the end of the cable ......................89
Installation ...................................................85
C
Cable
-plug, configuration ......................................84
-socket, configuration ...................................83
CAN-LED ...........................................................115
Diagnostics .................................................115
CANopen Gateway ..............................................14
CANopen network
Connecting ...................................................50
Component adapter for ribbon/round cable .........96
Config.-LED .......................................................116
Diagnostics .................................................116
Configuration
Cable plug ....................................................84
Cable socket .................................................83
SWD flat band conductor ..............................25
SWD round cable ..........................................26

Index
MN05006002Z-EN
142
Connecting
CANopen .....................................................50
Digital inputs and/or outputs ........................56
Enclosure bushing ........................................79
Field bus ......................................................50
M22-SWD... .................................................59
Power feeder module ...................................51
PROFIBUS-DP ...............................................50
Supply voltage POW .....................................52
SWD contactor modules ...............................58
SWD I/O module ..........................................55
SWD network .........................................50, 54
Switch cabinet bushing ................................72
Connecting digital inputs and/or outputs .............56
Connecting POW, supply voltage ........................52
Connecting the SWD connection cable ................82
Connection
AUX .......................................................48, 52
POW ......................................................48, 52
SWD connection cable ..................................82
SWD gateway ..............................................47
SWD ribbon cable ........................................82
SWD round cable .........................................82
Contactor coils
Wattage/current consumption ......................35
Contactors
Use of contactors .........................................45
Control voltage for contactors
Supply ..........................................................76
Current consumption
15 V SWD supply voltage ...........................123
24 V SWD control voltage U
AUX
Device master file (GSD) ....................................108
Diagnostics
CAN-LED ....................................................115
Config.-LED ................................................116
DP-LED .......................................................114
Ready-LED .................................................120
DIP switches ........................................................46

Index
143
MN05006002Z-EN
DP-LED ..............................................................114
Diagnostics .................................................114
Earth-free Operation ..........................................100
Earthing of inactive parts .....................................99
EDS description file ............................................108
Electrical load
Calculation ...................................................31
Electrical load, calculation
In the contactor supply .................................35
In the device supply ......................................32
Electromagnetic compatibility, EMC .....................99
Electronic Data Sheet ........................................108
EMC = Electromagnetic Compatibility .................99
EMC Directive ......................................................99
EMC planning
Required prior to installation ........................99
Enclosure bushing
Connecting ...................................................79
In the surface mounting enclosure ................79
Socket/plug ..................................................18
Engineering
With the SWD-Assist ....................................27
Exclusion of liability ...............................................6
External device plug
Installation ...................................................91
External device plug, link for ...............................18
External power supply
F
Field bus
Connecting ...................................................50
Field bus master
Configuration ...............................................28
Field bus side
Configuration ...............................................28

Index
MN05006002Z-EN
144
Function elements
Maximum current consumption ....................33
GSD, device master file .....................................108
Holding current ...................................................35
I
Installation of SWD components
Safety rules ..................................................45
Installation, SWD components (sequence) ...........45
L
LED indication
After the creation of a new target configuration
22
LED indication, SWD gateway
After changeover to the SWD mode “Normal” .
22, .............................................................112
After switching on with a new number of
slaves ...........................................................21
In the case of a changed actual
configuration .............................................109
In the case of a project configurationdeviation
Link for device plug, bottom/front .......................18
M22-SWD base fixing ..........................................64
M22-SWD front mount
Layout ..........................................................62
M22-SWD function element
Installation ...................................................63
M22-SWD… function elements
Connecting ..................................................59
Illustration ...................................................60

Index
145
MN05006002Z-EN
Mounting
Blade terminal ..............................................85
External device plug .....................................91
SWD gateway ...............................................46
SWD I/O module ...........................................46
SWD power feeder module ...........................46
Mounting rails ...................................................100
N
Network termination
For an installed ribbon cable ........................97
Network termination for an installed round cable 98
Network terminator .............................................17
Operation, earth-free .........................................100
Parts, earthing of inactive ....................................99
Passive SWD components
Functional description ..................................16
Overview ......................................................16
PCB base/device plug front
Using a link ..................................................80
PE connection ....................................................100
Pick-up current ....................................................35
POW supply voltage
Cable protection .....................................49, 53
Capacitive behavior ......................................50
Miniature circuit-breaker 24 V DC ..........49, 53
Terminal capacities of the cables ..................48
Power consumption, 24 V SWD
control voltage U
AUX
.........................................124
Power feeder module ..........................................17
Cables terminal capacity (AUX) ....................52
Cables terminal capacity (POW) ....................52
Connecting ...................................................51
Connecting the AUX supply voltage .............52
PROFIBUS-DP
Connecting bus ............................................50
Gateway .......................................................14

Index
MN05006002Z-EN
146
Ribbon/round cable, component adapter .............96
Round cable, network termination for an
installed ..............................................................98
Sensors ...............................................................15
Simultaneity factor k ...........................................35
Status messages, SWD gateway
After creation of the target configuration ...107
After initial switch-on
Supply voltage
Surface mounting enclosure M22-I…
PCB ..............................................................18
SWD accessories .................................................18
SWD components
Sequence of installation ...............................45
SWD elements ..............................................14
SWD slaves ..................................................14
SWD contactor modules ......................................14
Connecting ..................................................58
SWD coupling
Using for ribbon cables ................................95
SWD coupling unit
SWD elements
Definition .....................................................14
SWD external device plug
Crimping in the crimper ................................93
Sufficient cable length ..................................91
With correct polarity, illustration ..................92
SWD flat band conductor
Cable resistance ...........................................36
Configuration ...............................................25
SWD function elements .......................................15

Index
147
MN05006002Z-EN
SWD gateway
Connecting ...................................................47
Diagnostics, POW-LED ................................113
LED indication -> LED indication
Mounting .....................................................46
Status .........................................................113
Status messages -> status messages
Switching on -> switching on
SWD I/O module ..................................................15
Connecting ...................................................55
Diagnostics Ready-LED ...............................120
Diagnostics SWD-LED .................................118
EU5E-SWD-4D2R ..........................................57
EU5E-SWD-4D4D .........................................56
EU5E-SWD-8DX ............................................56
Mounting .....................................................46
SWD mode, normal ...........................................108
SWD network
Check before commissioning ......................104
Commissioning ...........................................103
Configuration ...............................................28
Connecting .............................................50, 54
Creating a project configuration .................108
Features .......................................................19
Master function ............................................11
Physical properties .......................................25
Slave function ...............................................11
Termination ..................................................17
Valid target configuration, creating ..............28
SWD power feeder module
Mounting .....................................................46
SWD PROFIBUS-DP gateway ................................29
SWD ribbon cable
Connecting ...................................................82
Fitting with plugs .........................................85

Index
MN05006002Z-EN
148
SWD round cable
Cable resistance ...........................................36
Configuration ...............................................26
Connecting ..................................................82
Connection to the printed circuit board ........69
Direct connection .........................................66
Incoming ......................................................67
Outgoing ......................................................67
Pluggable connection ...................................67
SWD slave
Status messages after initial switch-on 105, 107
SWD slave data, organization ..............................24
SWD slaves
Addressing when there is a change ..............23
Automatic addressing ..................................21
Brief overview ..............................................14
Definition .....................................................14
SWD station address ...........................................14
SWD topology
Dimensioning the power supply ...................31
Planning ......................................................27
Project planning help system ........................12
SWD-Assist .........................................................12
Engineering ..................................................27
SWD-LED ..........................................................117
Diagnostics ................................................117
Switch cabinet bushing
Connecting ..................................................72
Connections .................................................75
With a round socket .....................................73
With round plug ...........................................74
Switch on, SWD gateway
In the case of a changed actual
configuration .............................................109
In the case of a changed project
configuration .............................................110

Index
149
MN05006002Z-EN
Target group .........................................................6
Topology, SWD ....................................................16
Voltage Drop .......................................................36
Voltage drop
Calculation ...................................................31
Document Outline
- Title
- Imprint
- Safety Instructions
- Contents
- About This Manual
- 1 System description SmartWire- Darwin
- 2 Engineering
- 3 Installation
- Mechanical Mounting
- Electrical Installation
- Connecting the SWD connection cable
- Connecting the SWD ribbon cable
- Connecting SWD round cables
- Connect round socket to SWD round cable
- Connect round plug to the SWD round cable
- Fitting SWD ribbon cable with plugs
- Fitting the blade terminal SWD4-8MF2
- Fitting external device plugs SWD4-8SF2-5
- Coupling for an 8-pole blade terminal
- Using the ribbon/round cable adapter
- Using network termination
- Electromagnetic compatibility (EMC)
- SWD system for safety- related applications
- 4 Placing into operation
- 5 What Happens If …?
- Appendix
- Technical data
- Current consumption 15 V SWD supply voltage (device supply)
- Power consumption/current consumption 24 V SWD control voltage UAUX
- Gateways, Power Feeder Modules
- I/O modules
- M22-SWD connections
- Network termination, switch cabinet bushings
- Enclosure bushings plug, socket
- Coupling, plug
- DIL contactor modules
- Technical data
- Index
Wyszukiwarka
Podobne podstrony:
Charakterystyka trójfilarowej konstrukcji nowego systemu
10 faktów nt. nowego systemu dowodzenia Siłami Zbrojnymi RP (MON)
opis Control System XControl XC XV
wstęp opis złoża i systemu
4 PROFESJONALNE SYSTEMY BUKMACHERSKIE - OPIS, Biznes, Systemy analizy bkmacherskiej
Najczęściej zadawane pytania dotyczące nowego systemu emeryt
Opis VBA, systemy excela, makra
Opis ustawienia systemu MikroTi Nieznany
AMADEUS Opis i funkcje systemu
Budowa nowego systemu wiedzy u Comta
Opis szkolnego systemu oceniania
Opis szkolnego systemu oceniania
Opis szkolnego systemu wychowania
PATENTOWY OPIS C P STEINTZMENT SYSTEM OF ELECTRICAL DISTRIBUTION
Opis oprogramowania wspomagające analizę komponentów systemu komputerowego, Prace kontrolne
opis systemu blueVendo Tour
więcej podobnych podstron