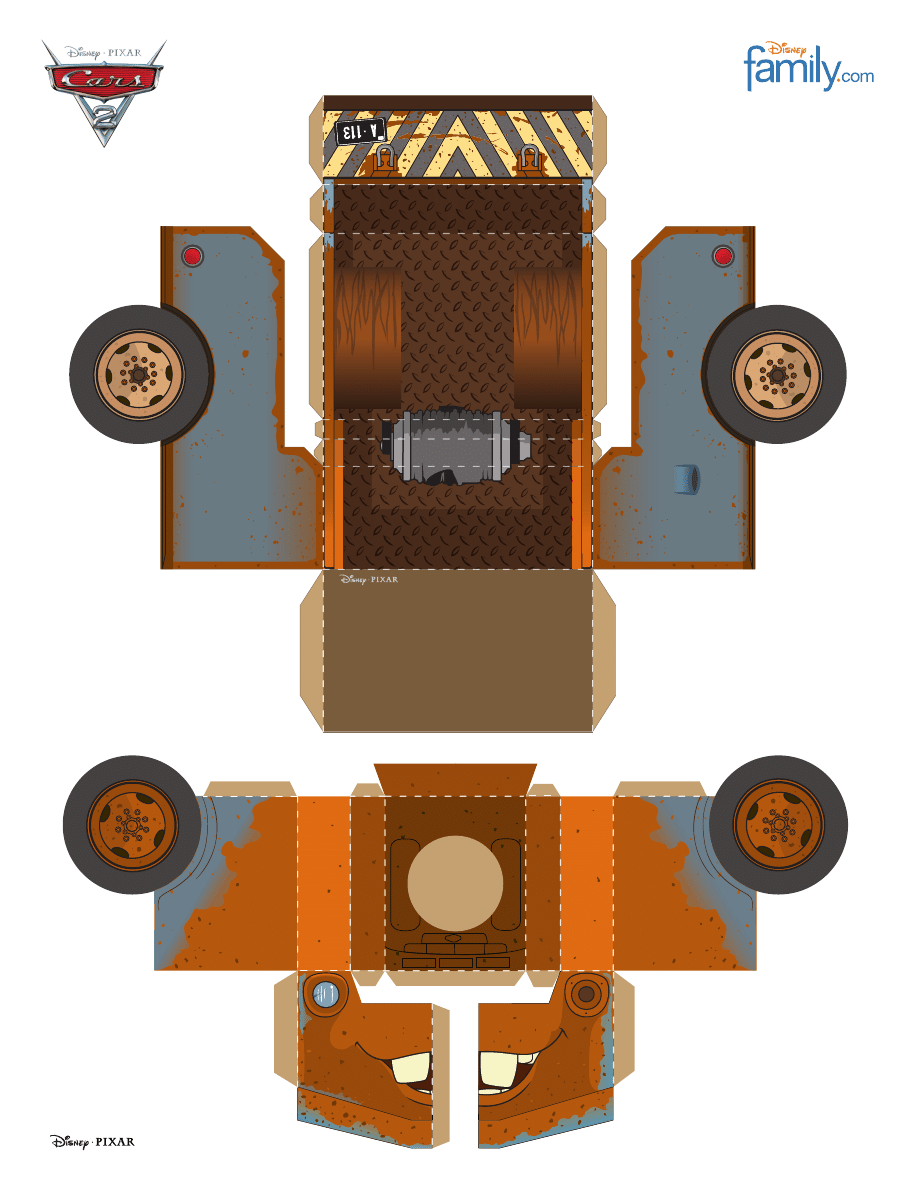
Hood
Bed
A
A
B
B
C
C
D
D
E
E
F
F
1
A
A
B
C
D
D
E
E
2
2
page 1 of 4
©
©
Tow Mater Papercraft
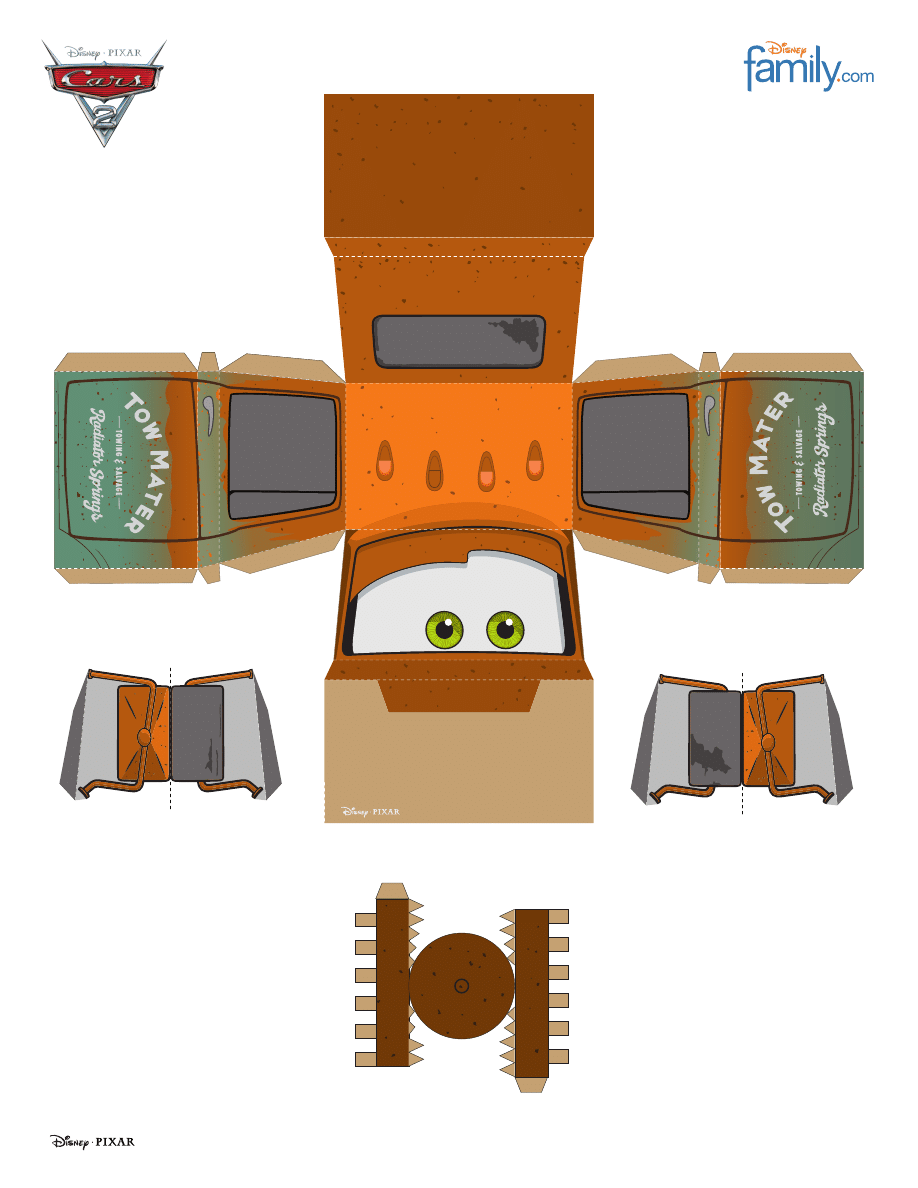
Roof
Radiator
Side Mirror
Side Mirror
1
2
A
A
A
A
B
B
B
B
C
C
C
C
page 2 of 4
©
©
Tow Mater Papercraft
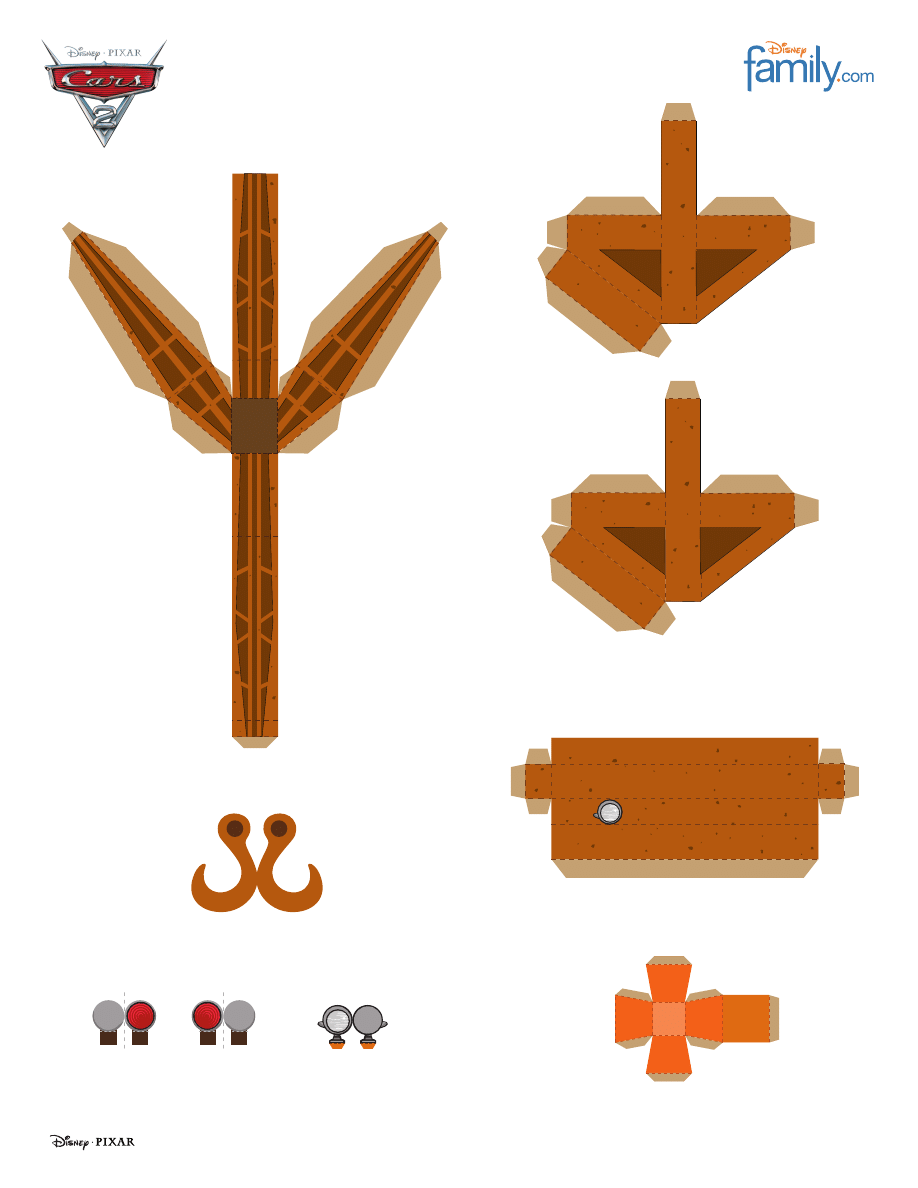
Tail Lights
Roof Reflector
Emergency Light
Recovery Boom
Hook
Hitch Bar
Hitch Posts
C
A
A
C
B
B
D
D
D
D
page 3 of 4
©
Tow Mater Papercraft

1. Print the template on regular paper or cardstock and cut out the pieces. Make all folds along dotted lines.
2. Starting with Mater’s hood, use glue or double-sided tape to attach all tabs to their corresponding pieces in
alphabetical order.
3. Repeat step 2 with Mater’s roof and bed.
4. Attach Mater’s bed to his roof by securing the #1 panels, then attach his hood to his roof by securing all #2 tabs.
5. Build Mater’s hitch posts, and attach them to the raised part of Mater’s bed, just behind his rear window.
6. Build Mater’s hitch bar, and mount it on top of his hitch posts. The light on the bar should be on Mater’s left
side facing the back.
7. Build Mater’s recovery boom, and mount it on Mater’s bed where the flat part meets the raised part. Be sure
that the shaded panel is the one you use to secure the recovery boom to Mater’s bed.
8. Fold each of Mater’s side mirrors in half along the dotted line, then, without gluing the tabs, secure with glue
or double-sided tape so the design is two-sided. Butterfly the tabs outward, and use them to attach the side
mirrors to the front of Mater’s side windows. The orange side of each mirror should face forward.
9. Build the emergency light, and attach it to the center of the hitch bar. Be sure to place it on top of the hitch bar
with the wider side down.
10. Fold the tail lights and roof reflector in half, then secure each part with glue or double-sided tape. Use the tabs
to attach these parts to Mater’s body. The roof reflector should go on the right side of Mater’s hitch bar. The
tail lights should be placed on the back of Mater’s bed – one on the left and one on the right.
11. Build Mater’s radiator and place it on his hood where indicated.
12. Fold the hook in half and secure with glue or double-sided tape. Punch a hole in the hook where indicated.
Use brown string to hang the hook from the tip of Mater’s boom recovery.
13. Finally, hang two more brown strings, one from each end of Mater’s hitch bar to the tip of his boom recovery.
page 4 of 4
©
Tow Mater Papercraft
Document Outline
Wyszukiwarka
Podobne podstrony:
lady and tramp lady cutie papercraft printable 0112
lady and tramp tramp cutie papercraft printable 0112
printable
KSIĘGA V - Dobra Doczesne Kościoła(1), Ecclesia Mater
mater. - wskaźniki, chemia, materiały do lekcji
mater białka instrukcja wykonania doświadczenia
mater uzup do zwartosci
dr sc tow
Cw4 tow
Gaude Mater Polonia
MATER DOLOROSA, OPOWIASTKI
Gaude Mater SAB
mater, PWR, MiBM WME, P Materiały
tow-wyk4, Logistyka, rok2, towarnoznastwo, wyklady
system oceny zgodnoÂci, Szkoła Przemek, Zarządzanie bezpieczeństwem pracy dr.krauze, FW ZZIP 12 Zar
GAUDE MATER POLONIA
nauka o mater
wytrzymałość mater lab 3
więcej podobnych podstron