
2009 Chevrolet Aveo
|
Aveo, Wave, G3, Barina (VIN S/T) Service Manual
|
Driver Information and Entertainment
|
Cellular, Entertainment, and Navigation
|
Specifications
| Document ID: 1733617
Fastener Tightening Specifications
Application
Specification
Metric
English
Audio System Screws
6 N·m
53 lb in
Front Speaker Screws
3.5 N·m
31 lb in
Rear Speaker Screws
3 N·m
27 lb in
Back Glass Antenna Retaining Screw
3 N·m
27 lb in
© 2010 General Motors Corporation. All rights reserved.
Page 1 of 1
Document ID: 1733617
7/5/2010
http://localhost:9001/si/showDoc.do?docSyskey=1733617&pubCellSyskey=46713&pubObj...
2009 Chevrolet Aveo
|
Aveo, Wave, G3, Barina (VIN S/T) Service Manual
|
Driver Information and Entertainment
|
Cellular, Entertainment, and Navigation
|
Repair Instructions
| Document ID: 2083277
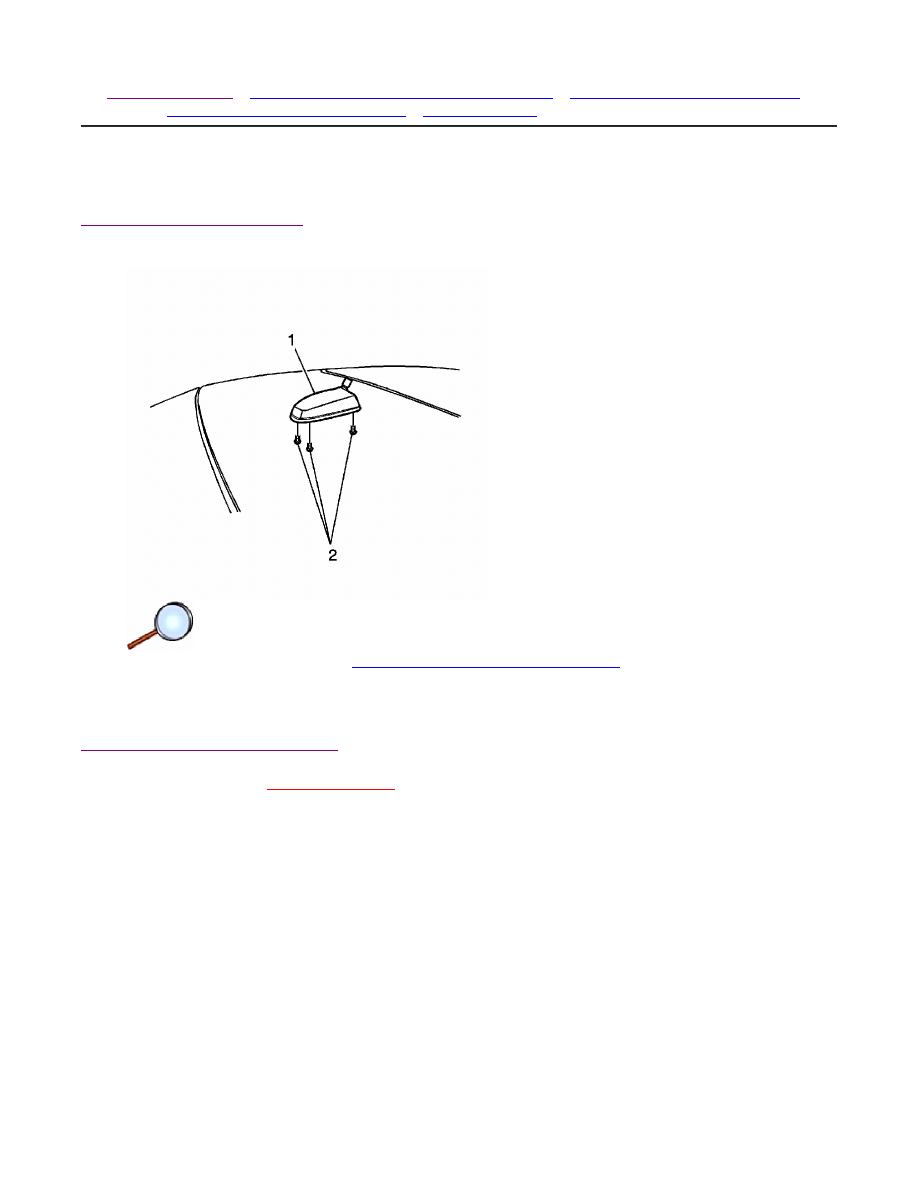
OnStar Button Assembly Replacement
Removal Procedure
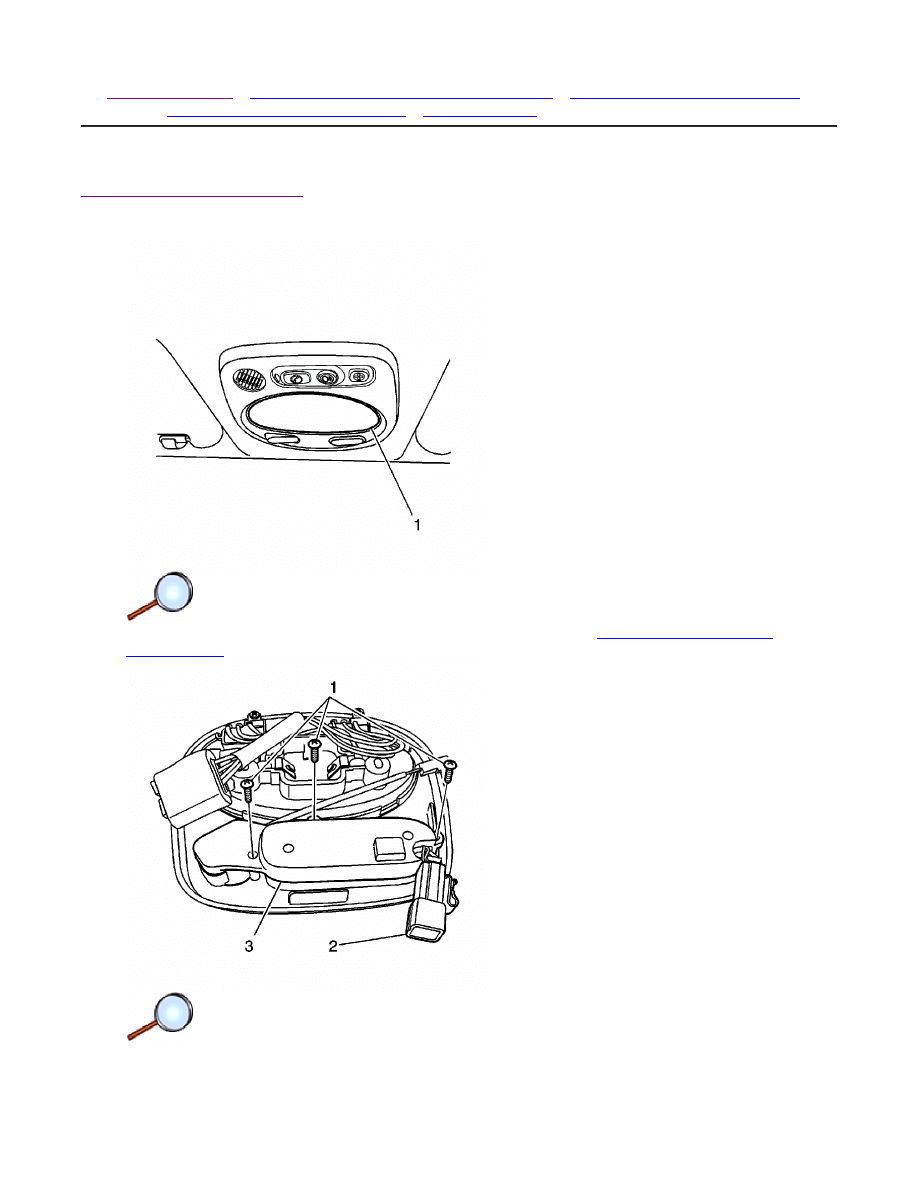
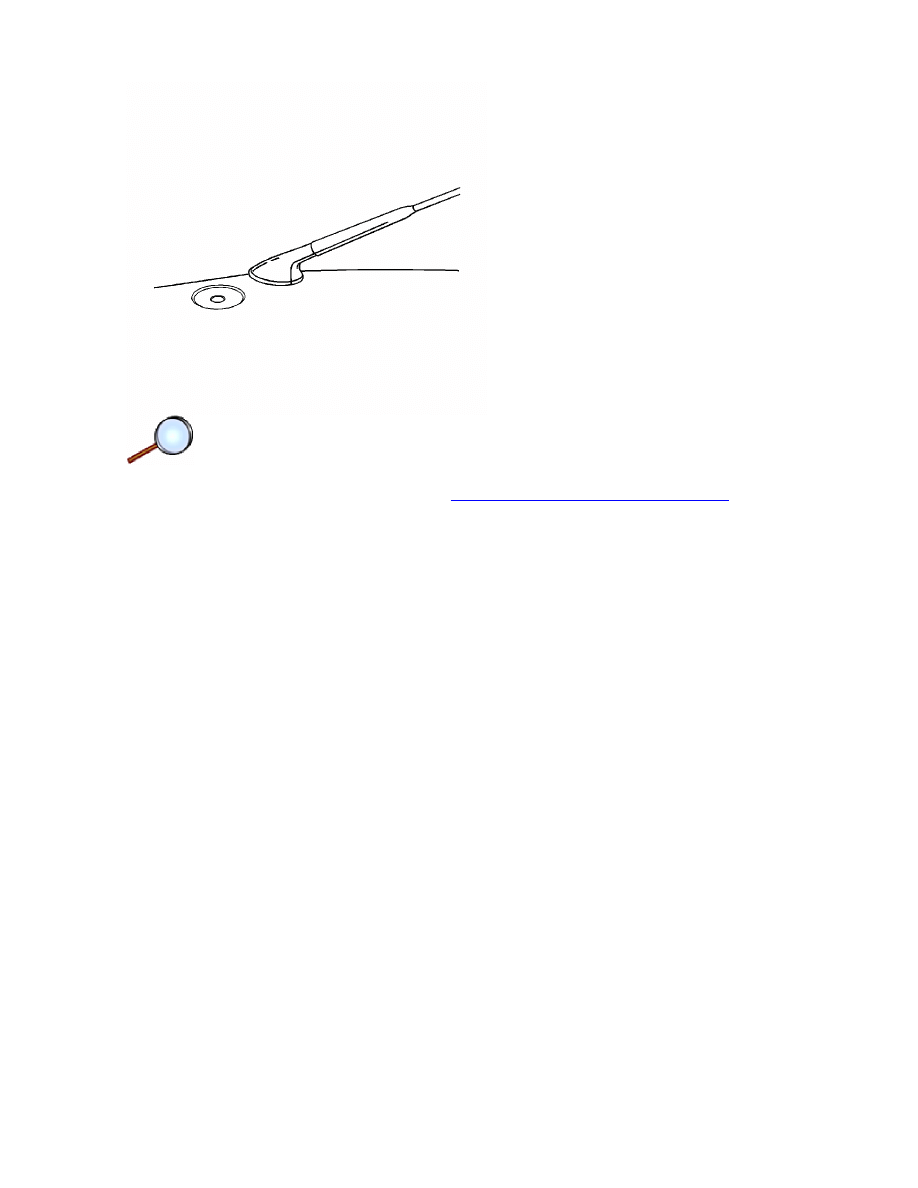
1. Remove the interior courtesy lampretaining tabs (1). Refer to
Interior Courtesy Lamp
Replacement
.
2. Disconnect the electrical connector (2).
3. Remove the screws (1) and the Onstar button cover (3) from the interior courtesy lamp.
© 2010 General Motors Corporation. All rights reserved.
Page 1 of 2
Document ID: 2083277
7/5/2010
http://localhost:9001/si/showDoc.do?docSyskey=2083277&pubCellSyskey=149693&pubO...
Installation Procedure
Caution:
Refer to
Fastener Caution
in the Preface section.
1. Install the Onstar button cover (3) and the screws (1) to the interior courtesy lamp and
tighten to 2.5 N·m (22 lb in).
2. Connect the electrical connector (2).
3. Install the interior courtesy lamp (1). Refer to
Interior Courtesy Lamp Replacement
.
Page 2 of 2
Document ID: 2083277
7/5/2010
http://localhost:9001/si/showDoc.do?docSyskey=2083277&pubCellSyskey=149693&pubO...
2009 Chevrolet Aveo
|
Aveo, Wave, G3, Barina (VIN S/T) Service Manual
|
Driver Information and Entertainment
|
Cellular, Entertainment, and Navigation
|
Repair Instructions
| Document ID: 2083320
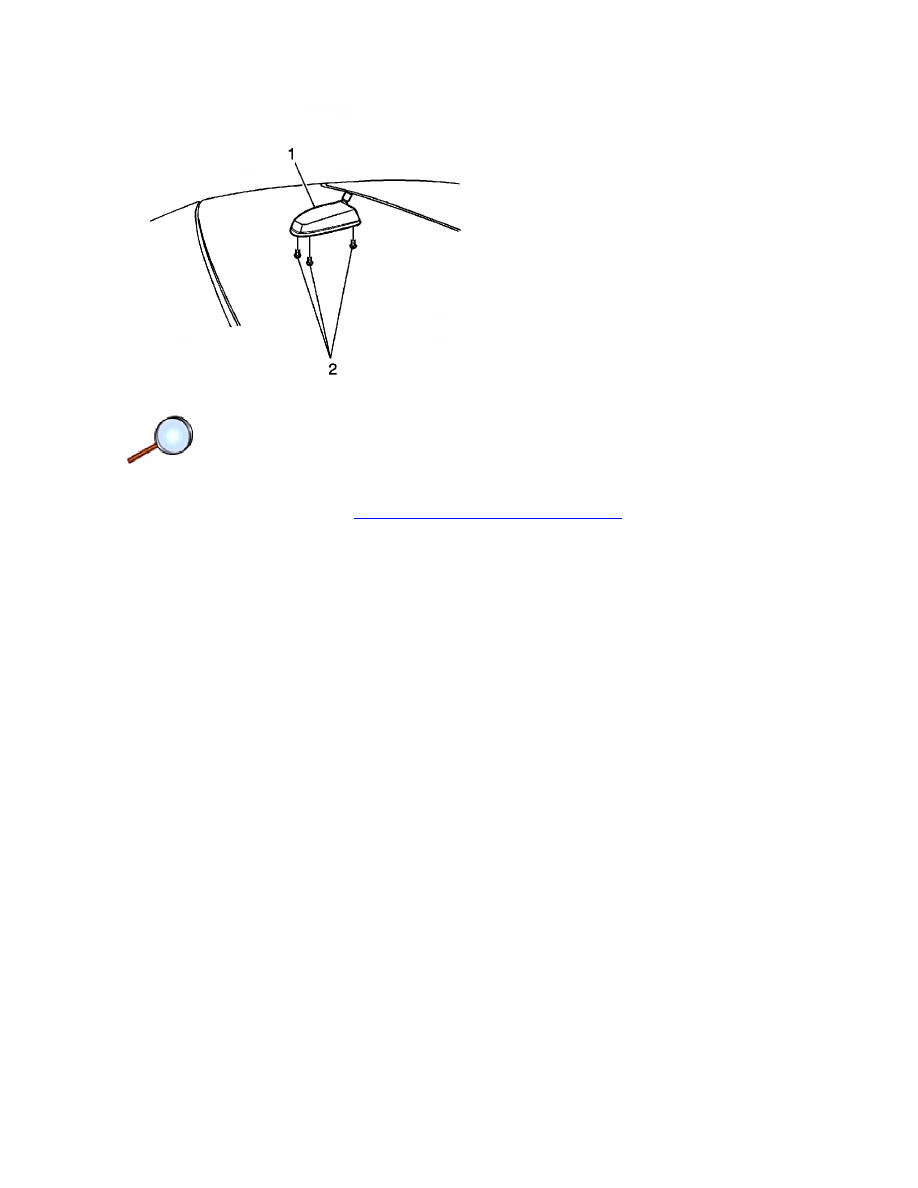
Mobile Telephone Microphone Replacement
Removal Procedure
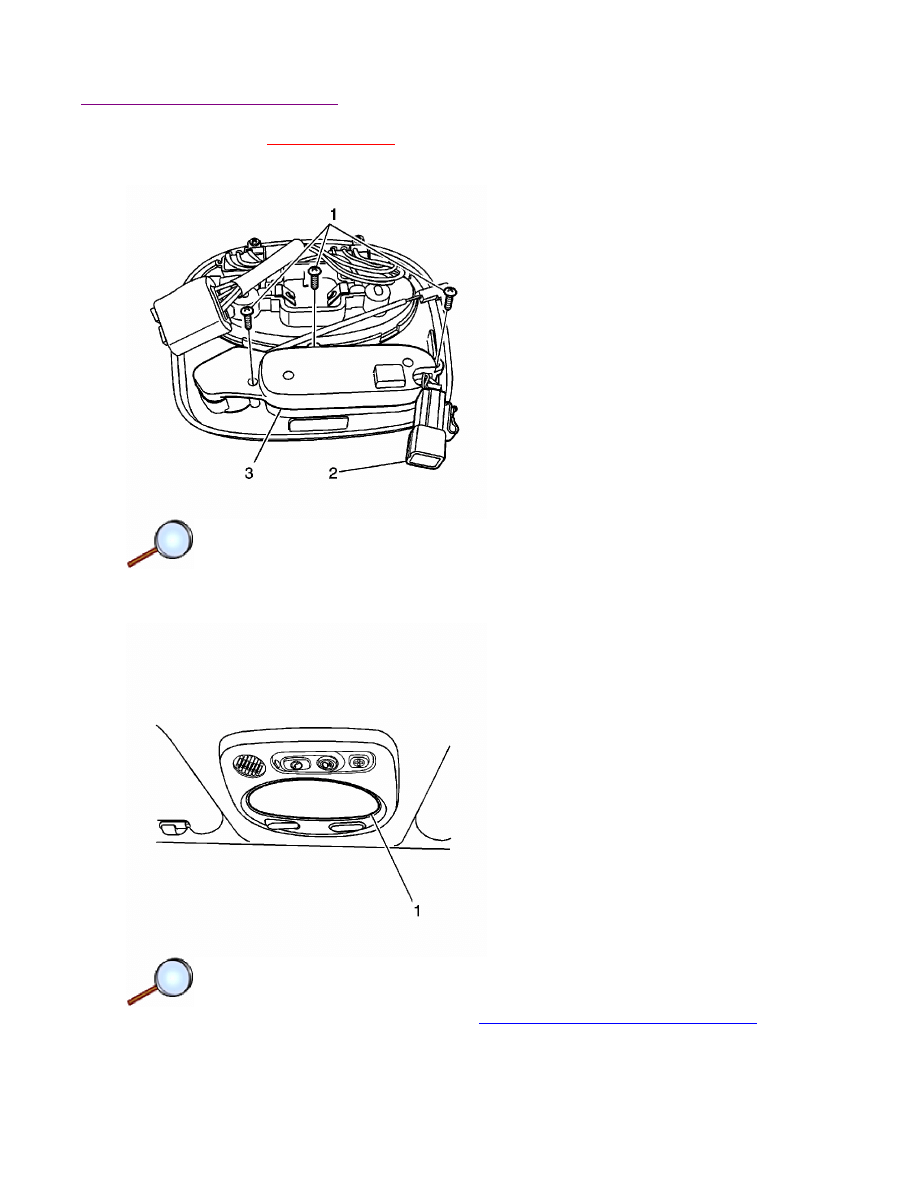
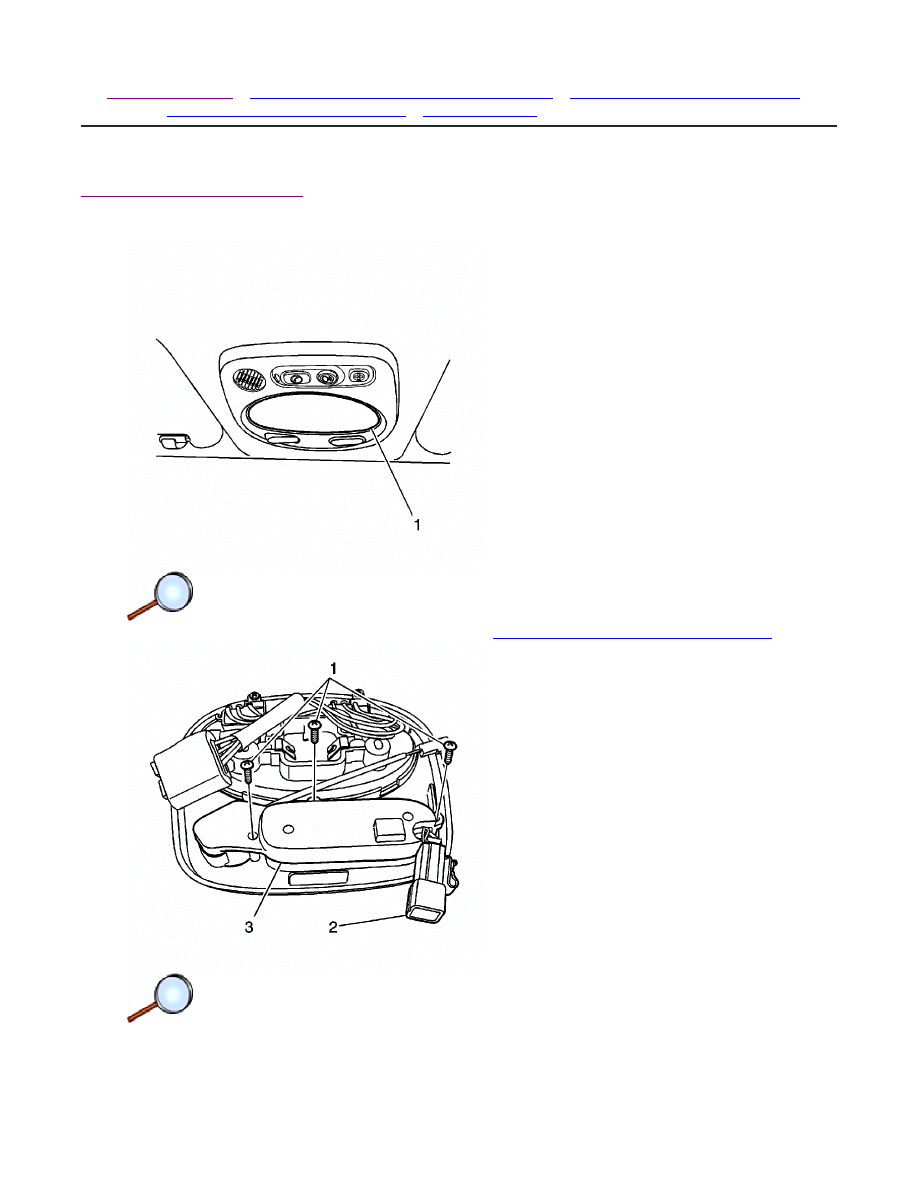
1. Remove the interior courtesy lamp (1). Refer to
Interior Courtesy Lamp Replacement
.
2. Disconnect the electrical connector (2).
3. Remove the screws (1) and the OnStar button cover (3) from the interior courtesy lamp.
4. Remove the OnStar cellular microphone from the interior courtesy lamp.
© 2010 General Motors Corporation. All rights reserved.
Page 1 of 2
Document ID: 2083320
7/5/2010
http://localhost:9001/si/showDoc.do?docSyskey=2083320&pubCellSyskey=149734&pubO...
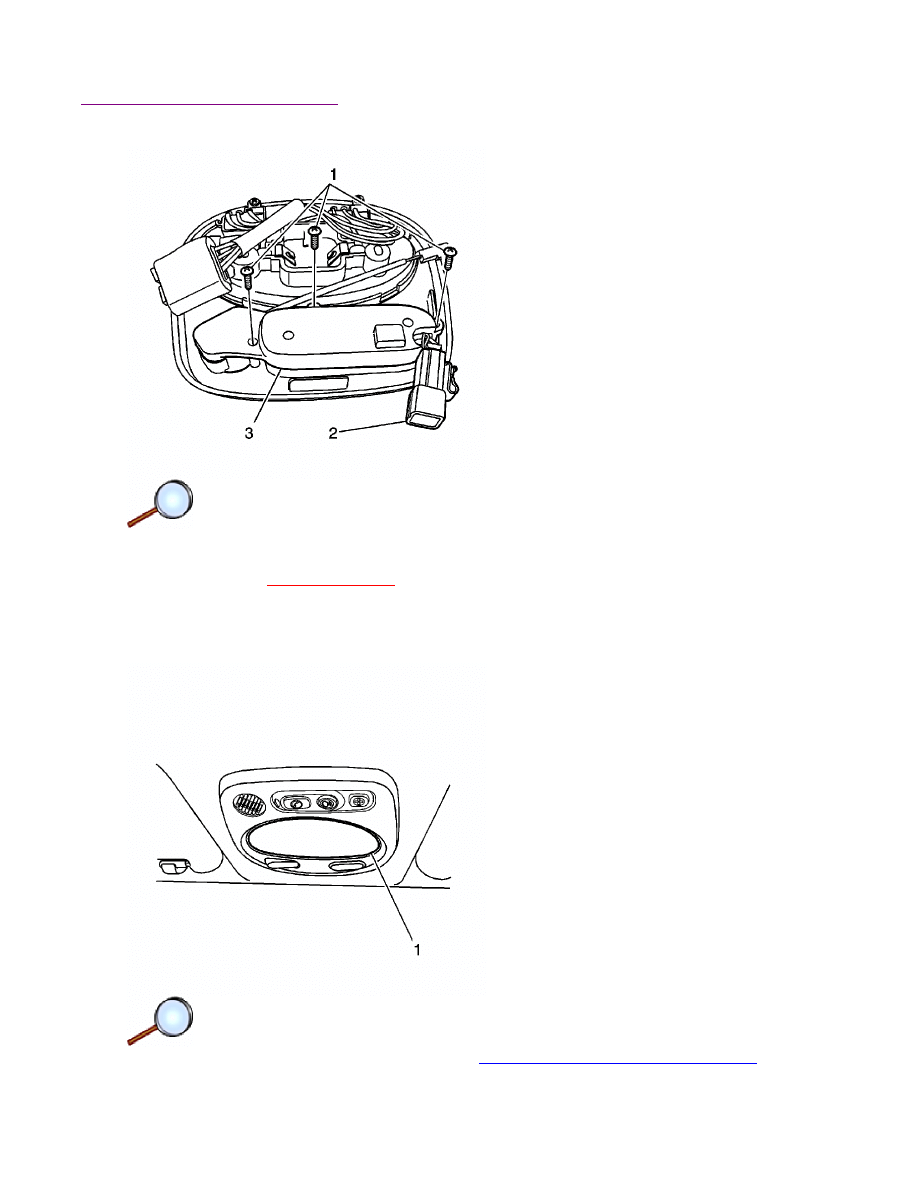
Installation Procedure
1. Install the OnStar cellular microphone on the interior courtesy lamp.
Caution:
Refer to
Fastener Caution
in the Preface section.
2. Install the OnStar button cover (3) and the screws (1) to the interior courtesy lamp and
tighten to 2.5 N·m (22 lb in).
3. Connect the electrical connector (2).
4. Install the interior courtesy lamp (1). Refer to
Interior Courtesy Lamp Replacement
.
Page 2 of 2
Document ID: 2083320
7/5/2010
http://localhost:9001/si/showDoc.do?docSyskey=2083320&pubCellSyskey=149734&pubO...
2009 Chevrolet Aveo
|
Aveo, Wave, G3, Barina (VIN S/T) Service Manual
|
Driver Information and Entertainment
|
Cellular, Entertainment, and Navigation
|
Repair Instructions
| Document ID: 2083321
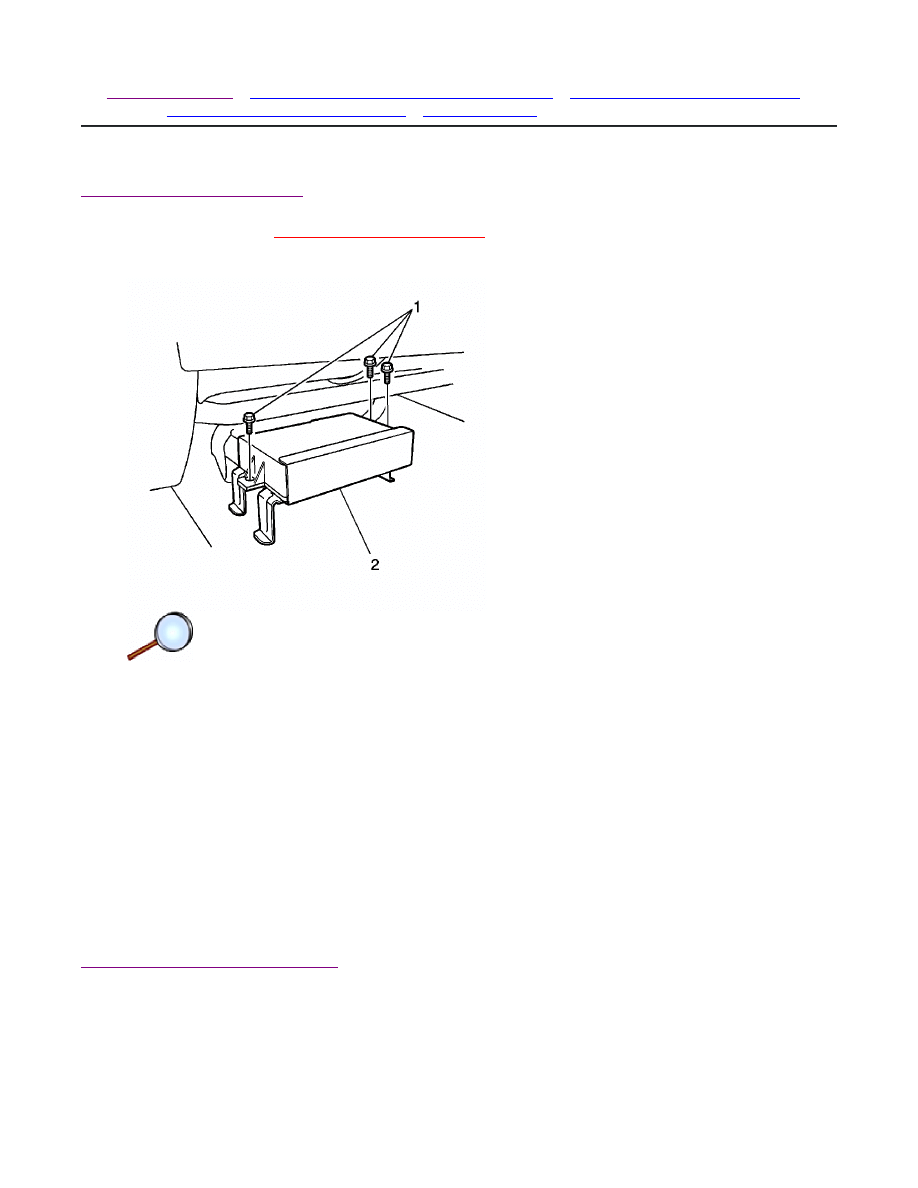
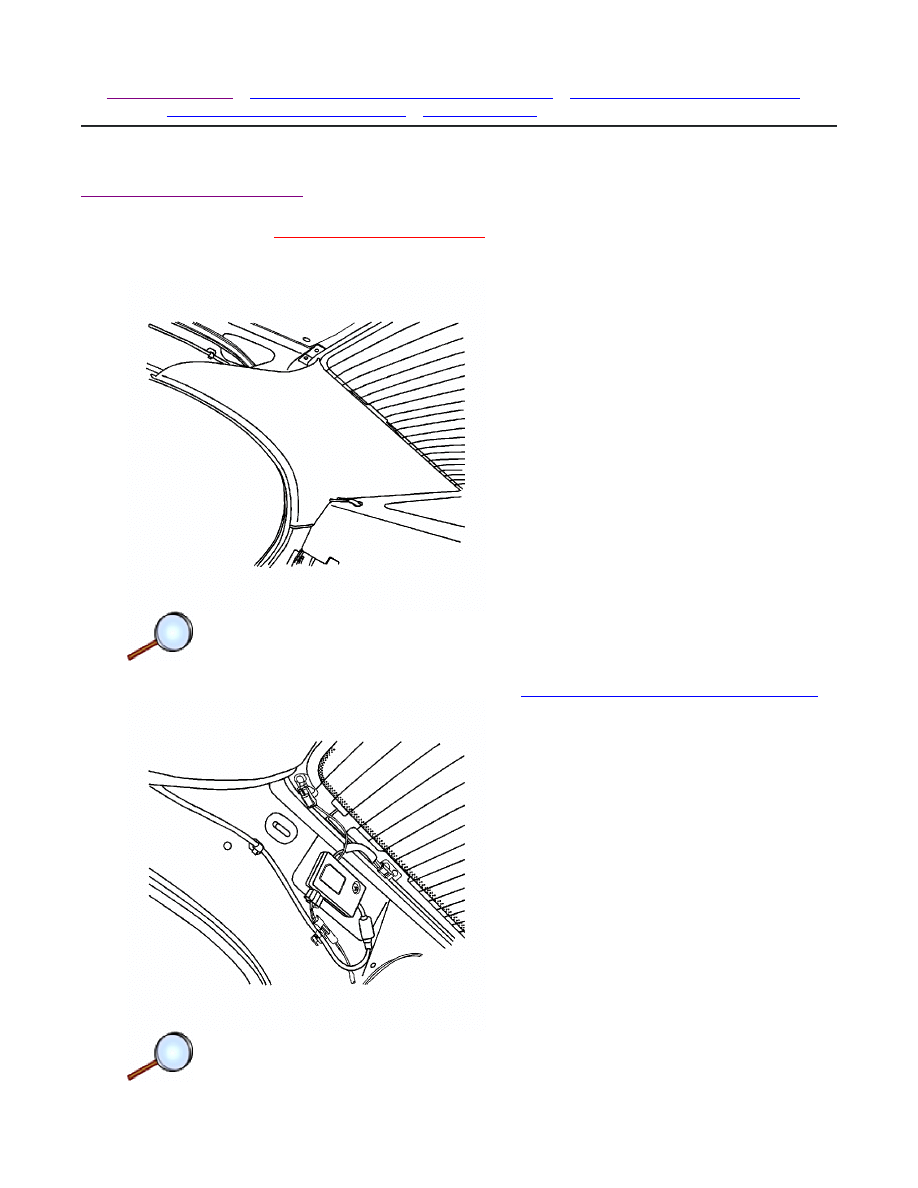
Communication Interface Module Replacement
Removal Procedure
Warning:
Refer to
Battery Disconnect Warning
in the Preface section.
Note: The vehicle communication interface module (VCIM) has a specific set of unique
numbers that tie the module to each vehicle. These numbers, the 10-digit station
identification and the 11-digit electronic serial number, are used by the National Cellular
Network and OnStar® to identify the specific vehicle. Because these numbers are tied to the
vehicle identification number of the vehicle, you must never exchange these parts with those
of another vehicle.
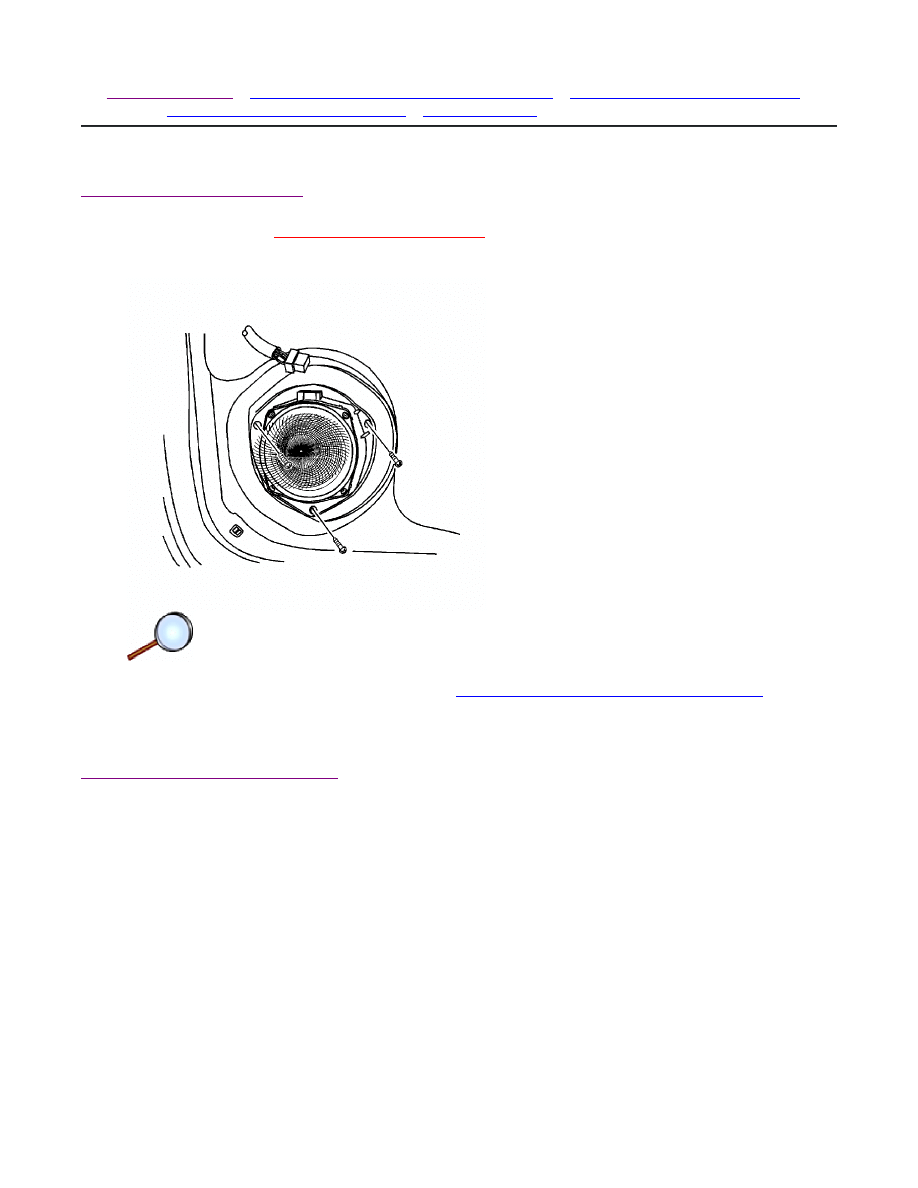
1. Disconnect the battery ground cable.
2. Disconnect the electrical connectors from the communication interface module which is
located on the bottom of the driver seat.
3. Slide the driver seat forward.
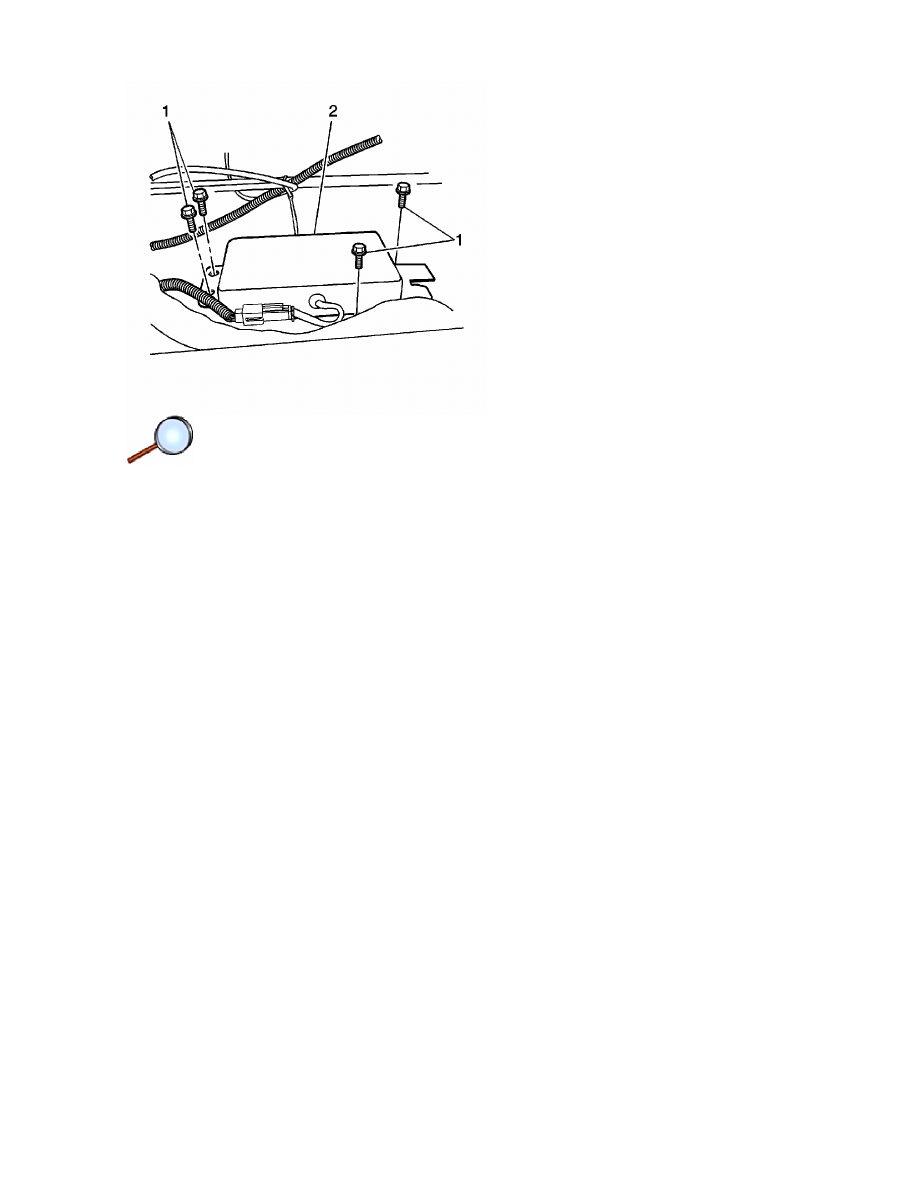
4. Remove the bolts (1) and remove the communication interface module cover (2) from the
seat rear side.
Installation Procedure
© 2010 General Motors Corporation. All rights reserved.
Page 1 of 2
Document ID: 2083321
7/5/2010
http://localhost:9001/si/showDoc.do?docSyskey=2083321&pubCellSyskey=149736&pubO...
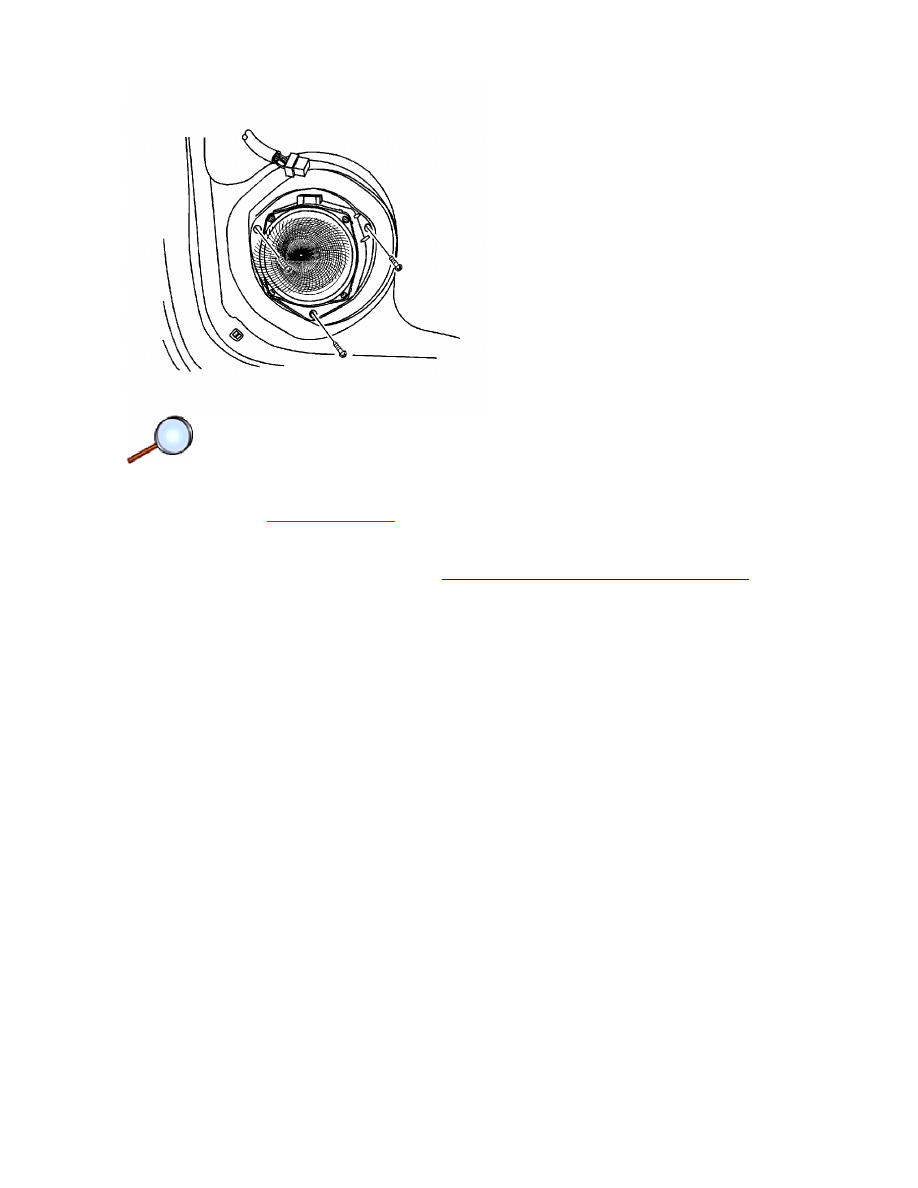
1. Position the vehicle communication interface module (2) in the vehicle.
Caution:
Refer to
Fastener Caution
in the Preface section.
2. Install the bolts (1) and tighten to 3 N·m (27 lb in).
3. Restore the driver seat position.
4. Connect vehicle communication interface module electrical connectors.
Warning:
Refer to
Battery Disconnect Warning
in the Preface section.
5. Connect the battery ground cable.
Page 2 of 2
Document ID: 2083321
7/5/2010
http://localhost:9001/si/showDoc.do?docSyskey=2083321&pubCellSyskey=149736&pubO...

2009 Chevrolet Aveo
|
Aveo, Wave, G3, Barina (VIN S/T) Service Manual
|
Driver Information and Entertainment
|
Cellular, Entertainment, and Navigation
|
Repair Instructions
| Document ID: 2083323
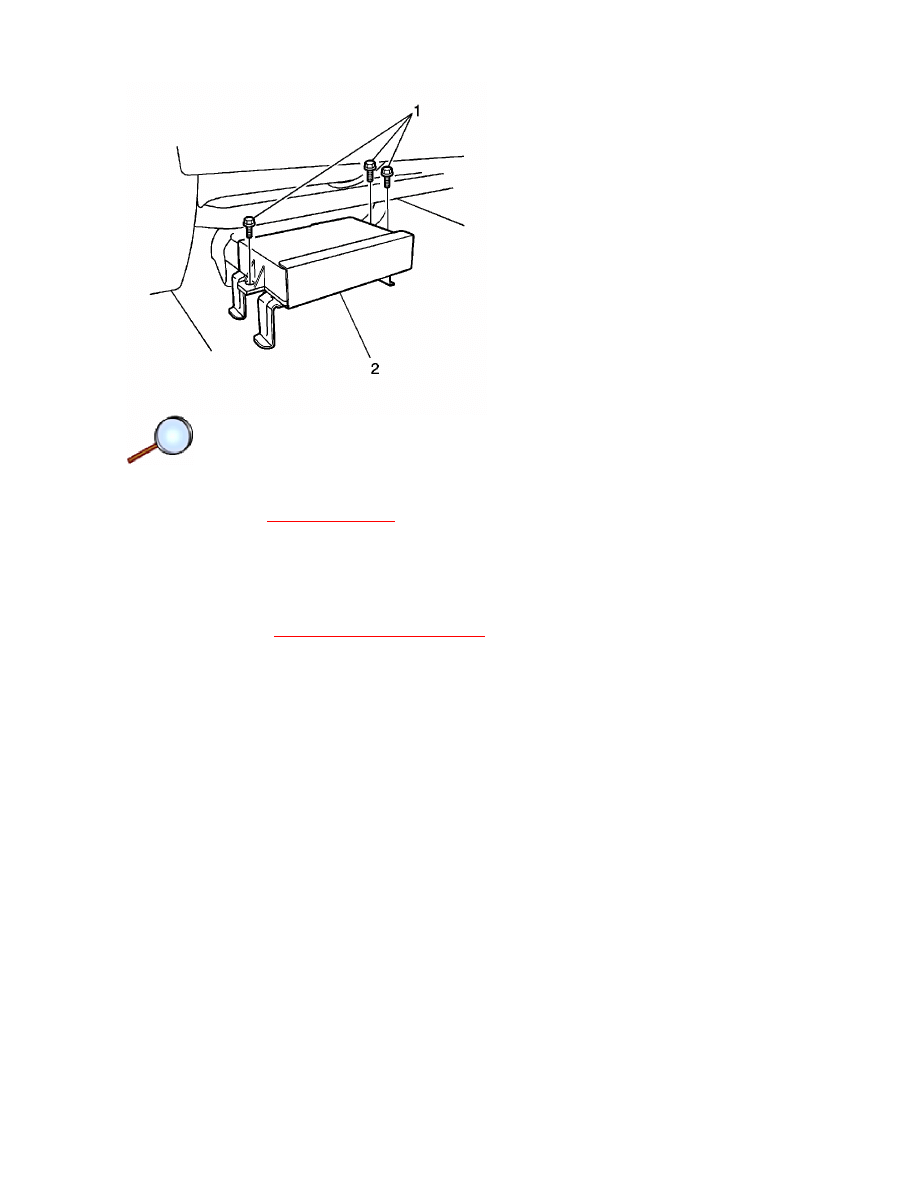
Communication Interface Module Battery Replacement
Removal Procedure
Warning:
Refer to
Battery Disconnect Warning
in the Preface section.
1. Disconnect the battery ground cable.
2. Slide the passenger seat rearward.
3. Disconnect the electrical connector from the Onstar module which is located on the bottom of
the passenger seat.
4. Remove the bolts (1) and the Onstar battery (2).
Installation Procedure
Caution:
Refer to
Fastener Caution
in the Preface section.
© 2010 General Motors Corporation. All rights reserved.
Page 1 of 2
Document ID: 2083323
7/5/2010
http://localhost:9001/si/showDoc.do?docSyskey=2083323&pubCellSyskey=149688&pubO...
1. Install the Onstar battery (2) with the bolts (1) and tighten to 3 N·m (27 lb in).
2. Restore the seat position.
3. Connect the electrical connectors.
4. Connect the negative battery cable.
Page 2 of 2
Document ID: 2083323
7/5/2010
http://localhost:9001/si/showDoc.do?docSyskey=2083323&pubCellSyskey=149688&pubO...
2009 Chevrolet Aveo
|
Aveo, Wave, G3, Barina (VIN S/T) Service Manual
|
Driver Information and Entertainment
|
Cellular, Entertainment, and Navigation
|
Repair Instructions
| Document ID: 2093383
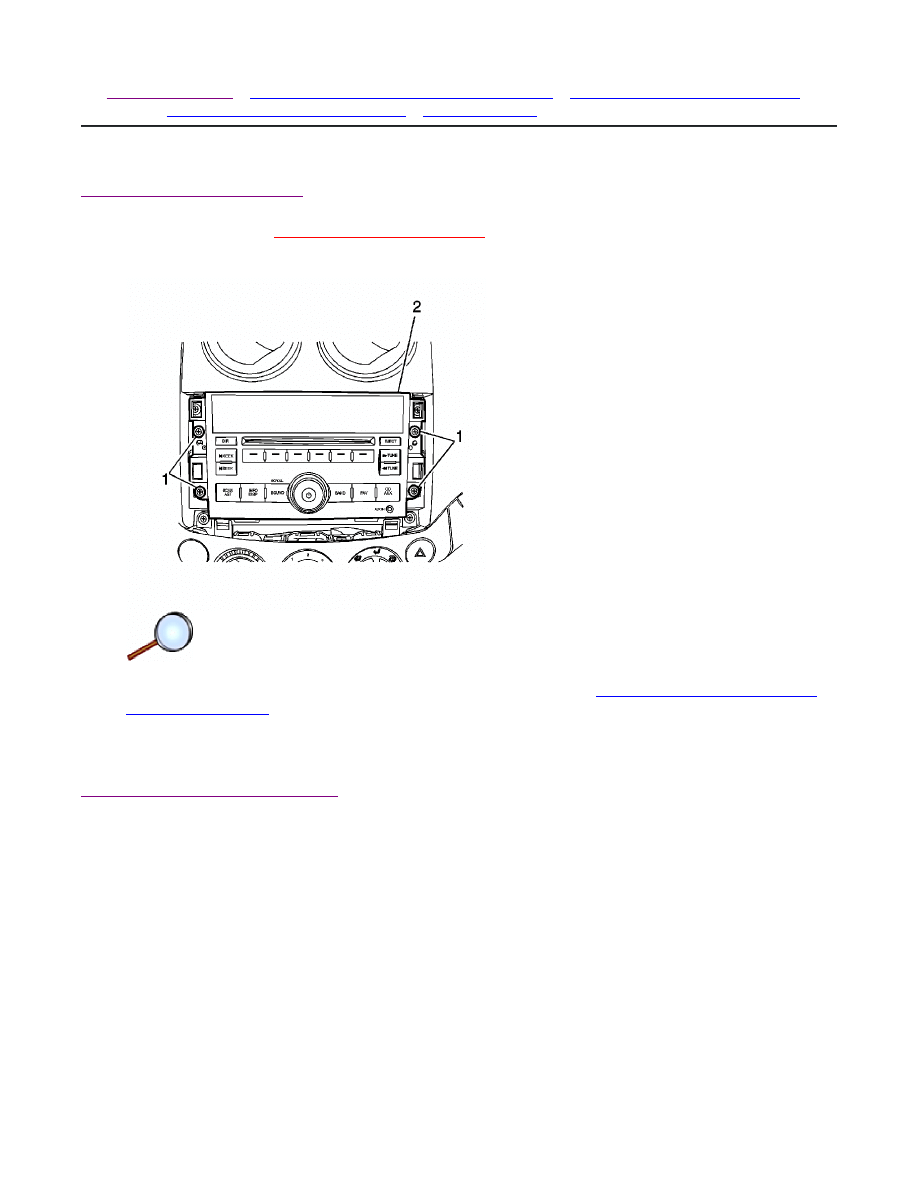
Radio Replacement (Hatchback)
Removal Procedure
Warning:
Refer to
Battery Disconnect Warning
in the Preface section.
1. Disconnect the negative battery cable.
2. Remove the instrument panel (I/P) lower trim panel. Refer to
Instrument Panel Lower Trim
Panel Replacement
.
3. Remove the screws (1) and the audio system (2).
4. Disconnect the audio system electrical connector and the antenna cable.
Installation Procedure
© 2010 General Motors Corporation. All rights reserved.
Page 1 of 2
Document ID: 2093383
7/5/2010
http://localhost:9001/si/showDoc.do?docSyskey=2093383&pubCellSyskey=46758&pubObj...

1. Connect the audio system electrical connector and the antenna cable.
Caution:
Refer to
Fastener Caution
in the Preface section.
2. Install the audio system (2) with the screws (1) and tighten to 6 N·m (53 lb in).
3. Install the I/P lower trim panel. Refer to
Instrument Panel Lower Trim Panel Replacement
.
4. Connect the negative battery cable.
Page 2 of 2
Document ID: 2093383
7/5/2010
http://localhost:9001/si/showDoc.do?docSyskey=2093383&pubCellSyskey=46758&pubObj...
2009 Chevrolet Aveo
|
Aveo, Wave, G3, Barina (VIN S/T) Service Manual
|
Driver Information and Entertainment
|
Cellular, Entertainment, and Navigation
|
Repair Instructions
| Document ID: 2083325
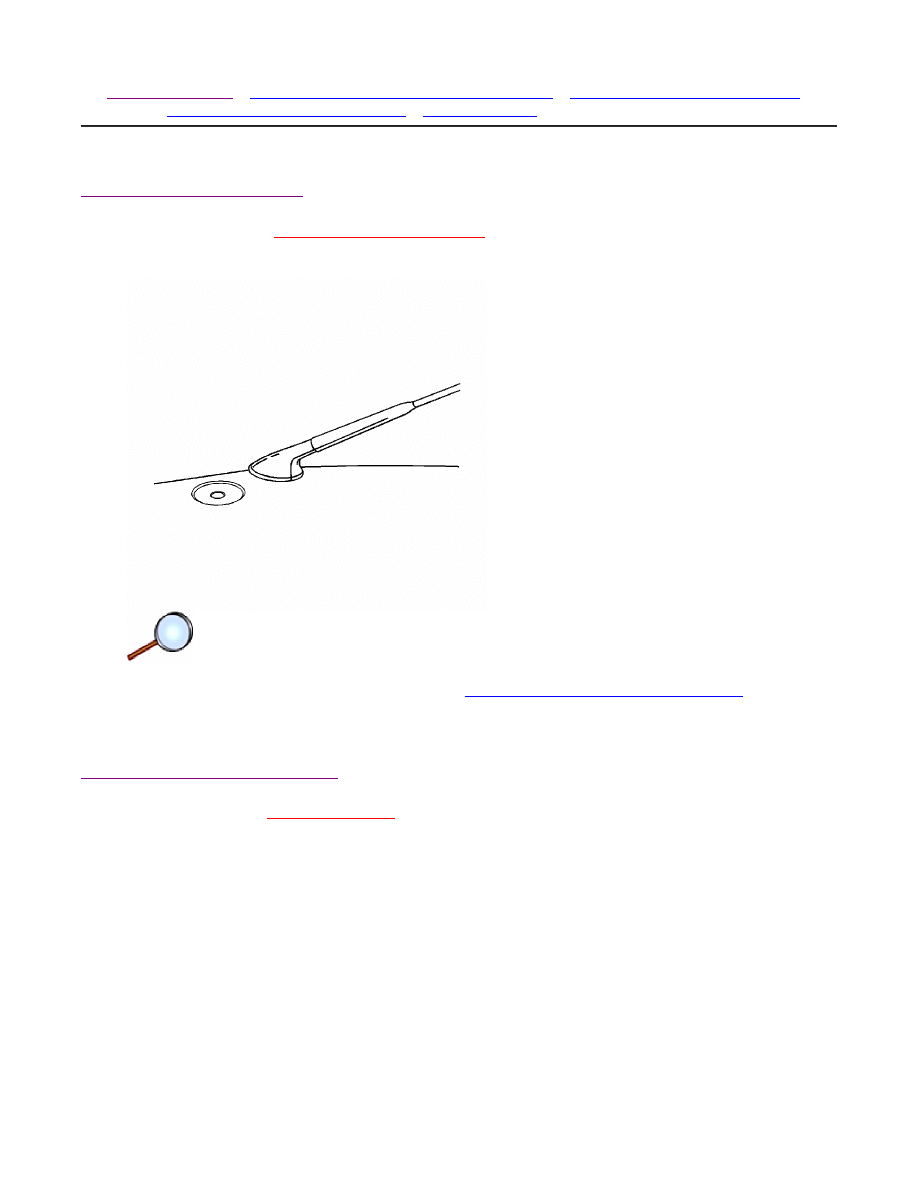
Cellular and Navigation Antenna Assembly
Replacement
Removal Procedure
1. Lower the headliner. Refer to
Headlining Trim Panel Replacement
.
2. Disconnect the connector of the antenna coax cable.
3. Remove the screws (2) and the cellular/navigation antenna (1).
Installation Procedure
Caution:
Refer to
Fastener Caution
in the Preface section.
© 2010 General Motors Corporation. All rights reserved.
Page 1 of 2
Document ID: 2083325
7/5/2010
http://localhost:9001/si/showDoc.do?docSyskey=2083325&pubCellSyskey=149666&pubO...
1. Install the cellular/navigation antenna (1) and the screws (2). Tighten to 9 N·m (80 lb in)
2. Connect the connector of the antenna coax cable.
3. Install the headliner. Refer to
Headlining Trim Panel Replacement
.
Page 2 of 2
Document ID: 2083325
7/5/2010
http://localhost:9001/si/showDoc.do?docSyskey=2083325&pubCellSyskey=149666&pubO...
2009 Chevrolet Aveo
|
Aveo, Wave, G3, Barina (VIN S/T) Service Manual
|
Driver Information and Entertainment
|
Cellular, Entertainment, and Navigation
|
Repair Instructions
| Document ID: 2093392
Radio Antenna Module Replacement (Notchback)
Removal Procedure
Warning:
Refer to
Battery Disconnect Warning
in the Preface section.
1. Disconnect the negative battery cable.
2. Remove the rear quarter upper trim panel. Refer to
Quarter Upper Trim Panel Replacement
.
3. Disconnect the negative battery cable.
© 2010 General Motors Corporation. All rights reserved.
Page 1 of 2
Document ID: 2093392
7/5/2010
http://localhost:9001/si/showDoc.do?docSyskey=2093392&pubCellSyskey=46833&pubObj...

4. Remove the screws and the glass antenna module.
Installation Procedure
Caution:
Refer to
Fastener Caution
in the Preface section.
1. Install the glass antenna module with the screws and tighten to 2.5-3.5 N·m (22-31 lb in).
2. Connect the electrical connectors.
3. Install the rear quarter upper trim panel. Refer to
Quarter Upper Trim Panel Replacement
.
4. Connect the negative battery cable.
Page 2 of 2
Document ID: 2093392
7/5/2010
http://localhost:9001/si/showDoc.do?docSyskey=2093392&pubCellSyskey=46833&pubObj...
2009 Chevrolet Aveo
|
Aveo, Wave, G3, Barina (VIN S/T) Service Manual
|
Driver Information and Entertainment
|
Cellular, Entertainment, and Navigation
|
Repair Instructions
| Document ID: 2093394
Radio Antenna Module Replacement (Hatchback)
Removal Procedure
Warning:
Refer to
Battery Disconnect Warning
in the Preface section.
1. Disconnect the negative battery cable.
2. Remove the interior courtesy lamp. Refer to
Interior Courtesy Lamp Replacement
.
3. Remove the screw from the vehicle inside.
4. Remove the roof antenna.
Installation Procedure
Caution:
Refer to
Fastener Caution
in the Preface section.
© 2010 General Motors Corporation. All rights reserved.
Page 1 of 2
Document ID: 2093394
7/5/2010
http://localhost:9001/si/showDoc.do?docSyskey=2093394&pubCellSyskey=46833&pubObj...
1. Install the roof antenna with the screw and tighten to 3 N·m (27 lb in).
2. Install the interior courtesy lamp. Refer to
Interior Courtesy Lamp Replacement
.
3. Connect the negative battery cable.
Page 2 of 2
Document ID: 2093394
7/5/2010
http://localhost:9001/si/showDoc.do?docSyskey=2093394&pubCellSyskey=46833&pubObj...
2009 Chevrolet Aveo
|
Aveo, Wave, G3, Barina (VIN S/T) Service Manual
|
Driver Information and Entertainment
|
Cellular, Entertainment, and Navigation
|
Repair Instructions
| Document ID: 2093401
Radio Front Speaker Replacement
Removal Procedure
Warning:
Refer to
Battery Disconnect Warning
in the Preface section.
1. Disconnect the negative battery cable.
2. Remove the front door trim panel. Refer to
Front Side Door Trim Panel Replacement
.
3. Remove the screws and the front speaker.
4. Disconnect the electrical connector.
Installation Procedure
© 2010 General Motors Corporation. All rights reserved.
Page 1 of 2
Document ID: 2093401
7/5/2010
http://localhost:9001/si/showDoc.do?docSyskey=2093401&pubCellSyskey=46919&pubObj...
1. Connect the electrical connector.
Caution:
Refer to
Fastener Caution
in the Preface section.
2. Install the front speaker with the screws and tighten to 3.5 N·m (31 lb in).
3. Install the front door trim panel. Refer to
Front Side Door Trim Panel Replacement
.
4. Connect the negative battery cable.
Page 2 of 2
Document ID: 2093401
7/5/2010
http://localhost:9001/si/showDoc.do?docSyskey=2093401&pubCellSyskey=46919&pubObj...
2009 Chevrolet Aveo
|
Aveo, Wave, G3, Barina (VIN S/T) Service Manual
|
Driver Information and Entertainment
|
Cellular, Entertainment, and Navigation
|
Repair Instructions
| Document ID: 2093408
Front Upper Speaker Replacement
Removal Procedure
Warning:
Refer to
Battery Disconnect Warning
in the Preface section.
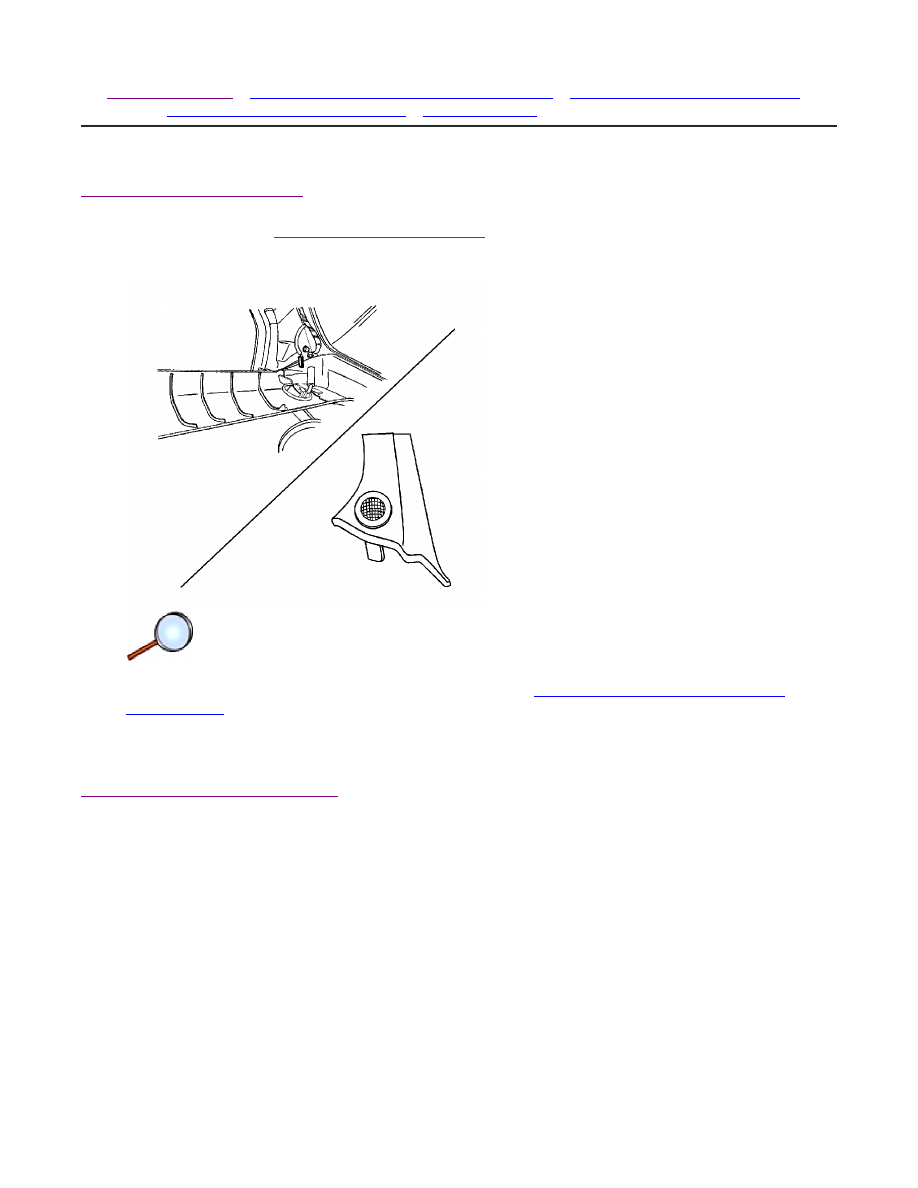
1. Disconnect the negative battery cable.
2. Pry off the windshield pillar garnish molding. Refer to
Windshield Pillar Garnish Molding
Replacement
.
3. Disconnect the electrical connector.
4. Remove the tweeter.
Installation Procedure
© 2010 General Motors Corporation. All rights reserved.
Page 1 of 2
Document ID: 2093408
7/5/2010
http://localhost:9001/si/showDoc.do?docSyskey=2093408&pubCellSyskey=46921&pubObj...

1. Install the tweeter.
2. Connect the electrical connector.
3. Install the windshield pillar garnish molding. Refer to
Windshield Pillar Garnish Molding
Replacement
.
4. Connect the negative battery cable.
Page 2 of 2
Document ID: 2093408
7/5/2010
http://localhost:9001/si/showDoc.do?docSyskey=2093408&pubCellSyskey=46921&pubObj...
2009 Chevrolet Aveo
|
Aveo, Wave, G3, Barina (VIN S/T) Service Manual
|
Driver Information and Entertainment
|
Cellular, Entertainment, and Navigation
|
Repair Instructions
| Document ID: 2093412
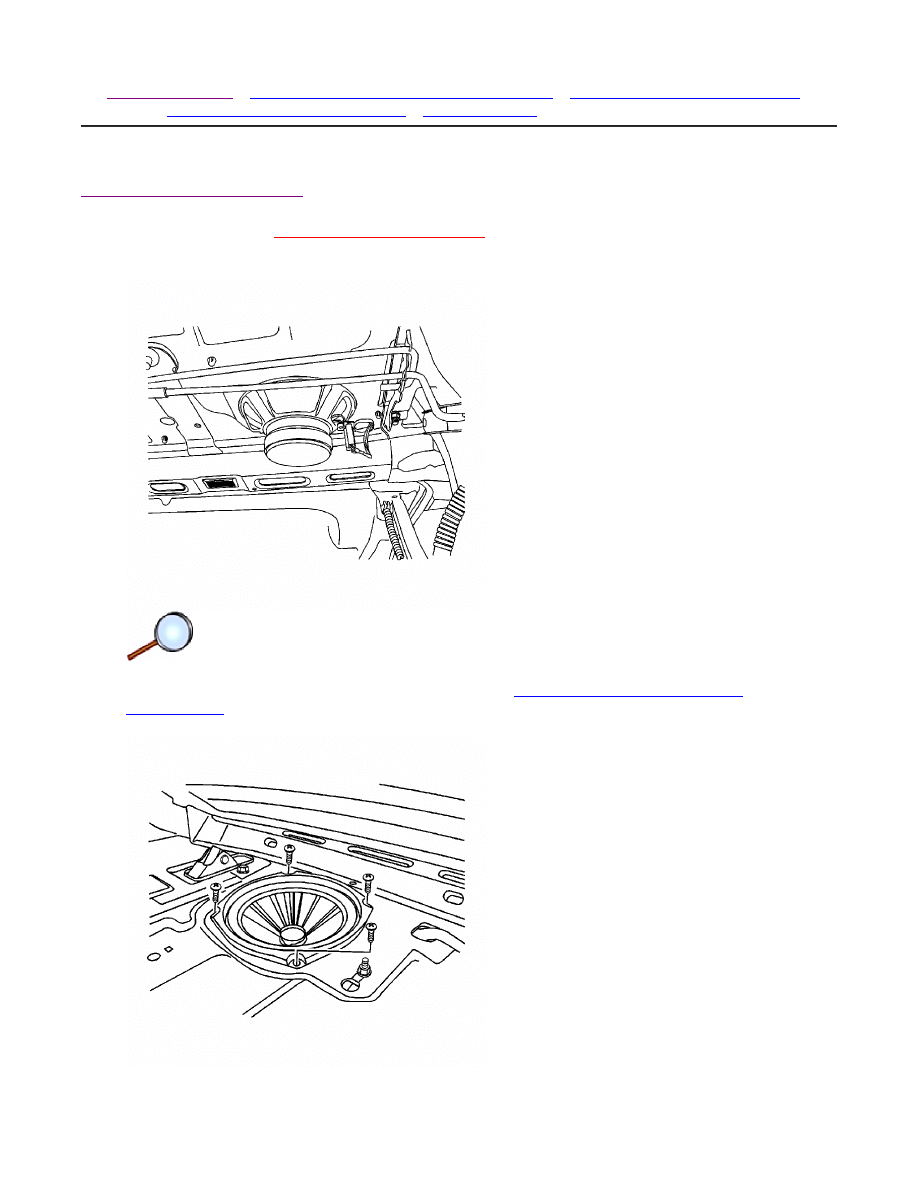
Radio Rear Speaker Replacement (Notchback)
Removal Procedure
Warning:
Refer to
Battery Disconnect Warning
in the Preface section.
1. Disconnect the negative battery cable.
2. Remove the rear window shelf trim panel. Refer to
Rear Window Shelf Trim Panel
Replacement
.
3. Disconnect the electrical connector.
© 2010 General Motors Corporation. All rights reserved.
Page 1 of 3
Document ID: 2093412
7/5/2010
http://localhost:9001/si/showDoc.do?docSyskey=2093412&pubCellSyskey=46905&pubObj...
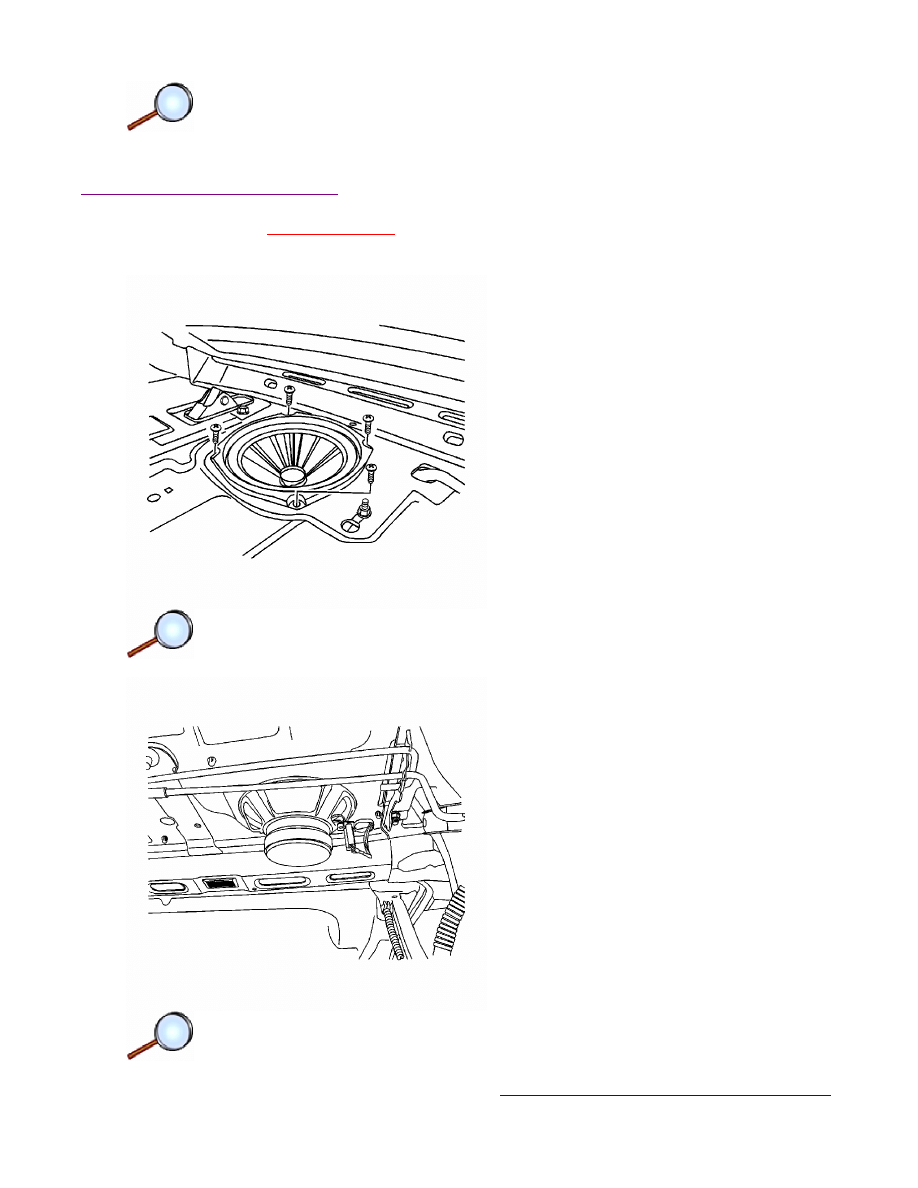
4. Remove the screws and the rear speakers.
Installation Procedure
Caution:
Refer to
Fastener Caution
in the Preface section.
1. Install the rear speakers with the screws and tighten to 3 N·m (27 lb in).
2. Connect the electrical connector.
3. Install the rear window shelf trim panel. Refer to
Rear Window Shelf Trim Panel Replacement
.
Page 2 of 3
Document ID: 2093412
7/5/2010
http://localhost:9001/si/showDoc.do?docSyskey=2093412&pubCellSyskey=46905&pubObj...

4. Connect the negative battery cable.
Page 3 of 3
Document ID: 2093412
7/5/2010
http://localhost:9001/si/showDoc.do?docSyskey=2093412&pubCellSyskey=46905&pubObj...
2009 Chevrolet Aveo
|
Aveo, Wave, G3, Barina (VIN S/T) Service Manual
|
Driver Information and Entertainment
|
Cellular, Entertainment, and Navigation
|
Repair Instructions
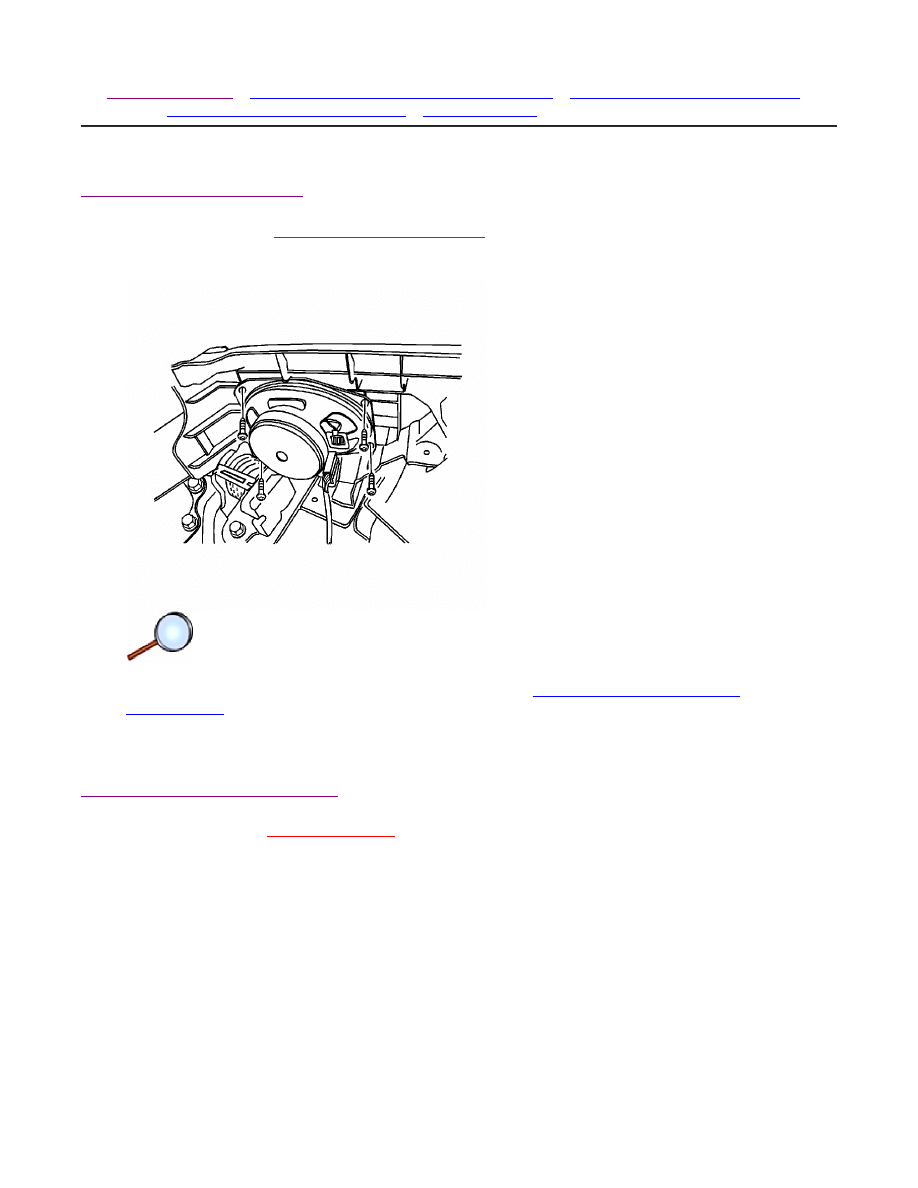
| Document ID: 2093415
Radio Rear Speaker Replacement (Hatchback)
Removal Procedure
Warning:
Refer to
Battery Disconnect Warning
in the Preface section.
1. Disconnect the negative battery cable.
2. Remove the rear cargo area side trim panel. Refer to
Cargo Area Side Trim Panel
Replacement
.
3. Disconnect the electrical connector.
4. Remove the screws and the rear speaker.
Installation Procedure
Caution:
Refer to
Fastener Caution
in the Preface section.
© 2010 General Motors Corporation. All rights reserved.
Page 1 of 2
Document ID: 2093415
7/5/2010
http://localhost:9001/si/showDoc.do?docSyskey=2093415&pubCellSyskey=46905&pubObj...
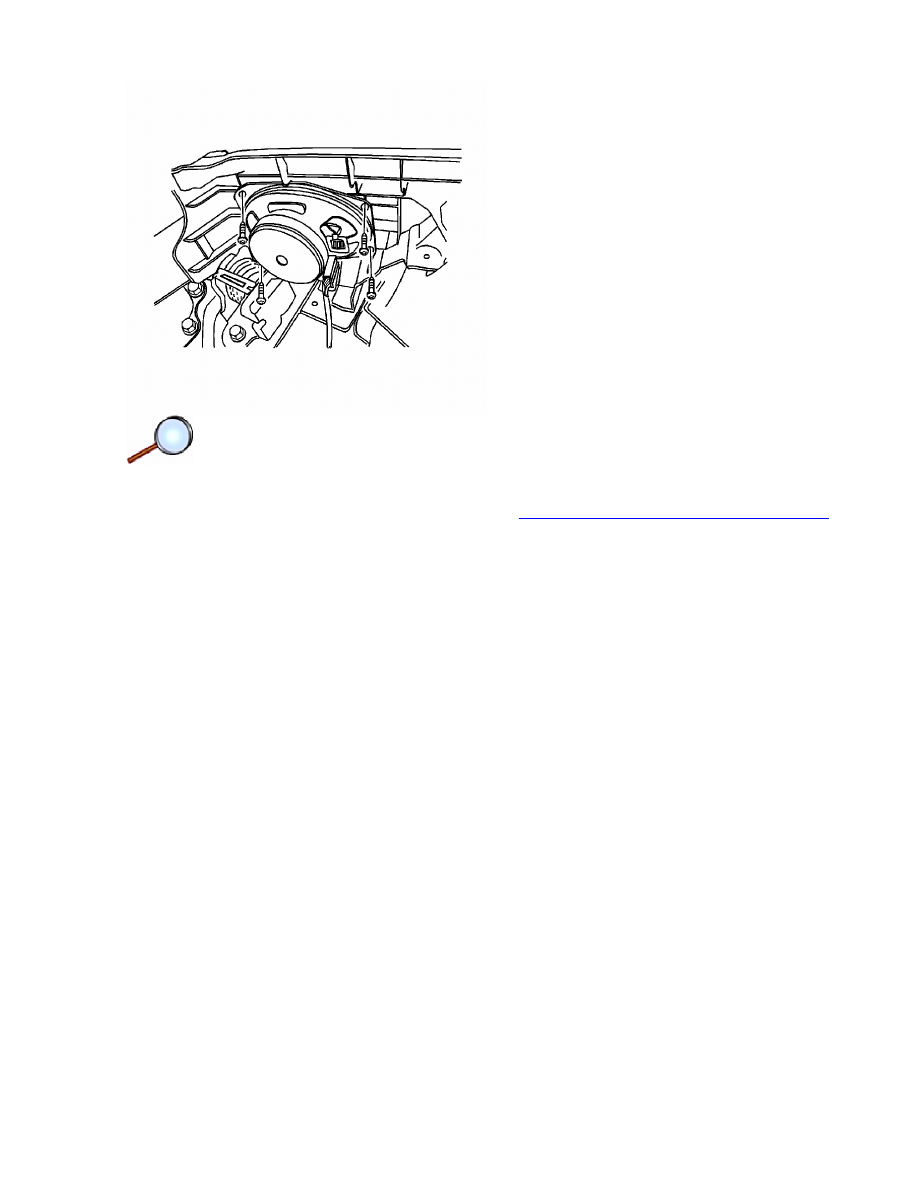
1. Install the rear speaker with the screws and tighten to 3 N·m (27 lb in).
2. Connect the electrical connector.
3. Install the rear cargo area side trim panel. Refer to
Cargo Area Side Trim Panel Replacement
.
4. Connect the negative battery cable.
Page 2 of 2
Document ID: 2093415
7/5/2010
http://localhost:9001/si/showDoc.do?docSyskey=2093415&pubCellSyskey=46905&pubObj...
Document Outline
Wyszukiwarka
Podobne podstrony:
Monensin induced suicidal erythrocyte death 2010 Cellular Physiology and Biochemistry
02e Entertainment and Communication
29 Dinner s on me entertaining and eating out
Navigation and Audio System
cellulite and its treatment
Cellulases and related enzymes in biotechnology
White Houseman The Navigability of strong ties small worlds tie strength and network topology
Radio navigation system MFD CD changer and TV tuner wiring
Band Stand Style Observation and Entertainme
Confocal optics microscopy for biochemical and cellular high throughput screening by Lenka Zemanová,
Postmodernity and Postmodernism ppt May 2014(3)
Scoliosis and Kyphosis
L 3 Complex functions and Polynomials
1 Cellulitid 9106 ppt
4 Plant Structure, Growth and Development, before ppt
więcej podobnych podstron