
ArchiCAD Tutorial
Getting started
Dr. Benny Raphael
Dept. of Building
National University of Singapore (NUS)

Launch ArchiCAD
You can either create a new project or open
an existing (previously saved) project. An
archicad project file contains a 3D model
of a building along with parameter
settings.
To do: Create a new project

Getting familiar with the GUI
The user interface consists of a main
window that has
• a menu bar
• a standard tool bar
• an area where drawings are displayed and
• a number of window panels containing
tools and text boxes where parameters are
set.

Showing and hiding palettes
Any palette (tool box) can be minimized or
closed by clicking on the usual buttons.
A palette that is closed can be made
visible by clicking on Window/Palette
display and selecting the menu item to
show the palette
Try this:
1. Close the main toolbox palette.
2. Make it visible again
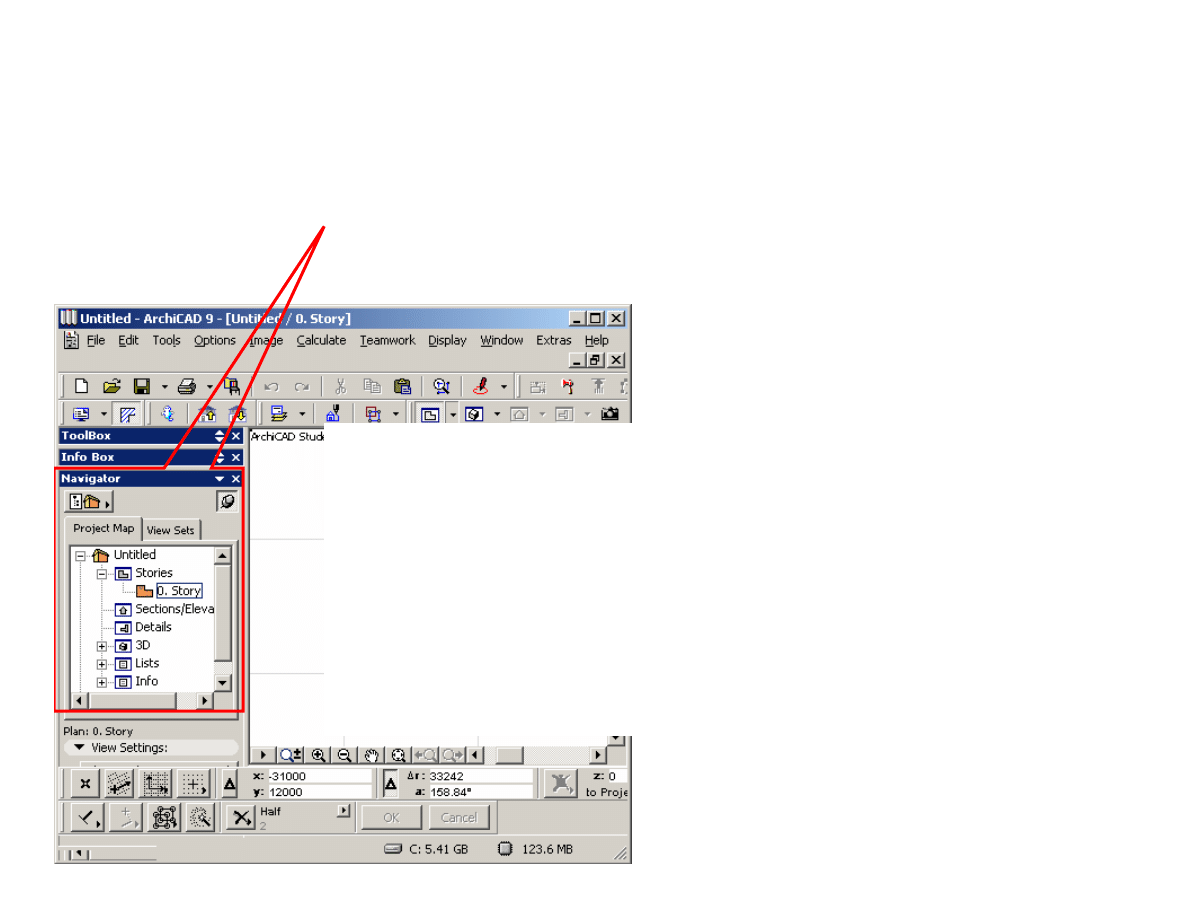
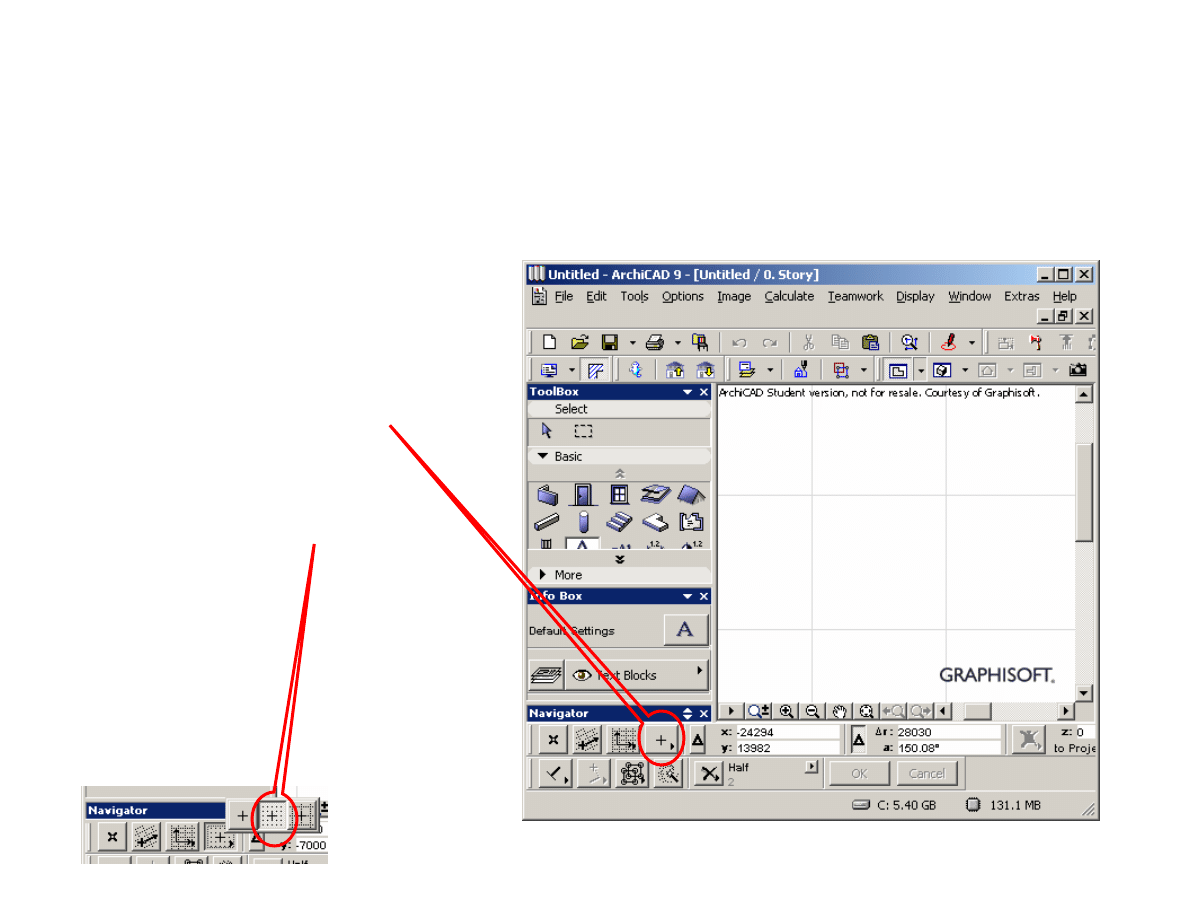
Navigator panel
The navigator panel helps to easily switch between
plan view, sections or 3D view.
Try this:
1. Click on Window/Palette Display/Hide
Navigator
2. Click on Window/Palette Display/Show
Navigator
3. Minimize Navigator
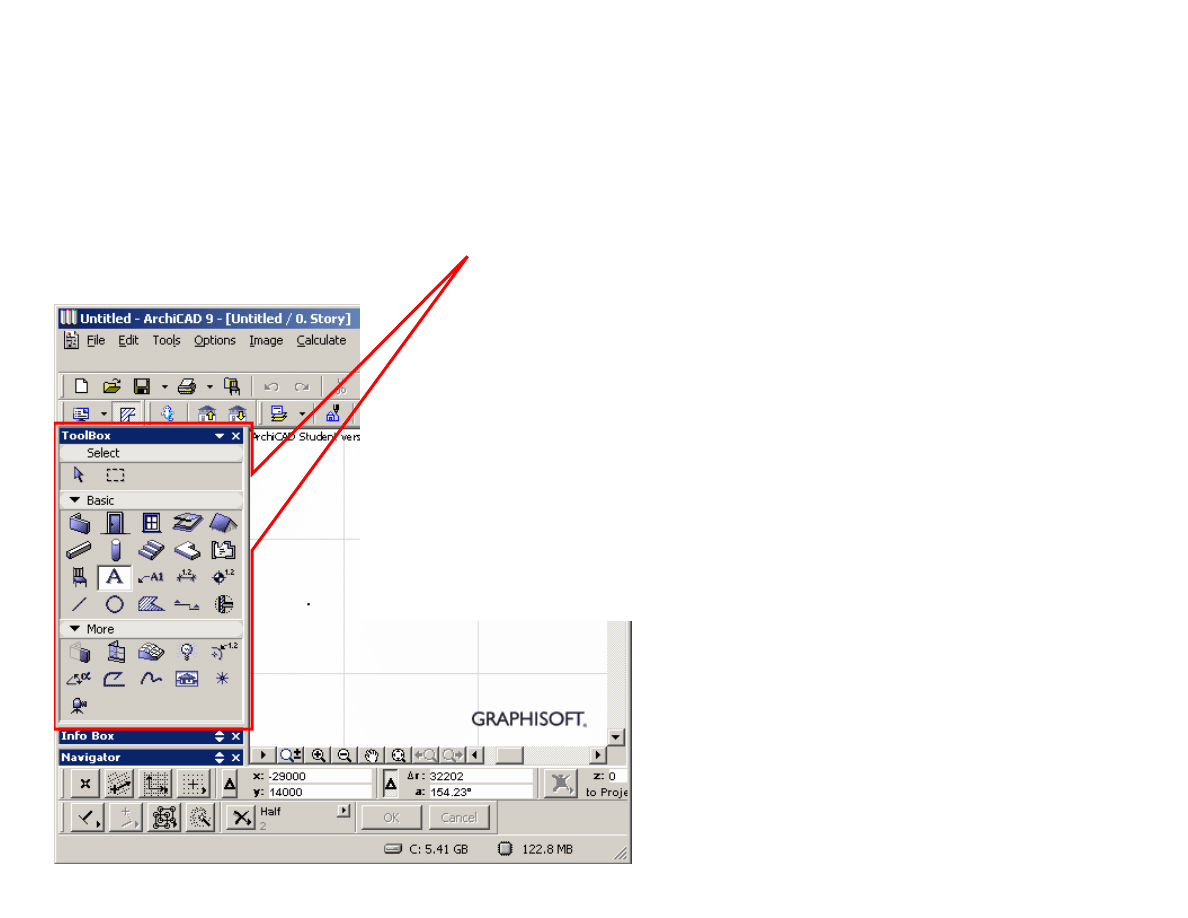
Toolbox palette
The toolbox palette contains
three groups of tools.
1. Tools to select objects (arrow)
2. Basic tools
3. Specialized tools (Under title
more)
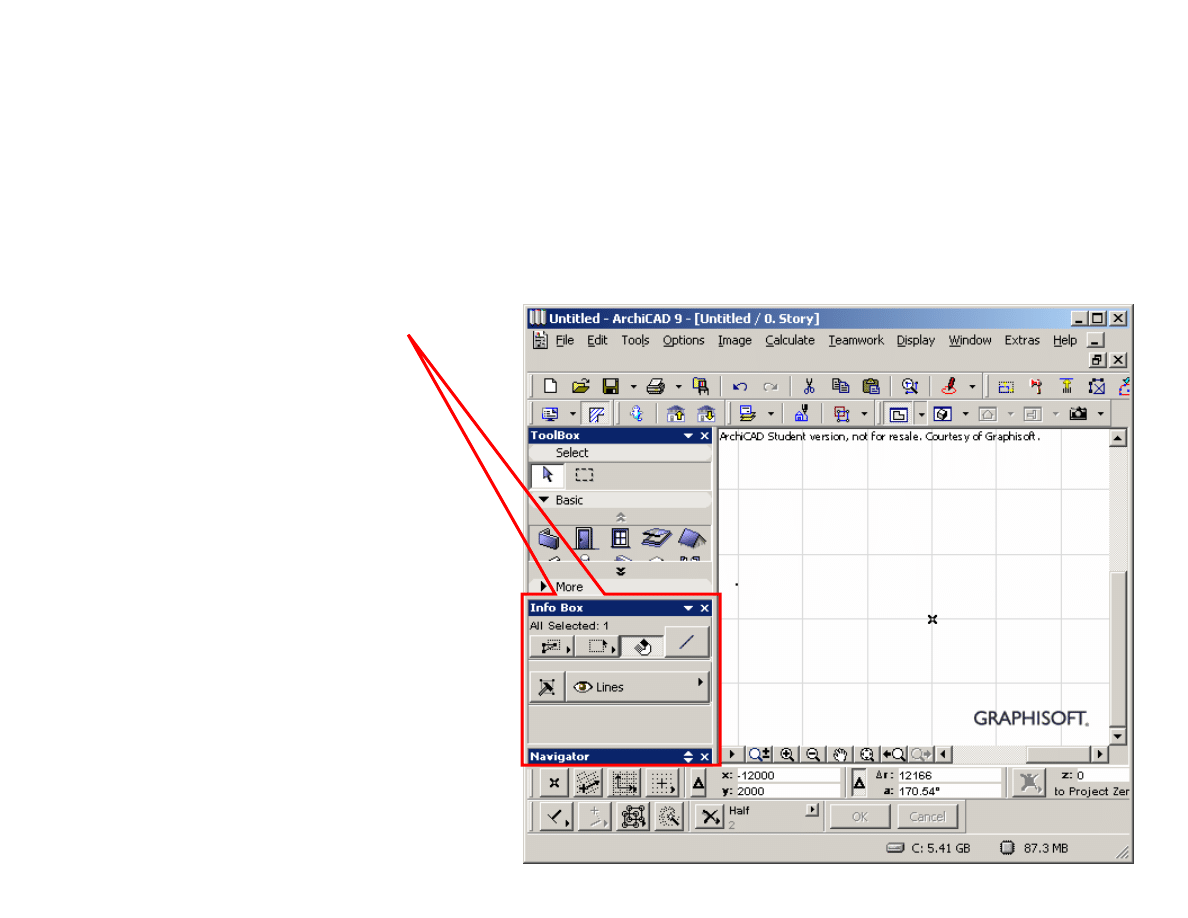
Information panel
The panel with
title “Info box”
contains
parameters
related to the
currently
selected tool.
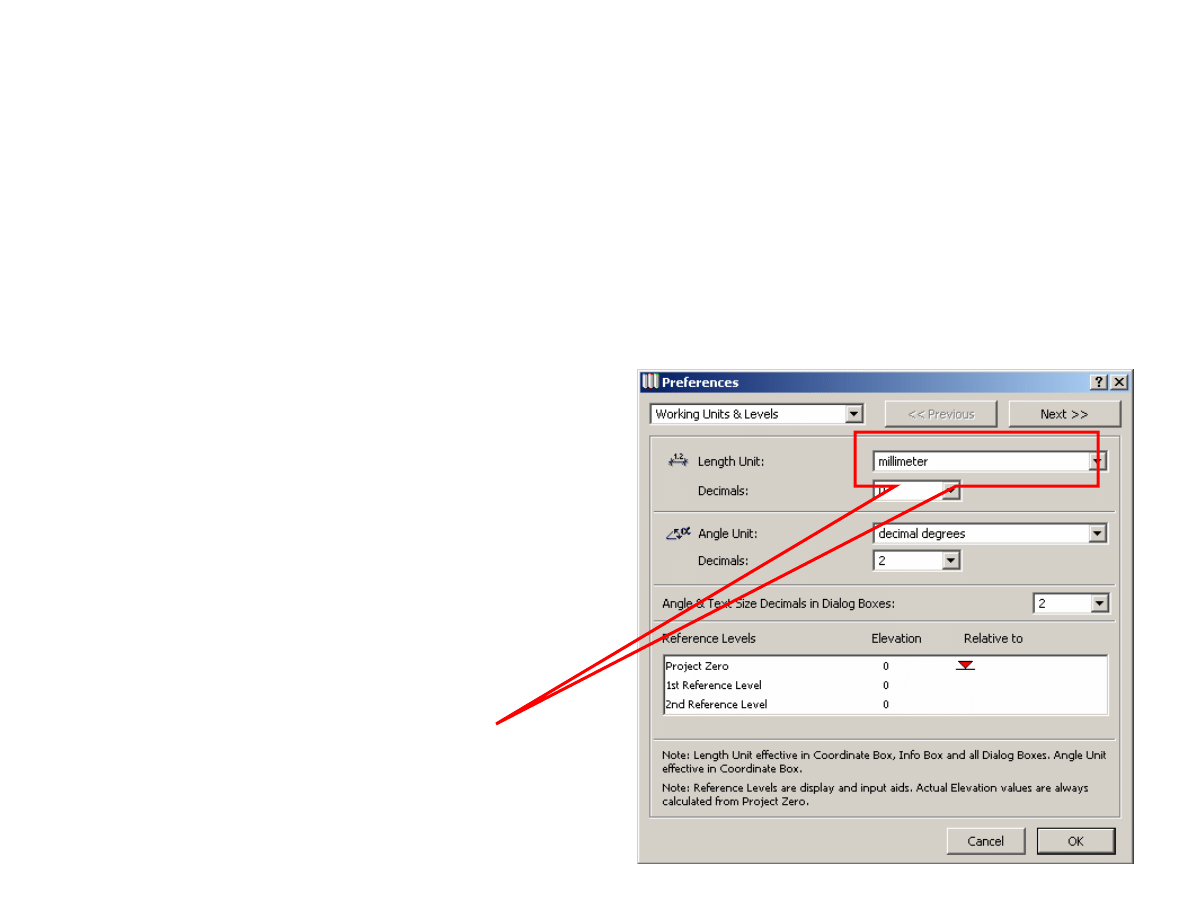
Units
It is important to set the
correct units before you
start drawings.
To do: Click on
Options/
Preferences/
Working Units & Levels
Set the units to mm.
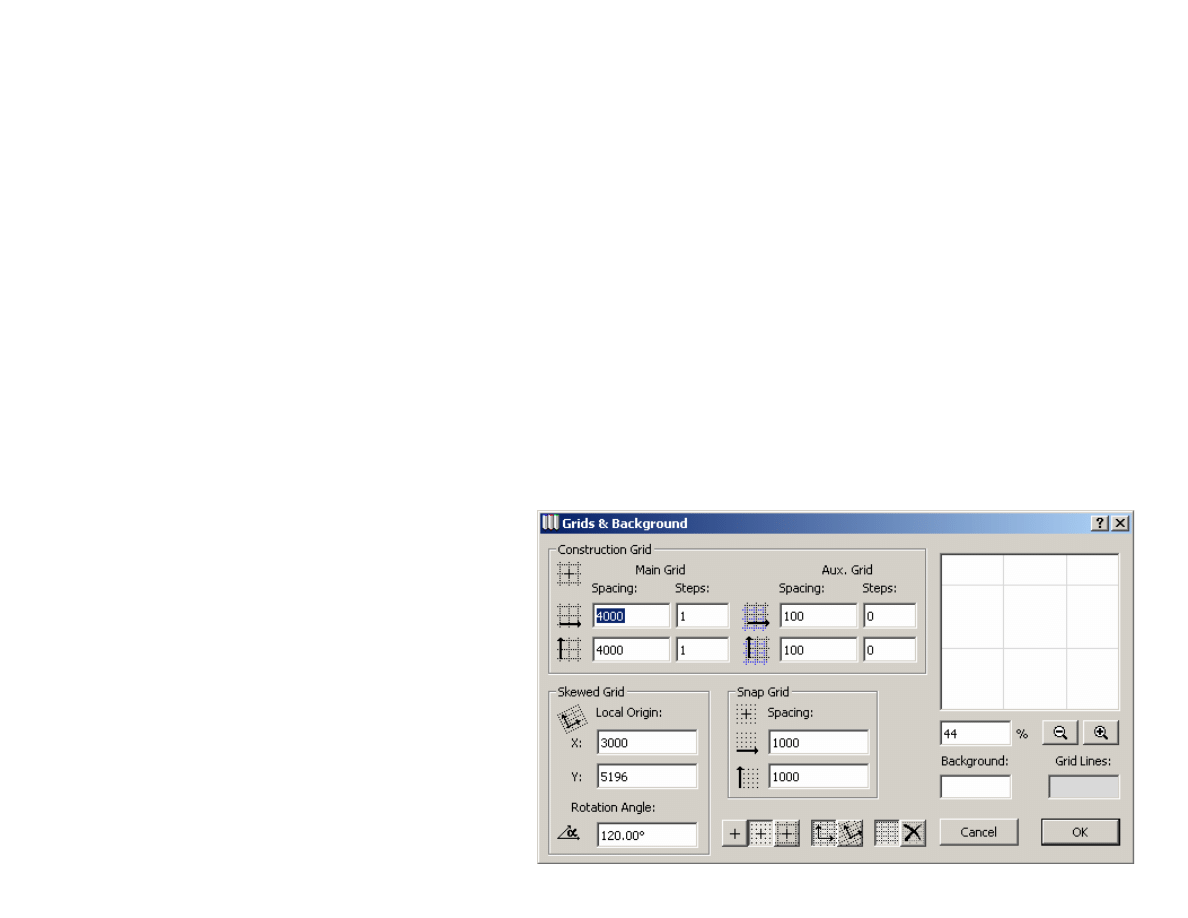
Grid
Set the spacing of main grid to 4000 and the
spacing of snap grid to 2000
To do: Click on Options/Grids & Background
Snap
Turn on snap.
To do:
Click on the button
“Grid snap” in the
lower tool bar
Select the middle
button
You can turn off
snap by selecting
the first button

Working in plan view
It is usually convenient to work in the plan
view.
To do:
Click on Window/Floor plan
Or
Select the story from the Navigator panel
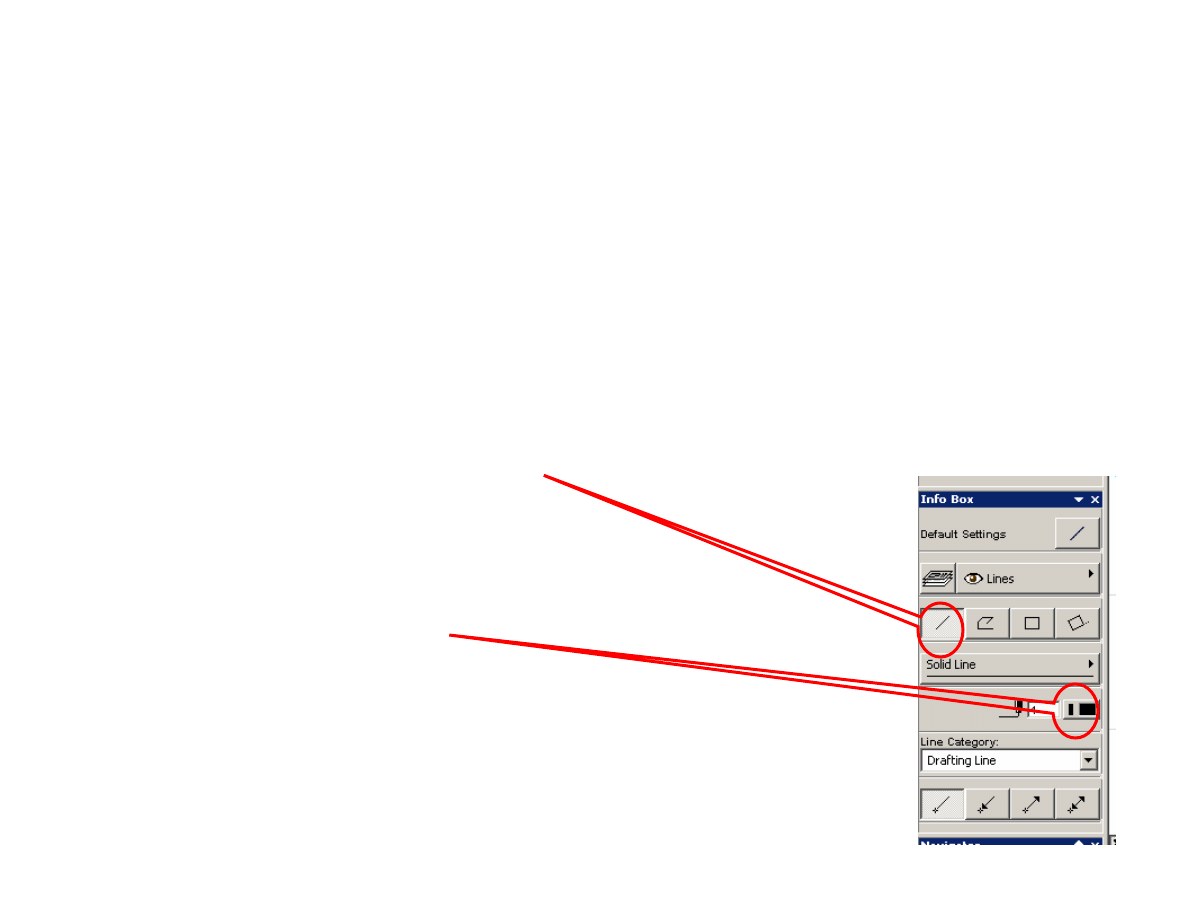
Drawing lines
• Click on the Line tool in the Basic toolbox
• Maximize info box
• Select simple straight line as “line
geometry method”
• Change the pen type if necessary
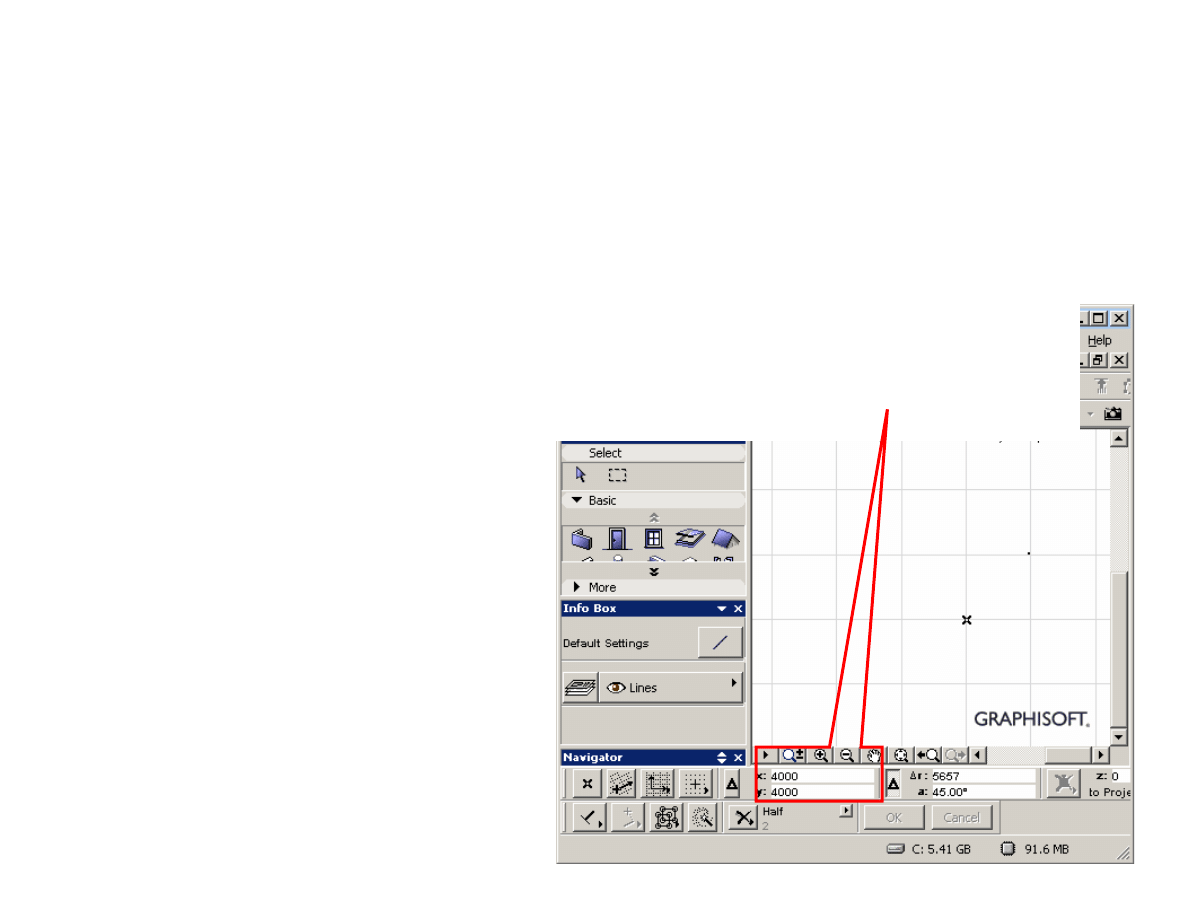
Locating coordinates
When you move the mouse over the
drawing area (canvas), the coordinates
are displayed in the coordinate box

Zooming
The drawing area can be zoomed by using
the scroll wheel of the mouse or the zoom
button at the bottom of the drawing area.
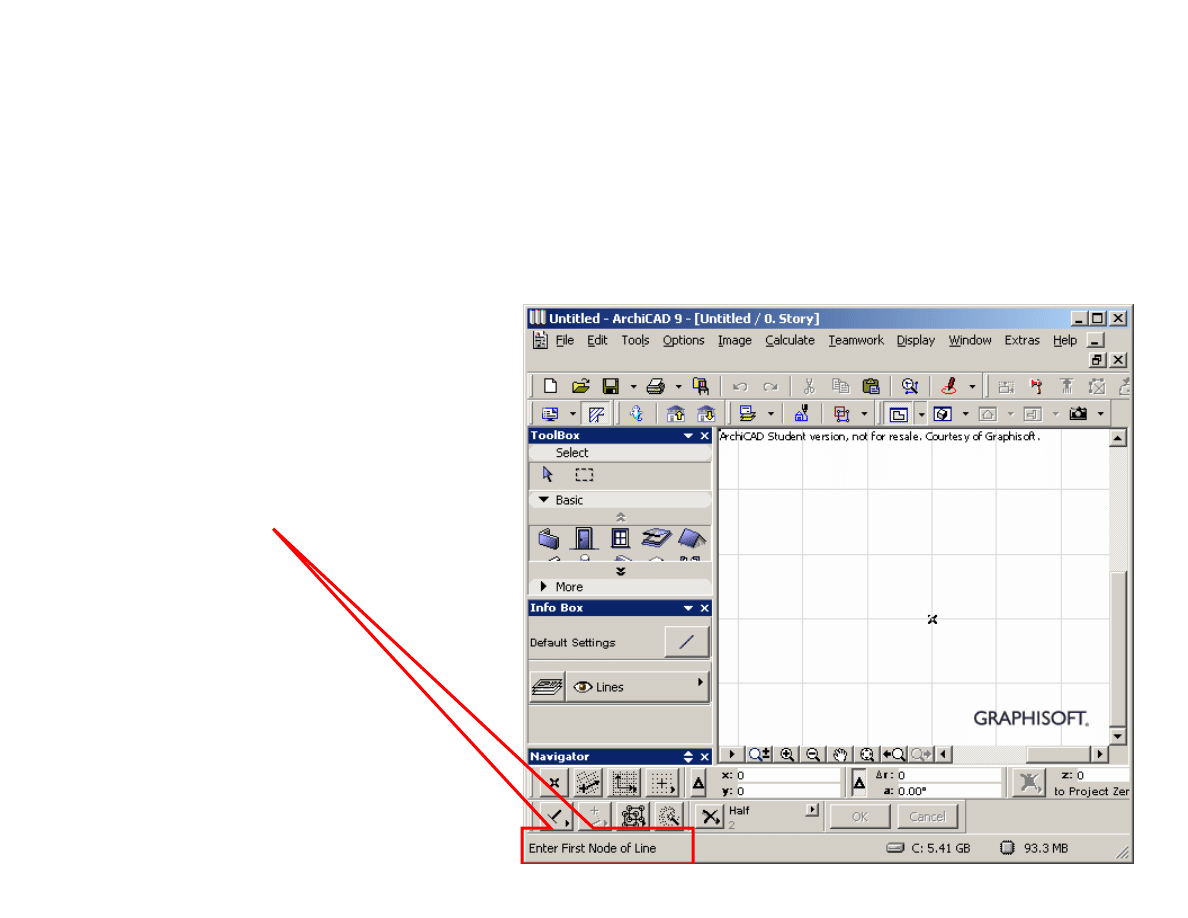
Status bar
Always look at the
status bar for
instructions and
other useful
information

Drawing a horizontal line
1. Select the line tool
2. Move the cursor to the starting point of the line
and click
3. Keep pressing the SHIFT button, move the
mouse to the end point of the line and click.
Pressing the shift button constraints the mouse
pointer to move in specific directions. Turning
on the snap is another way to control the
movement of the mouse.

Inputting coordinates through
keyboard
Try this:
1. Select line tool
2. Move the mouse over the drawing area.
3. Type x on the keyboard. Enter x-coordinate in
the coordinate box. (Do not press ENTER)
4. Type y. Enter y-coordinate.
5. Press ENTER
6. Complete the line.

Moving a line
1. Select the arrow tool from the toolbox.
2. Move the mouse over the line to be moved.
Notice that the cursor changes when the
mouse pointer is over the line. Click on the
line.
3. Click and drag over the
mid-point
of the line.
4. Move the line to the required position and click.
Note that whenever you are prompted to input
coordinates through mouse, you can press
x or y and input coordinates through
keyboard

Stretching a line
1. Select the arrow tool from the toolbox.
2. Move the mouse over the line to be
moved. Notice that the cursor changes
when the mouse pointer is over the line.
Click on the line.
3. Click and drag over an
end-point
of the
line.
4. Move the node to the required position
and click.

Changing the properties of an
object
1. Select the arrow tool from the toolbox
2. Click on an object in the drawing area
3. Click on the menu Edit
4. The last item in the drop down menu is
usually for editing the settings for the
selected object, for example, “Line
Selection Settings” if the selected object
is a line. Click on this menu item
5. Change the settings for the object in the
dialog that is displayed.

Saving the project
Click on File/Save
Or
Press Control-S (control key and s together)
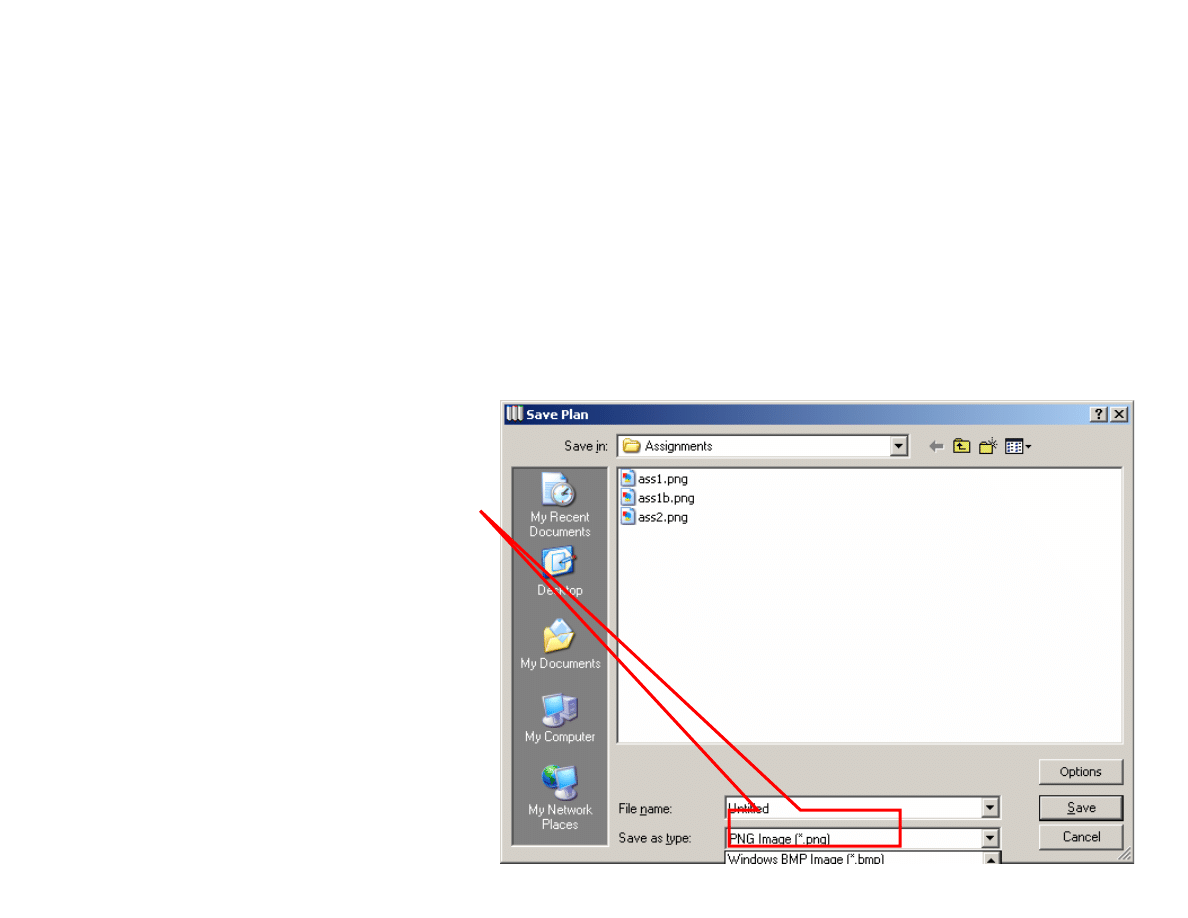
Saving as a 2D image
• Click on
File/Save As
• In the Save
Dialog window,
select the format.
• Type in the file
name and click
on the save
button

Drawing a line at a specified angle
• Select the line tool and click on the starting
point.
• Move the mouse for completing the line.
Press a on the keyboard and input the
angle in degrees. Press r and input the
length of the line. Press ENTER.

Deleting a part of a line
Sometimes we need to trim a line at the point where it
intersects another line or curve. We can do this
without computing the coordinates of the point of
intersection.
1.
Select the line to be trimmed
2.
Click on Edit/Split. On the status bar it displays “Click
on edge to split … “
3.
Select the line or curve which intersects the selected
line.
4.
Click on the side of the line which should be deleted.
The line will now be split into two parts and one part
will be selected for the next operation.
5.
Press DELETE key on the keyboard. This will delete
the currently selected line.

Trimming
Another way to delete a part of a line is by
trimming. Press Control key and select
the part of the line to trim.

Chamfer
You can create rounded corners by
chamfering. Select two lines that intersect
and click on the menu item
Edit/Fillet/Chamfer.
In order to add a new object to a selection,
press the SHIFT key and click on the new
object.

Summary
This tutorial is only to get you started. You
need to get familiar with the software by
exploration and experimentation. This is
the best way to learn rather than following
a tutor step by step!
Wyszukiwarka
Podobne podstrony:
ANSYS Getting Started Tutorial Workbench
Getting Started
getting started IAOTAGZXANHHC6G Nieznany
(ebook pdf) Matlab Getting started
Part I Getting Started
1 3 Getting started with Data Studio Lab
Getting Started with PostHASTE
Packt Publishing Getting Started with Backbone Marionette (2014)
Getting Started
chinas southwest 3 getting started
1 2 Getting started (2)
Neuro Solutions 5 Getting Started Manual
mr zr getting started
Matlab Getting Started
01 GETTING STARTED
Part I Getting Started
LV Getting Started
więcej podobnych podstron