For
personal
use
only!
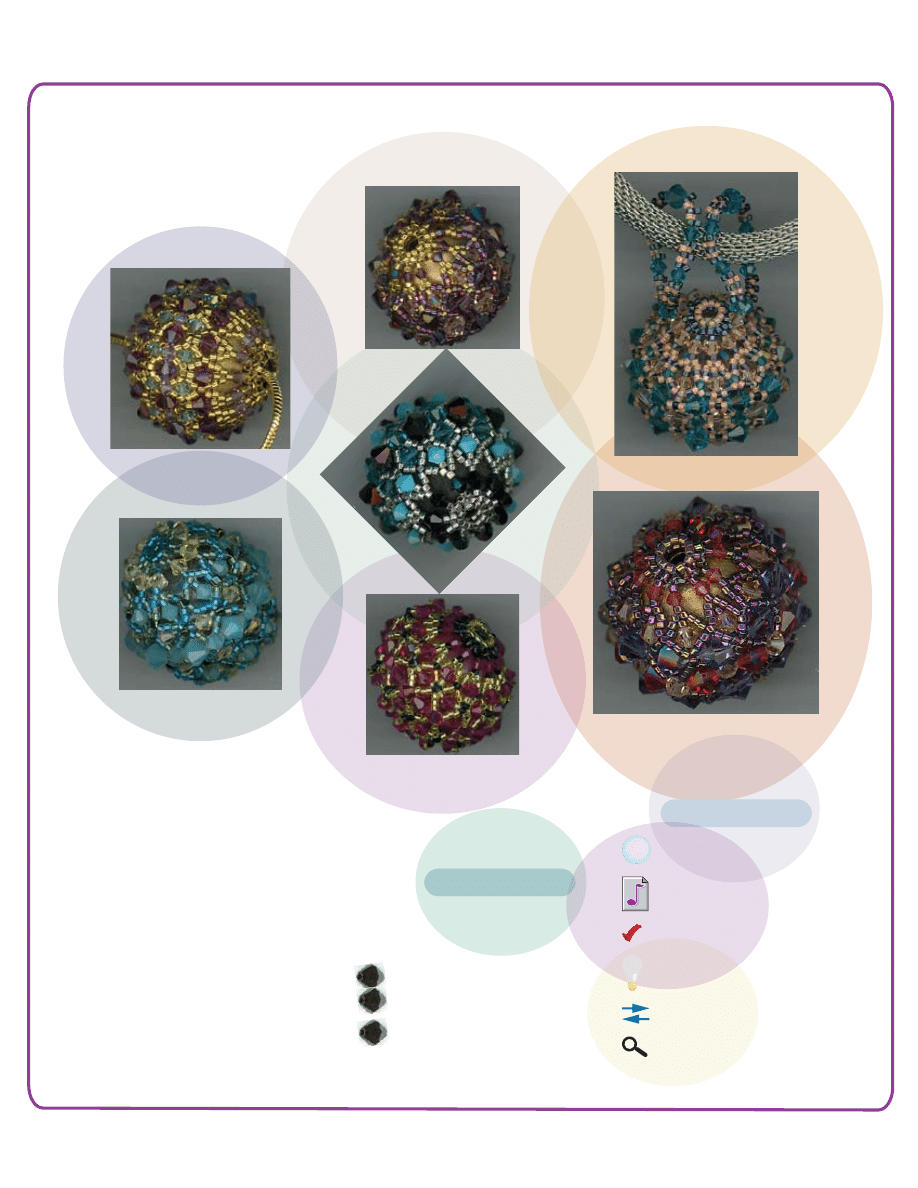
Beaded Bead Brigade Series
#2
Legend
Inspector
Steps
Noteworthy
Bright Ideas
Check
Thread direction
4mm bicone crystal
6mm bicone crystal
MC = main color
Cylinder Bead
AC = alternate color
Cylinder Bead
7 grams
4 grams
50
10
1
Supply List
25mm wooden bead
3mm bicone crystal
20
Copyright 2004 Keiser Designs All Rights Reserved.
www.keiserdesigsn.com
E-mail: eknow@msn.com
For
personal
use
only!
Beaded Bead Brigade Series
#2
©2004
Copyright 2004 Keiser Designs All Rights Reserved.
www.keiserdesigsn.com
E-mail: eknow@msn.com
(The number of sets completing the focal bead ring is
determined by: the size of crystals and
focal bead being covered)
fig. 5a
Alternate Color (AC) is a visual aid for
placement of “Point” bead that will be referred
to in netting steps. Netting consists of odd numbers,
relative to crystal size, (i.e., 6mm = 9, or 7 bead net,
4mm = 7 or 5 bead net, 3mm = 5 or 3 bead net)
Beaded Bead Brigade #2 design is based on a
focal bead circumference
By increasing size, number and surrounding beads, the possibilities
are endless.
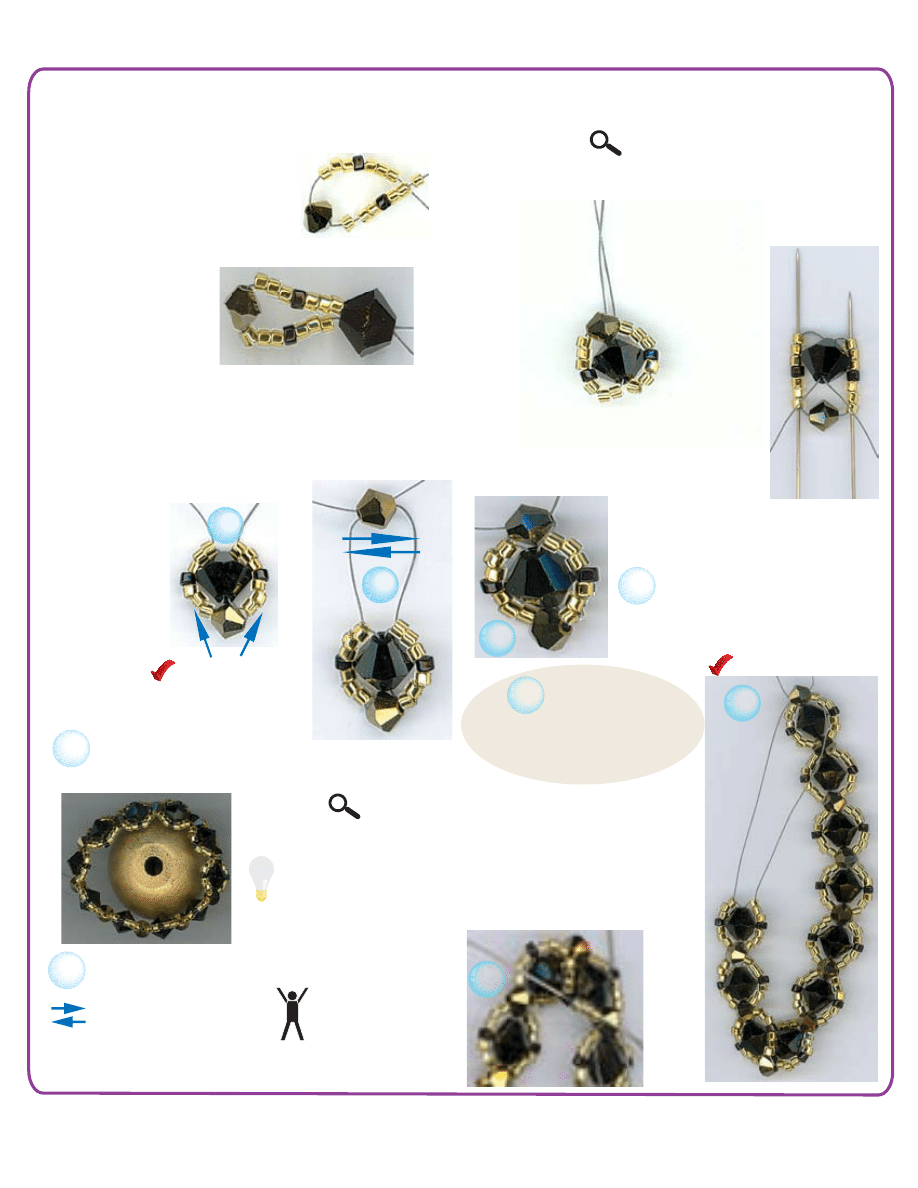
String as follows:
Left (3MC, 1AC , 3MC) = 7 beads
Right (3MC, 1AC, 3MC) = 7 beads
2)
3)
String (1) 4mm crystal, position to thread
center
Thread two “12 needles on 2 wingspans (approx 9’) Fireline 6#
Place a #12 needle on each thread end leaving 6” tail thread
1)
Pass both needles in the same direction up thru 6mm crystal
4)
Position thread
Left and Right on either side of 6mm - do not criss-cross thru 6mm!
Fold 6mm thread side towards 4mm, hold threads and 6mm firmly in place
5)
6) Pass Left needle up left side of bead set,
Pass
Right needle up right side of bead set (notice thread by-passes 6mm)
Gently tighten
Left and Right thread sides; vertically aligning the set
6
Thread (1) 4mm
criss-crossing
Left and Right thread positions
Gently tighten both sides centering
bead set
7
7
8
Repeat Steps
3 thru Step 7
Complete 9 Sets
Check thread position
Join ring with final set:
Repeat Steps 3 thru 6
criss-crossing
first 4mm strung
9
9
10
Pass focal bead thru ring
Fit will be very loose; If snug, tension
may be too tight; add additional sets
Needle
Left
and
Right
threads following thread path 1 full circle
around exiting Left and Right side AC
2 Needle technique ends here!
Remove needle and secure either Left or Right thread side
as non-working thread.
10
Note: 1 Set = steps 3 thru 7
7
Check thread position
fig. 4
fig. 3
fig. 5b
For
personal
use
only!
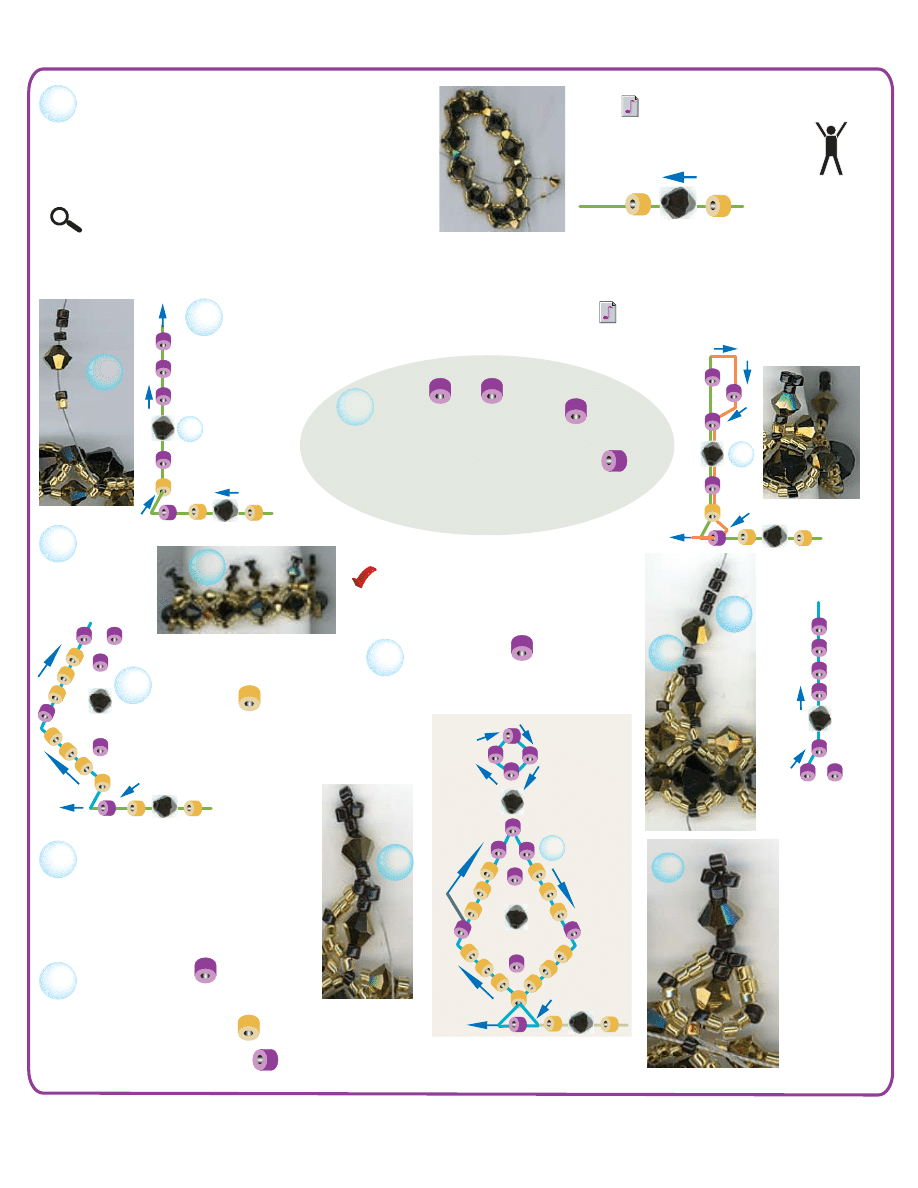
(3 bead picot)
11
From AC bead
String:
(1MC, (1) 4mm crystal, 1MC)*
Pass thru next AC bead
*Repeat Sets between each AC bead in the ring
Pass thru first set, needle to next AC bead
12
From an AC bead
String
:
(1MC, 1AC, (1) 4mm crystal, 3AC)* = 6 beads
14
*Repeat steps 12 and 13 around the ring
Exit next AC
Tension is moderate throughout
For “high tension” beaders,
the end-cap steps require
more tension.
Position ring over focal bead
Gently position ring to center of focal bead
This sets the tension, it must be loose. Remove focal bead and continue.
DO NOT tighten tension!
12
13
Skip AC and
Needle down to and thru next AC
Continue thru 4mm crystal, 1AC, 1MC
Needle thru the back of initial AC in ring
Needle thru (MC, 4mm Crystal, MC)
Exit next AC
*
4
5
6
12
*
3
4
5
6
2
1
Circular thread path around AC pivots sets.
13
3
4
5
2
1
*
16
From AC position
String:
(1AC, (1) 3mm crystal, 4AC) = 6 beads
6
15
From AC position needle up, and
thru first MC
String:
(3MC, 1AC, 3MC) = 7 beads
Needle up to, thru, and exit AC
1
5
6
16
15
17
14
3
4
5
6
2
1
*
17
From top of Set (3 bead picot)
Skip 3 AC
Needle down to and thru 3rd AC
Continue thru 3mm crystal,
and next AC
17
17
4
6
5
3
2
1
*
5
18
From AC position
String:
(3MC, 1AC, 3MC) = 7 beads
Needle down to and thru
Needle to, thru, and exit AC Proceed to Step 19 (next page)
1
*
Check tension and fit
6
Beaded Bead Brigade Series
#2
©2004
Copyright 2004 Keiser Designs All Rights Reserved.
www.keiserdesigsn.com
E-mail: eknow@msn.com
For
personal
use
only!
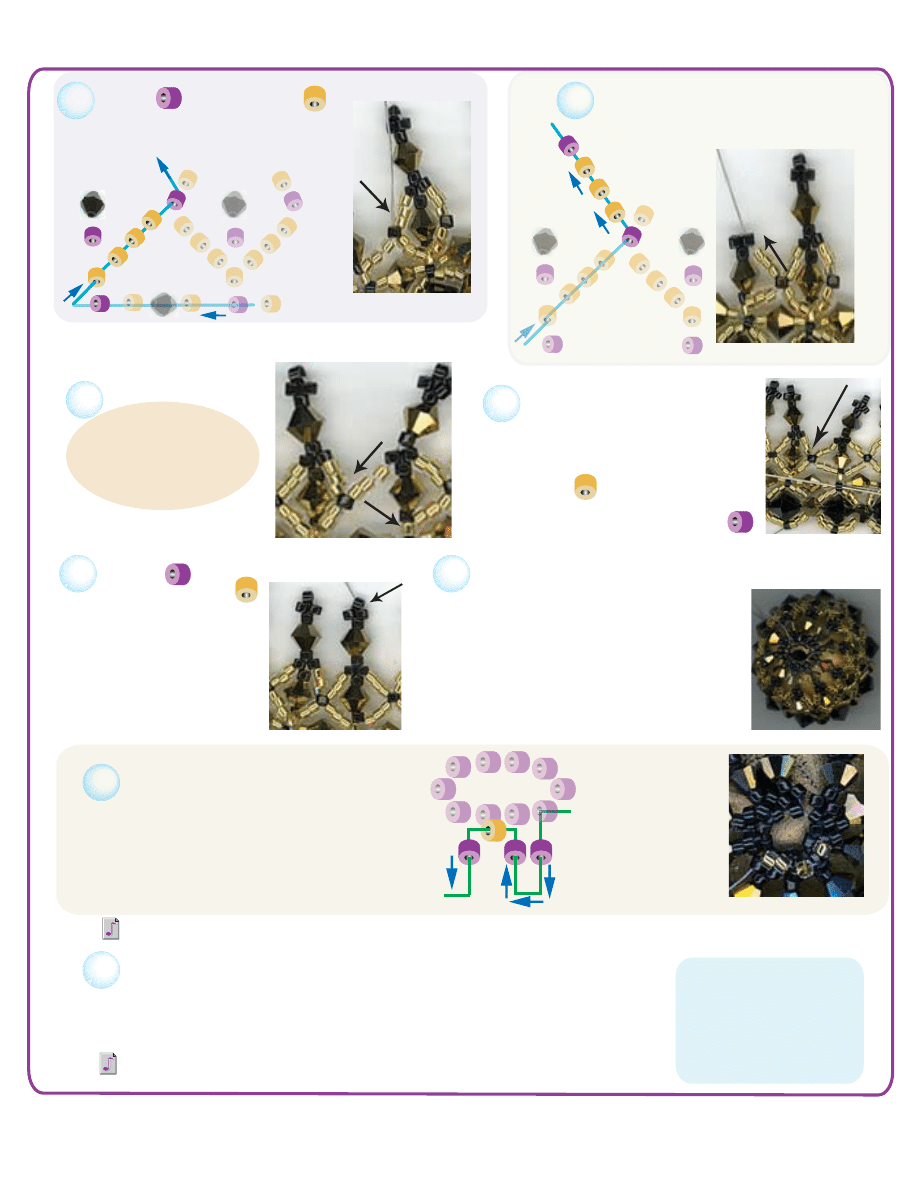
*
From AC needle up thru MC #
String: (3MC)
Needle up to, thru, and exit AC
19
1
From AC
String: (3MC)
Needle up to, thru, and exit AC
20
3
2
1
*
3
2
1
*
3
2
1
*
3
2
1
*
5
From AC at top of Set
Pass needle thru each AC at top of Set, forming a circle
Keep tension moderate
Pass thru circle a second time
Insert focal bead in bead cap
Set tension
Pass thread thru circle a third time
Exit any AC at top of Set
24
As promised for “high tension” beaders, the end cap requires increasing tension, and a good tug to complete!
Pass needle thru bead cap points, forming a circle
Pass thru again, increasing tension; taking up thread slack
Place focal bead in ring and position bead cap over bead opening
Increase tension, pull tightly
Pass thread thru circle three more times
Complete Side One by securing and ending working thread.
Focal bead remains in ring, proceed to Side Two
26
Side Two:
Repeat
Steps 11 thru 26
From AC at top of Set
Pass needle down thru AC
Pass up thru next AC
String 1 MC and pass down thru next AC
Keep tension consistent
Complete round (= 10 MC’s)
Exit any bead cap MC
25
6
5
5
From AC
*Repeat Steps 16 thru 20
Complete 9 sets
Exit AC
21
From AC
Needle up to, thru MC
Continue upward thru Set
(AC, 3mm Crystal, AC ),
and next Set
Exit AC at top of Set Picot)
23
1
*
Join Set 9 and Set 10 at AC
String: 3MC
Needle down to, thru, and exit next AC
String: 3MC
Needle down to, thru, and
exit MC from Set 9
Needle to, BACK thru, and exit AC
1
22
*
Beaded Bead Brigade Series
#2
©2004
Copyright 2004 Keiser Designs All Rights Reserved.
www.keiserdesigsn.com
E-mail: eknow@msn.com
Wyszukiwarka
Podobne podstrony:
eva maria keiser desings (6)
eva maria keiser desings
eva maria keiser desings (2)
eva maria keiser desings (3)
eva maria keiser desings (5)
ewa maria keiser desings Four Corner Bling
Nos vemos Paso a paso CD Eva Maria Lloret Ivorra
Nos vemos cwiczenia A1 A2 z 2CD Ivorra Eva Maria Lloret Ribas Rosa Wiener Bibiana Gorrissen Margari
Eva Maria Bartenschlager Richtige Hundeernährung
samosprawdzenie, pedagogika uczelnia warszawaka, podstawy psychologii ogólnej, wykłady Maria Jankows
10 COMON ?VA
Fragment wywiadu z Marią Wiernikowską n
Mann - Czarodziejska gora, Maria Kurecka „Czarodziej
proces pielęgnowania, OIOM- Proces, Maria Kwiatkowska
Interna 13.06.2011 - ver.1, giełda made by Maria, Mariola, Michał i Ols
więcej podobnych podstron