
- 2 -
Documentation by Synkron M&D AB: Roger Wiklander, Ernst Nathorst-Böös,
Ludvig Carlson and Anders Nordmark. The information in this document is
subject to change without notice and does not represent a commitment on
the part of Arkaos S.A. No part of this publication may be copied, reproduced
or otherwise transmitted or recorded for any purpose, without prior written
permission by Arkaos S.A. All product and company names are ™ or © trade-
marks of their respective owners.
© Arkaos S.A. 2001.
All rights reserved.
Table of Contents

- 3 -
Table of Contents

- 4 -
Table of Contents
Introduction
Welcome!
A few words about ArKaos VJ
A few words about the ArKaos
Visualizer
Registration of ArKaos VJ
Preparations
About this chapter
Setting up the Monitor
Setting up MIDI
Trying Out ArKaos VJ
Before you go
Looking into the Demo Synths
Basic Concepts
Introduction
Basic Elements
Setting up the Display
Introduction
If I have one Monitor - what do I
need to do?
If I have two Monitors - What do I
need to do?
Other ArKaos Settings
Setting up MIDI
Setting up MIDI under MacOS
Direct Driver
OMS
Setting up MIDI under Windows
Managing Synths and Patches
Introduction
Creating a Synth
Opening Windows Related to the
Synth
Saving, Opening and Closing
Synths
Making Screen Settings for the
Synth
Making MIDI Settings for a Synth
The Movie Folder dialog
Setting up Colors and
Transparencies for 256 colors
mode
Managing Patches
Setting up the Visuals
Preparations
The Visuals window
Assigning a visual to a key
The Visual Info dialog
The Effects
The Effects window
About Fixed and Plug-in Effects
Assigning an Effect to a key
Editing Effects
The Preview Function
Internal Effects and Parameters
Plug-in Effects and Parameters
Playing the Patches
Activating the ArKaos full-screen
display
Controlling ArKaos from a MIDI
keyboard
Controlling ArKaos from the
computer keyboard
Controlling ArKaos from a MIDI
sequencer
Using the Automation function
Closing the full-screen display
The Event Recorder
Introduction
Recording a “live” performance
Capturing a performance executed
by another MIDI device or program
Importing MIDI Files
Playing back
Managing Recordings
Rendering to QuickTime
Menu and Dialog Reference
File Menu
Edit Menu
Synth menu
Patch Menu
ArKaos Menu
Tips and Tricks
Pictures and Movies
Use of Effects
Optimizing Performance
Index

- 5 -
1
Introduction

- 6 -
Welcome!
We congratulate you on your choice of ArKaos VJ 2.1.
There is a lot of technology that allows musicians to manipulate audio and mu-
sical data in
real-time
editing and changing the contents of the music as it is
being played back.
ArKaos VJ brings the same approach to visuals.
If you are familiar with traditional multimedia on personal computers, you can
think of ArKaos VJ as the first real-time multimedia program, that in an innova-
tive, yet intuitive, way allows you to change and manipulate a visual perfor-
mance as it is running.
If you are a music oriented type of person, you can think of ArKaos VJ as a
sampler for pictures. The fresh attitude that samplers brought to audio, this
program brings to pictures and movies.
By combining ArKaos VJ with any MIDI sequencer software, you have the op-
tion of adding music and audio, turning your computer into a professional,
real-time multimedia workshop.
Regardless of your background we are sure you will appreciate the futuristic,
fast and flexible approach that ArKaos VJ takes to visual media. We wish you
many happy sessions with a software product, of which we are very proud.
Your ArKaos Team.

- 7 -
A few words about ArKaos VJ
This is one of two versions of ArKaos 2.1 available. The other version is VMP.
There are a few differences between the versions:
VJ
This is the version described in this documentation. VJ stands for Video
Jockey. This version will allow you to use all of the functions in ArKaos, includ-
ing QuickTime video loops and MIDI control.
VMP
VMP stands for visual MP3. In this version you can use all of the functions
available in VJ, with two exceptions;
• Movies
• MIDI control.
There are also some other differences between the versions, mainly in the
form of limitations to certain functions in ArKaos VMP.
Free or Registered
Each of the two versions can be run in Free or Registered mode. If you enter
no serial number you are only able to launch the program in Free mode. You
will be able to use all of the functions in ArKaos VJ, including saving your
work, but there will always be a banner with the text “www.arkaos.net” dis-
played in both full-screen mode and in the Preview window. How to register
ArKaos VJ is described on
A few words about the ArKaos Visualizer
The part of ArKaos VJ that displays the visuals in full screen mode is called the
ArKaos engine. There is also a plug-in version of this engine available called
the ArKaos Visualizer. This nifty little plug-in integrates seamlessly and trans-
parently into two major MP3 players; Soundjam and Winamp. In addition, the
plug-in also works with Windows MediaPlayer 7, Sonique 1.808 and Real-
Jukebox. The ArKaos Visualizer features a beat detection function, which
means that it listens to the spectrum of the music from the MP3 player and
triggers visuals at each new beat, effectively letting you create stunning visual
shows to accompany any MP3 song in perfect sync with the music. This
makes the ArKaos Visualizer the perfect tool for distributing all the cool visuals
you create with ArKaos VJ. More information about the ArKaos Visualizer is
available at www.arkaos.net.
- 8 -
Registration of ArKaos VJ
Although you can run ArKaos VJ without registering it, you get the absolute
most out of the program by purchasing a serial number and becoming a regis-
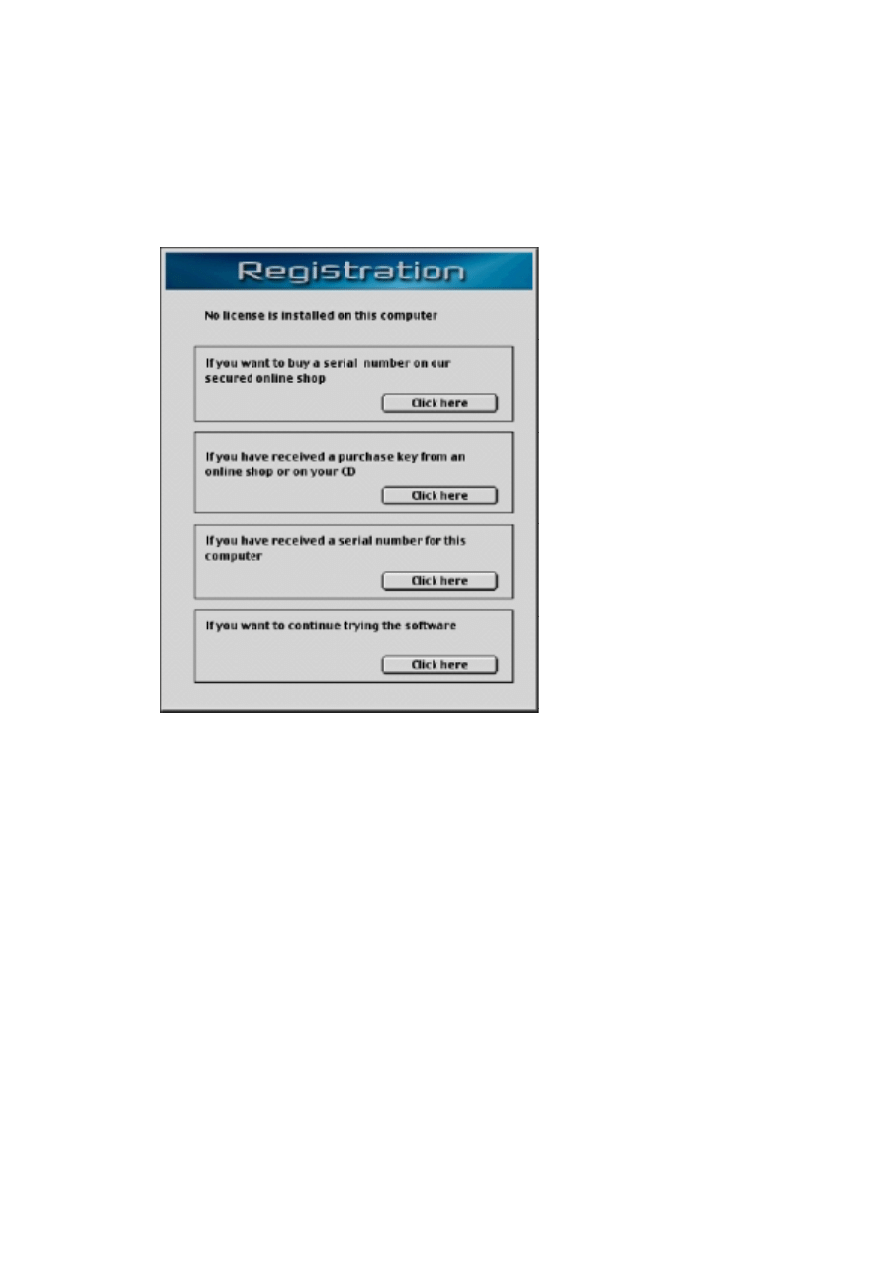
tered user. When you launch ArKaos VJ for the first time, the Registration di-
alog appears:
From here, there are a few different ways to go, depending on whether you
want to register ArKaos VJ or not, and from where you got the program:
If you want to buy a serial number...
Use this option if you have downloaded and installed ArKaos VJ from the
ArKaos website, and want to register the program. You need to have a work-
ing Internet connection.
When you click the button, your Internet browser is launched and you are
taken to the ArKaos website. The ID of your computer is then sent to ArKaos
secured webshop (when you download ArKaos VJ, the downloading com-
puter automatically receives an ID). A serialnumber is then generated for that
particular ID, and you can use the serialnumber to register your copy of
ArKaos VJ (see “If you have received a serialnumber...” on
).
• Temporary or Full serialnumber
There are two categories of serial numbers, temporary and full. A temporary serial-
number lets you use the full version of the software for a limited period of time only,
but on any computer. A full serialnumber on the other hand lets you use the full version
of the software indefinitely, but on one specific computer only.

- 9 -
If you have received a purchase key...
Use this option if you want to register the program when you have either:
• Downloaded ArKaos VJ from another webshop (i.e. not the ArKaos webshop).
• Bought ArKaos VJ “in a box” from a webshop.
• Bought ArKaos VJ over the counter in a store.
In any of these cases you will have received a purchase key, which you can
use to receive a serialnumber (see “Purchase key usage” on
purchase key can also be used as a temporary serialnumber (see “Temporary
or Full serialnumber” on
), that is, you can enter the purchase key in-
stead of a serialnumber when registering ArKaos VJ. See “Serial Activation”
on
If you have received a serialnumber...
Use this option when you have received a serial number for registering
ArKaos VJ on a specific computer. Clicking this button opens another dialog,
from which you register the program using the serialnumber. How to do this
is described under “Serial Activation” on
.
If you want to continue trying the software
Use this option if you do not want to register ArKaos VJ. As previously de-
scribed, you can still use the program in free mode if you choose not to regis-
ter it. You will still have access to all of the functions, including saving your
work, but there will always be a banner with the text www.arkaos.net visible
on the screen when the visuals are displayed in full-screen mode.
- 10 -
Purchase Key Usage
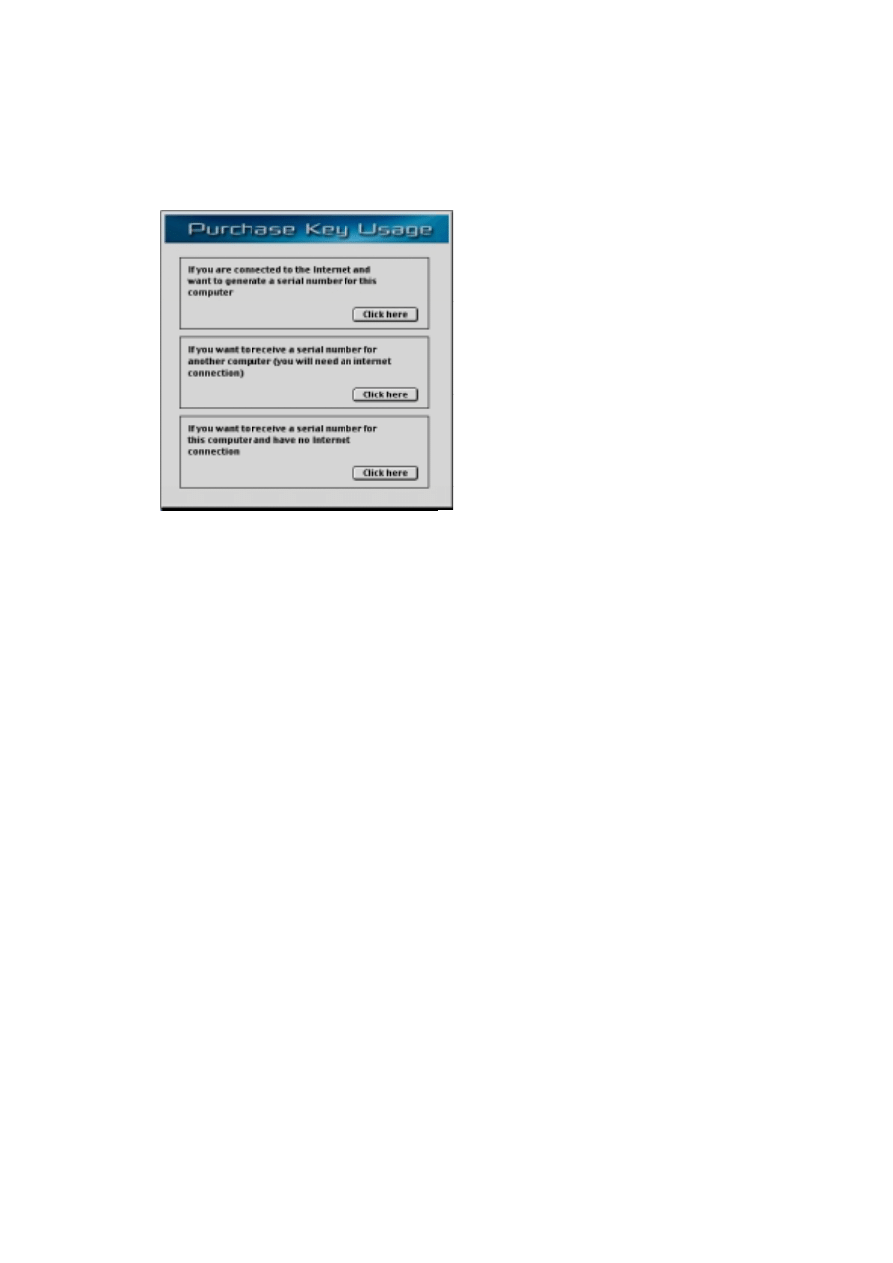
When you use the “If you have received a purchase key...” option in the Reg-
istration dialog (see
), another dialog opens. Here you specify how you
want to use your purchase key:
All three options can be used for receiving a serial number with which you can
register the program, as described under “If you have received a serialnum-
ber...” on
. The differences between the options are as follows:
• The first option is used if the computer on which you have installed and aim to use
ArKaos VJ has a working Internet connection. Clicking this option will open another di-
alog. See “Online Activation” on
• You can install ArKaos VJ on up to three different computers by using a purchase key,
but you can only register the program on
one
specific computer. The second option is
used if the computer on which you have installed and want to register ArKaos VJ does
not
have a working Internet connection, but you have also installed the program on an-
other computer that
does
have a working Internet connection and you are using that
computer. Clicking this option takes you to the Arkaos website where you will then re-
ceive a serialnumber.
❐
To be able to receive a serial number in this case you will need to have the pur-
chase key, and the ID of the computer for which you want to generate a serial
number.
• The third option is used if you do not have access to the Internet. If that is the case,
you can fax your computer ID and the purchase key to ArKaos, and you will receive a
serialnumber by fax or mail. See “Offline Registration” on
tion.
- 11 -
Online Activation
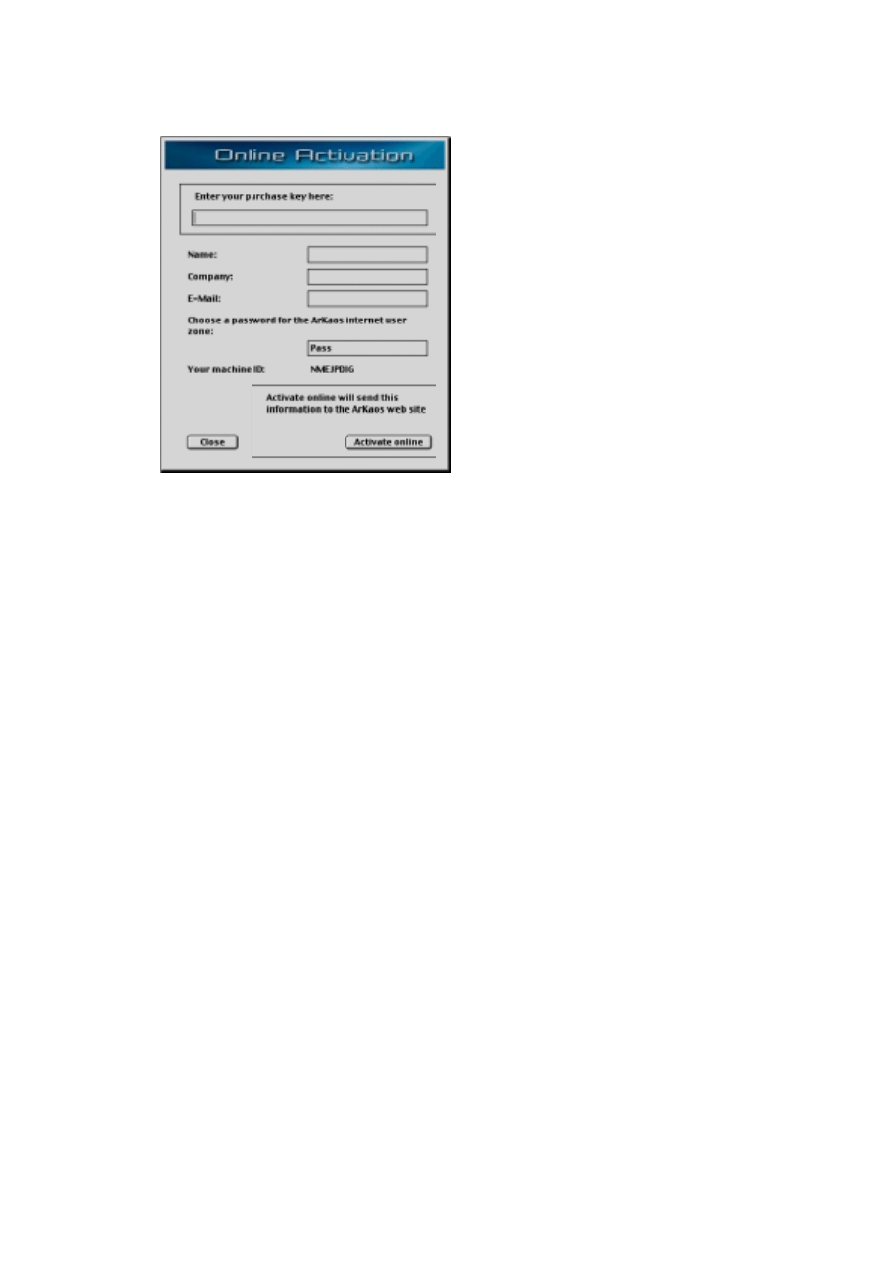
This dialog opens if you select the first option in the “Purchase Key Usage”
dialog (see
). Use this dialog to receive a serial number in the follow-
ing way:
1. Fill in the fields with your purchase key, name and company (if any).
2. Enter a password of your own choice.
This is very important, since it will give you access to a user zone on the ArKaos web-
site.
3. Click the “Activate online” button.
The data is sent encrypted to the ArKaos website. If everything is in order, you will re-
ceive a confirmation message and a serial number will automatically be generated and
recorded.
4. Quit ArKaos VJ and then relaunch the program.
This is to ensure that the preferences file is saved with the correct information.
If any errors occur when you click “Activate online”, check the following:
• Did you make some mistake when typing the purchase key?
• Is your Internet connection working properly?
- 12 -
Offline Registration
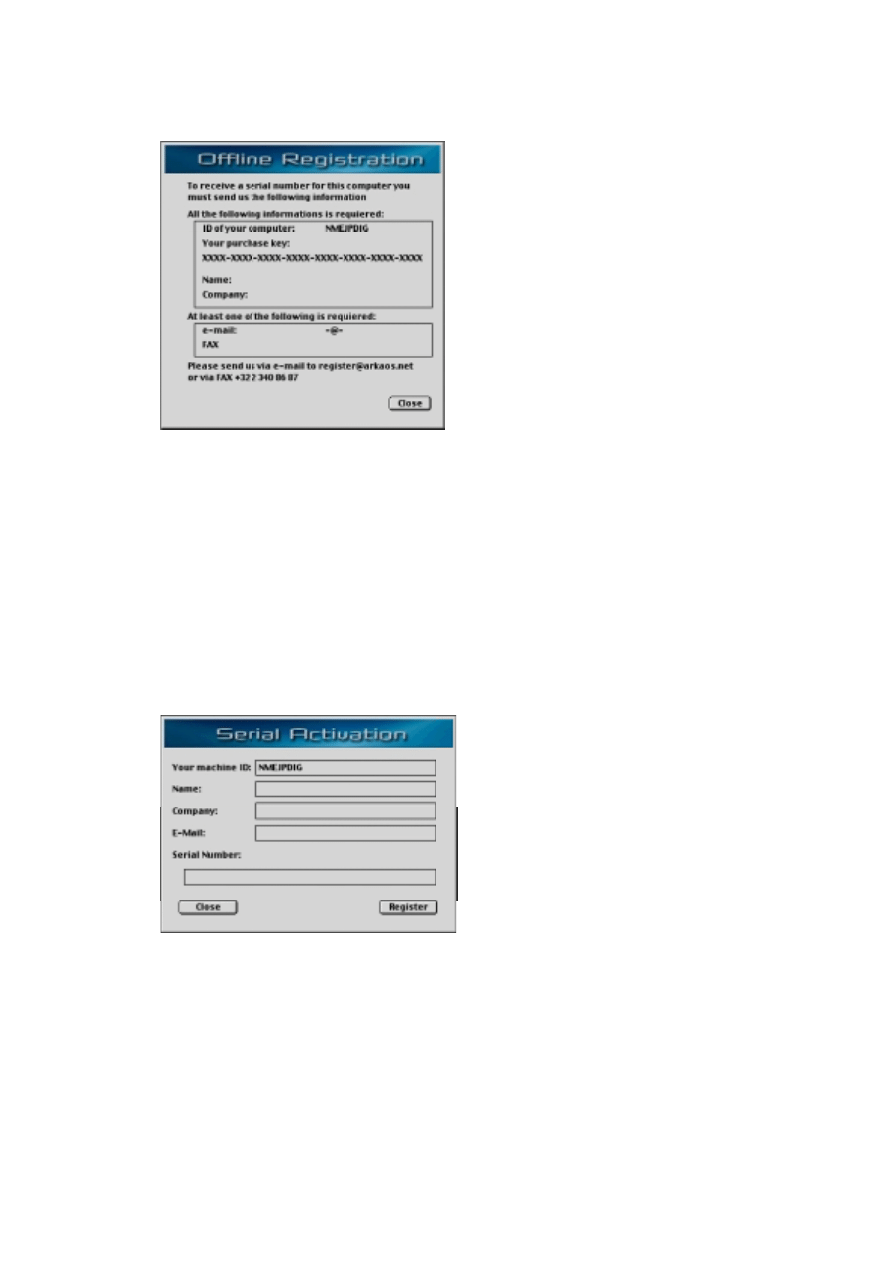
This window opens when you click the third option in the “Purchase key us-
age” dialog (see
). Take note of what it says and send the information
required here to ArKaos, and a serialnumber will be sent to you. You can ei-
ther use e-mail or fax. The e-mail address or fax number to use is displayed at
the bottom of the window.
❐
Don’t forget to supply ArKaos with a means of contacting you, either an e-mail
address or a fax number, otherwise the serialnumber can’t be sent to you. Please
also note that these are the only two ways of communication possible. ArKaos
will for instance
not
give you a serialnumber over the phone.
Serial activation
This dialog opens when you click the “If you have received a serialnumber...”
button in the main registration screen, as described on
valid serialnumber (temporary or full) you use this dialog to register ArKaos VJ
in the following way:
1. The dialog shows your machine ID. Fill in the fields with your name, company (if
any) and e-mail address.
❐
Do not make any changes in the Machine ID field.

- 13 -
2. Enter the serial number.
The easiest way to do this is to simply copy the serial number and then paste it into the
dialog.
3. Click the “Register” button.
The dialog closes, and you are now a registered user of ArKaos VJ 2.1.
❐
Note that you can also enter your purchase key instead of a serialnumber. The
purchase key will then work as a temporary serialnumber. There is a significant
difference between using a purchase key and a serialnumber: A purchase key al-
lows you to install and use the full version of the program on up to three differ-
ent computers, but only for a limited period of time. A serialnumber allows you
to install and use the full version of the program indefinitely, but on one com-
puter only.

- 14 -
2
Preparations

- 15 -
About this chapter
This chapter will guide you through the basic preparation procedures needed,
and will give some recommendations for getting the absolute most out of
ArKaos VJ on your system.
Recommended System configurations
In the Installation booklet, you will find the
minimum
system requirements for
the program. Below are the
recommended
system configurations, that will al-
low you to make full use of the capabilities of ArKaos VJ.
MacOS
• A Power Macintosh G3 or better.
• System 8.5 or later.
• QuickTime 4.1 or later.
• 64 MegaBytes of RAM total.
❐
It is not recommended to use a 68k Macintosh with the processor accelerated
with a PowerPC card, since the performance may still be limited by other, un-
accelerated components.
Windows
• A PC with a Pentium II processor or better.
• Windows 95, 98, 2000, NT4.
• DirectX 7.0 or later.
• QuickTime 4.1 or later.
• 128 MegaBytes of RAM total.
❐
Running ArKaos VJ continuously for an extended period of time requires an op-
erating system with very efficient memory management. Therefore Windows
2000 is recommended.
Optional Equipment
To be able to launch and run ArKaos VJ, all you need is a computer, Macintosh
or PC. However, to take full advantage of the program, you will probably want
some additional equipment:
• A MIDI controller and a MIDI interface.
This is essential for controlling ArKaos VJ’s visual effects in real-time (you can
do this from the computer keyboard as well, but then you will not have access
to velocity, pitch bend and modulation wheel). For details about the MIDI
equipment and installation, see
• An extra monitor.

- 16 -
The program can display the visual effects on a separate monitor. This de-
pends upon whether your computer can handle more than one monitor or not.
Most Macintosh models need a separate graphics card to achieve this. PC´s
need to have two separate graphics cards, and an OS that supports the use of
two monitors. See
.
• A MIDI sequencer program.
Recording your MIDI control messages in a MIDI sequencer gives you com-
plete automatic playback of the visual effects. ArKaos VJ handles internal
MIDI communication within the computer in the following ways:
MacOS:
The communication is handled by OMS (Open Music System), pro-
vided that the MIDI sequencer supports OMS, and that you have OMS 2.0 or
later installed on your computer (see
).
Windows:
The communication is handled by some third-party application,
such as Hubi´s LoopBack Device, which is a virtual MIDI Driver that enables
multiple MIDI programs to use the same MIDI device simultaneously. There
are various such programs available as freeware (see
Of course, there is also another way of connecting a sequencer to ArKaos VJ:
Externally, via the MIDI interface. This requires that you either use a stand-
alone hardware sequencer or that you have two computers, one for ArKaos
VJ and one for the sequencer program.
- 17 -
Setting up the Monitor
MacOS
If you have one monitor only
If you only have one monitor hooked up to your computer, proceed as follows:
1. Open the “Monitors” control panel, switch the screen resolution to 640 x 480,
and set the number of colors to thousands.
Actually, in most cases ArKaos VJ can do this for you, but that option is described on
.
2. If your Macintosh system doesn’t support this resolution, select the next larger
value.
This will not do any harm to your system, it only means the images won’t cover your
entire screen.
If you have two monitors
ArKaos VJ can display the visuals on a second monitor, leaving the first moni-
tor for the “work windows” and for other program’s windows. If you are for-
tunate enough to own two monitors, proceed as follows:
1. Open the “Monitors” control panel, and select the monitor that you want to use
for displaying the visuals.
2. Switch the screen resolution of this monitor to 640 x 480, and set the number of
colors to thousands.
3. In ArKaos VJ, select Preferences from the Edit menu, and from the submenu that
appears, select “Monitors...”.
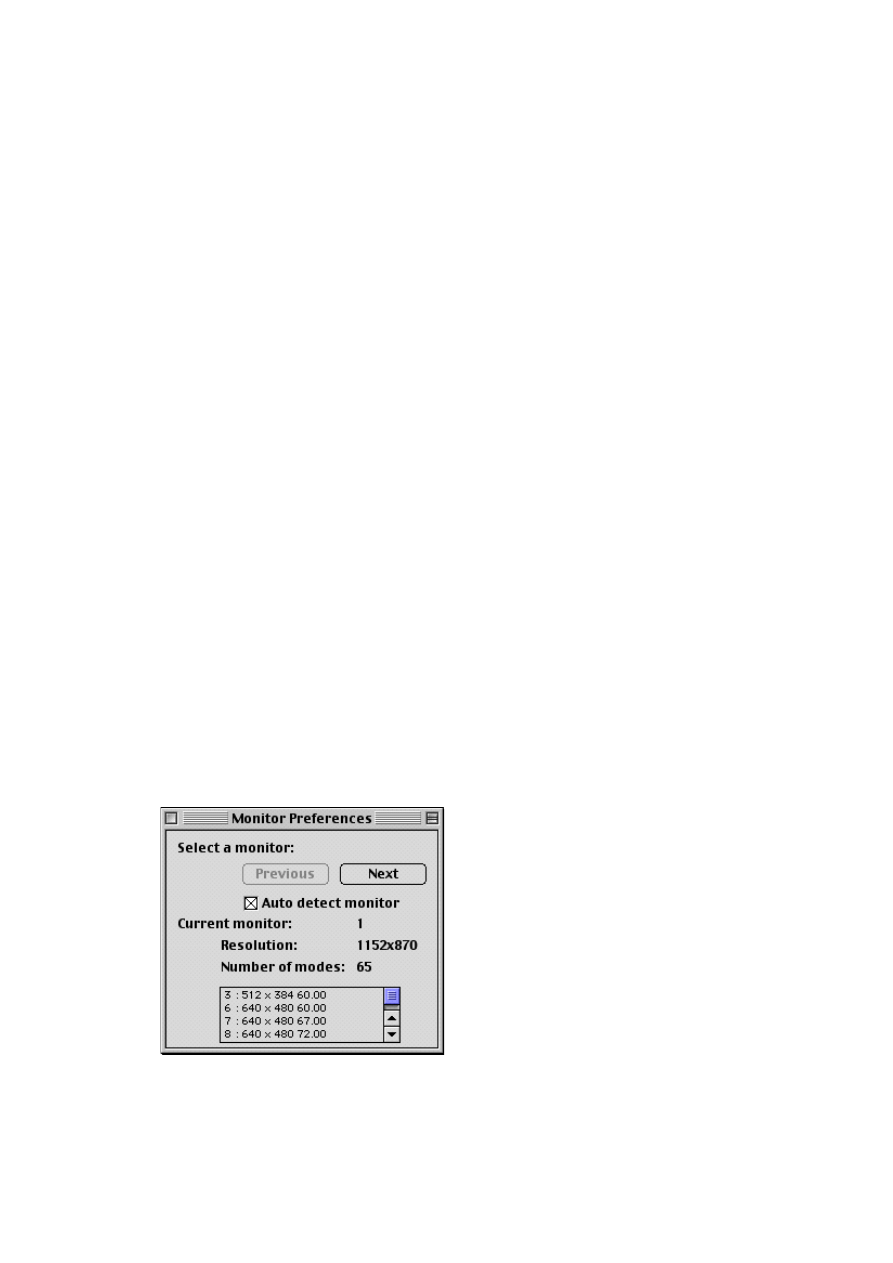
The Monitor Preferences dialog opens with the settings for the primary mon-
itor shown. If the program has detected the second monitor properly, the
“Next” button is black (instead of greyed-out).
4. Use the Previous and Next buttons to select the monitor that you want to dis-
play the visuals on.
- 18 -
5. Close the window.
There may be situations when you are not absolutely sure which monitor is selected
for the display. If that is the case, just pull down the ArKaos menu, select “Activate
ArKaos” and check on which monitor the visuals appear. To close the display, pull
down the ArKaos menu again and select “Deactivate ArKaos”.
See
for more information about setting up your monitor under Ma-
cOS.
Windows
If you have one monitor only
Because of the fact that ArKaos VJ uses DirectDraw to communicate directly
with your graphics hardware when displaying visuals, there really is no need
to make any settings except for the following:
1. Open the “Display Properties” dialog from the control panel or by right clicking
on your desktop, and set the number of colors to at least High Color (16 bits).
❐
On most relatively modern PC´s, the video card is connected to a port called AGP
(Accelerated Graphics Port). If the video card in your system is not connected via
AGP, then you need to do the following:
2. In ArKaos VJ, select Preferences from the Edit menu, and from the submenu that
appears, select “Monitors...”.
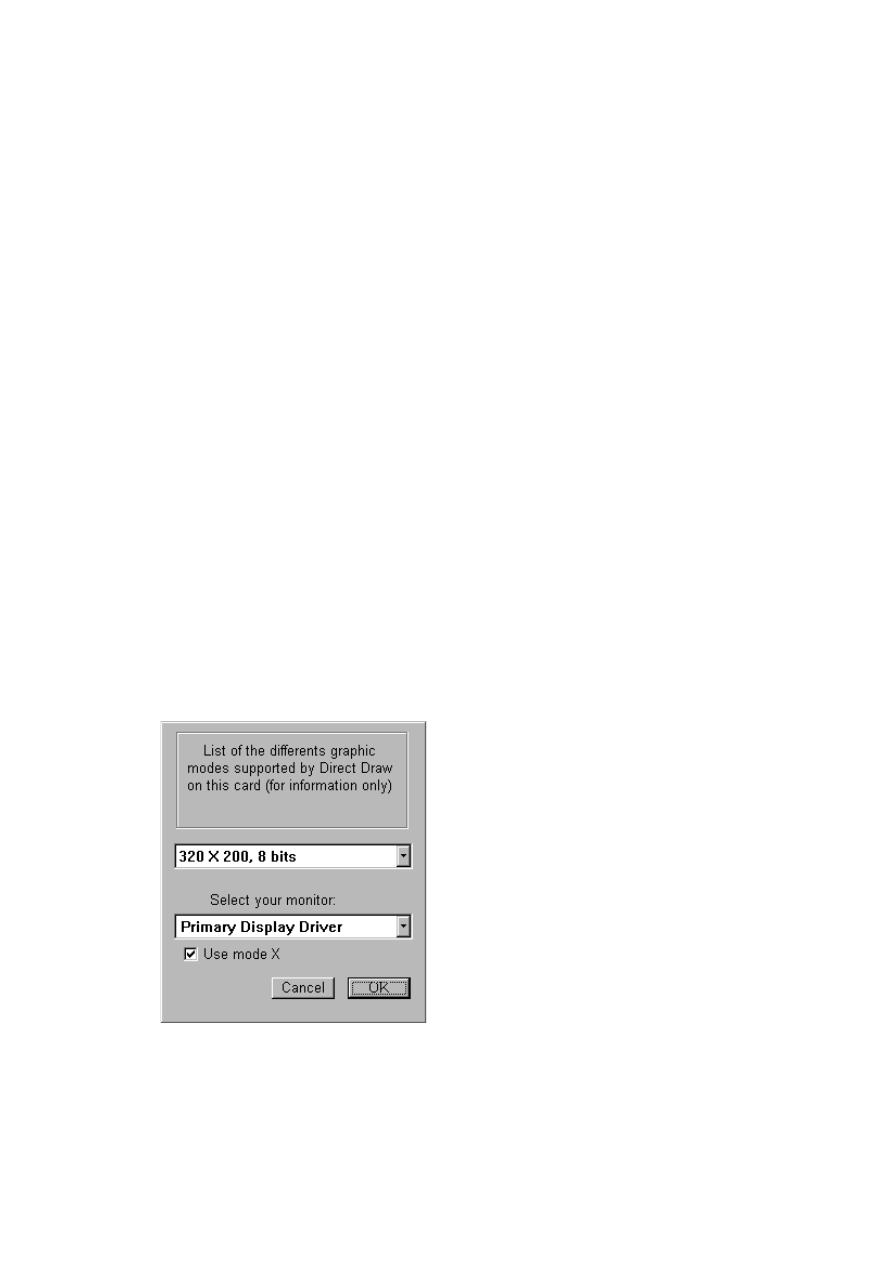
The Monitor information dialog opens.
3. In the dialog that appears, click in the “Use Mode X” box to activate this func-
tion.
This informs ArKaos VJ that you are using a non-AGP video card.

- 19 -
If you have two monitors
ArKaos VJ can display the visuals on a second monitor, leaving the first moni-
tor for the “work windows” and for other program’s windows. If you are for-
tunate enough to own – and have a system that supports the use of – two
monitors, proceed as follows:
1. In ArKaos VJ, select Preferences from the Edit menu, and from the submenu that
appears, select “Monitors...”.
The Monitor information dialog opens.
2. From the “Select your monitor” drop down list, select the monitor that you
want to use for displaying the visuals.
If your system is set up correctly, both your primary and secondary display driver will
be listed. If they are not, consult the troubleshooting manual for your operating sys-
tem.
3. If any monitor is connected to a non-AGP video card, be sure to activate the
“Use Mode X” option.
See
for more information about setting up your monitor under Windows.
Setting up MIDI
Basic Preparations
1. Make sure all your MIDI equipment is connected properly.
The MIDI interface should be installed. You should have a MIDI keyboard connected to
the MIDI In on the MIDI interface. Both the keyboard and the interface should be
turned on.
2. Make sure your MIDI keyboard transmits on MIDI Channel 1.
If you are unsure, consult the keyboard’s operation manual.
MacOS
1. In ArKaos VJ, pull down the Edit menu, select Preferences, and from the sub-
menu that appears, select “MIDI System”.
2. In the dialog that appears, select “Direct driver”.
3. Close the dialog.
4. Quit and restart the program.
5. Again select Preferences, but now select the “MIDI Setup” dialog.
6. Select the port (Modem or Printer) that your MIDI interface is connected to.
7. Close the dialog.

- 20 -
Windows
1. In ArKaos VJ, pull down the Edit menu, select Preferences, and from the sub-
menu that appears, select “MIDI Setup”.
2. Select the appropriate MIDI device.
If you have multiple MIDI devices installed, you can check the “Use all devices” box,
to be able to use them all simultaneously.
3. Close the dialog.

- 21 -
3
Trying Out ArKaos VJ

- 22 -
Before you go
This tutorial assumes the following:
• That you have your monitor set to at least a resolution of 640 x 480 pixels in 256
colors.
❐
It is highly recommended that you have your monitor set to a color depth of 16
bits (thousands of colors), if possible.
• That you have a regular MIDI interface connected to your computer, and a MIDI
keyboard connected to this interface.
However, if you don’t have a MIDI keyboard you can use the computer keyboard in-
stead. This is described in more detail on
• That you have made the preparations described in the previous chapter.
- 23 -
Looking into the Demo Synths
As described in the installation documentation, a standard ArKaos VJ installa-
tion includes a number of Preset Synth files, complete with pictures and mov-
ies. In this section, we will take a look at one of these files and try out using
ArKaos VJ.
❐
MacOS note: This assumes that you have used “Easy Install” or included Demo
Synths in your “Custom Install”. If not, you can launch the Installer again, select
Custom Install, and use the checkbox to install Demo Synths.
Playing a Patch
Preparations
1. Launch ArKaos VJ.
2. Pull down the File menu and select Open.
A file dialog appears.
3. Locate the “Demo Synths” folder, select the file “Organic.kos” and click Open.
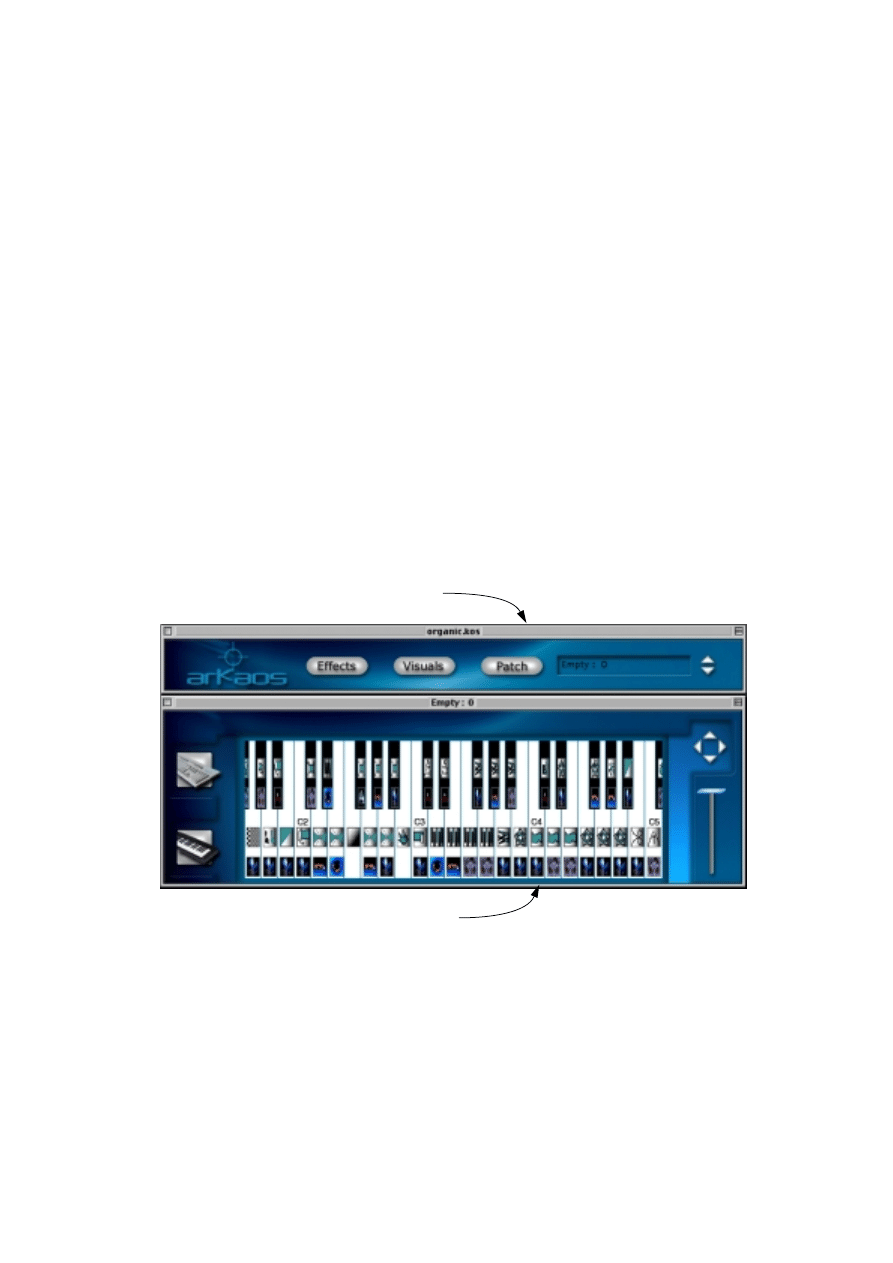
The file is a Synth (the main document in ArKaos VJ). When you open it, two
of the windows you will see on the screen are the following:
The window with the keyboard is called the Patch Keyboard window. It
shows which visuals (pictures or movies) and effects are assigned to the dif-
ferent keys. It also features a zoom slider and scrolling controls. These are lo-
cated to the right in the window.
The Synth panel window
The Patch keyboard window.
- 24 -
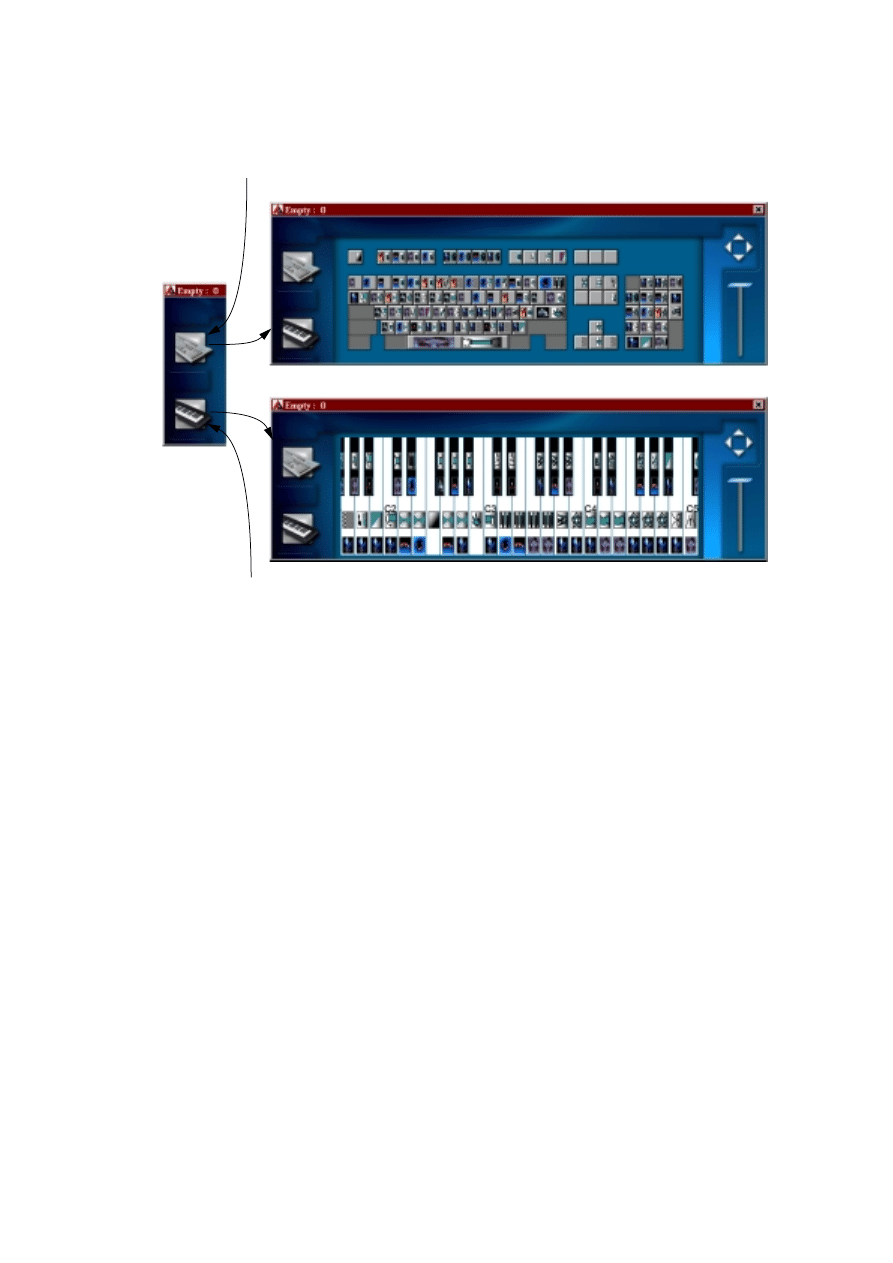
4. Decide whether you want to play the Patch via MIDI or via the computer key-
board, by clicking the corresponding button in the Patch keyboard window.
5. Pull down the ArKaos menu and select “Activate ArKaos”.
You now start the actual ArKaos engine, the “heart” of ArKaos VJ. The full-screen dis-
play opens.
6. Try playing different keys.
You will see different visuals and effects applied to them. Some of the effects are al-
most instantaneous, others require that you hold the key pressed for a while.
7. Exit the full-screen display by the following means:
If you only have one monitor, simply click the mouse button on the Macintosh. On the
PC, click the left mouse button. If you have two monitors, use the ArKaos menu and
select “Deactivate ArKaos”.
You are returned to the ArKaos VJ windows.
Switching Patches
What you just did was to try out the visuals and effects of a Patch. A Patch
contains settings for each key on the keyboard, as displayed in the Patch key-
board window. A Synth can contain up to 128 Patches. You switch Patches in
the following way:
1. Click on the Synth window so that it gets selected.
The Synth window is the window at the top of the screen.
The MIDI keyboard button.
The computer keyboard button.

- 25 -
2. Click on the Arrow Up-button.
This selects the next Patch, as shown in the Patch name box to the left of the arrows.
3. Click on the Patch button to open a Patch keyboard window for the new Patch.
If you now Activate ArKaos as described on the previous page, you will play the new
Patch, with the effects and visuals laid out as shown in the new Patch keyboard win-
dow.
❐
When you Activate ArKaos, the currently selected Patch is loaded. You select
Patch with the Arrow buttons, or by clicking on a Patch keyboard window.
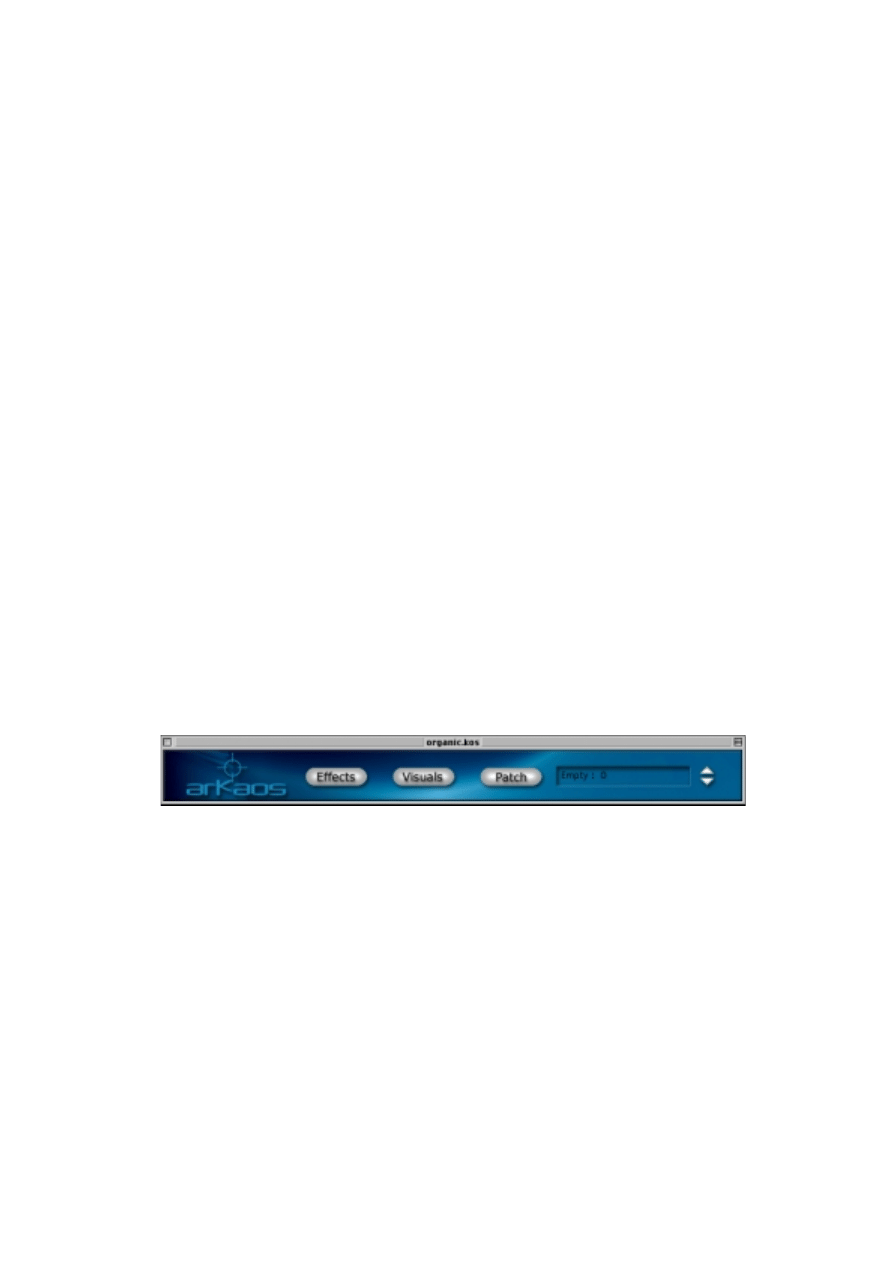
The Synth panel window, with
the Patch “Empty : 0” selected.
Clicking on this button
selects the next Patch.
- 26 -
Changing the settings of an Effect
In this section, you will try editing the settings of an effect. When you set up
the visuals and effects in a Patch, you wouldn’t want to Activate ArKaos all
the time to check out your settings, since this involves a bit of waiting for the
program to load the visuals. Instead you use the Preview window, which can
be open all the time while you are working:
1. Pull down the File menu and select Open.
A file dialog appears.
2. Locate the “Demo Synths” folder, select the file “Feedback.kos” and click Open.
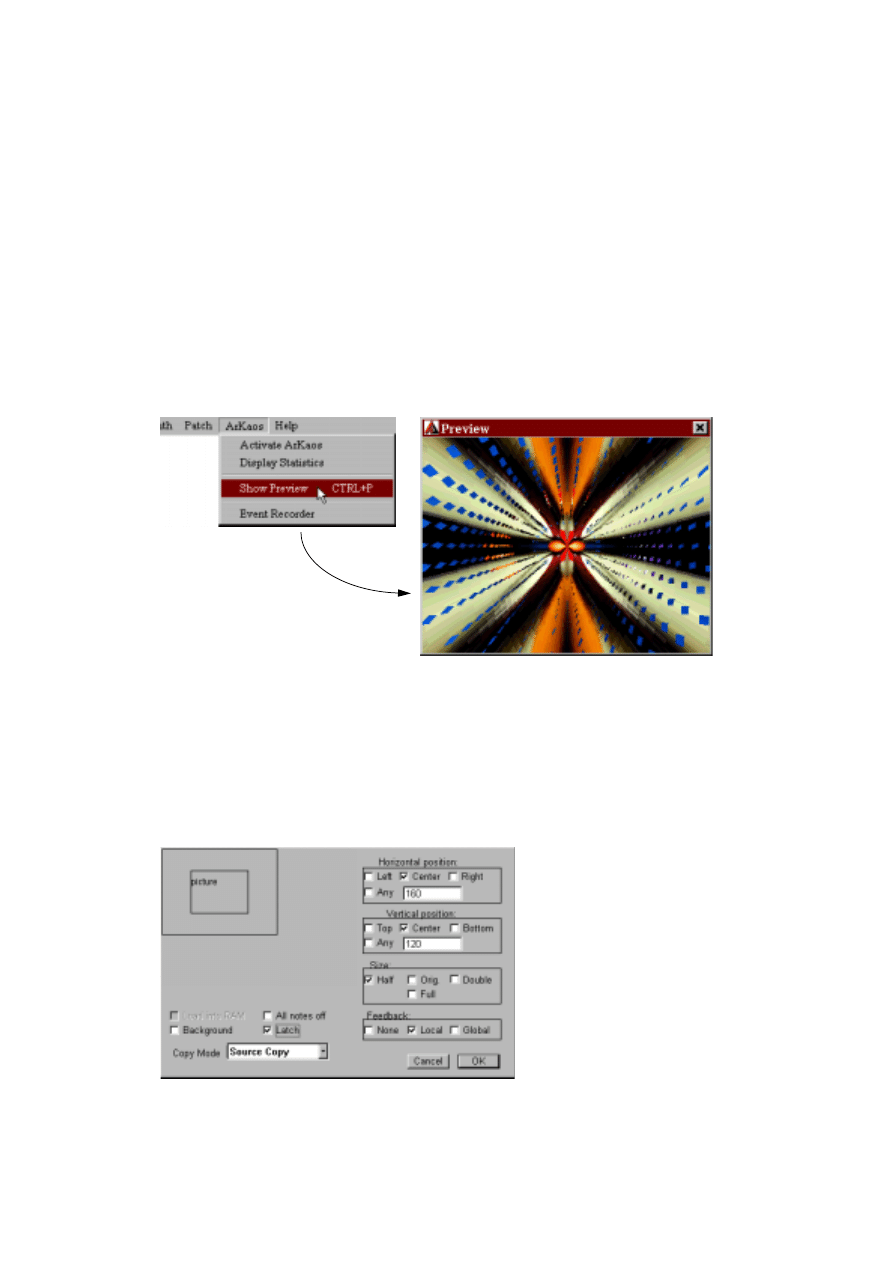
3. Pull down the ArKaos menu and select Show Preview.
The Preview window opens. If you like, you can drag it to a position where it doesn’t
obscure the other windows.
Opening the Preview window.
Next, we will make some settings for how the visuals we will use in this ex-
ample is displayed in relation to each other. This is jumping ahead a bit, but
don’t bother with grasping the concept of these settings just now. they will all
be explained later.
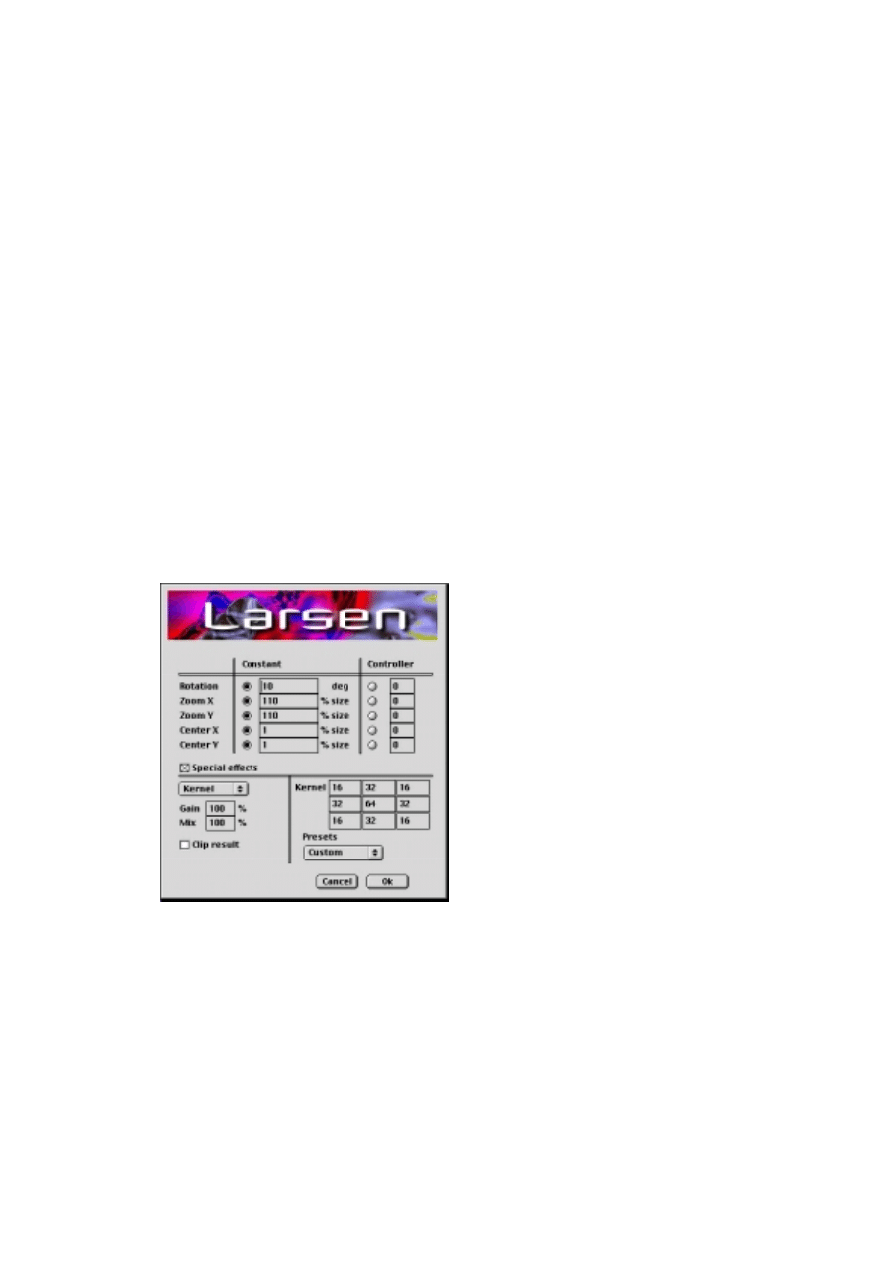
4. In the Patch keyboard, double click on the lower icon on the key D#1.
This opens a dialog with various settings for the visual.
5. Pull down the pop-up menu for “Copy Mode” and select “Transparent”.
6. Click OK to close the dialog.
- 27 -
7. Next, double click on the lower icon on the key C#2.
8. In the dialog, tick the checkboxes for the options “Background” and “Latch”.
9. Click OK to close the dialog.
10.Try the Preview function by pressing the key C#2 once, and then the key D#2 on
your MIDI keyboard. If you use the computer keyboard, first press [Spacebar]
once and then [U].
First, a picture resembling a Yin and Yang symbol is shown. It then becomes distorted
and starts to swirl. When you press the second key, another picture is displayed and
this picture, as you can see, is also affected by the effect on the first key. Try pressing
the second key a few times. You will notice that each time you press the key, the im-
age starts to swirl but each time the colors are slightly different. This is due to the ef-
fect on the second key. However, we will change the settings of the effect on the first
key, the one that makes the image swirl. This is an effect, called Larsen. To stop this
effect, just press the first key again.
Now, let’s edit the effect that is assigned to the second key:
11.In the Patch keyboard window, double click on the upper icon on the key that ac-
tivates the effect.
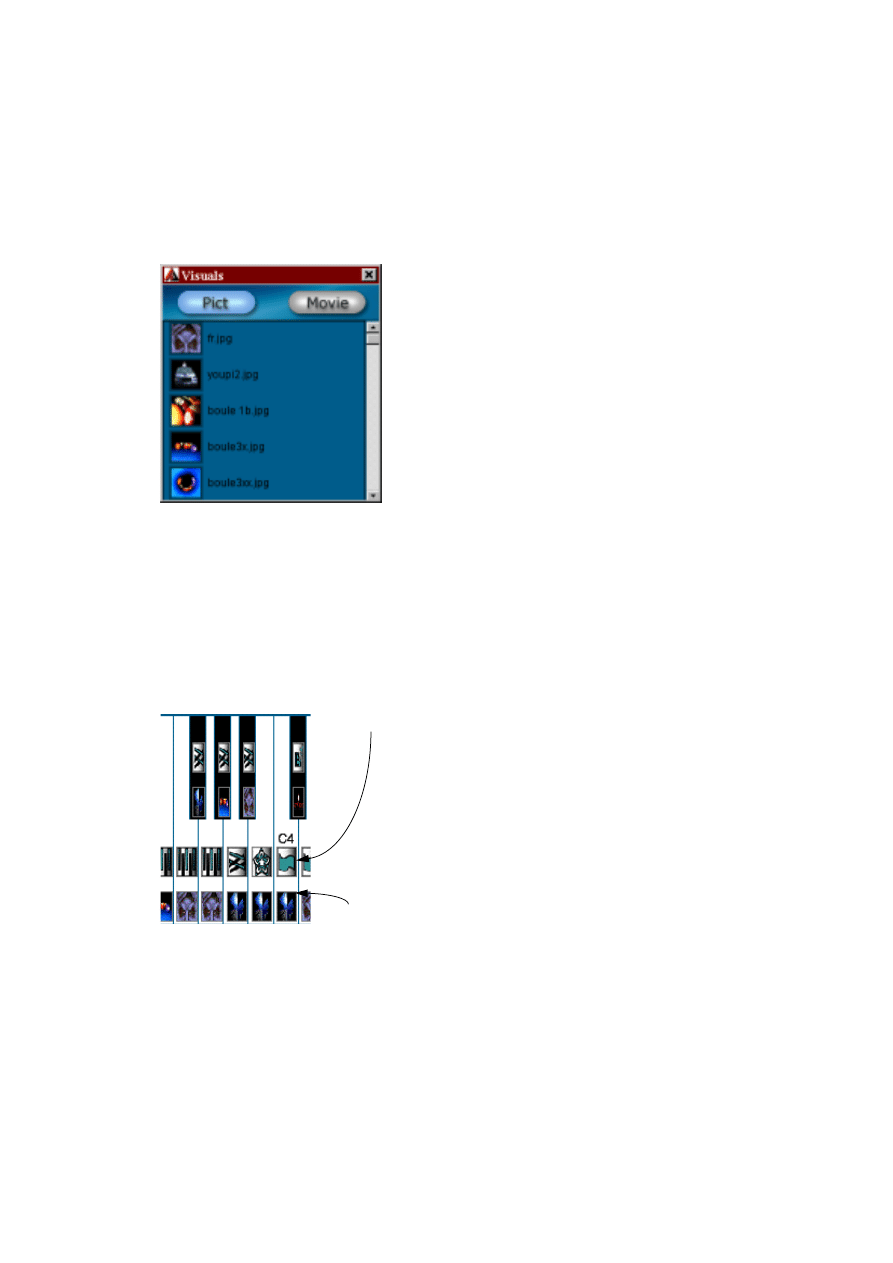
Double clicking on the effect icon opens a window with settings for the selected ef-
fect:
Settings for the “Larsen” effect.
12.Put a checkmark in the “Clip Result” box, by clicking in it.
The effects and their parameters will be explained later on in this book.
13.Click OK to close the Options dialog and the Effect list dialog.
14.Try the edited effect by pressing the keys again.
As you can see, you have changed the effect so that the swirling colors are not as
“wildly psychedelic”, but more based on the original colors of the picture.
- 28 -
Dragging a Visual onto a Patch Cell
Finally, let’s try adding another visual to the Patch:
1. In the Synth window, click on the Visuals button. You can also press [Com-
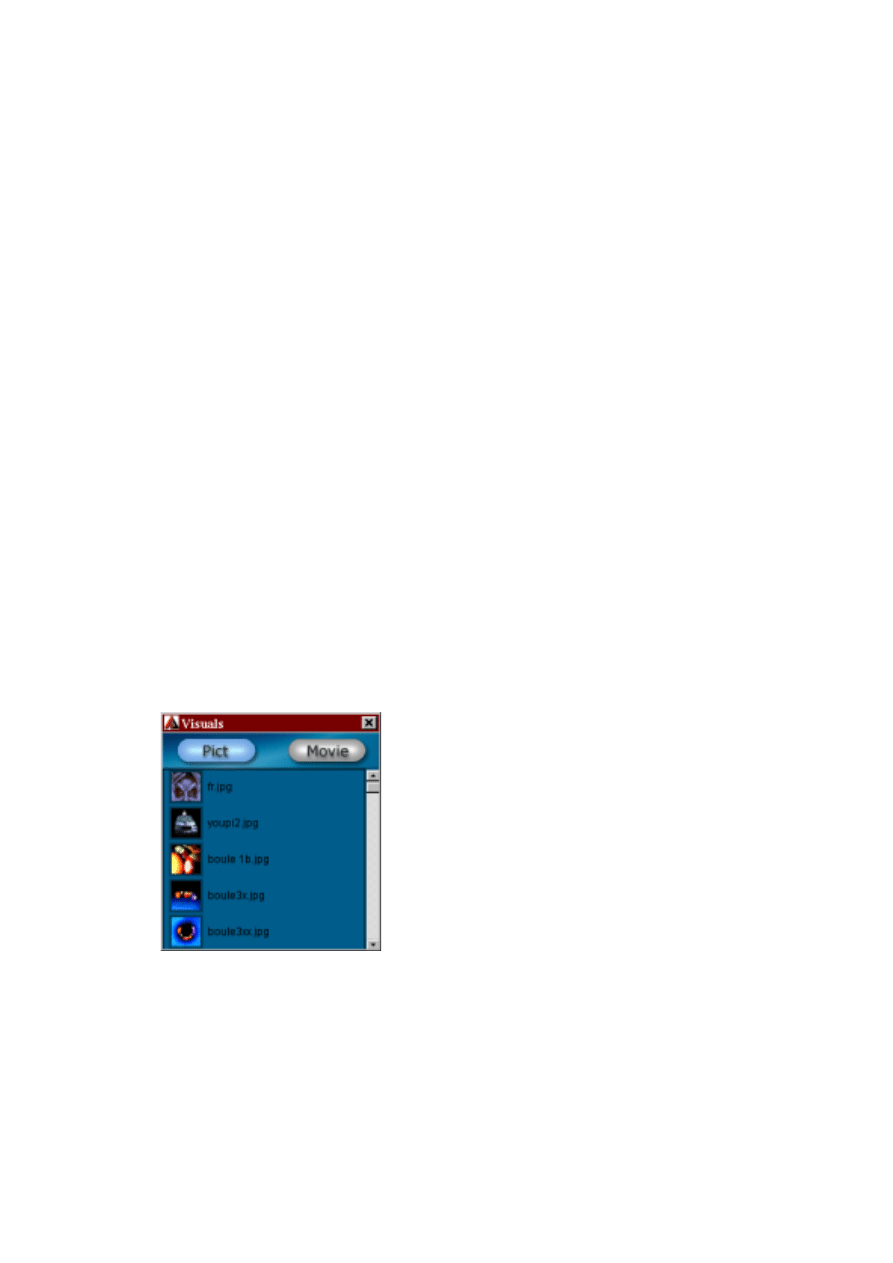
mand]-[1] on the Macintosh or [Control]-[1] on the PC.
The Visuals window is made active. This window contains lists of all pictures and
movies used in the Synth.
2. Click on the Pict button at the top left of the Visuals window.
This is to make sure that the picture list is shown, and not the list of movies.
3. Click on a picture icon of your liking and drag it into the Patch keyboard window.
4. Drop the icon in the lower cell of one of the keys.
The upper row of cells is used for effect icons, so you cannot drop the visual icon
there. If you drop the icon in a cell already containing a visual icon, the previous visual
will be replaced.
Now you have assigned a picture to one of the keys in the Patch. Try it out by opening
the Preview window or Activating ArKaos and pressing the key.
Now, you have seen a brief glimpse of the amazing capabilities of ArKaos VJ.
The following chapters describe how to set up your own Synths and Patches
for the program, and how to create visual performances of your own. Good
luck!
Effect cell
Visual cell

- 29 -
4
Basic Concepts
- 30 -
Introduction
This chapter introduces you to the basic concepts of ArKaos VJ and its “build-
ing blocks”. By reading this chapter you won’t actually learn how to do any-
thing, but it’ll make your life much easier when following the procedures in
the following chapters.
It is of course of great benefit if you have already followed the Tutorial in the
previous chapter.
Basic Elements
The following elements are used in ArKaos VJ:
Visuals
This is a general name for pictures and movies. As you probably know by
now, this program allows you to display pictures and movies in “real-time”,
and allows you to manipulate these in a number of ways, to create a complete
performance or “show”.
Picture and Movie formats
ArKaos VJ accepts pictures in PICT, BMP and JPEG file format and movies in
QuickTime (MOV), Video for Windows (AVI) and Flash Animation (SWF) for-
mat. For more information on how to prepare pictures and movies, see
The Visuals window
The Visuals window is opened by clicking the Visuals button on the Synth
panel, or by selecting “Visuals...” from the Synth menu. You can also use the
keyboard shortcuts [Command]-[1] on the Macintosh, and [Ctrl]-[1] on the PC.
It contains a list of all visuals used in your Synth (actually two lists, one for pic-
tures and one for movies).
You import visuals into this window by using drag and drop from the Finder in
MacOS and from the Explorer in Windows. You can also use the import com-
mand from the file menu in ArKaos VJ.
- 31 -
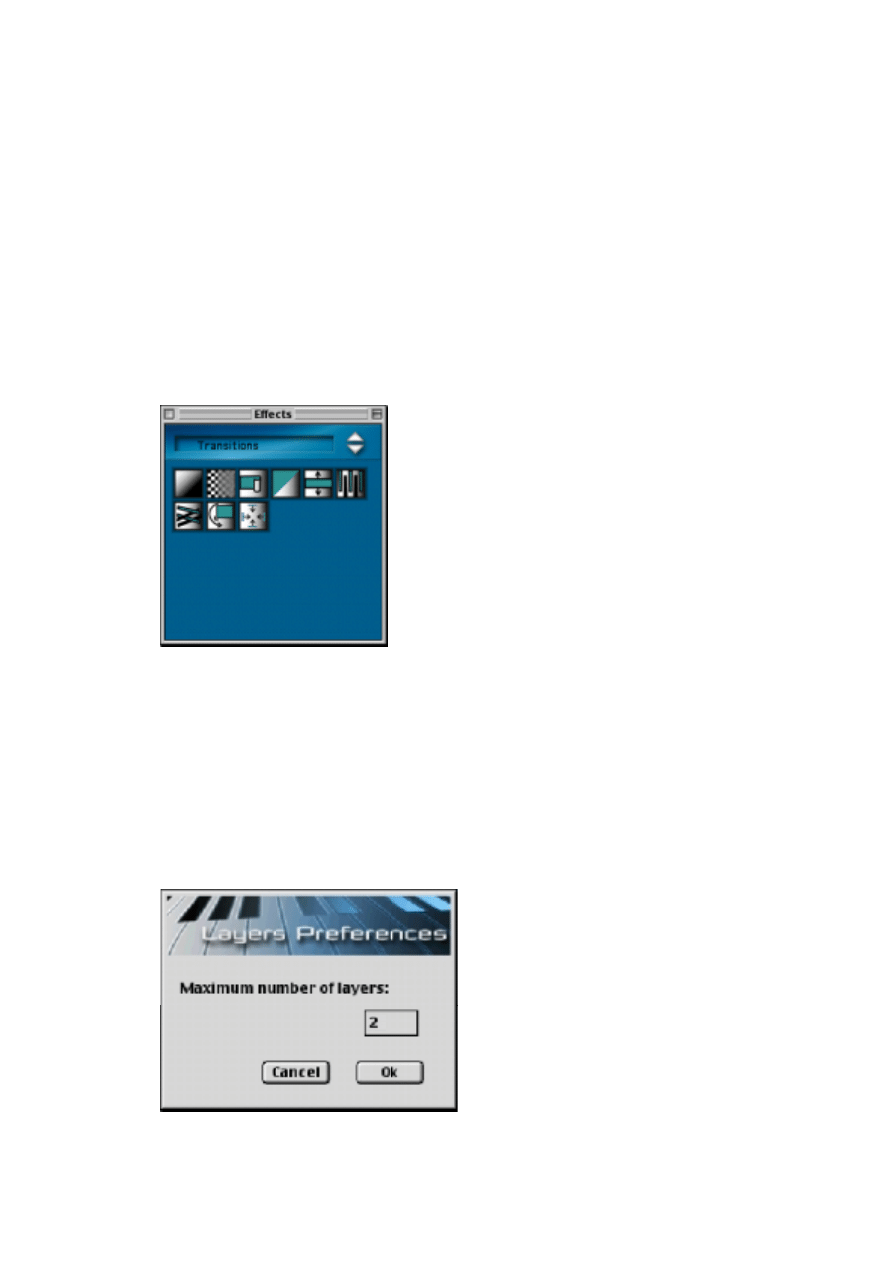
Effects
An Effect does something to alter the picture currently shown on screen. This
can be anything from changing its colors to shattering the image into little
pieces, changing its shape or whatever.
Many Effect types are included with ArKaos VJ, and due to the open architec-
ture of the program, new Effects may also be added at any time. If you regis-
ter your version of ArKaos VJ, as described on
, you will be able to get
new Effects from a user zone on the ArKaos website.
Most of the Effects have a number of parameters so that you can adjust them
to your liking.
The Effects window
This window contains icons for all Effects in the program. It is opened by click-
ing the Effects button on the Synth panel, or by selecting “Effects...” from
the Synth menu. You can also use the keyboard shortcuts [Command]-[3] on
the Macintosh, and [Ctrl]-[3] on the PC.
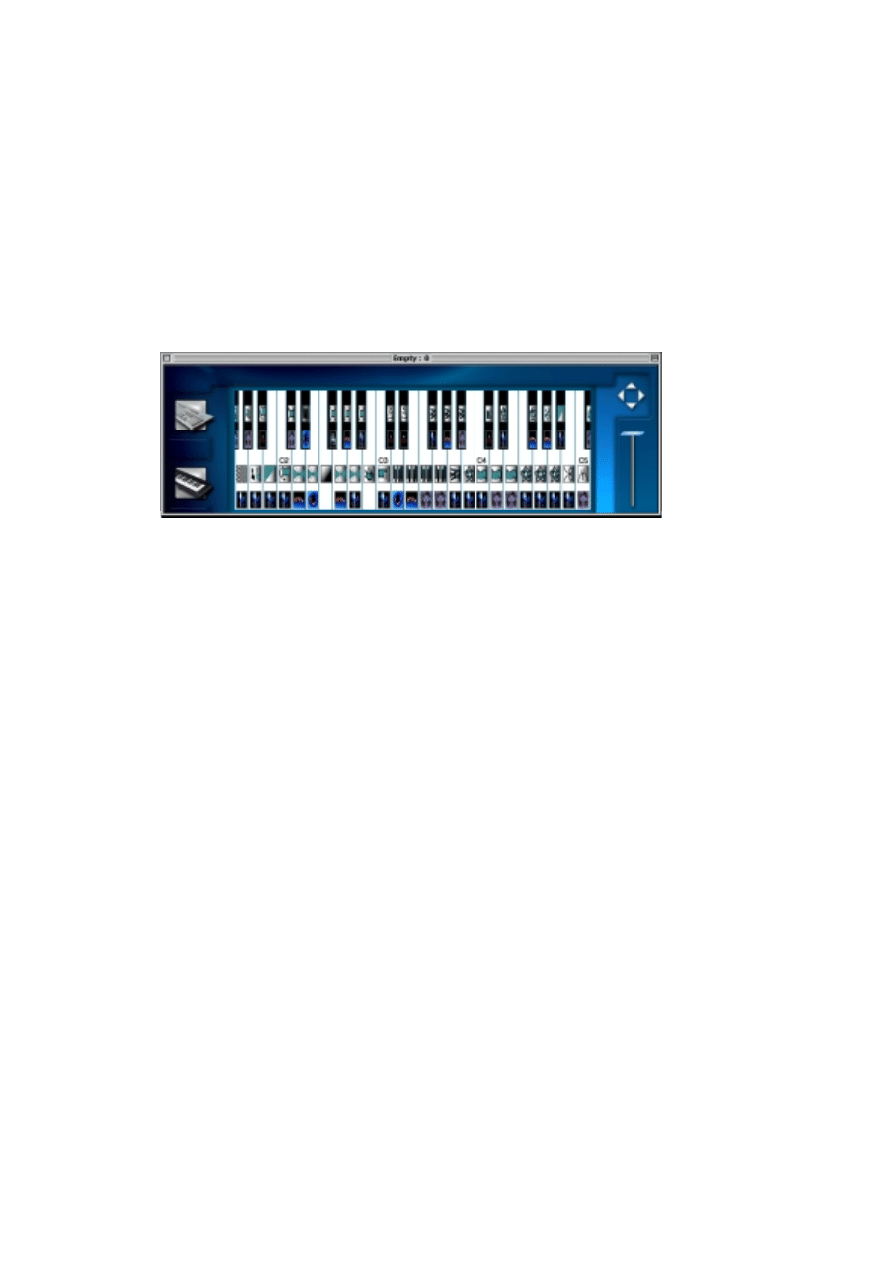
Layers
The purpose of Layers is to let you combine multiple effects by allowing them
to process the active contents of the screen simultaneously. You open the
Layers dialog by selecting “Layers...” from the Synth menu.
Use the dialog to specify the number of Layers you want ArKaos to be able to
display simultaneously. The maximum number of Layers is 50.
- 32 -
Patch
You set up your use of visuals and effects in a Patch window (much like you
set up a Patch on an audio synth). You can have up to 128 Patches per Synth
(see below), and switch between them using the mouse, via MIDI or The Au-
tomation function. More information on this in the chapter “Playing the
Patches on
You can also name your Patches, in the Patch Info dialog. This is described on
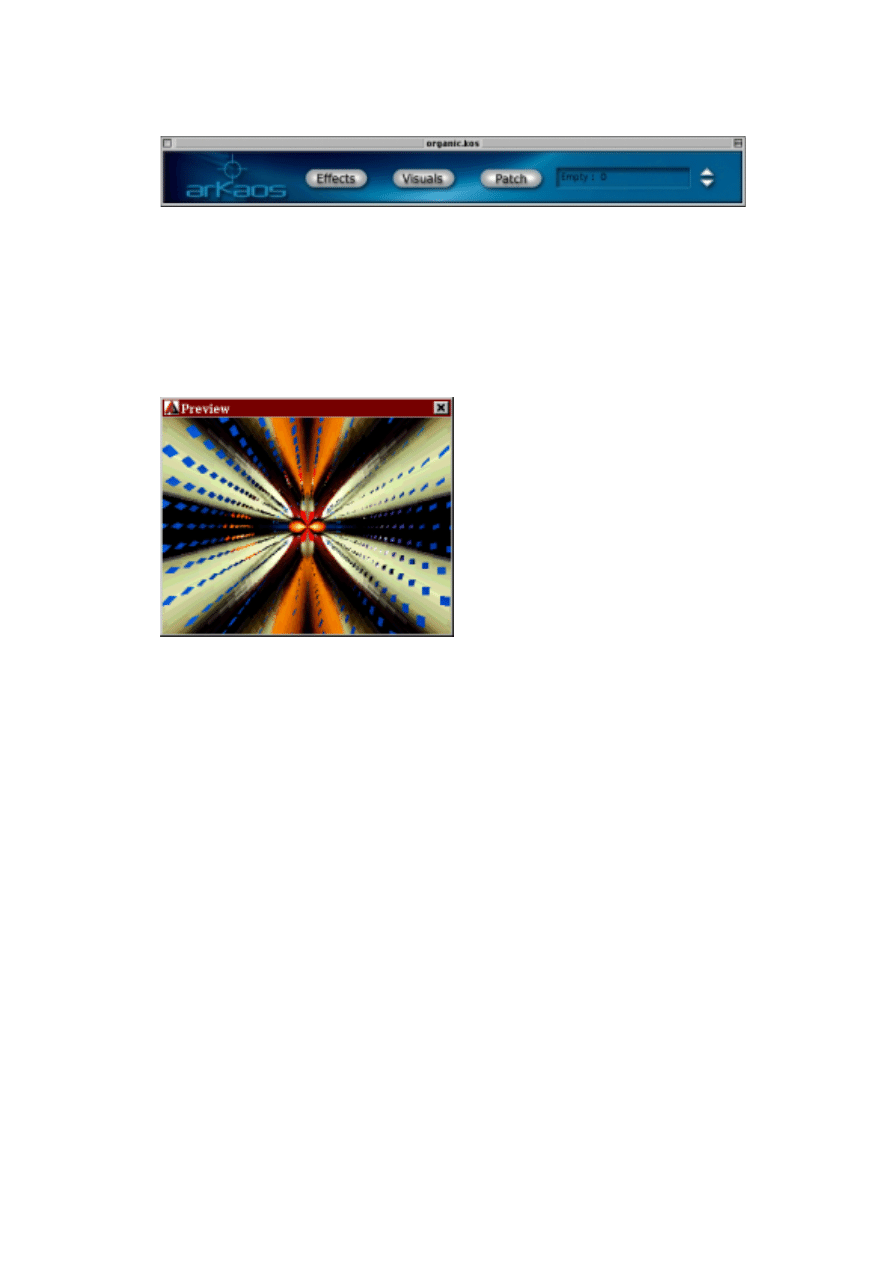
The Patch keyboard window
This is where you set up the Patches. Each key on the Patch keyboard corre-
sponds to a key on your MIDI keyboard.
On each key in the Patch keyboard window, there are two cells. As described
on
, assigning visuals and effects to a key is done by
dragging icons and dropping them in the cells. The upper cell is for effects,
and the lower cell is for visuals.
When ArKaos is active, pressing a key on the MIDI keyboard can make one of
two things (or both) happen:
• A visual (a picture or a movie) is displayed.
• An effect is activated, which will affect the image currently shown on the screen.
If you want to, you can assign both a visual and an effect to the same key, but
you can also assign only a visual or only an effect to a key.
Separating the two lets you display a single picture by pressing one key, and
process it in various ways by playing the other keys.
Synth
A Synth consists of a number of Patches, a Visuals window, and various other
settings. You could think of the Synth as a regular instrument, able to play dif-
ferent “sounds” (Patches) in various ways.
You can have several Synths open at the same time. Synths are also ArKaos
VJ’s document format, that is, when you save your work in ArKaos VJ you
save a Synth file.
- 33 -
The Synth Panel window
This is the main “control panel” for the Synth. It contains buttons for opening
the other windows, and Patch Arrow buttons for selecting a Patch.
The selected Patch (shown by name in the box to the right in the Synth Panel
window) is the one that will be “played” when you activate the full-screen or
Preview display.
Preview
The Preview window lets you view the visuals and effects while setting up
the Patch. You open the window by selecting Show Preview on the ArKaos
menu. Under MacOS you can also use the keyboard shortcut [Command]-[P].
Under Windows, the corresponding keyboard shortcut is [Ctrl]-[P].
The Arkaos Engine
This is the Preview window’s big brother, and this is also where you actually
“play” the Patch. When you have prepared your entire Synth, including
Patches, Effects and Visuals, you select “Activate ArKaos” from the ArKaos
menu. You can also press [Command]-[A] or [Command]-[Enter] on the Macin-
tosh. On the PC you can press [Ctrl]-[A] or [Ctrl]-[Enter] or [Ctrl]-[Return]. Your
monitor is then devoted to displaying the images. (One of your monitors if you
have two.)
The Event Recorder
The Event Recorder primarily allows you to record performances directly in
ArKaos VJ without using any external program. It also allows you to work to-
gether with a MIDI program to “transfer” performances into ArKaos VJ so
that they can be played back without the other application. The Event Re-
corder can also convert your recordings to QuickTime movies for use in
ArKaos VJ or other programs that read QuickTime movies. You open the
Event Recorder by pulling down the ArKaos Menu and selecting “Event Re-
corder”. You can also use the keyboard shortcuts [Command]-[R] (MacOS) or
[Ctrl]-[R] (Windows). For more information see
.

- 34 -
5
Setting up the Display

- 35 -
Introduction
There are a number of screen options you need to specify before you can
start working with ArKaos VJ. This is because different situations require dif-
ferent settings:
• You might have more than one monitor.
• You might want to use either 256, thousands or millions of colors (often referred to as
your monitor’s “pixel depth”).
Figuring out your capabilities
If you are unsure of what your particular system is capable of, then here´s
how you can check what resolutions and pixel depths (number of colors) are
available.
MacOS
On the Apple menu, use the control panel called “Monitors and Sound”, or
just “Monitors” (depending on which MacOS version you are running).
Windows
Click on Display Properties in the Control Panel and choose the Settings tab.
- 36 -
If I have one Monitor - what do I need to do?
MacOS
If you are using standard settings
If your monitor is already set to 640 x 480 and thousands of colors, you don’t
need to do anything, since this is the default setting for ArKaos VJ.
If you are using any other settings
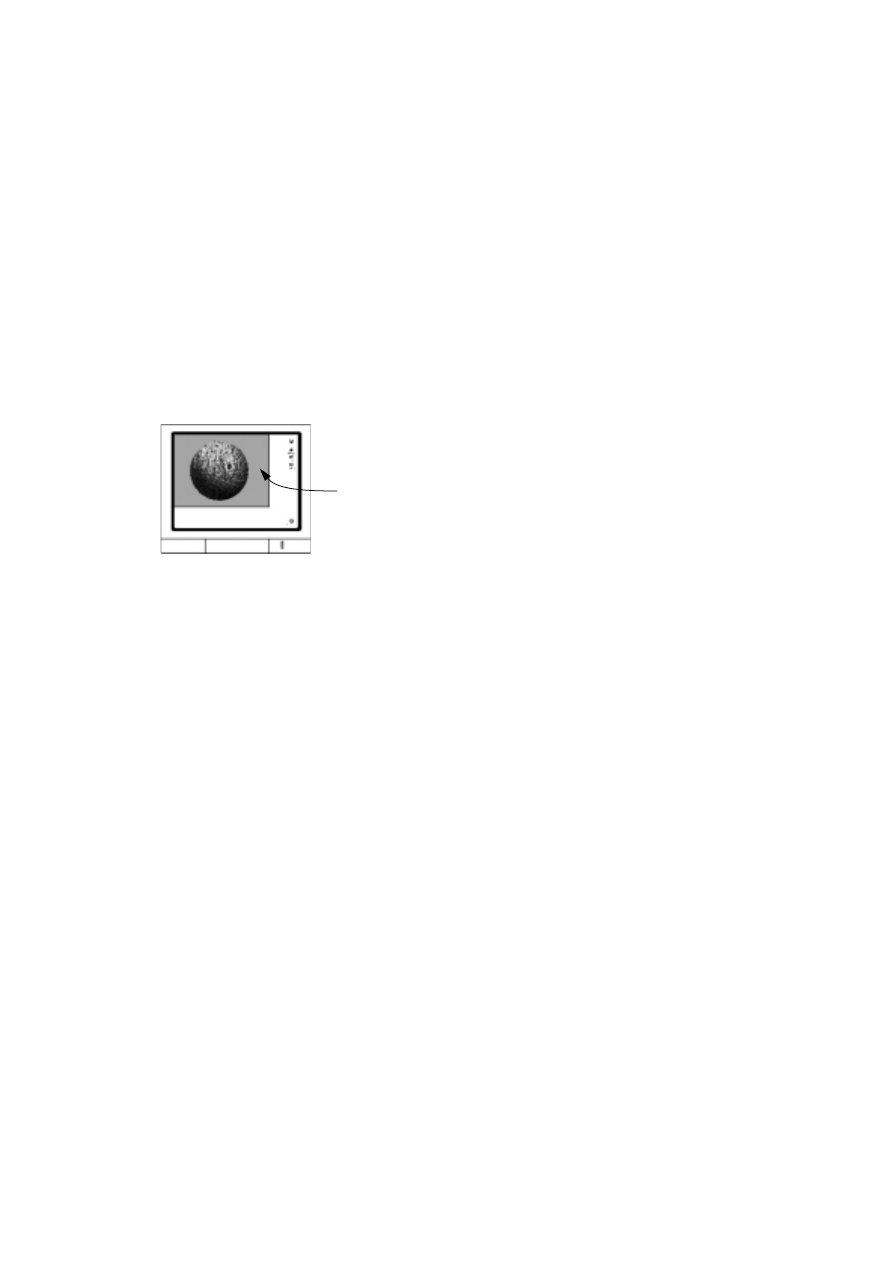
Let’s say your monitor is set to the resolution 800 x 600. You create a new
Synth and set it to Screen size 640 x 480 (see
size of your images. Displaying images in the size 640 x 480 as described
above, will then result in a display that is about 3/4 the width and height of the
actual monitor screen.
This is probably not what you want. To fix this you need to do one of three
things:
• Use the Monitors and Sound (or Monitors) control panel to change the monitor
resolution to 640 x 480.
This works, but will make the letters and windows on the screen look rather big and
clumsy, if you use a reasonably large monitor.
• Set up ArKaos VJ so that the monitor is automatically switched to the Synth’s
screen size (640 x 480 in this example) when you activate the ArKaos Engine, and
then switched back to your preferred working resolution when you return to
ArKaos VJ.
This is often the optimal solution. See below for instructions.
• Set up each Synth that you create, to work in the resolution and pixel depth your
monitor is already set to.
You then also need to make sure all your visuals are in this size. See
for in-
structions.
Switching monitor settings automatically
To make ArKaos VJ switch monitor resolution when activating the ArKaos en-
gine, and switch back again when you return to work in ArKaos VJ, proceed
as follows:
Setting the “working resolution”
If not already set, select the desired working resolution for your Monitor, as
described under “Figuring out your capabilities”
This should be the resolution you want for all work except displaying visuals in
the ArKaos engine.
Images only cover
this (grey) area.
- 37 -
Informing ArKaos VJ of the possible resolutions available
The next step is to make sure ArKaos VJ “knows” what resolutions your
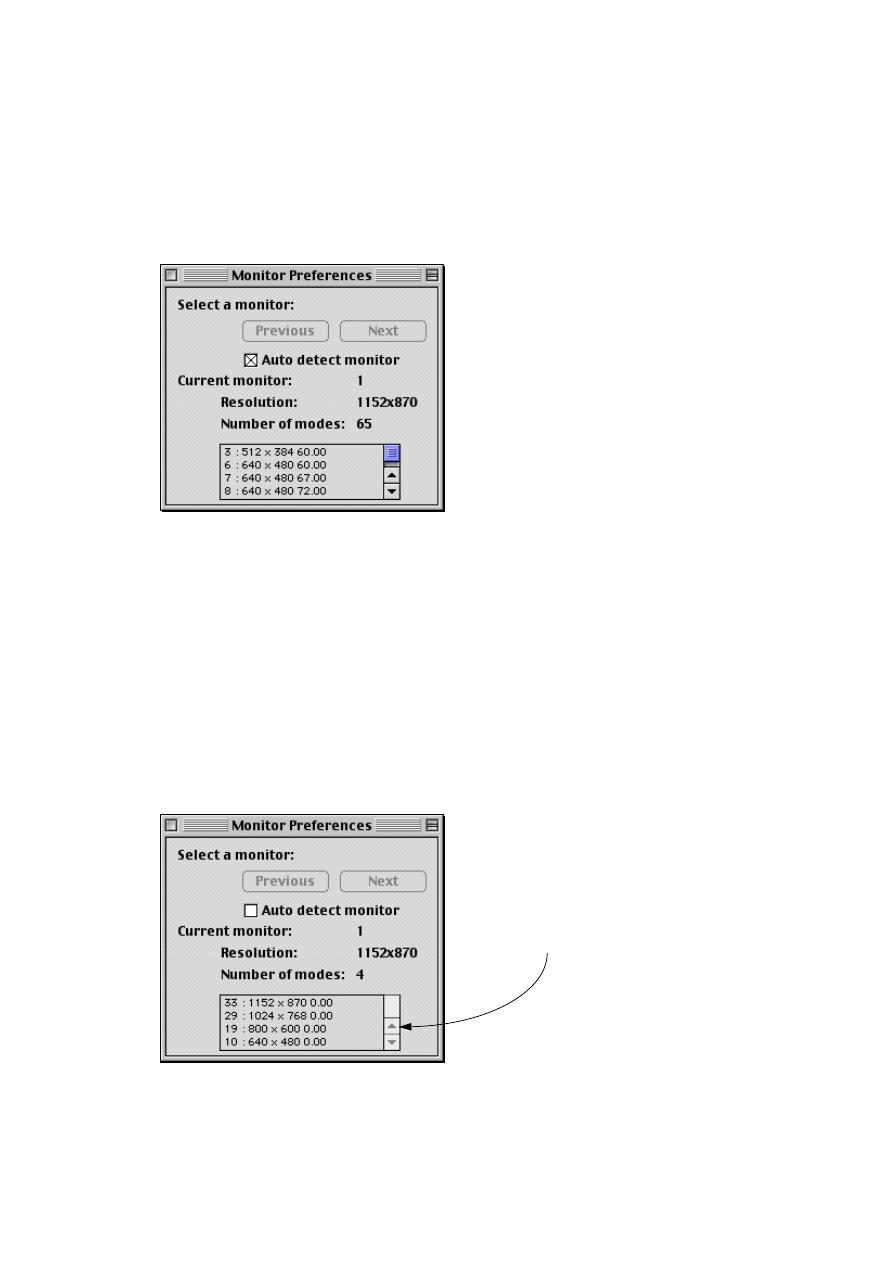
monitor can work with:
1. Pull down the Edit menu and select “Monitors...” from the Preferences sub
menu.
The Monitor Preferences dialog opens.
2. If you have a relatively new Macintosh model (a Power Macintosh with AGP or
PCI bus) you can simply activate “Auto detect monitor”, and you will get a list of
all the monitor modes this Macintosh model is capable of using.
This does not mean all of these can actually be used, since this depends on the moni-
tor connected, the amount of video RAM etc. See the heading “Figuring out your capa-
bilities”, on
3. If you don’t use the automatic option, you can instead build a list of the resolu-
tions actually available. To do so, make sure “Auto detect monitors” is not acti-
vated, open the “Monitors and Sound” (or “Monitors”) control panel and click
on each available resolution. Then switch back to ArKaos VJ.
Each resolution you clicked on now appears in the ArKaos VJ Monitor Preferences dia-
log.
No matter which of the two methods above you chose, you now have a list of
resolutions that ArKaos VJ possibly can switch to, when the ArKaos Engine is
activated.
4. Close the Monitors window.
In this case, a list of four
resolutions has been “built”.

- 38 -
❐
When you have “told” ArKaos VJ which resolutions are available (in step 3
above), this information is automatically saved in the ArKaos Preference file in
your System folder. Next time you launch ArKaos VJ, the list of resolutions will
already be there.
Activating Automatic switching
The last step is to tell ArKaos to switch the monitor resolution:
1. Pull down the Edit menu again and select “ArKaos Engine...” from the Prefer-
ences submenu.
The ArKaos Engine Preference dialog opens (described in detail on
2. Activate the option “Try to set Monitor resolution and pixel depth”.
When this is activated the ArKaos Engine will display in the resolution that the cur-
rently used synth is set to, regardless of what working resolution your system is set to.
3. If desired, also activate “Restore Monitor when deactivating ArKaos”.
If this option is activated, the resolution and pixel depth will be restored to the original
settings when you return from the full-screen display to ArKaos VJ.
4. Click OK.
What will now happen when I activate ArKaos?
There are three cases, depending on which screen size is set for the selected
Synth (see
):
• If the Synth you are working with is set to operate at the same screen size as the mon-
itor is already set to, nothing will happen, the monitor stays as set.
• If the synth is set to another resolution than the monitor is currently set to, and that de-
sired resolution is available in the list in the ArKaos VJ Monitors window, the screen is
automatically switched (and optionally switched back when you exit ArKaos).
• If the Synth is set to another resolution than the monitor is currently set to, but this de-
sired resolution happens to not be available in the Monitors list, the monitor is not
switched, and the images will only occupy part of the screen as in the example on
.
- 39 -
Windows
Because of the fact that ArKaos VJ uses Direct Draw to communicate directly
with your graphics hardware when displaying visuals, there really is no need
to make any settings except for the following:
1. Open the “Display Properties” dialog from the control panel or by right clicking
on your desktop, and set the number of colors to at least High Color (16 bits).
This is not of any importance to the ArKaos engine, but it does affect the ArKaos VJ
work and preview windows.
❐
On most relatively modern PC´s, the video card is connected to a port called AGP
(Accelerated Graphics Port). If the video card in your system is not connected
through AGP, then you need to do the following:
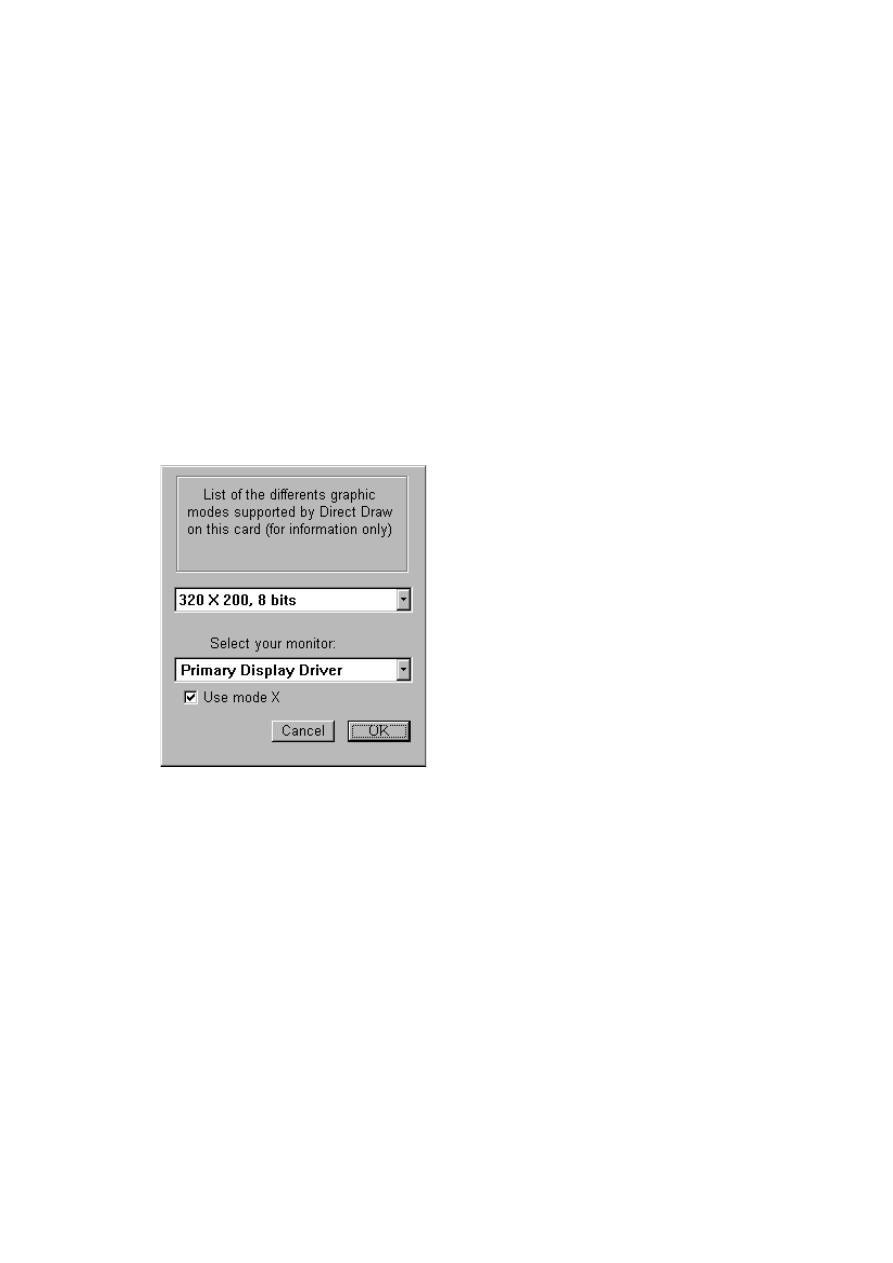
2. In ArKaos VJ, select Preferences from the Edit menu, and from the submenu that
appears, select “Monitors...”.
The monitor information dialog opens.
3. Click in the “Use Mode X” box to activate this function.
This informs ArKaos VJ that your video card is not connected via AGP.
4. Click OK.
- 40 -
If I have two Monitors - What do I need to do?
If you are fortunate enough to use a computer with two screens, we recom-
mend you to set things up as follows:
• Use one monitor as your “work bench”, for setting up Patches etc.
What resolution and pixel depth this monitor is set to is of no importance to the ArKaos
Engine. It does however affect the work and preview windows of ArKaos VJ. Even
though you can use whatever setting you like, it is highly recommended that you use
at least a resolution of 800 x 600 and “thousands” of colors (16-bits).
• Use the other monitor as a dedicated ArKaos display.
You need to inform ArKaos VJ that you want it to display the images on this monitor in
the following way:
MacOS
1. Open the “Monitors and Sound” (or “Monitors”) control panel, and select the
monitor that you want to use for displaying the visuals.
2. Switch the screen resolution of this monitor to 640 x 480.
You can set the number of colors to 256 or “thousands”, depending on the format of
your visuals. It should be stressed that “thousands” is the color depth for which most
of the effects in ArKaos VJ are optimized. Please be aware, however, that more colors
put an increased demand on your computer’s performance, so if your particular com-
puter has a hard time handling thousands of colors, you can use 256 instead.
3. In ArKaos VJ, select Preferences from the Edit menu, and from the submenu that
appears, select “Monitors...”.
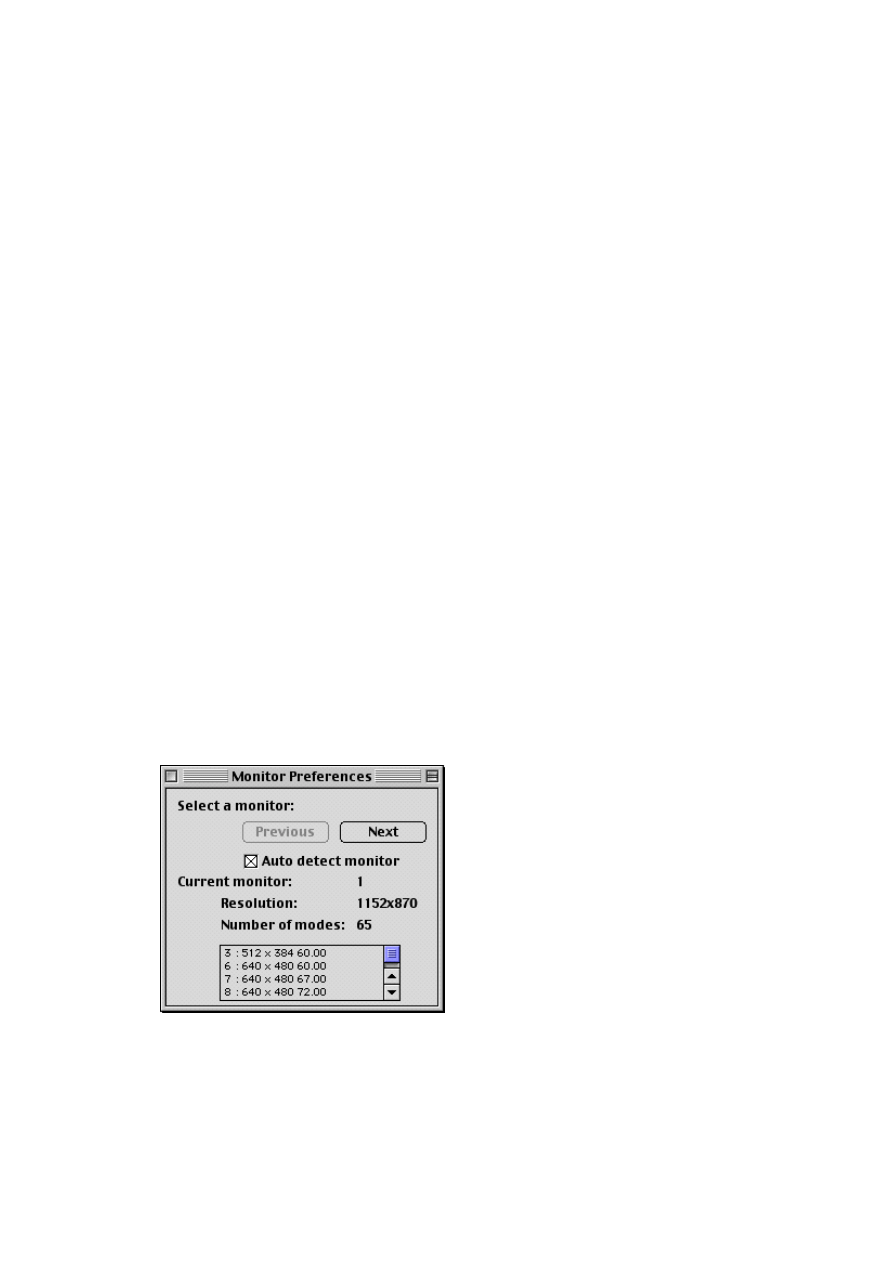
The Monitor Preferences dialog opens with the settings for the primary monitor
shown. If the program has detected the second monitor properly, the “Next” button is
black (instead of greyed-out).
The Monitor Preferences dialog in a multiple monitor system.
4. Use the Previous and Next buttons to select the monitor that you want to dis-
play the visuals on.
- 41 -
5. Click OK.
There may be situations when you are not absolutely sure which monitor is selected
for the display. If that is the case, just pull down the ArKaos menu, select “Activate
ArKaos” and check on which monitor the visuals appear. To close the display again,
pull down the ArKaos menu and select “Deactivate ArKaos”.
Windows
1. Open the “Display Properties” dialog from the control panel or by right clicking
on your desktop, and make sure that your monitors are set up properly.
2. In ArKaos VJ, select Preferences from the Edit menu, and from the submenu that
appears, select “Monitors...”.
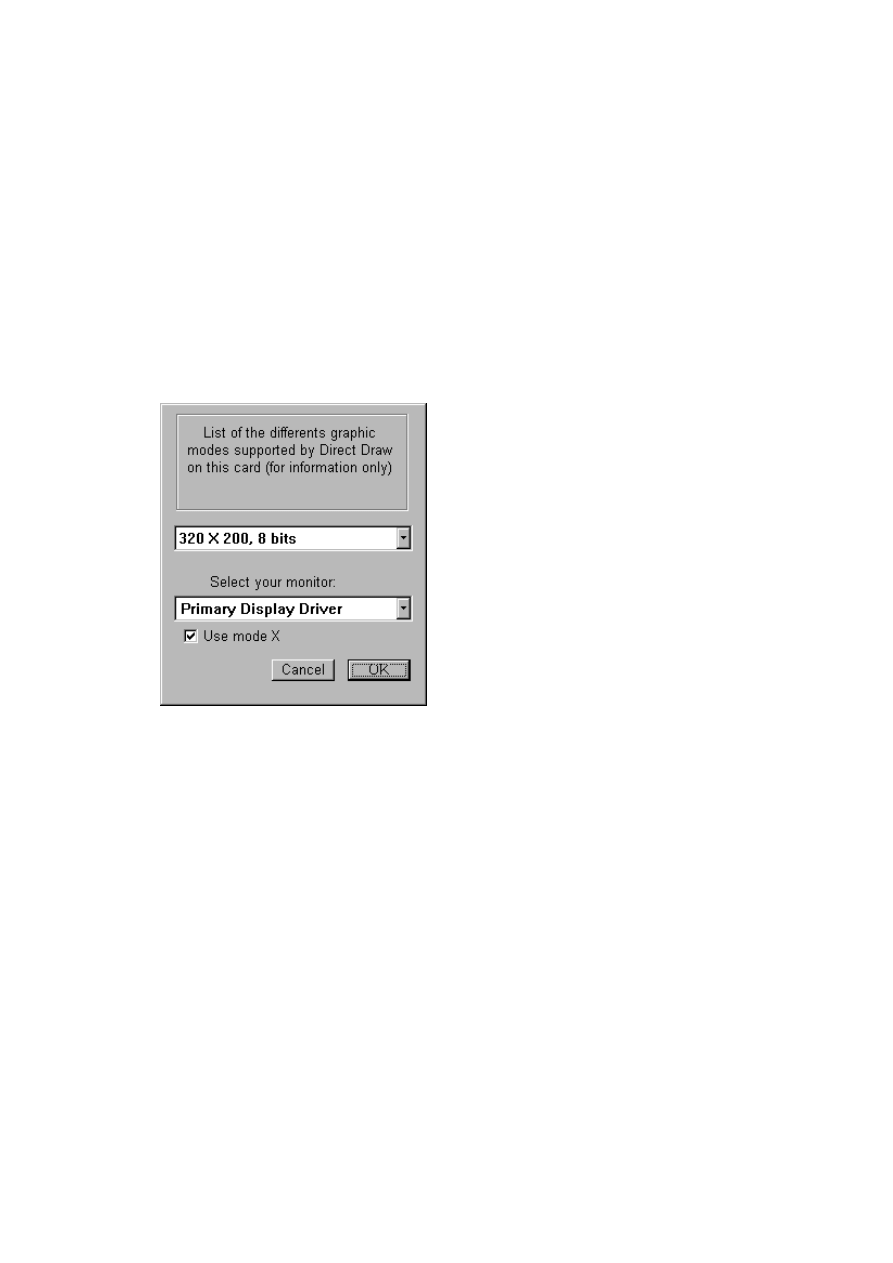
The Monitor information dialog opens.
3. From the “Select your monitor” drop down list, select the monitor that you
want to use for displaying the visuals.
If your monitors are set up correctly, you should be able to choose between your pri-
mary and your secondary display driver. If not, consult the troubleshooting guide for
your operating system.
4. If any monitor is connected to a non-AGP video card, be sure to activate the
“Use Mode X” option for that monitor.
This informs ArKaos VJ that the video card is not connected via AGP.
5. Click OK.
There may be situations when you are not absolutely sure which monitor is selected
for the display. If that is the case, just pull down the ArKaos menu, select “Activate
ArKaos” and check on which monitor the visuals appear. To close the display again,
pull down the ArKaos menu and select “Deactivate ArKaos”.
- 42 -
Other ArKaos Settings
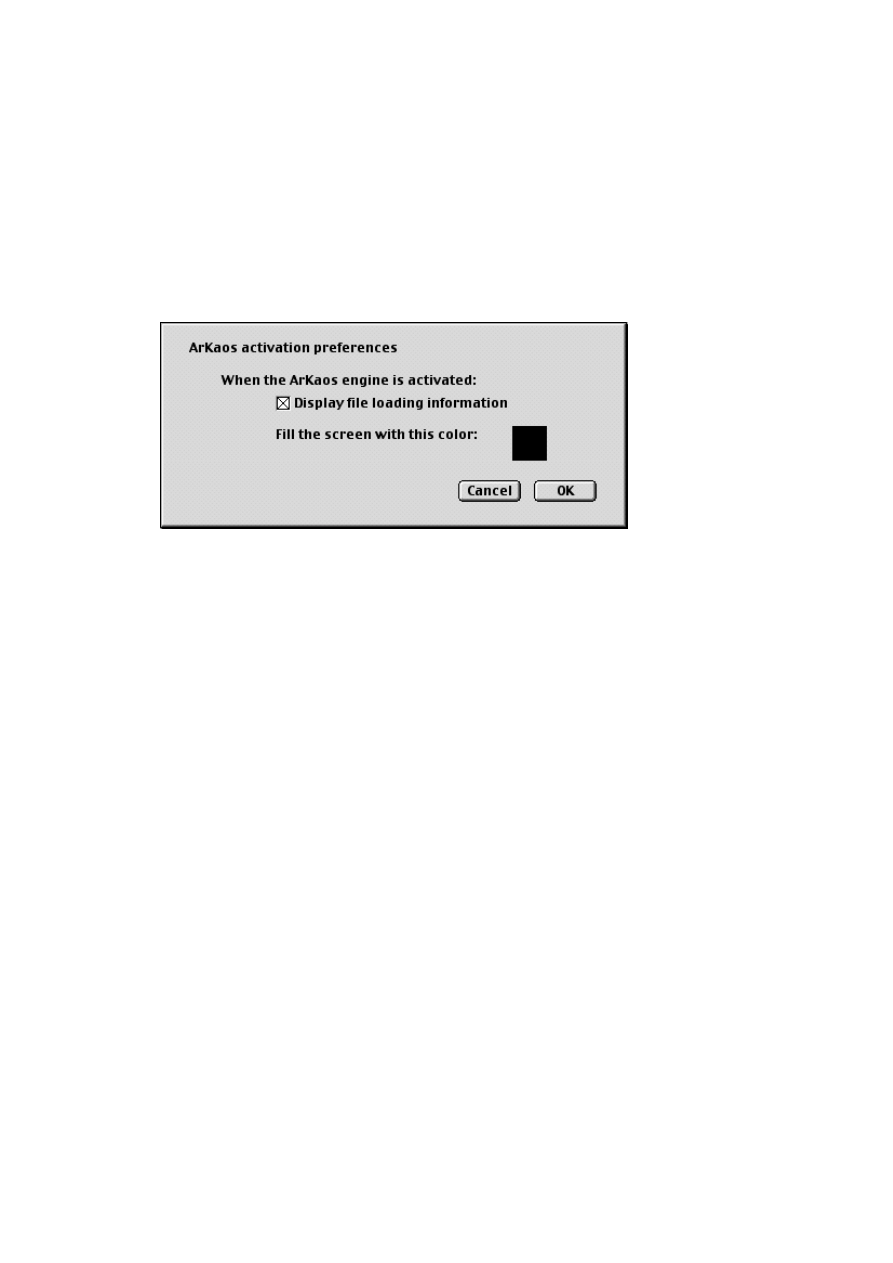
Startup screen settings
There are two additional settings you can make for how the screen should
look when you activate ArKaos (the full-screen display):
1. Pull down the Edit menu and select “ArKaos Startup...” from the Preferences
submenu.
A dialog box opens.
2. Select whether you want file loading information to be displayed or not, by
checking or unchecking the “Display File Loading Information” box.
If this is activated when you activate the ArKaos full-screen display, you will be shown
which files are being loaded into memory, and how much memory is left. This is prac-
tical when you are working and trying out your Patches, since it can help you optimize
the available memory. When you are running ArKaos VJ for an audience, however, you
will probably not want this information to be displayed.
3. Click (MacOS)/Doubleclick (Windows) on the colored square to select a back-
ground color to be shown when ArKaos is activated but no visual is yet dis-
played.
This opens a standard color picker dialog, where you can choose any color you like.
4. Click OK to close the dialog.
- 43 -
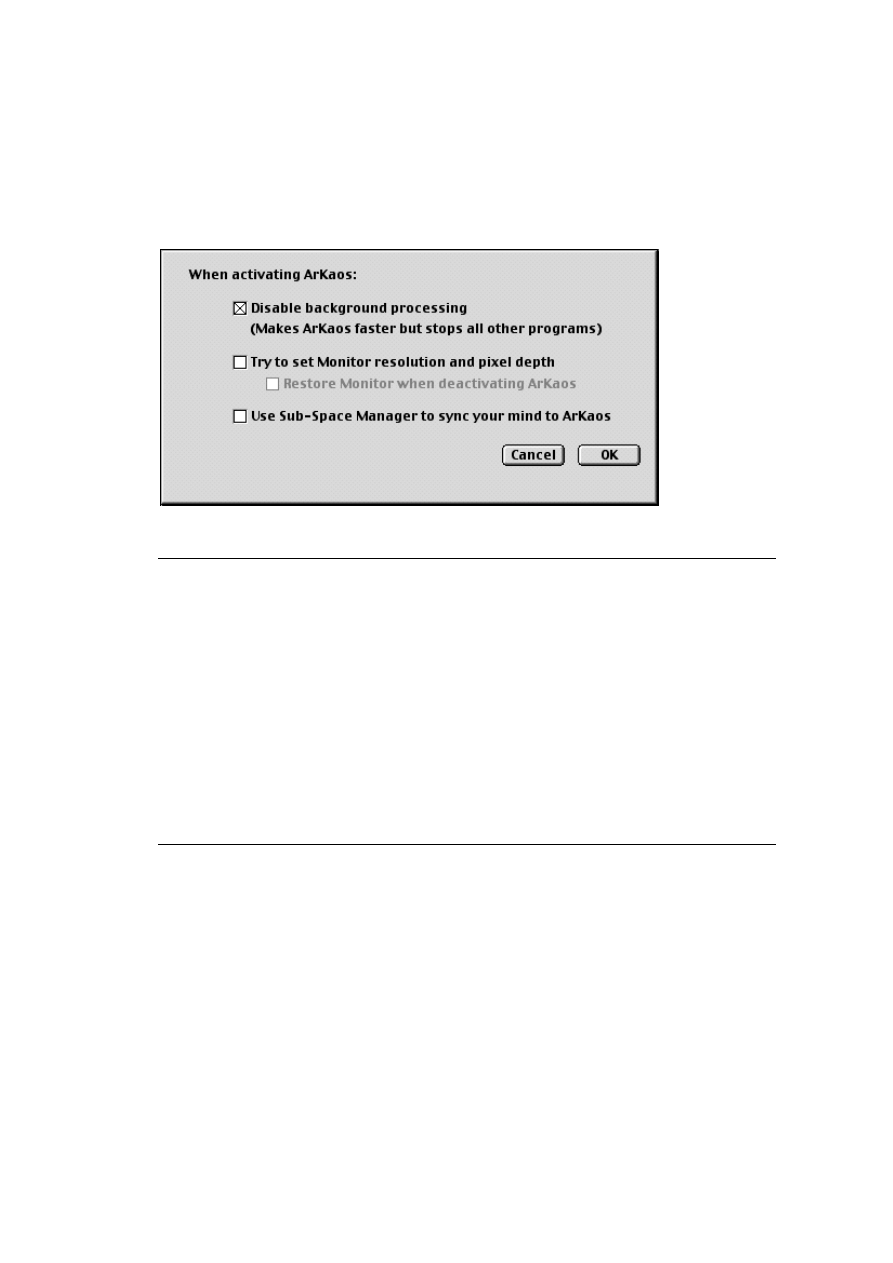
ArKaos Engine Preferences
In addition to the startup settings, there are some settings that you can make
to optimize the performance of the ArKaos engine:
1. Pull down the Edit menu and select “ArKaos Engine” from the Preference popup.
The ArKaos Engine Preferences dialog opens:
2. Check the options you want and click OK.
Option:
Description:
Disable background processing
If you activate this option, the ArKaos engine will use the
entire operating system, which will make the engine
faster. However, locking up the system also means other
programs will “stop running”. For example, this makes it
impossible to run a MIDI sequencer program simulta-
neously on the same computer.
Try to set Monitor resolution and
pixel depth (MacOS only)
Restore Monitor when deactivating
ArKaos (MacOS only)
Use Sub-Space manager to sync
your mind to ArKaos.
Channels your brain waves and links them to the com-
puter via meta-space, for a heightened visual experience.

- 44 -
6
Setting up MIDI

- 45 -
Setting up MIDI under MacOS
Two MIDI Systems - Which should I use?
ArKaos VJ can work with one of two MIDI “systems”, that is, two ways of
communicating via MIDI:
• Direct Driver. This is used for receiving data from standard MIDI interfaces (as op-
posed to multiple port interfaces), connected to the computer.
• OMS. This is short for Open Music System, a system extension in your computer that
standardizes MIDI communication both with MIDI interfaces and between programs.
We will explain when to use, and how to install, each of the two alternatives.
❐
Please note that it is also possible to run ArKaos VJ without any MIDI equipment
at all, by letting the computer keyboard and mouse serve as controllers. This is
described on
Direct Driver
This is the mode to choose when you wish to use MIDI signals from an exter-
nal device, connected to a regular (as opposed to multi-port) MIDI interface on
your computer.
When to use
• When you want to control ArKaos VJ from an external “controller”, such as a key-
board, a MIDI guitar or similar.
• When you want to send MIDI signals to ArKaos VJ from a sequencer which is either a
stand-alone device or is running on another computer.
Pros
• Accepts signal from other devices.
• Easily set up for standard modems.
• The mode to use for best possible ArKaos VJ performance.
Cons
• Does not work with multiple-port interfaces (use OMS instead, see below).
• Can not be used to receive signals from a program running on the same computer.
Setting up
1. Connect and set up the MIDI Interface as described in its documentation.
A standard “single” interface can be connected to either the Modem port or the
Printer port. Which one to choose depends on if you have any other equipment (such
as a printer or a modem) already connected to one of the ports. If you have a “double
port” or “multiple port” interface, refer to its documentation for info about connecting
it and setting it up. In the case of ArKaos VJ, there is no need for more than one MIDI
input, but you may still be able to use such an interface if that is what you have.
- 46 -
2. Connect the MIDI Cable from the MIDI Out port on the MIDI controller, to MIDI In
on the interface.
3. Turn on the MIDI interface (if needed) and the MIDI Controller.
Make sure the MIDI controller is actually transmitting MIDI data when you play it (refer
to the documentation for the MIDI controller).
4. Launch ArKaos VJ.
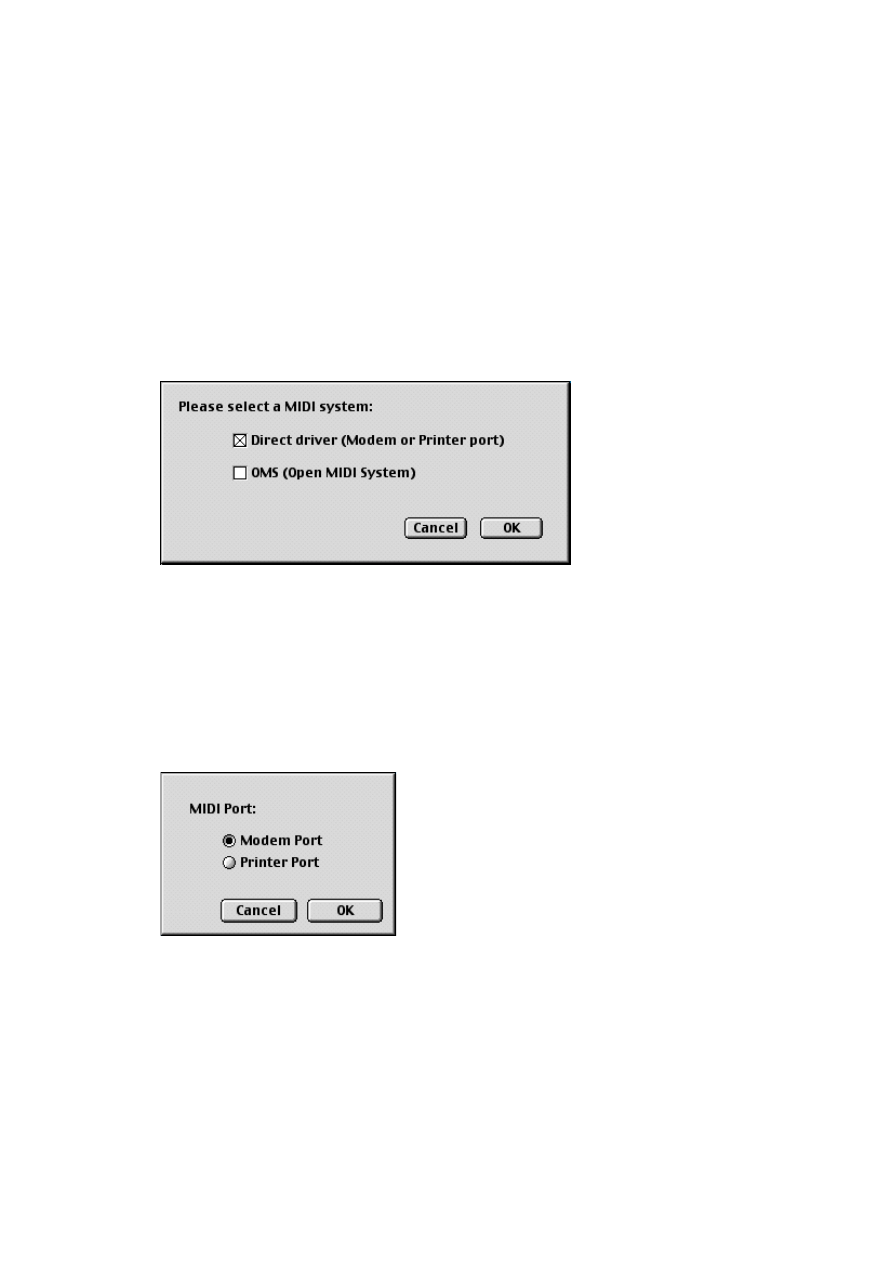
5. Pull down the Edit menu and move the pointer to the “Preferences” item.
A submenu opens.
6. Select “MIDI System”.
A dialog opens:
The MIDI System dialog.
7. Select “Direct driver” if it isn’t already selected.
8. Click OK.
If you have changed the MIDI driver setting in step 7 above, you will have to quit
ArKaos VJ and restart it for the changes to take effect.
9. Pull down the Edit menu and the Preferences submenu and select “MIDI Setup”.
Another dialog opens:
The MIDI setup “Direct Driver” dialog.
10.Select the port on your computer (Modem or Printer) to which you have con-
nected your MIDI equipment, and click OK.
❐
If either MIDI port is not available, this is because it is occupied by some other
software. For example, if you have a printer which uses AppleTalk connected to
the printer port, the printer port can not be used for MIDI.

- 47 -
MIDI Channel Setting
Now you have set up ArKaos VJ, so that it responds to MIDI signals on the
correct port. But there’s one thing left to do. You have to make sure that the
program receives on the same MIDI channel as the external MIDI device
transmits on. However, this is done separately for each Synth, and is there-
fore described on
OMS
OMS (short for Open Music System) is co-developed by Steinberg and Op-
code Systems Inc. It is a System Extension that bridges the gap between
MIDI applications and MIDI hardware. It also lets multiple MIDI applications
communicate and share resources, such as instrument Patch names and tim-
ing information.
❐
ArKaos VJ requires OMS 2.0 or later (hereafter referred to as “OMS”).
When to use
• When you already have OMS installed in your system, because other equipment that
you have requires it (for example a multi-port interface).
• When you want to set up a system where you can quickly switch between controlling
ArKaos VJ from external devices and from other programs running on the same com-
puter.
• When you want to control ArKaos VJ from external devices and from other OMS com-
patible programs, at the same time.
Pros
• Supports multi-port interfaces.
• Can be used for receiving MIDI data both from external MIDI devices and from other
(OMS compatible) MIDI programs.
Cons
• Somewhat degrades the performance of your computer.
• Slightly complicated to set up.
Setting up
1. Make sure you have installed and set up your MIDI interface and OMS 2.0 or
later, correctly.
See the OMS documentation for details.
2. Launch ArKaos VJ.
3. Pull down the Edit menu and select “MIDI System” from the Preferences sub-
menu.
4. In the dialog that appears, select “OMS” and click OK.
5. Quit ArKaos VJ and launch it again for your settings to take effect.
- 48 -
6. If you want to control ArKaos VJ from another OMS program, launch it and
make sure it uses OMS.
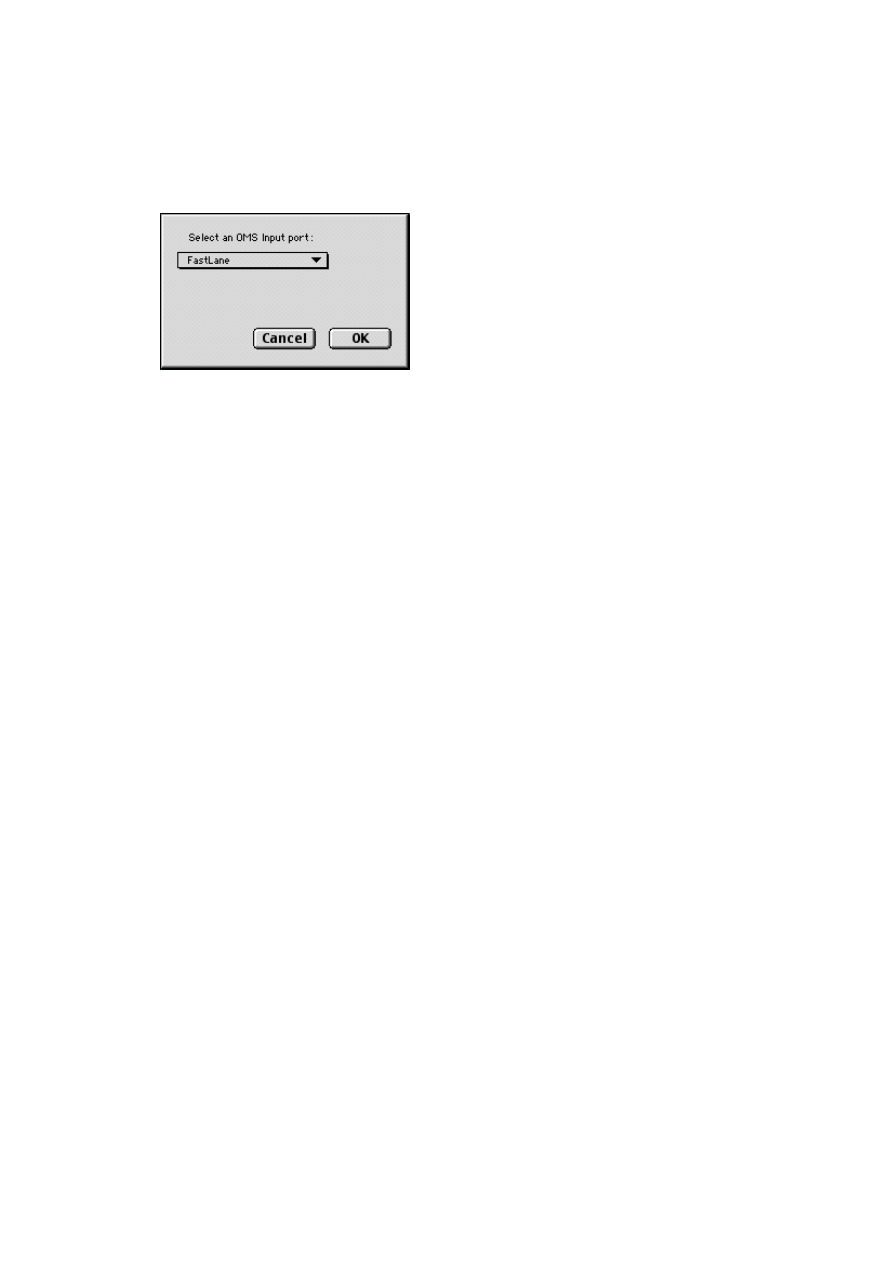
7. Pull down the Edit menu and select “MIDI Setup” from the Preferences sub-
menu.
The MIDI Setup OMS Input dialog.
8. Pull down the popup menu and select one of the OMS inputs.
The name of the MIDI program you launched in step 6 above is now possibly available
on the list, and you may select it as an input. If this option is not available, use the IAC
driver, which serves as a “virtual MIDI cable” in your computer (see the OMS docu-
mentation for more info).
9. In the MIDI sequencer, set the MIDI Output you want to use to the same value
(program name or IAC).
This connects the output of the MIDI sequencer to the input of ArKaos VJ.
MIDI Channel Setting
Now you have set up ArKaos VJ, so that it responds to MIDI signals from the
correct OMS device. But there’s one thing left to do. You have to make sure
that the program receives on the same MIDI channel as the external MIDI de-
vice transmits on. However, this is done separately for each Synth (each
ArKaos VJ file), and is therefore described on
- 49 -
Setting up MIDI under Windows
The following is a description of how ArKaos VJ communicates via MIDI and
how to set it up.
❐
Please note that it is also possible to run ArKaos VJ without any MIDI equipment
at all, by letting the computer keyboard and mouse serve as controllers. This is
described on
Controlling ArKaos VJ from external devices
When you want to control ArKaos VJ from an external “controller” such as a
keyboard, a MIDI guitar or similar, or when you want to send MIDI signals to
ArKaos VJ from either a stand-alone sequencer or a sequencer running on an-
other computer, proceed as follows:
1. Connect and set up the MIDI interface as described in its documentation.
2. Connect the MIDI cable from the MIDI Out port on the MIDI controller, to MIDI in
on the interface.
3. Turn on the MIDI interface (if needed) and the MIDI controller.
Make sure the MIDI controller is actually transmitting MIDI data when you play it (refer
to the documentation for the MIDI controller).
4. Launch ArKaos VJ.
5. Pull down the Edit menu and move the pointer to the “Preferences” item.
A submenu opens.
6. Select “MIDI Setup”.
A dialog opens.
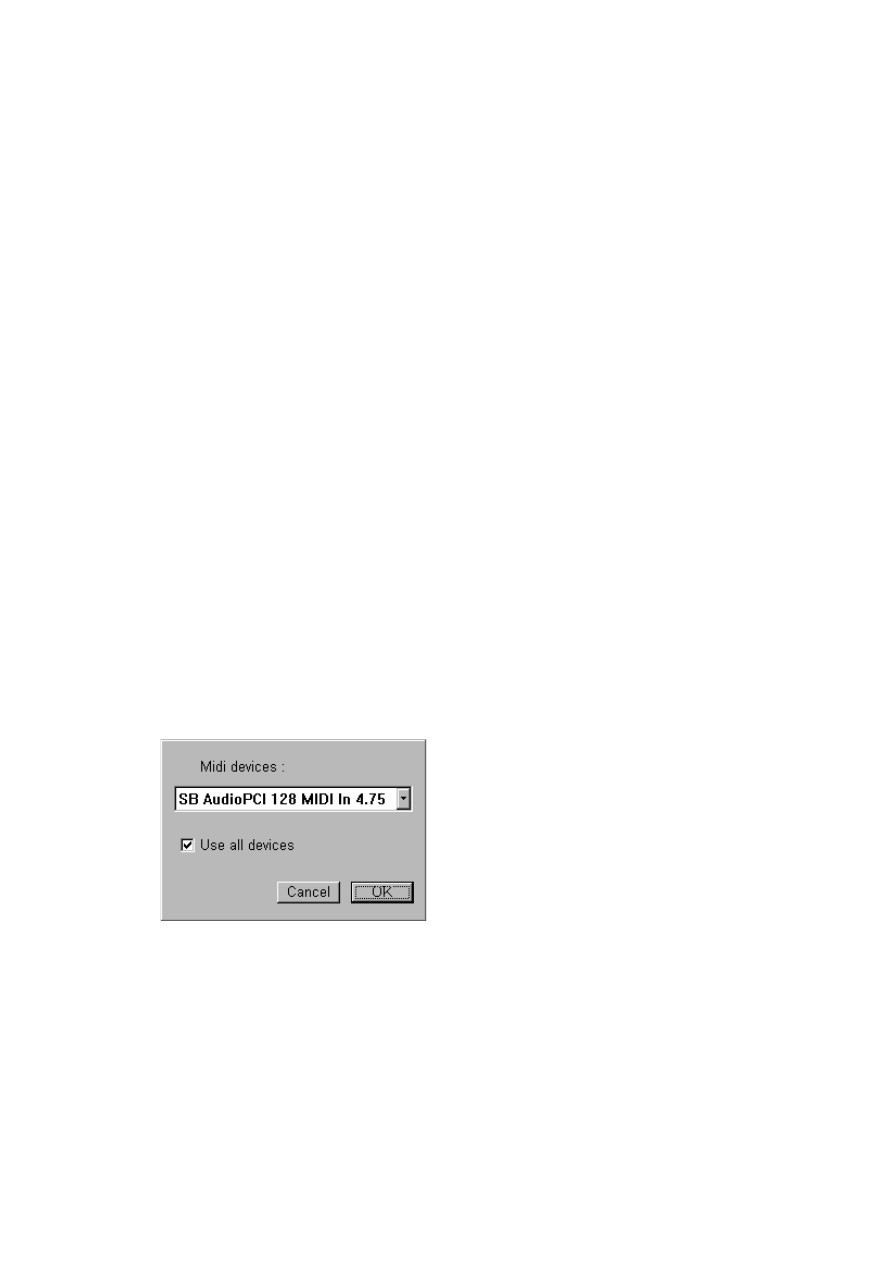
The MIDI Setup dialog.
7. From the drop down list, select the MIDI device to which you have connected
your MIDI equipment.
8. If you have multiple MIDI devices installed in your system and want to be able to
use them all simultaneously, click in the “Use all devices” box.
9. Click OK.

- 50 -
MIDI Channel Setting
Now you have set up ArKaos VJ, so that it responds to MIDI signals from the
correct device. But there’s one thing left to do. You have to make sure that
the program receives on the same MIDI channel the external MIDI device
transmits on. However, this is done separately for each Synth (each ArKaos
VJ file), and is therefore described on
.
Controlling ArKaos VJ from programs running on the same computer
If you want to control ArKaos VJ from a MIDI sequencer program running on
the same computer, you need to install some third-party application that en-
ables multiple MIDI programs to use the same MIDI device simultaneously,
by providing “virtual MIDI ports”. There are various such programs available
as free-ware, for instance Hubi´s LoopBack Device. From here on, the applica-
tion needed will be referred to as the MIDI application.
1. Make sure you have installed and set up the MIDI application of your choice.
Please refer to the documentation included with it.
2. Launch ArKaos VJ.
3. Pull down the Edit menu and select “MIDI Setup” from the Preferences sub-
menu.
4. In the dialog that appears, pull down the drop down menu and select one of the
inputs provided by the MIDI application.
If the MIDI application was installed and set up properly, the virtual MIDI ports made
available by it should be listed.
5. Launch the MIDI sequencer program from which you want to control ArKaos VJ.
Make sure that the virtual MIDI ports provided by the MIDI application are available as
outputs.
6. In the MIDI sequencer, set the MIDI Output of each channel containing MIDI data
you wish to send to ArKaos VJ to any one of the virtual MIDI ports.
This connects the output of the MIDI sequencer to the input of ArKaos VJ.
MIDI Channel Setting
Now you have set up ArKaos VJ, so that it responds to MIDI signals from the
correct device. But there’s one thing left to do. You have to make sure that
the program receives on the same MIDI channel the external MIDI device
transmits on. However, this is done separately for each Synth (each ArKaos
VJ file), and is therefore described on
.

- 51 -
7
Managing Synths and Patches
- 52 -
Introduction
As mentioned in the chapter “Basic Concepts”, the main ArKaos VJ docu-
ment is the Synth. The Synth contains the following:
• The list of Visuals
• Up to 128 Patches
• Additional settings
In this chapter you will learn how to create and manage Synths and what set-
tings are available for each. You will also learn some basics about Patches. In
the following chapters, you will learn how to actually set up the Patches, with
regards to the effects and visuals they use.
Creating a Synth
You create a new Synth in the following way:
1. Pull down the File menu and select “New...”.
A standard file dialog opens.
2. Enter a name and location for your Synth file.
It is often convenient to use the “New Folder” button and create a new project folder
for the Synth file and visuals.
The reason why you have to create a file from the start, is that the program needs to
“know” where to save picture files when they are added to the Synth.
3. Click on Save.
The new Synth file is created and a Synth panel window is opened, along with the
other Arkaos VJ windows.
The Synth panel.
- 53 -
Opening Windows Related to the Synth
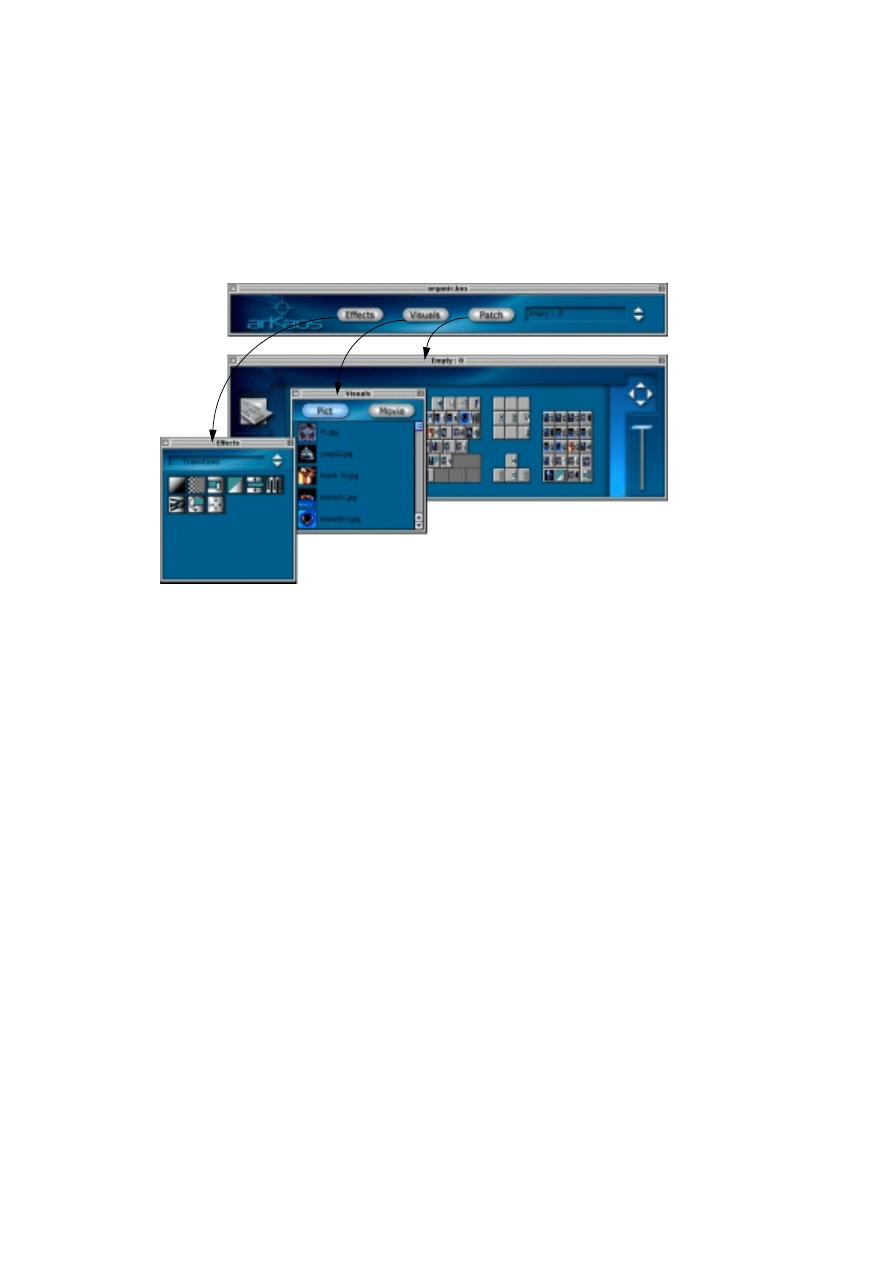
The buttons in the Synth panel window allow you to open (or activate, if they
already are open) other ArKaos VJ windows, that “belong” to the Synth.
• The “Patch” button activates the Patch keyboard window, for the Patch selected to
the right in the window.
• The “Effects” button activates the Effects palette (see
• The “Visuals” button activates the Visuals window (see
The Synth buttons and the windows they open.
Saving, Opening and Closing Synths
As usual, the file handling is done from the File menu, which contains the fol-
lowing functions:
Open
Use this to open a Synth file. You can have several Synths open at the same
time.
Double clicking a Synth file in the Finder (MacOS) or the Explorer (Windows)
will of course also open it (and launch ArKaos VJ if the program is not already
running).
This version of ArKaos VJ has the same file format as the previous versions,
hence it is possible to open Synth documents created with those versions.
❐
Synth documents created with this version of the program should not be
opened with older versions, because of the new features and effects imple-
mented in this version.
Close
Use this item (or click on the Synth panel window’s close box) to close the
Synth (including its Patch, Visuals and Preview windows, if open). If the Synth
contains unsaved changes, you will be asked if you want to save it before
closing.
If any other window than the Synth window is active, selecting Close will sim-
ply close that window.
- 54 -
Save
Use this to save changes made to the Synth (or its Patches), to disk.
Save As
This option allows you to save the currently selected Synth under a different
name and location. Use this when you want to make a copy of the Synth, or if
you have modified an existing Synth, but want to keep the original intact.
❐
If the Synth includes movies and you save it in a different location on your hard
disk, make sure to activate the “Anywhere” option in the Movie Folder dialog
(see
Making Screen Settings for the Synth
You can make screen settings separately for each Synth, independently from
the overall display settings described in the chapter “Setting up the Display”.
Proceed as follows:
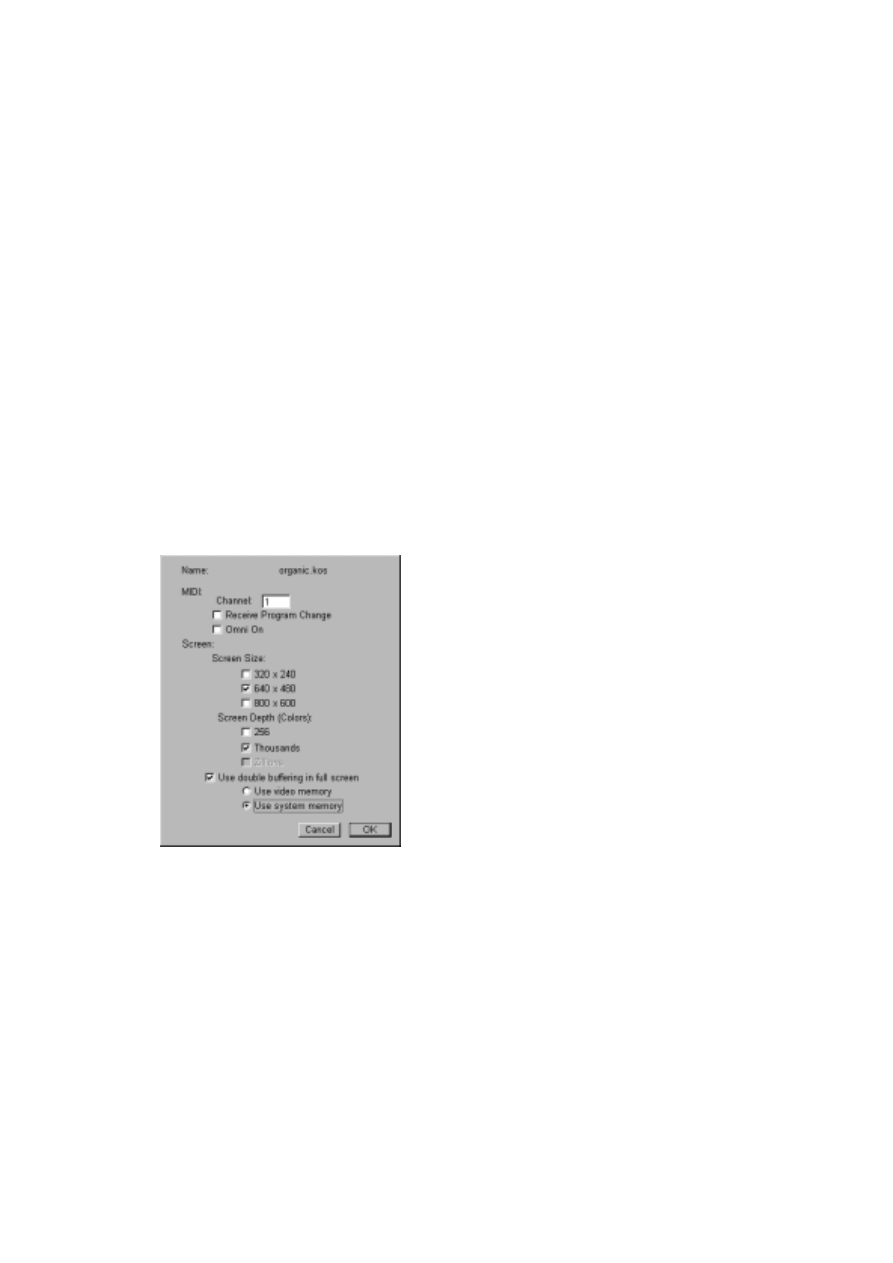
1. Pull down the Synth menu and select “Get Synth Info”.
The Synth Info dialog opens:
2. Select the desired Screen Size.
This should be matched to the visuals you plan to use. You should also select
a size that your monitor can actually handle, and take into account that higher
resolutions means that the computer must send more data to the monitor,
which in turn puts greater demand on the speed of the computer.
• 320 x 240 can be used if you want to output the video to a big size video screen (such
as a video wall, RGB-projector device, etc.). The low resolution wouldn’t matter much
in such cases, since such devices usually don’t exhibit high visual fidelity.
• 640 x 480 is a classic size/resolution, used in many documents and applications. This
makes for a good compromise between computer power requirement and visual
quality.
• 800 x 600 is preferably used on high-end machines.

- 55 -
3. Select the desired Screen Depth.
This is the same as the number of colors used when displaying the visuals. Just as
with the resolution, there is a connection between required computer speed and the
number of colors. Although it is strongly recommended for use, “thousands” of colors
require exactly twice the amount of data transferred for each frame, compared to 256
colors.
4. Optionally, activate “Use double buffering in full screen”.
Basically, what this option does is that it draws everything displayed in the ArKaos en-
gine in a memory buffer “off screen” before writing directly to the screen. This feature
has both advantages and drawbacks:
• Activating this option makes it possible to play several keys, i.e. display multiple layers
(see
), without the flickering that occurs if this option is not activated.
• Having an extra memory buffer will put an increased load on your computer and sys-
tem, thereby decreasing its performance.
5. Under Windows, decide whether the above mentioned buffer should use system
memory (RAM) or video memory (RAM on your video card).
There are some (fairly technical) considerations to be made here:
• If you only have the minimum amount of system memory required to run ArKaos VJ
(see the Installation document) you should use video memory. Provided that there is
enough on your video card (see below).
• If you decide to use video memory, you should make sure that you have a sufficient
amount of memory on your video card to accommodate the frame buffer (the amount
of memory needed to store the contents of the screen) while leaving an ample amount
for computation. The required size of the frame buffer depends on what resolution you
use and the memory access-rate (8-bit, 16-bit, 32-bit etc.) of your video card. As a
loose rule, it is estimated that a resolution of 1024 x 768 with 64-bit memory access re-
quires 4 MB of video memory for the frame buffer.
• Video memory in this present time is generally faster than system memory, though
this depends on the type of memory on your video card. If you have a video card with
conventional DRAM, it does not make any difference, but if you for instance have
VRAM on your video card, the speed is significantly higher since that type of memory
is dual-ported (allows read and write operations at the same time).
• If your video card is connected through AGP and has a fair amount of RAM, you will
definitely benefit from using video memory for the buffer, since AGP lets the video
card use conventional system memory for computing, leaving all of the video memory
for the frame buffer.
• If you are using the Video Feedback mechanism (see
), you should use system
memory. Otherwise, system performance will be severely degraded and noticeably
slower.
If in doubt about what type of memory to use and the specifications for your
particular video card, consult its documentation. If you feel completely lost in
the technicality issues, it is probably best (and completely safe) to use system
memory (even though it may degrade the performance of your computer).
6. When you are done, click OK to close the dialog.

- 56 -
Making MIDI Settings for a Synth
In the chapter “Setting up MIDI” you learned how to set up ArKaos VJ, so
that it responds to MIDI signals from the correct source. This setting is valid
for all synths you create and use. However, there are a number of MIDI set-
tings which are set independently for each Synth. Proceed as follows:
1. If needed, click on the Synth Panel window so that it is made active.
2. Pull down the Synth menu and select “Get Synth Info”.
The Synth Info dialog opens.
3. Set the MIDI Channel value to the channel your MIDI source is transmitting on.
Now, ArKaos VJ will only react to MIDI messages on this MIDI Channel.
4. If you want to be absolutely sure that ArKaos VJ will respond to the signals from
your MIDI controller, no matter which MIDI channel it is transmitting on, activate
“Omni On”.
This makes ArKaos VJ respond to messages on all 16 MIDI channels. If you plan to run
other MIDI devices in the same MIDI “chain” and want to be able to separate the mes-
sages to different devices, Omni On should not be activated.
5. If you want to be able to switch between Patches using Program Change mes-
sages, activate the “Receive Program Change” option.
This is described in more detail on
6. If you want to have the visuals of a new patch preloaded into memory for faster
display, activate the “Load Visuals On Program Change” option.
This is described in more detail on
7. Click OK.
Testing the MIDI Settings
If you have already set up or loaded a Patch with visuals in it, you might want
to test if your MIDI settings are OK:
1. Select “Show Preview” from the ArKaos menu, or Press [Command]-[P] (Ma-
cOS) or [Ctrl]-[P] (Windows) on your computer keyboard.
This opens the Preview window, where you can check your visuals and effects while
you are working (see
2. Try playing different keys on your MIDI controller.
You should see various images and effects in the Preview window while you are play-
ing. If not, go back and redo the connections and settings (you may also try running
other MIDI software to make sure that your MIDI interface is working OK).
- 57 -
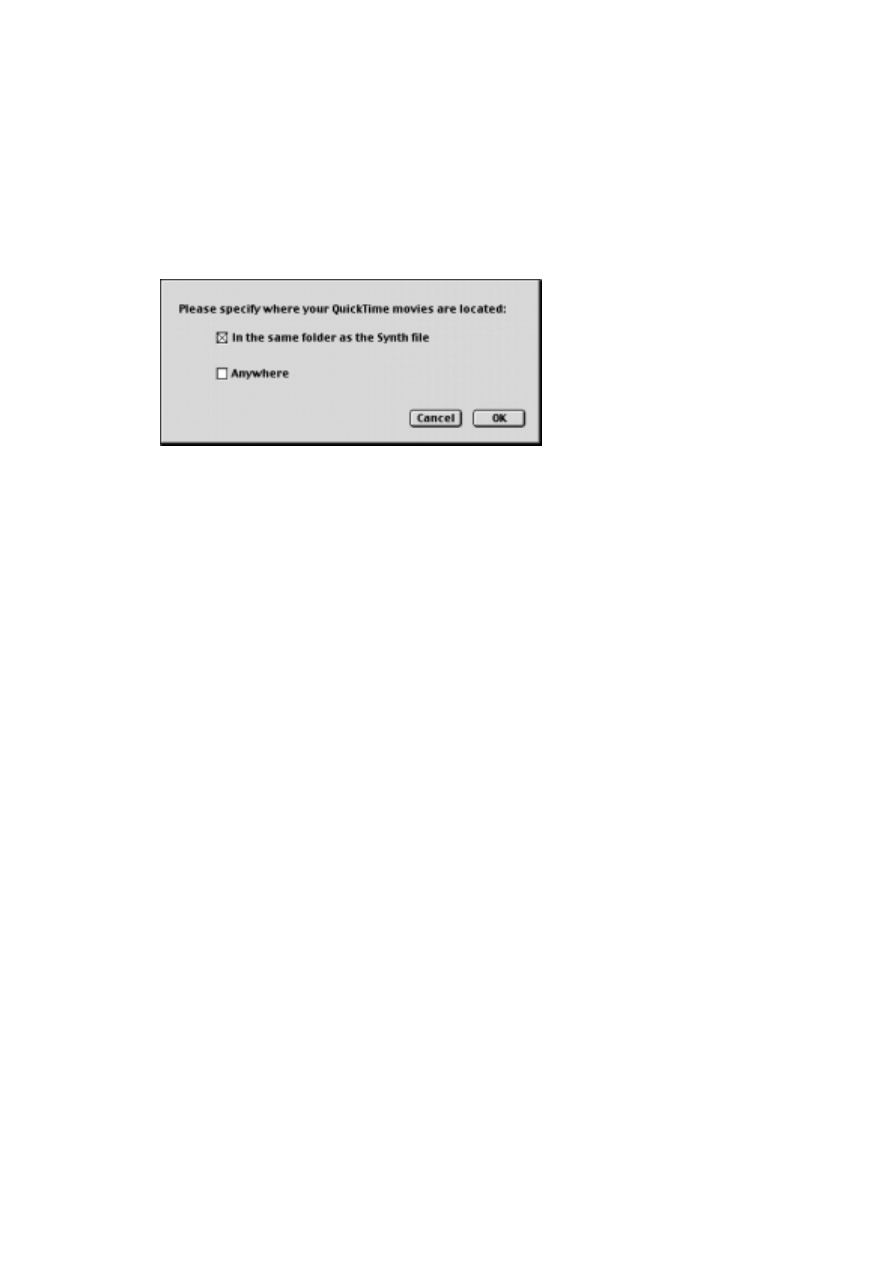
The Movie Folder dialog
Putting your Movie files in the same folder as the Synth file allows the pro-
gram to operate as fast as possible. However, this might not always be possi-
ble (or you might think your system is fast enough anyway, to allow you the
convenience of having your files all over the place). Proceed as follows:
1. Pull down the Synth menu and select “Movie Folder...”.
2. Select “In the same folder...” if you will keep your movies in the same folder as
the Synth file.
3. Select “Anywhere” if you want to allow your movies to be located anywhere on
your disk(s).
Note that if you at a later time should relocate your movies to the same folder as the
Synth file but still have this option activated, the movie will still be found since the
ArKaos Engine will first try to find the movie in its original place, and if the movie is not
found there, a second try will be made in the same folder as the Synth file.
- 58 -
Setting up Colors and Transparencies for 256 colors
mode
The Colors window can be opened in two ways:
• By pulling down the Synth menu and selecting “Colors...”.
• By pressing [Command]-[2] (MacOS) or ([Ctrl]-[2] (Windows) on the computer key-
board.
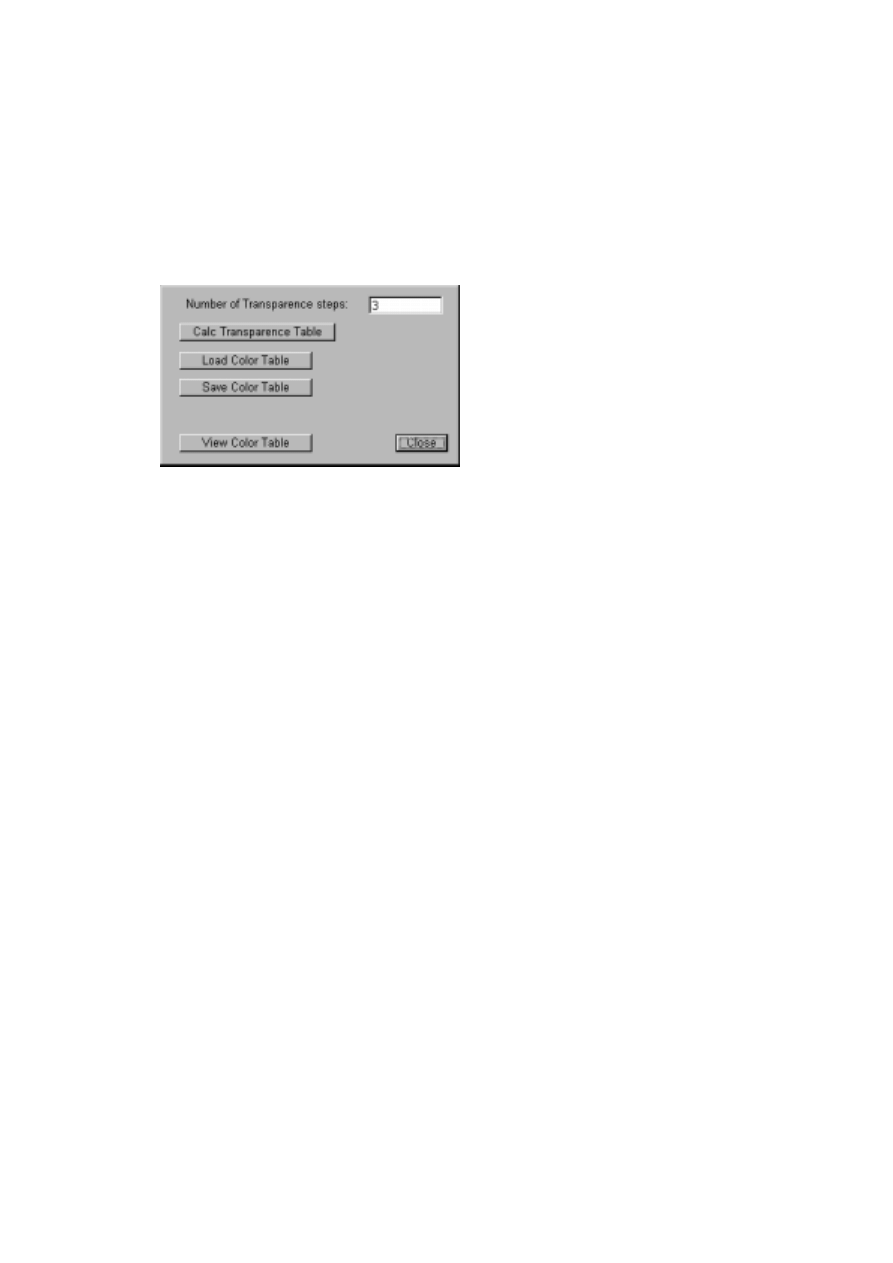
The dialog is used for two purposes: managing non-standard Color Tables and
setting up the Transparency effect.
❐
Note that this dialog can only be opened if you have your synth set to 256 colors.
About Color Tables
A color table is a set of definitions for 256 colors. If you use ArKaos VJ in 256
colors mode, the program will use one “main color table” for displaying the vi-
suals. If your pictures are created with another color table, they will be con-
verted automatically before they are displayed.
However, if the colors in a picture are too different from the standard color ta-
ble, converting it will result in distorted colors. The solution is to extract and
save the picture’s color table in Adobe Photoshop, and load it into ArKaos VJ
as the new “main color table”. Now, all pictures will be converted to the
loaded color table before they are displayed. Therefore, you may have to ex-
periment with different color tables until you find the one that is most suitable
for all pictures.
Load Color Table
Opens a file dialog box where you can locate a saved color table file created in
Adobe Photoshop, and select it for use in the Synth.
Save Color Table
Opens a file dialog box, allowing you to save the current color table in the
Adobe Photoshop format. You can then import it into Photoshop and use it to
optimize other pictures you want to use in your Synth.
View Color Table
Lets you view the current color table.
- 59 -
Transparency
As described on
, you can make settings for Visuals, so that they are
displayed in different degrees of transparency, depending on how hard you
press the MIDI keys when you trigger them. In order for this to work, you
must calculate a Transparence table for the Synth.
1. Enter a number of Transparency steps in the value box at the top of the window.
This is the number of different “levels” of transparency.
2. Click the “Calc Transparence Table” button.
3. Again, to actually use the Transparence effect, you have to select a Transparent
Copy mode for the appropriate visuals.
This is described on
.
❐
The transparence table is saved in the Synth file. You don’t have to calculate it
again, unless you want to change to a new number of transparency steps.
Managing Patches
This short section only shows you some basic management procedures re-
lated to Patches. To learn how to actually set up and create Patches, see the
following chapters.
Selecting Patches
There are always 128 Patches in a Synth (though you will probably not use
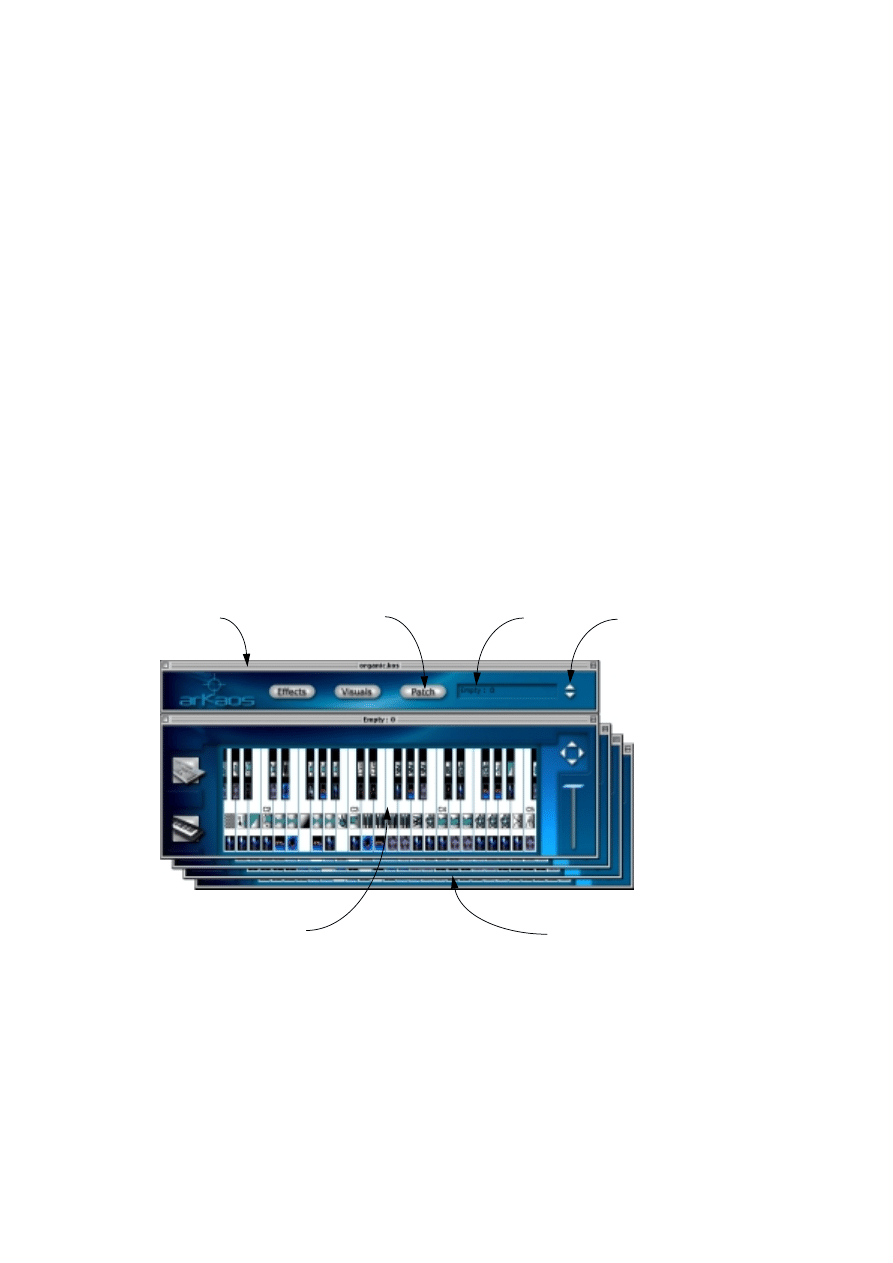
them all). There are three ways to select a Patch in ArKaos VJ:
• You can use the Up and Down arrow keys in the Synth panel window.
Synth
window
Button for opening Patch
window for selected Patch
Name of selected
(active) Patch
Patch select
buttons
The selected (active)
Patch window
Other Patch
windows
- 60 -
• If you have a Patch keyboard window open for the Patch, you can click directly
on this, to select the corresponding Patch.
Either way, the name of the selected Patch is shown in the name box to the right in
the Synth panel window. As soon as a Patch is selected, it is ready to use.
• When ArKaos is activated, or if you have the Preview window open, you can
switch between Patches via MIDI Program Change messages.
This is described on
.
Opening a Patch window
If you want to open the Patch keyboard window for a Patch, select it on the
Synth panel with the Arrow buttons, and click the Patch button.
Naming and Getting Info about a Patch
Since you can have up to 128 different Patches in a Synth, it is practical to
give them names corresponding to their contents and use. You name a Patch
as follows:
1. Click in the Patch keyboard window to make sure it is active.
2. Pull down the Patch menu and select “Get Patch Info”.
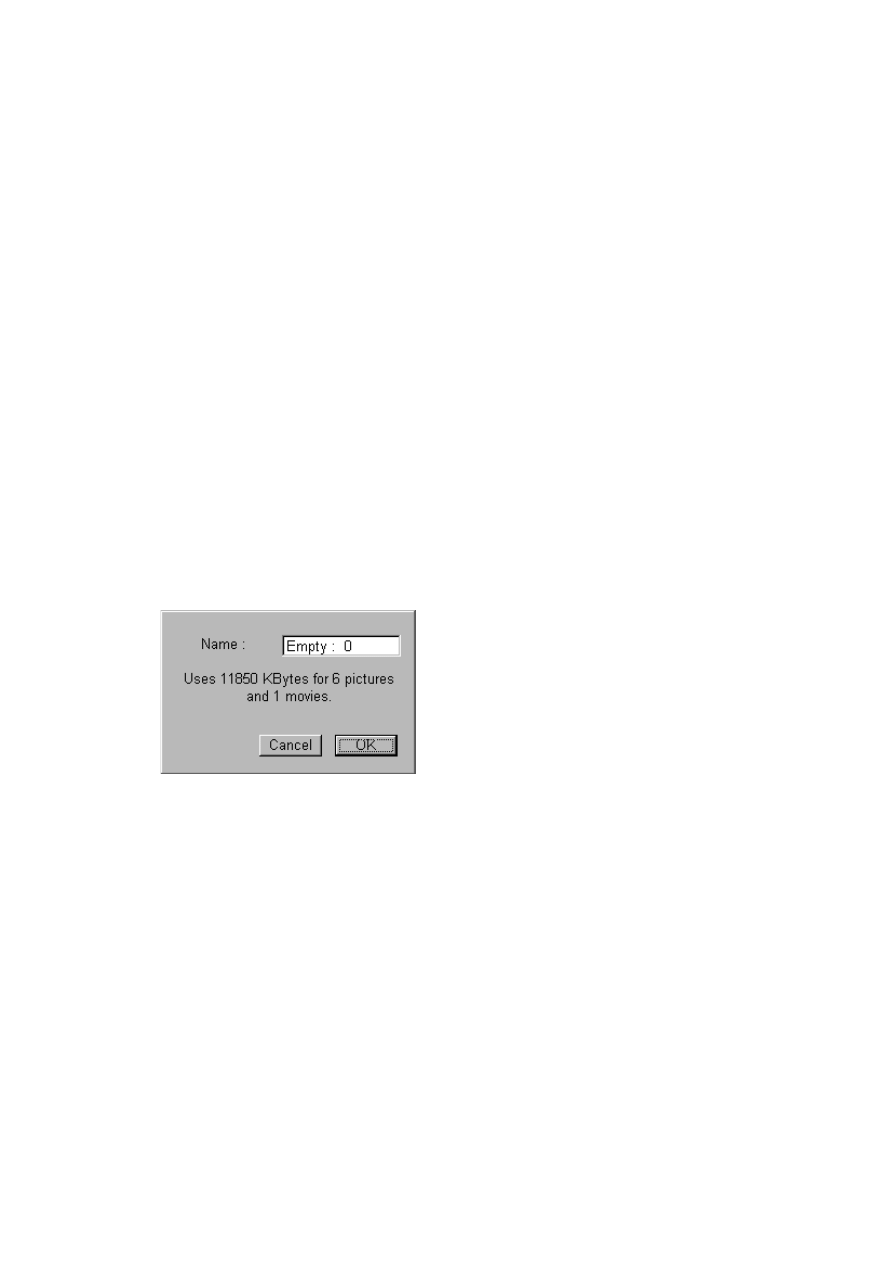
The Patch Info window opens. This contains information about the number of pictures
and movies used in the Patch, and the total amount of memory occupied by these. It
also contains a name box for the Patch.
The Patch Info window
3. Type in a new name for the Patch, and click OK or press [Return].
The new name is displayed in the title bar of the Patch keyboard window, and in the
Patch field in the Synth control panel window.
❐
The default names for the Patches are “Empty 0” to “Empty 127”. Since these
numbers also correspond to the MIDI Program Change numbers for each Patch,
it might be a good idea to keep the numbers at the end of the Patch names. That
way, it will be easier to find the right Program Change number for each Patch, if
you want to change Patches via MIDI later on (see

- 61 -
8
Setting up the Visuals

- 62 -
Preparations
When you prepare your visuals, please consider the following guidelines:
General
• The size of each visual should match the screen size specified for the Synth. If you
want the picture to cover the whole screen, as is, it must be of exactly this size.
ArKaos VJ has features for changing the size of any visual, but it is preferred if the orig-
inal size is as close to the desired size as possible.
• If you are working in 256 colors mode, make sure all pictures and movies in the Synth
use the same Color Palette, (see
).
Picture File Formats
ArKaos VJ can read picture files in the following formats:
PICT – A standard picture format for the Macintosh.
BMP – A standard picture format for the Windows platform.
JPEG – A compressed picture format.
Other Picture File Considerations
• The picture files can be located anywhere on your hard disk(s), but it is often conve-
nient to gather all your pictures in a folder specially created for the project, together
with your Synth file.
• For a good balance between computer speed requirements and visual quality, we rec-
ommend that you use full-screen images of the size 640 x 480 pixels (or even divisions
thereof) and the resolution 72 dpi.
• You might want to consider using the JPEG file format exclusively for your visuals,
since it is the smallest in size of the three supported formats. JPEG pictures use a
compression algorithm, and most photo editing applications let you specify the rate of
compression when converting pictures to this format. The compression scale used dif-
fers from application to application, but as a rule of thumb you should use a low com-
pression ratio if you want visuals of a high quality. If your foremost priority is reducing
the pictures in size, you should use a high compression ratio.
• You may use 16-bit (thousands of colors) or 8-bit (256 colors) picture files. While thou-
sands of colors give the highest picture quality, and therefore is recommended, there
are some drawbacks:
–Thousands of colors put greater demand on your computer speed.
–256 color pictures are loaded quicker, since they are smaller.
–The Synth file gets larger if it contains 16-bit pictures.
Movie File Formats
• ArKaos VJ uses QuickTime movies (MOV), Video for Windows movies (AVI) and Flash
Animations (SWF).
• Movies should probably be in a size which is a multiple of the Synth’s screen size. For
example, a movie in 160 x 120 can be displayed in four times its original size, to cover
a 640 x 480 screen.

- 63 -
• Make sure all movies are saved in self-contained format (rather than with pointers to
other movies).
• We recommend that you place the movies you want to use, in the same folder as the
Synth file, since this is the fastest. However, you can also use the “Movie folder“ dia-
log on the Synth menu (see
) to specify that the movies are located anywhere
on the disk.
Move File Compression considerations
If you create your own QuickTime movies (as described on
your compression method and settings carefully, depending on the media and
computer system you plan to play the movie from (CD-ROM/hard disk, slow/
fast computer etc.).
• If you want to produce movies of a high quality, you should use a very small amount of
compression, in which case the Animation codec is the compression method of
choice. Note however, that if you use a low compression rate for the movies, the sys-
tem from which you play them has to be very fast.
• If your system isn’t fast enough to play near-uncompressed movies, the Cinepak co-
dec is generally the best compression method, producing movies that are small in size
and can be played back very fast (although the actual compression process may take a
long time).
• If you want movies of small size, for instance if you want to use them in a kos file to be
distributed over the internet and played in the ArKaos Visualizer, you will have to use a
large amount of compression. The recommended compression method in this case is
the Sorenson Video codec, which produces great compression, without giving up on
quality. However, the compression and decompression of movies with this codec
takes a rather long time.
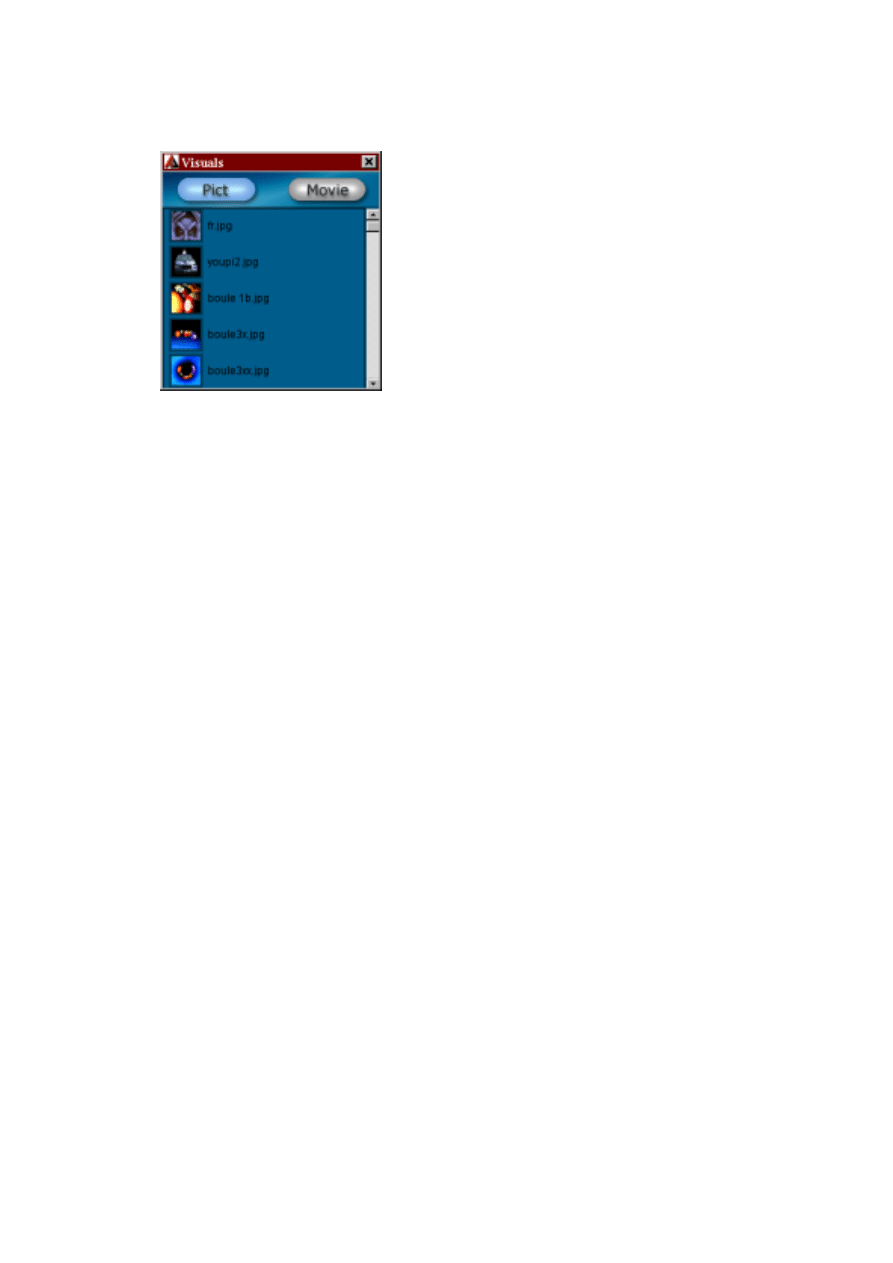
- 64 -
The Visuals window
The Visuals window contains a list of all the visuals used in your Synth (actu-
ally two lists, one for pictures and one for movies).
❐
Please note that the Visuals window is common to all Patches in your Synth!
Opening the Visuals window
This can be done in several ways:
• By clicking on “Visuals” in the Synth Panel window.
• By pulling down the Synth menu and selecting “Visuals...”.
• By pressing [Command]-[1] (MacOS) or [Ctrl]-[1] (Windows) on the computer
keyboard.
Importing Visuals
This can be done in three ways:
Dragging & Dropping
1. Open the Visuals window.
2. Under MacOS use the Finder and under Windows use the Explorer to locate the
visuals you want to import.
For information about supported picture and movie formats, see
Arrange the windows so that they are both visible when ArKaos VJ is active.
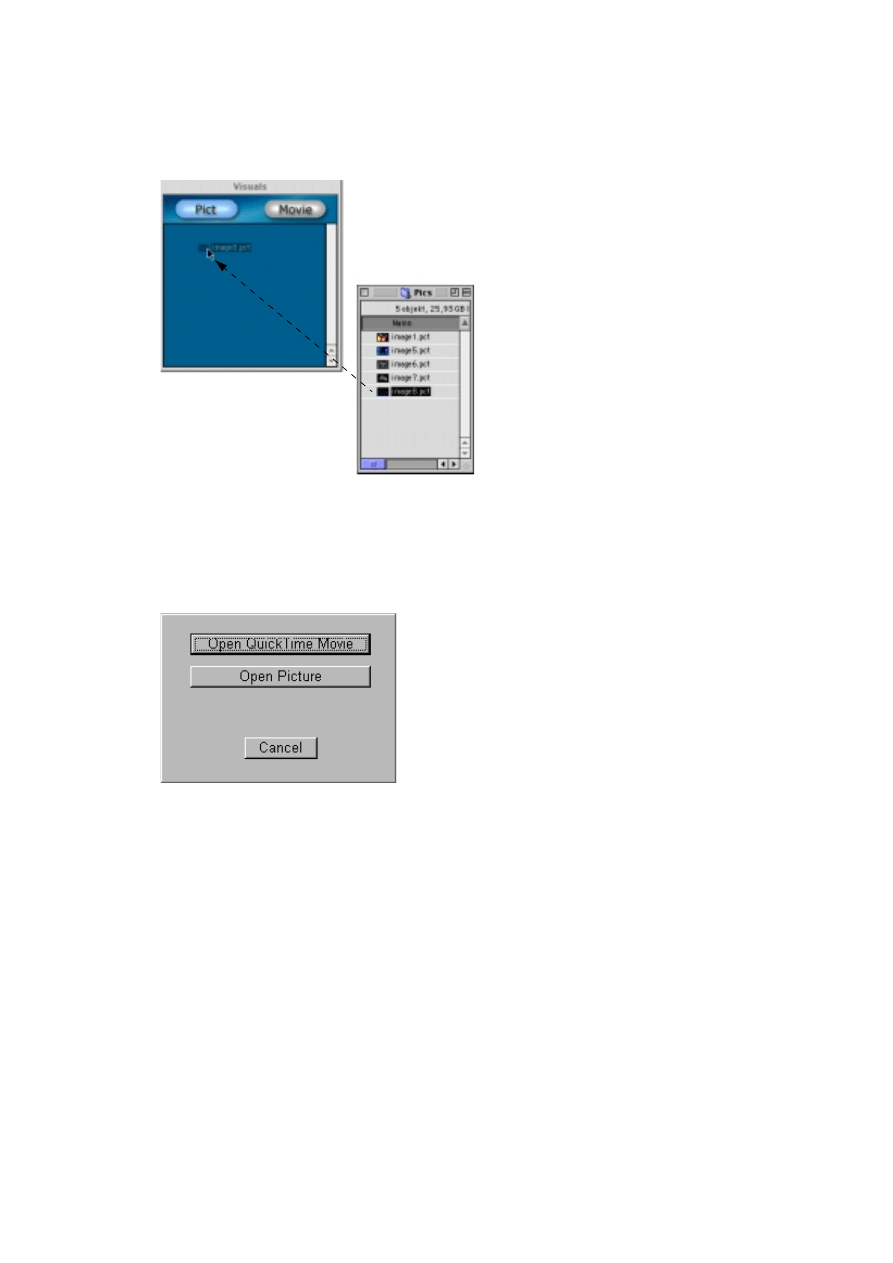
- 65 -
3. Click on the picture icon, keep the mouse button pressed while dragging it to the
Visuals window, and then release the mouse button.
ArKaos VJ automatically puts the visual in the correct list (movie/picture).
Dragging a picture file into the Visuals window.
Using the Import command
1. Pull down the File menu and select “Import...”.
A dialog appears:
2. Select whether you want to import a movie or a picture, by clicking the corre-
sponding button.
3. In the file dialog that appears, locate the file you want to import and click
“Open”.
The visual icon is added to the list in the Visuals window.
Importing directly into the Patch Keyboard
You can drag and drop files directly onto the Patch keyboard. This is described
on
❐
If you import visuals directly into a Patch keyboard window, they will automati-
cally be added to the Visuals window (if they aren’t already there).
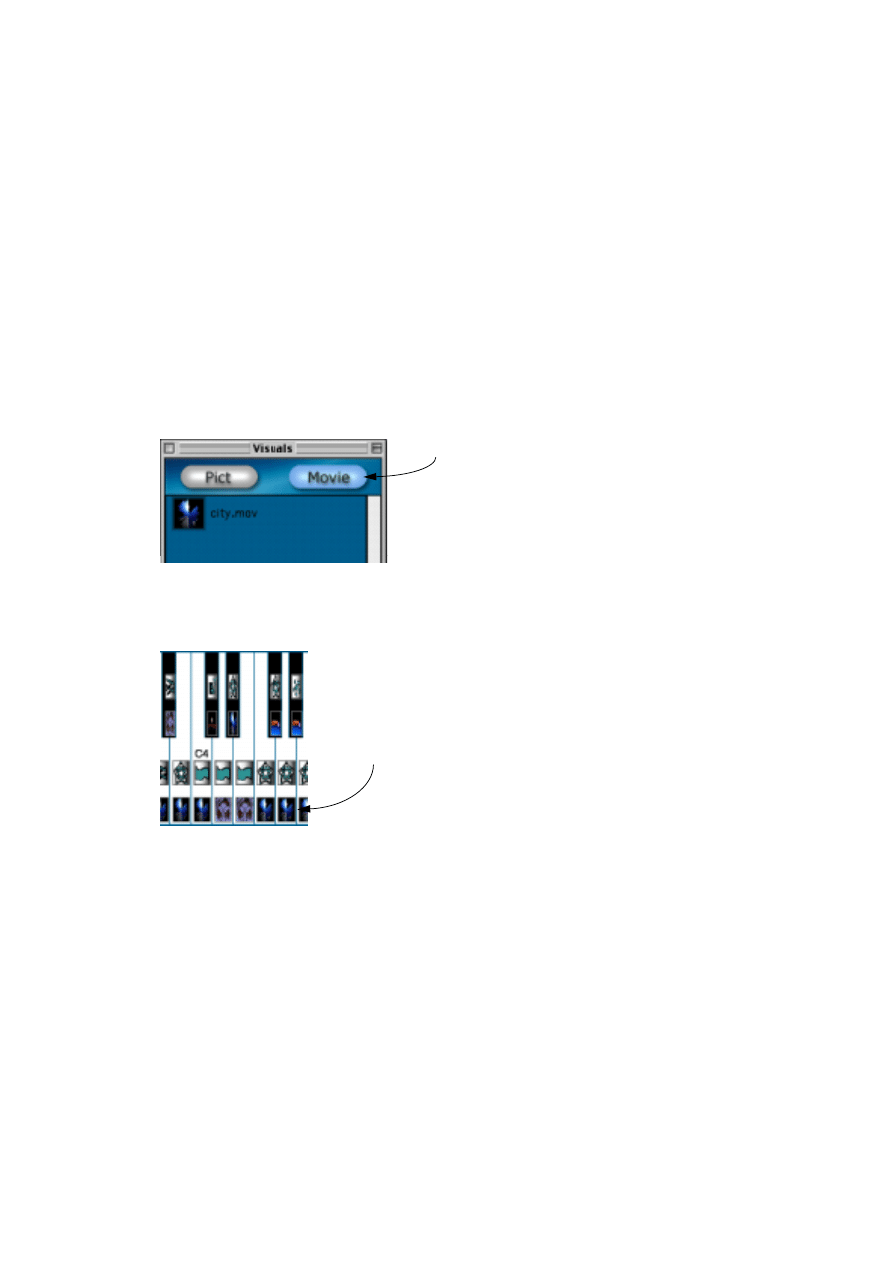
- 66 -
Removing Visuals from the Visuals window
This can be done in two ways:
• Click on the Visual to select it, pull down the Edit menu and select “Clear”.
• Select the visual and press [Command]-[Delete] (MacOS) or [Ctrl]-[Delete] (Win-
dows) on the computer keyboard.
❐
Removing a visual from the visual window will also remove all references to it in
every Patch in the Synth.
Switching between the Picture and Movie list
As already stated, the Visuals window consists of two separate lists, one for
pictures and one for movies. You decide which of the lists to be shown, by
clicking on the Pict or Movie button at the top of the Visuals window.
Assigning a visual to a key
As shown in the picture above, there are two “cells” on each key in the Patch
keyboard window. The upper cell is for effects, and the lower is for visuals.
When a visual is assigned to a key, the box contains the icon for the visual.
There are several ways to assign a visual to a key:
The Movie list selected
This row of cells
is for visuals.
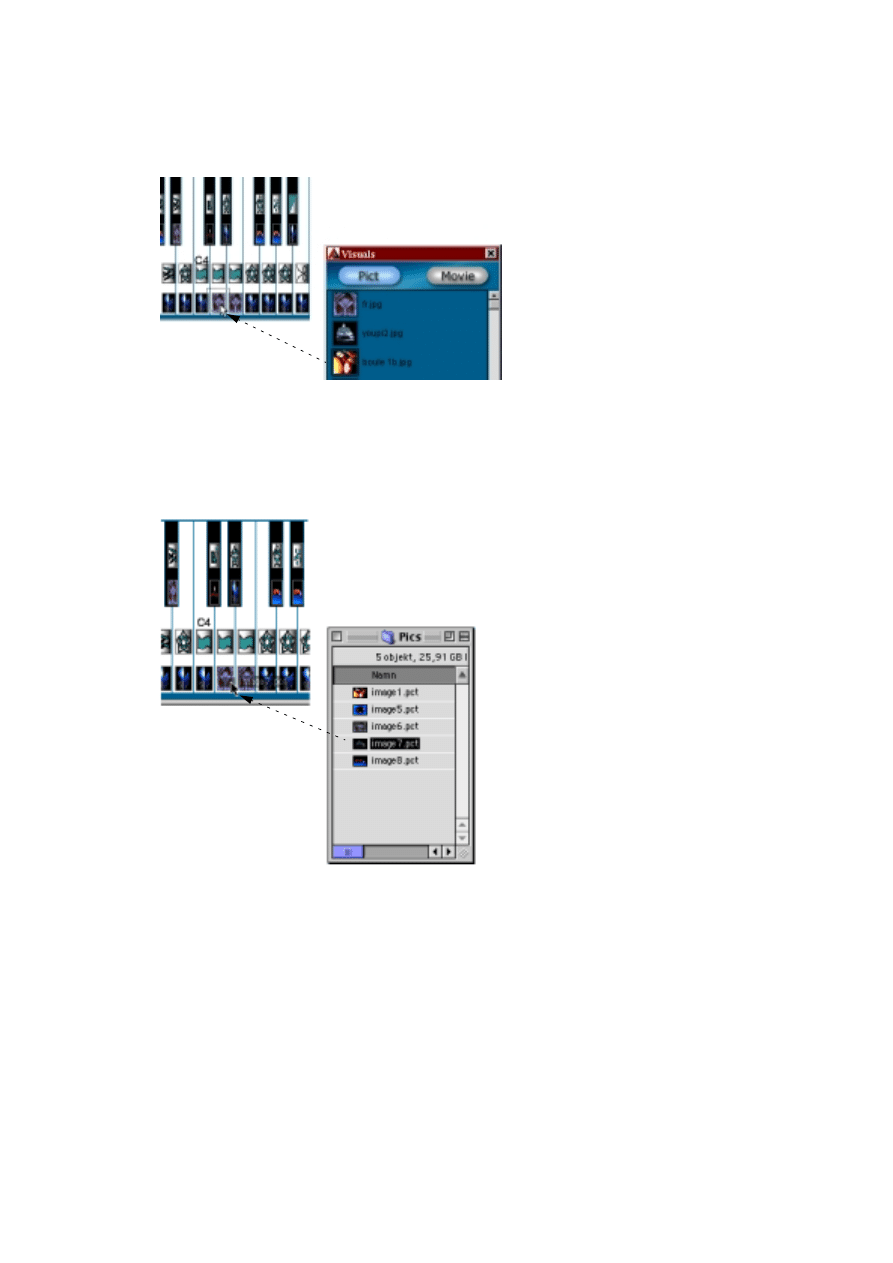
- 67 -
• Dragging the visual icon from the Visuals window.
Click on the visual in the Visuals window, drag it - with the mouse button pressed - to
the Patch keyboard window, and drop it on the lower cell of the key on the keyboard.
Dragging a visual from the list to the Patch keyboard.
• Dragging the visual icon from the Finder (MacOS) or the Explorer (Windows).
Drag it in the same way as above, but from the Finder/Explorer, and drop it on the cell.
When you do this, the visual is also automatically added to the Visuals window, if it’s
not already there.
Dragging a picture file to the Patch keyboard.
• Double clicking on an empty cell on the Patch keyboard.
This opens a dialog, where you can choose to import a picture file or a movie, just like
when you select “Import” from the File menu. When you do this, the visual is also au-
tomatically added to the Visuals window, if it’s not already there.
❐
Depending on the setting in the Movie Folder dialog (see
), movies may
have to be in the same folder as the Synth file.
• Copying the visual icon from one key to another in the Patch keyboard window.
If you drag a visual icon from one cell to another, you will create a copy of it. This fea-
ture works between different Patch keyboard windows as well.

- 68 -
• Using the Cut, Copy and Paste commands on the Edit menu.
To do this, you first have to select the cell by clicking on it (the selected cell will be
highlighted.). The Cut command (or [Command]-[X] MacOS, [Ctrl]-[X] Windows) re-
moves the visual from the cell and places it on the Clipboard. The Copy command (or
[Command]-[C] MacOS, [Ctrl]-[C] Windows) places a copy of the visual on the Clip-
board without removing the original from the cell. The Paste command (or [Command]-
[V] MacOS, [Ctrl]-[V] Windows) copies the visual on the Clipboard into the selected
cell. You can repeat this with other cells if you like.
Checking the Visuals
If you have a large number of visuals in your Visuals window, it can be very
hard to remember how they all look. Therefore, you can display each visual
without actually triggering it.
1. Double click on a visual icon in the Visuals window.
The visual opens in a separate window.
❐
The separate window that opens will be in one of two sizes depending on
whether the preview window is open or not. For a larger size, close the preview
window first.
2. If the visual is a movie, you can use the playback controls at the bottom of the
window to view it.
These consist of (from left to right) a Play/Stop button, a movie transport slider (that
lets you view any segment of the movie at any speed) and buttons for stepping
through the movie one frame at a time, forwards or backwards.
3. To close the window, click on its close box, as usual.
Removing a Visual from a key
If you just want to replace one visual with another, there is no need to remove
the first one. However, there may be situations when you need empty keys,
and therefore wish to remove the visual from a key. This can be done in sev-
eral ways:
• Click on the visual icon, pull down the Edit menu and select Clear.
• Click on the visual icon, pull down the Edit menu and select Cut.
This will remove the icon from the cell, and place it on the clipboard, from where you
may later paste it into other cells, as previously described.
• Click on the visual icon and press [Command]-[Delete] (MacOS) or [Ctrl]-[Delete]
(Windows).
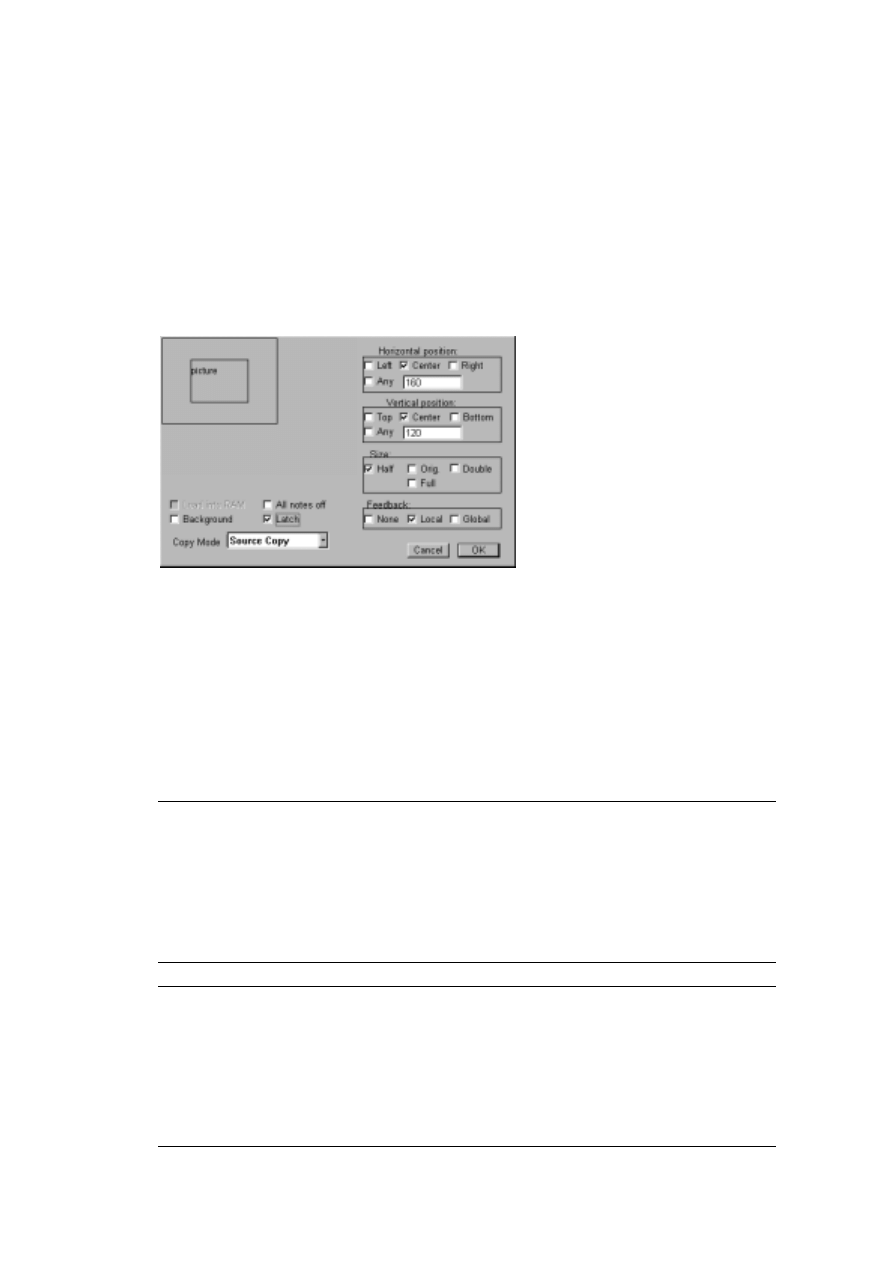
- 69 -
The Visual Info dialog
In the Visual Info dialog you can, among other things, specify the size and po-
sition of each visual:
1. To select a visual in the keyboard window, click in its cell.
A selected visual is displayed with a highlight.
2. Pull down the Patch menu and select “Get Visual Info...”. You can also press
[Command]-[I] (MacOS) or [Ctrl]-[I] (Windows), or simply double click the visual.
The dialog opens:
3. Make the desired settings (described below).
4. Click OK to exit the dialog and keep the changes.
To leave the dialog without keeping the changes, click Cancel.
Size and Position Settings
You use the position box to the left and the three groups of checkboxes to the
right, to determine the size and position of the visual. The buttons have the
following functions:
Horizontal Position
Left
The visual is aligned with the left side of the screen.
Center
The visual is centered horizontally.
Right
The visual is aligned with the right side of the screen.
Any
In this mode you can position the visual freely along the horizontal axis,
by dragging the picture square in the box to the left.
Vertical Position
Top
The visual is aligned with the top of the screen.
Center
The visual is centered vertically.
Bottom
The visual is aligned with the bottom of the screen.
Any
In this mode you can position the visual freely along the vertical axis, by
dragging the picture square in the box to the left.

- 70 -
❐
To be able to move the visual in “Free Mode”, it has to be smaller than the
screen.
Copy Mode
The Copy Mode pop-up in the lower left corner is used for determining how
the visual should be displayed when “superimposed” on another visual.
ArKaos VJ can be made to display a visual in different shades of transparency,
depending on how hard you press the MIDI key. If you work in 256 color
mode you need to have made settings for the Transparence steps as de-
scribed on
. Among other things, this feature lets you create sophisti-
cated fades from one visual to another.
The following options are available on the Copy Mode popup menu:
Size
Half
The visual will be displayed in half its normal size.
Orig.
The visual will be displayed in its normal size.
Double
The visual will be displayed in twice its normal size.
Full
The visual will be made to fit the screen.
Option:
This will happen when the visual is displayed:
Source Copy
The screen will be completely redrawn with the new visual (the previ-
ous image will only be visible if the new visual is smaller).
Background Copy
Only the foreground parts of the new visual will be displayed. In the
background “empty” parts of the visual, the previous image will still be
visible. The background is defined as the first color in the palette. For
the standard palette, this is white.
Transparent
The visual will be shown in different degrees of transparency, depend-
ing on the velocity value of the incoming note. If you press the key re-
ally softly, the visual will not be visible at all; if you press it really hard,
the previous image will not be visible at all. In between, there are a
number of steps of transparency, where you will be able to see the pre-
vious image through the semi-transparent new visual (In “thousands”
of colors mode the number of transparency steps are always 3. In 256
colors mode the number of transparency steps are set globally for the
Synth, as described on
).
Transparent Ghost
Works like the Transparent mode, but the new visual will only be seen
while you keep the key pressed. When you release the key, the previ-
ous image will be displayed again. This means that you can “flash” the
visual very briefly, in different shades of transparency, by pressing the
key quickly with different velocities.

- 71 -
Load into RAM
This option is available for movies only.
• If Load into RAM is activated, the movie will be loaded into memory before the
Patch is played.
This will make it “easier” for the computer to display the movie, sometimes resulting
in the movie running smoother. A movie is loaded into RAM in compressed format,
which means that if a movie occupies 1 MB on your hard disk, it will require the same
amount of free RAM.
• If Load into RAM is not activated, the movie will be played back directly from the
hard disk.
This is good if you are short on RAM, but may result in “jumpy” movie playback if your
hard disk is not sufficiently fast. We recommend that you first try to run the movies
without “Load into RAM” activated. If the movie playback is OK then, all is well; other-
wise, try activating Load into RAM.
Background
With this option activated, the visual or effect on the key will always be played
in the background, or - more correctly - regardless of how many keys you play
simultaneously and in which order, the key for which you have this option ac-
tivated will always be considered as the first key played.
This is extremely useful wen you take advantage of the multi-layering capabil-
ities of ArKaos VJ (as described on
) because since some of the ef-
fects occupy the entire screen (Color Cycling and 3D Tunnel to mention a
couple), it is not possible to use other effects at the same time.
The Background option remedies this problem by forcing a key with such ef-
fects to always play in the background, thereby allowing other effects to be
played on top of it.
❐
Note that you can not play more than one key with the Background option acti-
vated at the same time. Well, actually you can. But if you do, the first back-
ground will be stopped and replaced with the second one. They will not both
play at once.
All notes off
When this option is activated for a key, and you press it, it causes any and all
visuals and effects on other keys currently playing to be automatically
stopped. If you are playing several layers at once, through use of the multi-lay-
ering (see
) and Latch (see below) capabilities, and want to clear all
other layers before launching a new visual, activate this option for it.
Latch
If you activate this option, the effect on the key will not stop when you re-
lease the key. Instead it will run continuosly until you press the key a second
time to stop it.

- 72 -
Feedback settings
The feedback mechanism in ArKaos VJ can be used to create interesting rep-
etition effects.
When a feedback option is activated for a key, the output from the key (a vi-
sual combined with an effect, or an effect only) is sent into a temporary mem-
ory buffer, and then fed back to the input of the key. This causes an image
identical to the original one, only with a time delay and a slightly different
shape, to appear on the screen along with the original.
The following Feedback options are available:
❐
If you want to apply Background, All notes off, Latch or Feedback to an effect
placed “alone” on a key, note that it is not necessary to have a visual on the key.
You can also open the Visual Info dialog as described on
an effect on the key.
Feedback
None
No feedback is applied.
Local
When playing multiple layers at once (see
) only the current
layer, i.e. the one triggered by the key with this option selected, is af-
fected by the feedback.
Global
When playing multiple layers at once, all active layers are affected by
the feedback, even if only one of the layers has this option activated.

- 73 -
9
The Effects
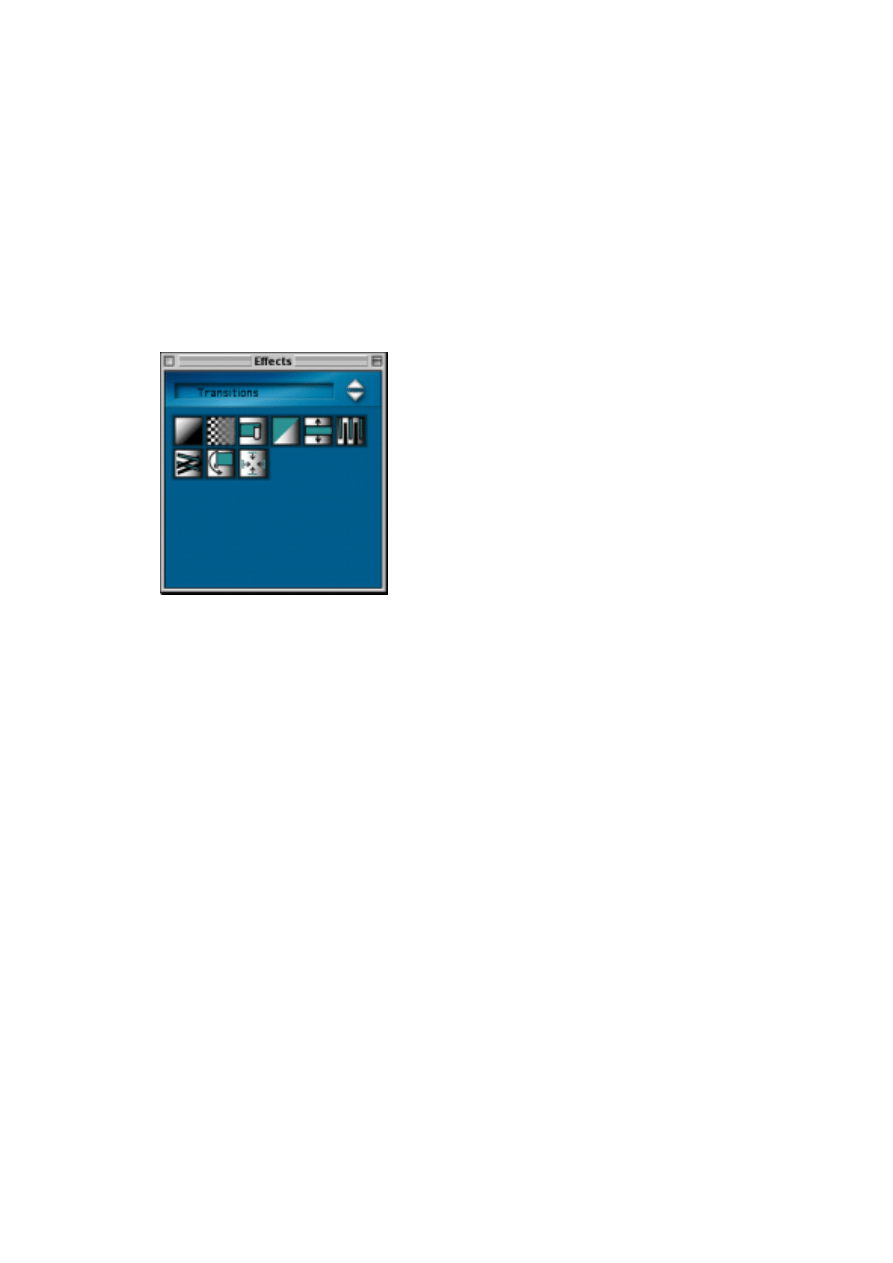
- 74 -
The Effects window
The Effects window contains icons for all the internal Effects, as well as the
external Effects in the Plug-In folder inside your ArKaos VJ folder. There are
three ways to open the Effects window:
• Click on the Effects button in the Synth panel window.
• Pull down the Synth menu and select “Effects...”.
• Press [Command]-[3] (MacOS) or [Ctrl]-[3] (Windows) on the computer keyboard.
This picture shows the Effects window as it looks when you have installed
ArKaos VJ and opened a new Synth:
The Effects window.
The effects are divided into six different categories. To switch between the
different categories, use the arrow buttons on the top left side of the window.
About Fixed and Plug-in Effects
ArKaos VJ has a number of built-in effects. In addition to this the program
uses a plug-in structure so that new effects can be added as they are devel-
oped. Included with the program are a number of Plug-in effects, placed in a
subfolder in the ArKaos VJ program folder.
Future plug-in effects
Additional plug-ins will be made available to ArKaos VJ users, as they are de-
veloped. Please monitor the ArKaos web page for more information.
• To install a plug-in effect, simply drag it to ArKaos VJ’s “Plug In” folder before
launching the program.
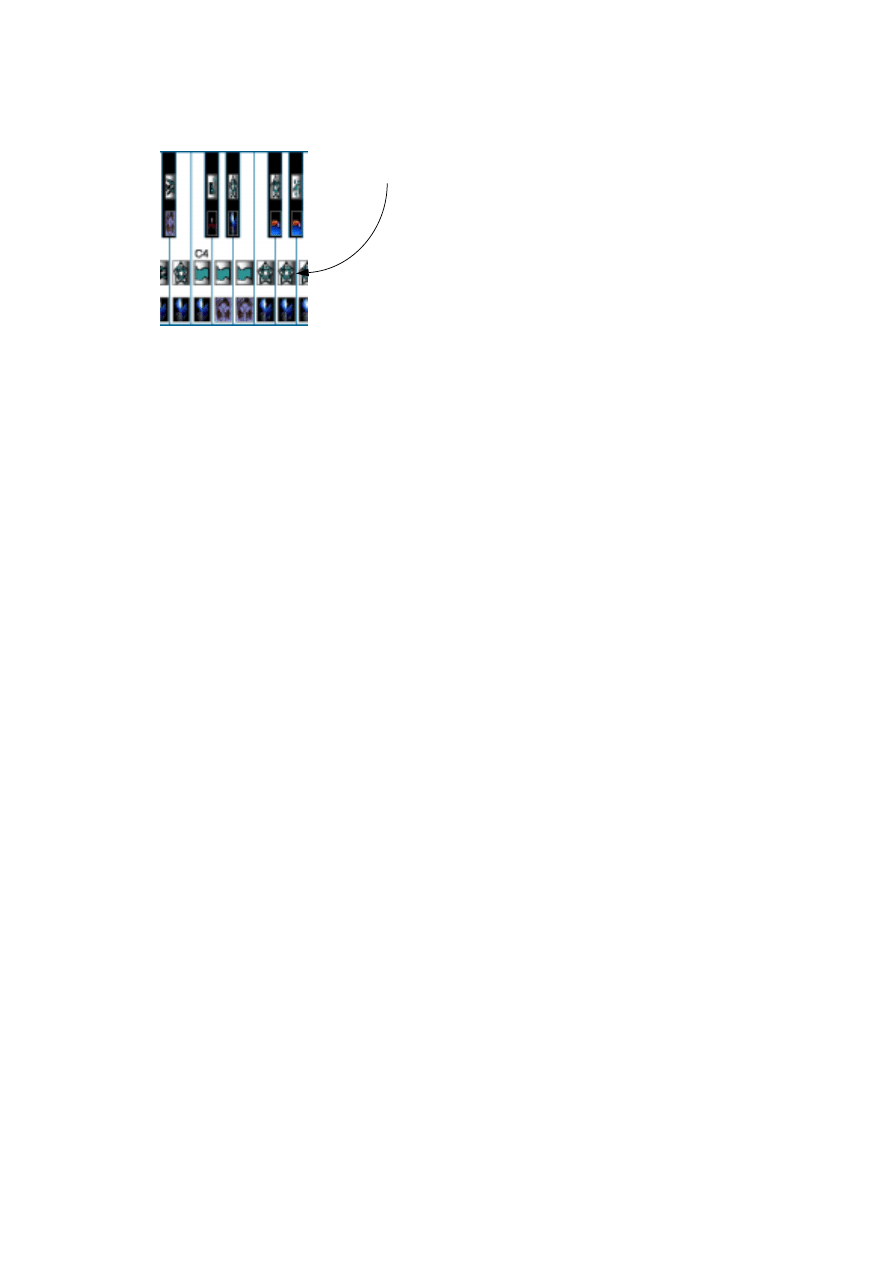
- 75 -
Assigning an Effect to a key
The upper cell on each key in the keyboard window is for effects. Just as with
visuals, you assign an effect to a key by placing its icon in the cell. This can be
done in the following ways:
• Dragging the effect icon from the Effects window.
Click on the icon in the Effects window, drag it with the mouse button pressed, to the
Patch keyboard window, and drop it on the upper cell of the key.
• Dragging the effect icon from one key to another in the Patch keyboard window.
If you drag an effect icon from one key to another, it will not be moved, but copied.
• You can also Cut, Copy and Paste effects just as with Visuals (see
Effects and Visuals, combined or separate?
You may place an effect on a key together with a visual, so that the visual is al-
ways processed by this certain effect. You may also place an effect alone on
a key, to process the currently shown image. The following applies:
• An effect combined with a visual on the same key works on the visual image
only.
That means, for small visuals, that the surrounding “background” image is not af-
fected by the effect.
• If you place effects “alone” on keys, you can combine them with effects on other
keys.
Due to the multi-layering capability of ArKaos (as described on
) you can play
several keys with effects at the same time and thereby create a visual processed by
multiple effects.
❐
Please note that the effects Hypersize, Vortex, Warp and Size will only work
when combined with a visual on the same key.
Removing an Effect from a key
If you just want to replace one effect with another, there is no need to re-
move the first one. Simply assign the new effect to the key, and the old one
will be replaced. However, there may be situations when you need empty
keys, and therefore wish to remove the effect from a key. This can be done in
several ways:
• Replace the effect icon with the “None” effect from the Effects window.
This row of cells
is for effects.
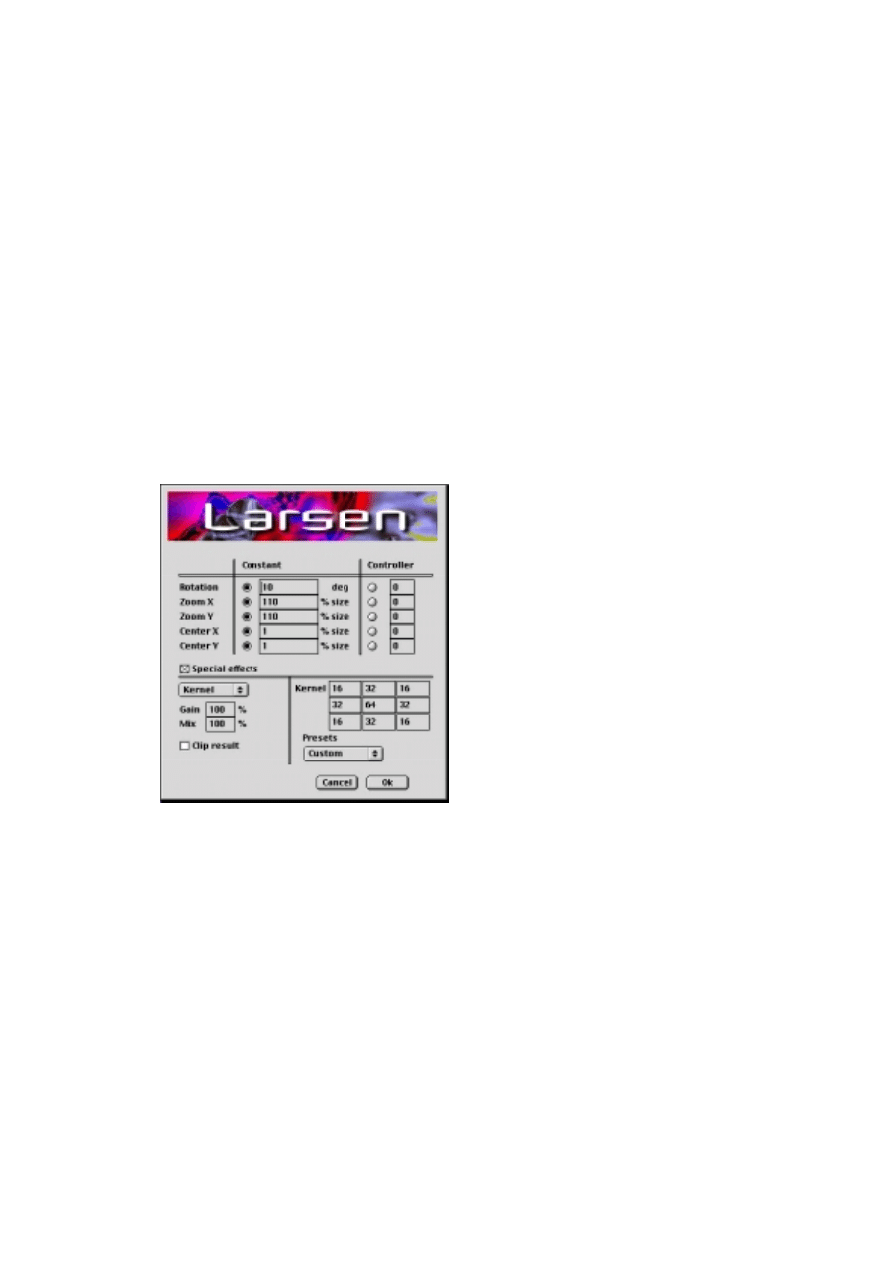
- 76 -
• Click on the effect icon, pull down the Edit menu and select Clear.
• Click on the effect icon, pull down the Edit menu and select Cut.
This will remove the icon from the cell, and place it on the clipboard, from where you
may later paste it into other cells. See
• Click on the effect icon and press [Command]-[Delete] (MacOS) or [Ctrl]-[Delete]
(Windows).
Editing Effects
If you have already placed an effect icon on a key in the Patch keyboard win-
dow, you can double click on it to make additional settings for it, in the follow-
ing way:
1. Double click on the icon for the effect you want to edit.
A dialog with additional settings opens (some effects have no settings, in which case
nothing will happen when you double click).
The options dialog for the “Larsen” plug-in.
2. When you have made the desired settings, click OK.
To exit the dialog without keeping your changes, click Cancel.
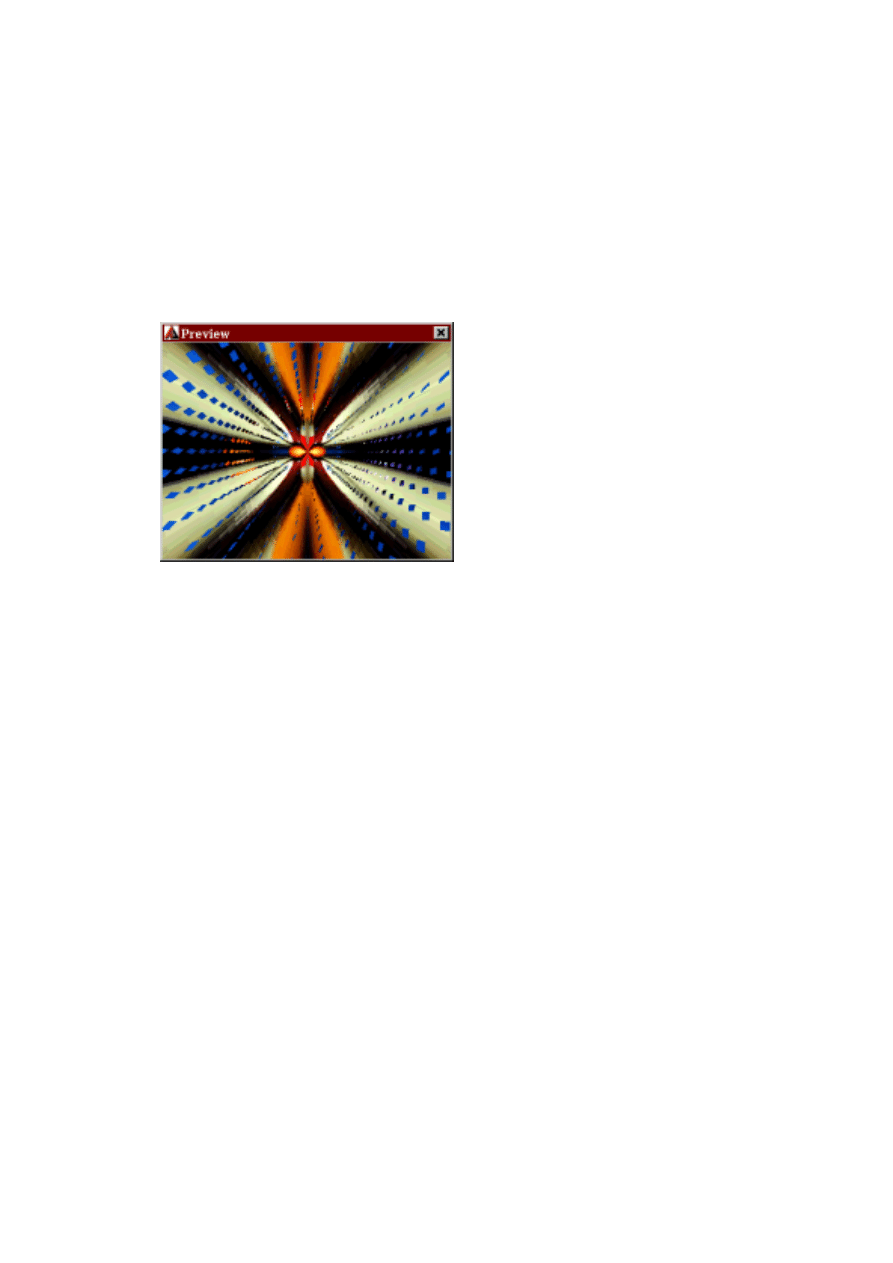
- 77 -
The Preview Function
While you are setting up your Patch, you will probably want to try different
combinations of visuals and effects. Instead of displaying your Patch in full-
screen mode, you can use the Preview function. This displays the visuals and
effects in a smaller window, which you can position freely on the screen:
1. Pull down the ArKaos menu and select “Show Preview”, or press [Command]-
[P] (MacOS) or [Ctrl]-[P] (Windows).
The Preview window opens.
2. Press the keys on your MIDI controller to try out the assigned visuals and effects.
For details on how to use a MIDI controller, see
• You can also set up the computer keyboard, so that the computer keys serve as
MIDI keys.
This feature (described on
) allows you to try out your Patches even if you
have no MIDI controller connected.
You can continue working with the Preview window open. Since the Preview
function does not involve any pre-computing, you can try out your visuals and
effects at any time during your work.
❐
Some Effects may not work in Preview mode. If in doubt, activate the full-screen
display.
- 78 -
Internal Effects and Parameters
On the following pages, the built-in effects included with ArKaos VJ are listed,
together with their icons and parameters:
None
No effect is applied. On the keys in the Patch keyboard window, this “effect”
is indicated by an empty white cell. Use this when you want a key to display a
movie or an “undistorted” picture.
Do the Clut Dance (256 color mode only)
“Clut” stands for Color Look-Up Table, a concept used by the computer to de-
termine which colors are used on the screen. The “Clut Dance” is an effect
that gradually changes the colors on the screen, one step at a time or contin-
uously.
❐
Please note that the Clut Dance changes the color globally, affecting the entire
screen area. This means that all active applications are affected. For this reason,
the Clut Dance will have no effect in Preview mode.
The options for this effect are as follows:
Stop Clut Dance
This “effect” simply restores the colors to normal.
Advance One Step
In this mode, the colors will change one “step” each time you
press the key.
Auto Run Mode
In this mode, the colors will change continuously while you are
holding down the key.
Restore Colors when
Stopping
(Auto Run Mode only)
If this option is activated, the colors will be restored to normal as
soon as you release the key.
Synchronization
(Auto Run Mode only)
If this is set to “No Synchronization”, the effect simply runs as
fast as possible. You can also set this to one of the specified
frame rates. Choose the fastest rate the playback system can han-
dle with an even and “smooth” result. The options are 10, 20 and
30 frames/second.
Use Mod Wheel
In this mode, you can change the colors continuously with the
modulation wheel on your MIDI controller. A Modulation value of 0
will result in the normal color table.
- 79 -
Size
This effect changes the size of the visual.
The options for this effect are as follows:
❐
This effect does not work if placed on a key with no visual assigned.
Warp
This will gradually fill the image with thin lines or squares, and you can deter-
mine the size and orientation of these.
The options for this effect are as follows:
❐
This effect does not work if placed on a key with no visual assigned.
Velocity
In this mode, the size of the visual will change depending on how hard
you press the key on the MIDI controller. The harder you press it, the
larger the visual.
Use Modulation
Wheel
In this mode, the size of the visual will change with the modulation
wheel value sent from the MIDI controller. Raising the modulation
wheel will result in a larger visual.
Horizontal
The lines will be horizontal.
Vertical
The lines will be vertical.
H and V
There will be both horizontal and vertical lines.
From Center
The lines will appear to spread evenly from the starting point, set with the
“crosshair” that appears when you select this option.
Square
The image will be filled with squares instead of lines.
Warp Size
The length of the lines (or size of the squares). Use the slider to change
the value.
- 80 -
Fill Screen
This effect fills the screen, or part of it, with a color of your choice.
The options for this effect are as follows:
Hyper Size
Zooms continuously in and out on the image. The image will first be displayed
in the Start Size, and zoom to the End Size (in increments determined by the
Delta Size parameter). This procedure is then reversed (zooming from End
Size back to Start Size) and repeated for as long as you keep the key pressed.
The options for this effect are as follows:
❐
This effect does not work if placed on a key with no visual assigned.
Position
If “1/2 screen” or “1/4 screen” is selected below, you can position the fill
area by dragging the square in the box to the desired position.
Size
Determines the size of the fill area. Choose between Full screen, 1/2 screen
and 1/4 screen.
Select Color
Click on the color square to open a standard Color Picker where you can se-
lect the desired fill color.
Start Size
The size (in percent) of the image when the zoom cycle starts.
End Size
The size (in percent) of the image at the turning point of the zoom cycle.
Delta Size
The increment in size (in percent). Low values will cause the image to
zoom slowly and smoothly, while high values will cause fast, abrupt
changes in size.
Synchronization
If this is set to “No Synchronization”, the effect simply runs as fast as
possible. You can also set this to one of the specified frame rates.
Choose the fastest rate the playback system can handle with an even and
“smooth” result. The options are 10, 20 and 30 frames/second.
- 81 -
Vortex
Causes the image to rotate, automatically or controlled by Pitch Bend.
❐
For smooth rotation, we recommend that you use small pictures.
The options for this effect are as follows:
❐
This effect does not work if placed “alone” on a key.
Bombo Blaster
Explodes the image into squares, that will move outwards from the image.
You can determine the size of the squares and also add special effects such
as rotation.
The options for this effect are as follows:
Use Pitch Bend
In this mode, the rotation of the image is controlled by Pitch Bend mes-
sages. Raising the Pitch Bend (positive values) will rotate the image
clockwise, while lowering it will rotate the image counter-clockwise.
Moving the Pitch Bend control to either end point will rotate the image
180˚.
Auto Increment
In this mode, the image rotates automatically, clockwise, as long as you
keep the key pressed.
Start Angle
In the Auto Increment mode, the image will initially be displayed at this
angle when you press the key.
Delta Angle
The increment in degrees. Low values will cause the image to rotate
slowly and smoothly, while high values will cause a fast, abrupt rotation.
Synchronization
If this is set to “No Synchronization”, the effect simply runs as fast as
possible. You can also set this to one of the specified frame rates.
Choose the fastest rate the playback system can handle with an even and
“smooth” result. The options are 10, 20 and 30 frames/second.
Grid Width
This value determines into how many parts the screen should “explode”
along the x-axis (horizontal).
Grid Height
This value determines into how many parts the screen should “explode”
along the y-axis (vertical).
Random Moves
Causes the pieces of the image to move at random.
Rotation
Causes the pieces to rotate.
Synchronization
If this is set to “No Synchronization”, the effect simply runs as fast as
possible. You can also set this to one of the specified frame rates.
Choose the fastest rate the playback system can handle with an even and
“smooth” result. The options are 10, 20 and 30 frames/second.
- 82 -
Plug-in Effects and Parameters
On the following pages, the different categories of plug-in effects included with
ArKaos VJ are listed, together with their icons and parameters:
Artistic
Color Cycling
A computer generated image basically consists of a combination of three col-
ors; red, green and blue. This effect splits up the image into these three basic
components, or layers, and cycles through them, thereby creating variations
in color.
The options for this effect are as follows:
Yin and Yang
The image distorts in waves, resembling the classic “Yin & Yang” symbol.
The options for this effect are as follows:
Color Cycling
For each of the three components, you can specify how long it will take
(in milliseconds) for the image to cycle from being displayed in its original
color, to being displayed through a layer of only that particular component.
Use Controllers
You can choose to assign any MIDI controller number to each of the three
components, thereby being able to control the color cycling in real-time
with MIDI controller messages.
Cycle & Multiply
When you use MIDI controllers for the color cycling, you can select be-
tween Cycle and Multiply to determine how the different layers are “su-
perimposed” onto the original image. Cycle produces a more separated
effect, while Multiply is smoother and blends the layer with the original
image.
Rectangle
The image slowly takes on a rectangular shape.
Use Original Image
The image remains close to its original shape.
- 83 -
Pixel Vortex
“Smudges” each pixel in the image, gradually distorting the picture in various
ways.
The options for this effect are as follows:
Tunnel
Transforms the image into a revolving tunnel.
The options for this effect are as follows:
Plane
Creates the illusion of flying above the image.
Pudding
The image is slowly garbled in many places at once.
Rotation
Rotates the image clockwise, smudging it along the way.
Classical Vortex
The image transforms into a whirlpool, being sucked into itself.
Expansion
Makes the image expand slowly outwards from the center of the screen.
Spiral
Turns the image into a slow spiral.
Symmetry
This allows you to select if the picture should only be split along a horizontal
axis (double) or along both the horizontal axis and the vertical axis (Quad).
Movement
The effect of these two options is more apparent on static images than mov-
ies. If Angle is activated, the sections will “turn”. If Distance is activated it
will appear as if you travel inwards, towards the center of the image.
Quality
This allows you to select from three levels of detail.

- 84 -
Morphosis
This effect stretches an image dynamically, in any direction or with a number
of controls. The basic idea is to position one or more “vectors” on the image.
A vector is indicated by an arrow that indicates in which direction the image
will stretch.
• To add a vector, click the Add Vector button.
• To select a vector, click on it.
It turns red.
• To delete a vector, select it and click the Delete Vector button.
• To move, change the direction of, or change the length of a Vector, drag the ar-
row by the head or tail.
To move it, you need to drag both end points, one at a time.
• To make settings for a vector, select it and use the radio buttons on the side of
the dialog.
There are certain rules you must follow for the vector positions. If you make il-
legal settings for the vectors, the program will inform you. The vector(s) that
need to be adjusted will also flash in red. The rules are:
• The area a vector affects must not overlap the area of any other vector.
• Circular movements affect larger areas than linear. It is therefore easier to run into “il-
legal” situation with circular movements.
• The maximum number of vectors is four.
The options for this effect are as follows:
Motion
Here you can choose between Linear and Circular.To get a feel for the differ-
ence, experiment!
Control
Here you can set how the motion is controlled, per vector:
Automatic: The stretch happens automatically, which gives a pulsating effect.
Velocity: The amount of stretch depends on the velocity of the note.
Wheel: The stretch can be controlled in real time via a modulation wheel.
Controller: The stretch can be controlled in real time via any MIDI Controller
number. When you select this, another dialog appears asking you to specify
which controller number to use to control this vector.
- 85 -
Fire
Burns and melts the image.
The options for this effect are as follows:
Kaleidoscope
This effect is similar to viewing in a kaleidoscope.The image is projected on
four sides of a box.
The options for this effect are as follows:
Up slow & hard
edge
The image moves slowly upwards while dissipating.
Up slow & smooth
edge
The same as above but in a warmer, smoother manner.
Up fast
The image moves upwards, dissipating quickly.
Left slow
As Up slow & hard edge, but the image moves to the left as well as up-
wards.
Color fire 1-3
The image burns quickly and then fades out in a flash of colors.
Repetition
Choose how many instances of the kaleidoscope box you want, one, two
or four.
Controller:This allows you to control the effect in real time via any MIDI
controller number. Using that MIDI controller, you can zoom in and out to
increase or decrease the number of kaleidoscope boxes.
Cyclic: With this option, zooming in and out is automatical, for as long as
you keep the key pressed. Enter a value in milliseconds to determine the
speed of the zooming.
Texture Rotation
Constant: As previously described, the image is projected on four sides
of the kaleidoscope box. This option regulates the rotation of the image
within the box. Enter a value in milliseconds for a fixed, constant rotation
speed.
Controller: This allows you to control the rotation via any MIDI controller
number.
Splitter Rotation
Constant: This option regulates the rotation of the kaleidoscope box,
rather than the image within it. Enter a value in milliseconds for a fixed,
constant rotation speed.
Controller: This allows you to control the rotation via any MIDI controller
number.
Distortion
This works in conjunction with texture rotation, and does exactly what it
says; it stretches and distorts the image in the kaleidoscope box.
- 86 -
Bubble
This effect is similar to throwing stones in water to make rings spread on the
surface.
The options for this effect are as follows:
Flow
This effect makes it look like the elements of the image are being “poured”
into it as liquid matter which then solidifies.
The options for this effect are as follows:
High Resolution
When this is activated, the effect will be more detailed, but it will also re-
quire more processing power.
Density
This changes the way the “water” is calculated by increasing the appar-
ent density.
Main effect
Here you can set how the motion is controlled:
Surf: A linear effect, like throwing stones at a narrow angle to the sur-
face.
Rain: Like when dropping stones straight into water.
Trash: Like when throwing a handful of gravel in the water.
Flow movement
This lets you decide the direction of the flow. You can either have the el-
ements of the image “poured” into it from the top or from the bottom.
Flow speed
This simply lets you decide how fast the flow should be. You can choose
from three different speeds; Slow, Medium or Fast.

- 87 -
Filter
This effect lets you apply various filters on an image to alter its appearance.
Filter is also featured in a couple of other effects, namely the Larsen effect
and the Diffusion effect.
The options for this effect are as follows:
Filter Type
From the drop-down menu, you can select one of five different filter
types or none. The “None” option does not mean that there will be
no effect. It only means that no specific filter type is applied. You can
still use the Gain, Mix and Clip result parameters.
Gain
This lets you control the amount of effect applied to the visual. The
higher the value, the more effect. High values (over 100) cause the
original colors of the image to be heavily oversaturated, “burning”
the image.
Mix
This controls the balance between the original image and the effect.
High values cause the effect to be more predominant.
Clip result
With this option activated, the output of the effect will be attenu-
ated, which is useful if you want to prevent wild color cycling when
“burning” a visual with the Gain parameter.
Kernel
This section is used when you select Kernel as Filter Type. You can
then either choose from seven different presets or create a custom
Kernel setup by entering values in the nine Kernel boxes. You can
enter any value between -1024 – +1024. Kernel filtering is a complex
issue, and this manual can by no means provide any in depth tutorial
on the subject. What can be said is that this kind of filtering lets you
change the gain of a center pixel and its eight surrounding pixels, to
make an image sharper, blurred, saturated etc. You can probably find
extensive reading material about Kernel filtering in your local book-
store or on the Internet, if you wish to learn more about it.
- 88 -
Larsen
This effect, in its fundamental form, is built upon the concept of Video Feed-
back (see
) It lets you zoom, rotate and position a visual freely on the
screen. In addition it also features an optional Filter effect.
The options for this effect are as follows:
Rotation
This parameter controls the speed and direction of rotation. You can
choose to either enter a constant value, or any MIDI controller num-
ber to control rotation. Just click the corresponding radio-button, and
enter a value. Negative values cause clockwise rotation, and positive
values cause counterclockwise rotation.
Zoom X & Zoom Y
These parameters govern the zoom-factor of the visual along its X-
axis (horizontal) and its Y-axis (vertical). You can either enter a con-
stant value or any MIDI controller number to control zooming, by
clicking either radio-button and entering a value. MIDI controllers, as
opposed to constant values, let you effectively zoom an image in and
out in real-time.
Center X & Center Y
Use these parameters to determine the visuals position on the
screen along the X-axis (horizontal) and the Y-axis (vertical). Click the
radio-button of your choice (constant or controller) and enter a value.
With the constant option, negative values move the visual left/up
and positive values move it right/down.
Special effects
Check this box to activate the optional filter effect. For a description
of the various filter parameters, see the documentation for the effect
“Filter” on

- 89 -
Diffuse
Much like the previously described Larsen effect, Diffuse is an effect with
one basic function and an optional Filter effect. Primarily, this effect uses
Video Feedback (see
) to blur and distort an image in various ways.
The options for this effect are as follows:
Diffuse type
From the drop-down menu you can choose between six different ty-
pes of Diffusion.
Effect
Sets the intensity of the effect, and determines the direction of
movement for the Diffusion types, rotating or otherwise. You can
enter any value between -1000 – +1000. The direction of movement
is altered depending on whether you enter a negative or a positive
value. Note that a value of “0” means that no effect will be produced
at all. You can also enter any MIDI controller number to control the
intensity of the effect in real-time.
Rotation
This causes the visual to rotate clockwise or counterclockwise. Ei-
ther enter a fixed value or any MIDI controller number for controlling
rotation in real-time. Click the radio-button of your choice and then
enter a value. When using the Constant option, negative values
cause counterclockwise rotation and positive values cause clock-
wise rotation.
Zoom X & Zoom Y
These parameters let you zoom the visual in and out along the X-axis
(horizontal) and the Y-axis (vertical). You can either enter a constant
value or any MIDI controller number to control the zooming. Values
above 100 zooms in on an image – the higher the value, the faster
the zooming. Values below 100 zooms out on an image – the lower
the value, the faster the zooming.
Center X & Center Y
Having these parameters set to anything other than “0” causes the
visual to move across the screen.You set the direction and speed
along the X-axis (horizontal) and the Y-axis (vertical). Negative values
make the visual move left/up and positive values make it move right/
down. The higher the value you enter, the faster movement will be.
You can also enter any MIDI controller number with which to control
this in real-time.
Special effects
Check this box to activate the optional filter effect. For a description
of the various filter parameters, see the documentation for the effect
“Filter” on

- 90 -
3D World
PlanetWorks
Have you ever seen a planetarium? This effect turns the image into a planetar-
ium, with a number of planets and satellites revolving around one another.
The options for this effect are as follows:
Planets
This lets you specify the number of planets (and orbiting Satellites) .
The maximum number is 10.
Transparency: Activate this to make the planets transparent. (See
for more information about transparency).
Swap Images: Normally the planets consist of the image, and are
placed on the background color of the ArKaos Engine. With this acti-
vated, the image will be the background, and the planets will consist
of the background color.
Planet Speed
This lets you decide how fast the planets will move around on the
screen. You can either specify a constant number, in milliseconds (the
lower the number, the faster the movement), or any MIDI controller
number to use for determining the speed.
Planet Size
This lets you decide how big the planets will be. You can either spec-
ify a constant number, in percent, or any MIDI controller number to be
able to change the planet size in real time.
Planet Orbit Radius
This lets you specify how far apart the planets should be, if you have
several on screen. You can either specify a constant number, in per-
cent, or any MIDI controller number to be able to change the distance
in real time.
Revolution Speed
This lets you decide how fast the planets and satellites will revolve
around their own axis. You can either specify a constant number, in
milliseconds (the lower the number, the faster the revolution), or any
MIDI controller number to use for determining the speed.
Satellite Speed
This lets you decide how fast a satellite with rotate around its planet.
You can either specify a constant number, in milliseconds (the lower
the number, the faster the rotation), or any MIDI controller number to
use for determining the speed.
Satellite Size
This lets you decide how big the satellites will be. You can either
specify a constant number (in percent) or any MIDI controller number
to be able to change the satellite size in real time.
Satellite Orbit Radius
This lets you specify how far away from it´s planet a satellite should
be. You can either specify a constant number (in percent) or any MIDI
controller number to be able to change the distance in real-time.

- 91 -
Waving Flag
This effect makes the image act like an unfurled flag, billowing in the wind.
The options for this effect are as follows:
Waves
Amplitude: Enter a percentage value to determine just how much
the flag will billow.
Constant Speed of: Enter a value between 0 and 65000 milliseconds
to determine the speed with which the flag will billow. The lower the
number, the faster the movement.
Controller: Enter any MIDI controller number with which to control
the billowing speed in real-time.
Lighting
No Lighting: With this option activated there will be no lighting ef-
fects across the flag.
Static Light: A static lighting effect will highlight parts of the flag in
sync with it´s movements.
Controller: With this option you can assign any MIDI controller num-
ber to control the lighting of the flag in real-time.
Translucency
Opaque: With this setting, the flag is solid rather than translucent.
Dissolve far stuff: With this setting, the farthest ends of the flag are
translucent and blended into the background, to create a subtle shad-
ing and a more “lifelike” billowing motion.
Controller: This setting lets you assign any MIDI controller number
for controlling the translucency of the flag in real-time.
Resolution
This lets you decide between four different levels of detail. If you
have a reasonably fast machine, always use “Sluggishly Neat” since
it gives the best appearance. It is however also the most demanding
on your system.
Distance To Screen
Constant: This means that the flag is always the same size.
Controller: This lets you assign any MIDI controller number, with
which you can increase and decrease the size of the flag in real-time.
Full Screen
If you activate this option, the flag will be increased in size to occupy
the entire screen.

- 92 -
Tunnel 3D
This effect transforms the image into a tunnel, giving the viewer a feeling of
moving through it.
The options for this effect are as follows:
Scrolling
Controller: This lets you assign any MIDI controller number, to con-
trol the speed of “movement” through the tunnel.
Constant Speed of: This lets you specify a number between 1 and
65000 milliseconds to determine the speed. The lower the number,
the faster the speed.
Sea-Sick Motion: With this option activated, the “movement”
through the tunnel is made in short dashes, periodically and rhythmi-
cally coming to a near halt, before proceeding.
Resolution
This lets you decide between four different levels of detail. If you
have a reasonably fast machine, always use “Sluggishly Neat” since
it gives the best appearance. It is however also the most demanding
on your system.
Lighting
No Lighting: With this option activated there will be no lighting ef-
fects on the tunnel walls.
Static Light: A static lighting effect will highlight the tunnel walls.
Controller: With this option you can assign any MIDI controller num-
ber to control the lighting of the tunnel walls in real-time.
Tunnel Direction
Turn Left: With this activated, the tunnel will turn constantly to the
left.
Smooth Curve: With this activated, the tunnel will twist and turn in
random directions.
Controller: This lets you assign any MIDI controller number to control
the twists and turns of the tunnel in real-time.
Position In Tunnel
Stay In Center: The viewer will have the feeling of always being in
the exact center of the tunnel.
Move Slowly: The viewer will have the feeling of moving slowly from
wall to wall of the tunnel.
Circle Around: The viewer will have the feeling of moving in a spiral-
ling motion through the tunnel.
Centrifugated: The viewer will have the feeling of always being
thrown up against the farthest wall of the tunnel at every turn.
Controller: This lets you assign any MIDI controller number to control
the viewers perceived position in the tunnel in real-time.
Translucency
Opaque: With this setting, the tunnel walls are solid rather than trans-
lucent.
Dissolve Tunnel Ends: With this setting, the tunnel walls are translu-
cent and blended into the background.
Controller: This setting lets you assign any MIDI controller number
for controlling the translucency of the tunnel walls in real-time

- 93 -
Particles
This effect shatters the image into many small pieces, which are then ani-
mated in various different ways.
The options for this effect are as follows:
Effect
Effect: Here you can choose from a number of preset animations.
New Image On Particles: Indicates that the particles will be made
out of the image, and the background will be (by default) black.
New Image In Background: Indicates that the image will be shown
in the background, while the particles will be (by default) black. (For in-
formation about changing the background color see
Animation Control
Constant Speed of: This lets you specify the speed of the animation.
You can enter a number between 1-65000 milliseconds.
Controller: This lets you assign any MIDI controller number, with
which you can change the animation speed.
Reverse Animation: This option reverses the entire animation se-
quence. If an animation for instance starts with a whole image which
is then shattered into particles, activating this option will instead turn
the animation into particles gathering to form a whole image.
Sea-Sick Animation: This will make the animation less fluid, and
causing it to periodically and rhythmically come to a near halt before
proceeding.
Lighting
No Lighting: With this option activated there will be no lighting ef-
fects.
Static Light: With this option activated there will be a continous,
static lighting effect.
Controller: With this option you can assign any MIDI controller num-
ber to control the lighting effects.
Translucency
Opaque: With this setting, the particles are solid rather than translu-
cent.
Dissolve Far Stuff: With this setting, the particles are translucent and
blended into the background.
Controller: This setting lets you assign any MIDI controller number
for controlling the translucency of the particles in real-time.
Number Of Particles
This lets you decide between four different levels of detail, with
“Sluggish Myriad§” being the best but also the most demanding on
your system.
Particles Rotation
Random: This means that the particles will rotate at random intervals
and speed, independently from the speed set under Animation Con-
trol.
Time-dependent: This means that the particles will rotate in sync
with the speed set under Animation Control, or any MIDI controller
you have assigned to controlling the speed.
Controller: This setting lets you assign any MIDI controller number
for controlling the rotation of the particles in real-time.
- 94 -
Galactic Scrolling
This effect scrolls the image across the screen, in a slanting fashion.
The options for this effect are as follows:
Particles Size
Constant: This simply means that the size of the particles will never
change during the animation.
Shrink Then Vanish: This causes the particles to slowly be reduced
in size during the animation, to eventually disappear completely.
Controller: This setting lets you assign any MIDI controller number
for controlling the size of the particles in real-time.
Experts Only
Z-Sorting: This is an algorithm used in 3-D graphics. It controls how
objects are displayed, in front of, and behind other objects. The way it
works is basically that it starts by displaying the most far away objects
in a 3-D image, and then displays each closer object over the previ-
ous. Experiment at your own leisure with this function, but bear in
mind that it consumes quite a bit of CPU capacity.
Control
The time for the effect to complete a scroll.
Constant Speed of: This lets you specify a time between 1 and 65000 milli-
seconds.
Modulation Wheel: This lets you use the modulation wheel on your MIDI
keyboard to control the scrolling.
Pitch Wheel: This lets you use the pitch bend wheel on your MIDI keyboard
to control the scrolling.
Controller: This lets you assign any MIDI controller number to control the
scrolling in real-time.
Scrolling
Sets the direction from which the image appears. The options are: Upwards,
Downwards, Back & Forth, Forth & Back.
Wrapping
One Image: With this setting, the image will scroll once across the screen
and then disappear.
Wrap Image: With this setting, several instances of the image will scroll
across the screen continuosly.
- 95 -
Flying Object
This effect puts you in complete control of how an image behaves on the
screen. You control it´s movement, size and opacity.
The options for this effect are as follows:
Aspheroids
This effect turns the image into a number of swirling and bouncing orbs (plan-
ets).
The options for this effect are as follows:
Position
Here you specify how you want to control the horizontal & vertical move-
ment of the image. You can choose between using the modulation or pitch
bend wheel on your MIDI keyboard, and you can also use any MIDI control-
ler number.
Size Control
Here you specify how you want to control the size of the image. The op-
tions are the same as for controlling the position.
Opacity
Opaque: With this setting, the image is completely solid.
Transparent White: In a standard color palette, the first color is white.
This color is also the “background” color of all images using that color pal-
ette. Activating this option makes white transparent, causing only the
“foreground” of the image to be visible.
Translucent: Makes the image transparent. (See
for more infor-
mation)
Orbit
This controls how the planets move on the screen. You can choose
between four different animations.
Planets
Number: How many planets do you want? Your choice, but the max-
imum number is 10.
Transparency: Activate this to make the planets transparent, making
the background visible through them.
Swap Images: Normally the planets consist of the image, and are
placed on the background color of the ArKaos Engine. With this acti-
vated, the image will be the background, and the planets will consist
of the background color.
Orbital Speed
This lets you decide how fast the planets will move around on the
screen. You can either specify a constant number, in milliseconds (the
lower the number, the faster the movement), or any MIDI controller
number to use for determining the speed.
Revolution Speed
This lets you decide how fast the planets will revolve around their
own axis. You can either specify a constant number, in milliseconds
(the lower the number, the faster the revolution), or any MIDI control-
ler number to use for determining the speed.
- 96 -
Usix 3D
This effect transforms the image into a cube which then zooms in and out in
a rotating motion.
The options for this effect are as follows:
Turnix 3D
Transforms the image into a cube that rotates and zooms into view.
The options for this effect are as follows:
Transparency
Makes the image transparent. (See
Note that this option does not work if you have your synth set to work
in 256 color mode.
Zoom
This sets how far away from the screen the cube will be. You can
specify a constant value between -10 – +10, in which case there will
be no zooming effect. The cube will instead be in a static position at a
certain distance from the screen. Postive values cause the cube to be
located farther away from the screen. The higher the value, the far-
ther away the cube will be. You can also enter any MIDI controller
number with which you then will be able to zoom the cube in and out
in real-time.
Rotation a
These parameters govern the speed and direction of rotation along
the a-axis of the cube. You can either enter a constant value, any MIDI
controller number or choose to use the Pitch Bend wheel on your
MIDI keyboard to control the rotation. When entering a constant
value, the direction and speed of rotation changes depending on
whether you enter a negative or a positive value, and how high the
value is. A value of “0” means that no rotation will occur.
Rotation b
These parameters regulate the speed and direction of rotation along
the b-axis of the cube. The options are the same as for rotation a, with
the exception that you can choose to use the Modulation wheel on
your MIDI keyboard instead of the Pitch Bend wheel to control the ro-
tation.
Duration
The Time (in milliseconds) it takes for the image to reach full size.
Transparency
Makes the image transparent. Note that this does not work in 256
color mode. (See
Rotation Around Center
Makes the image rotate into view in a spiralling motion around the
center of the screen.
Rotation left & right
Sets the direction of rotation.
Rotation angle
You can choose a vlaue between 10 and 60. A higher number re-
sults in a more radical angle of rotation.
Rotation Around Cube
You can specify a value between 1 and 10 for both the X-axis (hori-
zontal and the Y-axis (vertical). A higher number results in a faster
rotation along that particular axis.
- 97 -
Transitions
Fade To Black
This effect fades the image in or out.
The options for this effect are as follows:
Blur
This effect works in a similar way to the Fade To Black effect, in that it fades
the image in or out. The difference is that it does so by blurring or unblurring
the image.
The options for this effect are as follows:
Fade Control
Fade In: Makes the image fade into view.
Fade Out: Makes the image fade out of view.
Modulation Wheel: Lets you control the fade with the modulation wheel
on your MIDI keyboard.
Pitch Wheel: Lets you control the fade with the pitch bend wheel on your
MIDI keyboard.
MIDI Controller: Lets you control the fade with any MIDI controller num-
ber.
Duration: Lets you specify how long it will take to complete a fade.
Final Color
The fade does not necessarily have to be to/from black. The Choose Color
button in this dialog opens up a standard color picker menu from which
you can choose any color you like.
Blur Control
Fade In: Makes the image blur into view.
Fade Out: Makes the image blur out of view.
Modulation Wheel: Lets you control the blur with the modulation wheel on
your MIDI keyboard.
Pitch Wheel: Lets you control the blur with the pitch bend wheel on your
MIDI keyboard.
MIDI Controller: Lets you control the blur with any MIDI controller number.
Intensity: Lets you specify a percentage value to determine how much the
image is blurred. It also affects the speed of the blurring effect.
Duration: Determines the length of the blurring process.
High Quality: Check this box for a higher level of detail.
Direction
You can choose to make the blur effect either horizontal or vertical.
- 98 -
Directional Transition
This effect creates a smooth transition between a previous image and the im-
age you use along with this effect. Kind of like a visual crossfade if you like.
The options for this effect are as follows:
Transition
This effect is a simplified version of the Directional Transition effect. The only
option is Transition Type, which works exactly the same as in Directional Tran-
sition.
❐
Both Transition and Directional Transition work best with the screen depth set
to thousands of colors. For this effect to work at all in 256 colors you must have
calculated a Transparence Table of between 5 and 10 colors.
Transition Type
With Time: This means that the transition takes place over a period of
time. You specify the time in milliseconds. The lower the value, the
faster the transition.
Controller: This lets you assign any MIDI controller number to control
the transition in real-time.
Constant: With this option,the transition is practically instantaneous,
and you can also choose to let the transition be only partly completed.
You can enter a number between 0 and 100. The lower the number, the
less complete the transition will be.
Rotation Speed
This parameter only has an effect along with the following shapes (see
below): Triangle, Cross and Star. These shapes cause the transition to
be made in a rotating fashion, and this parameter regulates the speed of
that rotation.
Constant: Enter a number in milliseconds. The lower the number, the
faster the rotation.
Controller: This lets you assign any MIDI controller number to control
the rotation speed in real-time.
Repetition
You can choose to split up the image into two or four parts. The transi-
tion then works separately on each part.
Polarity
Choose between making the transition from right to left (+) or from left
to right (-).
Shape
This lets you choose from eight preset transition shapes.
Slope
Use the slider to control the visibility of the border between the image
and the background color during the transition. A low value results in
blurred borders and a high value results in well defined borders.
- 99 -
Slide Effect
This transition effect turns any previous image into a pair of “sliding doors”
that open to reveal the image placed along with this effect.
The options for this effect are as follows:
Shutter II
This effect places a new image on top of any previous one, in the form of a
number of shutters closing on the previous image.
The options for this effect are as follows::
Duration
This lets you specify how long it will take for the “doors” to open. You
can enter a value between 500 and 10000 milliseconds. The lower the
number, the faster the effect.
Cycling
This cycles the effect over and over again, as if there is always a new
pair of “doors” behind the ones that open.
Compression
This option makes the image appear in a compressed shape through the
center of any previous image, and then stretch to it´s full size, thereby
forcing the previous image apart.
Scrolling Direction
You can choose whether you want the “sliding doors” to open vertically
or horizontally.
Duration
Enter a value between 100 and 2000 milliseconds to specify how fast
the shutters will close.The lower the value, the faster the effect.
Transparency
Activate this to make the shutters transparent. Note that this does not
work in 256 color mode. (See
for more information).
Shutters Rotation
Decide whether the shutters should be vertical or horizontal.
Number Of
Shutters
You can have between 2 and 64 shutters, in multiples of two, to form
the new image. Choose from the drop down list.
Rotation By
Shutter
You can have the shutters swing around before settling. Choose be-
tween 1 to 4 swings from the drop down list.
- 100 -
Shutter
This effect places a new image on top of any previous one, in the form of a
number of shutters closing on the previous image.
The options for this effect are as follows:
Turnix
Rotates and zooms the image into view.
The options for this effect are as follows:
Scroller
This effect scrolls the image into view.
The options for this effect are as follows:
Transparency
Activate this to make the shutters transparent. Note that this does not
work in 256 color mode. (See
for more information).
Duration
Enter a value between 100 and 2000 milliseconds to specify how fast
the shutters will close.The lower the value, the faster the effect.
Shutters Rotation
Here you determine whether the rotation of the shutters should be ver-
tical or horizontal.
Shutters Speed
Choose between Fast, Medium or Slow to determine the rotation
speed of the shutters.
Shutters
Movements
Choose where you want the first shutter to appear and in which direc-
tion you want subsequent shutters to follow.
Number Of
Shutters
Specify how many shutters you want along the X-axis (horizontal) and
the Y-axis (vertical). Choose a number between 1 and 16, in multiples of
two, from the drop down list.
Duration
The time (in milliseconds) it takes for the image to reach full size.
Transparency
Makes the image transparent. (See
Rotation
left or right
Sets the direction of rotation.
Rotation angle
Enter a number between 1 and 60. A higher number means that the rota-
tion will be closer to the center of the screen, producing a more narrow
effect.
Duration
The time (in milliseconds) it takes to complete the scroll.
Direction
Choose one of four directions from which the scrolling will start.
- 101 -
Various
Sound Player (MacOS only)
This plug-in allows you to import and play back an audiofile. When you assign
this effect to a key and double click on the effect icon, a dialog opens to let
you browse for an audio file. You can use files in the AIFF format. Upon decid-
ing for an audio file, you will be asked if you want to play it as a loop or not. If
you choose “Loop”, the audio file will be played back over and over again for
as long as you keep the key pressed. If you choose “Don´t Loop”, the audio
file will be played back just once each time you press the key.
QuickTime Controller
This plug-in lets you control the playback of QuickTime movies in various
ways
The options for this effect are as follows:
Play Selection
This option lets you play back only a part of the movie. You specify the
length of the part by using the start and end sliders (see below). If you
do not activate this option, the movie will simply play back in its entire
lenght.
First Loop
From Start
If you choose to play back a part of the movie as a loop (see below), ac-
tivating this option will cause the movie to start from the beginning and
then initiate looping when it reaches the start position of the loop (see
below).
Start & End
Sliders
Use these sliders to set the start and end postions for playing or looping
only a part of the movie.
Speed/Position
Constant Speed: You can choose to have a movie play back in its orig-
inal speed by activating this option and entering 100 % as speed ratio.
You can also enter a lower value to make the movie play back in slow
motion, or a higher value to make it play back in rapid motion.
Speed Controller: Activating this option lets you assign any MIDI con-
troller number to control the speed of movie playback in real-time.
Position Controller: Activating this option lets you assign any MIDI
controller number for moving forward and backward in a movie, frame
by frame, in real-time.
Speed Direction
Optionally, you can reverse movie playback. Choose whether you want
to play back the movie from start to end (+), or from end to start (-). You
can also assign any MIDI controller number to control this in real-time
instead.
Loop Sequence
This option, in combination with “Play Selection” and the Start & End
Sliders lets you loop a part of the movie over and over for as long as you
press the key.
- 102 -
QuickTime Effects
This gives you access to a number of QuickTime effects, usable on both mov-
ies and pictures.
The dialog that opens has the following options:
❐
Please be aware that the use of QuickTime effects requires that you have per-
formed a full installation of QuickTime. A standard installation does not include
effects. This is also important to bear in mind if you plan to distribute the Synth
file for use with the ArKaos Visualizer (see
), since most people will prob-
ably only perform a standard installation of QuickTime.
High Resolution
Controllers
MIDI controller messages send values between 0 and 127. This can
also be referred to as the resolution with which the controller is able to
make real-time changes. If you for example send a message on MIDI
controller 7 (volume) to increase the volume, the increase is made in
whole steps from one value to the next, i.e. from 0 to 1 then from1 to 2
etc. Some people find the real-time changes made with this stepping
not smooth enough, and here´s where High Resolution Controllers
come into play. These controllers are between 0 and 31 and actually
send two messages simultaneously, one from the so called MSB block
which is 0-31, and one from the so called LSB block which is 32-63. To
put it simply, High Resolution Controllers split up each value or step be-
tween 0 and 127 into an additional 128 steps. This gives a higher reso-
lution and a smoother real-time change.
Transition Duration
Some of the QuickTime effects are transitions. This simply lets you de-
termine the length (in milliseconds) of those transitions.
Use Transparence
Makes the currently selected effect transparent. This makes it possible
to use the effect on one key and a visual on another key simultaneously.
Call QuickTime
Set-up
By clicking this button you open yet another dialog with a list of all the
effects from which you can choose. There is also a preview window,
and parameters to set for each effect. Doubleclicking the name of an ef-
fect in the list brings up a brief description of what the effect does.
- 103 -
Plasma
Turns the image into floating, psychedelic plasma.
Photo
Takes a snapshot of the image currently on the screen, and saves it as a Bit-
map file (a common high-resolution picture file format) on your hard disk.
Grab
If you have a computer with a video card, and a camera connected to it, you
can use this plug-in to grab any image from the video input “on the fly”, and
process it with other effects.
❐
MacOS note: This effect requires that you have a Macintosh in the AV series!
For this effect to work properly, you must now inform the program of what
type of signal to expect:
Source
Here you select the basic type of video signal, Composite, S-Video or RGB
Format
Only applies to Composite video signals. It is used to select the format of
the signal: PAL (most of Europe), NTSC (US and other parts of the world) or
SECAM (France only).
- 104 -
Invert
This effect inverts the colors of an image and makes them negative. For ex-
ample; black turns into white and vice versa.
❐
This effect does not work in 256 color mode.
The options for this effect are as follows:
Invert Color
This works just like the Invert effect, in that it inverts the colors of an image
and makes them negative. The difference is that this is a more basic effect,
not allowing the inversion of separate color components.
The options for this effect are as follows:
Invert
You can choose to invert all, or any combination of, the three compo-
nents (Red, Green, Blue) that make up an image. If you don´t choose
any component, no effect will occur.
Inversion Mode
Simply Invert: Inverts the image according to the settings you have
made in the invert dialog, i.e. which components you have activated for
inversion.
Random Invert: Creates a new, possible inversion every time you
press the key, based on which components you have activated. Note
that you need to have at least two components activated for this to have
any effect.
Random Flashes: Rapidly cycles between all possible inversions for as
long as you press the key, based on which components you have acti-
vated. Note that you need to have at least two components activated
for this to have any effect.
Stroboscope
Stroboscope On: This causes the inversion effect to be constantly tog-
gled on and off while you press the key.
Period: Lets you define the interval (in milliseconds) between the tog-
gling on and off.
Always Invert
The image is constantly inverted when it is displayed.
Flash
This causes the inversion effect to be constantly toggled on and off
while you press the key.
Constant Speed
Lets you define the interval (in milliseconds) between the toggling on
and off.
Controller
Lets you assign any MIDI controller number to toggle the color inver-
sion on and off in real-time.
- 105 -
Video
Earthquake
This effect makes the image shake and rumble.
The options for this effect are as follows:
Video Split
This effect splits the image into a number of smaller images.
The options for this effect are as follows:
Quake Mode
Choose between Exponential or Linear for two different time based ef-
fects. When you select any of these two, you can also enter a value in
the Decay Time box, to determine the length of the effect.
Constant: If you activate this option, the effect will continue for as long
as you press the key.
MIDI Controller: This lets you assign any MIDI controller number to
control the effect in real-time.
Amplitude
You can enter a value between 1 and 700 pixels to detemine the
“width” of the effect. The higher the value you enter, the farther the im-
age will shake in each direction.
Jerkiness
You can enter a value between 1 and 200 to determine how many
times per seond the image will shake.
Number Of
Subscreens
Lets you specify how many instances of the image you want on the
screen. You can choose to have between 1-20 images along each axis.
Refresh Mode
The “Refresh Rate” of a computer monitor is the frequency, measured
in Hertz, with which the screen is redrawn every second. Lower fre-
quencies result in more screen flickering. These three options deter-
mine how the screen is redrawn with the image. Experiment to see the
differences.
- 106 -
Pixxicato
A computer generated image consists of pixels. If you magnify an image, the
pixels are increasingly distinguishable as squares of different colors. Zooming
in on an image therefore makes it more coarse in detail. This effect does just
that.
The options for this effect are as follows:
Control
Fade In: This starts at a high magnification, and zooms out, thereby cre-
ating a Fade- In.
Fade Out: This works just the other way around.
Modulation Wheel: This lets you control the zooming with the modula-
tion wheel on your MIDI keyboard.
Pitch Wheel: This lets you control the zooming with the pitch bend
wheel on your MIDI keyboard.
MIDI Controller: This lets you assign any MIDI controller number to
control the zooming in real-time.
Intensity: This regulates the amount of “pixellation”, and the size of
the pixels.You can enter a value between 0 and 100.The higher the
number, the larger the pixels.
Duration: This lets you specify how fast the zooming will be when you
use the Fade In or Fade Out option.
Pixify
Use the check boxes to stretch the pixels either horizontally or vertically
upon zooming. If both are checked, the pixels will keep their original
proportions. If none is checked, there will be no zooming at all.
Tile Size
Linear: With this option, the zooming will be made in a smooth, fluent
motion.
Fit To Screen: With this option, the zooming will be more choppy, since
it is made in increments, pixel by pixel.
High Quality
Select this for increased level of detail.
- 107 -
Old Film
You know those really old, choppy and scratchy black and white movies?This
effect simulates the look of those movies, but it works equally well on both
movies and images.
The options for this effect are as follows:
Motion Blur
This effect does exactly what it says, it creates an illusion of a blurred motion.
It is particularly useful with video streams. The only option allows you to
choose whether it should be a light blur or a strong blur.
Black &White
Activate this to make the image black and white.
Irregular
Exposure Time
Activate this to make the image flicker between different levels of dark-
ness and brightness.
Background Noise
Activate this to simulate poor film quality, with speckles and dust, etc.
Pick Black &
Pick White
These buttons open a standard color picker dialog to let you define the
hues of black and white in an image. This way you can, for instance,
give the image an old looking, yellowish tone.
Unsteady Image
Activate this to make the image wobbly and shaky.
Scratches
Activate this to add scratches and lines on the image.
Limit Frame
Rate To
The Frame Rate is the number of frames per second with which a
movie is being played back.You can enter a value between 1 and 200
fps.The lower the value, the more choppy the playback.
- 108 -
Irisation
This effect splits the image into three layers. One for each of the three com-
ponents; red, blue and green. You can then choose to either have the layers
merge or divide.
The options for this effect are as follows:
Hue Shift
This effect continuously changes the colors on the screen.
The options for this effect are as follows:
Control
Fade In: This gradually merges the three layers, to eventually form the
original image.
Fade Out: This works just the other way around.
Modulation Wheel: This lets you control the merging with the modula-
tion wheel on your MIDI keyboard.
Pitch Wheel: This lets you control the merging with the pitch bend
wheel on your MIDI keyboard.
MIDI Controller: This lets you assign any MIDI controller number to
control the merging in real-time.
Intensity: This regulates how strongly accentuated the layers should
be. You can enter a value between 0 and 100. The higher the number,
the more visible the layers are.
Duration: This lets you specify how fast the merging will be when you
use the Fade In or Fade Out option.
High Quality
Select this for increased level of detail.
Hue Modulation
None: With this option selected, there will be no effect.
Cycle In: This lets you specify a time between 1 and 30 000 millisec-
onds. This is the interval at which the colors will change, so the lower
the value, the faster the color change.
MIDI Controller: This lets you assign any MIDI controller number to
control the changing of colors in real-time.
High Quality
Select this for increased level of detail.

- 109 -
Whirl
This effect turns the image into a whirlpool of colors.
The options for this effect are as follows:
Inner Speed
This controls the rotation speed of the center of the whirlpool. You can
choose to either enter a number between 0 and 65000 milliseconds
(the lower the number, the faster the rotation), or assign any MIDI con-
troller number to control the speed in real-time. Note that it is possible
to enter a negative value, for example -2000 ms, to make the rotation
clockwise instead of counterclockwise.
Outer Speed
This controls the rotation speed of the outer rim of the whirlpool. You
can choose to either enter a number between 0 and 65000 milliseconds
(the lower the number, the faster the rotation), or assign any MIDI con-
troller number to control the speed in real-time. Note that it is possible
to enter a negative value, for example -2000 ms, to make the rotation
clockwise instead of counterclockwise.
Central Star Size
You can enter a value between 0 and 200 pixels. With any value higher
than zero, the center of the whirlpool will take on the shape of a six-
pointed star. The higher the value you enter, the bigger the star will be.
You can also assign any MIDI controller number to control this effect in
real-time.
Central Star Speed
This controls the rotation speed of the star. You can choose to either
enter a number between 0 and 65000 milliseconds (the lower the num-
ber, the faster the rotation), or assign any MIDI controller number to
control the speed in real-time. Note that it is possible to enter a negative
value, for example -2000 ms, to make the rotation clockwise instead of
counterclockwise.
Zero-Centered
Controllers
With this option activated, a MIDI controller value of 64 is considered as
0. This means that, in the case of rotation speed, a MIDI controller mes-
sage with a value over 64 is a positive value and causes counterclock-
wise rotation. A MIDI controller message with a value below 64, on the
other hand, is a negative value and causes clockwise rotation.

- 110 -
10
Playing the Patches

- 111 -
Activating the ArKaos full-screen display
Before going into full-screen display mode, you need to make sure that the
right Synth and Patch is selected:
1. Click on the Synth panel window for the Synth you want to “play”.
2. Select a Patch with the up and down arrows in the Synth panel window.
You can also select a Patch by clicking on the corresponding Patch keyboard window
(if open).
3. Pull down the ArKaos menu and select “Activate ArKaos”. You can also use the
following keyboard shortcuts. MacOs: [Command]-[Enter] or [Command]-[A].
Windows: [Ctrl]-[Enter] or [Ctrl]-|A].
The full-screen display is activated. The screen will be filled with a background color,
and the visuals in the Patch will be loaded into memory. You can choose a background
color and decide whether the loading information should be displayed or not, as de-
scribed on

- 112 -
Controlling ArKaos from a MIDI keyboard
If you have set up your MIDI equipment as described in the chapter “Setting
up MIDI”, all you need to do is to activate ArKaos, press the keys on your
MIDI keyboard (or other MIDI controller), and watch the monitor. There are a
few things to think about:
• The keys on the ArKaos VJ Patch keyboard are labelled “C-2” to “G-8”, corresponding
to the MIDI note numbers 0-127. On some MIDI controllers, the octaves may be la-
belled differently.
• Some of the Effects use MIDI velocity, pitch bend and modulation and other control-
lers. Make sure that your MIDI controller is set to transmit these messages.
Changing Patches via MIDI
In each ArKaos VJ Synth, there can be up to 128 Patches. These correspond
to MIDI Program Change number 0-127. If your MIDI controller can send Pro-
gram Change messages, you can use these to switch to another Patch, when
the ArKaos full-screen display (or Preview) mode is active. To enable MIDI
Program Change in ArKaos VJ, you have to make the following setting before
activating ArKaos:
1. Click on the Synth panel window, so that it gets selected.
2. Pull down the Synth menu and select “Get Synth Info...”.
The Synth Info dialog opens.
3. Make sure that “Receive Program Change” is checked and close the dialog.
Now, when you activate ArKaos or bring up the Preview, you can send Program
Change messages from your MIDI controller and instantly switch Patches this way.
Preloading the new visuals (MacOS only)
• When you switch patches using Program Change messages, you can choose to
activate the “Load visuals on PGM change” option.
This causes the visuals of the new Patch to be preloaded into memory before the ac-
tual switching of Patches. If a visual is not preloaded in this way, there will be a slight
delay each time it is used.
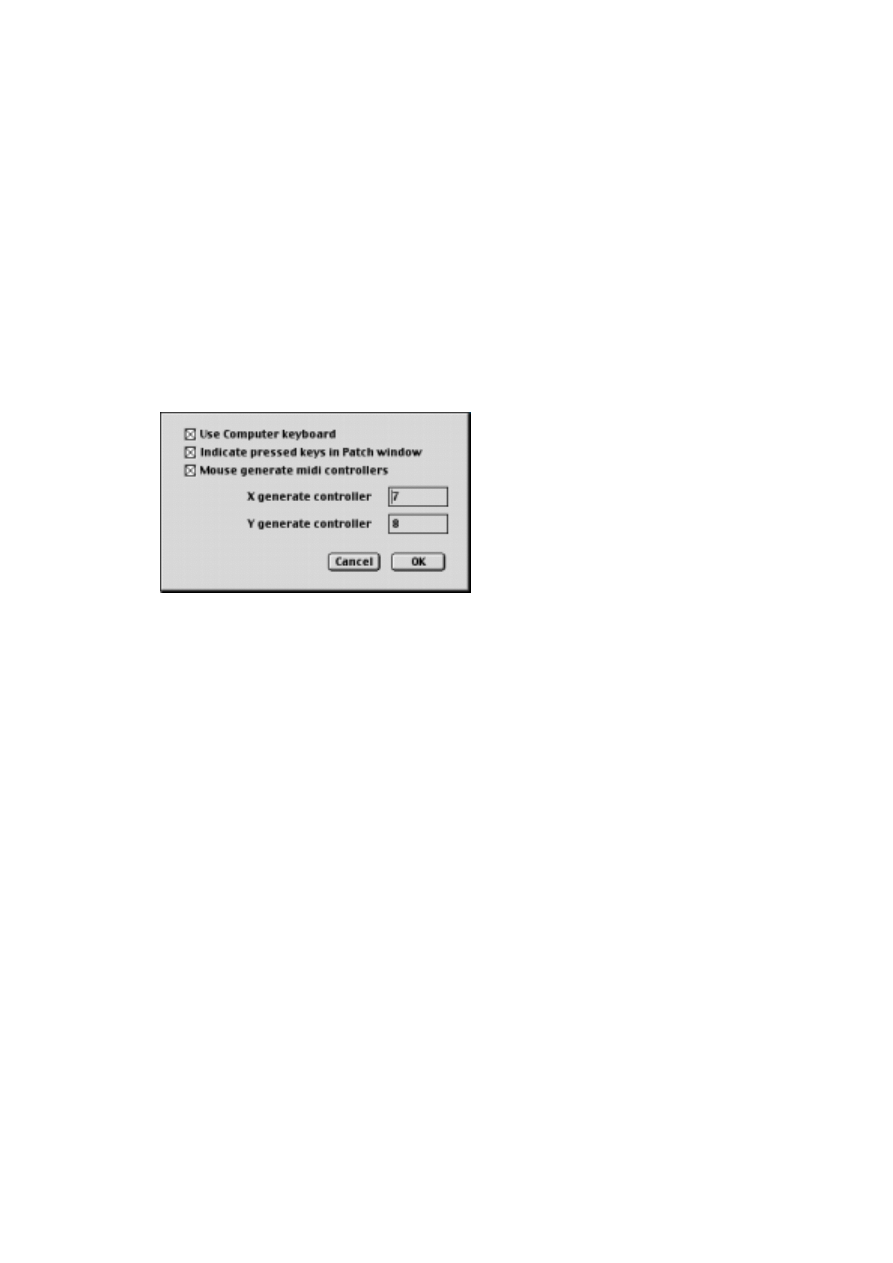
- 113 -
Controlling ArKaos from the computer keyboard
There may be situations when you don’t have access to a MIDI controller, but
still want to be able to try out your work. If this is the case, you can do the ba-
sic triggering from the keyboard on your computer.
❐
Please note that using the computer keyboard slightly decreases the perfor-
mance speed of ArKaos VJ. If you have the means of using a MIDI controller in-
stead, do so.
Set it up as follows:
1. Pull down the Edit menu and select “Keyboard...” from the Preferences sub-
menu.
The Keyboard Setup window opens.
2. Activate the “Use Computer keyboard ” option.
3. If you want the pressed key to be indicated in the Patch keyboard window in Pre-
view mode, activate “Indicate pressed keys in Patch window”.
This is often preferred, since it makes it easier to find the right octave when using the
computer keyboard in Preview mode.
4. Activate the “Mouse generate MIDI controllers” option.
This lets you use the mouse for emulating MIDI controller messages. Enter the num-
bers of any MIDI controllers you wish. ArKaos will then respond to horizontal (X) and
vertical (Y) movements of your mouse as if they were MIDI controller messages.
5. Click OK to close the dialog.
6. Try your settings by either activating ArKaos or by using the Preview function,
and press one of the keys on the computer keyboard.
The Visual and Effect assigned to the key is displayed in the Preview window. If you
activated visual response in step 3 above, the corresponding key will be lit up on the
Patch keyboard.

- 114 -
Controlling ArKaos from a MIDI sequencer
For this to work, you have to make the proper MIDI settings for the Synth as
described on
(MacOS) and
(Windows). There are two major
options:
• Controlling ArKaos VJ from an external sequencer.
Under MacOS this requires you to decide whether you want to use the Direct driver, or
OMS. You will have to choose OMS if you use an interface that requires it.
• Controlling ArKaos VJ from another sequencer program running on the same
computer.
Under MacOS this requires OMS, See
. Under Windows this requires a third-
.
Setting the Sequencer to transmit to ArKaos VJ
Exactly how to do this depends on the mode used, as described above:
• If you use an external sequencer, connect the sequencer to the MIDI interface on
your computer and make sure the sequencer you have connected is set to trans-
mit to the right port and on the correct MIDI channel.
• If you use a sequencer application running on the same computer, make sure the
Track you want to use transmits on the MIDI port and MIDI channel that ArKaos
VJ is set up to receive on. See
.
Creating the MIDI data
You can either use your sequencer’s step-editing or “drawing” features to en-
ter the MIDI data you want to use to control ArKaos VJ. Or, you can use a key-
board or other controller to directly record the data onto the Track. The
following MIDI messages are of interest:
• Note on and Note Off messages, together with their velocity information. These are
used for activating visuals and control effects. Please note that the lengths and veloci-
ties of your notes are often very important.
• Some effects respond to pitch bend, modulation wheel data and other MIDI controller
messages. See the description of each effect for details.
• In addition to the above, Program Change messages can be used to switch between
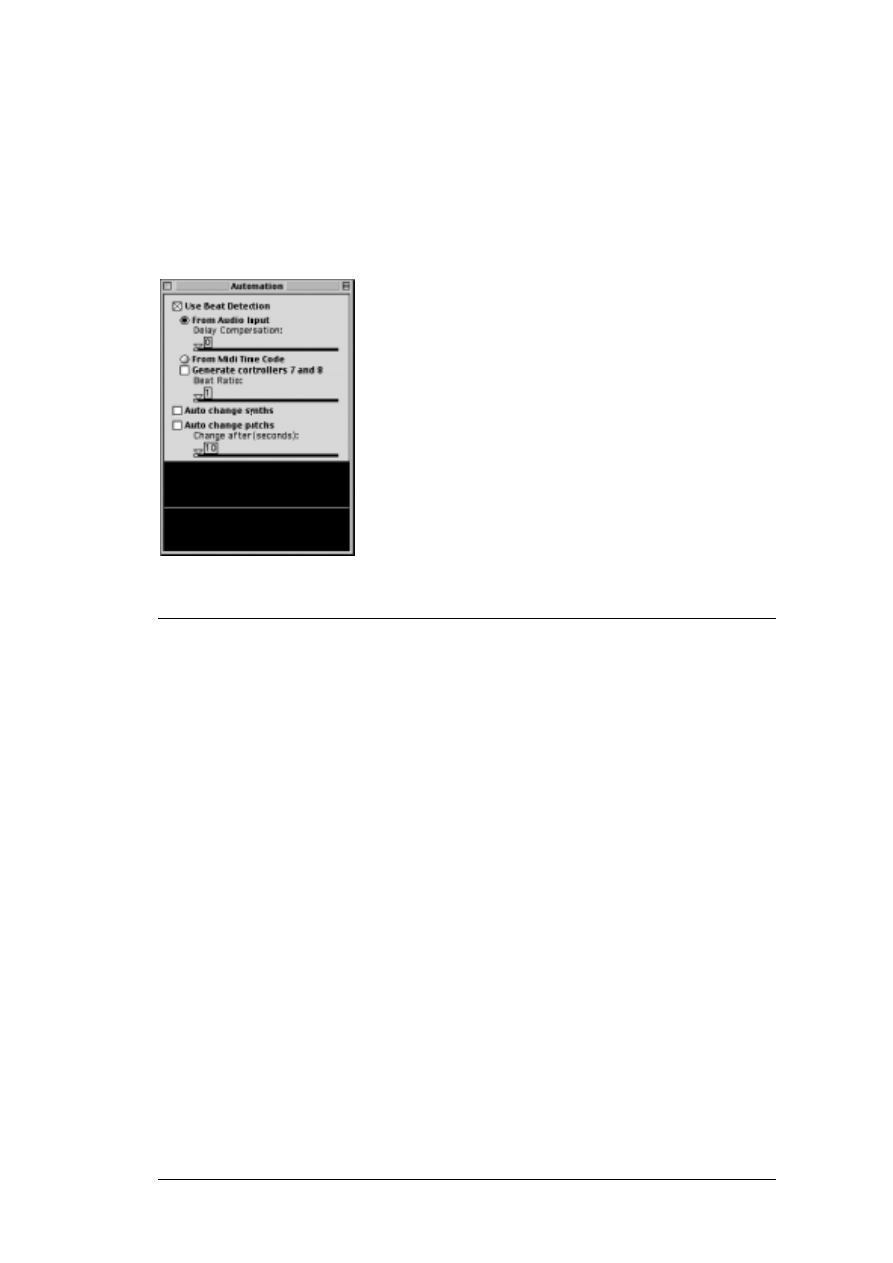
- 115 -
Using the Automation function
Another way of playing your Patches is by using the Automation function. This
works much in the same way as the ArKaos Visualizer (see
features a Beat Detection function which analyzes incoming audio, finds the
tempo and triggers visuals in perfect sync with the beat of the music.
To open the Automation dialog, pull down the Edit menu and move the
pointer to the Preferences item. Then select Automation from the sub-menu.
The Automation dialog
The options for this function are as follows:
Use Beat Detection
This activates Beat Detection, which is used for identifying the
tempo of the incoming audio. By checking and unchecking this box,
you effectively turn Automation on and off.
From Audio Input
If you activate this option, Automation will be synchronized to the
internal clock of the audio hardware in your computer.
Delay Compensation
If you experience that the Automation function does not respond
fast enough when triggering visuals in sync with the audio (i.e. the
triggering is delayed), you can try raising this slider.
From MIDI Time Code
If you activate this option, Automation will be synchronized to in-
coming MIDI Time Code.
Generate controllers
7 and 8
If you have set up parameters for any or all of the effects in a synth
so that they are controlled by MIDI controller messages 7 & 8 (see
The Effects chapter), you can activate this option to have the Auto-
mation function generate virtual MIDI controller movements.
Beat Ratio
Use this slider to set the frequency with which new keys will be
triggered. A beat ratio of 1 means that a key will be triggered at
each beat of the music. A ratio of 2 will cause a key to be triggered
every 2 beats, etc. If you are playing long video loops, you should
raise this slider to a high value.
Auto change synths
You can open several Synths (.kos files) at once, and have the Auto-
mation function switch between them if you activate this option.
Auto change patches
As previously described, a Synth can contain up to 128 Patches. By
activating this option, you can have the Automation function switch
between the Patches of the currently active synth.
Change after (seconds)
When using the Auto change options, this slider lets you set the in-
terval between each Synth and/or Patch switch.

- 116 -
Closing the full-screen display
To deactivate ArKaos (close the full-screen display) and return to the ArKaos
VJ settings, use one of the following methods:
• If you use one monitor only, just click the mouse button (the left mouse button
under Windows).
• If you use a separate monitor for the ArKaos display, pull down the ArKaos menu
in ArKaos VJ and select “Deactivate ArKaos”.

- 117 -
11
The Event Recorder
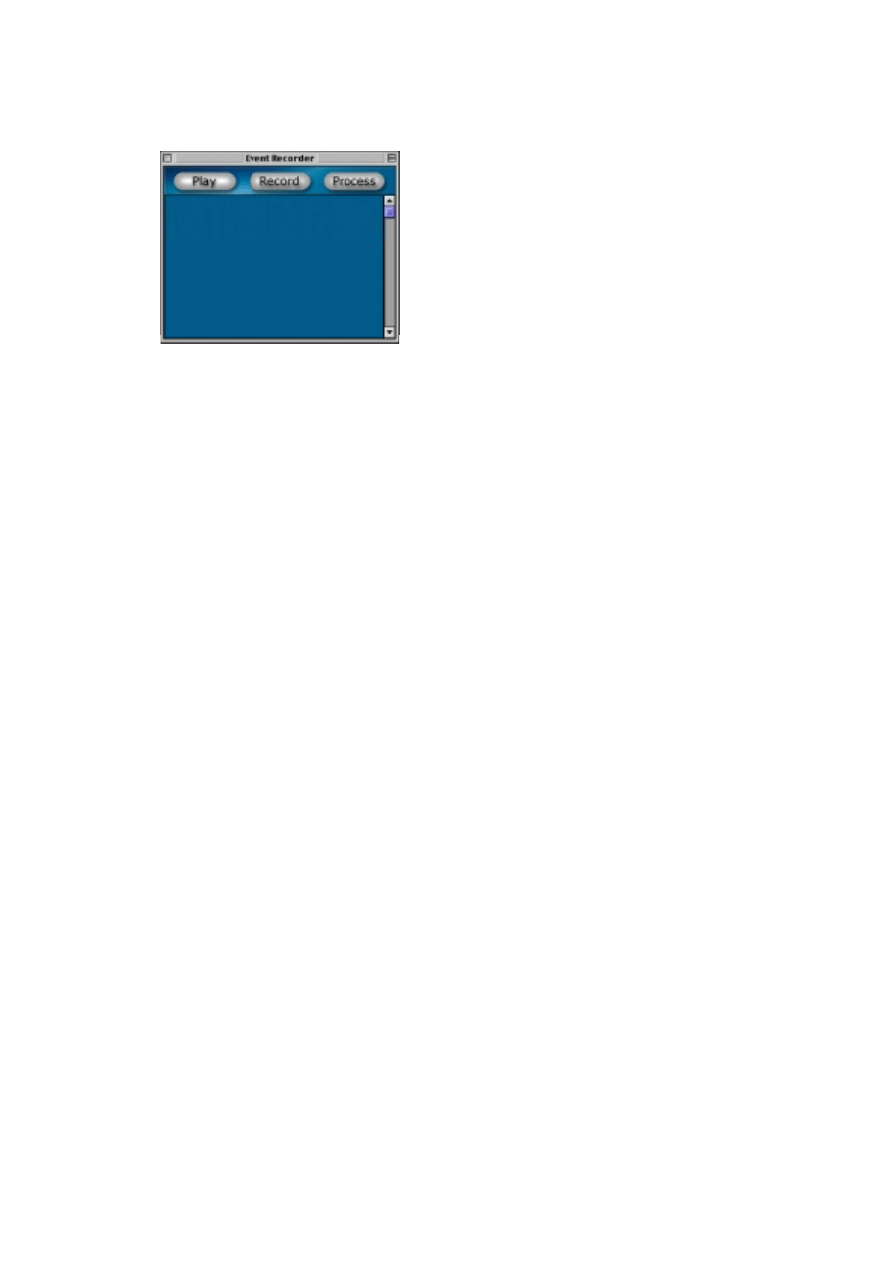
- 118 -
Introduction
The Event Recorder window.
The Event Recorder primarily allows you to record performances directly in
ArKaos VJ without using any external program. It also allows you to work to-
gether with a MIDI program to “transfer” performances into ArKaos VJ so
that they can be played back without the other application. This can be done
in two ways:
• By “capturing” (recording) a performance that is actually carried out by some external
MIDI device or a MIDI sequencing application.
• By importing MIDI files created in other programs.
The Event Recorder also allows you to convert your recordings to QuickTime
movies for use in ArKaos VJ or other programs that read QuickTime movies.

- 119 -
Recording a “live” performance
To record a performance, proceed as follows:
1. Set everything up as for any other type of performance.
This includes creating a Patch, making system settings etc.
2. Rehearse the performance so that you feel confident performing it in one pass.
3. Close the Preview window, if it’s open.
4. Pull down the ArKaos menu and select “Event Recorder”. Alternatively, you can
use the keyboard shortcuts [Command]-[R] (MacOS) or [Ctrl]-[R] (Windows).
The Event Recorder window opens, listing any previous performances.
5. Click Record.
The Recording Set-Up window opens.
6. In the dialog that appears, click the “Edit” button, then enter a name for the re-
cording and click “Record”.
The program now waits for you to start your performance. Nothing gets recorded until
you begin.
7. Perform as desired. When you are ready click the mouse button to stop.
The Event Recorder reappears, with your new recording added.
8. To check out the Performance, click the Play button.
If you make a mistake while recording
If you decide you want a second try, proceed as follows:
1. Click on the recording you just made, in the list, so that it gets selected.
2. Press [Command]-[Delete] (MacOS) or [Ctrl]-[Delete] (Windows) to delete it.
3. Record again, as described above.

- 120 -
Capturing a performance executed by another MIDI
device or program
If you have used another MIDI application or device to create an automatic
performance, you might want to “capture” or “transfer” this into the Event
Recorder in ArKaos VJ. This has two advantages:
• You can play it back without using any other equipment or programs.
• You can convert it into a QuickTime movie.
Proceed as follows:
1. Set everything up so that the Performance plays back as it should.
2. Close the Preview window, if it’s open.
3. Pull down the ArKaos menu and select “Event Recorder”.
4. Click Record in the Event Recorder.
The Recording Set-Up window opens.
5. Click the “Edit” Button, then enter a name for the recording and click “Record”.
The program now waits for the performance to actually start. Nothing gets recorded
while the program is “waiting”.
6. If the MIDI is played back from another device (i.e. not on the same computer),
activate playback at this point.
7. If the other MIDI program is on the same computer, you now need to switch over
to that program to activate playback (probably with a lead in of a few bars), then
switch back to ArKaos VJ.
8. When the performance is over, click the mouse button to stop.
The Event Recorder reappears, with your new recording added.
9. To check out the Performance, click the Play button.
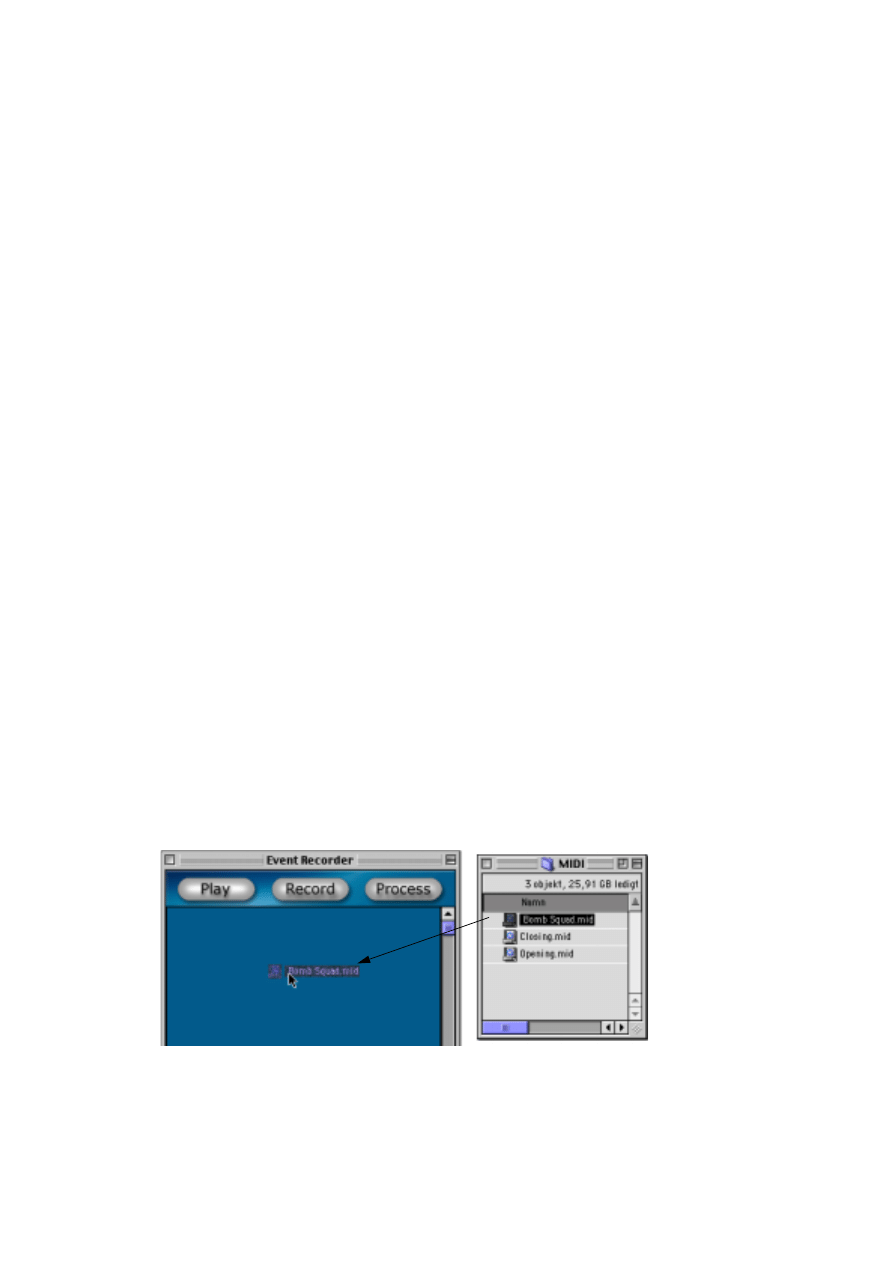
- 121 -
Importing MIDI Files
The final way to add a recording to the Event Recorder is by importing a Stan-
dard MIDI file, SMF. The SMF file format is used for transferring MIDI se-
quences (recordings) between programs and devices.
If you have already created a recording in another MIDI device or program, im-
porting it as a MIDI file might be the most convenient way to convert it into an
ArKaos VJ recording. Proceed as follows:
1. Make sure the performance plays back as intended when you run it “live” to
ArKaos VJ.
2. Save the performance as a MIDI file, and if required, transfer it to the hard disk of
the computer on which you are running ArKaos VJ.
Exactly how to do this depends on what device/application created the MIDI file. See
the operation manual that came with the application/device.
From here on there are two methods you can use:
Using Import
1. Open the Event Recorder window (from the ArKaos menu).
2. Pull down the File menu and select Import.
3. Locate the file on your hard disk and open it.
Using Drag and Drop
1. Arrange your windows so that you can see both the Finder (MacOS) or the Ex-
plorer (Windows) window and the ArKaos Event Recorder window, at the same
time.
2. Drag the MIDI File from the Finder/Explorer into the Event Recorder window.
Regardless of which of these two methods you use, the MIDI file will appear
as a new Recording in the Event Recorder window.
Dragging from the Finder (MacOS)/Explorer (Windows) to the Event Recorder window.

- 122 -
Playing back
There are two ways to play back a recording in the Event Recorder window:
• Select it and click the play button.
• Double click on it.
About the relationship between the Event Recorder and Patches
The Event Recorder plays back the recording using the currently active Patch.
The actual Patch you used is not saved together with the recording. This
means it is up to you to make sure the correct Patch is selected when you ac-
tivate Playback.
Managing Recordings
Deleting
To delete a recording from the list, select it and press [Command]-[Delete]
(MacOS) or [Ctrl]-[Delete] (Windows).
Saving and Opening
There are no special methods needed for saving and opening recordings. All
recordings in the list are part of the Synth file and are saved and opened with
it.

- 123 -
Rendering to QuickTime
You can convert, or “render” a recording into a QuickTime movie. QuickTime
movies can be played back from a number of applications, including ArKaos
VJ itself! Proceed as follows:
1. Open the Event Recorder and select the recording to be “rendered”.
2. Click the Process button.
3. Click the Setup button and decide upon a screen size and frame rate.
The movie size and what screen rate you should choose depends on the system from
which you plan to play back the movie. The higher the rate the better the quality, but
large movies recorded at high rates also require more processing power.
4. Click OK to close the Setup dialog.
5. Click the Format button and set up the compression options as desired.
The dialog that appears is actually not an ArKaos dialog but is instead provided by
QuickTime. The options here might also vary with your system and the version of
QuickTime you are using. Please refer to the QuickTime documentation for details.
6. Click Make, specify a name and a location for the file and click Save.
The Movie is now created and saved to disk. A progress bar informs you about the pro-
cess. If you like, you can click Close at any time. This will interrupt the rendering, but
will leave you with a QuickTime movie containing everything that has been rendered
so far. You can use this as a “preview” feature.

- 124 -
12
Menu and Dialog Reference

- 125 -
File Menu
See the chapter “Managing Synths and Patches” for information about file
handling. Below follows a summary of the menu commands.
New
Use this to create a new Synth. Opens a file dialog where you enter the name
and location of the new Synth file.
Open
Use this to open a Synth file saved to disk.
Import
This item is used for importing visuals into the Synth (see
for importing MIDI files into the Event Recorder (see
).
Close
Closes the currently selected window. If this is a Synth window, and the
Synth contains unsaved changes, you will be asked if you want to save it be-
fore closing.
Save
Use this to save any changes made to the Synth, to disk.
Save As
Use this to save a copy of the Synth under another name or in another loca-
tion.
Quit
Quits the program. If any open Synth contains unsaved changes, you will be
asked if you want to save it before closing.
Edit Menu
Undo
Undo is not available in ArKaos VJ.
Cut
Standard Cut, used with a Visual or an Effect in the Patch keyboard window,
to remove it from its cell and place it on the Clipboard. See
.
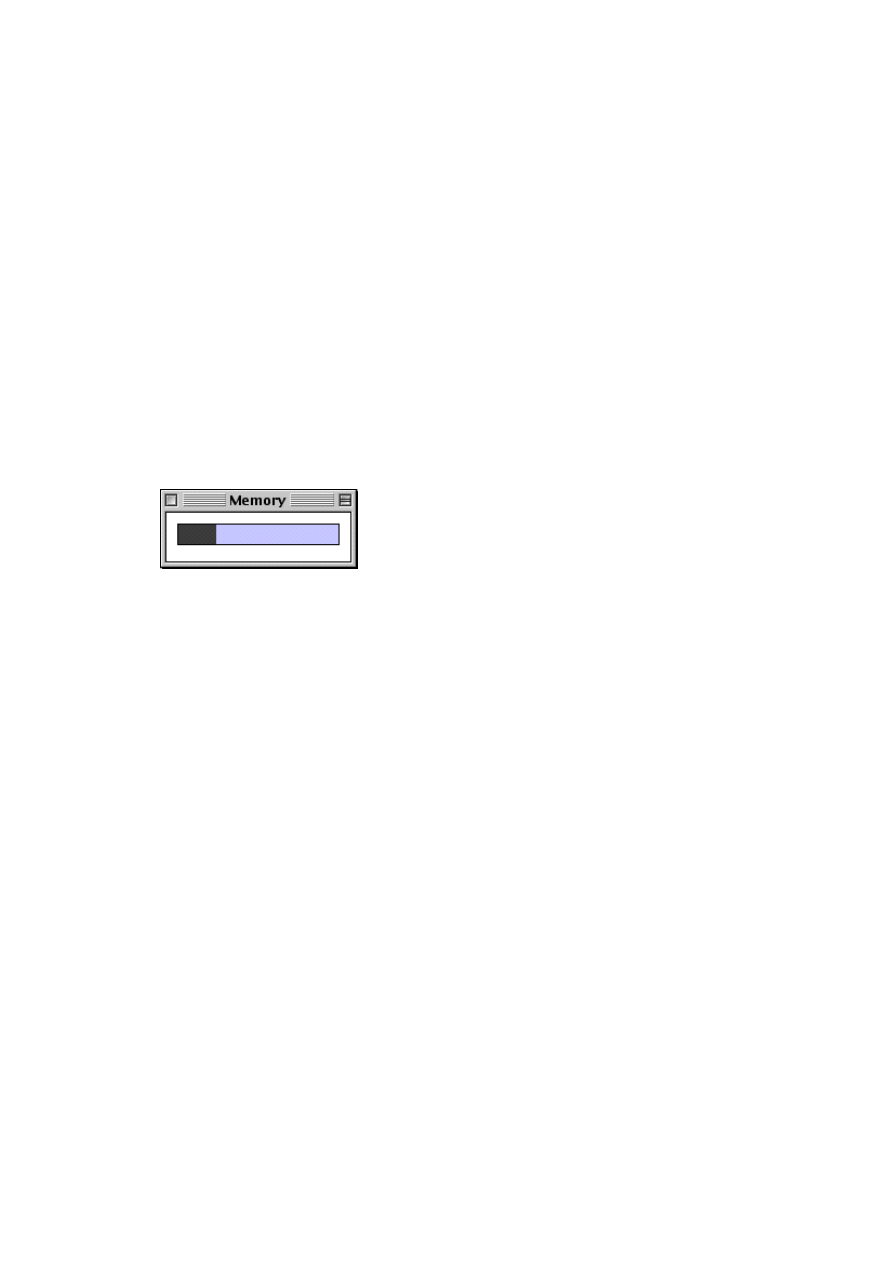
- 126 -
Copy
Standard Copy, used with a Visual or an Effect in the Patch keyboard window,
to place it on the Clipboard without removing it. See
Paste
Standard Paste, used with a Visual or Effect cell in the Patch keyboard win-
dow, to paste in the contents of the Clipboard. See
Clear
Use this to remove the Visual or Effect from the selected cell in the Patch key-
board window. See
Memory (MacOS)
Opens the memory window:
If you open this window and activate ArKaos, the meter continuously shows
you how much RAM is being used. Since ArKaos uses a dynamic memory al-
location scheme, the amount of memory in use will change depending on
which visuals are displayed and which effects are activated. You can use the
Memory meter to pinpoint effect combinations that are particularily memory-
demanding. This way you can determine if you need to alter your Patch or as-
sign more memory to the program. See the installation chapter.
Please note however, that it’s not necessary to have enough memory to load
all pictures into RAM. If you don’t have enough memory to load everything
into RAM, the dynamic allocation scheme removes the oldest pictures from
RAM and replaces them with new ones as they are requested (as described
in the installation chapter). Still, this transfer can cause a slight delay, which
may be undesired.
❐
If you are running ArKaos VJ with one monitor, and want to be able to see the
Memory window when ArKaos is active, you will have to use a screen-size that
does not cover your whole monitor (see
).
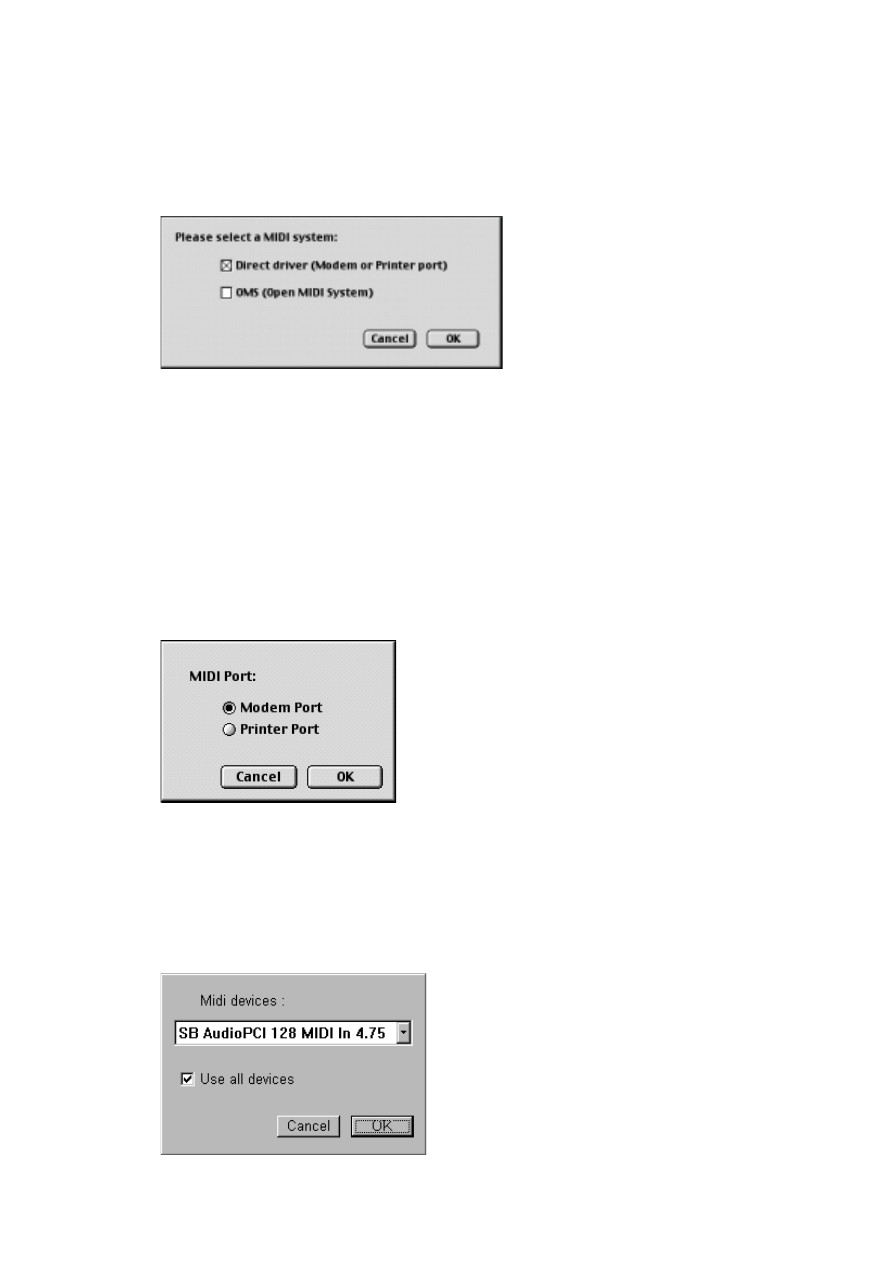
- 127 -
Preferences
This item contains a submenu, where each item opens a dialog:
MIDI System dialog (MacOS)
Determines which MIDI driver will be used:
• Direct Driver
Use this option when you want to control ArKaos VJ from a MIDI device (keyboard, se-
quencer, etc) that is connected to the Modem or Printer port. See
.
• OMS
Use this option if you have OMS 2.0 installed on your Macintosh and use a multi-port
MIDI interface or want to control ArKaos VJ internally from an OMS-compatible MIDI
application. See
.
MIDI Setup dialog (MacOS)
• If “Direct Driver” is selected in the MIDI System dialog (see above), you use the MIDI
Setup dialog to select the port (Modem or Printer) that your MIDI equipment is con-
nected to.
• If “OMS” is selected in the MIDI System dialog (see above), you use this dialog to se-
lect the OMS input ArKaos VJ should receive from (see
MIDI Setup dialog (Windows)
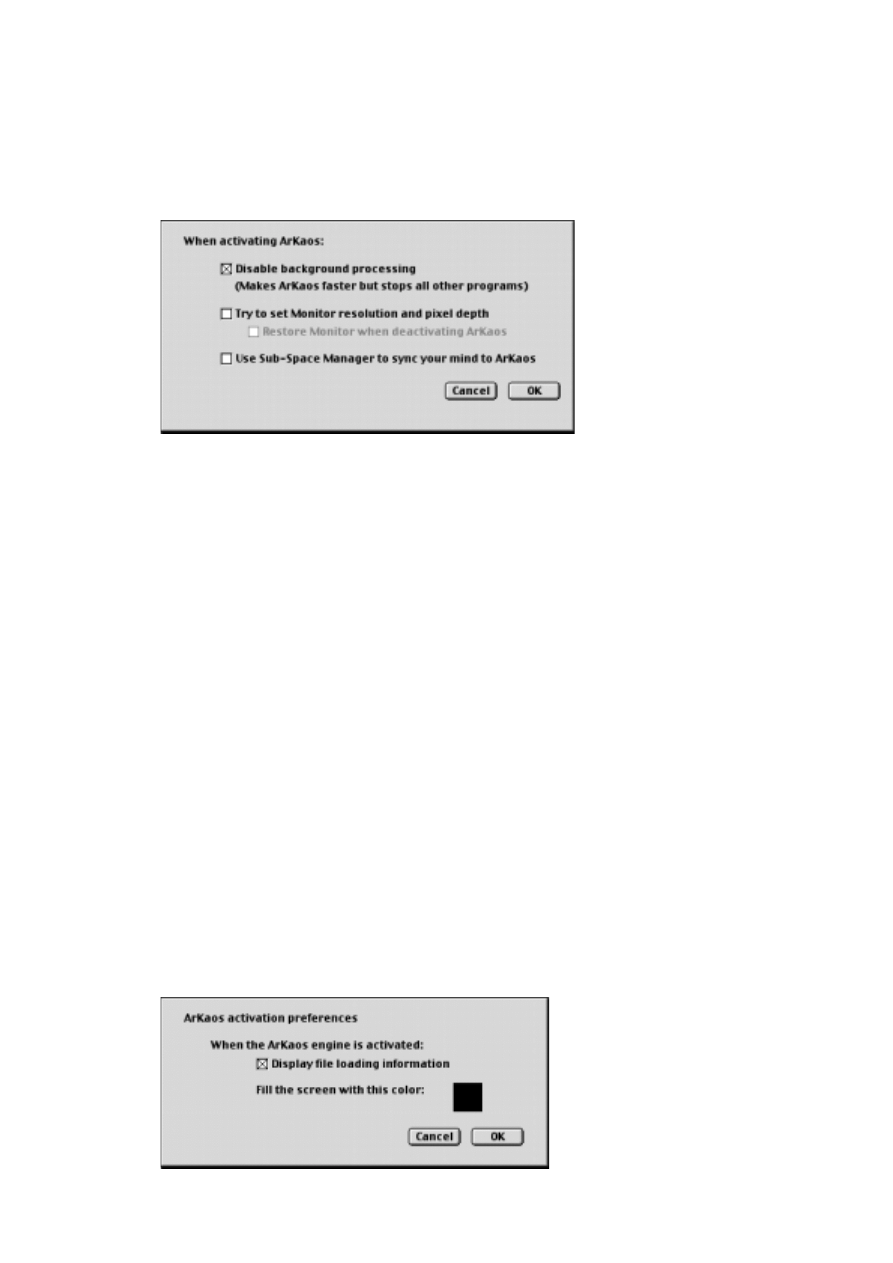
- 128 -
• Select the appropriate MIDI device from the drop down list. If you have multiple MIDI
devices installed, you can check the “Use all devices” box, to be able to use them all
simultaneously.
ArKaos Engine dialog
This dialog contains some settings for how the ArKaos engine (the “heart” of
the visual processing in ArKaos VJ) should behave:
• Disable background processing.
If you activate this option, the ArKaos engine will monopolize the whole system, which
will make the engine faster. However, this makes it impossible to run any other pro-
grams (such as sequencers) simultaneously.
❐
To optimize the performance, and devote all possible CPU time to ArKaos, you
should not only disable background processing, but also deactivate the use of
the computer keyboard, in the Keyboard Preferences dialog.
• Try to set Monitor resolution and pixel depth. (MacOS only)
Use this option if you want to work in ArKaos VJ with your regular screen settings, and
run the ArKaos full-screen display in another resolution and with another number of
colors. See
.
• Restore monitor when deactivating ArKaos. (MacOS only)
If this option is activated, the resolution and pixel depth will be restored to the original
settings when you return from the full-screen display to ArKaos VJ (only relevant if the
“Try to set...” option is activated).
• Use Sub-Space manager to sync your mind to ArKaos.
Applies soft-focus wavelocking mechanisms to superimpose the ArKaos output on
your optic nerve pattern.
ArKaos Startup dialog
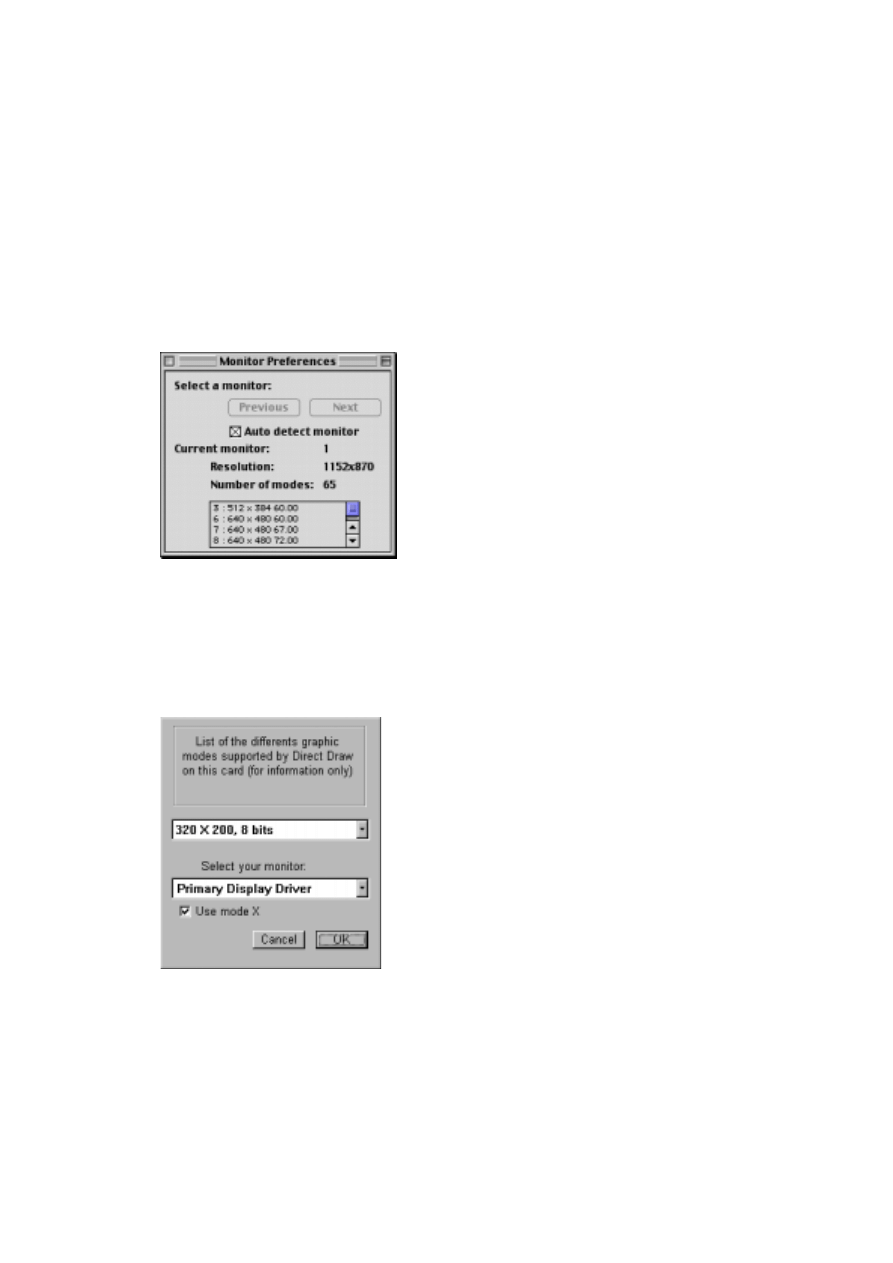
- 129 -
Contains settings for the display when you activate the ArKaos full-screen dis-
play.
• Display file loading information.
If this is activated, a box will be shown while loading the Visual files into memory. The
box contains information about the files being loaded and the amount of memory left.
• Fill screen with this color.
Click on the colored square to select a background color for the ArKaos full-screen dis-
play.
Monitors dialog (MacOS)
This dialog is used for telling ArKaos VJ about the monitor resolutions avail-
able with your setup, and, if you use more than one monitor, to select a mon-
itor for the ArKaos display. Please refer to the chapter “Setting up the
Display” for a full explanation of this dialog.
Monitors dialog (Windows)
This dialog informs you about the different graphic modes supported by Di-
rect Draw. If you use more than one monitor, you can also select which mon-
itor to use for the ArKaos display. Please refer to the chapter “Setting up the
Display” for more information
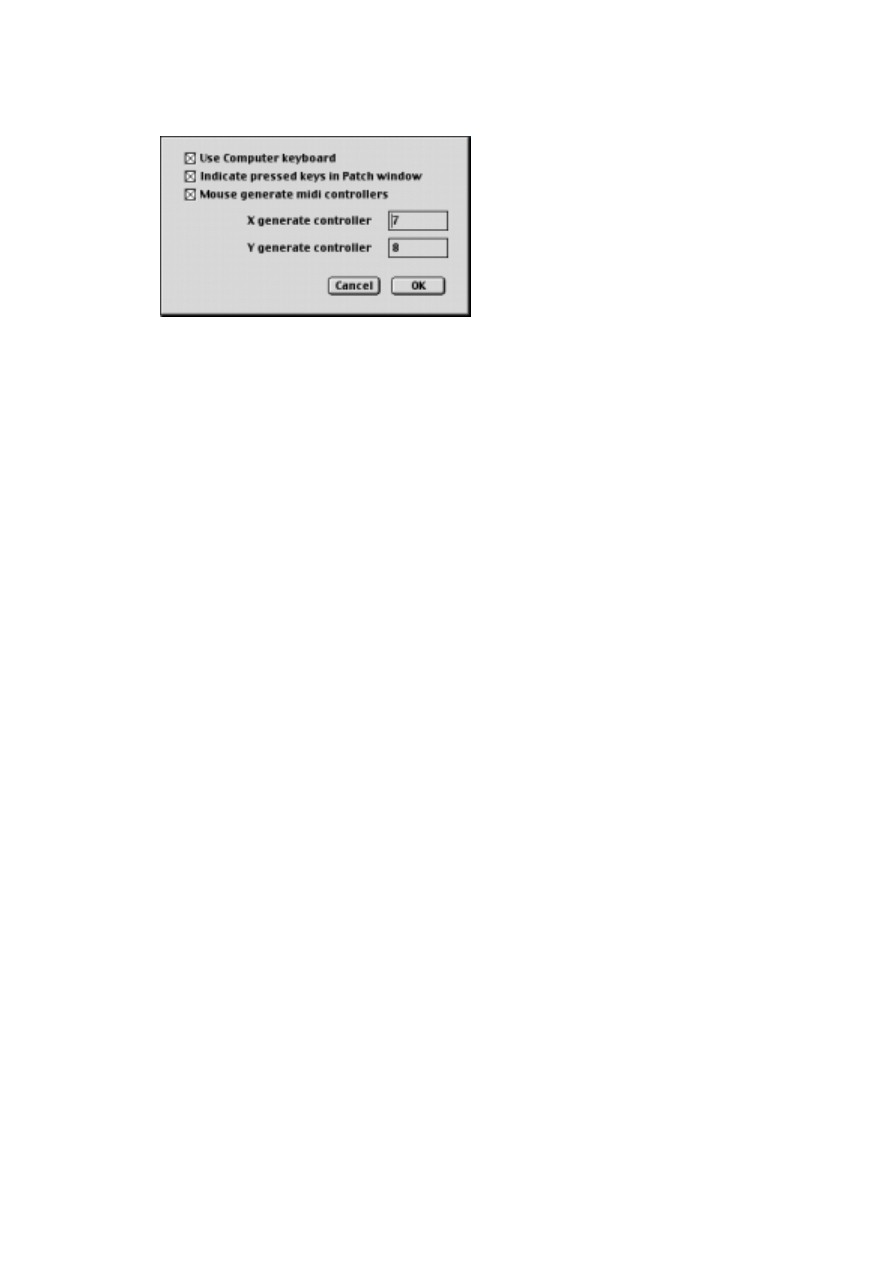
- 130 -
Keyboard dialog
• Use Computer keyboard
Activate this to set up your computer keyboard for use as a MIDI keyboard replace-
ment.
• Indicate pressed keys in Patch window
If you activate this option, the key you press on the computer keyboard will be high-
lighted in the Patch keyboard window in Preview mode. See
• Mouse generate MIDI controllers
Activating this option makes the ArKaos engine interpret mouse movements as MIDI
controller messages. Enter any MIDI controller number for horizontal (X) and vertical
(Y) movements.
❐
When you activate the ArKaos full-screen display, the performance will be faster
if you deactivate the “Use Computer keyboard...” option, and also disable back-
ground processing in the ArKaos Engine Preference dialog (see
Registration
If you are only trying out ArKaos VJ, you can use this menu item to register the pro-
gram. See
.
Automation
Opens the Automation menu. ArKaos can be synchronized to the tempo of in-
coming Audio and trigger visuals, effects and events in perfect sync with the
incoming music. Read more about Automation on
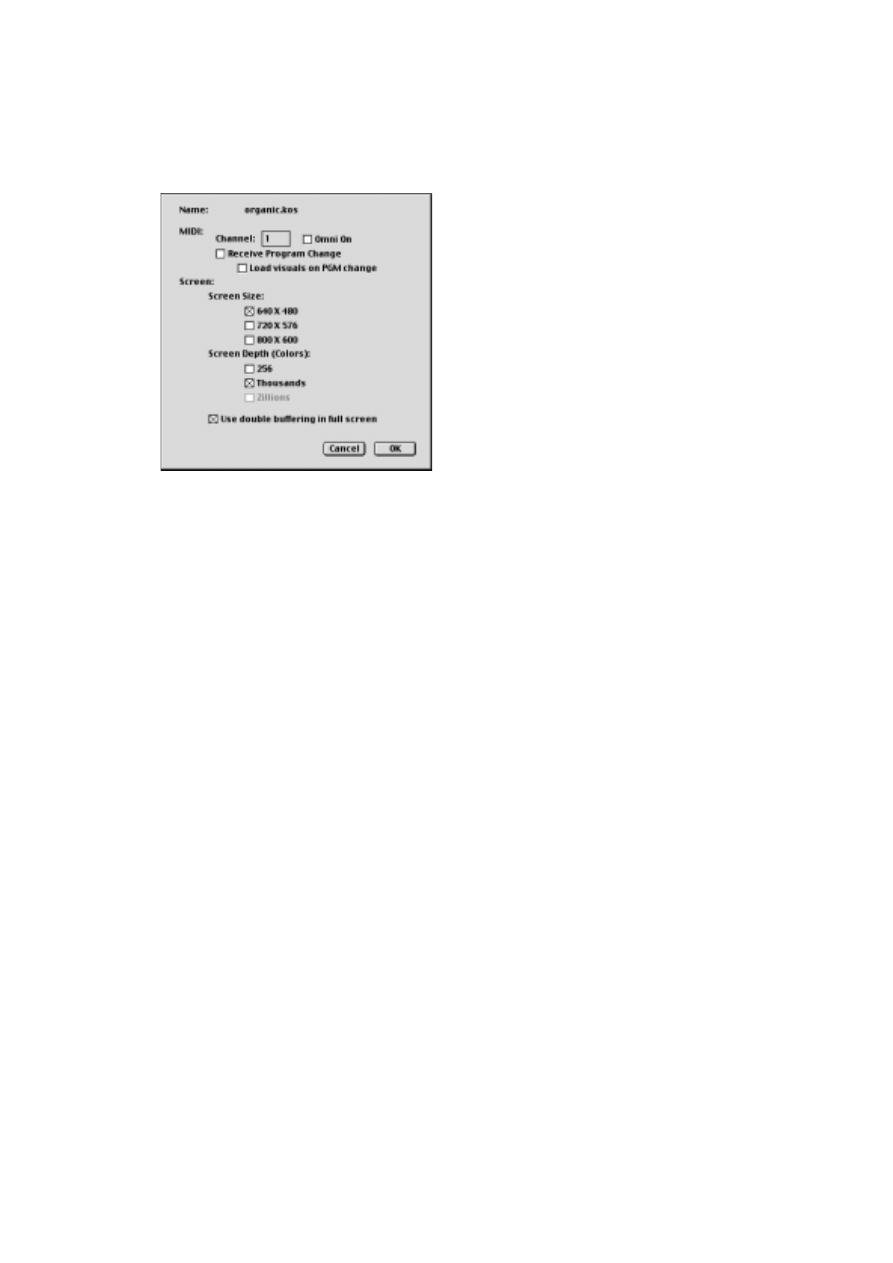
- 131 -
Synth menu
Get Synth Info...
Opens a dialog where you can make MIDI and screen settings for the se-
lected Synth.
MIDI
• Channel
Specify on which MIDI channel ArKaos VJ should receive MIDI messages. See
• Omni On
Makes ArKaos VJ respond to MIDI messages on all MIDI channels. See
.
• Receive Program change
Enables you to switch between Patches by using Program Change messages. See
.
• Load Visuals On Program Change (MacOS only)
Preloads the Visuals of a new Patch into memory when switching Patches by using
Program Change messages. See
Screen
• Screen Size
Set the desired screen size. See
• Screen Depth
Set the desired screen depth. See
• Use double buffering in full screen
Predraws visuals in an extra memory buffer before actually drawing them directly to
the screen of the ArKaos engine. Under Windows you will also have to specify
whether this buffer should use video memory or system memory. See
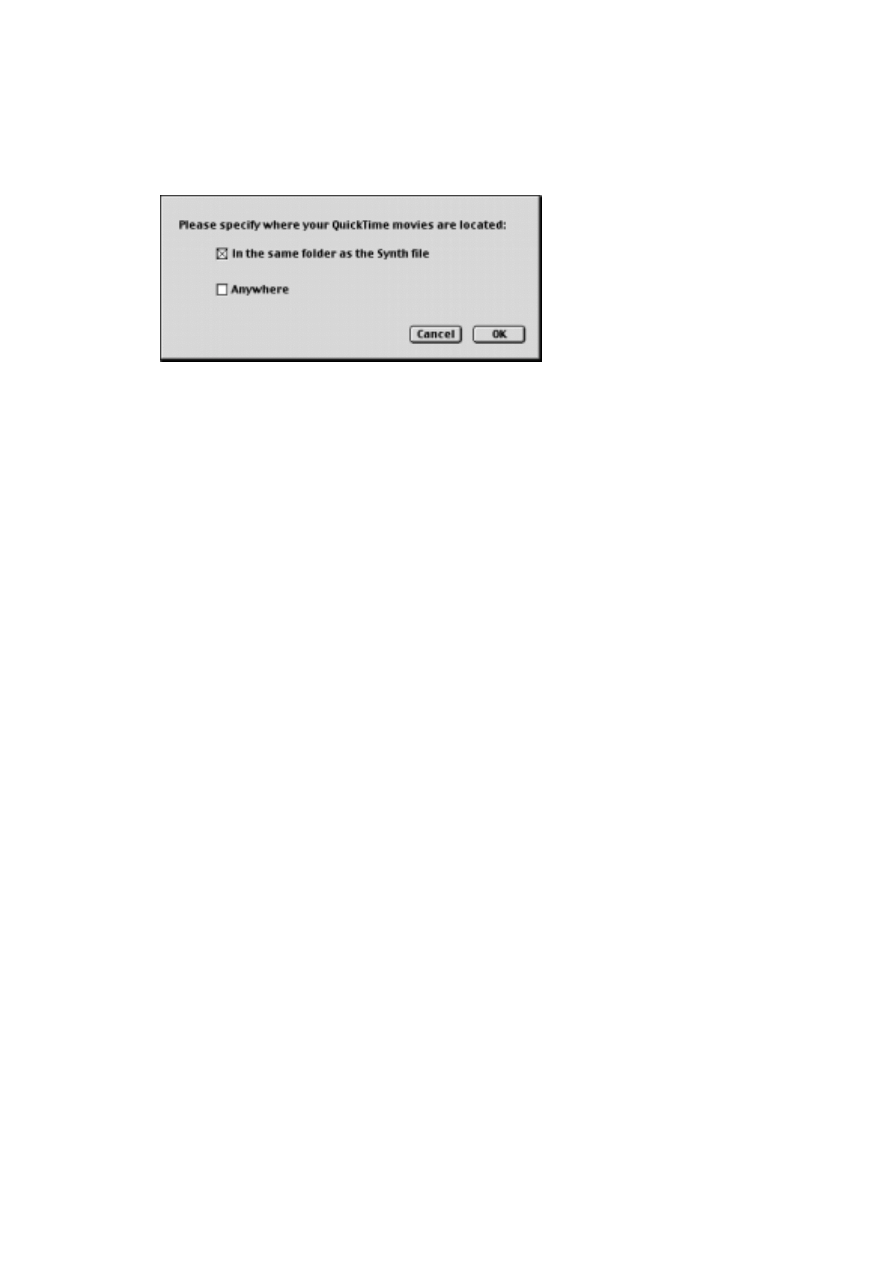
- 132 -
Movie Folder...
Opens a dialog for specifying to the program where your movie files are lo-
cated. See
for details.
• Select “In the same folder...” if you will keep your movies within the Synth file folder.
• Select “Anywhere” if you need to use movies situated elsewhere on your disk(s).
Layers
Opens a dialog for specifying the maximum number of layers ArKaos should
be able to display simultaneously. See
Visuals...
Opens a window containing lists of all pictures and movies included in the se-
lected Synth. If the window is already open, selecting “Visuals...” will bring it
to the front. See
Colors...
Opens a dialog containing settings for Transparency and color tables. Only
necessary if you choose to have your synth set to use 256 colors. See
Effects...
Opens a window containing icons of all Effects included in the program. If the
window is already open, selecting “Effects...” will bring it to the front. See
.
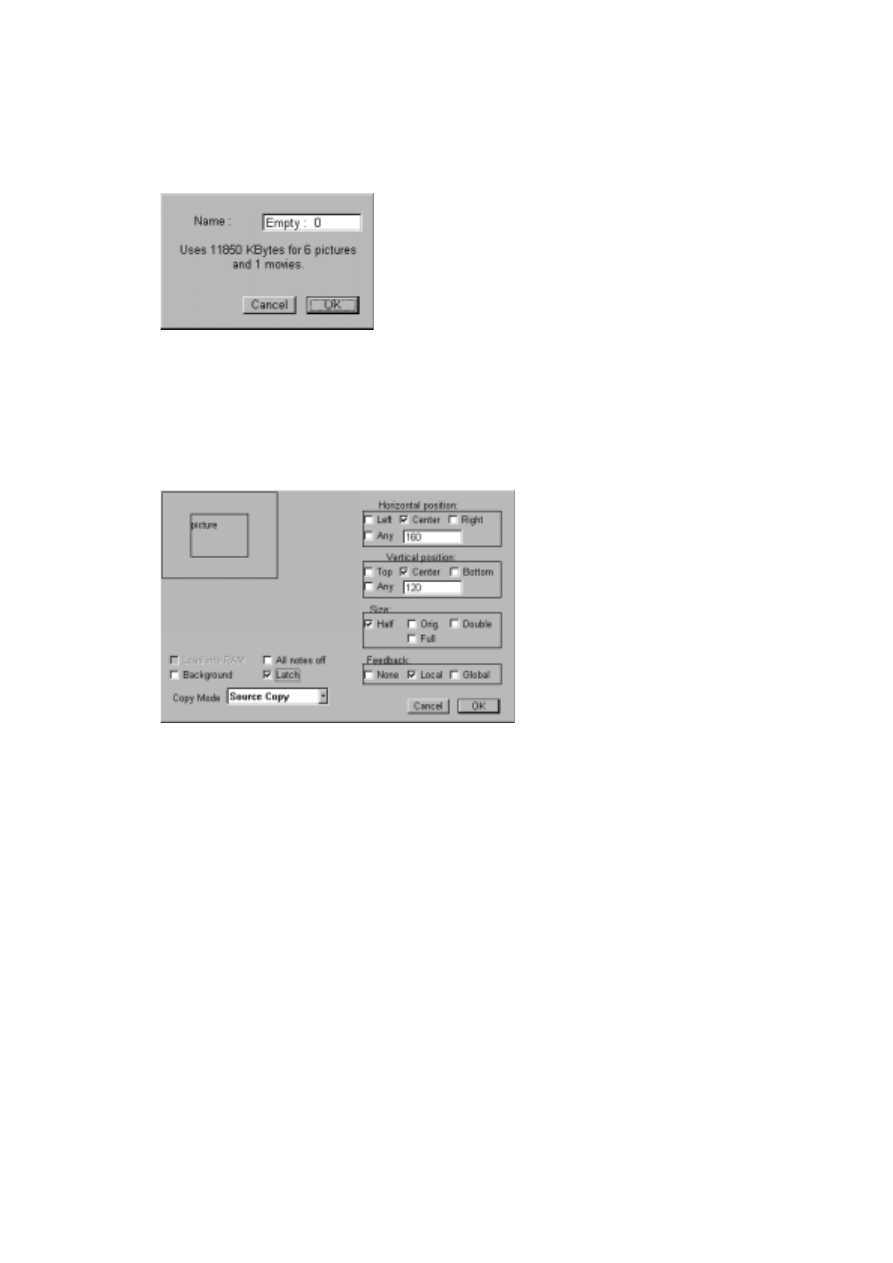
- 133 -
Patch Menu
Get Patch Info...
Displays the name of the selected Patch, and the amount of memory used by
the included Visuals.
• To rename the Patch, enter a new name and click OK or press [Return].
Get Visual Info...
This dialog contains settings for the selected Visual. See
Below follows a summary of the options.
Horizontal/Vertical Position
Allows you to specify the position of the Visual on the screen. If you select
the “Any” option, you can use the box in the upper left corner to drag the Vi-
sual freely to the desired position.
Size
Lets you specify a size factor for the Visual. If you select “Full” the Visual will
be made to fit the screen.
Load into RAM (movies only)
If you activate this option, the selected movie will be loaded into memory
when you activate ArKaos. This can make movie playback smoother.

- 134 -
Background
Instructs ArKaos to always display the associated visual/effect as the back-
most layer when playing multiple layers (see
).
All notes off
Causes any other layer currently active to be stopped when you press a key
with this option activated.
Latch
With this option activated for an effect, it will not stop when you release the
key. You will instead have to press the key a second time to stop the effect.
Feedback
This section lets you decide what type of feedback effect – if any – should be
applied to the visual. See
for information about Feedback.
Copy Mode
Use this pop-up menu to determine how the Visual should be displayed, in re-
lation to the previously shown image on the screen. See
Below follows a summary of the options.
ArKaos Menu
Activate ArKaos
Select this item to activate the full-screen display, using the ArKaos engine.
You can also use the following keyboard shortcuts: MacOS: [Command]-[A] or
[Command] [Enter]. Windows: [Ctrl]-[A] or [Ctrl]-[Enter] or [Ctrl]-[Return]. See
• If you use two monitors, this menu item will change name to “Deactivate
ArKaos” after launching ArKaos.
Select it to close the full-screen display and return to the ArKaos VJ settings.
• If you use one monitor, you deactivate ArKaos by clicking the mouse button.
(The left mouse button on the PC.)
Option:
This will happen when the visual is displayed:
Source Copy
The screen will be completely redrawn with the new visual (default
mode).
Background Copy
Only the foreground (non-white) parts of the new visual will be dis-
played.
Transparent
The visual will be shown in different degrees of transparency, depend-
ing on velocity (see
).
Transparent Ghost
Works like the Transparent mode, but the new visual will only be seen
temporarily, while you hold the key pressed.

- 135 -
Display Statistics
If you activate this option, the frame rate of the visuals will be displayed in the
full-screen display as you play them.
Show Preview
Opens the Preview window, which allows you to try out your Visuals and Ef-
fects while working with a Patch. See
. Close it by clicking on its close
box. The keyboard shortcuts for opening this window are: MacOs: [Com-
mand]-[P]. Windows: [Ctrl]-[P].
Event Recorder
This opens the Event Recorder window, which allows you to record a perfor-
mance directly in ArKaos VJ without using an external program. For further in-
formation see
. The keyboard shortcuts for opening the Event
Recorder window are: MacOs: [Command]-[R]. Windows: [Ctrl]-[R].

- 136 -
13
Tips and Tricks

- 137 -
Pictures and Movies
• The Copy Mode setting in the Visual Info dialog works for movies as well as pic-
tures.
• You can play several movies simultaneously by positioning them cleverly on the
screen.
• For quick multimedia presentations, you can use QuickTime 16 bit sound files
(with or without images), and play them as “samples” from your keyboard.
• You can paste an entire patch to a new, empty patch. Just make sure that noth-
ing is selected in the patch you want to copy, and then use the copy and paste
commands as usual.
Use of Effects
• When using the Hypersize or Size effects, try different sizes and positions, or use
background copy.
• Try the Bombo Blaster effect with Grid width set to 1, Grid Height set to 19 and
Rotation activated.
• With the Plane effect, you can add a picture on the blank part of the screen by si-
multaneously pressing a key with a picture and the Fire effect assigned to it. A
couple of other effects that produce cool results in this way are Yin & Yang and
Pixel Vortex.
• The Pixel Vortex effect works much faster with a smaller picture. Try 320 x 240.
• A nice combination is to use the QuickTime effect Fire, with transparency acti-
vated, along with an image on another key.
• The Feedback function produces the best results with effects that only make
subtle changes to the visual, like for instance Waving Flag and Turnix 3D.
Optimizing Performance
• When creating Quicktime movies, save them in a size that is a multiple of 160 x
120 (320 x 240 or 640 x 480) and compress them with the Cinepak codec.
• Choose the frame rate of your movies depending on the speed of your computer.
• If using transparencies results in poor performance with a synth set to 256 col-
ors, open the Colors dialog and recalculate the Transparency table, possibly with
a smaller number of steps.
• Controlling the visuals and effects from the computer keyboard decreases the
performance of ArKaos VJ.
If possible, use a MIDI keyboard instead.
• Never use visuals saved in a larger size than the actual screen size.

- 138 -
• For an ideal compromise between image size and quality, use JPEG images for
your visuals.
• It is a generally a good idea to fine tune your QuickTime movies using a pre-pro-
cessing tool, such as the Media Cleaner Pro. It is for example always beneficial to
remove the audio track of a movie.
• When you generate a QuickTime movie from the Event Recorder, use the Soren-
son compression codec if you want the movie to be small in size. If you want a
movie of high quality, but large in size, use the Animation codec. The ideal com-
promise between these two is the Cinepak codec.
• Last but definitely not least: Unless you´ve got a pressing reason not to, and as
long as your system can handle it, always have your synths set up to work in
thousands of colors mode, since most of the effects are optimized for it.

- 139 -
Index

- 140 -
A
Activate ArKaos
All notes off
ArKaos Engine
About
Activating
Closing
Controlling from a MIDI keyboard
Controlling from a MIDI sequencer
Controlling from the computer keyboard
Optimizing Performance
Preferences
Startup Preferences
ArKaos Visualizer
Aspheroids
Automation
B
Background
Background Color
Blur
Bombo Blaster
Bubble
C
Clut Dance
Color Cycling
Color Table
Colors Window
Computer keyboard control
Copy Mode
D
Demo Synths
Diffuse
Direct Driver (MacOS)
Directional Transition
Disable background processing
Display file loading information
Display Statistics
Do the Clut Dance
Double Buffering
E
Earthquake
Effects
About
Adding Plug-in effects
Assigning to keys
Editing
Internal
Plug-in
Removing from keys
Switching between categories
Effects Window
Event Recorder
About
Capturing a performance executed by an-
other MIDI device or program
Deleting a recording
Importing MIDI files
Playing back a recording
Recording a performance
Rendering to QuickTime
F
Fade To Black
Feedback
Fill Screen
Filter
Fire
Flow
Flying Object
G
Galactic Scrolling
Grab
H
Hue Shift
Hyper Size
I
Import
MIDI files
Visuals
Invert
Invert Color
Irisation
K
Kaleidoscope
Keyboard Setup

- 141 -
L
Larsen
Latch
Layers
Load Visuals on PGM change
M
Memory
In a Patch
Monitoring
Memory Window
MIDI Channel Settings
MIDI sequencer control
MIDI Setup dialog (MacOS)
MIDI Setup dialog (Windows)
MIDI System (MacOS)
Dialog
Selecting
Mode X (Windows)
Modulation
Monitor Preferences (MacOS)
Monitor settings (MacOS)
Automatic resolution switching
One monitor
Two monitors
Monitor settings (Windows)
One Monitor
Two monitors
Morphosis
Motion Blur
Mouse generate MIDI controllers
Movie Folder dialog
Movies
Compression
Formats
Loading into RAM
Location on hard disk
N
None (effect)
O
Old Film
Omni On
OMS (MacOS)
P
Particles
Patch Info Window
Patch keyboard window
Patches
About
Assigning Effects to
Assigning Visuals to
Naming
Selecting
Switching via MIDI
Photo
Pictures
Formats
Location on hard disk
Pitch Bend
Pixel Vortex
Pixxicato
Plane
PlanetWorks
Plasma
Plug-in effects
3D World
Artistic
Transitions
Various
Video
Preview Window
Program Change
Purchase key
Q
QuickTime Controller
QuickTime Effects
R
Receive Program Change
Registration
S
Screen Depth
Screen Size
Scroller
Shutter
Shutter II
Size
Slide Effect
Sound Player (MacOS)
Stop Clut Dance
Sub-Space Manager Mind Sync

- 142 -
Synth
About
Closing
Creating
Demo
Opening
Saving
Saving a copy
Synth Info dialog
Synth Panel window
T
Transition
Transparency
Tunnel
Tunnel 3D
Turnix
Turnix 3D
U
Usix 3D
V
Velocity
Video Split
Visual Info dialog
Visuals
About
All notes off
Assigning to keys
Background
Copy Mode
Displaying
Feedback
Importing
Latch
Removing from keys
Removing from Synth
Size and Position
Visuals Window
About
Opening
Switching between Pictures and Movies
VJ
VMP
Vortex
W
Warp
Waving Flag
Whirl
Y
Yin and Yang
Document Outline
- Table of Contents
- Introduction
- Preparations
- Trying Out ArKaos VJ
- Basic Concepts
- Setting up the Display
- Setting up MIDI
- Managing Synths and Patches
- Setting up the Visuals
- The Effects
- Playing the Patches
- The Event Recorder
- Menu and Dialog Reference
- Tips and Tricks
- Index
Wyszukiwarka
Podobne podstrony:
Podrecznik uzytkownika
OpenOffice – Podręcznik użytkownika Writer
asembler podrecznik uzytkownika OOJHQHHGL4XKD5C7LJZPZGPQDNDQ6CI23AUGTVQ
PODRĘCZNIK UŻYTKOWNIKA PL
Podręcznik użytkownika
fx0n 3a PODRECZNIK UZYTKOWNIKA
Pocket PC Podrecznik uzytkownika pockpo
Koparki EO 2621 EO 2626 Opis techniczny i podręcznik użytkownika
podrecznik uzytkownika ivona MC Nieznany
[pl] norton ghost podręcznik użytkownika NKD3UEX4IIMMY42K2DVIJ5FZZFRFQOC6FOAPENY
Budynki Wysokie dla Windows Podrecznik Uzytkownika (2)
ALPHA PODRECZNIK UZYTKOWNIKA
AL2 2DA Podrecznik uzytkowania
FX2N 2LC PODRECZNIK UZYTKOWNIKA
norton personal firewall podrecznik uzytkownika pl book ZNHRDVIN6BN235624GDYCAULLU726IBXYNPHKJQ
Podrecznik uzytkownika Windows Nieznany
FX1N 1DA BD PODRECZNIK UZYTKOWNIKA
AutoCad 2005 PL podrecznik uzytkownika
więcej podobnych podstron