Final
release
date:01/27/02
DV-C601,
Ref:
112200-3
Service Tip and Troubleshooting:
Make sure static free work environment is observed at all times when working with Laser Pickup.
Symptoms:
(1) Disk Starts, Spins and DISK ERROR comes up.
(2) Disk plays with intermittent picture breaking up.
(3) Disk fails to initialize, or locks up trying to read disk.
(4) Plays DVD but fails to play CD or plays CD but not DVD.
Mandatory Solution:
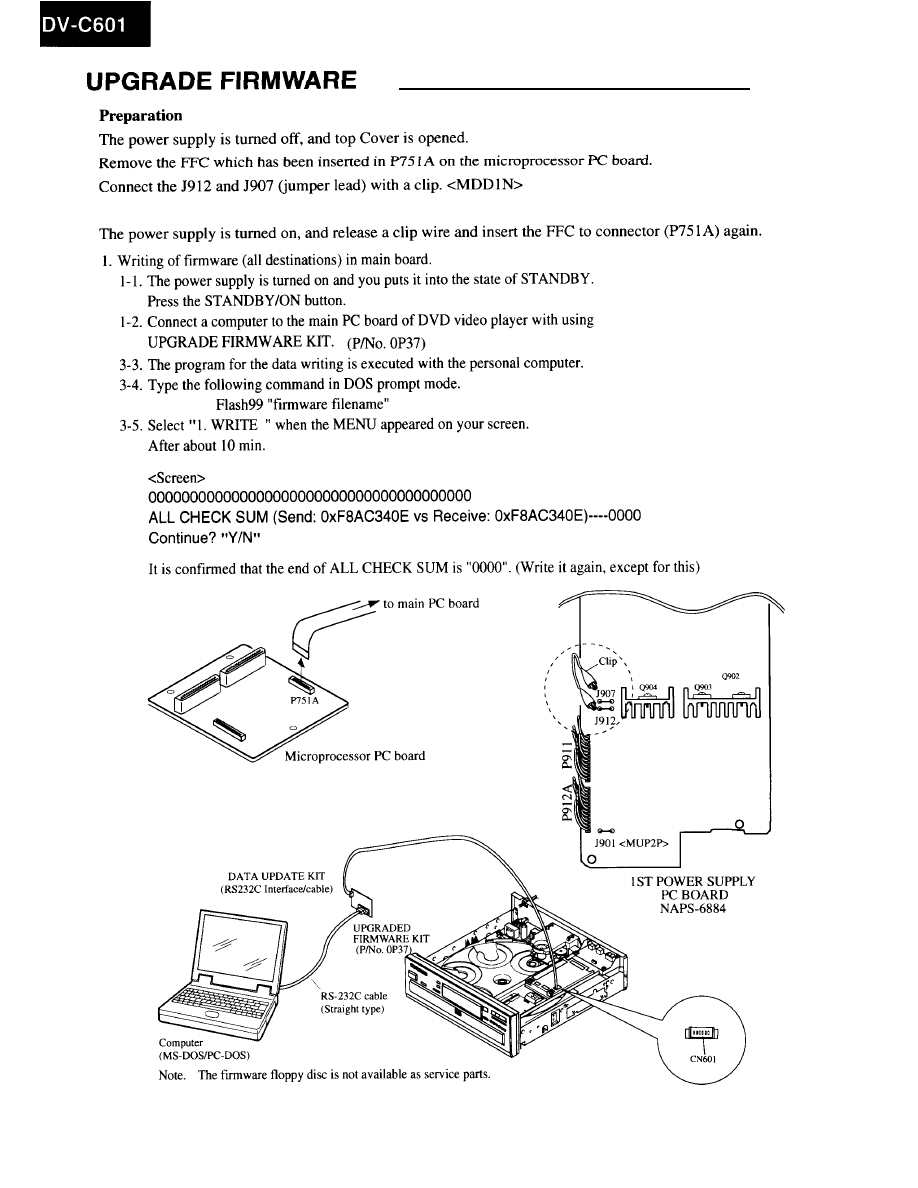
Replace pickup connector cables, Remove pick-up connector intermediate PCB, update
firmware with most recent version.
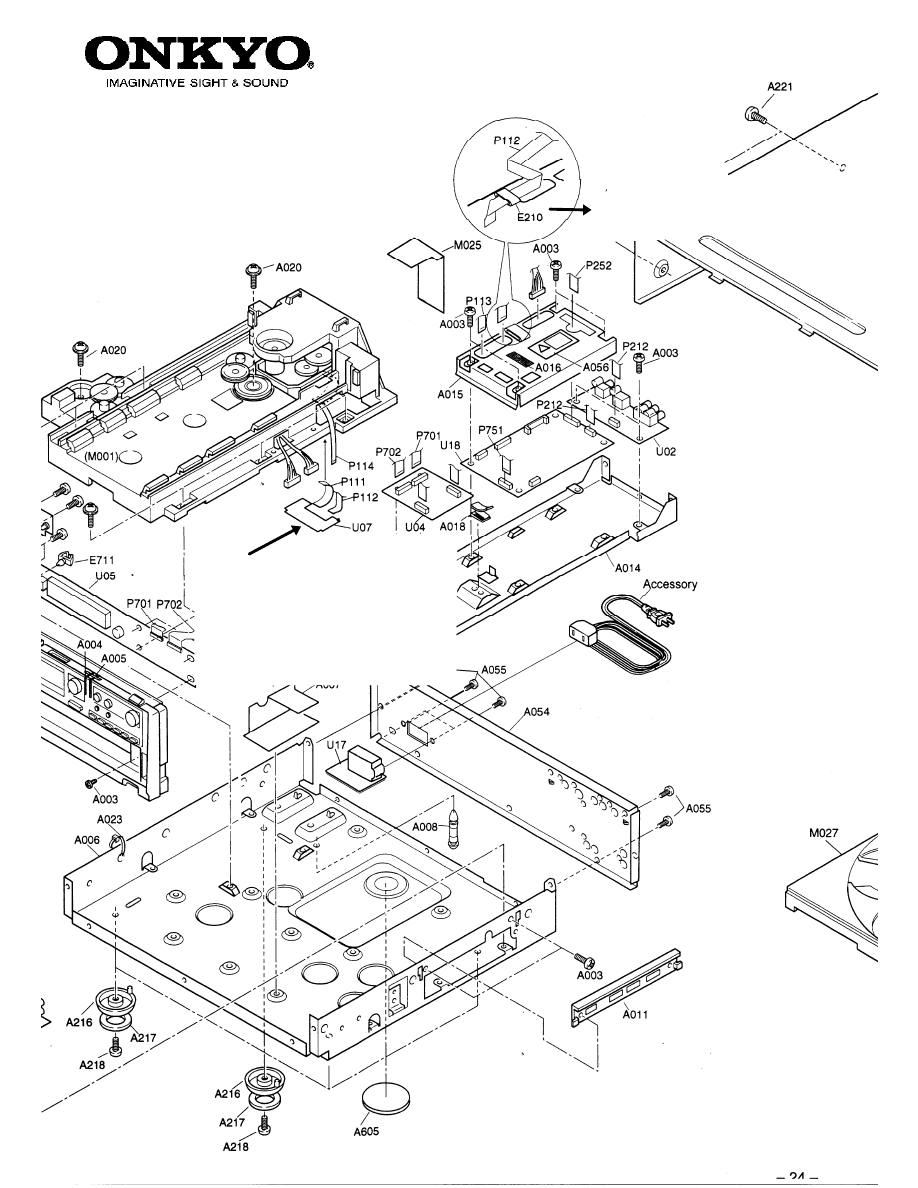
Part Location
Old Part number
New part Number
Reason For change
P112
2042183512
2042184012
Improved RF (Eye Pattern)
P111
2042180512
Eliminated (Remove)
RF Loss improved
U7
1H412554-2
Eliminated (Remove)
RF Loss improved
E210 None 230957 (Add)
RF Noise improved
Before you start work, the following process must be addressed in order to avoid damage to the pickup assembly.
Your finding may resemble the followings:
a. Powers, rotates carousel, chucks, (clamps) and LD is not ON, and immediately un-chuck.
b. Powers, chucks, and LD is on spins for a few seconds and unclamps goes to next disk.
c. Powers, chucks, LD is on, spins and spins trying to read TOC. Endless loop.
d. DVD plays but not CD or plays CD not DVD.
e.
Picture breakup problem.
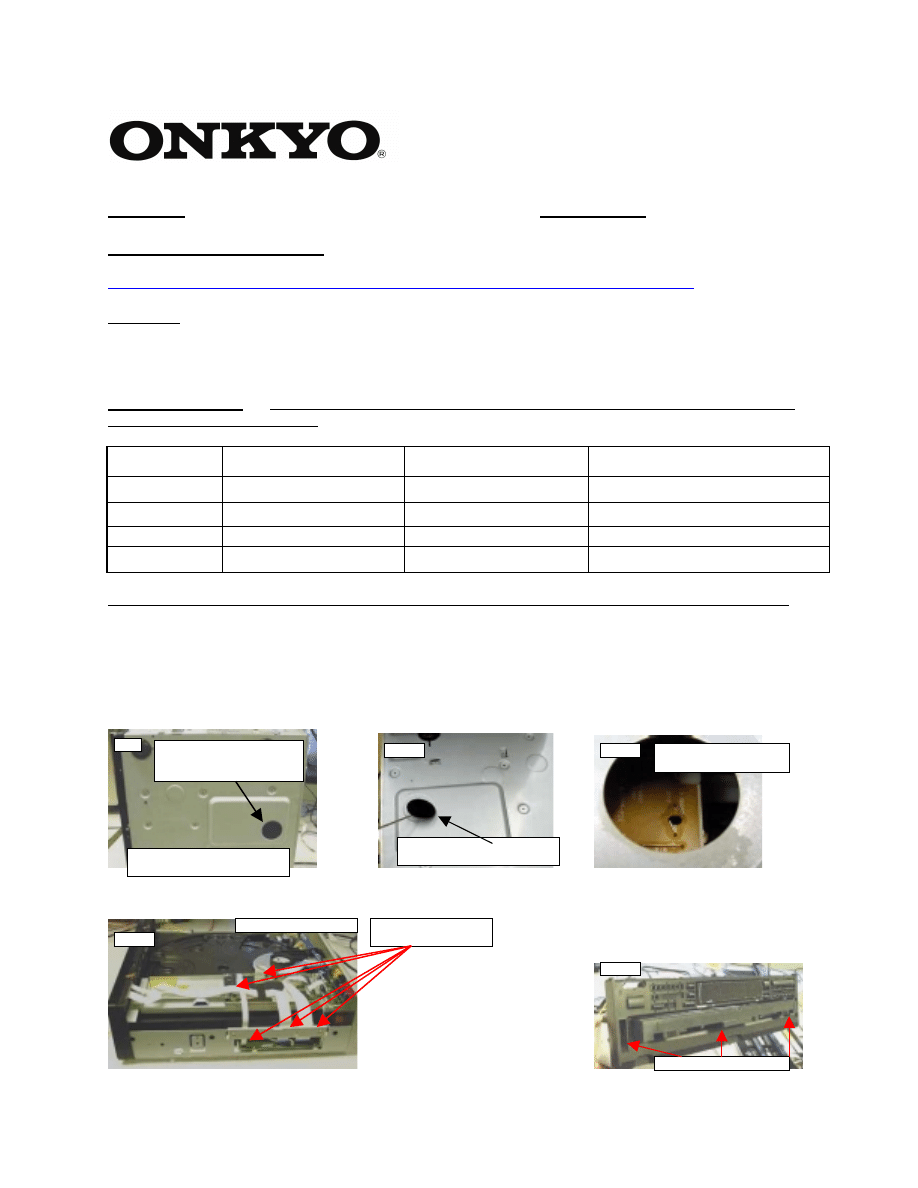
Access hole for shorting
pickup at the bottom.
Must return cap when done.
Fig1
Fig2
Fig3
Lift cap with a screwdriver.
Short J019 with solder.
Fig4
Remove top cover
Fig5
Remove front panel screws
Disconnect al wires
from digital PCB.
Solution:
Replace pickup connector cable. "Second time around".
Fig6
Fig7
Fig8
Front and rear panel removed
Pull carousel forward with latch
pushed down.
Latch
Carousel removed
You may disconnect cable from
P111B
Remove two PCB mounting screws
and short pickup LD terminals.
Connect cable PN#2042184012
directly to the pick-up. Please pay
attention to the BLUE BACK.
Bend the new cable
PN#2042184012 at the point of red
marking towards the marking.
Re-assemble the unit back
and attach the cable as
illustrated next Fig14. It is
important to keep the pickup
shorted until last.
Bend cable as you see on this
picture. Please do not crush cable.
Make sure the cable at
connector CN501 is curled to a
minimum to avoid cable break.
Fig9
Fig10
Fig11
Fig12
Fig14
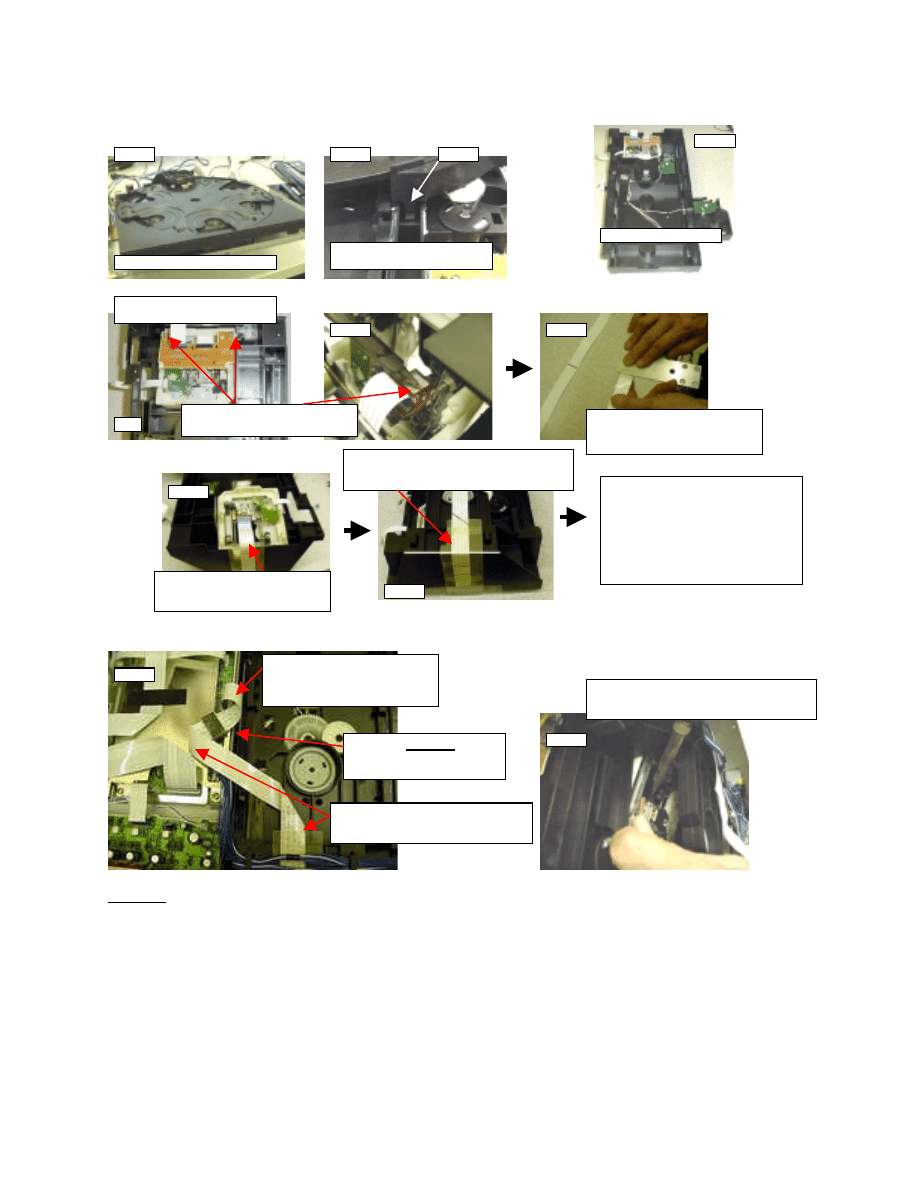
Set the unit on its side and de-solder the
shorting from the pick up very carefully.
Fig15
Core PN#
230957
must be
installed at this point using
double side tape.
The bend seen in Fig11 shall match this corner
(white mark). Return the clear vinyl as it was.
Use double side tape to attach cable.
Fig13
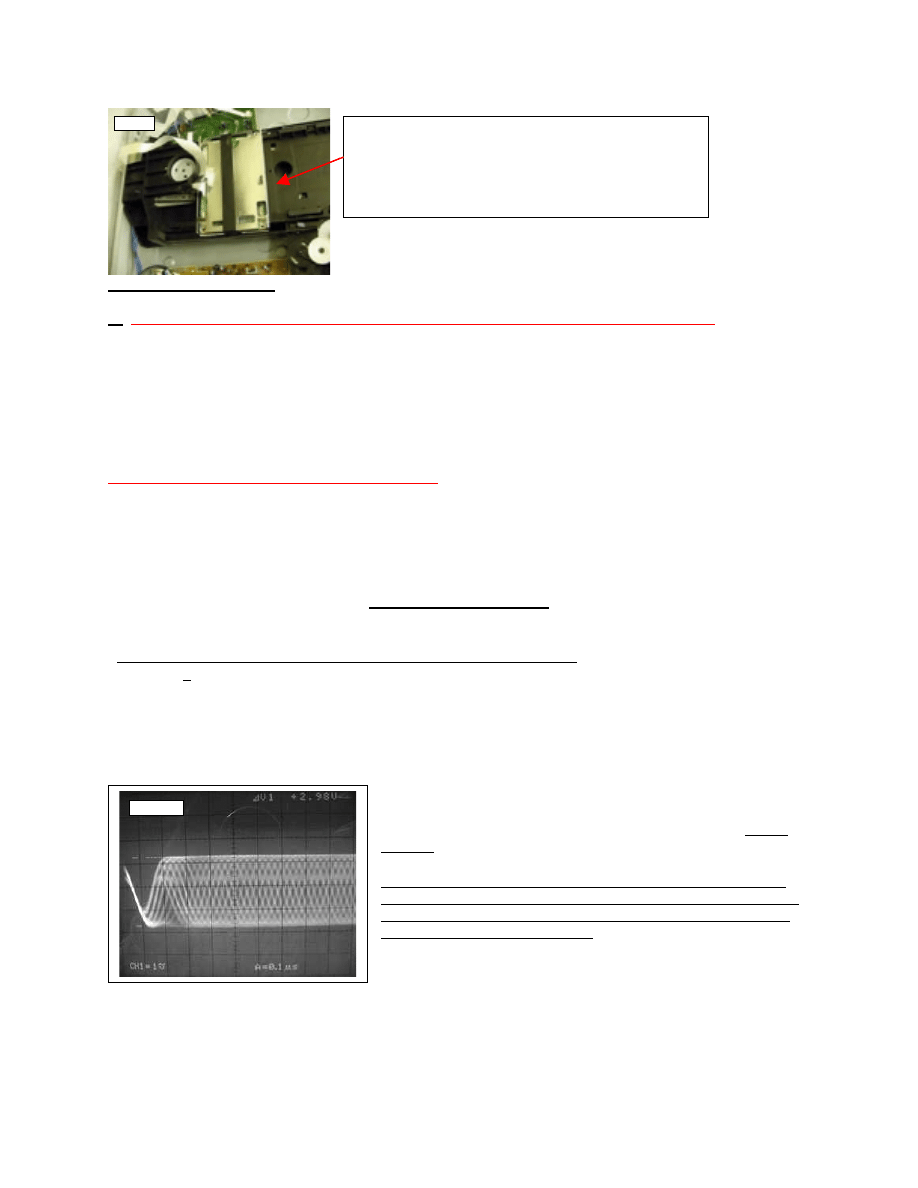
Test points and references:
A:
make sure static free work environment is observed at all times when working with Laser Pickup.
With the unit totally turned OFF, confirm the impedance of the Focus Coil and the tracking coil at CN501. Between
pin 10 and 13, 8.2ohm for Focus coil and across pin 11 and 12, 8.3ohm for the Tracking Coil.
Check and verify procedure as given on page 43,44 of service manual. For disk to be recognized while carousel is
rotating but fail to spin and focus is a result of missing LD ON. This happens when one of the connectors at any of
the three points (Fig1 A, B and or Fig2 C) is lacking good contact to the ribbon.
***The laser pick needs no adjustment!!! ***
The troubleshooting guide given between pages of 43 and 50 is extremely helpful to determine the condition of the
PICKUP.
B: Disregarded Step 3 of page 45 and make correction as follows.
The reference should be:
lop = Voltage between
E522 and E523 3.3ohm
The voltage drop across R505 (3.3ohm) resistor is higher than 218~238mvDC in normal operating condition and the
LD is not on, connection (Fig1 A, B and or Fig2 C) may be loose or poor. This indicates the LD is not present as
load to the voltage rail R505.
The Individual optical output level may be monitored at the pickup connector point using an oscilloscope with no
more than 10pf input capacitance.
For location refer to manual Page 50.
D: To help reduce the break up of the video signal, remount CORE
#230957. The installation of this core should be as illustrated on Fig14.
** Since the root cause for the failure of DV-C600 and DV-C601 is
mainly noisy pick-up signal do to poor connector terminals, it is very
important all of the necessary steps mentioned are exhausted before
attempting to replace the PICKUP.
If the shorting PCB seen in Fig 3 is not in place, you
will need to keep the DSP still connected to CN501
connector until pick-up shorting is done as seen on
figure 10. Keep DSP attached to the frame with an
electrical tape.
Fig16
TP-515
Mandatory:
Mandatory:
Pi t
f
d
t l
DVD
CD
B th
Picture freeze, does not play DVD, or CD or Both
l t d
bl
related problem.
B f
l
i
i k
bl it i i
t
t th t th
Before replacing a pickup assembly it is important that the
f ll
i
t h
i
d
d
l
Must add ferrite core
following component change is adressed properly.
Do Not Attempt to Remove Optical Ribbon cable before
Must add ferrite core
PN#230957 or 230951
Do Not Attempt to Remove Optical Ribbon cable before
shorting the landing found on the pick up assembly
PN#230957 or 230951
shorting the landing found on the pick-up assembly.
Short Pick up assembly and remove
part U7. Part P112 have been replaced by
Pn# 2042184012
Pn# 2042184012

DV-C601
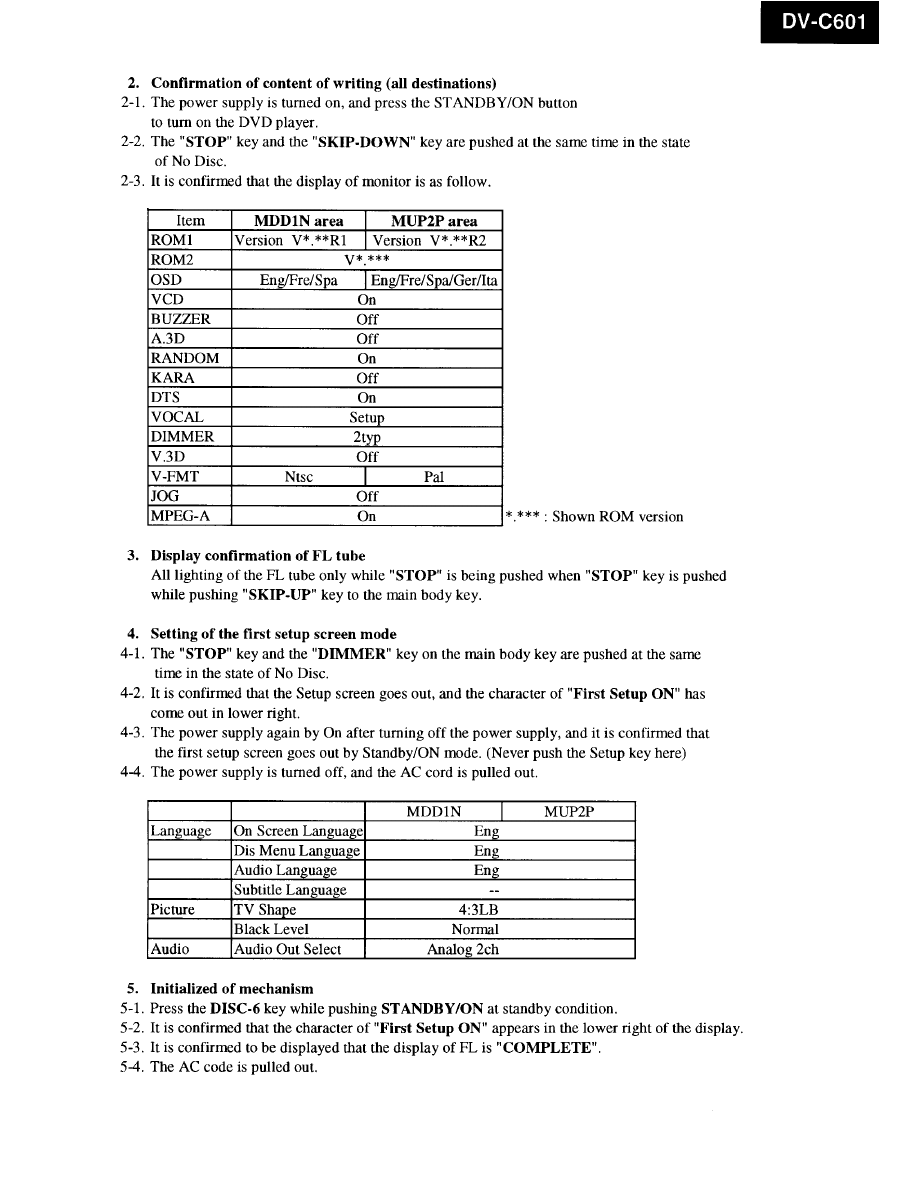
To check the Firmware version before update is done follow this process.
Using the remote controll Press [ZOOM] ----> [606] -----> [ZOOM]
Th di
l
ill h
th
i
th di
l
l
The display will show the version on the display panel.
If the dsiplay indicates a firmware of curent version need not update, unless
PCB has been replaced.
** Firmware runs in DOS mode only.
** Firmware runs in DOS mode only
Firmware runs in DOS mode only.
Wyszukiwarka
Podobne podstrony:
Onkyo Dpc6 1 Final
Onkyo Dvc601 Instruct[1]
Onkyo Dvc600 Final
Architecting Presetation Final Release ppt
Opracowanie FINAL miniaturka id Nieznany
Art & Intentions (final seminar paper) Lo
FINAŁ, 3 rok, edukacja ekologiczna
pyt contr final
KRO Final
FInal pkm 3
Raport FOCP Fractions Report Fractions Final
FINAL
fizyka egzamin paja final
CCNA 2 Final Exam v
05 Daimler GroupA FINAL
Palm Beach Perfect FINAL
więcej podobnych podstron