
Part Programming Commands
Part Programming
This chapter details the part programming codes used to run your Excellon machines automatically.
The CNC-7, like all Excellon machines, has a set of part programming codes that can be used to control the machine for
drilling, toolchanging, setting up machine parameters (such as feeds and speeds), and routing (if so equipped). Also, like
other Excellon machines, the part program codes are backward compatible. This means that part programs from a CNC-
2,4,5 or 6 can be run on your CNC-7 without modification. Since newer controls contain new features, the reverse is not
necessarily true (You may not be able to run all CNC-7 programs on a CNC-2,4,5 or 6). Part programs are simply data files,
coming from any one of a variety of sources or devices. This chapter will detail all available part program codes available
for your use.
Part Program Headers
The M48 header is used to give your machine general information about the job. This includes the size of tools you want to
drill and/or rout the PC board, the kind of measurement system you are using, the direction of the X and Y axis of the work,
and other details. These instructions may be generally listed in any order in the header. The part program header is
optional. Most commands that you can program into the header can also be entered at the CNC-7 console before the
program runs.
Part Program Body
The set of drilling and/or routing commands is called the part program body. It is usually much longer than the header and
tells the machine exactly where each hole is to be drilled, which drill bit to use, what shape you want routed, etc. The
commands are laid out in the sequence you want them carried out on the PC board. For example, one line of the program
will tell the machine where to drill a hole, the next line will tell where to drill the next hole, the next line will tell the machine
to stop and change the drill bit. Usually the program is carried out in sequence from top to bottom. However, some
commands will tell the machine to move to another location on the PC board, go back to a previous line in the program, and
repeat the pattern.
Excellon Program Format vs. Other Manufacturers
Because Excellon is a pioneer in the manufacture of computerized drilling and routing equipment, it was necessary for
Excellon to develop a set of commands to control the machines. The set is called Excellon Numeric Control and it uses the
same commands for all Excellon machines. Some of these commands have become standard in the industry and are widely
used by other manufacturers. The first machines introduced by Excellon were drilling machines. The set of commands used
on drillers later became known as Format One. When Excellon introduced machines with routing capability, a set of
commands called Format Two was created. Then in 1979, Excellon revised Format Two to combine drilling and routing
commands into one common set. The machines introduced prior to 1979 are called generation one machines and cannot
use Format Two. They do not have all the capabilities of the newer machines. However, newer generation two machines can
run part programs with either Format One or Format Two commands.
What a Part Program Must Include
There is some information that the CNC-7 cannot know without being told. Some of the things that the part program must
tell the machine are:
Additionally, if the programmer wants to change the speed of the direction of a particular tool of the worktable, without
Where to drill each hole
Where to rout
What size tool to use
Page 1 of 49
Program Commands
12/11/2003
file://C:\CNC%20Programming.htm
stopping the machine, the change must be made in the part program. Examples of these changes are:
Writing a Part Program
This section describes what you need to know to write a part program header and a part program. It identifies the
mandatory requirements, as well as the options, and provides you with examples of how a part program might look.
The Header: Setting Up The Job
The header is always located at the beginning of a part program. It consists of a series of instructions (commands) that are
used to give your machine general information about the job. This includes the size and speed of tools, the kind of
measurement system you are using, the direction of the X and Y axis of the work, and other details. The header can have
just a few commands, or dozens of them, depending on your needs. Most of these commands may be placed in any order.
But one thing the header may NOT include is machine motion commands such as JOG or HOME. Do you remember that we
said the header is optional? This does not mean that the commands you write into a header are optional. If you choose not
to use a header, then you must either write the commands into the part program or enter them at the CNC-7 console before
the program runs. Entering them manually can lead to problems. Suppose that you get an order to produce a set of the
same PC boards every two or three months. Each time the program is loaded into the CNC -7, you must be given
instructions on all the commands that have to be entered before the job can begin. If you put the commands in the header
instead, you are assured of consistent settings for the machine.
Example of a Header
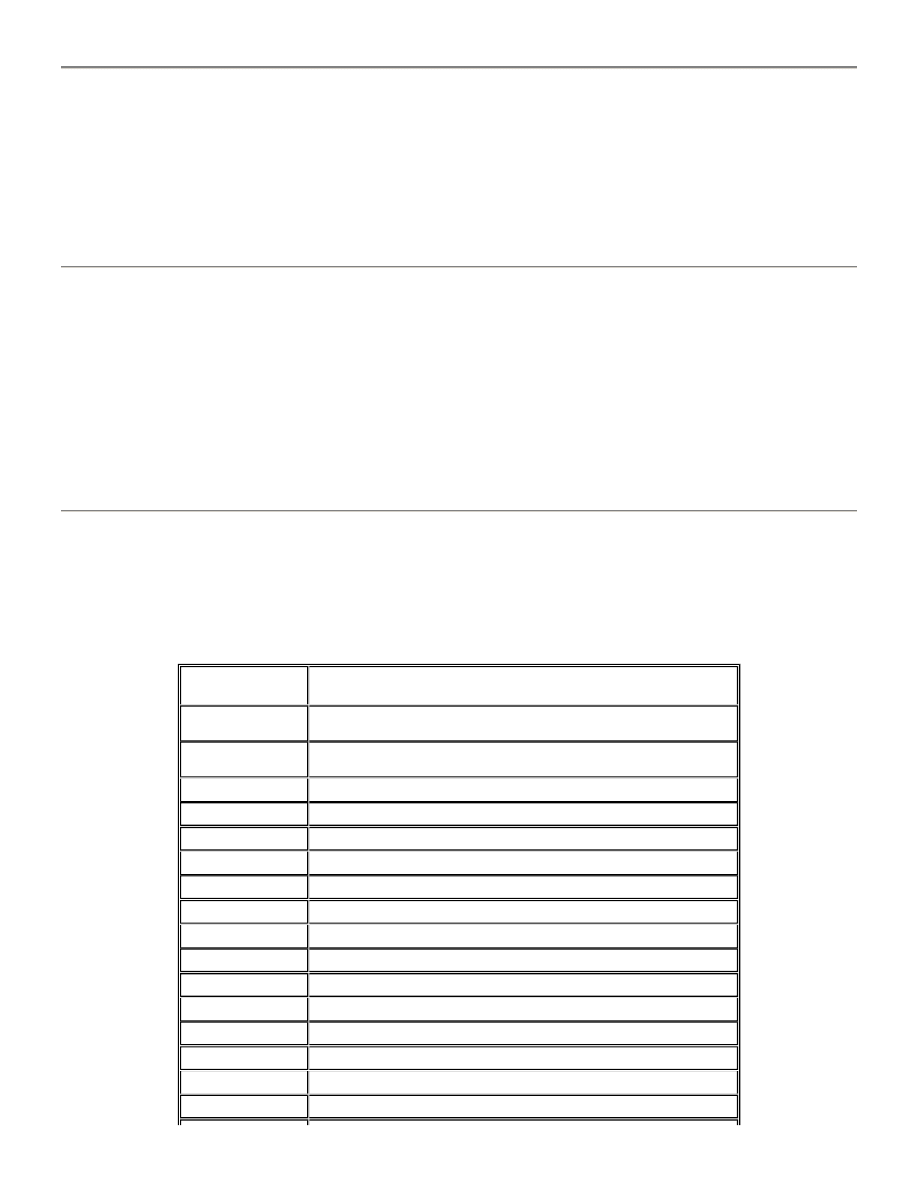
Below is a sample of a header. The PURPOSE shown to the right of the COMMAND is not part of the command, but is
shown for your benefit to explain the command:
Beginning of a Part Program Header
M48
M48 Defines the start of an M48 part program header. This command must appear on the first line of the part program
header. This tells the CNC-7 that the program has a header. Please note that comment lines and blank lines are permitted in
the M48 header and are ignored. Comment lines are lines of text beginning with the semicolon (;) character.
See also: Part Program Headers
Reverse the direction of routing
Change the table feed rate
Change the spindle RPM
COMMAND
PURPOSE
M48
The beginning of a header
INCH,LZ
Use the inch measuring system with leading zeros
VER,1
Use Version 1 X and Y axis layout
FMAT,2
Use Format 2 commands
1/2/3
Link tools 1, 2, and 3
T1C.04F200S65
Set Tool 1 for 0.040" with infeed rate of 200 inch/min Speed of 65,000 RPM
DETECT,ON
Detect broken tools
M95
End of the header
Page 2 of 49
Program Commands
12/11/2003
file://C:\CNC%20Programming.htm
End of a Part Program Header
M95
M95 Defines the end of a part program header. Either this command or the % command must follow the last header
command in the part program header. This tells the CNC-7 where the header ends. When this command is used, the
machine will immediately start to execute the part program body commands following the M95 command.
See also: Part Program Headers, M48
Rewind Stop
%
% Defines the end of a part program header. Either this command or the M95 command must follow the last header
command in the part program header. This tells the CNC-7 where the header ends. When this command is used, the
machine will stop at the end of the header and await your action. You may enter any appropriate Keyboard commands
and/or press CYCLE START to continue.
Note: This command has a different meaning when used in the part program body.
See also: Part Program Headers, M48, M49
Commands Used in a Header
The following table provides you with a list of commands which (not a complete list) are the most used in a part program
header. Some Operating System commands, which are discussed in the chapter on System Software, are not included here.
If other commands are used, the CNC-7 will display a message when you try to run the part program. Most of the
commands between the M48 and M95 or % commands may be arranged in any order, but there are some common sense
exceptions. For example, the INCH/METRIC command must be specified before any commands with dimensions.
COMMAND
DESCRIPTION
AFS
Automatic Feeds and Speeds
ATC
Automatic Tool Change
BLKD
Delete all Blocks starting with a slash (/)
CCW
Clockwise or Counterclockwise Routing
CP
Cutter Compensation
DETECT
Broken Tool Detection
DN
Down Limit Set
DTMDIST
Maximum Rout Distance Before Toolchange
EXDA
Extended Drill Area
FMAT
Format 1 or 2
FSB
Turns the Feed/Speed Buttons off
HPCK
Home Pulse Check
ICI
Incremental Input of Part Program Coordinates
INCH
Measure Everything in Inches
METRIC
Measure Everything in Metric
M48
Beginning of Part Program Header
Page 3 of 49
Program Commands
12/11/2003
file://C:\CNC%20Programming.htm

Duplicate Commands
If you have a command in the header and the exact same command in the part program body, there is no harm done. Nor
will it matter if you enter the exact same command from the keyboard. In each case, because the commands do not
contradict each other, the performance of the machine will not be affected.
Keyboard and Header Commands vs. Body Commands
Some commands allow you to specify optional information. When the options in the part program body are different from
the options in the header or console, the body options are not used. Suppose you specify in the header which spindle
speed you want for a particular tool. Then you repeat the tool command in the part program body and specify a different
speed. The speed in the header will override the speed in the body. You could change the speed ten times in the program,
but the spindle will rotate at the speed you specified in the header, each and every time.
M95
End of Header
NCSL
NC Slope Enable/Disable
OM48
Override Part Program Header
OSTOP
Optional Stop Switch
OTCLMP
Override Table Clamp
PCKPARAM
Set up pecking tool,depth,infeed and retract parameters
PF
Floating Pressure Foot Switch
PPR
Programmable Plunge Rate Enable
PVS
Pre -vacuum Shut-off Switch
R,C
Reset Clocks
R,CP
Reset Program Clocks
R,CR
Reset Run Clocks
R,D
Reset All Cutter Distances
R,H
Reset All Hit Counters
R,T
Reset Tool Data
SBK
Single Block Mode Switch
SG
Spindle Group Mode
SIXM
Input From External Source
T
Tool Information
TCST
Tool Change Stop
UP
Upper Limit Set
VER
Selection of X and Y Axis Version
Z
Zero Set
ZA
Auxiliary Zero
ZC
Zero Correction
ZS
Zero Preset
Z+# or Z-#
Set Depth Offset
%
Rewind Stop
#/#/#
Link Tool for Automatic Tool Change
/
Clear Tool Linking
Page 4 of 49
Program Commands
12/11/2003
file://C:\CNC%20Programming.htm

Keyboard vs. Header Commands
Commands entered by you at the keyboard will also override duplicate commands in the part program body. Keyboard
entered commands and header commands have the same authority, and they can conflict with each other. But system
software uses the latest one entered as the governing authority. After a part program has been loaded, any commands
entered at the keyboard will override the same command in the header. But if the command is entered at the keyboard, and
then the part program is loaded, the header overrides the keyboard.
Beyond The Header: The Part Program Body
COMMAND
DESCRIPTION
A#
Arc Radius
B#
Retract Rate
C#
Tool Diameter
F#
Table Feed Rate;Z Axis Infeed Rate
G00X#Y#
Route Mode
G01
Linear (Straight Line) Mode
G02
Circular CW Mode
G03
Circular CCW Mode
G04
X# Variable Dwell
G05
Drill Mode
G07
Override current tool feed or speed
G32X#Y#A#
Routed Circle Canned Cycle
CW G33X#Y#A#
Routed Circle Canned Cycle
CCW G34,#(,#)
Select Vision Tool
G35(X#Y#)
Single Point Vision Offset (Relative to Work Zero)
G36(X#Y#)
Multipoint Vision Translation (Relative to Work Zero)
G37
Cancel Vision Translation or Offset (From G35 or G36)
G38(X#Y#)
Vision Corrected Single Hole Drilling (Relative to Work Zero)
G39(X#Y#)
Vision System Autocalibration
G40
Cutter Compensation Off
G41
Cutter Compensation Left
G42
Cutter Compensation Right
G45(X#Y#)
Single Point Vision Offset (Relative to G35 or G36)
G46(X#Y#)
Multipoint Vision Translation (Relative to G35 or G36)
G47
Cancel Vision Translation or Offset (From G45 or G46)
G48(X#Y#)
Vision Corrected Single Hole Drilling (Relative to G35 or G36)
G82(G81)
Dual In Line Package
G83
Eight Pin L Pack
G84
Circle
Page 5 of 49
Program Commands
12/11/2003
file://C:\CNC%20Programming.htm

G85
Slot
G87
Routed Step Slot Canned Cycle
G90
Absolute Mode
G91
Incremental Input Mode
G93X#Y#
Zero Set
H#
Maximum hit count
I#J#
Arc Center Offset
M00(X#Y#)
End of Program - No Rewind
M01
End of Pattern
M02X#Y#
Repeat Pattern Offset
M06(X#Y#)
Optional Stop
M08
End of Step and Repeat
M09(X#Y#)
Stop for Inspection
M14
Z Axis Route Position With Depth Controlled Contouring
M15
Z Axis Route Position
M16
Retract With Clamping
M17
Retract Without Clamping
M18
Command tool tip check
M25
Beginning of Pattern
M30(X#Y#)
End of Program Rewind
M45,long
message\
Long Operator message on multiple\ part program lines
M47,text
Operator Message
M50,#
Vision Step and Repeat Pattern Start
M51,#
Vision Step and Repeat Rewind
M52(#)
Vision Step and Repeat Offset Counter Control
M02XYM70
Swap Axes
M60
Reference Scaling enable
M61
Reference Scaling disable
M62
Turn on peck drilling
M63
Turn off peck drilling
M71
Metric Measuring Mode
M72
Inch Measuring Mode
M02XYM80
Mirror Image X Axis
M02XYM90
Mirror Image Y Axis
M97,text
Canned Text
Page 6 of 49
Program Commands
12/11/2003
file://C:\CNC%20Programming.htm
List of Equivalent Format One Commands
X and Y Coordinates
The location on the PC board where a hole is to be drilled or a router begins or ends a move is called a coordinate. A
coordinate is a pair of measurements used to locate that point. It is measured along an axis which runs from the front to the
back of the machine, and an axis which runs from left to right. These axes are perpendicular to each other and are known
as the X and Y axis. When the machine is not in the routing mode, the coordinate is also the command for a drill bit to
plunge into the panel and drill a hole. The coordinate tells the CNC-7 to move the spindle to the location and drill. There are
two ways to move from coordinate to coordinate and you must choose one of them when you are programming. The two
ways are absolute and incremental. Absolute means that every coordinate is measured to the same location on the board.
This location is called work zero. Incremental means that every coordinate is measured to the previous coordinate. Unless
you specify otherwise, the CNC-7 runs in the absolute mode, and part programs must be programmed for absolute. When
M98,text
Canned Text
M99,subprogram
User Defined Stored Pattern
P#X#(Y#)
Repeat Stored Pattern
R#M02X#Y#
Repeat Pattern (S&R)
R#(X#Y#)
Repeat Hole
S#
Spindle RPM
T#
Tool Selection; Cutter Index
Z+# or Z-#
Depth Offset
%
Beginning of Pattern (see M25 command)
/
Block Delete
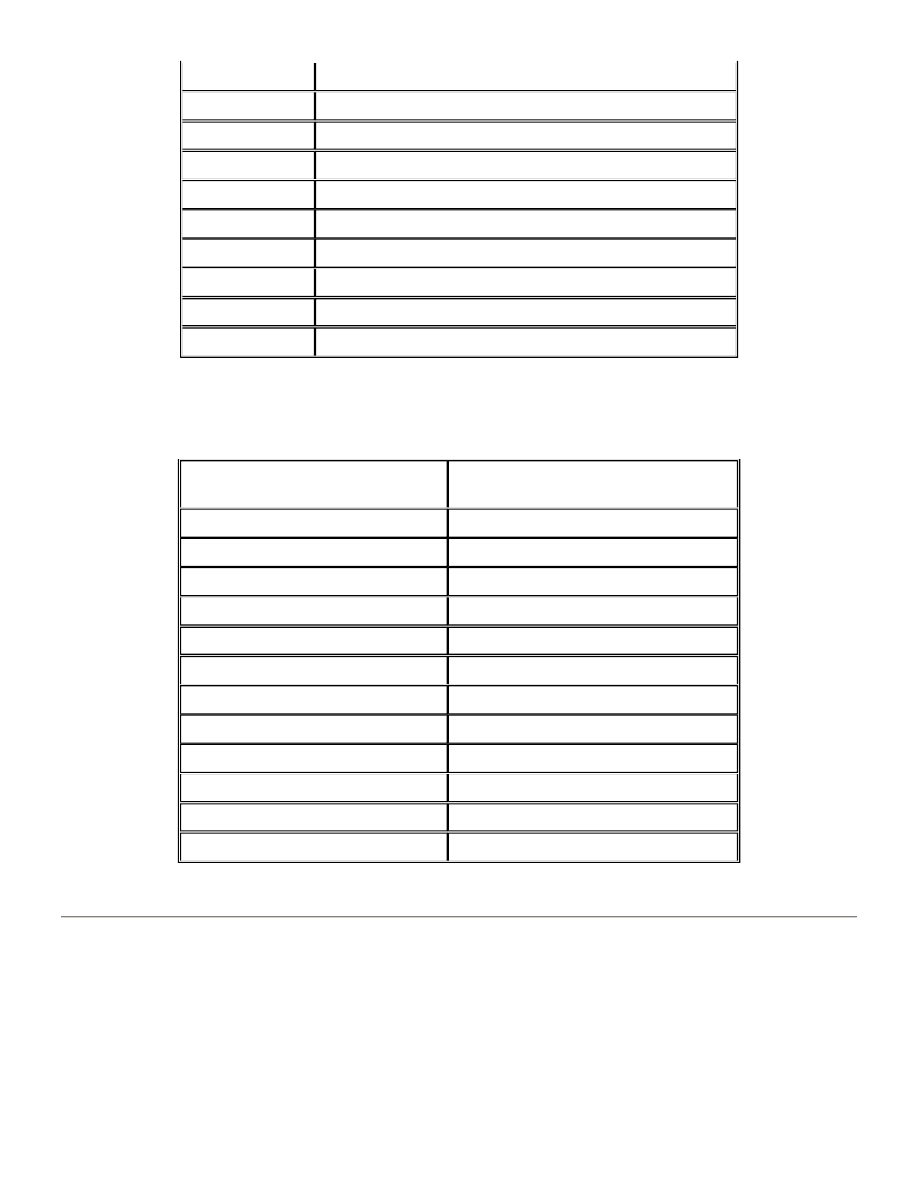
FORMAT TWO COMMAND
EQUIVALENT FORMAT ONE
COMMAND
G05
G81
M00
M02
M01
M24
M02
M26
M06
M01
M08
M27
M09
M00
M02X#Y#M70
M26X#Y#M23
M72
M70
M02X#Y#M80
M26X#Y#M21
M02X#Y#M90
M26X#Y#M22
R#M02
R#M26
Page 7 of 49
Program Commands
12/11/2003
file://C:\CNC%20Programming.htm
you program in the incremental mode, include the ICI,ON command in the part program header, or in the MACH.DAT file.
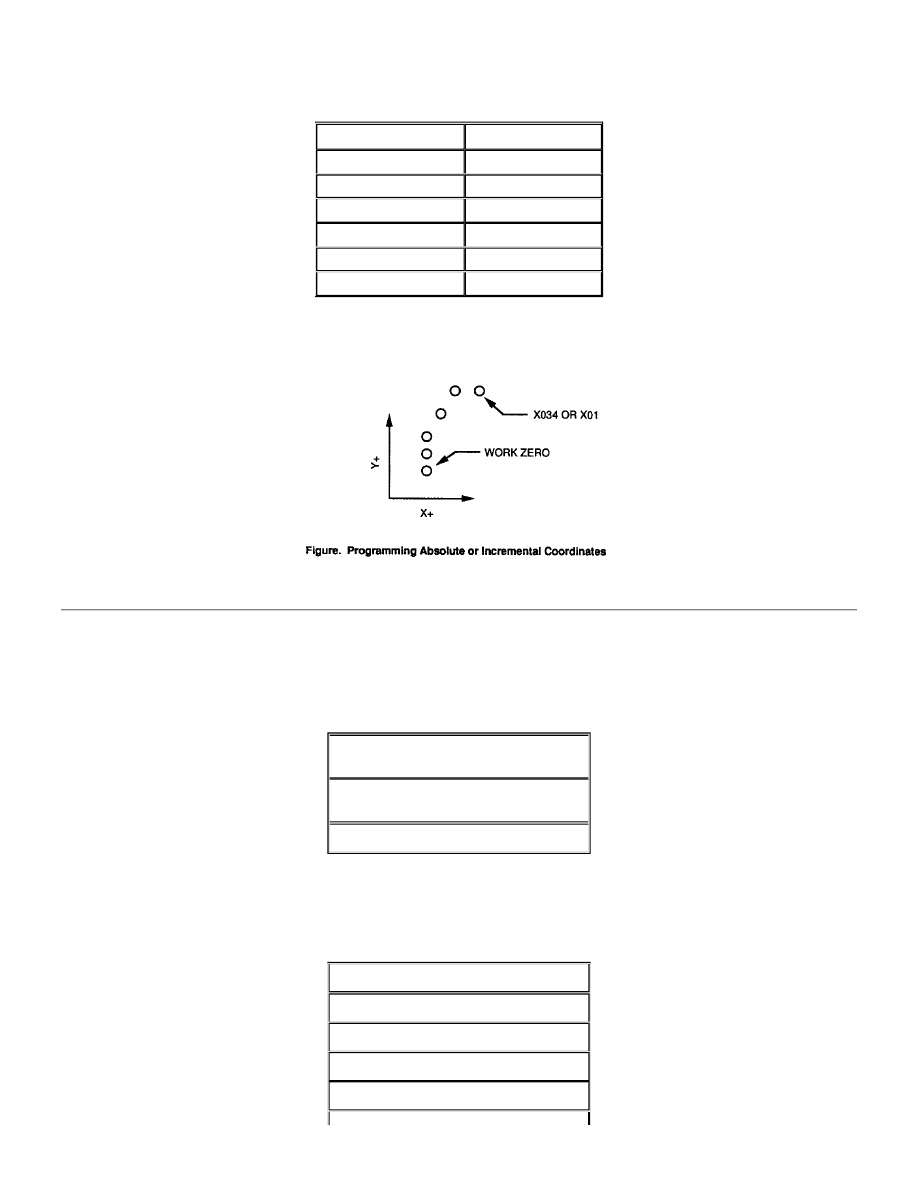
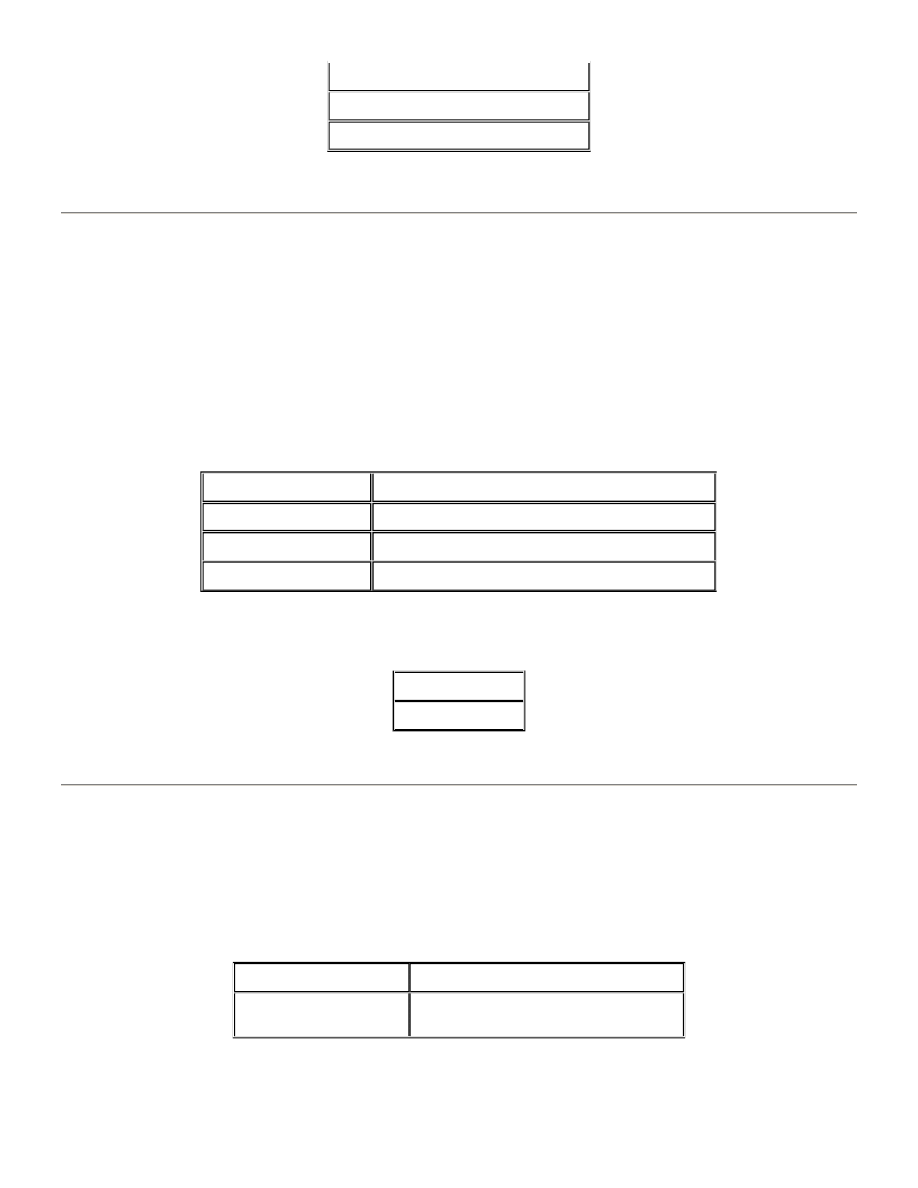
The following illustrates how a set of holes are programmed in either absolute or incremental mode. Note that when either
the X or Y coordinate does not change from one hole to another, it does not have to be repeated.
Inch vs. Metric
Coordinates are measured either in inch or metric (millimeters). Inch coordinates are in six digits (00.0000) with increments
as small as 0.0001 (1/10,000). Metric coordinates can be measured in microns (thousandths of a millimeter) in one of the
following three ways:
You specify the coordinate measurement you want by using the METRIC or INCH command in the program header. When
the program is running on the machine, all X and Y coordinates will be displayed on the screen in the form you have
chosen. Additionally, all other measurements will be displayed in this form, including the following:
ABSOLUTE
INCREMENTAL
XY
XY
Y01
Y01
Y02
Y01
X012Y032
X012Y012
X024Y044
X012Y012
X034
X01
Five digit 10 micron resolution
(000.00)
Six digit 10 micron resolution
(0000.00)
Six digit micron resolution (000.000)
Feed Rate
Tool Diameter
Spindle Upper and Lower Limit
Rout Depth
Spindle Retract Rate
Page 8 of 49
Program Commands
12/11/2003
file://C:\CNC%20Programming.htm
Leading and Trailing Zeros
When you type coordinates into the CNC-7, it is important that you understand leading and trailing zeros. The previous
section explains that the CNC-7 uses inches in six digits and metric in five or six digits. The zeros to the left of the
coordinate are called leading zeros (LZ). The zeros to right of the coordinate are called trailing zeros (TZ). The CNC-7 uses
leading zeros unless you specify otherwise through a part program or the console. You can do so with the INCH/METRIC
command discussed later in this chapter. If you don't specify leading or trailing zeros, the CNC-7 will automatically use the
last setting. With leading zeros, when you type in a coordinate, the leading zeros must always be included. If you don't, the
CNC-7 will misinterpret the coordinate and move to the wrong location on PC board. Trailing zeros are unneeded and may
be left off. The CNC-7 will automatically add them. This allows you to save time in typing the coordinates. If you have
selected trailing zeros, the reverse of the above is true. You must show all zeros to the right of the number and can omit all
zeros to the left of the number. The CNC-7 will count the number of digits you typed and automatically fill in the missing
zeros.
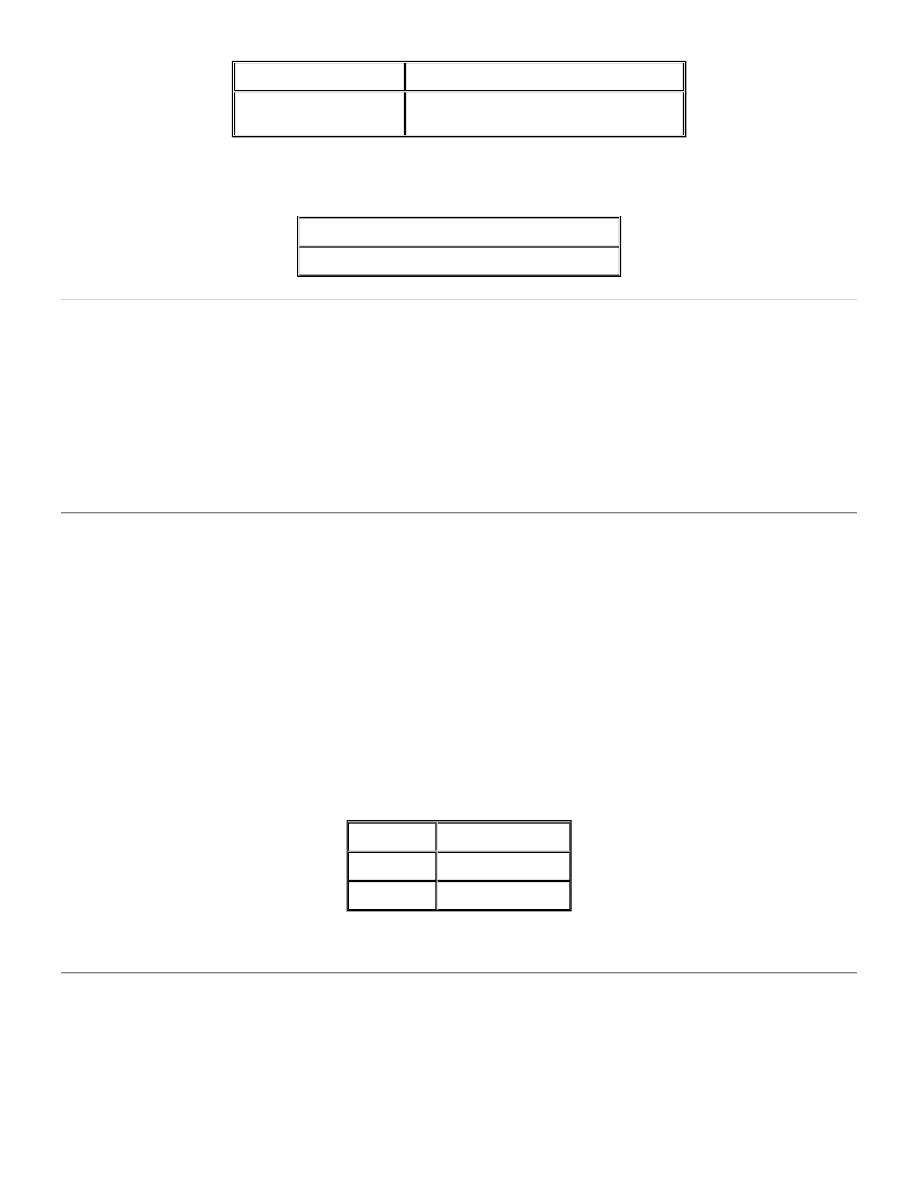
Here are some examples of using the leading zero inch mode:
Here are some examples of using the trailing zero inch mode:
The rules for typing leading and trailing zeros for other commands are discussed under each command.
Decimal Places
Decimals are not needed in either INCH or METRIC modes. But if you do use them, the decimal point will automatically
override leading zero or trailing zero mode. Coordinates can be typed with or without the decimal. If you use the decimal
and the coordinate distance is less than one inch or one centimeter, you can eliminate the zeros to the left of the decimal.
For example, in the INCH format:
The same applies to the METRIC format with three and four zeros to the left of the decimal. But in either case, if you have a
whole number to the left of the decimal, it must be included. For example:
All Zero Locations
Depth Offset
Routing Distance
X0075
Correct
X007500
Incorrect, the two trailing zeros are unnecessary
Y014
Correct
Y014000
Incorrect, the three trailing zeros are unnecessary
X7500 = 0.75 inch
X75 = 0.0075 inch
X.075
Correct
X00.075
Incorrect, the two zeros are
unnecessary
Page 9 of 49
Program Commands
12/11/2003
file://C:\CNC%20Programming.htm
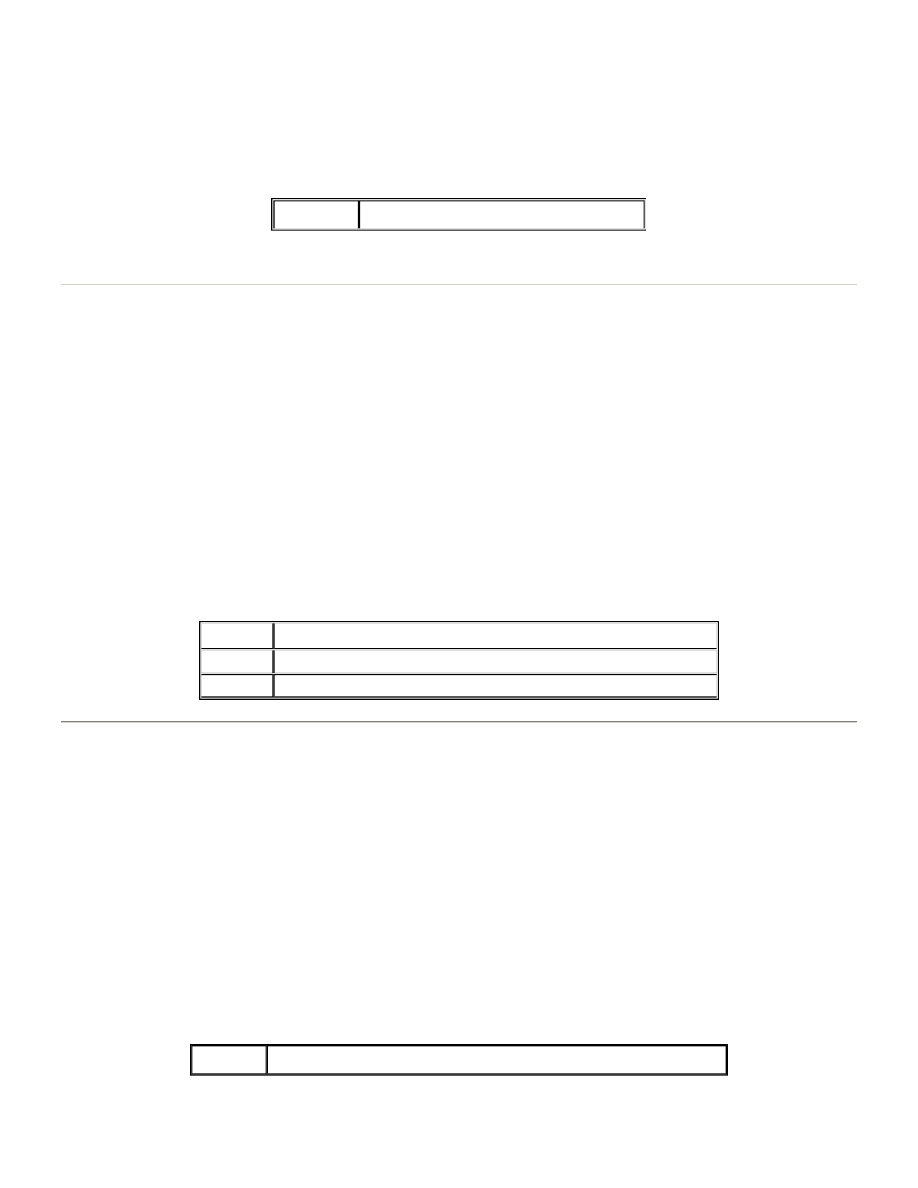
If you choose to type coordinates without the decimal, all zeros to the left of the decimal must be shown. For example:
Tool Commands
There are several commands used to select and control tools. Some are used separately and others are combined to form a
single command. Whenever tool commands are used in the header, they are strictly for loading tool data into the CNC -7.
When tool commands are intended for tool changing or for machine movements, they must be in the body of the program.
The # in each command indicates that a number is to be used to designate quantity, distance, speed, etc. From one to six
digits are used, depending on the command. The number of the tool specified with the tool command is the same as the
tool number on the Tool Data Page.
Tool Commands
Tool Selection
T#
T# is used to specify which tool is to be used next in the manual or automatic tool change mode. It may be used in the part
program header or body, or an M02 block step and repeat patterns. On machines with automatic tool change, the spindle
will put away the tool it is using, pick up the tool number you specify in the place of #, and move to the next coordinate in
the part program. On machines with manual tool change, the worktable will move to the part position and stop. The screen
will display the message in the Machine Status box. After changing the tool, you press the CYCLE START button and the
machine resumes operation. Tool numbers 1 through 9 may be specified with or without a leading zero. (e.g. 01 or 1)
Examples of usage:
Tool Selection with Compensation Index
T#(#) is used to select a specific tool and to set the Compensation Index for that tool. This command allows you to specify
four digits. The last two are for the index number. If you omit the last two digits, or specify zeros, the index will be set equal
to the tool number in the first two digits.
Compensation value is used in routing operations. Routing tools can bend and deflect away from the work, especially when
moved in the counterclockwise direction. The Compensation value offsets the path of the tool to compensate for the size
and deflection of the tool. For example, a tool of 0.092" diameter might be specified for a clockwise direction. In the
Y1.45
Correct
Y0001.45
Incorrect, the three zeros are
unnecessary
X00093 = 0.093 inch in inch format
Y00093 = 93 micron in metric format 000.00
T1
Tool number one
T01
Tool number one
T10
Tool number ten
Page 10 of 49
Program Commands
12/11/2003
file://C:\CNC%20Programming.htm
counterclockwise direction, however, you might need to use a diameter of 0.094". But you may not have such a diameter, or
it may not be possible or practical to switch tools. Instead, you can assign an index number for a tool with a diameter of
0.094" (Refer to the CP,#,#.# command in the Keyboard Commands chapter). When you identify the index number with your
0.092" diameter routing tool, the CNC-7 will offset the path of the tool as though it were 0.094" diameter.
The Compensation Index value must be entered before the rout mode is turned on (G00 command), and may not be
changed during routing moves.
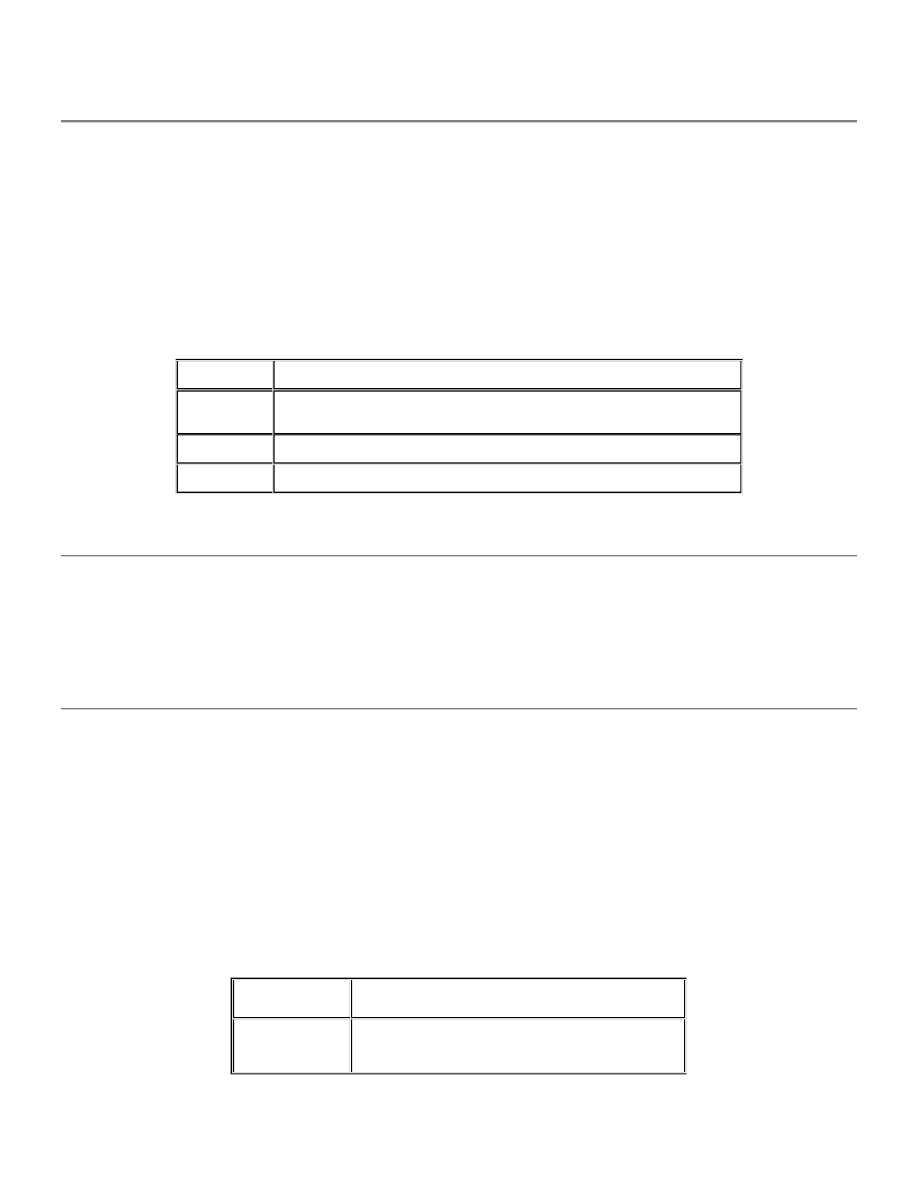
Example of usage:
See also: CP,#,#.#
Z-Axis Infeed
F#
F# is used within a routing sequence to set the worktable feed rate, or in a drilling sequence to set the spindle (Z-axis)
infeed rate. Feed rate values are always entered in leading zero format, e.g.: F2 means 200 inches per minute, and F02
means 20 inches per minute. The value you assign in place of #, indicates inches per minute (IPM) or millimeters per
second (mm/s). Decimals are not to be used with this command. They will produce a message when the part program runs
on the machine. Drilling feed rates must be given to the CNC-7 or the machine will not run. The rate may be specified in the
Tool Data Page, or through the F# command. The F# command may also be entered at the Tool Data Page to change the
infeed rate for a particular tool.
The drilling feed rate can be set from 10 to 500 IPM (4 to 212 mm/s), in increments of 1 IPM (1mm/s). The routing table feed
rate can be set from 10 to 150 IPM (4 to 63 mm/s), in increments of 1 IPM (1 mm/s). If you do not set a feed rate, the CNC-7
will use a maximum rate of 100 IPM for any router.
Examples of usage:
Retract Rate
B#
B# is used to set the spindle (Z-axis) retract rate, e.g., the speed at which the tool is withdrawn from the work. Retract
values are always entered in leading zero format, e.g.: B02 means 200 inches per minute, and B002 means 20 inches per
minute. The value you assign in place of # indicates inches per minute (in/min) of millimeters per second (mm/s). Decimals
are not to be used with this command. They will produce a message when the part program runs on the machine. The B#
command may also be entered at the Tool Data Page to change the retract rate for a particular tool. A default retract rate is
established when the CNC-7 is started. If NO B# command is specified for a tool, the default retract rate will be used. The
default rate may be changed using the RTR keyboard command. The retract rate can be set from 10 to 1000 IPM (5 to 425
mm/s), in increments of 1 IPM (1 mm/s). Unless altered by the RTR command, the default retract rate is 1000 in/min (425
mm/s).
Example of usage:
T0302
Tool number 3 with Compensation Index 2
T01F2
Tool number one with a spindle infeed rate of 200 IPM or 200 mm/s
F07
Worktable feed rate of 70 IPM or 70 mm/s for routing
F03
Worktable feed rate of 30 IPM or 30 mm/s for routing
T01B02
Tool number one with a spindle retract rate of 200 IPM or 200 mm/s.
Page 11 of 49
Program Commands
12/11/2003
file://C:\CNC%20Programming.htm
See also: RTR
Spindle RPM
S#
S# Sets the speed of spindle rotation. The value you assign in place of # indicates RPM in thousands. Trailing zeros are not
shown. The S# command may also be entered at the Tool Data Page to change the rate for a particular tool. The spindle
speed on most machines may be programmed from a minimum of 14,000 RPM to a maximum of 60,000 RPM for routers and
80,000 RPM for drilling tools. Some machines have spindles speeds greater than 100,000 RPM. When you specify a speed of
six digits on these machines, use a decimal point, followed by a number to indicate hundreds of RPM's. This command may
not be used by itself, but must be included in a tool selection block (T#S#).
Examples of usage:
Override Current Tool Feed OR Speed
G07
When G07 is used inside the part program, the tool feed or speed can be changed after G07 command. It only affects the
current part program.
Tool Diameter
C#
C# is used to select the tool diameter necessary for certain machine canned cycles. When feed and speeds are not
specified with Tool Diameter, the CNC-7 will load them from the tool diameter table if a tool diameter table has been loaded.
The value you specify in place of # indicates the diameter in thousandths of an inch, or microns, depending on which
measurement mode the machine is set for. Trailing zeros are not shown. The C# command may also be entered at the Tool
Data Page to change the diameter of a particular tool. This command should not be used by itself but must be included in a
tool selection command block (T#C#).
Examples of usage:
See also: Canned Cycle Commands
T01S612
Tool number one with a speed of 61,200 RPM
T06F200S61
Tool number six with a feed rate of 200 IPM or 20 mm/s and a speed of
61,000 RPM
T03S6
Tool number three with a speed of 60,000 RPM
T04S110.5
Tool number four with a speed of 110,500 RPM
T1C.04
Set Tool number one to .040" diameter (with feed
and speed from the tool diameter page).
T1C.04F200S65
Set Tool number one to .040" diameter with an
infeed rate of 200 and spindle speed of 65,000
RPM.
Page 12 of 49
Program Commands
12/11/2003
file://C:\CNC%20Programming.htm
Set Maximum Hit Count
H#
H# is used to make sure that only sharp drill bits are used to drill holes. You set the maximum number of times that a drill
tool may drill a hole (hit) by specifying a number in place of #. Hit counters keep track of the number of times each tool bit
drills a hole. When the counter equals the maximum set by this command, the tool bit is considered to be expired, and the
machine stops drilling. If other tools are linked to the expired tool, the machine will automatically change tools and
continue drilling. Otherwise, the worktable will move to the park position and stop. The H# command may also be entered at
the Tool Data Page to change the maximum number of hits for a particular tool. This command should not be used by itself,
but must be included in a tool selection command block (T#H#). Leading and trailing zeros do not apply and decimals are
not allowed. This command can also be used to turn off a hit counter so that the drill bit continues drilling. Type the H by
itself without a number and the hit counter for that tool will be turned off.
Examples of usage:
Depth Offset
Z+# or Z-#
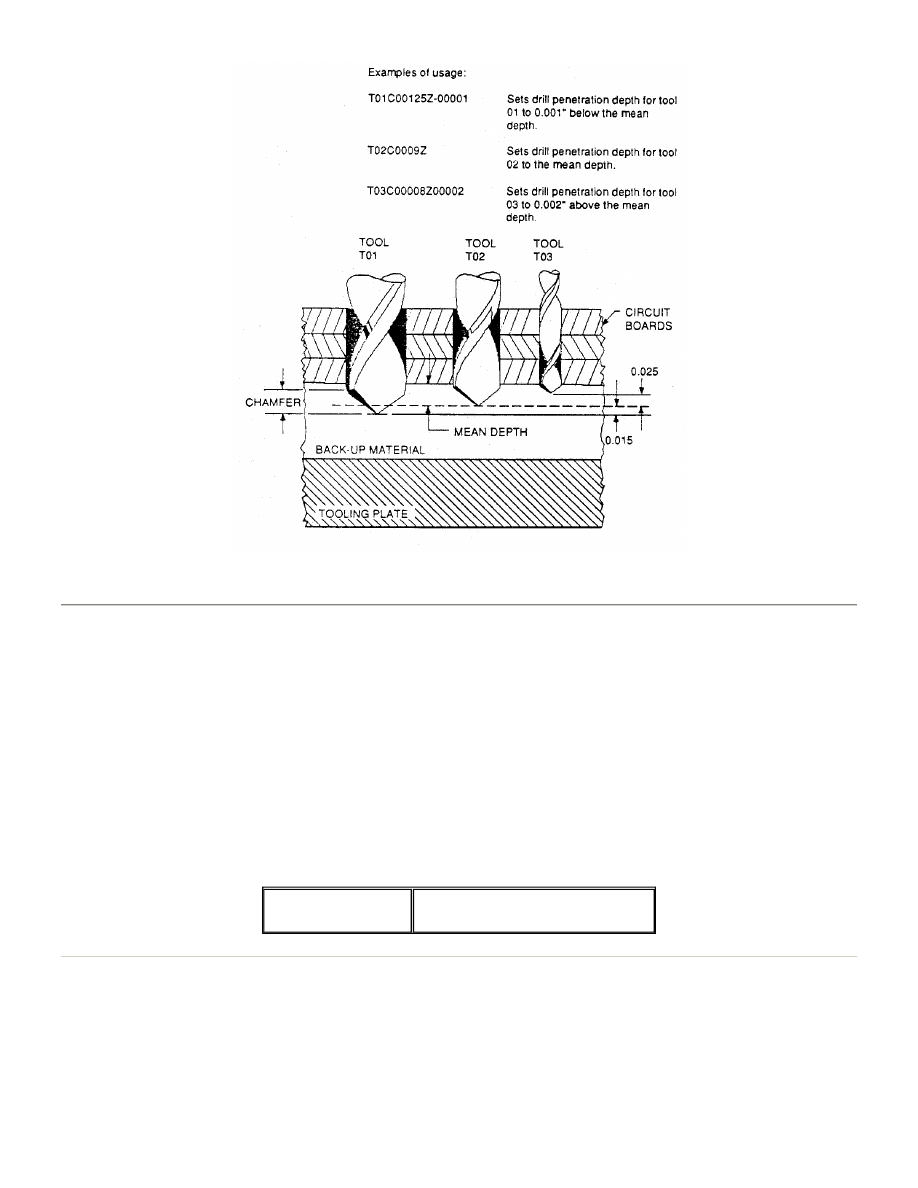
Z+# (or Z-#) Sets the Depth Offset for tools. This command is used in conjunction with T# command. Depth Offset may be
programmed for each logical tool. A mean depth, common to all tools, can be supplied through the part program header, or
by you through the keyboard, or through the LOWER LIMIT or ROUT DEPTH switches on the Touch Screen. The Depth
Offset is programmed as a deviation or offset from the mean depth. You supply the offset in place of #.
The offset value will be in inch or metric, LZ or TZ, depending on how the machine is set. The offset can be supplied in
increments of 0.001" (0.01mm). Decimal mode may be used. Plus signs (+) may be omitted, but minus signs (-) must be
used to indicate negative values. A positive value offsets the depth of the tool above the mean depth set by you or the part
program header. A negative value represents a distance below the mean depth.
Depth Offset permits control of drill penetration depth into the backup material. A large tool Depth Offset, requires a greater
penetration depth than does an intermediate size tool, or a small tool. Accurate penetration depth is necessary to ensure
that the tool chamfer clears the back of the last circuit board in the stack being drilled. The mean depth, plus the
programmed Depth Offset, gives you the actual depth for that tool. The resulting actual depth must not be less than zero
because this represents the lower limit of Z-axis (spindle) travel. A minimum Z-axis stroke length must be maintained.
Therefore, the actual depth must be at least 0.125" (3.18mm) lower than the Upper Limit set.
The Z# command may also be entered at the Tool Data Page to change the depth offset for a particular tool. Depth Offsets
may be included with preprogrammed infeed and speed information through the keyboard or a part program header.
Offsets can also be stored on the Diameter Page. The Depth Offset may also be included in a part program as part of an
integral feed and speed block.
Examples of usage:
T03H2000
Tool number three set at 2,000 hits maximum
T01H
Tool number one maximum hit counter is turned off
T01C00125Z-00001
Sets drill penetration depth for tool 01 to 0.001" below the mean
depth
T02C0009Z
Sets drill penetration depth for tool 02 to the mean depth
T03C00008Z00002
Sets drill penetration depth for tool 03 to 0.002" above the mean
depth
Page 13 of 49
Program Commands
12/11/2003
file://C:\CNC%20Programming.htm
Link Tools for Automatic Tool Changers
#/#/#
#/#/# links tools together so that when one tool expires (too dull to drill anymore), the machine will automatically change
tools and continue drilling. Naturally, all the tools linked together must be the same size. You select the tools to be linked
by specifying a tool number in place of #. You may link as many of the same size tools together as you need. When the
CNC-7 reads this command in your part program, it will update the Tool Data Page to show which tools are linked together.
Tools will be used in sequence from left to right, as you specify in the command.
The tool linking command may also be entered at the Tool Data Page to change the linking arrangement. Tool linking does
not apply to the Tool Management System (TMS). The maximum hit counter tells the CNC-7 when it is time to replace a
worn-out tool, and tool linking tells the CNC-7 which tool is to be used next. Tool linking is used in conjunction with
Automatic Tool Change (ATC). When ATC is OFF, the CNC-7 will PARK the worktable and instruct you to replace the tool in
the collet. If ATC is ON, but tool linking is disabled, the machine will put the tool away and request a replacement.
Example of usage:
Clearing Tool Linking
A slash, all by itself in a block, will clear any previous tool linking performed by the Tool Linking command described
above. When the CNC-7 reads this command in your part program, it will clear the links, which are displayed on the Tool
data page if your machine is equipped with an ATC Toolchanger.
Hierarchy of Tool Commands
1/5/6
Link tools number one, five, and
six.
Page 14 of 49
Program Commands
12/11/2003
file://C:\CNC%20Programming.htm

When several tool commands are combined into one, the order of their appearance in the combined command can be very
important. The CNC-7 reads the command from left to right. The commands on the left can be overridden by the commands
to the right.
For example, look at the following two sample commands:
Both commands contain the same information, but in a different order. In the first example, the CNC-7 selects tool 01, sets
the feed at 190 IPM, sets the spindle speed at 73,000 RPM, and then is told that the diameter of the bit is 0.0038". The CNC-7
will now look at the Tool Diameter Page and use the feed and speed listed, if any, in the table. It may ignore the feed and
speed you specified in the command. In the second sample, the opposite is true. The CNC -7 selects tool 01, looks in the
Tool Diameter Page for a drill bit of 0.0038" diameter, then sets the feed at 190 IPM and the speed at 73,000 RPM. The feed
and speed in the Diameter Page will be ignored.
Tool Changing
If you have only manual tool changing on your machine, then you must specify in the part program when you want to
change the tool. If you have automatic tool change on your machine, you need to specify not only when to change tools,
but which tool the spindle is to pick up. Changing a tool is a simple matter. When you get to the point in the program where
the tool is to be changed, just type in a tool command and specify which tool is to be used for the next operation. Nothing
has to be said about the tool that you are dropping. If you need to have a special RPM or infeed rate used with the tool,
include it with the tool command.
Drilling and Routing Commands
When you switch from a drill bit to a router, or vice versa, the CNC-7 needs to know what mode it is in: drilling or routing.
This is done with the G00 or G05 commands, which are described later in this chapter. As soon as the CNC-7 encounters
one of these commands in the part program, it knows which mode it is in. Several other commands will also tell the CNC-7
whether it is in drilling or routing mode. These are the canned cycles commands which are described in the next section.
Rout Mode
G00
G00 turns the routing mode on and the drilling mode off. This command is required before any routing can be performed.
An X and Y coordinate must be provided to move the worktable to a starting point for routing. When the CNC-7 encounters
this command, the worktable moves to the X,Y coordinate. The spindles will not plunge into the work until a plunge
command (e.g. M15) is given. Compensation is automatically turned off during the move and can be turned on again after
the move. The G00 command remains in effect until another G00 command, or a G01, G02, G03, or G05 command is
encountered. Do not use this command when the Z-axis is in the rout position. The tool can be damaged by a high speed
move.
Format: G00X#Y#
Drill Mode
G05
T01F190S73C.038
T01C.038F190S73
Page 15 of 49
Program Commands
12/11/2003
file://C:\CNC%20Programming.htm
G05 turns the routing mode off and returns to the default drill mode. This command is programmed in a block by itself and
remains in effect until a G00 is encountered. G05 is not needed if routing has not been turned on by any rout command in
the part program. Any coordinates following the G05 command will cause the worktable to move at maximum velocity to the
command position and perform a drill stroke. The spindles will start to rotate above the tool holders with Automatic Tool
Change (ATC) ON, and at the Drill Ready position with ATC OFF.
Special note: The G81 command, when used in Format 1, is equivalent to the G05 command. The G81 command, when used
in Format 2, becomes equivalent to the G82 command.
Routing Commands
Excellon has developed a series of fourteen commands which are used strictly for routing. Each of these commands are
presented here.
Linear Move
G01
G01 turns on linear interpolation mode. This means that the machine will begin routing in a straight line. If you supply an X
and/or Y coordinate with the command, the machine will rout a straight line from the current position to the coordinate
position. If you do not supply coordinates, the CNC-7 will look for coordinates in a succeeding block, and rout to the first
coordinate found. Unless a different rate has been set, linear movement will occur at a default rate of 100 IPM (42.3 mm/s) at
100% feed rate. This can be overridden with the F# command, described in the Tool Commands section of this chapter, or
with the FEED RATE buttons on the Touch Screen.
Format: G01(X#)(Y#)
Circular Clockwise Move
G02
G02 turns on circular interpolation mode and sets clockwise direction of travel. If you supply an X and/or Y coordinate with
the command, the worktable will move to that coordinate position. The move will be made along an arc in a clockwise
direction at a controlled velocity. If you do not supply coordinates, the CNC-7 will look for coordinates in a succeeding
block, and rout to the first coordinate found. The arc must be equal to or less than 180 degrees. The arc radius or the arc
center offset is specified either by the A# command or the I#J# command. These commands are indicated as optional. If
they are not included in the G02 command, they must be included in a previous block of the program, either alone or with
another routing command. The A# and I#J# commands are discussed in the next sections. Unless a different rate has been
set, movement will occur at a default rate of 100 IPM (42.3 mm/s) at 100% feed rate. This can be overridden with the F#
command, described in the Tool Commands section of this chapter, or with the FEED RATE switches on the Touch Screen.
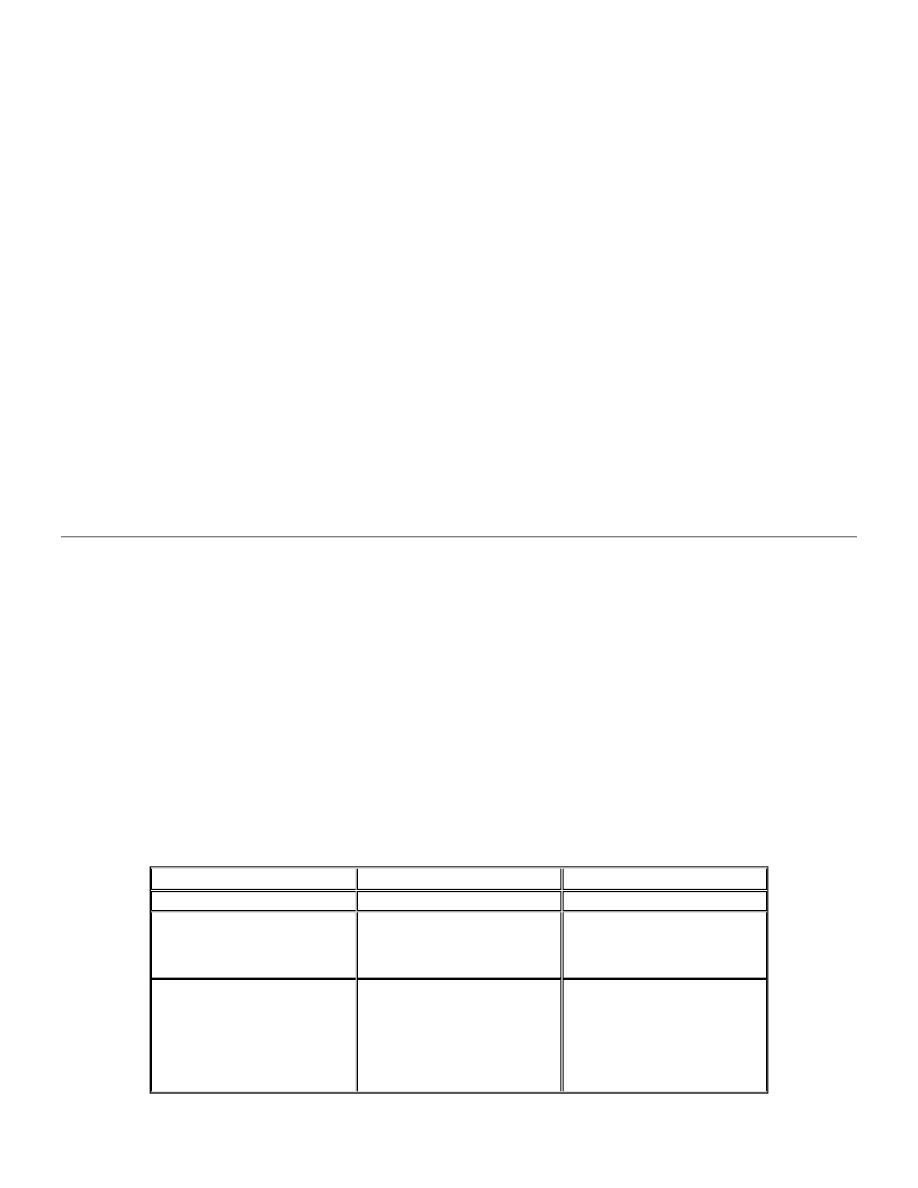
Examples of usage (these are three separate examples):
Format: G02(X#)(Y#)(A#) G02(X#)(Y#)(I#J#)
EXAMPLE NUMBER
COMMAND
DESCRIPTION
1
G02X0245Y021A00075
Sets radius to 0.075"
2
G02X0245Y021A00075
X025567Y020567
Sets radius to 0.075"
Circular clockwise move
with 0.075" radius
3
G02X0245Y021A00075
X025567Y020567
X0246Y0154A0015
Sets radius to 0.075"
Circular clockwise move
with 0.075" radius
Circular clockwise move
with 0.15" radius
Page 16 of 49
Program Commands
12/11/2003
file://C:\CNC%20Programming.htm
Circular Counterclockwise Move
G03
G03 turns on circular interpolation mode and sets counterclockwise direction of travel. If you supply an X and/or Y
coordinate with the command, the worktable will move to that coordinate position. The move will be made along an arc in a
counterclockwise direction at a controlled velocity. If you do not supply coordinates, the CNC-7 will look for coordinates in
a succeeding block, and rout to the first coordinate found. The arc must be equal to or less than 180 degrees. The arc
radius or the arc center offset is specified either by the A# command or the I#J# command. If they are not included in the
G03 command, they must be included in a previous block of the program, either alone or with another routing command.
The A# and I#J# commands are discussed in the next sections. Unless a different rate has been set, movement will occur at
a default rate of 100 IPM (42.3 mm/s) at 100% feed rate. This can be overridden with the F# command, described in the Tool
Commands section of this chapter, or with the FEED RATE switches on the Touch Screen.
Format: G03(X#)(Y#)(A#) G03(X#)(Y#)(I#J#)
Arc Radius
A#
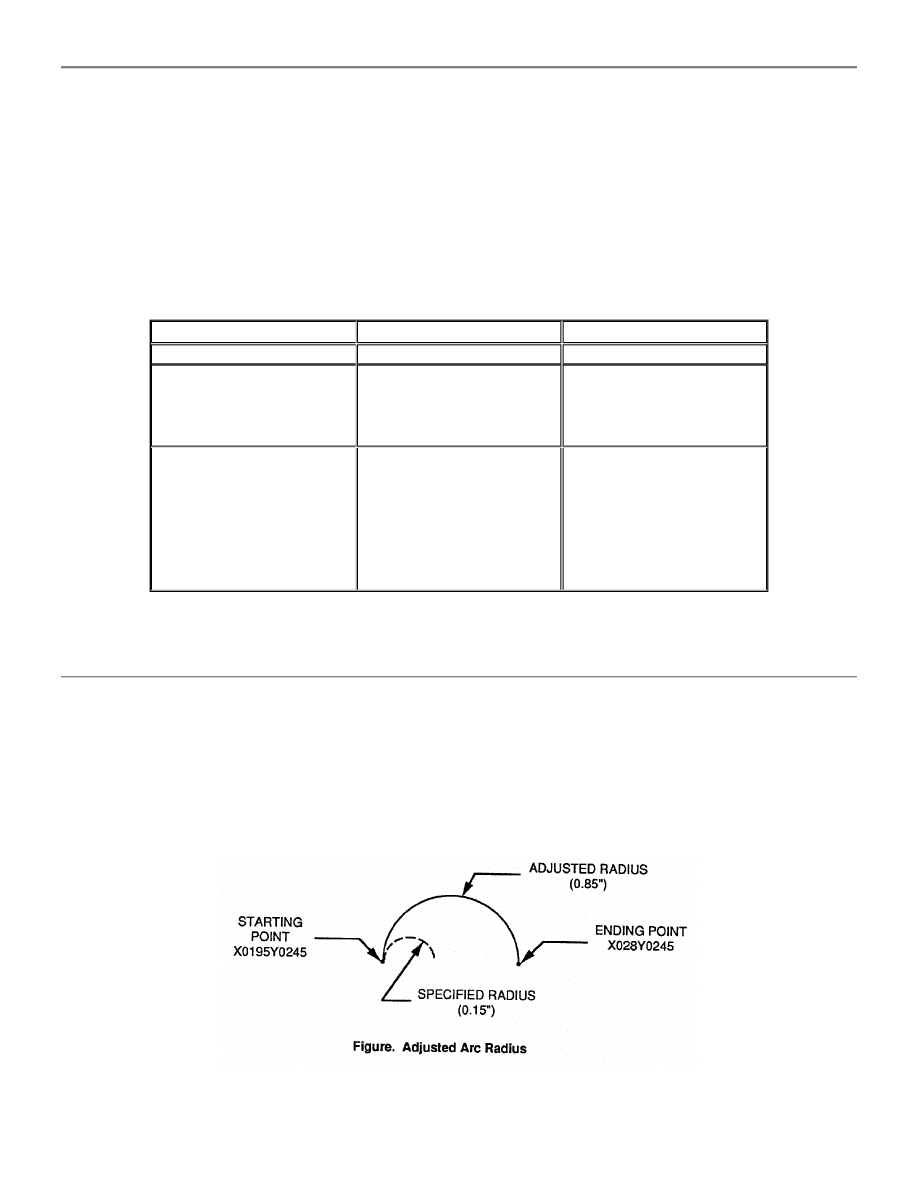
A# Specifies the arc radius of a circular move. You specify a radius in place of #. The digits you supply will be in inch or in
metric mode, however the system is set. The arc radius command is used in conjunction with the G02, G03, G32, or G33
commands discussed in this section. If the radius you specify does not fit the X,Y coordinates supplied with these
commands, the CNC-7 will adjust the arc to fit the coordinates. The following figure shows how the arc is adjusted.
EXAMPLE NUMBER
COMMAND
DESCRIPTION
1
G03X0245Y021A00075
Sets radius to 0.075"
2
G03X0245Y021A00075
X025567Y020567
Sets radius to 0.075"
Circular
counterclockwise move
with 0.075" radius
3
G03X0245Y021A00075
X025567Y020567
X0246Y0154A0015
Sets radius to 0.075"
Circular
counterclockwise move
with 0.075" radius
Circular
counterclockwise move
with 0.15" radius
Page 17 of 49
Program Commands
12/11/2003
file://C:\CNC%20Programming.htm
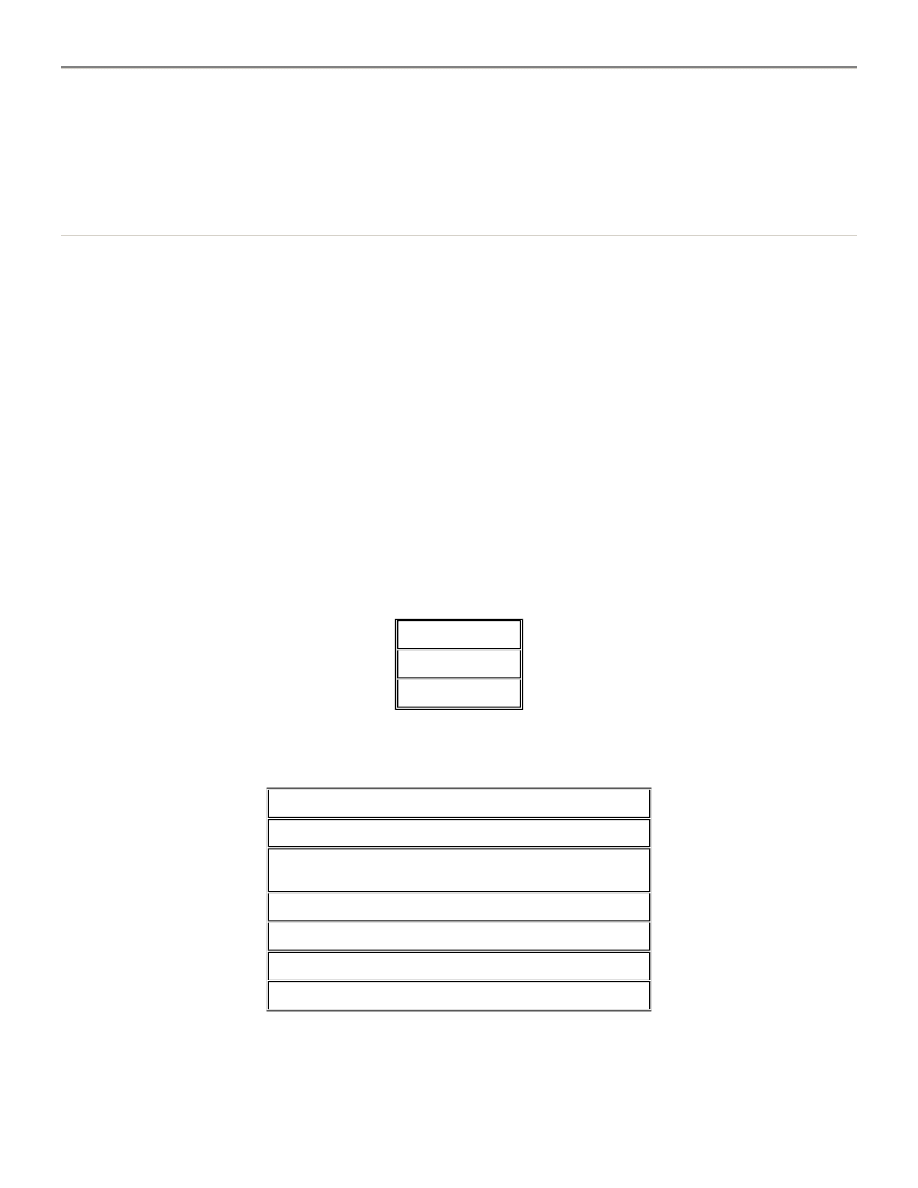
Arc Center Offset
I#J#
I#J# Specifies the distance from the arc center to the starting point of the arc to be routed. I# specifies the offset distance
along the X axis and J# specifies the offset distance along the Y axis. I and J distances are measured from the arc center,
not from work zero.
Routed Circle Canned Cycle CW or CCW
G32
G33
G32 or G33 is used to rout out an inside circle. The G32 command routs in a clockwise (CW) direction, and the G33
command routs in a counterclockwise (CCW) direction. These commands provide automatic plunge, retract, and
compensation with plunge and retract points off the circle to prevent gouging. You supply the coordinates for the center of
the circle in place of X#Y#, and a radius in place of A#. A# may be omitted if the radius is the same as the previous rout
move. The minimum radius size is one half of the Compensation Index value, plus 0.01" (0.254 mm). Anything less results in
a message. A# can be omitted if the radius is the same as one specified several rout moves back, with no radius being
specified in between.
Note: Cutter compensation is always used. Commands G32 and G33 must be used for each inside circle to be cut. The
pattern repeat code P cannot be used with these two commands. The G32 and G33 commands cause the machine to plunge
0.01 inch (0.254mm) off the edge of the circle, rout 540 degrees in the appropriate direction, end up 0.1 inch (2.54mm) off the
edge of the opposite side of the circle, and retract. The Feed command (F#) may be entered in the block prior to the G32 or
G33 commands to set the Table Feed Rate.
For example:
The G32 command will generate the following sequence internally:
Note: If a specific controlled table feed rate is desired, the G32 or G33 must be preceded with a G00 block containing the
feed rate.
Format: G32X#Y#A# G33X#Y#A#
G00
F02
G32X04Y04A005
G00X#Y#
M15
G02X1Y1Ac (where Ac = A# - one half compensation
value)
Y2
Y1
XrYr
M17
Page 18 of 49
Program Commands
12/11/2003
file://C:\CNC%20Programming.htm

Cutter Compensation Off
G40
G40 turns cutter compensation off. This command is programmed in a block by itself. Cutter compensation is discussed
with the G41 and G42 commands below, and with the Cutter Compensation Page.
THIS COMMAND MUST NOT BE USED WHILE PLUNGED!
Example of usage:
G40
See also: G41, G42, Cutter Compensation Page
Cutter Compensation Left
G41
G41 turns cutter compensation on for the tool being used to rout. The compensation path is left of the part relative to the
direction that the tool is moving.
THIS COMMAND MUST NOT BE USED WHILE PLUNGED! A Compensation Index must be specified on the Cutter
Information Page for the tool being used. Without an Index there will be no compensation applied to the tool after
compensation is turned on. A value must be assigned to the index number. Compensation will continue for all routing
moves until a G00, G40, or G42 command is encountered, or the part program ends. The command must be programmed in
a block by itself.
Example of usage:
G41
See also: G40, G42, Cutter Compensation Page, Compensation Index
Cutter Compensation Right
G42
G42 turns cutter compensation on for the tool being used to rout. The compensation path is right of the part relative to the
direction that the tool is moving.
THIS COMMAND MUST NOT BE USED WHILE PLUNGED! A Compensation Index must be specified on the Cutter
Information Page for the tool being used. Without an index there will be no compensation applied to the tool after
compensation is turned on. A value must be assigned to the index number. Compensation will continue for all routing
moves until a G00, G40, or G41 command is encountered, or the part program ends. This command must be programmed in
a block by itself.
Example of usage:
G42
See also: G00, G40, G41
Z Axis Rout Position with Depth Controlled Contouring
Page 19 of 49
Program Commands
12/11/2003
file://C:\CNC%20Programming.htm

M14
M14 is provided for routing machines equipped with the optional router depth control scale. The M14 command performs
the same function as the M15 command and also enables Depth Control Contouring. The command causes the spindle to
plunge to the Rout Down position, the position from which rout moves are made. The vacuum is turned on and Depth
Controlled Contouring is enabled. To perform Depth Controlled Contouring, depth control must be enabled and the tool
must be declared as a depth controlled tool. A depth controlled plunge will be performed, where the machine senses the
touchdown of the pressure foot to determine the proper depth. Throughout the cut, the height of the material is
continuously monitored. The spindle height is adjusted automatically to maintain a constant depth into the material. Depth
Controlled Contouring is turned off by G32/G33 and M15 commands, and at End of Program. With the exception of the G32
and G33 commands, a rout position command must be used before any rout moves are made. When a rout move is
complete, the spindles are retracted, and the worktable moves to another rout position. A rout position command must then
be used again before starting the rout move.
Z Axis Rout Position
M15
M15 causes the spindle to plunge to the Router Down position. This is the position from which rout moves are made. The
vacuum is turned on and the spindle clamps are applied. For machines so equipped, if depth control is enabled and the tool
is declared as a depth control tool, a depth controlled plunge will be performed. This is where the machine senses the
touchdown of the pressure foot to determine the proper depth. This depth is then maintained for the duration of the cut.
With the exception of the G32 and G33 commands, a rout position command must be used before any rout moves are
made. When a rout move is complete, the spindles are retracted, and the worktable moves to another rout position. A rout
position command must then be used again before starting the rout move.
Retract with Clamping
M16
M16 turns off vacuum, releases the spindle clamps, and causes the spindle to retract out of the Router Down position to the
Upper Limit position.
The Floating Pressure Foot is activated 0.2" (5mm) before the end of the line segment preceding the M16 Retract command,
unless the Pressure Foot Switch is off. The M16 command is programmed in a block by itself.
Retract without Clamping
M17
M17 turns off vacuum, releases the spindle clamps, and causes the spindle to retract out of the Router Down position to the
Upper Limit position.
The Floating Pressure Foot is not activated by this command. The M17 command is programmed in a block by itself.
Canned Cycle Commands
Most PC boards have integrated circuits installed in them. These circuits use a pin pattern that is standard throughout the
electronics industry. By using a simple command, you can type the coordinates of two pin holes and the CNC -7 will
Page 20 of 49
Program Commands
12/11/2003
file://C:\CNC%20Programming.htm
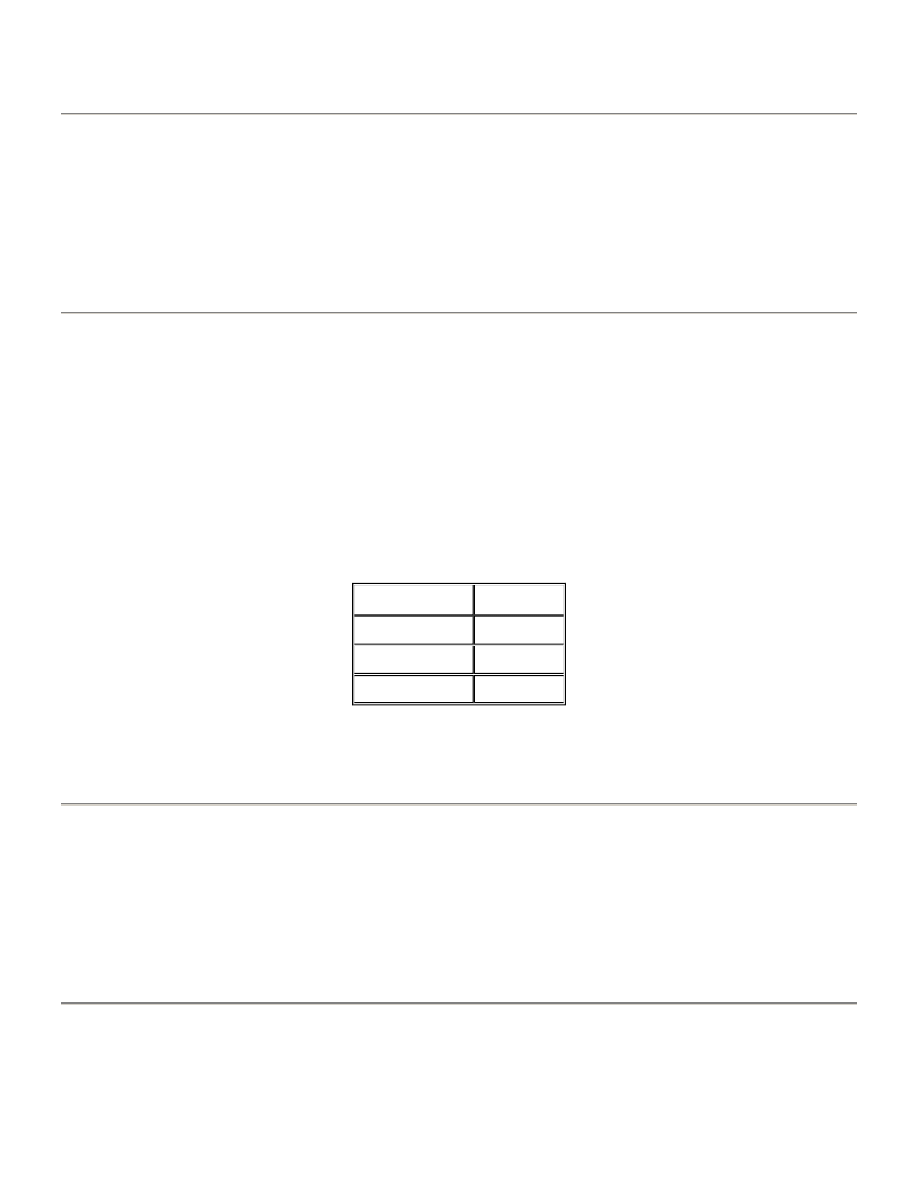
automatically drill the rest. This is called a "canned cycle". Excellon has supplied you with commands for drilling a large
hole or a slot when you don't have a router to use. These are also canned cycles.
Excellon Supplied Stored Patterns
Excellon has built five canned cycles into system software for your use:
Dual In Line Package 8 Pin Circular L Package Drill a large hole with a drill bit Drill a slot with a drill bit
Each of these cycles is described below.
Dual In Line Package
G82
G82 Drills a dual in line integrated circuit hole pattern. The optional X and Y values in the first block of the command
determine the space between the holes and the space between the rows of holes. The X value determines the spacing
between the holes, and Y value determines the space between the two rows. If these parameters are omitted, the X and Y
values will be 0.100 and 0.300 respectively. The next two blocks in the command contain X and Y coordinates specifying the
two opposite corners of the desired pattern. The CNC-7 uses the two coordinates to determine the number of pins, and
locations of the pattern, and the direction of the pattern. The G82 command drills a Dual In Line Package in both Format 1
and Format 2. The G81 and G82 commands both do the same thing in Format 2. The G81 command in Format 1 however, is
equivalent to the G05 command.
Note: Do not use the G82 command to program square packages. Since the G82 command is only given the two corners of
the pattern, it will not know which side to put the pins on. You may also see different results from one machine type to
another. Use the repeat hole commands to generate square patterns where necessary.
Eight Pin L Pack
G83
G83 Drills a circular eight pin package with pin spacing of 0.400 inch. You supply the coordinates for two opposite holes.
They are on either the vertical or horizontal centerline of the pattern, whichever you choose.
Format: G83 X#Y# X#Y#
Canned Circle
G84
G84 Cuts a hole by drilling a set of overlapping holes around the circumference of a circle. The hole is programmed by
Format 2
Format 1
G82/G81(X#Y#)
G82(X#Y#)
X#Y#
X#Y#
X#Y#
X#Y#
Page 21 of 49
Program Commands
12/11/2003
file://C:\CNC%20Programming.htm
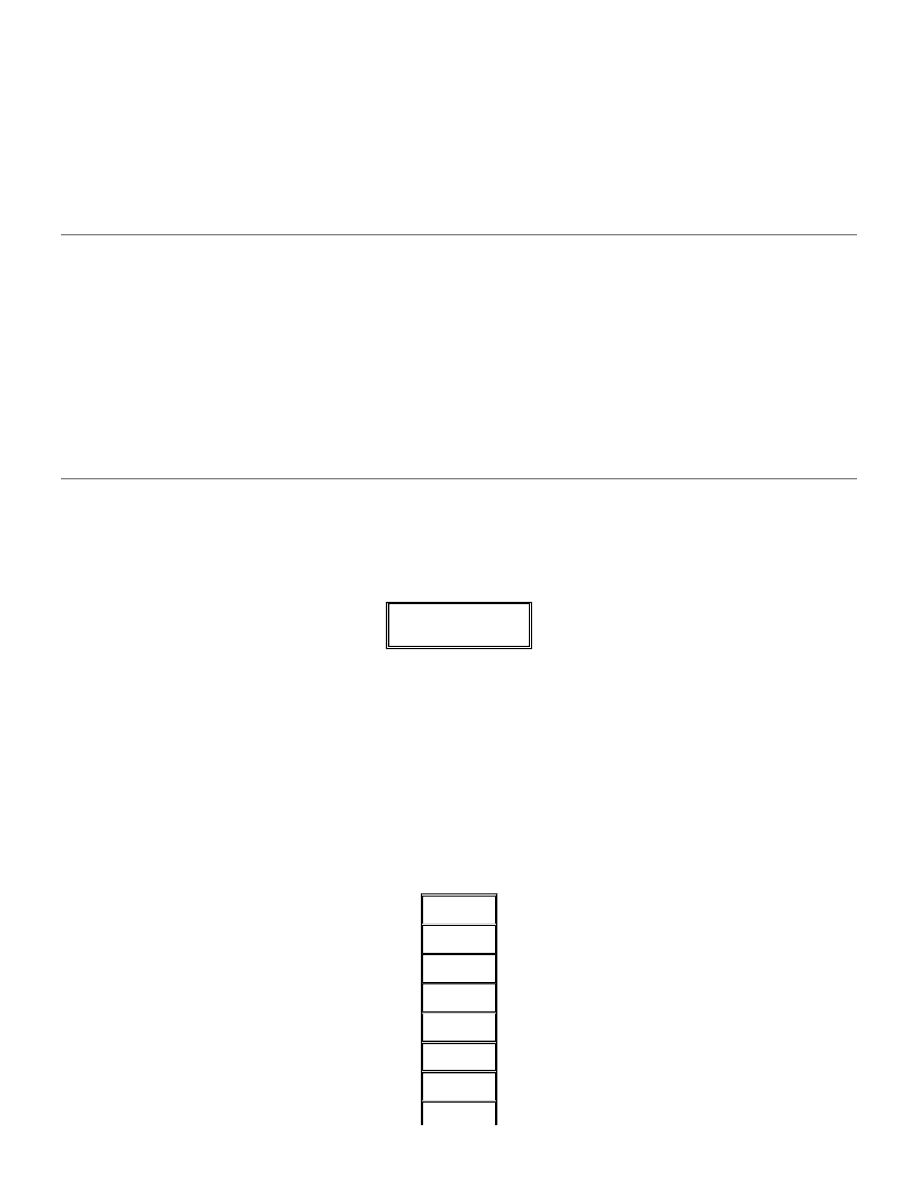
specifying the center of the circle with an X and Y coordinate, followed by another G84 command, followed by an X
dimension which specifies the diameter of the circle in thousandths of an inch or microns. This command must be in one
block. It may not be broken up onto different lines (blocks) of the part program. The smallest hole diameter allowed is twice
the tool diameter. If a smaller diameter is specified, the CNC-7 will display a message on the screen. The CNC -7 will use the
drill size found in the tool diameter table to compensate the cutting radius. If the size is zero (not specified), a 0.125
diameter will be assumed by the CNC-7. Drilling overlapping holes around the circle creates a hole. This leaves protrusions
around the edge of the hole. The holes are spaced close enough that these protrusions are less than 0.0005".
Format: X#Y#G84X#
Slot
G85
G85 Cuts a slot by drilling a series of closely spaced holes between two points. The start of the hole is programmed with an
X and Y coordinate, followed by the command, followed by the ending X and Y coordinate. The tool is specified with a T
command prior to the G85 command. The tool size MUST be specified prior to using this command. The size may be
provided by the Operator through the console, in the part program body, or the part program (M48) header. The slot is as
wide as the drill bit used. The slot is created by drilling a series of evenly spaced adjacent holes from one end of the slot to
the other. This leaves protrusions around the edge of the hole. Then another set of spaced holes is drilled between the
previous set. This continues until a smooth sided slot has been produced. The holes are spaced close enough that these
protrusions are less than 0.0005".
Routed Step Slot Canned Cycle
The G87 code is used to rout a slot by making multiple passes. Each pass cuts deeper into the slot by a specified amount
until the desired depth is reached.
The form of the G87 block is:
Where:
X1Y1 - Start of slot X2Y2 - End of slot Z-# - Depth increment (must be a negative value) U# - Initial depth offset
The beginning and ending points (X1Y1, X2Y2) define the center of the slot at each end. Cutter compensation is NOT
applied during step slot routing. The final depth of the slot must be specified according to the current depth mode, prior to
the G87 block. This may be done either within or outside of the part program. G87 supports all depth modes, i.e. depth
control and non-depth control routing. The initial depth (U code) is given as a positive offset above the final depth. The
depth increment (Z code) is a negative value specifying the distance the cutter will plunge each pass through the slot. Note
that the final plunge distance may be reduced in order to complete the slot at the proper depth. The G87 command
internally generates the following program sequence:
X1Y1G87X2Y2Z-
#U#
G40
T#Z#
G00X1Y1
M15
G01
X2Y2
G00X2Y2
Page 22 of 49
Program Commands
12/11/2003
file://C:\CNC%20Programming.htm
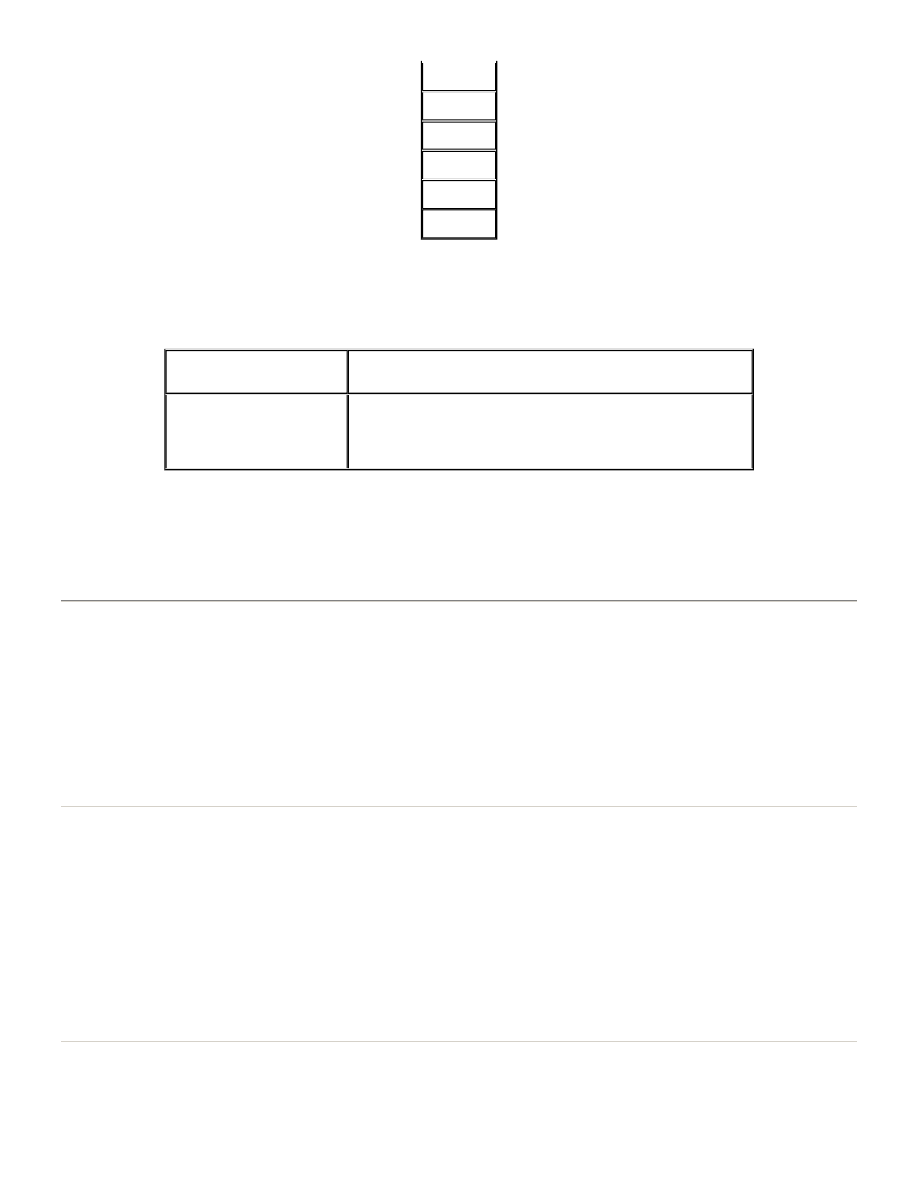
Each M15 advances the cutter deeper into the slot until the desired depth is reached. Note that the spindle is not raised
until the slot is completely routed.
Example of usage (Controlled penetration (Mode 3) routing):
Note: The pattern repeat 'P' code cannot be used with this command.
Format: X#Y#G87X#Y#Z-#U#
See also: Setting up Depth Control
User Defined Stored Patterns
Most likely you will have many other patterns that you often use. Just imagine a board with 30 24-pin IC's. That's 720 holes
to write coordinates for! It would be nice to have a simple command that would allow you to locate just one hole for each IC
and let the CNC-7 figure out where the rest go. The M99 command is just such a command. It allows you to program
patterns which you use frequently, store them on a device, and use them later in a part program. These are called user
defined patterns. When you use the M99 command, you specify the name of the file containing the pattern, along with the
XY coordinate of the first hole to be drilled. The CNC-7 copies the pattern from the file and drills the rest of the holes. User
defined patterns are not just for drilling holes. They can be used to drill and/or rout, provide set-up information, and
perform step-and-repeat patterns. Each of these is described in detail below.
Creating a Pattern
Patterns are created by using the Editor to type a set of X and Y coordinates. Drilling patterns locate the coordinates of
each hole to be drilled. Routing patterns locate the coordinates of rout moves. Coordinates may be programmed in either
absolute or incremental mode, the same as the part program. For example, if the part program is written in the incremental
mode, the user defined pattern must also be incremental. It is also important to know which version of X and Y coordinates
are used by the part program. Version refers to the direction of X and Y coordinates. The version of your user defined
pattern must be the same as your part program. Otherwise the worktable will move in the wrong direction when it drills or
routs the pattern. Once you have programmed the set of coordinates, store them as a file on the system software disk. The
following figure shows how to program the coordinates for 10 pin pattern. This is a sample to illustrate the form of a pattern
and how to program it. The coordinates are shown in both absolute mode with leading zeros and incremental mode with
trailing zeros.
Naming Your Patterns
When you enter the Editor to program the coordinates of the pattern, you must first specify a name for your pattern. That
T#Z#
G00X2Y2
M15
G01X1Y1
G00X1Y1
. . . M17
T6Z-.05
Pick up tool 6 and set the rout depth at .05 inches into the
backup
X05Y06G87X05Y07Z-.1U.2
Rout a 1 inch long slot (Y axis). The machine will rout the
slot in 3 passes at the following depths: 1st pass: .15 inches
above the backup 2nd pass: .05 inches above the backup
3rd pass: .05 inches into the backup
Page 23 of 49
Program Commands
12/11/2003
file://C:\CNC%20Programming.htm

name will be the name of the file on one of the system's devices. Along with the filename, specify the device to be used.
You must specify which device you want the file stored on. Typically, you will want the M99 patterns stored with the non-
replaceable data in USER (on the hard disk), or on the floppy disk containing the part program which calls the M99 file.
Each file name must be different (unique), should relate to the purpose the file was created for, and should not be too long.
Rules and guidelines for naming the files are covered later in this chapter.
Using a User Defined Stored Pattern
To use the User Defined Stored Pattern, type the M99 command, as described below. The CNC -7 will copy the pattern into
memory from the device and drill or rout the rest of the pattern. This command requires two blocks in the part program.
When the CNC-7 encounters an M99 command, it searches the device and copies the stored pattern file you identified with
"name". Next the CNC-7 temporarily changes the work zero to the location specified by X#Y#. This temporary zero is
dropped after M99 completion. The CNC-7 then carries out all the instructions in the pattern in the order they are presented.
The X,Y coordinates in the pattern are relative to the X#Y# in the M99 command. The machine moves from one coordinate to
another in succession. Upon completion of the last instruction in the pattern, the CNC-7 returns to the part program and
continues with the next command. The M99 pattern may include any part program commands except the M99 command
itself. This includes set-up information, such as tool feed and speed or any of the commands used in the part program
body.
Format: M99,name X#Y#
Repeating Stored Patterns
Often you will need to repeat stored patterns. Earlier we presented a possible situation of a board with 30 24-pin chips. This
situation lends itself to using the repeat pattern command saving time when writing programs.
Repeat Stored Pattern
P#
P tells the CNC-7 to repeat the previous Excellon supplied stored pattern. It can also be used to repeat M99 stored patterns.
You specify the number of repeats (up to three digits) in place of # following the P. An X and/or Y coordinate must be used
to define the spacing between the start of the patterns. These coordinates must be in the same block as the P; they may not
be on a separate line.
Examples of usage:
P9X3.23 Repeat nine times, spaced by X3.23 P03X# Repeat three times P20X#Y# Repeat twenty times P200X# Repeat two
hundred times The following figure illustrates how to use the repeat pattern command in a part program. This illustration
uses the 10-pin pattern which we created earlier in this chapter.
Repeating a Hole
Some electrical components have so may variations of pin quantities that it would be highly impractical to create a user
defined pattern for each one. As an alternative, the repeat hole command lets you locate the first pin hole and let the CNC-7
drill the rest without a stored pattern.
Repeat Hole
R#
This command drills a series of equally spaced holes from the previously specified hole. The number following the R (up to
four digits) specifies the number of repeats. An X and/or Y coordinate must be used to define the spacing between hole
centers. These coordinates must be in the same block as the R: they may not be on a separate line.
Examples of usage:
Page 24 of 49
Program Commands
12/11/2003
file://C:\CNC%20Programming.htm
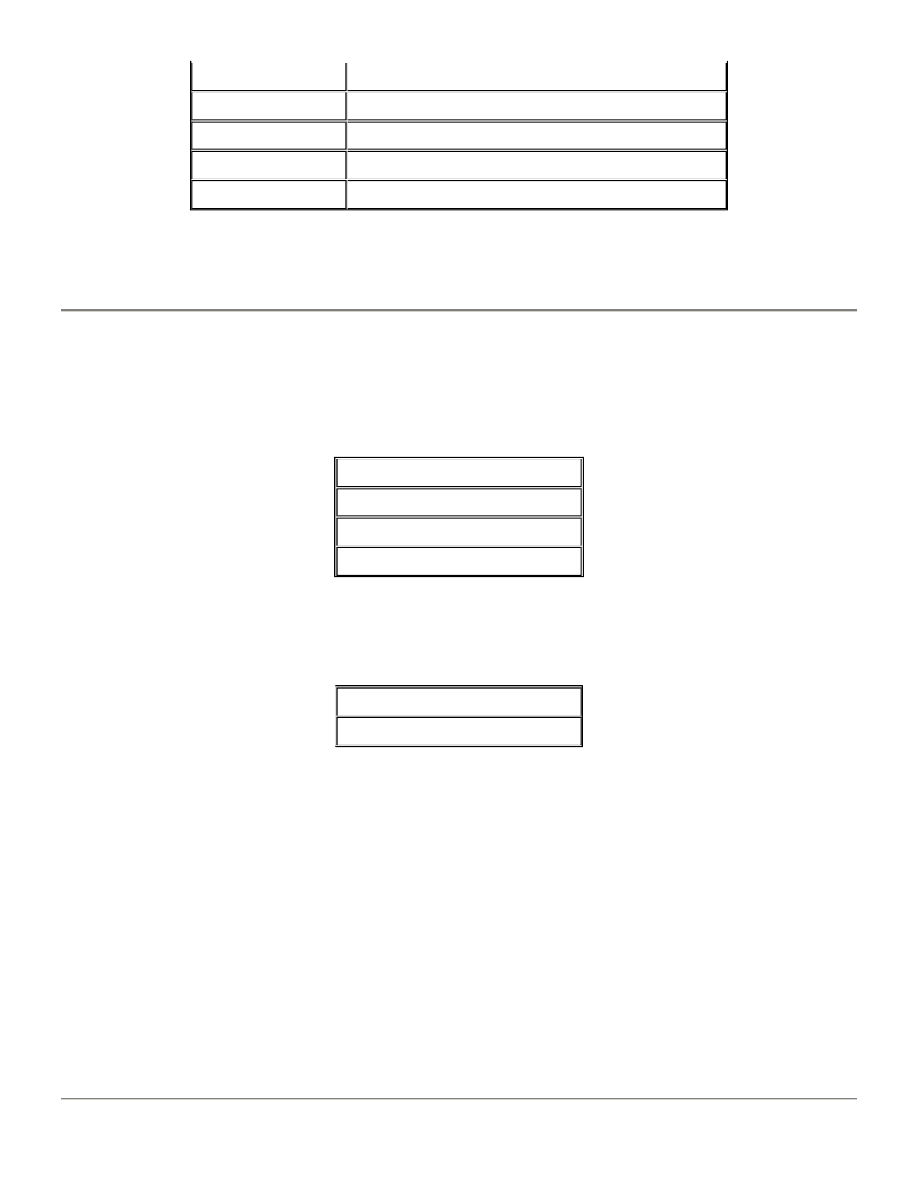
This method may be easier than developing a stored pattern with 32 coordinates.
Format: R#X#(Y#)
Canned Text
M97
It is possible to drill a series of holes that spell out words or numbers. The M97 and M98 commands allow you to program
the CNC-7 to write a message on the board. This feature can be used to:
The machine will drill a series of holes to spell out the message you supply in place of text. M97 drills the text along the X+
axis and the M98 drills along the Y+ axis.
The characters you can use are:
Commas will be interpreted as spaces.
An asterisk (*) will be replaced by text which has been identified with the OPID keyboard command. The OPID command can
identify up to 20 characters. If you have entered an asterisk as part of an M97/M98 command, and either OPID,OFF has been
entered, or no OPID command has been entered, the asterisk will be ignored. Any text after the asterisk in the M97/M98
command will be moved to the right to close up the gap left by the asterisk.
Both commands will start drilling at the X,Y coordinate which follows the command. If no tool diameter is specified in the
Tool Page, the CNC-7 will use the default letter height of 0.25", and will drill the holes 0.0417" apart. If a diameter is
specified, the holes that make up the characters will be spaced 1.2 diameters between hole centers. The characters are
drilled on a 4x7 grid (4 columns in 7 rows).
Format:
M97,text X#Y#
M98,text X#Y#
See also: OPID
R9X001
Repeat nine times on X axis every 0.100"
R03Y1.5
Repeat three times on Y axis 1.5" apart
R20X00075Y00103
Repeat twenty times along a sloped line
R200X000075
Repeat two hundred times on X axis every 0.0075"
R4000X0009
Repeat four thousand times on X axis every 0.090"
Identify a company or product.
Supply a part number.
Identify the machine operator.
Date the board.
A through Z
0 through 9 + - / *
Page 25 of 49
Program Commands
12/11/2003
file://C:\CNC%20Programming.htm
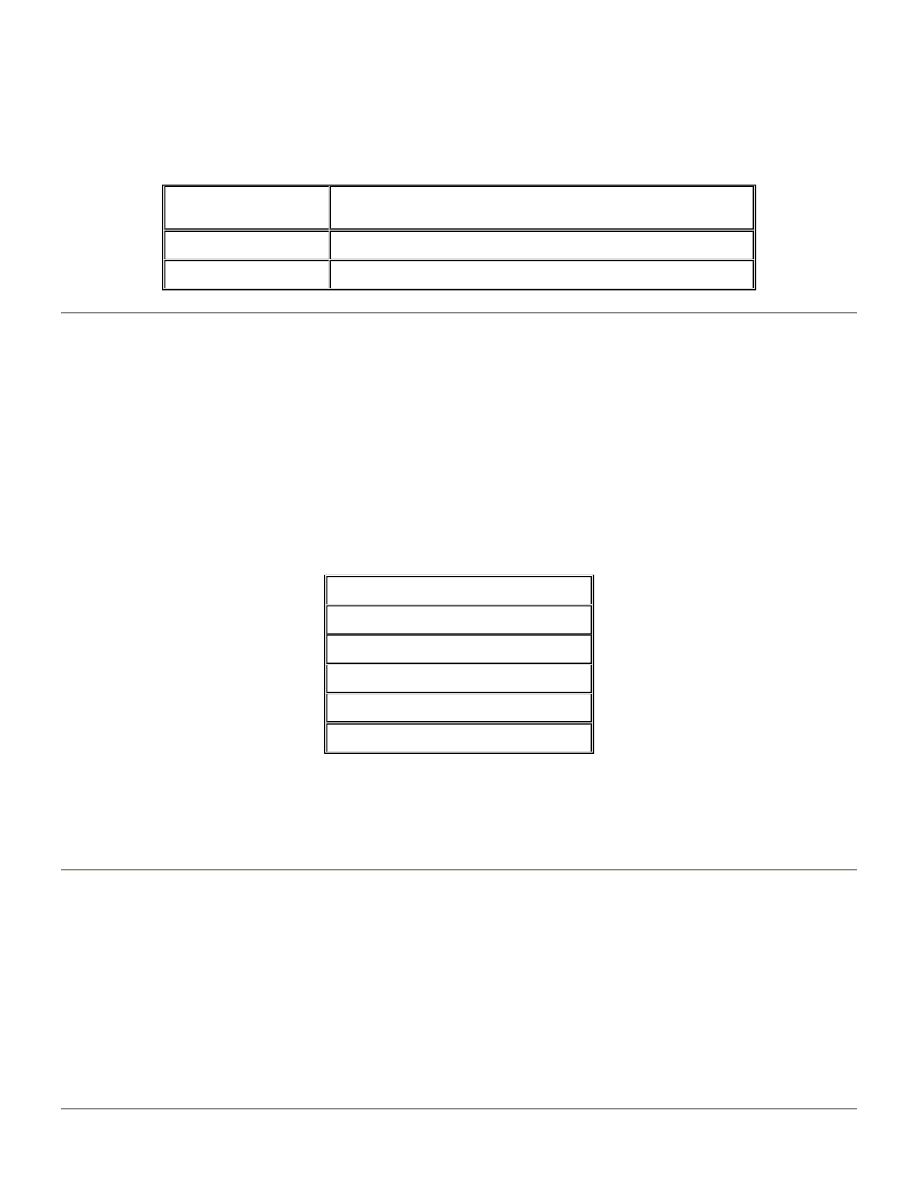
Canned Text Offset
CAN_TEXT_OFF
It is possible to offset the original X, Y coordinate given by the M97 and M98 commands to shift the position of the text
away from the edge clamps. This command will affect all M97/98 commands.
Step and Repeat Commands
Step and Repeat means to drill or rout a pattern, move to another location and repeat the pattern. This feature is a great
time saver for programmers. It can be used to repeat a large variety of patterns on the same board or to make several PC
boards from one large panel. For example, let's say that you are making six boards out of one panel. You can load a tool
and drill all the holes in one board for that size tool. Then step and repeat all the same size holes for the next five boards.
Next, change the tool and return to the first board and repeat the procedure until all six boards are drilled with that tool.
This procedure can be continued until the boards are completely finished. A Step and Repeat pattern begins with an M25
command and ends with an M01 command (M24 in Format 1). Two or more M02 commands are inserted after the pattern to
identify how many repeats are to be made. The M02 commands also supply the coordinates where the repeats are to begin.
If you have commands that you don't want repeated, such as screening holes and tool changes, you perform them before
the M25 command. The number of things you can do between the M25 and M01 commands is almost limitless:
Mirror image Repeat entire PC boards!
Following are step and repeat commands with an explanation of how to use them.
Beginning of Pattern
M25
M25 indicates the beginning of the part program section which is to be repeated. These commands do not actually cause a
repeat action by themselves, but work in conjunction with the M01 and M02 commands. The M25 and % commands are
equivalent, and are programmed in a block by themselves.
CAN_TEXT_OFF,#,#
The first parameter is X coordinate, and the second parameter
is Y coordinate.
CAN_TEXT_OFF,#
Modify the X coordinate only.
CAN_TEXT_OFF
Show the current value of X, Y in machine status window.
Repeat canned cycles
Repeat user defined patterns
Drill holes Rout Change tool
Drill and rout Repeat holes
Canned text
Turn things sideways or upside down
Page 26 of 49
Program Commands
12/11/2003
file://C:\CNC%20Programming.htm
End of Pattern
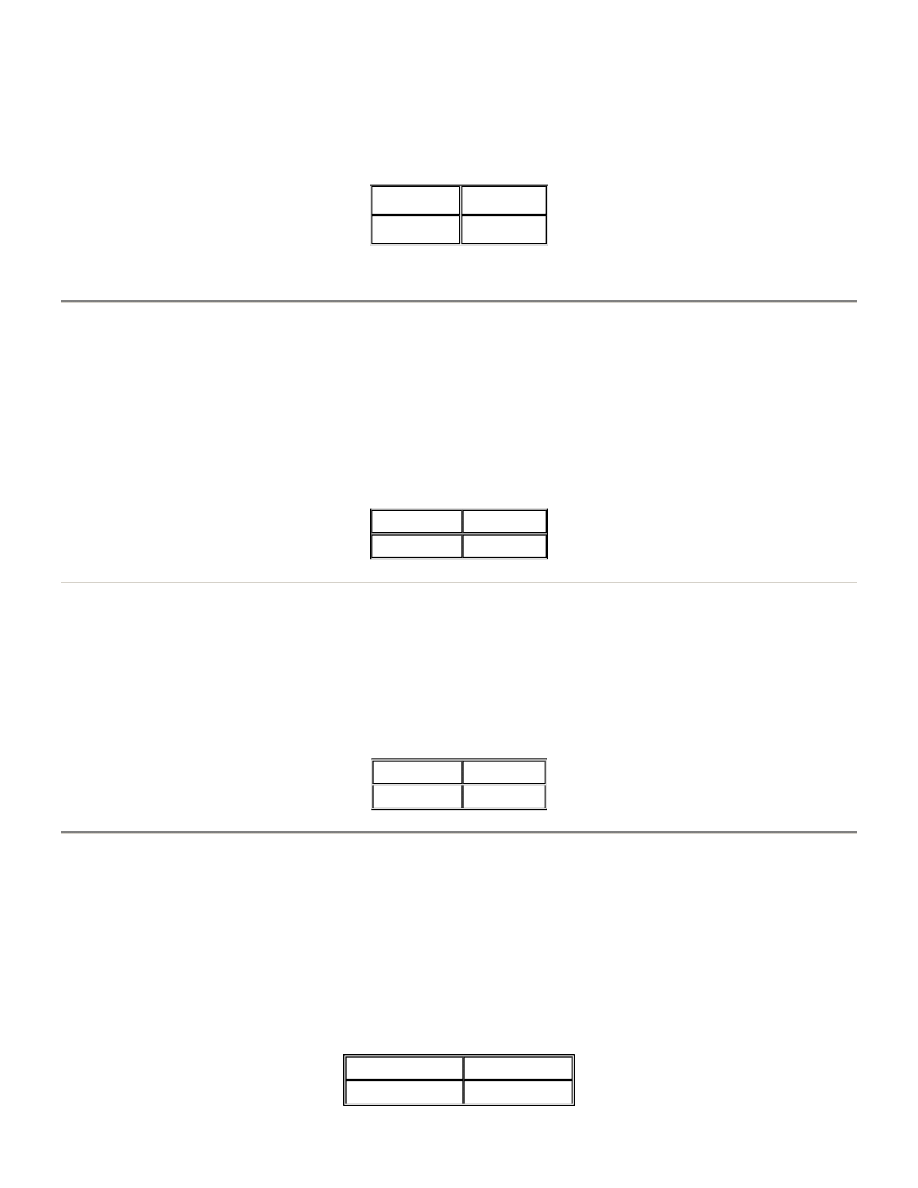
M01
M01 indicates the end of the part program section which is to be repeated. This command is programmed in a block by
itself.
Repeat Pattern Offset
M02
The M02 command causes a repeat of all the commands between the M25 command and the M01 command. The M02
command is incremental. This means that the coordinate X#Y# is the distance from the beginning of the last pattern, not the
distance from Work Zero. A separate M02 command is required for each repeat of the pattern of set of patterns. After the
last M02 repeat command, an extra M02 command which requires no coordinates, must be added in a block by itself. This
will clear a counter built into the system software. The M02 command must always occur after the M01 command discussed
above, and before the M08 command discussed below.
End of Step and Repeat
M08
M08 indicates the end of all step and repeat commands. If all M02 commands have not been completed, the CNC-7 will
return to the last start of pattern command and repeat. When all patterns have been completed, the program will continue
on past the M08, finding either an end of program command or more program information. An M30 end of program
command may be combined with this command, otherwise it is programmed in a block by itself.
Repeat Block
R#M02
R#M02 is used in place of the M02 command, discussed above, for a pattern which has the same X coordinate or the same
Y coordinate as the previous pattern. It is useful when making a column of evenly spaced parts. The number following the R
indicates the number of repetitions of the pattern. You specify the coordinate (X# or Y#) which changes. The X or Y
coordinate which does not change can be left out of the command, at your option. The Repeat Block command may be
used with the mirror image or swap axis commands which are discussed in the next section. The following figure illustrates
the use of this command to produce a column of patterns with the same Y coordinate. The repeat pattern offset M02
command is also shown for comparison. They will both produce the same column of patterns.
Format 2
Format 1
M01
M24
Format 2
Format 1
M02X#Y#
M26X#Y#
Format 2
Format 1
M08
M27
Format 2
Format 1
R#M02X#Y#
R#M26X#Y#
Page 27 of 49
Program Commands
12/11/2003
file://C:\CNC%20Programming.htm
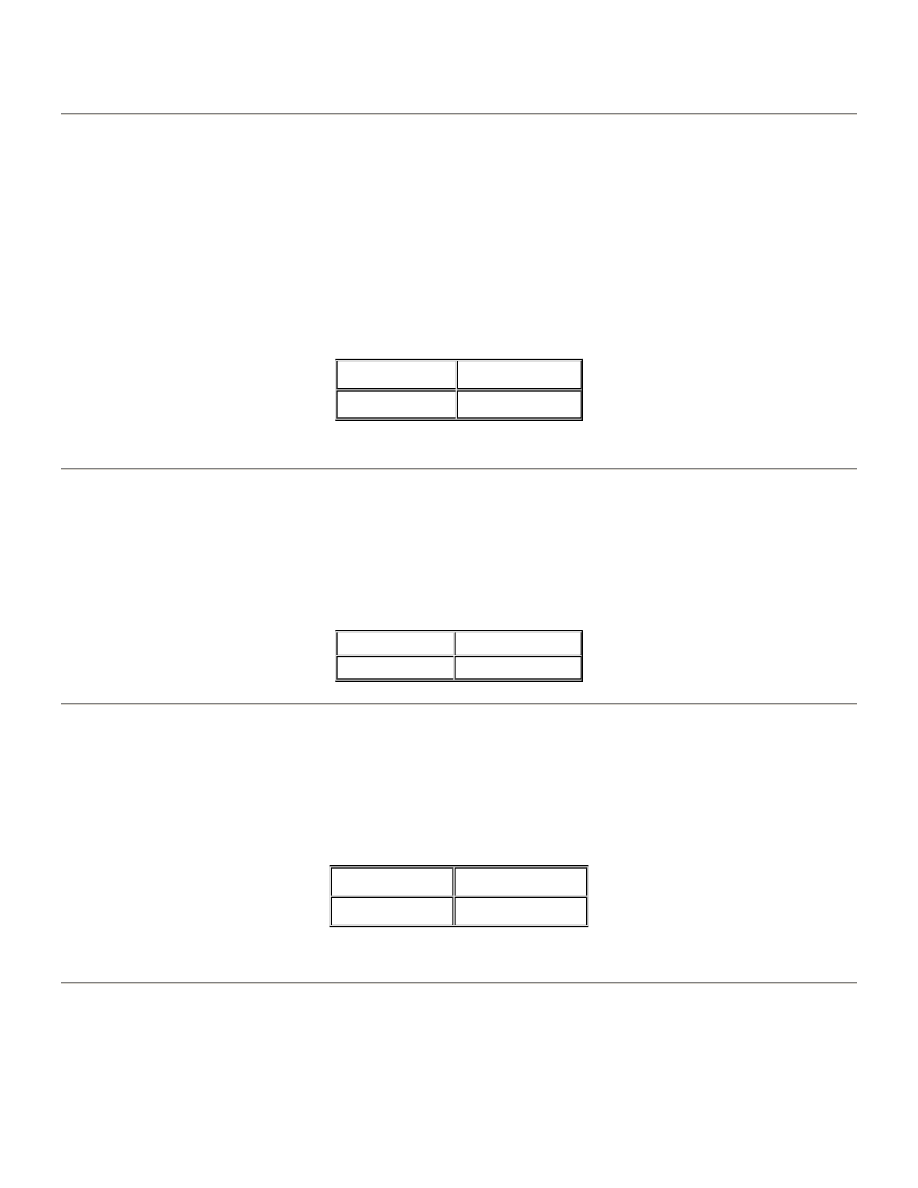
See also: Mirror Image, Swap Axis
Swap Axis
M70
Mirror Image and Swap Axis
You can make better use of PC board materials and reduce setup time by turning the axis of the boards by 180 degrees, or
by reversing the axis to create a mirror image, or both. Excellon provides you with three commands which enable you to
reverse and/or rotate the axis of a pattern, or an entire PC board. These commands are step and repeat commands and
must be used in combination with the M25 and M01 commands, described earlier in this chapter. The swap rotates the
pattern 90 degrees and makes a mirror image by changing the X axis to Y, and the Y axis to X. This command is used in a
step and repeat offset block only, as shown.
Mirror Image X Axis
M80
M80 creates a mirror image of a pattern or group of patterns by reversing the sign of the X axis coordinates. All X+
coordinates will be changed to X-, and all X- coordinates will be changed to X+. The Y coordinates remain the same. This
command is used in a step and repeat offset block only.
Mirror Image Y Axis
M90
M90 creates a mirror image of a pattern or group of patterns by reversing the sign of the Y axis coordinates. All Y+
coordinates will be changed to Y-, and all Y- coordinates will be changed to Y+. The X coordinates remain the same.
This command is used in a step and repeat offset block only.
Nested Step and Repeat Commands
Step and repeat programs may contain multiple step and repeat patterns, one within the other. When a pattern has been
stepped and repeated, it creates two identical patterns. These two patterns can be stepped and repeated to form four
patterns, etc. Or you can create three identical patterns and then step and repeat to form six. This procedure is known as
nesting. An unlimited number of M01 commands can be used in any one step and repeat section. The following figure
shows just how powerful a few commands can be when they are nested. Following the M25 command, a user defined
Format 2
Format 1
M02X#Y#M70
M26X#Y#M23
Format 2
Format 1
M02X#Y#M80
M26X#Y#M21
Format 2
Format 1
M02X#Y#M90
M26X#Y#M22
Page 28 of 49
Program Commands
12/11/2003
file://C:\CNC%20Programming.htm
stored pattern routs an L shaped hole, and an M01 commands marks the end of the pattern. Next an M02 offsets Work Zero
by the distance X#Y#, and another M02 repeats any pattern between itself and the M25 command. Then an M01 ends the
repeat. This produces a total of two patterns. A third M02 offsets Work Zero by the distance X#Y#, and a fourth M02 repeats
any patterns between itself and the M25 command. There are now four patterns in this category, so four patterns are
repeated. Then an M01 ends the repeat. This produces a total of eight patterns. An M08 ends the step and repeat.
Setup Commands
Setup commands speed set -up and reduce operator involvement when preparing your machine for a new job. As with all
Excellon commands, parentheses () are used to indicate options. These commands must be used in the part program body.
They cannot be used as keyboard commands.
The following table provides a list of each of the setup commands in the order they are detailed below.
Details of the Setup commands are described in the following sections.
Absolute Mode
G90
G90 Sets absolute measuring mode, which causes all coordinates to be referenced to work zero. G90 must be programmed
in a block by itself.
Incremental Mode
G91
G91 Sets incremental mode, which causes all coordinates to be referenced to the last coordinate. This mode does not
change Work Zero.
The computer accumulates the coordinates into absolute dimensions, starting from Work Zero. The incremental
accumulators are cleared at the end of a step-and-repeat pattern, the end of the program, or by a system reset. Clearing the
accumulators sets them back to Work Zero. G91 is programmed in a block by itself.
COMMAND
DESCRIPTION
G90
Absolute Mode
G91
Incremental Input Mode
G93X#Y#
Zero Set M18 Command tool tip check
M45,text\
Long Operator message
M47,text
Operator Message
M60
Reference Scaling enable
M61
Reference Scaling disable
M62
Turn on peck drilling
M63
Turn off peck drilling
M71
Metric Measuring Mode
M72
Inch Measuring Mode M96 Select Spindle Group
Page 29 of 49
Program Commands
12/11/2003
file://C:\CNC%20Programming.htm

Zero Set
G93
G93 Sets work zero relative to absolute zero. You supply a coordinate value in place of #. The CNC -7 adds the zero set
coordinates to the zero correction and false zero to set up the new work zero (zero set + zero correction + false zero = work
zero). The adding together of separate values allows the user to build part programs that will run on any Excellon machine,
regardless of the tooling configuration.
Format: G93X#Y#
Operator Message
M47
M47 halts automatic operation of the machine and lights the red CYCLE STOP indicator light. The message you supply in
place of text is displayed on the console screen, along with the M47 block. You may supply up to 20 numbers or letters for
text. When the operator presses the CYCLE START button, the program will resume. This command can be used to identify
a part program before the operator runs it.
Format: M47,text
See also: M45
Long Operator message
M45
M45 halts automatic operation of the machine and lights the red CYCLE STOP indicator light. The message you supply may
consist of multiple lines of text, each (except the last) terminated by a backslash "\" character. A total of up to 78 characters
per line may be supplied, and there is no practical limit on the length of the message. The first line which is NOT terminated
by a backslash indicates the end of the M45 message. As the system encounters each M45 message in sequence, the
machine will stop and bring up the display program (see TYP or HELP) to display the message. You can use the display
program to page through VERY long messages. To continue operation, you must QUIT out of the display program, and
press START to restart the machine. If the screen is in use when the M45 is encountered (e.g.: in the editor), the system will
wait until you return to the displays before bringing up the display program. M45 messages may be displayed ONLY the
first time through the program for setup purposes (e.g.: telling the operator which kinds of backup, entry material, etc to
use) or they may be displayed each time the program is run (refer to the M45_REDISPLAY VSB command). If the M45
messages are displayed only the first time through, you must clear the program out of memory with an "I" or "SI" command
in order to get the M45 messages to display again.
Format: M45,text\ text\ text
See also: M47, TYP
Reference Scaling enable
Page 30 of 49
Program Commands
12/11/2003
file://C:\CNC%20Programming.htm

M60
M60 Enables Reference Scaling. Any drilled hole coordinates following this command will be adjusted per the Reference
Scaling values entered by the operator and displayed on the Reference Scaling page. This command allows the part
program to enable Reference Scaling under part program control so that certain coordinates can be scaled, others not. This
part program command is equivalent to entering the SCLR,ON keyboard command to enable Reference Scaling.
See also the description on setting up Reference Scaling.
Format: M60
Reference Scaling disable
M61
M61 Disables Reference Scaling. Any drilled hole coordinates following this command will NOT be adjusted per the
Reference Scaling values entered by the operator and displayed on the Reference Scaling page. This command allows the
part program to disable Reference Scaling under part program control so that certain coordinates can be drilled without
Scaling. This part program command is equivalent to entering the SCLR,OFF keyboard command to disable Reference
Scaling.
See also the description on setting up Reference Scaling.
Format: M61
Turn on peck drilling
M62
This command allows the part program to enable peck drilling under part program control. This part program command is
equivalent to entering the PECK,ON keyboard command
Format: M62
Turn off peck drilling
M63
This command allows the part program to disable peck drilling under part program control. This part program command is
equivalent to entering the PECK,OFF keyboard command
Format: M63
Tool tip check
Programmed tool tip check
M18
M18 commands a tool tip check under part program control. This command allows you to request a tool tip check at any
point in the program you desire. No M18 command is necessary to request the tool tip checks which are performed by the
Page 31 of 49
Program Commands
12/11/2003
file://C:\CNC%20Programming.htm

system when starting the machine or after a toolchange. These do not have to be programmed with an M18 command. The
M18 is normally not needed for Depth Controlled drilling, but may be useful under certain special circumstances. For
example:
1) When doing testing and you want to collect data about a number of tool tip checks without going through toolchanges.
2) When doing extremely critical depth controlled drilling where you are concerned about compensating for normally
minimal factors, such as thermal spindle growth or drill wear.
M18 has no effect if Depth Control is not enabled, or if Depth Control is not on for the particular tool in question.
Format: M18
Metric Measuring Mode
M71
M71 Sets metric measuring mode. Any values following this command in the part program will be interpreted as millimeters,
millimeters per second, or meters of cutting distance. This command does not translate inch values to metric; it merely
assumes all values to be metric. M71 will use the digit format you last selected (000.000, 0000.00, 000.00) or, if you did not
select any, the default format of 000.000. M71 must be programmed in a block by itself. It should be used only at the
beginning of a part program, before the first hole is drilled or before the first rout plunge.
Inch Measuring Mode
M72
M72 Sets inch measuring mode. Any values following this command in the part program will be interpreted as inches,
inches per second, or feet of cutting distance. This command does not translate metric values to inch, it merely assumes all
values to be inch. M72 must be programmed in a block by itself. It should be used only at the beginning of a part program,
before the first hole is drilled or before the first rout plunge.
Format: Format 2 Format 1
M72 M70
Select Spindle Group
M96
M96 selects one of the spindle groups previously defined by the Spindle Group Assignment keyboard command (SG).
M96,OFF will turn the spindle group mode off from within a part program. After an M96,OFF command is encountered, the
operator can be prompted with a message (using the M47 command) to manually select the desired spindle group for
further operations.
Format: M96,# or M96,OFF
Stop Commands
Stop commands are used to temporarily stop the running of the part program or to indicate the end. Many of these
commands may contain X and Y coordinates which cause the worktable to position but not to drill. If the coordinates you
specify in the commands exceed the worktable limits, the limits will override your coordinates.
NOTE: In each of these stop commands, the coordinate (which you provide) is relative to absolute zero, not work zero.
Absolute zero is in the X and Y version (1 through 8) which is currently selected. As with all Excellon commands,
parentheses () are used to indicate options. Each command is entered by pressing the RETURN key after typing the
command. The following table provides a list of each of the setup commands, in the order they are detailed below.
Page 32 of 49
Program Commands
12/11/2003
file://C:\CNC%20Programming.htm
List of Stop Commands
Details of the Stop commands are described in the following sections.
Variable Dwell
G04
G04 Halts the machine for the time you specify in place of #. This command is used, for example, to cool a router bit after a
long cut. The dwell time is interpreted as 1 millisecond per increment in the current coordinate measurement mode (inch or
metric). The dwell time may be programmed from 1 to 10 seconds of 1 msec. If you program beyond these limits, or if you
do not supply a value, the dwell time defaults to 10 seconds.
Format: G04X#
Example of usage:
G04X001 = 1 second
Stop for Inspection
M09
M09 Halts automatic operation of the machine and lights the red CYCLE STOP indicator light. The Machine Status box on
the console screen will display the message:
If you supply a coordinate (X#Y#), the worktable will move to that position relative to absolute zero. If you do not provide a
coordinate, the machine stops in its current location (it does not self park). Pressing the CYCLE START button will continue
the program.
Format:
Optional Stop
M06
M06 this command is similar to the Stop for Inspection command, with the exception that the operator must turn the
function on at the keyboard. When the operator types the OSTOP,ON command before the M06 command is encountered,
the machine will stop for inspection. If OSTOP is OFF, the CNC-7 will ignore the M06 command. To continue the part
program after an optional stop, the operator presses the CYCLE START switch.
Format:
COMMAND
DESCRIPTION
G04X#
Variable Dwell
M09(X#Y#)
Stop for Inspection
M06(X#Y#)
Optional Stop
M00(X#Y#)
End of Program, No Rewind
M30(X#Y#)
End of Program, Rewind
Format 2
Format 1
M09(X#Y#)
M00(X#Y#)
Page 33 of 49
Program Commands
12/11/2003
file://C:\CNC%20Programming.htm
End of Program, no rewind
M00
M00 indicates the end of the part program with no rewind of the paper tape. If you specify a coordinate (X#Y#), the
worktable moves to that position relative to absolute zero. If no coordinate is supplied, the worktable will move to the park
position.
Format:
See also: End of Program Command file
End of Program, rewind
M30
M30 indicates the end of the part program with rewind of the paper tape. The tape will rewind until it encounters an End of
Rewind command (%). If none is found, the tape will rewind to the end of the tape. If you specify a coordinate (X#Y#), the
worktable moves to that position relative to absolute zero. If no coordinate is supplied, the worktable will move to the park
position.
See also: End of Program Command file
Binary Map Commands
M19 code inside the part program will allow the machine to drill binary map code. The characters after M19 will be treated
as binary map code only when you specify the binary map input from part program. Otherwise it will be ignored. See also
Binary Map Setup Commands.
Format: M19 or M19,######
Rules for Naming Your Programs
Part programs and user defined patterns are stored as files on floppy disks, hard disk directories, or on a remote file server
(such as a DataWorkshop). You must give each file a name so that the CNC-7 can identify each file. When you display the
list of files in the directory, the different file names will display in the file selection pop-up window. File names may be from
3 to 12 characters long on the hard disk, or up to 20 characters long on a ZOS format floppy disk. You may use the
following characters, in any order:
A through Z
0 through 9
? % - $ !
Format 2
Format 1
M06(X#Y#)
M01(X#Y#)
Format 2
Format 1
M00(X#Y#)
M02(X#Y#)
Page 34 of 49
Program Commands
12/11/2003
file://C:\CNC%20Programming.htm
The characters space, tab, comma, quotes and backslash, as well as "&@(){}[]<>" are specifically prohibited.
Forward slashes - "/" - usually will not work, since the operating system takes this character as a directory identifier.
Examples of file names:
IC32PIN Describes a 32-pin pattern for an IC
WO6443 Work Order number
6443 PO11640 Purchase Order 11640
Sample Part Program
Following is a sample part program developed by Excellon. It was designed to demonstrate how part program commands
work together to produce a PC board with a variety of drill patterns. The pattern shown below is produced from this part
program.
1.
M48
Part Program Header
2.
R,C
Reset Clocks
3.
R,H
Reset Hits
4.
R,T
Reset Tool Information
5.
VER,1
Axis Version Select
6.
FMAT,2
Excellon Format Two
7.
INCH,LZ
Inch Mode, Leading Zero Format
8.
BLKD,OFF
Block Delete Switch
9.
SBK,OFF
Single Block Mode Switch
10.
SG,OFF
Spindle Group Select
11.
TCST,OFF
Tool Change Stop Switch
12.
ICI,OFF
Incremental Mode Switch
13.
OSTOP,OFF
Optional Stop Switch
14.
RSB,ON
Front Panel Reset Button Switch
15.
ATC,ON
Auto Tool Change Switch
16.
FSB,ON
Feed and Speed Button Switch
17.
T1C.0135F080S80B0500H1500
F=Feed
S=Speed
B=Retract
H=Max Hits
Z=Z-Axis Depth Offset/Compensation
18.
T2C.032F070S70B0700H2000
19.
T3C.043F160S53B1000H3000
Page 35 of 49
Program Commands
12/11/2003
file://C:\CNC%20Programming.htm

20.
T4C.052F132S44B1000H3000
21.
T5C.062F109S36B1000H3000
22.
T6C.070F099S33B1000H3000
23.
T7C.125F040S20B1000Z -.010
24.
T8C.250F020S20B1000Z -.020
25.
%
End of Rewind Block
26.
M47,DRILL DEMO
Operator Message
27.
G05
Drill Mode
28.
M72
Inch Mode
29.
G93X0325Y015
Zero Set
30.
T1
Pick Up Tool One (339 Hits)
31.
M25
Beginning of Step & Repeat
32.
X042Y01
(Start Original Pattern)
33.
R9X0005
34.
Y0105
35.
R9X -0005
36.
M01
End of Pattern <NESTED STEP AND
REPEAT ARRAY(MAXIMUM OF 3 M01)>
37.
R2M02XY001
1st Array
38.
M01
End of Pattern
39.
R2M02X007Y
2nd Array
40.
M01
End of Pattern
41.
R2M02XY007
3rd Array
42.
M08
End of Step & Repeat
43.
G83
44.
X003Y041
<CIRCULAR EIGHT PIN PATTERN>
45.
X007Y041
46.
G83
47.
X011Y041
48.
X015Y041
49.
T2
Pick Up Tool Two (1,322 Hits)
50.
X03Y05G85X03Y047
51.
X034Y046G85X031Y046
52.
X03Y042G85X03Y045
Page 36 of 49
Program Commands
12/11/2003
file://C:\CNC%20Programming.htm

53.
X026Y046G85X03Y045
<DRILLED SLOT PATTERN>
54.
G045X005
Variable Dwell (5 Seconds)
55.
X032Y047G85X033Y049
56.
X031Y045G85X033Y043
57.
X029Y049G85X027Y043
58.
X027Y049G85X029Y047
59.
M97,COMPLEX,PART,PROGRAM
60.
X0115Y003
Reference Location
61.
M98,DEMONSTRATION,PANEL
<CANNED TEXT>
62.
X06Y012
Reference Location
63.
M97,EXCELLON,AUTOMATION
64.
X0115Y052
Reference Location
65.
T3
Pick Up Tool Three (134 Hits)
66.
G82
67.
X005Y033
16 Pin 0.1 x .3
68.
X012Y036
69.
G82X.1Y.4
70.
X02Y033
28 Pin 0.1 x .4
71.
X033Y036
72.
G82X.2Y.5
73.
X04Y033
16 Pin 0.2 x .5
74.
X054Y038
75.
G82X.1Y.6
76.
X04Y023
32 Pin 0.1 x .6
77.
X055Y029
78.
G82
79.
X037Y042
14 Pin 0.1 x .3
80.
X04Y048
81.
P2X007
Stored Pattern Repeat
82.
T4
Pick Up Tool Four (104 Hits)
83.
M25
Beginning of Step and Repeat
84.
X01Y018
85.
R8Y -001
Original Pattern
Page 37 of 49
Program Commands
12/11/2003
file://C:\CNC%20Programming.htm

86.
R4X001
87.
M01
End of Pattern
88.
M02X002Y002M70
Axis Swap
89.
M02X043M90M70
Mirror Image Y Axis Swap
90.
M02X002Y-002M80
Mirror Image X
91.
M02X -002Y038M80M90M70
Mirror Image X Y Axis Swap
92.
M02X002Y002M80M90
Mirror Image X Y
93.
M02X -047M90
Mirror Image Y
94.
M02X002Y-002M80M70
Mirror Image X Axis Swap
95.
M02
Offset Counter Control
96.
M08
End of Step and Repeat
97.
T5
Pick Up Tool Five (76 Hits)
98.
M99,LOGO
User Defined Stored Pattern
99.
X015Y014
Reference Location
100.
T6
Pick Up Tool Six (57 Hits)
101.
X0025Y01
Move to And Drill
102.
G91
103.
Y001
104.
Y001
105.
Y001
< Stored Program Called LOGO Located
On Disk Drive 2>
106.
Y001
107.
Y001
108.
X001
109.
X001
110.
X001 XY007
111.
X001 R2Y -001
112.
X001
Incremental Mode R6X001
113.
Y-001 R5Y -001
114.
Y-001 R8X001
115.
Y-001 R2Y001
116.
Y-001 R6X -001
117.
Y-001 R8Y001
118.
X-001 R6X001
Page 38 of 49
Program Commands
12/11/2003
file://C:\CNC%20Programming.htm
Vision Assist Commands
Vision Assist commands are used with the Vision Assisted Drilling and/or Routing option. The additional
commands described in this section allow to to do precise drilling relative to a set of visible landmarks.
Several vision commands are provided, and allow you to locate reference landmarks and drill and/or rout
patterns relative to them. Commands are provided for selecting vision tools, single point offsets, multipoint
compensation, drilling a target, and Autocalibration. In addition, nested vision functions are provided so that
119.
X-001 R2Y001
120.
X-001 R8X -001
121.
X-001 R5Y -001
122.
X-001 R5X -001
123.
G90
Absolute Mode
X012Y007
R2X001
R2Y -001
R5X -001
R2X001Y001
124.
R5Y001 125. R5X001
REPEAT HOLE (One Axis Moves)
126.
R5Y -001
127.
R4X -001
128.
X016Y046
Move to and Drill
129.
R4X.1Y.1
130.
R4X.1Y -.1
REPEAT HOLE (Two Axis Moves)
131.
R4X -.1Y-.1
132.
R3X -.1Y.1
133.
X03Y046
Move to and Drill
134.
T8
Pick Up Tool Eight (3 Hits)
135.
X005Y041
Move to and Drill
136.
X009Y046
Move to and Drill
137.
X013Y041
Move to and Drill
138.
T7
Pick Up Tool Seven (78 Hits)
139.
X009Y046G84X005
Drilled Circle Pattern
140.
XY
Move to and Drill Program Zero
141.
M30
End of Program, Rewind
Page 39 of 49
Program Commands
12/11/2003
file://C:\CNC%20Programming.htm
you can use one set of landmarks to compensate the approximate panel locations, and nested functions to
find precise targets within the panel. As with all Excellon commands, parentheses () are used to indicate
options. These commands must be used in the part program body. They cannot be used as keyboard
commands. The following table provides a list of each of the vision commands in the order they are detailed
below.
Details of the Vision commands are described in the following sections.
Select Vision Tool
G34,#,#
G34 Selects a vision tool for use. The number following the G34 is the number of the vision tool, which starts at one. If there
are five parameters, parameters two through four are four vision tools used for inspecting a large target. In the case of more
than one parameter, the last optional number is an offset used for a four point vision cycle using four consecutive vision
tools. In the case of multiple tool use, the inspected center will be the average of the four results. This is useful when
inspecting targets which are large relative to the field of view. G34 and its arguments are programmed in a block by
themselves. This command may have one of three forms:
G34,v1 "v1" tool is used for inspection G34,v1,delta "v1" tool is used for four inspections at a spacing of "delta" around the
target. G34,v1,v2,v3,v4,delta Tools "v1" through "v4" are used to do four inspections at a spacing of "delta" around the
target.
Single Point Offset
G35X#Y#
G35 is used to find a single point offset which is used to adjust a series of locations which follow. For example, you might
want to drill a series of holes relative to the inspected location of a visible pad. The coordinate provided with the G35 is the
location of the pad to be measured, and the amount of variance to the ACTUAL location of the pad will affect all coordinates
that follow. Please note that G35 is relative to the current work zero, and is not affected by any current vision translation or
offset. G35 and G36 cannot be active at the same time. G35 and its coordinate are programmed in a block by themselves.
Multipoint Vision Translation
COMMANDS
DESCRIPTION
G34,#(,#)
Select Vision Tool
G35(X#Y#)
Single Point Vision Offset (Relative to Work Zero)
G36(X#Y#)
Multipoint Vision Translation (Relative to Work Zero)
G37
Cancel Vision Translation or Offset (From G35 or G36)
G38(X#Y#)
Vision Corrected Single Hole Drilling (Relative to Work Zero)
G39(X#Y#)
Vision System Autocalibration
G45(X#Y
#) Single Point Vision Offset (Relative to G35 or G36)
G46(X#Y#)
Multipoint Vision Translation (Relative to G35 or G36)
G47
Cancel Vision Translation or Offset (From G45 or G46)
G48(X#Y#)
Vision Corrected Single Hole Drilling (Relative to G35 or G36)
M50,#
Vision Step and Repeat Pattern Start
M51,#
Vision Step and Repeat Rewind
M52(#)
Vision Step and Repeat Offset Counter Control
Page 40 of 49
Program Commands
12/11/2003
file://C:\CNC%20Programming.htm

G36X#Y#
G36 is used to adjust a series of locations relative to two or three alignment pads which can be seen by the Vision System.
For example, you might want to align the drilled pattern to some alignment pads. Two or three G36 commands are used in
series, depending on the setting of the ROTATE variable in the Vision Configuration file. If two G36 codes are used, the
pattern is adjusted for offset and rotation only. If three G36 codes are used, the pattern is adjusted for offset, rotation, and
stretch. The coordinate provided with the G36 is the location of the pad to be measured, and the amount of the variances
are used together to translate all coordinates that follow. Please note that G36 is relative to the current work zero, and is not
affected by any current vision translation or offset. G35 and G36 cannot be active at the same time. G36 and its coordinate
are programmed in a block by themselves.
Cancel Vision Translation or Offset
G37
G37 is used to cancel a G35 or G36 adjustment which has been set up previous to this point in the part program. After this
command has been used, all coordinates that follow are strictly relative to work zero, and are unaffected by any vision
translation or offset. G37 is programmed in a block by itself.
Vision Corrected Single Hole Drilling
G38X#Y#
G38 is used to locate a target at the specified location and drill a hole in the middle of it. This is useful for hitting the center
of a critical pad or other target. The coordinate provided with the G38 is the location of the pad to be drilled, and the amount
of the variance is used to translate just this one hole. Please note that G38 is relative to the current work zero, and is not
affected by any current vision translation or offset. G38 is not affected by, nor does it affect the current G35 or G36
translation or offset. G38 and its coordinate are programmed in a block by themselves.
Vision System Autocalibration
G39X#Y#
G39 is used to drill a series of holes used to calibrate the Spindle to Camera Offset. The number of holes to be drilled is
specified by the COUPON setup in the Vision Configuration file. If entry material is being used, you will be instructed to
install and remove the entry material at the appropriate places. This function is useful when it is desired to highly automate
the use of the Vision System in a production environment, recalibrating the Vision System regularly, perhaps every board,
to assure proper operation of the system.
The coordinate provided with the G39 is the location of the first calibration hole. All other variables are provided by the
COUPON setup in the Vision Configuration file.
Please note that G39 is relative to the current work zero, and is not affected by any current vision translation or offset. G39
is not affected by, nor does it affect the current G35 or G36 translation or offset.
G39 and its coordinate are programmed in a block by themselves.
Nested Single Point Offset
G45X#Y#
G45 is used to find a single point offset which is used to adjust a series of locations which follow. For example, you might
want to drill a series of holes relative to the inspected location of a visible pad. The coordinate provided with the G45 is the
location of the pad to be measured, and the amount of variance to the ACTUAL location of the pad will affect all coordinates
that follow. Please note that G45 is relative to the current G35 or G36 vision translation or offset. G45 and G46 cannot be
active at the same time. G45 and its coordinate are programmed in a block by themselves.
Page 41 of 49
Program Commands
12/11/2003
file://C:\CNC%20Programming.htm

Nested Multipoint Vision Translation
G46X#Y#
G46 is used to adjust a series of locations relative to two or three alignment pads which can be seen by the Vision System.
For example, you might want to align the drilled pattern to some alignment pads. Two or three G46 commands are used in
series, depending on the setting of the ROTATE variable in the Vision Configuration file. If two G46 codes are used, the
pattern is adjusted for offset and rotation only. If three G46 codes are used, the pattern is adjusted for offset, rotation, and
stretch. The coordinate provided with the G46 is the location of the pad to be measured, and the amount of the variances
are used together to translate all coordinates that follow. Please note that G46 is relative to the current G35 or G36 vision
translation or offset. G45 and G46 cannot be active at the same time. G46 and its coordinate are programmed in a block by
themselves.
Cancel Nested Vision Translation or Offset
G47
G47 is used to cancel a G45 or G46 adjustment which has been set up previous to this point in the part program. After this
command has been used, all coordinates that follow are relative to the original G35 or G36 vision translation or offset. It is
important to understand that the G47 does not affect the G35 or G36, but simply cancels the G45 or G46 translation. G47 is
programmed in a block by itself.
Nested Vision Corrected Single Hole Drilling
G48X#Y#
G48 is used to locate a target at the specified location and drill a hole in the middle of it. This is useful for hitting the center
of a critical pad or other target. The coordinate provided with the G48 is the location of the pad to be drilled, and the amount
of the variance is used to translate just this one hole. Please note that G48 is relative to the current G35 or G36 vision
translation or offset. G48 is not affected by, nor does it affect the current G45 or G46 translation or offset. G48 and its
coordinate are programmed in a block by themselves.
Vision Step and Repeat
Step and Repeat. Vision Commands
The vision step and repeat commands M50, M51 and M52 are a powerful set that help to optimize vision assisted drilling
and routing.
By using these commands, all the patterns on a panel may be vision inspected first and the resulting corrections used over
and over as many times as needed, usually after tool changes. For example, after inspection a drill tool may be used to drill
all patterns with the regular step and repeat commands. Then the tool may be replaced and the holes of that diameter may
be drilled on all patterns and so on. This procedure eliminates the need for extra tool changes which would be the case if
these commands were not used.
Vision Step and Repeat Pattern Start
M50,#
M50 is used to indicate the beginning of a vision correction pattern which is expected to be repeated later on. The number
that follows the command is a label or marker used to "name" that particular pattern so it may be referenced later with the
command M51. This command is normally used in the part program right before an M25, so the machine will vision inspect
the pads contained in the main pattern enclosed between M25 and M01, and then it will also inspect the equivalent targets
contained in the stepped and repeated patterns marked by M02 creating a set of vision corrections for each of them all. As
previously said, the main advantage of this command is that along with M51 and M52 allows the part-programmer to vision
inspect a pattern and use the generated corrections any time later, for example after tool changes. Please note that M50 is
not affected by, nor does it affect the current G36, G38, G45 or G46 translation or offset. However, it should be used in
Page 42 of 49
Program Commands
12/11/2003
file://C:\CNC%20Programming.htm
conjunction with G36 and/or G46. M50 and its label are programmed in a block by themselves.
Vision Step and Repeat Rewind
M51,#
M51 is used to rewind a vision correction "pointer" back to a previous pattern in order to use the vision corrections stored
with the command M50. The number that follows the command is the same label or marker used to "name" that particular
pattern with the command M51.
This command is normally used in the part program right before an M25, and after a tool change command T# so the
machine will use the vision corrections for the main pattern enclosed between M25 and M01 and the subsequent step and
repeat patterns marked by M02. M51 and its mandatory label are programmed in a block by themselves. Note that the label
following M51 must be previously used with M50.
Vision Step and Repeat Offset Counter Control
M52[#]
M52 is used to advance the vision correction "pointer" to the next pad in a pattern that it is being corrected after an M51,#.
Because G36 or G46 are used only in the main pattern with M50, any time the vision corrections for that pattern are used
again, they must be replaced with M52s. There must be as many M52 commands after an M51 as G36/G46 there were in the
main pattern under M50. For example, if three G36 were used after M50, three M52 would be necessary after M51. To
simplify the part -program an optional number may follow the command to indicate the total number of M52 in only one
block. In this case the block would look like this: M52,3. This command is normally used in the part program right after an
M25, so the machine will advance the vision corrections every time it steps and repeats. M52 and its optional label are
programmed in a block by themselves.
Note that M51 must precede M52.
Vision Step and Repeat Examples
There are two ways to write a part -program using these vision step and repeat commands. Both of them produce the same
results, but allow the programmer to use the method with which he/she feels more comfortable. One of these methods
combine vision blocks with drill blocks. In this case the part program looks very much like a standard drill program. The
second method has a step and repeat section just for the vision inspection blocks and then is followed by subsequent
sections where the drilling blocks are specified. An example of the first procedure follows:
COMMAND
DESCRIPTION
M48
T1S20F09
T2S20F09
T3S20F09
%
G34,1
Vision tool number
G36X -0087Y-007
Panel pre -alignment targets
G36X -0087Y155
G36X09Y155
T1
M50,1
Vision Step and Repeat Pattern Start
M25
G46XY
Alignment targets
Page 43 of 49
Program Commands
12/11/2003
file://C:\CNC%20Programming.htm

G46XY02
G46X02Y02
X005Y005
X0051Y0151
M01
M02X03
M02X03
M02
M08
T2
M51,1
Vision Step and Repeat Rewind
M25
M52,3
Vision Step and Repeat Offset (Replaces previous
G46's declared inside M50)
X01Y005
X0101Y0151
M01
M02X03
M02X03
M02
M08
M50,
2 New vision Step and Repeat Pattern Start
M25
G46X015Y
Alignment targets
G46X01Y02
G46X02Y03
X01Y002
X01Y018
M01
M02X03
M02X03
M02
M08
T3
M51,1
Vision Step and Repeat Rewind
M25
M52,3
Vision Step and Repeat Offset
X015Y005
X0151Y0151
M01
Page 44 of 49
Program Commands
12/11/2003
file://C:\CNC%20Programming.htm
An example of the second procedure looks like:
M02X03
M02X03
M02
M08
M30
COMMAND
DESCRIPTION
M48
T1S20F09
T2S20F09
T3S20F09
%
G34,1
Vision Tool Number
G36X -0087Y-007
Panel pre -alignment targets
G36X -0087Y155
G36X09Y155
M50,1
Vision Step and Repeat Pattern Start
M25
G46XY
Alignment targets
G46XY02
G46X02Y02
M01
M02X03
M02X03
M02
M08
T1
M51,1
Vision Step and Repeat Rewind
M25
M52,3
Vision Step and Repeat Offset
X005Y005
X0051Y0151
M01
M02X03
M02X03
Page 45 of 49
Program Commands
12/11/2003
file://C:\CNC%20Programming.htm
M02
M08
T2
M51,1
Vision Step and Repeat Rewind
M25
M52,3
Vision Step and Repeat Offset
X01Y005
X0101Y0151
M01
M02X03
M02X03
M02
M08
M50,2
New Vision Step and Repeat Start
M25
G46X015Y
New Alignment Targets
G46X01Y02
G46X01Y02
X01Y002
X01Y018
M01
M02X03
M02X03
M02
M08
T3
M51,1
Vision Step and Repeat Rewind
M25
M52,3
Vision Step and Repeat Offset
X015Y005
X0151Y0151
M01
M02X03
M02X03
M02
M08
M30
Page 46 of 49
Program Commands
12/11/2003
file://C:\CNC%20Programming.htm
Part Program Vision Commands
In addition to the regular vision part program commands seen before, several keyboard commands may be included inside
the part program to change the configuration and set up of the vision system at run time while the machine is inspecting
targets. This feature adds great flexibility to the inspection process, allowing the machine to adapt itself to variations
throughout the inspected panels. Most of these commands are the equivalent to screen buttons, which means that while
executing these commands, the machine will behave as if there was an operator modifying the set up as the inspection
phase progresses. Please note that when vision mode is enabled, the machine performs two complete passes thru the part
program. In the first one, only vision commands are executed. On the second pass, the drilling/routing operations are
carried on. The syntax of these commands is the same as if they were issued from keyboard. The only difference is that
they must be preceded by the symbol "$". For a complete detail of the operation of these commands, see the Buttons
section. A list of them and a brief description follows:
If your machine is equipped with Servo Controlled Variable Zoom and Focus, the following additional commands are
available:
Part Program Vision Commands Examples
The following example shows a typical vision assisted part program with the addition of specific commands which permit
the user to change the machine's vision configuration at run time and so further automating the inspection procedure.
$uvis,auto,on(off)
Entry material used/not used
$uvis,box,on (off)
External video processor used/not
used
$uvis,search,on (off)
Turn autosearch on
$uvis,searcharea,#
Specify the radius of the area to
search
$uvis,entry,on (off)
Same as $uvis,auto,on
$uvis,insp,#
Set number of vision inspections
$uvis,focus,x#y#
Auto focus at the indicated location
$uvis,lamp,#
Change camera light to indicated value
$uvis,zoom,#
Set magnification to passed level
$uvis,calib
Do camera to spindle offset calibration
$uvis,alg,#,#
Specify algorithm number and fiducials
COMMAND
DESCRIPTION
M48
T1S20F09
T2S20F09
T3S20F09
%
$uvis,search,on
Turn Autosearch ON
$uvis,zoom,7
Change Magnification Level
Page 47 of 49
Program Commands
12/11/2003
file://C:\CNC%20Programming.htm

$uvis,lamp,30
Change Camera Light Intensity
$uvis,focus,xy
Auto Focus on Target at Work Zero
$uvis,alg,0,2
Use Excellon Algorithm (0) with 2 Fiducials
$uvis,zoom,3
$uvis,calib
Perform Auto Camera Calibration
$uvis,lamp,25
$uvis,insp,2
Request two inspections
G34,1
G36XY
G36X8.6Y
$uvis,search,off
Turn Autosearch OFF
T1
G34,2
$uvis,zoom,7
$uvis,calib
$uvis,lamp,55
$uvis,alg,0,3
Use Excellon Algorithm (0) with 3 Fiducials
$uvis,insp,1
Make one inspection
M50,1
M25
G46XY
G46X2.4Y
G46X1.2Y2.4
XY
M01
R3M02X3.1Y
M01
R6M02XY2.9
M08
T2
M51,1
M25
M52,3
X2.4Y
M01
R3M02X3.1Y
M01
R6M02XY2.9
M08
T3
Page 48 of 49
Program Commands
12/11/2003
file://C:\CNC%20Programming.htm
Machine Manuals
|
Diameter Pages
|
Helpful Hints
|
Contact Info
|
Excellon Private
M51,1
M25
M52,3
X1.2Y2.4
M01
R3M02X3.1Y
M01
R6M02XY2.9
M08
$uvis,lamp,0
Turn Camera Light Off
M30
Page 49 of 49
Program Commands
12/11/2003
file://C:\CNC%20Programming.htm
Wyszukiwarka
Podobne podstrony:
MTS CNC Programowanie CNC Toczenie wydawnictwo REA PL
fanuc cnc program manual gcode
Sterowanie CNC i programowanie
MTS CNC Programowanie CNC Toczenie wydawnictwo REA PL
pomoc programowania na tokarki cnc
programowanie dla walka w cnc predk skraw Przyklad recz progr OSN
Programowanie CNC
CNC ZASADY PROGRAMOWANIA, CNC
CNC Conversional programming
Podstawowe wiadomości programowania maszyn cnc
Instrukcja obsługi programu CNC Simulator v.453, CNC
troszke o programowaniu CNC, Mechatronika, CNC, Inne
PROGRAM CNC, Studia, Politechnika Śląska, Mechatronika, Semestr 3, sem3
NX CAM Programowanie sciezek dla obrabiarek CNC nxcamp
Programowanie obrabiarek CNC
programowanie maszyn sterowanych CNC
programowanie maszyn cnc
więcej podobnych podstron