Beaded Crochet Rope Instructions
by Judith Bertoglio-Giffin,
BeadLine Studios
Everything on this page is © 2000, Judith Bertoglio-Giffin, BeadLine Studios
you may print out and use these instructions for your personal use only.
These instructions are derived from 1912 bead crochet instructions with my added observations, hints and photos.
Edith, whom I met in 1999 at a Bead Cave, was responsible for getting me hooked on this technique. For pure
creative inspiration I can only look to Martha & Pat at
Beads Without End
. The rest is my own obsession with the best
travel beading there is.
These are VERY Basic instructions - and it's not all that easy to pick up. I had been crocheting for over 30 years and I
did a dozen bracelets before I was even beginning to be happy with my work!
INSTRUCTIONS
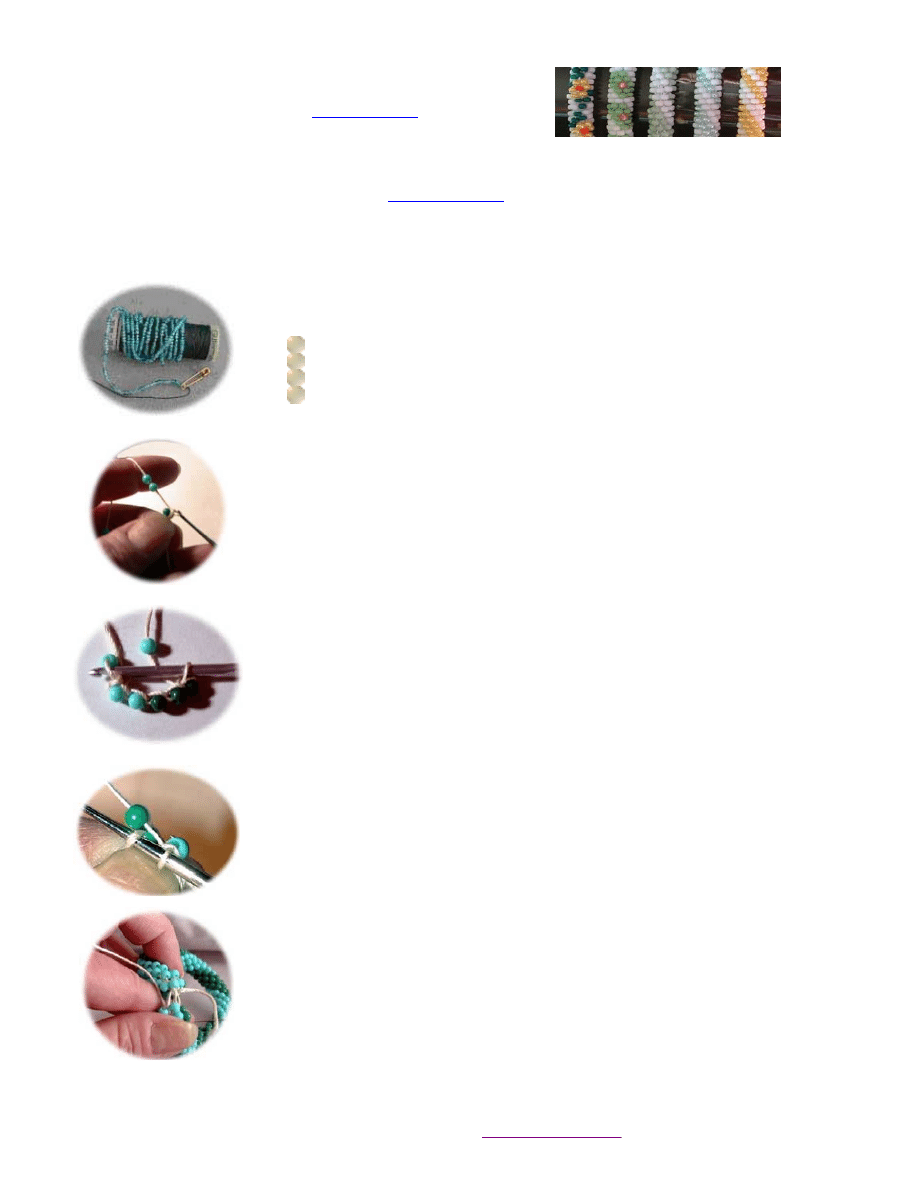
String the seed beads on the thread in a pattern until you have the desired length. A
spiral pattern works well to start.
Remember.... The last bead strung will be the first bead worked! You will be working
in a slip stitch helix, - each stitch having a single bead in it.
Chain 6, leaving a bead in each stitch. Join your chain to the 1st stitch with a slip
stitch.
Push hook through loop on which 1st bead is fastened; push the first bead over the
hook, down to the right (left) and BE SURE to bring the thread from the spool
OVER the top of the bead. Slide down the next bead and fasten with a slip stitch.
Continue on in this manner, working in a slip stitch spiral, until the desired length is
reached. Care should be taken to see that there are always 6 beads around and that
your pattern is looking right. If not, then unravel the work back to where it is right!
To finish the rope, Cut your thread, leaving a tail and pull through the last stitch.
Hook: size 10 (1.0mm) USA
Thread: 100% Polyester Top Stitch or Nylon Upholstery thread
Beads: glass size 11/0
Size of rope: 6" of strung 11/0 beads yields about 1" of crocheted rope.
Endless Bracelet: To make an endless loop bracelet, thread one tail with a tapestry
needle, mate both ends, matching design and sew it together by passing the needle
UNDER each ending bead and catching the thread. When weaving, make sure to
place the needle under the beads of the last six
that were crocheted so that the bead stays on the correct side of the thread just like
you were crocheting another spiral. Each bead stitched should lie in the same
direction as the others. Leave the first few stitches loose until you are sure the beads
are matching up, then snug up tight. Weave the tail back into the crochet work and
clip.
HINTS:
If you have never tried this before, please use white thread and opaque colored beads with a simple spiral for
your first attempt. You can then see that you are crocheting like colored beads on top of each other. If you have an
extra bead in your pattern, you can break it. Messed up the pattern... call it "free-form" and keep on
going.
Distributed by
http://www.bead-patterns.com
Wyszukiwarka
Podobne podstrony:
Stitch Beaded Crochet Rope
Kitten Crochet Amigurumi Pattern
Bead Crochet Rope Graph Paper
The Happy Hooker Stitch N Bitch Crochet Errata Shortnsweet
How to Crochet Granny Squares 9 Free Crochet Afghan Patterns eBook
The Happy Hooker Stitch N Bitch Crochet Errata Belt du jour
The Happy Hooker Stitch N Bitch Crochet Errata
6 Easy Crochet Bag Patterns eBook
DMC Hoooked Zpagetti Riviera handbag crochet pattern
DMC Hoooked Zpagetti San Remo handbag crochet pattern
DMC Hoooked Zpagetti Ligure bag crochet pattern
8 Last Minute Valentine Gifts Crochet Patterns for that Special Someone eBook
Snap Apart Olaf Crochet Pattern
Easy ways a modify a crochet pattern
Crochet Patterns
crochet pattern theo the cat
Shell Pendant Necklace Crochet Pattern
Koigu Mini Pouch Crochet Pattern
Free Crochet Patterns Charleston Garden Afghan Pattern 2013 11 19
więcej podobnych podstron