From
Woodsmith
magazine
www.Woodsmith.com
page 1 of 3
©2005 August Home Publishing Company
All rights reserved
Plans
N O W
w w w . P l a n s N O W . c o m
®
S
ometimes, projects that look quite challenging
at first glance are really the simplest of proj-
ects when it comes right down to actually
building them. And that’s the case with the two
sets of candle holders shown on these pages.
Each of the candle holders you see starts out as a
square block of hardwood that’s been cut to rough
size. Then to create the unique look, you make curved
cuts on the band saw and glue in the accent strips. I
used mahogany strips to provide a contrast to the
maple that makes up the body of each holder.
CURVED CANDLE HOLDERS
MAKING THE BLANKS.
To start, you’ll need a pair of
3"-square blanks about 5
1
/
2
" long. I made mine by
gluing up thinner workpieces and then trimming
them to size.
Once you have the blanks glued up, the next
step is to add the accent strips. The only thing to
keep in mind as you add the accent strips is to
locate them so they’re within the boundaries of
the shape you’ll be cutting out.
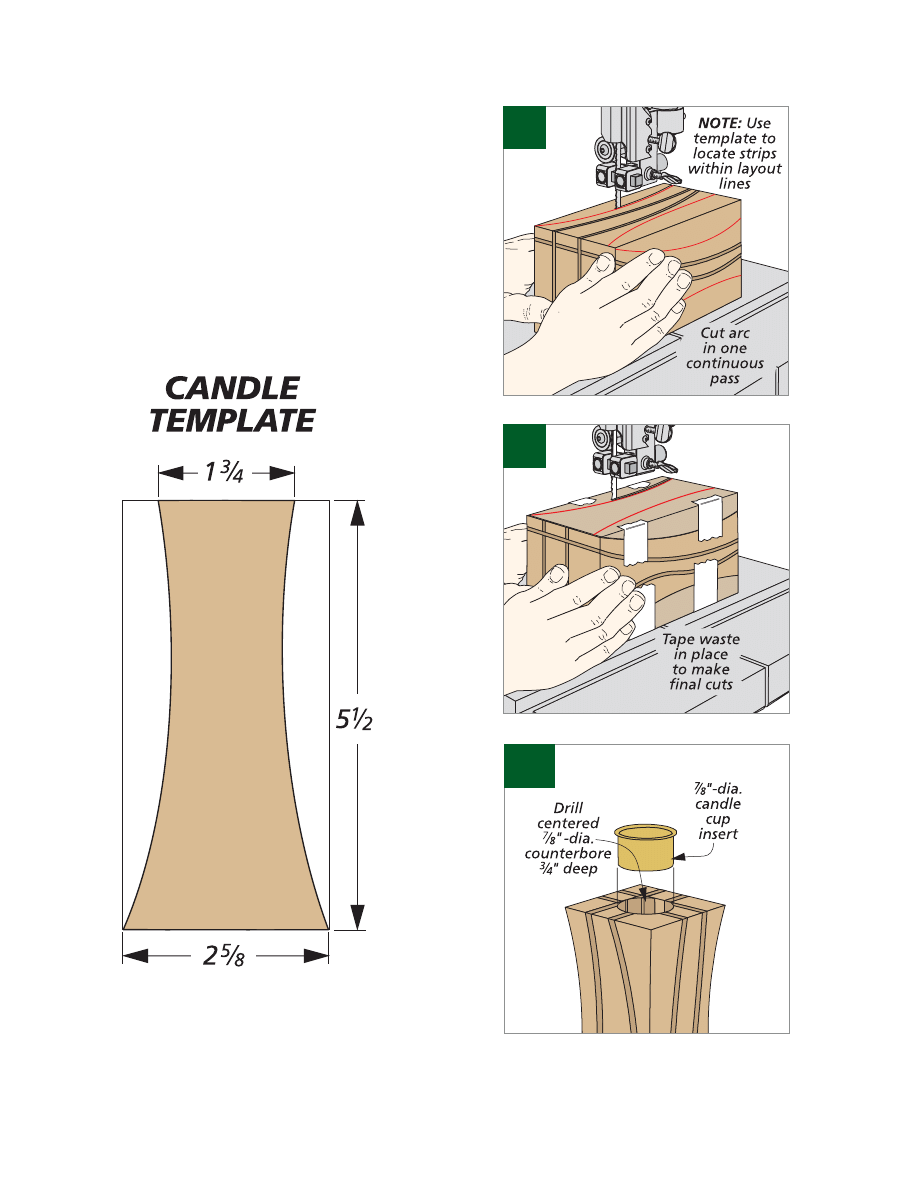
SHAPE THE BLANKS.
After adding the accent strips,
all that’s left to do is shape each blank and then
drill a hole in the top for the candle holder cup.
As you can see in Fig. 1 on page 2, a band saw
makes quick work of shaping the blank. To make
the final shaping cuts you see in Fig. 2, you’ll
need to tape the waste pieces back in place.
FINAL DETAILS.
Once the shaping is complete, you
can sand the curves smooth. Then drill a
7
/
8
"-
dia. hole in the top of each holder for the brass
insert that will securely hold a slim taper candle,
as in Fig. 3.
All that’s left to do at this point is apply a
finish. I rubbed in a few coats of oil. And when
the oil was dry, I glued a felt pad to the bottom
of each candle holder.
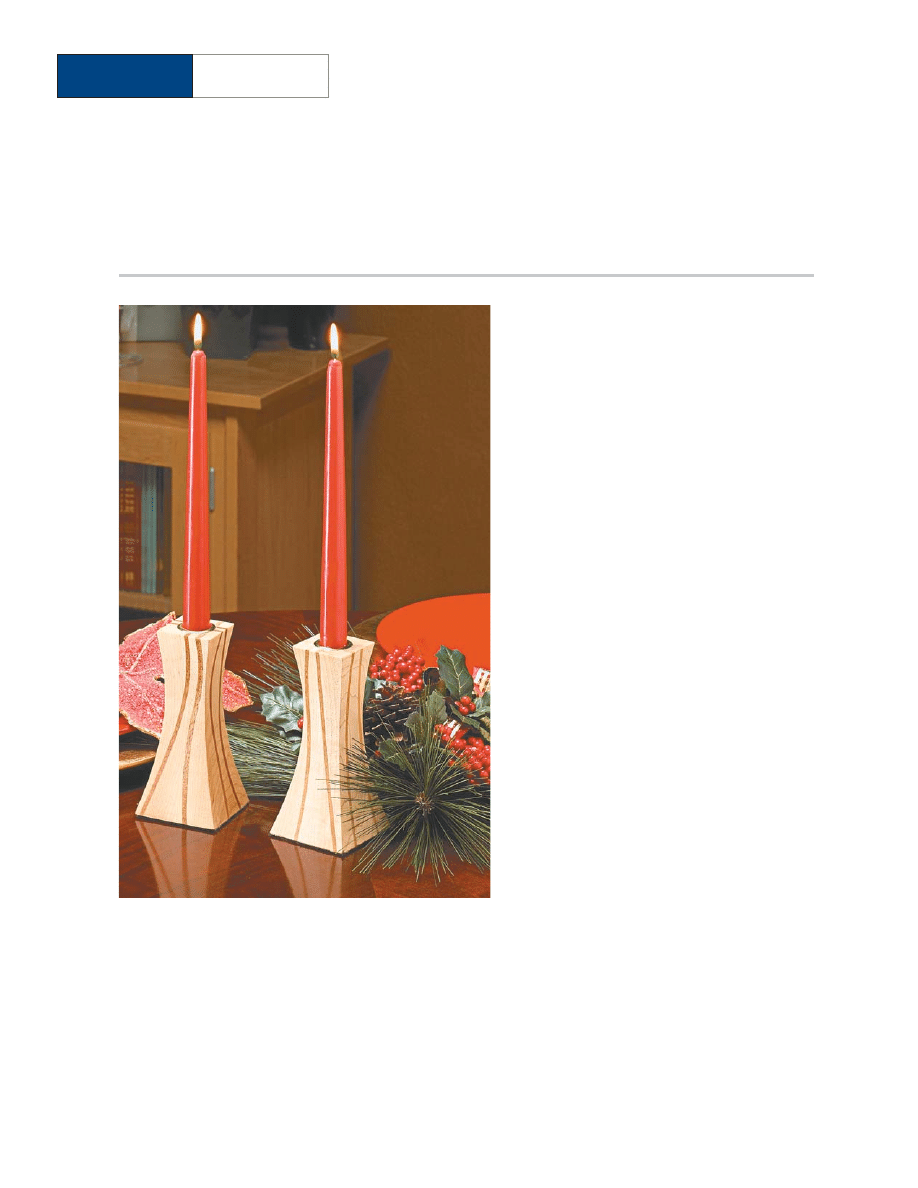
C
ANDLE
H
OLDERS
taper & pillar
Create two different candle holders with
contrasting accent strips - both using the
same band saw technique.
From
Woodsmith
magazine
www.Woodsmith.com
page 2 of 3
©2005 August Home Publishing Company
All rights reserved
2
3
1
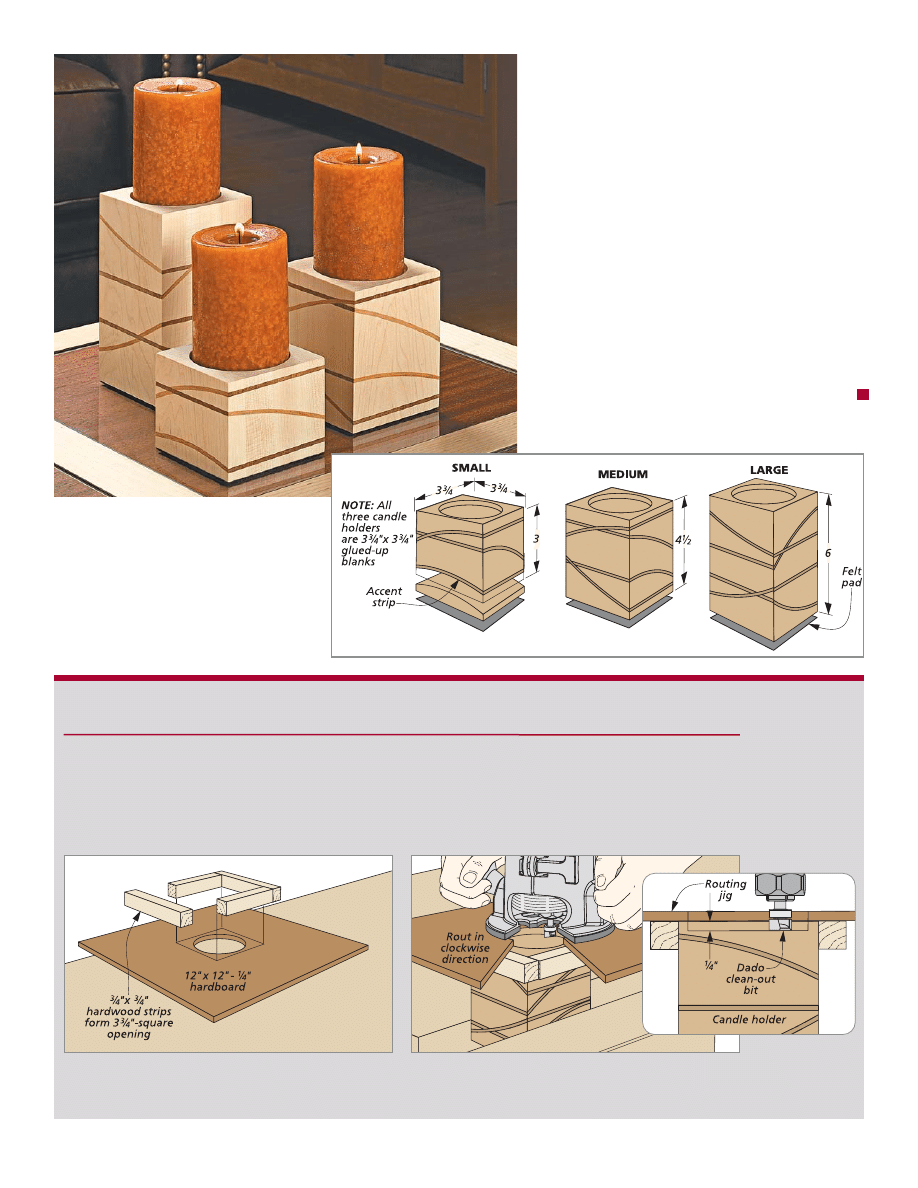
SQUARE HOLDERS
The curved candle holders provide an elegant look.
For something a little different, take a look at the
set of square candle holders at right.
The process for making this set of candle holders
isn’t all that different from the curved holders. It’s
a bit easier since you don’t have to make any final
shaping cuts on the band saw. But that’s not to say
there aren’t some interesting challenges in making
the square candle holders.
From
Woodsmith
magazine
www.Woodsmith.com
page 3 of 3
©2005 August Home Publishing Company
All rights reserved
CROSSGRAIN & THROUGH CUTS.
For starters, instead of
working with the grain as before, I made all the cuts
across the grain. As I did this, I made sure to do three
things.
The first was to rotate the blank between each
cut. This alternates the curve from face to face.
Second, as I glued in each accent strip, I made sure
the edge grain followed the curve of the cut. And
finally, I made a couple of the cuts through the accent
strips that had already been glued in place.
HOLDING THE CANDLE.
Once all the accent strips are
in place and sanded flush, you can trim the blank to
final size and then complete a couple final details.
Since the large candles for these holders don’t
need an insert to hold them in place, I simply routed
a counterbore in the top of each holder (see the box
below).
Finally, all that’s left to do is apply a finish and
then glue a felt pad to the bottom of each holder.
{
Varying the heights and adding
intersecting accent strips across
the grain provides a different
look for the square candle
holders shown above.
To hold the candles in place, you’ll
need to add a large counterbore into
the top of each holder. To do this, I
used a hand-held router, a routing
jig, and a dado clean-out bit.
The jig is a scrap of hardboard
with a 3
1
/
8
"-dia. hole cut in it. To posi-
tion the jig, there’s a hardwood
frame (left drawing). Routing the
hole is just a matter of setting the jig
in place and making a
1
/
4
"-deep cut
with a dado clean-out bit. After
routing around the edge of the hole,
nibble away at the remaining waste.
Routing Jig. The routing jig starts out as a piece of hardboard
with a hole in it. Then to center the jig over the candle holder,
hardwood strips are glued in place to form a frame.
Rout Hole. Now set the jig in place and adjust the bit for
the depth of cut (detail ‘a’). After routing clockwise around
the hole in the jig, clean out the remaining waste.
a.
How-To: Routing a Hole for a Candle
W
Wyszukiwarka
Podobne podstrony:
Crafts Woodworking Plans (ebook) candle holder
Candle Contemporary Candle Holders
Woodsmith Magazine Oak Bookcase
Jig Magazine Holder and Box Joint Jig
Wood Magazine America s Best Home Workshops 2009 Bonus Plans
now
NLP Magazine 01 id 320421 Nieznany
[ebook renewable energy] Home Power Magazine 'Correct Solar Panel Tilt Angle to Sun'
Dane techniczne SW50 700 now
Millionaire Magazine 10
Akumulator do HOLDER A AE
Akumulator do HOLDER C C@P Pp
Holderlin wiersze tłum Libera i wstęp
Akumulator do HOLDER P P0 PP P`
17 Money Making Candle Formations
Garret Water Carburator Plans For Water Powered Vehicles
DIY Mortis Dreadmought Plans & Templates
więcej podobnych podstron