A
M E R I C A
'
S
F
AVO R I T E
W
O O D WO R K I N G
P
L A N S
U - B I L D
B RO U G H T TO YO U BY
:
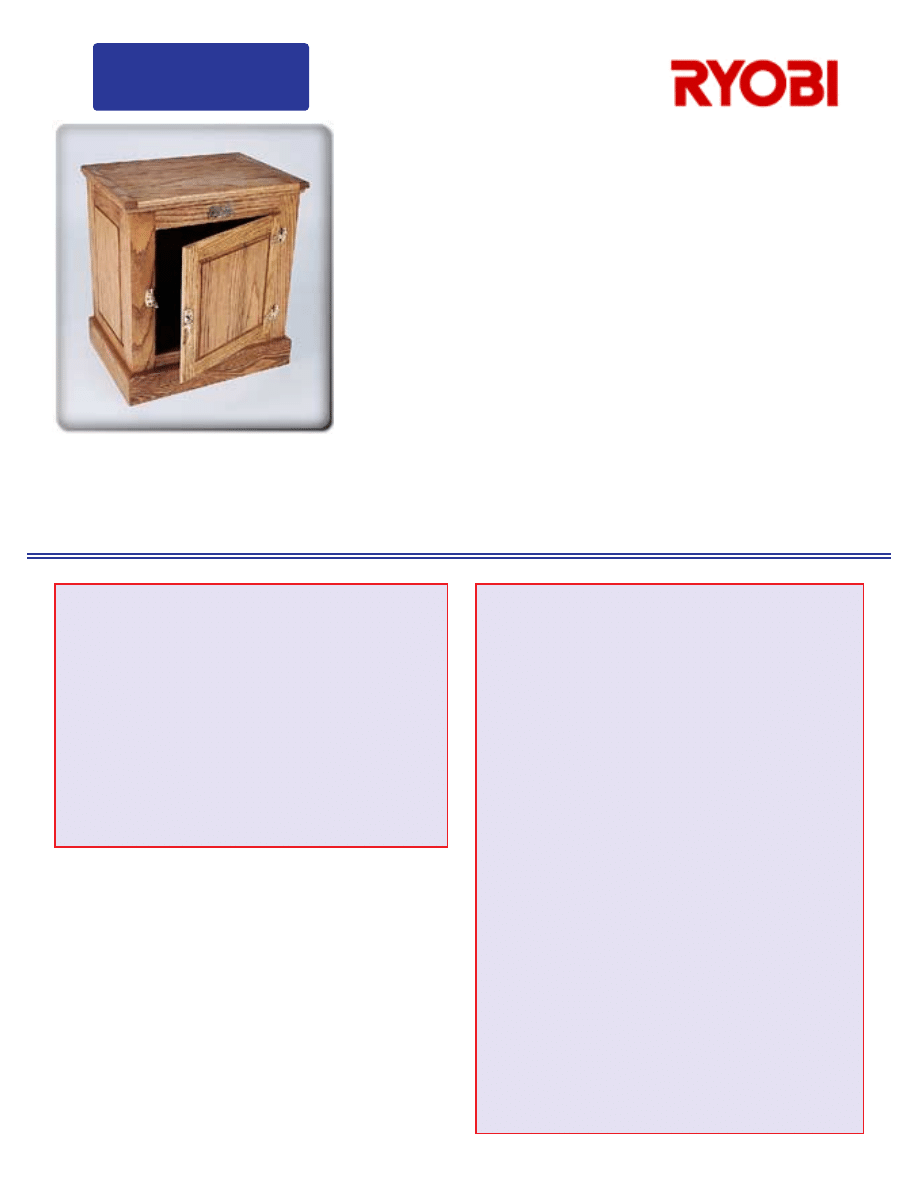
One-Door Ice Box
Plan No. 723
Copyright U-Build, Inc., 2000.
All rights reserved. Printed in the U.S.A.
Bill of Material
Quantity
Size
Material
5
3/4” x 6” x 8’*
oak
1
1/8” x 48” x 48”
oak plywood
32
3/8” x 2”
dowel pins
1 box
1 1/4”
finish nails
1 bottle
wood glue
1 small can
finish of choice
1 pair
1 5/16” x 3 3/8”
3/8” offset brass ice box hinges
1
2 1/4” x 2 1/16”
brass ice box latch (right-hand)
1
brass ice box name plate
*About 20 board-feet of 3/4” oak
Cutting Schedule
Item
Qty
T
W
L
Material
A
2
3/4”
3”
23 1/4”
oak
B
2
3/4”
2 1/4”
23 1/4”
oak
C
2
3/4”
3”
10”
oak
D
2
3/4”
4”
10”
oak
E
2
3/4”
10”
16 1/4”
oak
F
2
1/8”
10 1/2”
16 3/4”
oak plywood
G
2
3/4”
3”
23 1/4”
oak
H
1
3/4”
3”
16”
oak
I
1
3/4”
4”
16”
oak
J
1
3/4”
15 1/8”
20 1/2”
oak*
K
1
3/4”
2”
20 1/2”
oak
L
1
3/4”
2”
22”
oak
M
2
3/4”
4”
16 3/4”
oak
N
1
3/4”
4”
23 1/2”
oak
O
1
1/8”
21 1/4”
25 1/4”
oak plywood
P
1
3/4”
16 3/4”
20 1/2”
oak*
Q
2
3/4”
1 1/2”
16 3/4”
oak
R
2
3/8”
3/4”
16 3/8”
oak
S
1
3/8”
3/4”
22 3/4”
oak
T
2
3/4”
2”
16 7/8”
oak
U
2
3/4”
2”
12 5/8”
oak
V
1
3/4”
12 5/8”
12 7/8”
oak
W
1
1/8”
13 1/8”
13 3/8”
oak plywood
*Smaller pieces of stock must be glued-up to create parts (J)
and (P). 3/4” oak plywood may be substituted for (J).
NOTES
1. Read all instructions and check materials before
beginning work.
2. Read manufacturer’s instructions before operating
equipment.
3. Always wear safety glasses.
4. Oak is preferred for this project for its authenticity
and beauty.
5. Drill pilot holes in oak before nailing.
There was a time when an ice box like this one could be found in almost every home. Although refrigerators have rendered them obso-
lete, antique oak ice boxes remain popular with collectors, even though they’re usually expensive and hard to find.
This do-it-yourself project and authentic reproduction is neither: it is both inexpensive and easy to build, making use of readily avail-
able materials and requiring only straight cuts. It’s also versatile, and makes a great end table or bedside table.
The one-door ice box measures 26 inches tall by 23 inches wide by 17 inches deep.
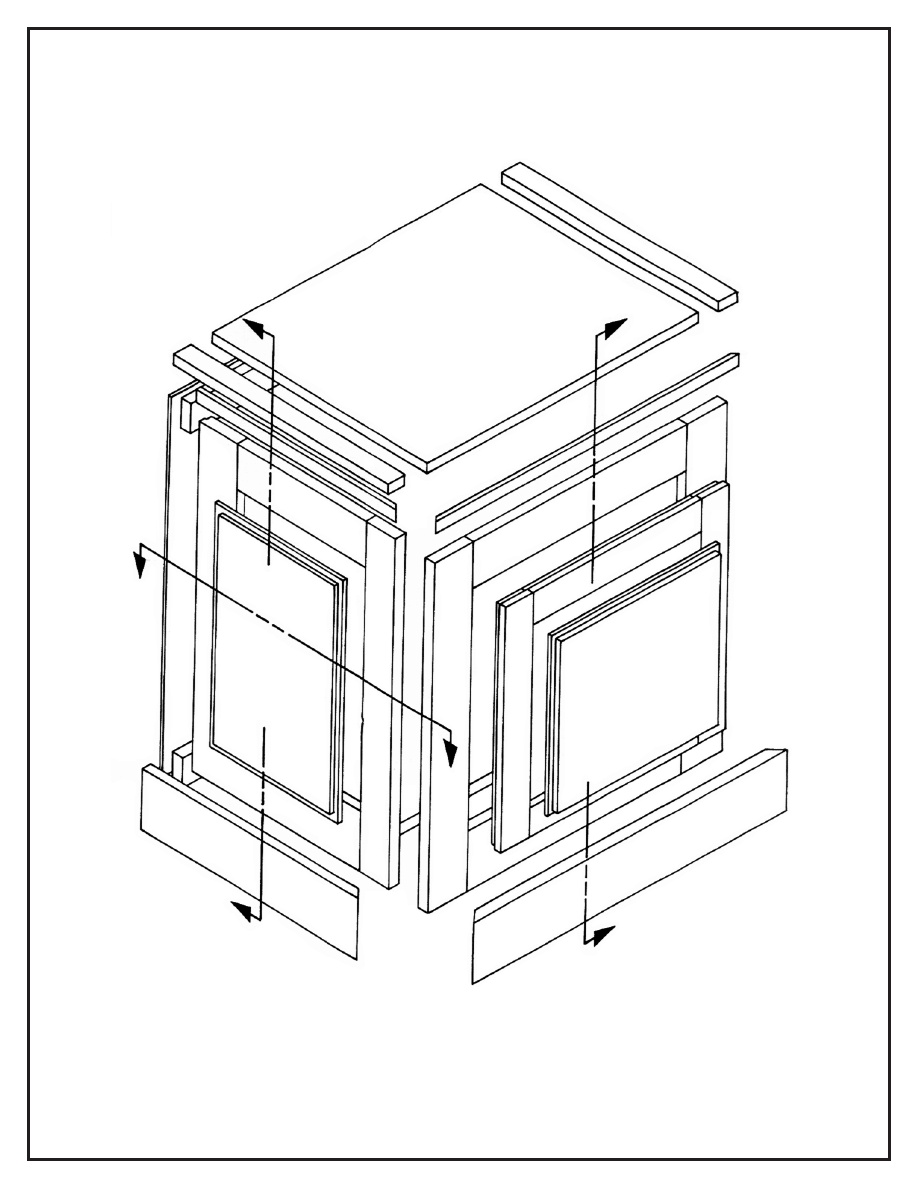
Isometric
P
A
A
C
C
B
B
H
S
G
G
I
N
T
U
V
W
U
T
Q
Q
K
A
B
F
J
D
E
L
M
C
O
R
Read all instructions before beginning any work. Cut all material to sizes shown in cutting schedule.
Assembly Instructions
Page One
1.
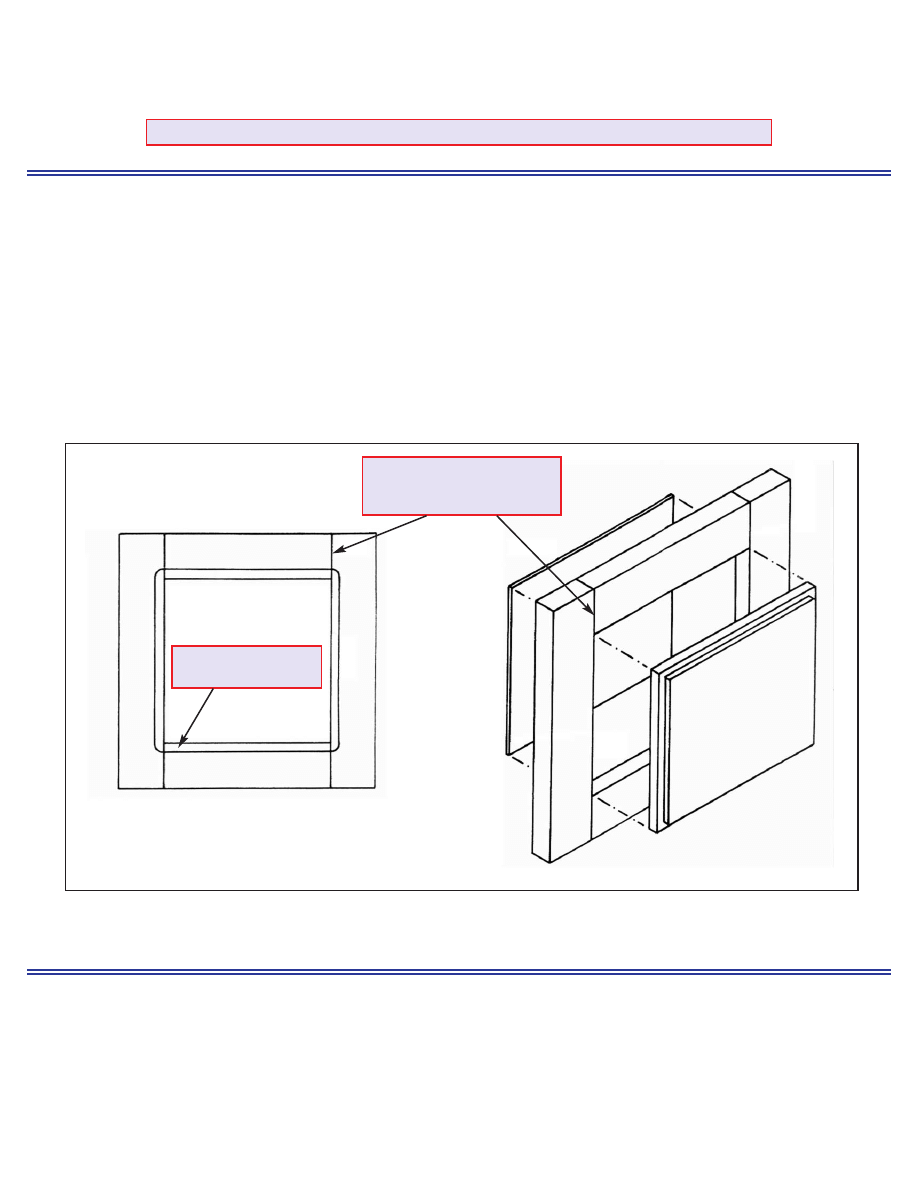
Mark location for dowel pins and drill pieces A, B, C, D, G, H, I, T and U. Refer to Figure 1.
2.
Assemble and clamp face frame, side frame, and door frames using glue and 3/8" dowel pins as illustrated in Figure 1. Check
frames for squareness.
3.
Route a continuous rabbet around the back side openings of the side panel and door frames and install 1/8" plywood panels F and
W. Refer to Figure 1.
4.
Using a panel-raising bit, route around all four edges of parts E and V to create raised center panels. Glue center panels E and V
to plywood inserts F and W. Refer to Figure 1.
Figure 1
Side Panel, Face Frame and Door Construction
(Back side of door and side panels)
C, H, U
C, H, U
E,V
F,W
A, G,T
A, G,T
D, I, U
D, I, U
A, G,T
A, G,T
Drill and install two 3/8” x 2”
dowel pins at this location on
each joint.
Continuous 1/4” x 1/8”
rabbet for 1/8” plywood.
5.
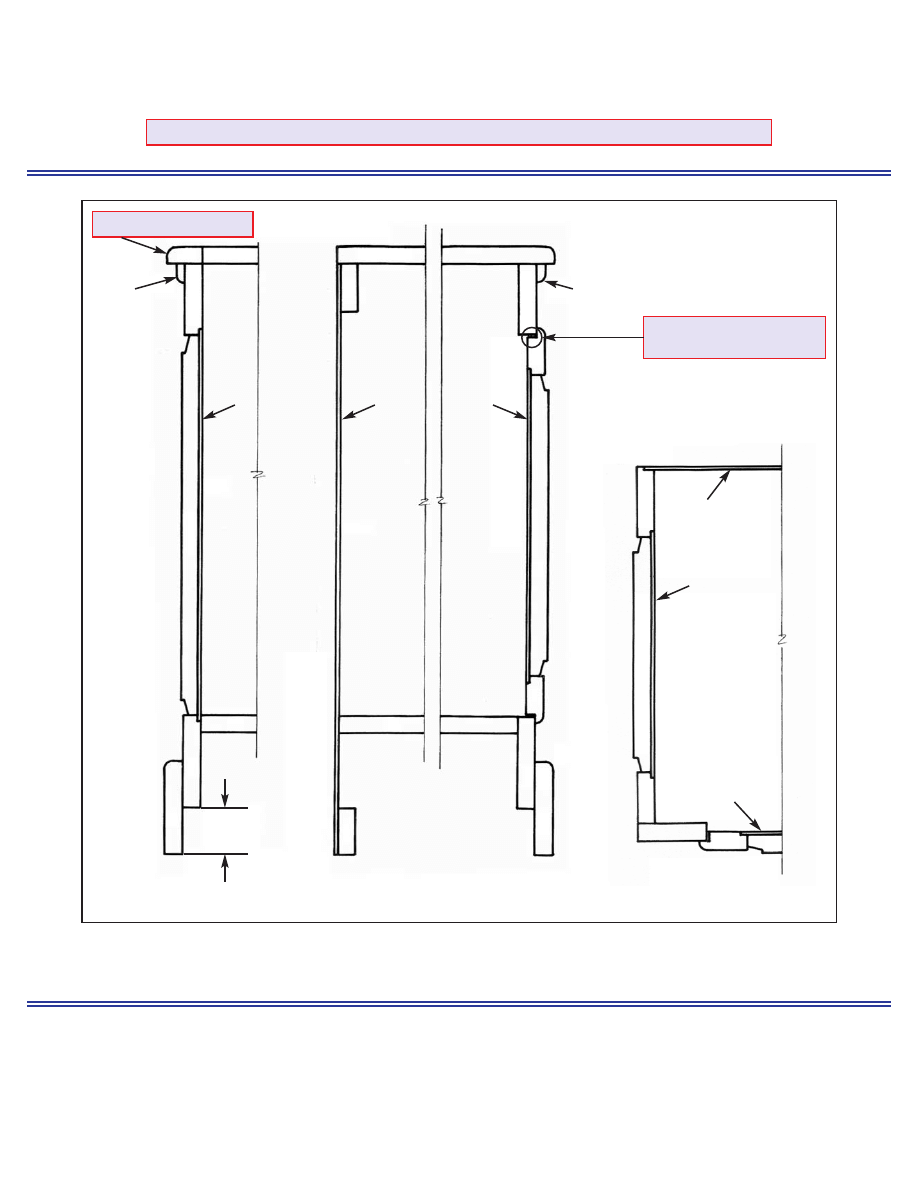
Nail and glue completed side panels to J, K, L and front face frame. Refer to Isometric and Sections A-A and B-B in Figure 2.
6.
Attach top (P), base (M, N) and trim (R, S) with glue and finish nails. Refer to Sections A-A and B-B in Figure 2. Route back of
unit for insertion of 1/8" plywood (O) (see Section C-C in Figure 2).
7.
Route a 3/8” shoulder around the inside edges of the door to create a 3/8” offset. Refer to Section B-B in Figure 2.
Read all instructions before beginning any work. Cut all material to sizes shown in cutting schedule.
Assembly Instructions
Page Two
8.
Before final assembly, sand and apply finish of choice.
9.
Mount door using 3/8” offset hinges. Once door is mounted, determine location and mount door latch.
C
R
F
F
E
J
J
L
N
D
I
M
2”
Section A-A
Section B-B
Section C-C
Q
P
K
P
3/8” or 1/2” radius (TYP.)
3/8” offset door (cut to fit 3/8”
offset hardware).
W
O
O
W
S
H
U
U
V
E
A
B
G
T
V
Figure 2
Sectional Views
Wyszukiwarka
Podobne podstrony:
Cabinet Two Door Ice Box
Cabinet three door bookcase
Last One Close the Door Richard Chwedyk
Cabinets Raised Panel Door Tools and Techniques
leach ll in one 246
instrukcja obs ugi do ekspresu do kawy JURA Impressa XS90 One Touch black PL (videotesty pl)
podstawy teorii part one bzz v1 07 02 06
Corner Buffet Cabinet(1)
DOOR ENTRY SYSTEM
GunsnRoses Knockin on heavens door
The History of Great Britain - Chapter One - Invasions period (dictionary), filologia angielska, The
One more round
Paintings and One Qaradawi
ci ga spr one
Prsus one one one
ONE MORE CHANGE
One dollar
Woolf A Room of One's Own
Chirurgia ALL in ONE
więcej podobnych podstron