Art Technique - Digital Portrait - Epilogue.net - Fantasy and Sci-fi at their best© [Fantasy art, sci-fi art, anime and more!]
Digital Portrait: Painting realistic skin tones with Photoshop and Painter by
Intermediate to advanced level tutorial. Various tips and tricks to achieving realistic skin tones
from traditional methods, applied to digital painting.
Hello! I am impatient and I usually get bored with tutorials that are long and boring, so I made
this fun for you...I hope! You can always ask me more questions. I would be happy to answer by
e-mail at yazstudios@hotmail.com. For this tutorial in digital painting, I have used a Wacom
drawing pen/tablet, Photoshop and Painter.
The technique I have used here is from painting traditionally with acrylic paints and markers.
Since they both dry very fast, you must paint quickly in thin layers. I tend to use transparent
brushes to lay down my strokes. The same method works well in digital painting, especially if you
have a nicely rendered drawing and you want to add color to it. You have more control over the
overall image until the end of the illustration.
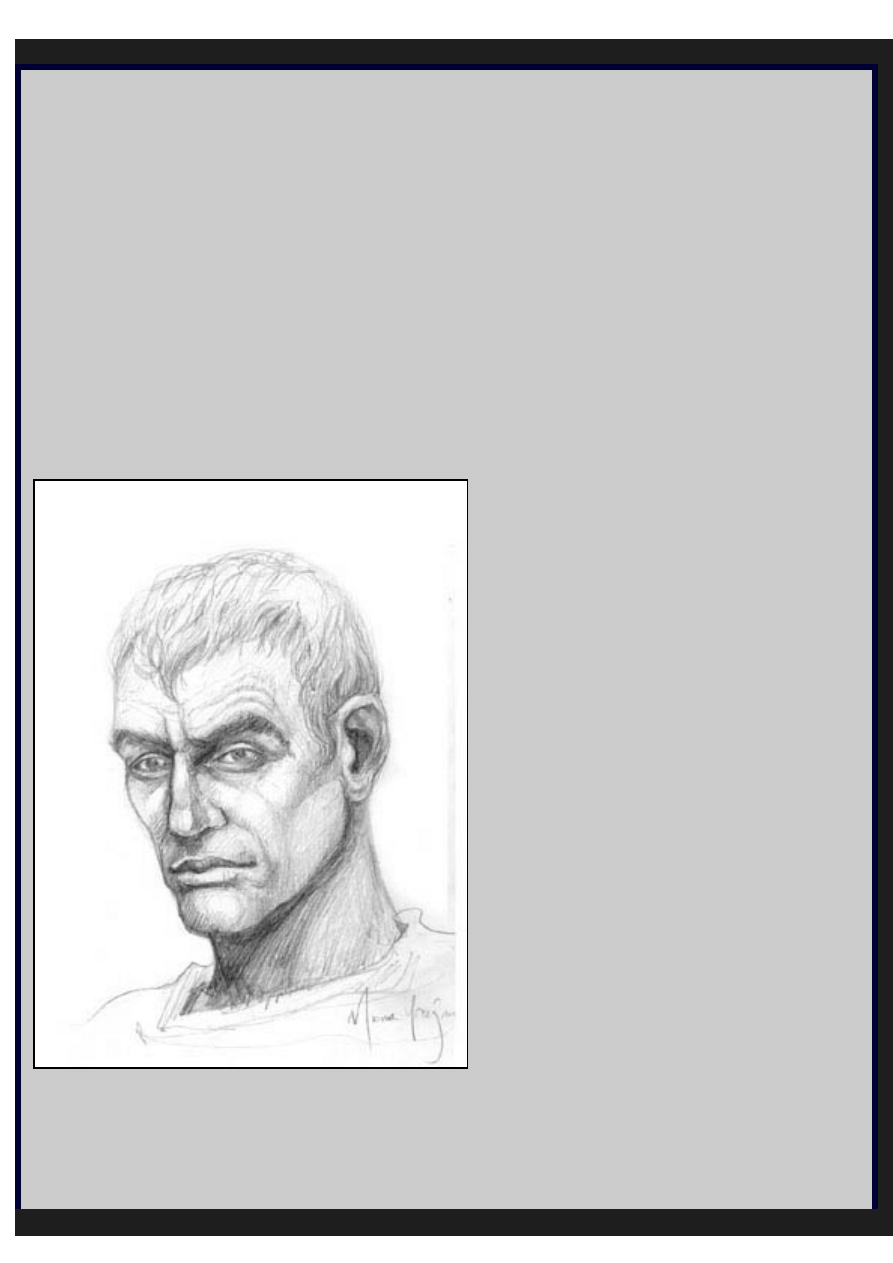
Step 1:
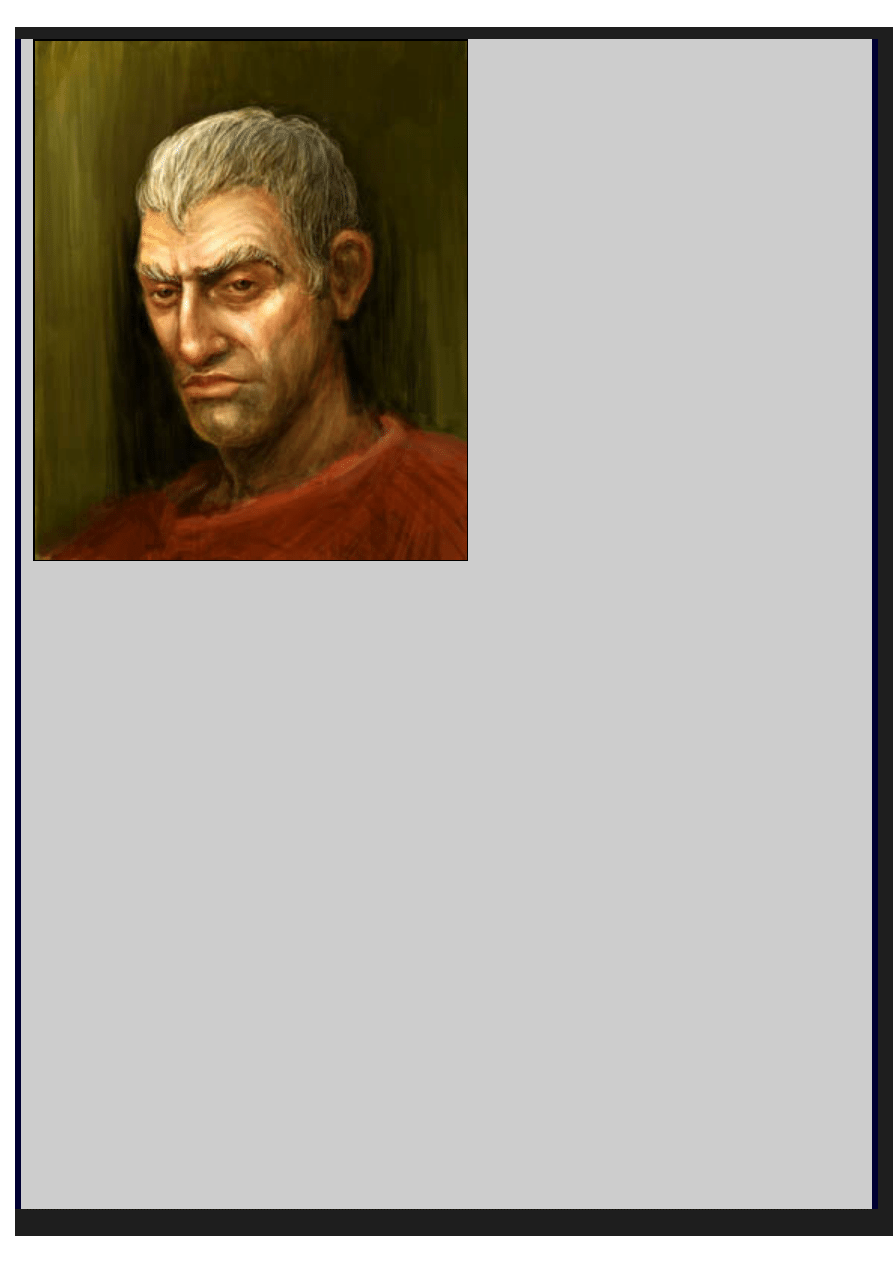
Let's get started. First I sketched out roughly what I wanted to paint. In this case, I wasn't sure
of the final look of the character, I simply wanted him to be a Roman, that's why I gave him that
particular hairstyle.
Since it wasn't meant to be a photorealistic painting, I didn't use any photo references, I kind of
winged his facial features from memory. I wanted him to be arrogantly looking down at you, to
file:///E|/Files%20Estratti/Digital%20Portrait%20Painting...shop%20and%20Painter/epilogue.netarttechyaz_portrait.html (1 di 8)27/09/2005 23.42.04
Art Technique - Digital Portrait - Epilogue.net - Fantasy and Sci-fi at their best© [Fantasy art, sci-fi art, anime and more!]
belittle the viewer as if to say, "I am a Roman, you are beneath me". So, once I scanned the
image at Greyscale 300 dpi (to be able to print it later) I cleaned it up a bit by adding some
brightness and contrast in Photoshop and then resized it to be around 8" x 10".
Step 2:
I started painting in Photoshop with a large round brush, about 60-100. Don't worry about
making it smooth. I usually set the Opacity level at 50% to 80% and I paint away without
thinking, I just lay down the colors to give the painting some shape.
At this stage, I keep the layers to a minimum. I only use layers if I really need to. This way I am I
forced to paint as if painting by hand. I don't erase or use the Undo at this stage either.
Step 3:
file:///E|/Files%20Estratti/Digital%20Portrait%20Painting...shop%20and%20Painter/epilogue.netarttechyaz_portrait.html (2 di 8)27/09/2005 23.42.04
Art Technique - Digital Portrait - Epilogue.net - Fantasy and Sci-fi at their best© [Fantasy art, sci-fi art, anime and more!]
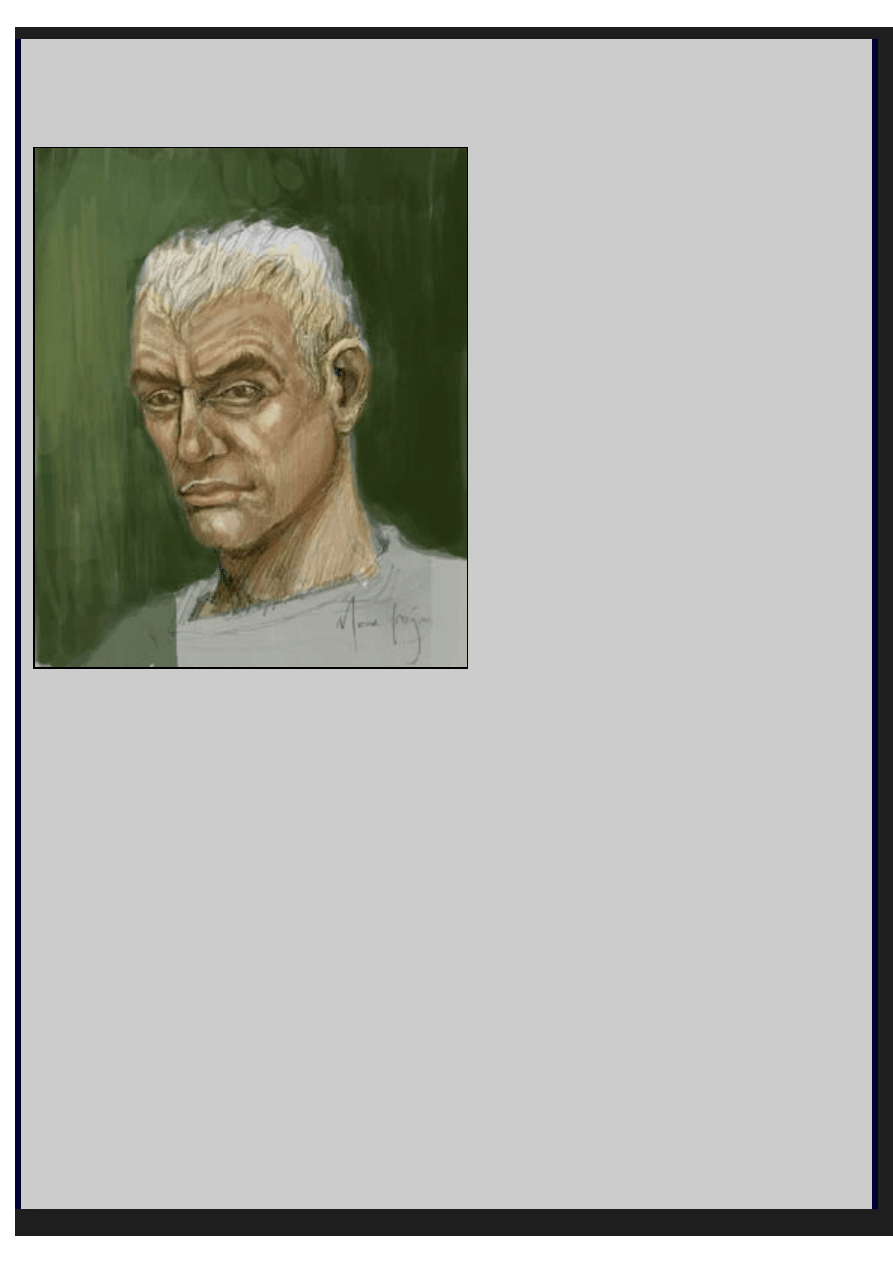
I have chosen to go with complimentary colors, warmer red colors for the foreground figure and
cooler green for the background. The skin tone is established at this point and I have started to
add some highlights and shadows because the paint is building up and I am losing my drawing
underneath. A question that I frequently get asked is "How do you blend colors"? Well, I don't
really blend them, I just overlay the colors on top of each other, like a marker rendering.
Sometimes I darken a color by introducing a darker shade of the color (ex. dark green on green)
and sometimes I do the opposite. Since the opacity of the brush is set to 50% (more or less), the
blending is achieved by itself.
Step 4:
file:///E|/Files%20Estratti/Digital%20Portrait%20Painting...shop%20and%20Painter/epilogue.netarttechyaz_portrait.html (3 di 8)27/09/2005 23.42.04
Art Technique - Digital Portrait - Epilogue.net - Fantasy and Sci-fi at their best© [Fantasy art, sci-fi art, anime and more!]
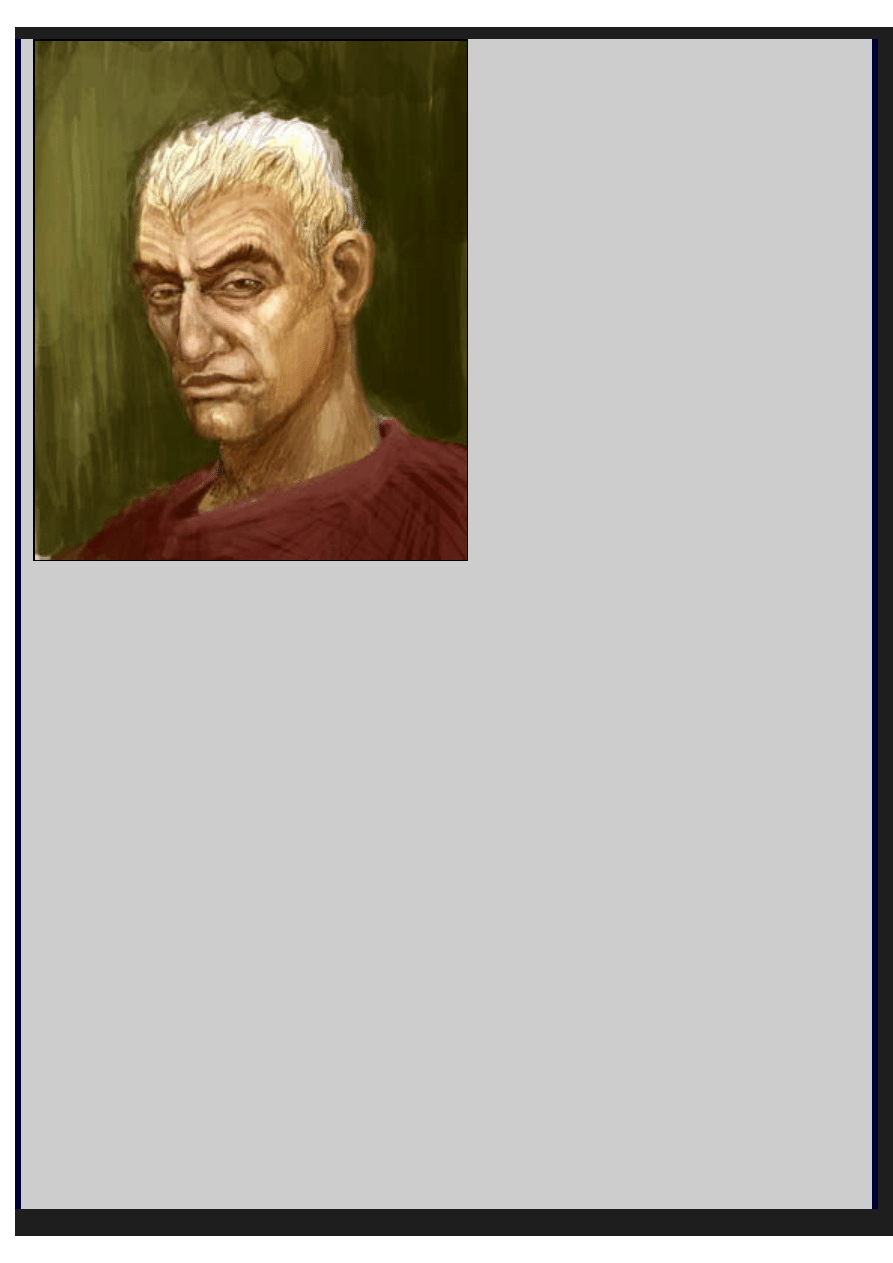
In order to avoid the skin tones from being too even all over his face, I made his nose, cheeks
and lips more reddish than the rest of his face. His forehead is more yellowish, and his beard and
neck are more blueish. These are some general rules for older male figures.
One very useful trick is flipping the whole canvas horizontally to detect any flaws in the painting.
If you take a photo and flip it, it still looks good, doesn't it? Your illustration works the same way,
it must look good from both ways. I continue doing this until the very end, I even flip it vertically
sometimes. Since you look at your artwork for hours, your "artistic eye" gets too used to seeing
it, and you start looking at it subjectively. When you look at it upside down you start seeing
shapes and colors. This way you can concentrate on the shapes instead of the subject matter.
Reminder: It's important not to lose your original light source. It is the most important element to
your work. In this case, it's the upper left side. So I make sure to add the highlights and shadows
according to that light source.
Step 5:
file:///E|/Files%20Estratti/Digital%20Portrait%20Painting...shop%20and%20Painter/epilogue.netarttechyaz_portrait.html (4 di 8)27/09/2005 23.42.04
Art Technique - Digital Portrait - Epilogue.net - Fantasy and Sci-fi at their best© [Fantasy art, sci-fi art, anime and more!]
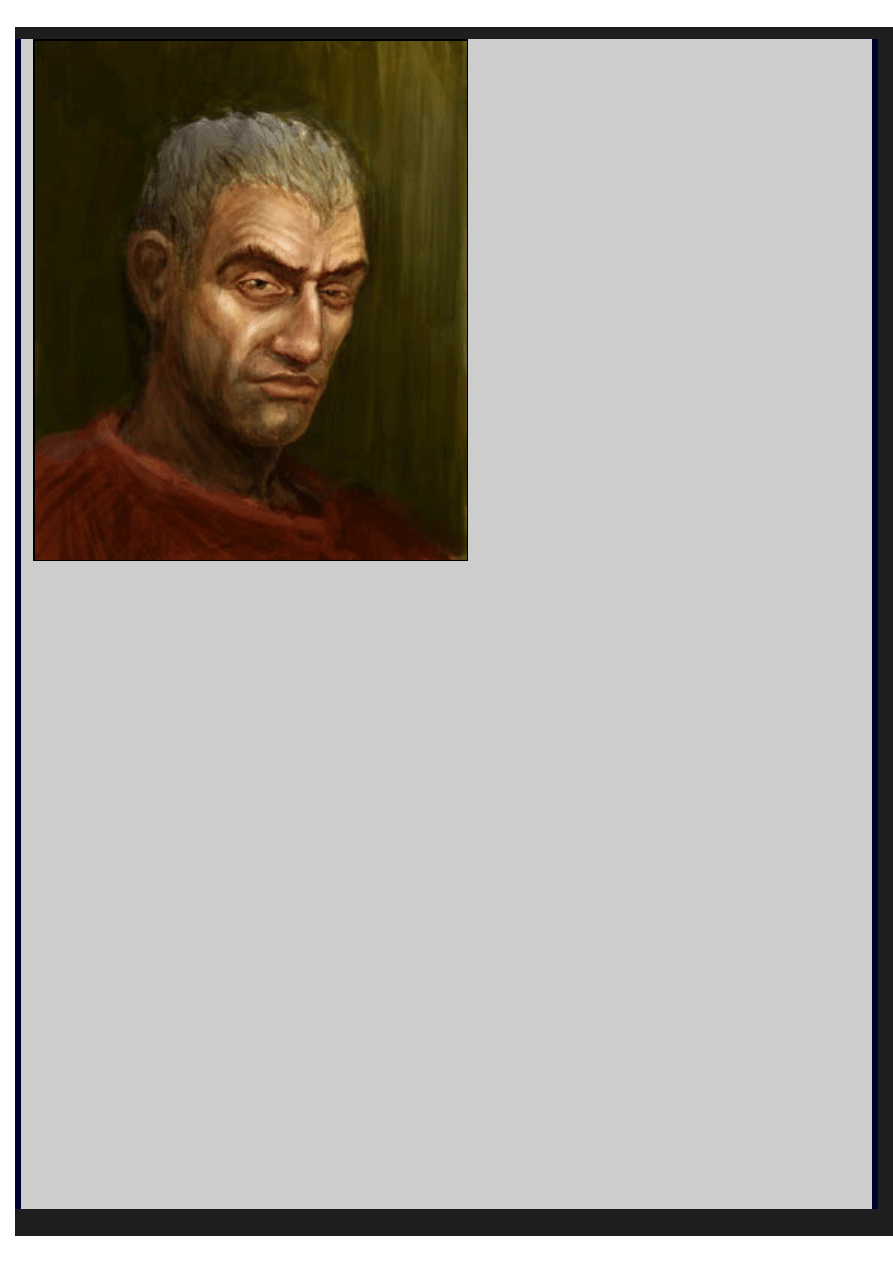
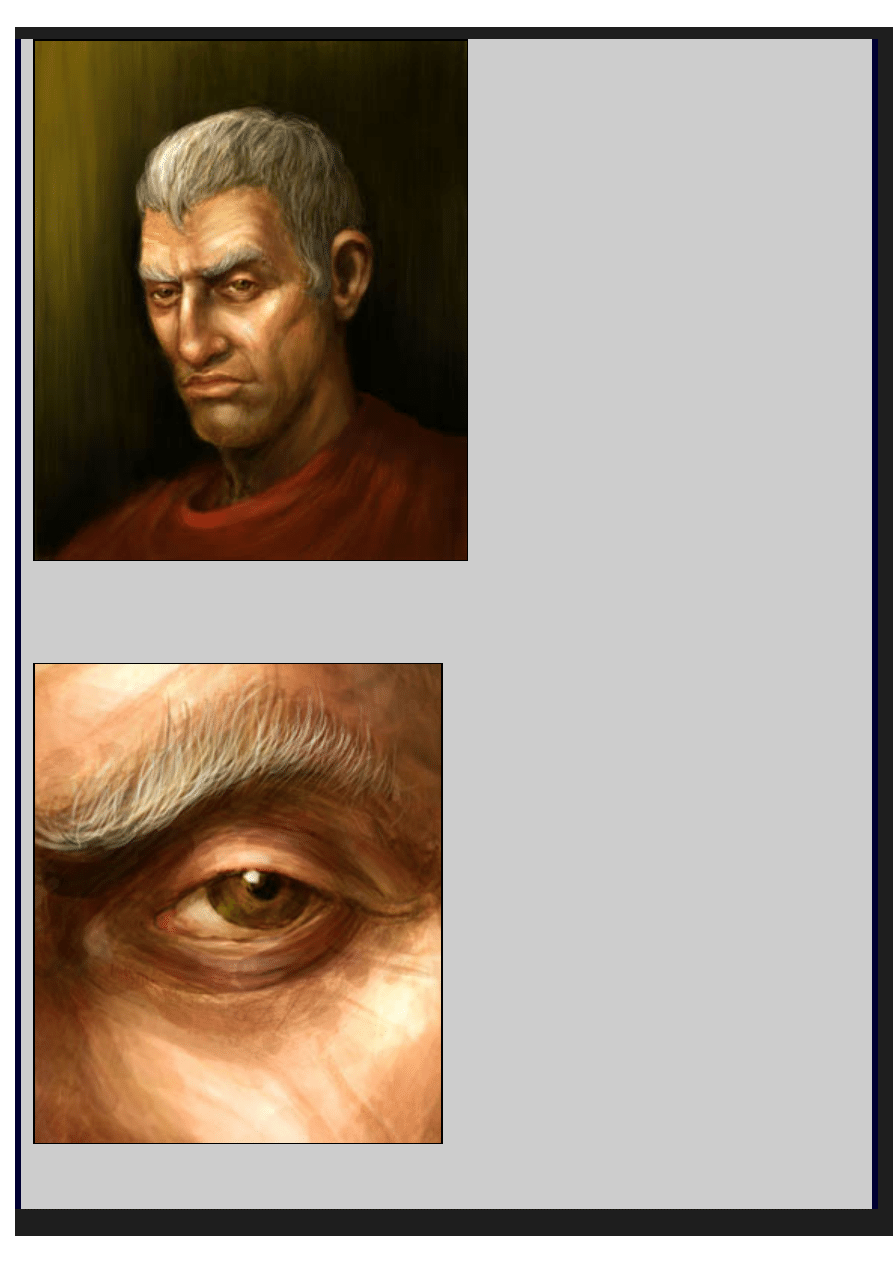
Here I have taken the painting to Painter to give it some smoother brushstrokes. I select the Fine
Brush and continue adding highlights and blend some of the background colors together. I
roughly estimate the shadows and add some cast shadows underneath the noze, chin and
eyebrows. Remember, the brighter the light source, the harsher your shadows will be. Put your
hand under a lamp, watch the shadow get darker or blurrier depending on how close it is to the
light.
PAINTER TIP: If you want to change the brush size, hold ALT+CTRL and change your brush size
on the spot.
I haven't worked too much on the cloth because I don't know what I want yet. That is one of the
troubles of not defining it in my original drawing. Not a big problem. In order not to ruin anything
I let the painting "bake" overnight. It is good to give it a rest and tackle your visual problems the
next day.
Step 6:
file:///E|/Files%20Estratti/Digital%20Portrait%20Painting...shop%20and%20Painter/epilogue.netarttechyaz_portrait.html (5 di 8)27/09/2005 23.42.04
Art Technique - Digital Portrait - Epilogue.net - Fantasy and Sci-fi at their best© [Fantasy art, sci-fi art, anime and more!]
Still in Painter. As I kept on getting closer to finishing it, I was tempted to smooth out all the
rough edges. As a general rule, rendering everything super smooth makes the painting appear
boring and unprofessional so don't go crazy with the airbrush. Smooth out any rough edges by
reducing your regular brush size, zooming in more and start working on the details. Here's a
detail of the eye:
Step 7:
file:///E|/Files%20Estratti/Digital%20Portrait%20Painting...shop%20and%20Painter/epilogue.netarttechyaz_portrait.html (6 di 8)27/09/2005 23.42.04
Art Technique - Digital Portrait - Epilogue.net - Fantasy and Sci-fi at their best© [Fantasy art, sci-fi art, anime and more!]
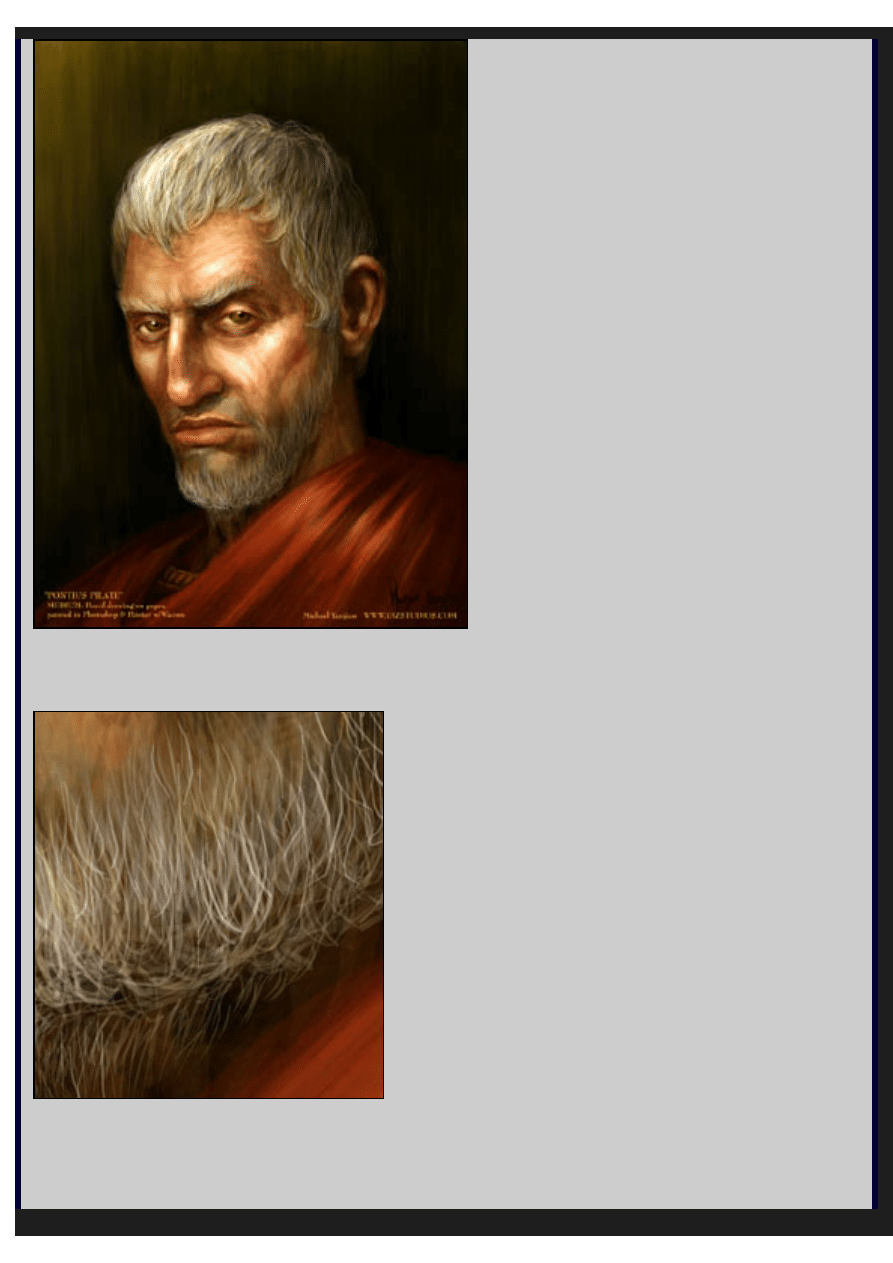
Back to Photoshop. At this point I started adding layers. One layer for his beard and one for his
red toga. I keep on adding more and more fine strands of hair on his head and his beard. It is
also important to draw sgraggly and uneven hair. Observe people with beards, look at photo's,
magazines and other artists work. Here's a detail of the beard:
One of the great things about doing a freestyle painting like this is the lack of boundaries. So,
don't limit yourself, paint something original and have fun! Always diversify your source of
inspiration, challenge yourself, be open minded and listen to what others have to say. Oh and
never take a critique in vain...oh...which reminds me, any comments on Pilate over here?
file:///E|/Files%20Estratti/Digital%20Portrait%20Painting...shop%20and%20Painter/epilogue.netarttechyaz_portrait.html (7 di 8)27/09/2005 23.42.04

Art Technique - Digital Portrait - Epilogue.net - Fantasy and Sci-fi at their best© [Fantasy art, sci-fi art, anime and more!]
Take Care and see ya at the next tutorial.
Michael Yazijian - www.yazstudios.com
file:///E|/Files%20Estratti/Digital%20Portrait%20Painting...shop%20and%20Painter/epilogue.netarttechyaz_portrait.html (8 di 8)27/09/2005 23.42.04
Document Outline
Wyszukiwarka
Podobne podstrony:
How to Draw Anime Hair (Coloring with Photoshop)
(ebook tutorial) FARP Coloring Pencil Drawings With Photoshop(2)(1)
Tutorial Photoshop Combining Illustrator Graphics With Photoshop Images
Farina Reproduction of auditorium spatial impression with binaural and stereophonic sound systems
11 3 2 3 Lab Testing Network Latency with Ping and Traceroute
Business Process Modeling with EPC and UML
M Kaufmann Programming Cameras and Pan tilts With DirectX and Java fly (2)
Applying Principles of Neurodevelopment to Clinical Work with Maltreated and Traumatized Children
8 3 2 7 Lab Testing Network Connectivity with Ping and Traceroute
Farina Reproduction of auditorium spatial impression with binaural and stereophonic sound systems
Verbs Adjectives Nouns with Prepositions Q AND R
Applying Principles of Neurodevelopment to Clinical Work with Maltreated and Traumatized Children
DIAGNOSIS MODE VEHICLES WITH RADIO AND CD PLAYER
Verbs Adjectives Nouns with Prepositions C AND D
IRREGULAR VERBS with deffinitions and examples
IBM Using Ajax with PHP and Sajax (2005)
FIDE Trainers Surveys 2013 05 22, Karsten Müller Endgames with Rook and minor piece against Rook an
#1011 Building with Wood and Metal
więcej podobnych podstron