1
all Ledge
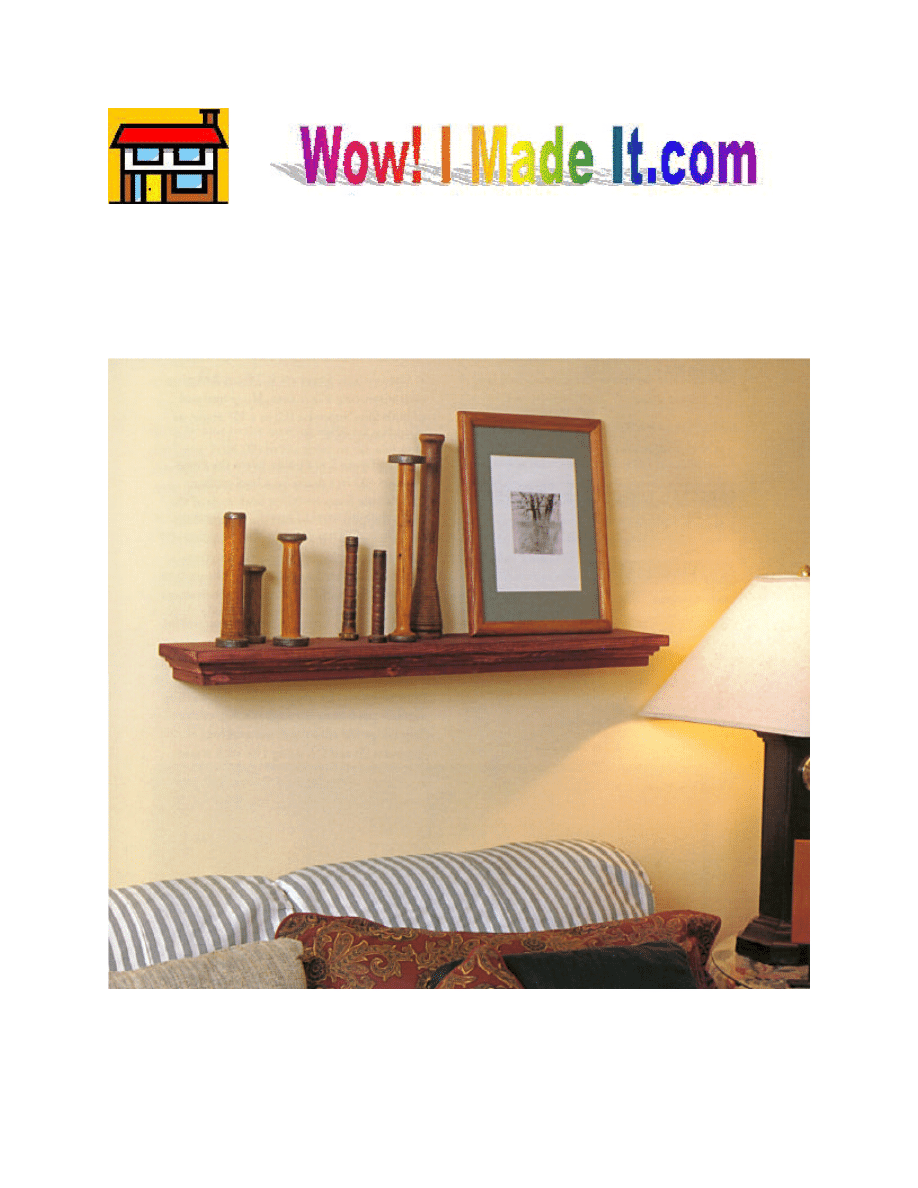
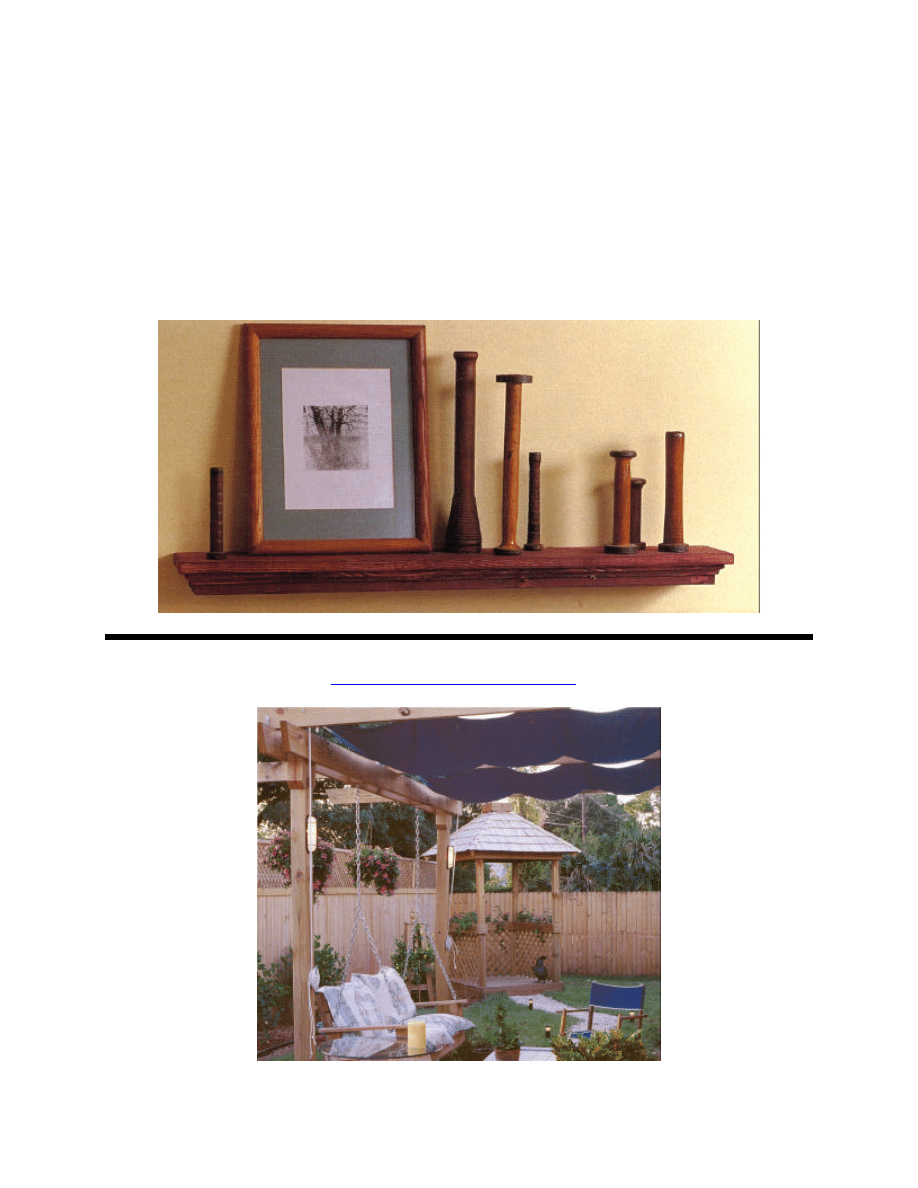
This simple ledge is one of our favorite projects, and can be constructed in only a few
hours. Top it with anything that needs a home—from a row of picture frames to your collection
of candlesticks—and your friends will think you hired a master decorator!
W

2
Materials
§ 4 linear feet of 1 x 6 pine
§ 4 linear feet of 2 x 4 pine
§ 4 linear feet of 3/4"-wide cove molding
§ 3 linear feet of 1 x 2 pine
Hardware
§ 10, 2” wood screws
§ 20, 1-5/8” wood screws
§ 15, 1” (2d) finishing nails
Special Tools and Techniques
§ Miter
Cutting List
Code
Description
Qty.
Material
Dimensions
A
Top Ledge
1
1 x 6 pine
36" long
B
Front Support
1
2 x 4 pine
34" long
C
Side Support
2
2 x 4 pine
4-1/2" long
D
Long Trim
1
¾:”-wide cove molding
35-1/2” long
E
Short Trim
2
¾”-wide cove molding
5-1/4” long
F
Ledge Mount
1
1 x 2 pine
25" long
Making the Ledge
1. Cut one Top Ledge (A) from 1 x 6 pine measuring 36 inches.
2. Cut one Front Support (B) from 2 x 4 pine measuring 34 inches.
3. Miter both ends of the Front Support (B) at opposing 45-degree angles, as shown in Figure
1.
4. Cut two Side Supports (C) from 2 x 4 pine measuring 4-1/2 inches. Miter one end of both
Side Supports (C) at a 45-degree angle, as shown in Figure 2.
5. Following Figure 3 as a guide, place the Front Support (B) face down on a level surface.
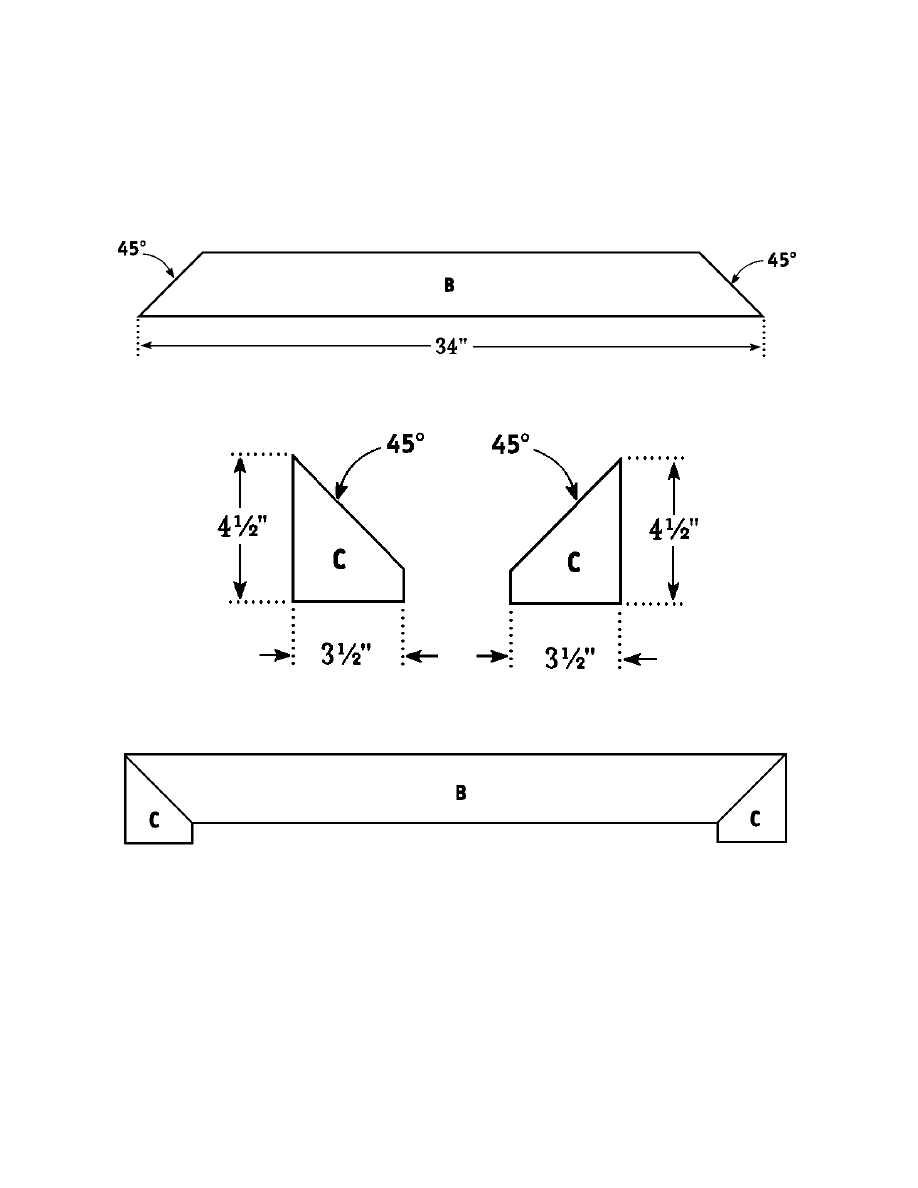
3
Place a Side Support (C) at both ends of the Front Support (B) so that the miters of the
Front Support (B) meet the Side Support (C) miters. Apply glue to the meeting surfaces.
Connect the Side Supports (C) to the ends of the Front Support (B) using two 2” wood
screws.
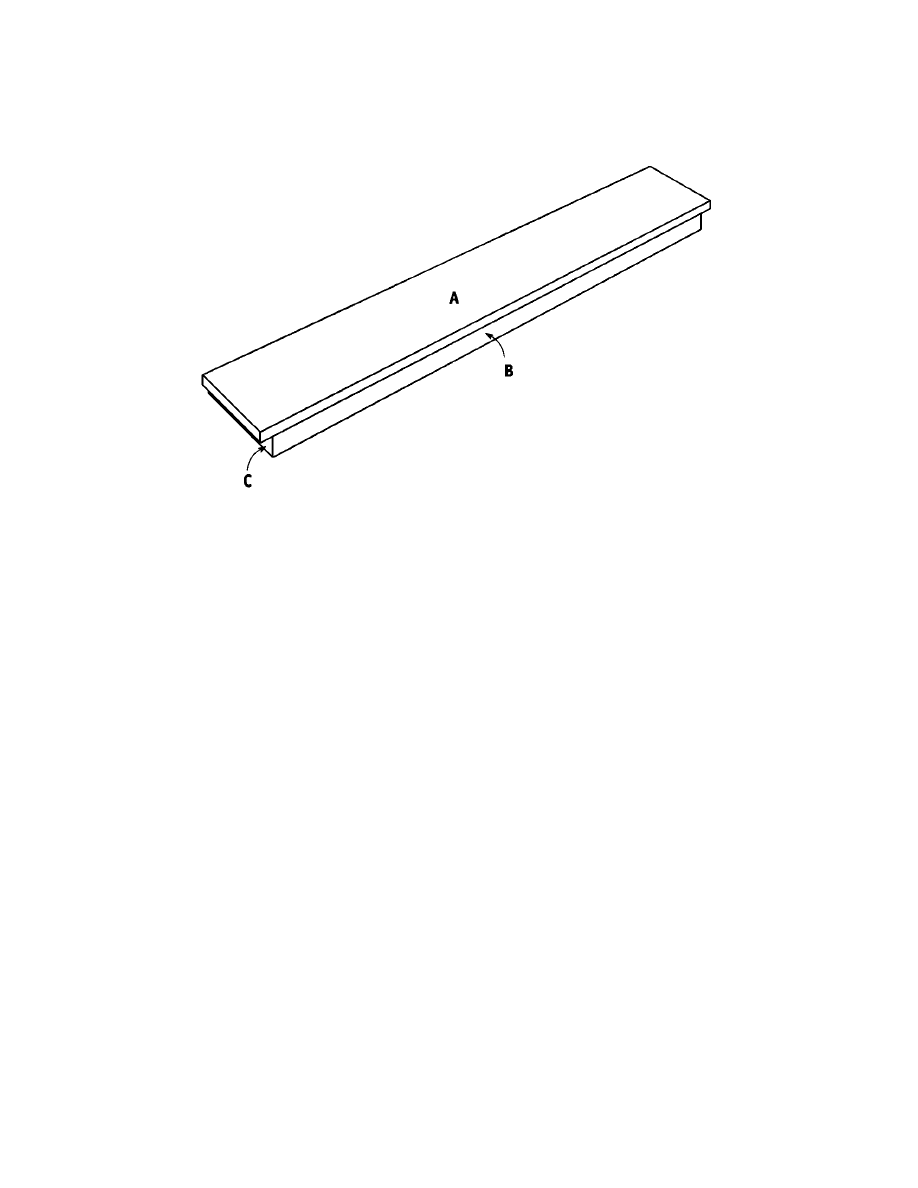
6. Place the Top Ledge (A) over the assembled Front and Side Supports (B and C) as shown in
Figure 4. The edge of the Top Ledge (A) should overhang the ends and front sides of the
Side Supports (C). Apply glue to the meeting surfaces, and screw through the face of the
Top Ledge (A) into the Front and Side Supports (B and C) using 1-5/8” screws.
7. Cut one Ledge Mount (F) from 1 x 2 pine measuring 25 inches. This board will be mounted
to the wall with screws and the ledge will be attached to it.
Figure 1
Figure 2
Figure 3
4
Adding the Trim
1. Cut one Long Trim (D) from ¾”-wide cove molding, measuring 35-1/2 inches.
2. Miter both ends of the Long Trim (D) at opposing 45-degre angles.
3. Apply glue to the meeting surfaces, and nail the Long Trim (D) to the front of the assembly,
just below the Top Ledge (A), using 1-inch nails spaced about every 4 inches.
4. Cut two Short Trims (E) from ¾”-wide cove molding, each measuring 5-1/4 inches.
5. Miter one end of each of the two short Trims (E) at a 45-degree angle.
6. Apply glue to the meeting surfaces, and nail one Short Trim (E) to the side of the assembly,
just below the end of the Top Ledge (A). Nail through the Short Trim (E) into the Side
Supports (C) using three 1-inch nails.
7. Repeat Step 6 to attach the remaining Short Tri (E) to the other side of the assembly.
Finishing
1. Fill any cracks, crevices, or screw holes with wood filler.
2. Thoroughly sand all surfaces of the completed ledge.
Figure 4
5
3. Seal and paint or stain your completed ledge the color of your choice.
4. Locate wall studs, and attach the Ledge Mount (E) to the wall using 1-5/8” wood screws.
Make certain that the Ledge Mount (E) is perfectly level, then set the assembled ledge on
top of the Ledge Mount (E), flush against the wall. Secure the ledge to the Ledge Mount
(E) by screwing through the ledge into the Ledge Mount (E) using 1-5/8” wood screws
about every 10 inches.
Enjoy many other indoor and outdoor projects from
www.wowimadeit.com
!

6
Wyszukiwarka
Podobne podstrony:
Wall Clock zegar scienny
wall shelve polka scienna
Medicine Cabinet(2) szafka scienna na lekarstwa
Oświetlenie zewnętrzne szafka sterownicza
78 Nw 07 Okladziny scienne
63 MT 10 Szafka biurko
instr obslugi scienne CORONA
Jajo z Wall Street
How to build a Retaining Wall
Zwyczaje wiosenne na Śląsku Opolskim, szkolna gazetka ścienna, ^gazetki ścienne
Kotwy KK do elementow sciennych
Witaj szkolo, szkolna gazetka ścienna
Pustak ścienny ogólnie
47 Malarstwo monumentalne w XIX i XX wieku witraż i malarstwo ścienne
Fascia in the Abdominal Wall to the Thigh KT method
Modlitwa, Ścienne gazetki szkolne
papież22, Ścienne gazetki szkolne
bathroom cabinet szafka lazienkowa
więcej podobnych podstron