1
all Table
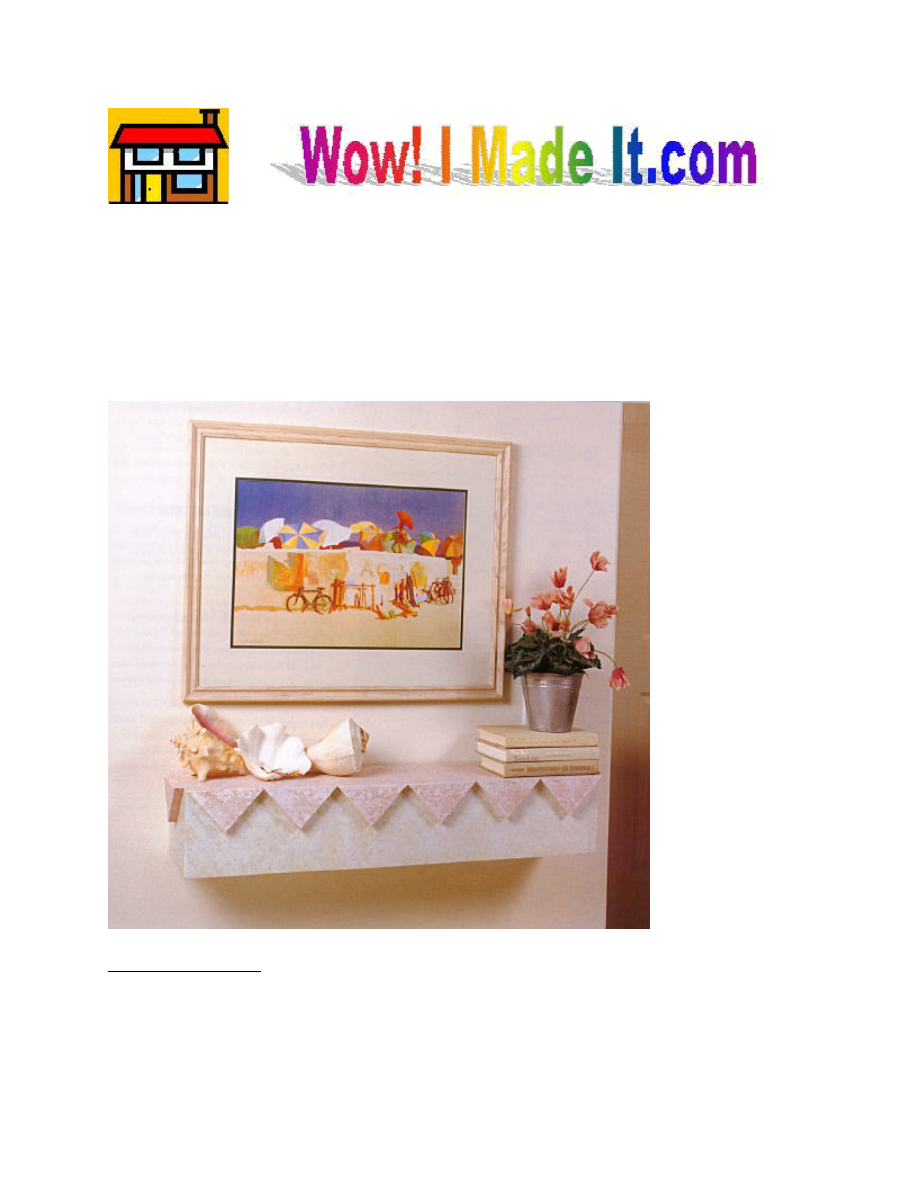
This suspended table is a nice addition to a neglected area in an entryway. It takes up no floor
space, is only about 9 inches deep, and makes a perfect surface for a small plant and a few odd
decorative items.
Materials List
§ 11 linear feet of 1 x 8 pine
§ 5 linear feet of 1 x 4 pine
§ 3 linear feet of 1 x 2 pine*
W
2
Hardware
§ 35, 1-1/2” 4d finishing nails
§ 12, 1-1/2” wood screws
*Notes on Materials:
Because the 1 x 2 pine will be used as the inner support for the table, you may substitute any
scrap wood for this piece, as long as it is approximately 30 inches.
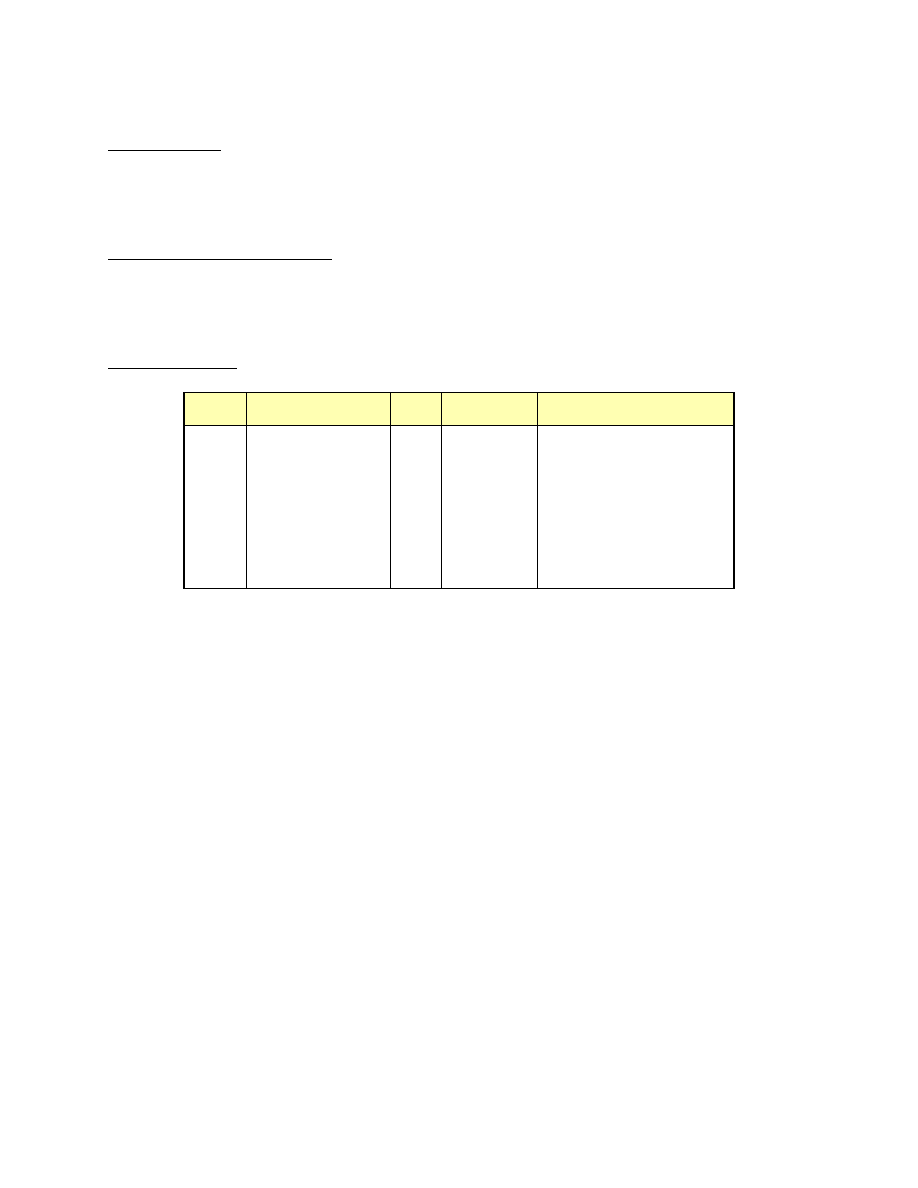
Cutting List
Code
Description
Qty
Material
Dimensions
A
Top and Bottom
2
1 x 8 pine 36" long
B
Front
1
1 x 8 pine 36" long
C
Sides
2
1 x 8 pine 7-1/4" long
D
Triangular Trim
8
1 x 4 pine 6-1/4" x 4-7/8" x 4-7/8"
E
Support
1
1 x 2 pine 30” long
Constructing the Table
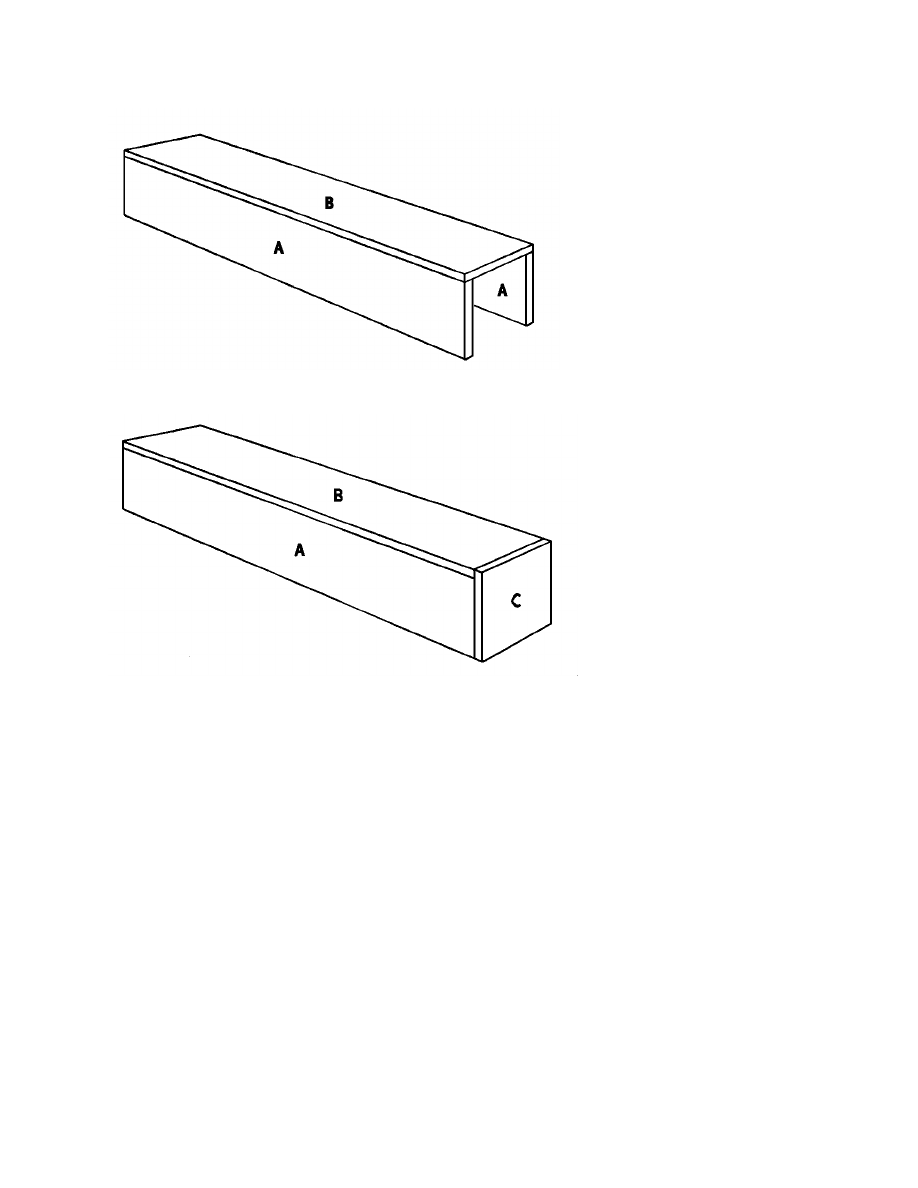
1. Cut two top and bottom (A) from 1 x 8 pine, each measuring 36 inches.
2. Cut one Front (B) from 1 x 8 pine, measuring 36 inches.
3. Place the top and bottom (A and B) on a level surface, parallel to each other and 5-1/2
inches apart.
4. Apply glue to the top edges of the Top/Bottom (A). Place the Front (B) over the top edges
of the Top/Bottom (A), as shown in Figure 1. Nail through the Front (B) into the edges of
the Top/ Bottom (A), using 1-1/2” finishing nails spaced 5 inches apart.
5. Cut two Sides (C) from 1 x 8 pine, each measuring 7-1/4 inches.
6. Apply glue on the meeting surfaces, and attach one Side (C) to the one open end of the
assembly, as shown in Figure 2. Nail through the Side (C) into the edges of the
Top/Bottoms (A) and Front (B), using two 1-1/2” nails on each joint.
7. Repeat Step 6 to attach the remaining Side (C) to the other open end of the assembly.
3
Adding the Triangular Trim
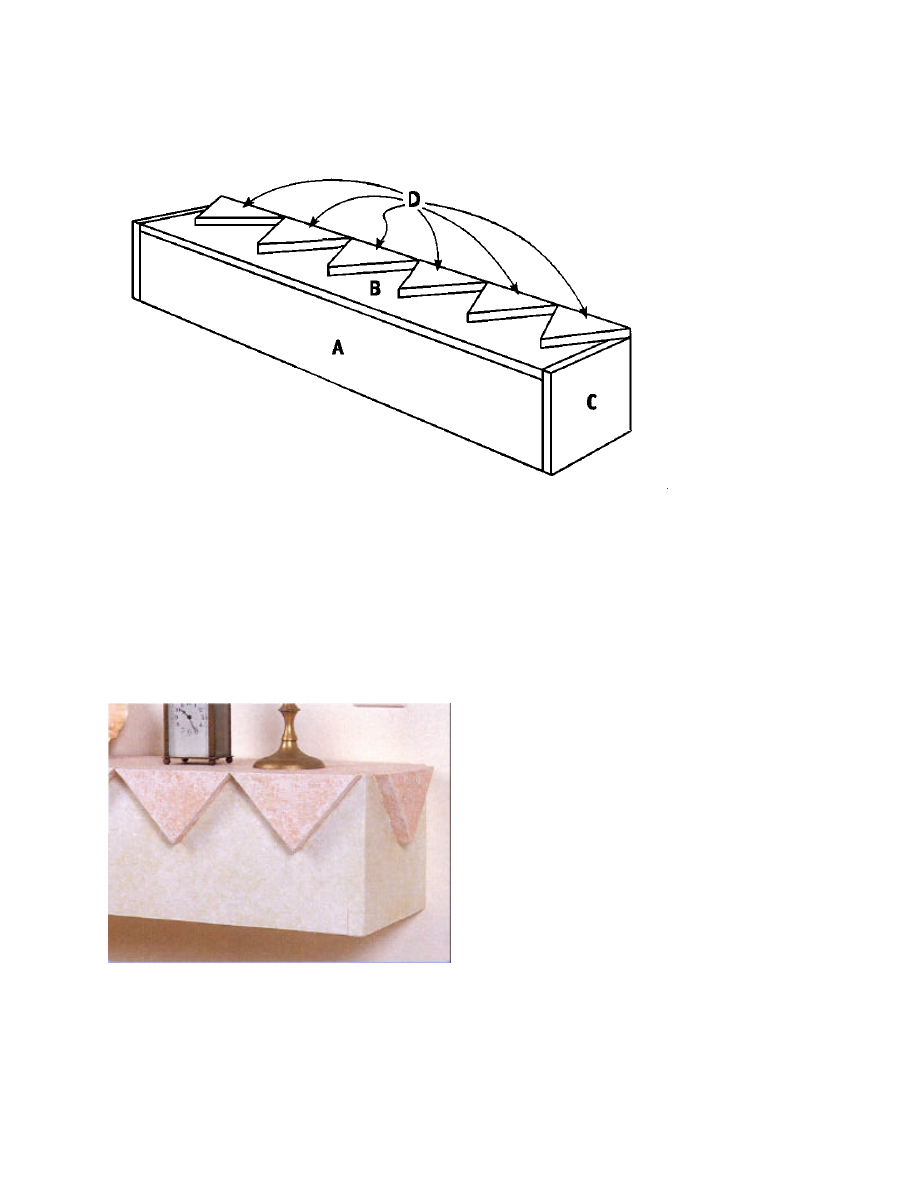
1. Cut eight Triangular Trims (D) from 1 x 8 pine, each measuring 6-1/4 x 4-7/8 x 4-7/8 inches.
2. Sand all edges of each of the Triangular Trims (D).
3. Place the table assembly Front Side up on a level surface. Place six evenly spaced Triangular
Trims (D) across the Front (B), even with the top edge of the table, as shown in Figure 3.
After sanding, you will have minuscule spaces between the Triangular Trims (D).
4. Apply glue on the meeting surfaces, and attach the six Triangular Trims (D) to the Front (B),
using two 1-1/2” nails. Nail through the Triangular Trims (D) into the Front (B).
5. Center one Triangular Trim (D) on the top edge of one Side (C).
6. Apply glue on the meeting surfaces, and attach the Triangular Trim (D) to the Side (C),
using two 1-1/2” nails. Nail through the Triangular Trim (D) into the Front (B).
Figure 1
Figure 2
4
7. Repeat Steps 5 and 6 to attach the remaining Triangular Trim (D) to the opposite Side (C).
Finishing
1. Fill any nail holes or imperfections in the wood with wood filler.
2. Thoroughly sand all parts of the table.
3. Stain or paint the finished table the color(s) of your choice. We chose a mauve paint for the
top and Triangular Trims, and a pale green for the remaining portions of the table.
Attaching the Table to the Wall
1. Cut one Support (E) from 1 x 2 pine,
measuring 30 inches long (or substitute
other material that is approximately the
same length).
2. Attach the Support (E) to the wall, 3/4-
inch lower than you want your table height
to be, and centered horizontally where
your table will hang. Given the length of
the Support (E), you should be able to locate at least one stud. If your walls are plaster or
concrete, you will need to substitute special screws designed for that purpose.
Figure 3
5
3. It is helpful to have an assistant to mount the table. Position the table over the Support (E),
making sure that it is in the correct horizontal position. Have your helper hold the table in
place while you screw through the top of the table into the Support (E). Use three or four
1-1/2-inch-long screws spaced evenly across the top. Counter-sink the screws.
4. Fill the screw holes will wood filler, and use touch-up paint or stain to cover the filled holes.
Enjoy other terrific indoor and outdoor projects from
www.wowimadeit.com
Your neighbors will love to visit your comfortable back yard with projects from
www.wowimadeit.com
. Try something from our vast array of outdoor projects!
Wyszukiwarka
Podobne podstrony:
Wall Clock zegar scienny
wall shelf2 szafka scienna
krenov wall hung shelves
Charmer Polka
Polka Kazimierza Bylicy
78 Nw 07 Okladziny scienne
instr obslugi scienne CORONA
Jajo z Wall Street
Matka Polka jako komentarz do Konrada Wallenroda
Polka tyrolka M Drozdowskiej
How to build a Retaining Wall
Zwyczaje wiosenne na Śląsku Opolskim, szkolna gazetka ścienna, ^gazetki ścienne
Kotwy KK do elementow sciennych
Witaj szkolo, szkolna gazetka ścienna
Polka husia siusia, TEKSTY POLSKICH PIOSENEK, Teksty piosenek
Pustak ścienny ogólnie
47 Malarstwo monumentalne w XIX i XX wieku witraż i malarstwo ścienne
Fascia in the Abdominal Wall to the Thigh KT method
więcej podobnych podstron