UKWorkshop - Garden Planters Project
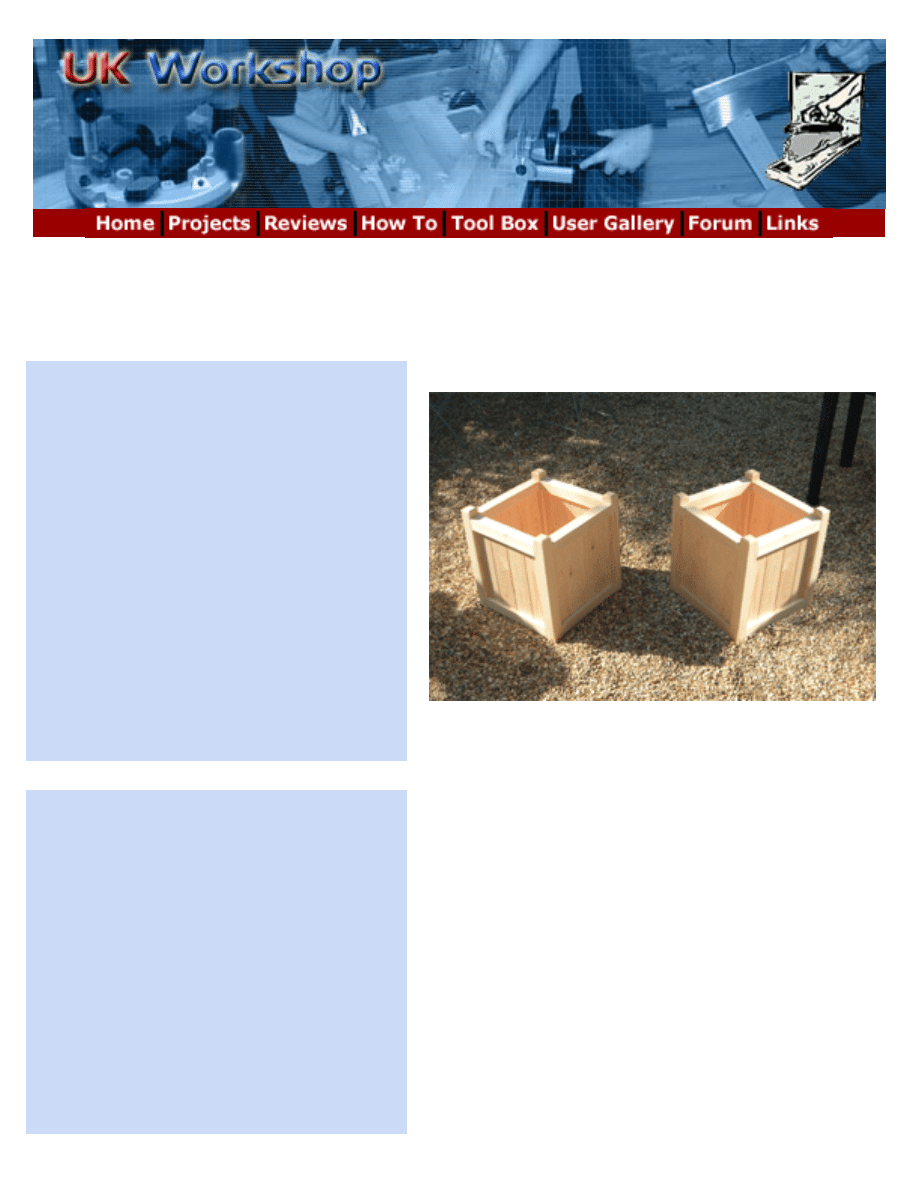
Garden Planters (Yes they're finally online )...
Nearly two years ago now I drew
some plans to build these garden
planters and do a guide for UKW -
but they never got done till
yesterday, with the help of Adam &
Tom. I'm glad we've finally done
them! They look good, are very
strong, easy to build (as long as you
have a router) and the woodwork
can be done in a day.
I've done a plan which includes a
cutting list and you can download it
by clicking
Start by cutting the 45x45mm posts
and rails to length. We've used the
powered mitre saw and set up stop
blocks to make the process go
quicker and to make sure all the
pieces are the same length. Cut the
four posts to 450mm long the eight
rails to 350mm.
http://www.ukworkshop.co.uk/projects/planter/index.php (1 of 6)17/03/2005 22:30:48

UKWorkshop - Garden Planters Project
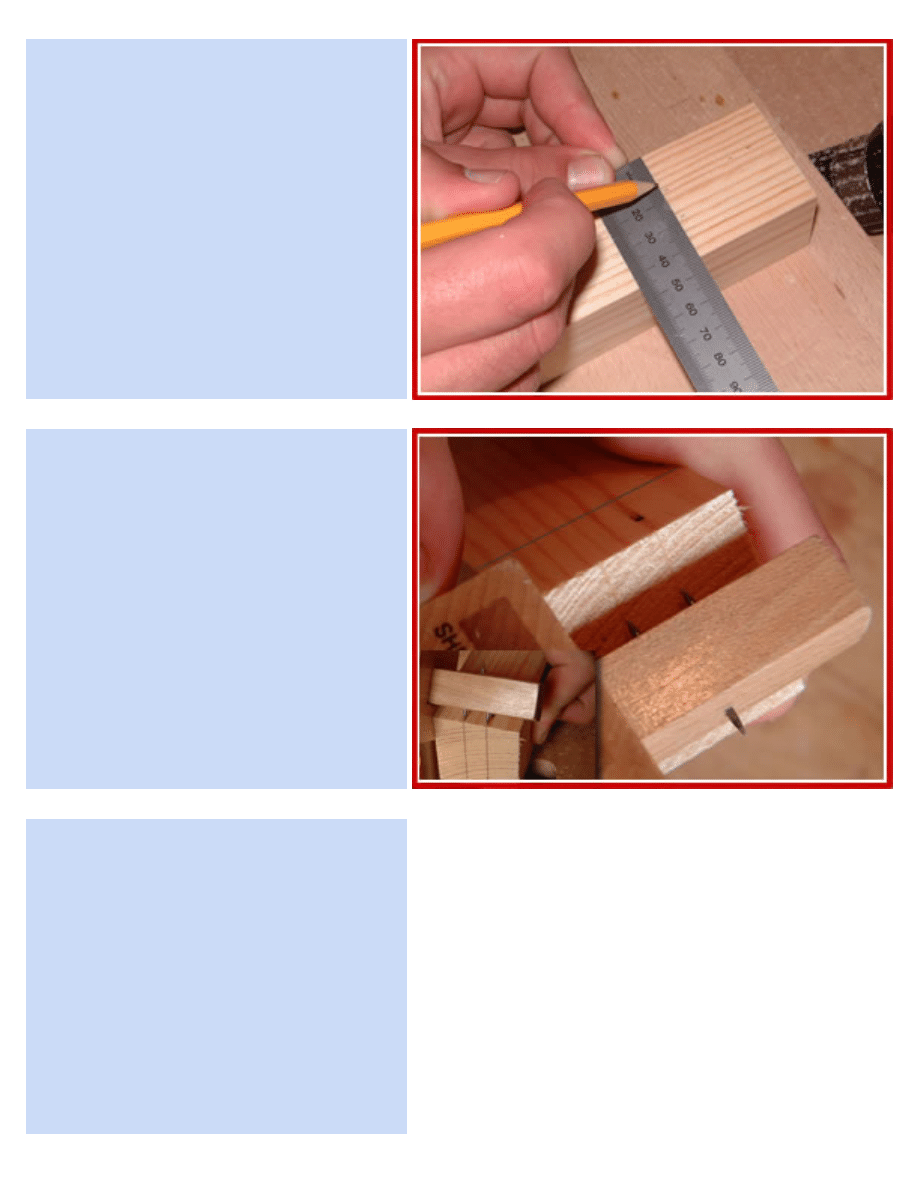
Take one of the four posts and on
one face make a mark 30mm down
from the top and another mark
10mm up from the bottom.
You also need to take one of the
eight rail pieces and mark 10mm in
from one end.
Using a square and pencil continue
the marks you made on the post and
rail, all the way around the wood.
http://www.ukworkshop.co.uk/projects/planter/index.php (2 of 6)17/03/2005 22:30:48

UKWorkshop - Garden Planters Project
Clamp all four posts together making
sure their edges are flush with each
other. Then with a square, ruler and
pencil follow the 30mm & 10mm
lines you marked in the step above,
across the other three posts. Loosen
the clamps, turn the pieces over and
do the same - repeat till the two
lines go all the way around all four
posts.
Take one of the posts and put a ruler
against its edge (as shown in the
picture). With a pencil, mark
16.5mm in from both sides, so that's
one mark at 16.5mm and another at
28.5mm with a 12mm gap in the
middle for the tongue and groove
boards. Now set your mortise gauge
up to those two marks.
http://www.ukworkshop.co.uk/projects/planter/index.php (3 of 6)17/03/2005 22:30:48
UKWorkshop - Garden Planters Project
You now want to grab the rail piece
which you marked 10mm in from one
end earlier and using the mortice
gauge, gauge from the line, around
the top and down the other side and
stop at the pencil line to layout the
tenon. You only have to do this on
one of the rail pieces and we'll use it
to set the router table up.
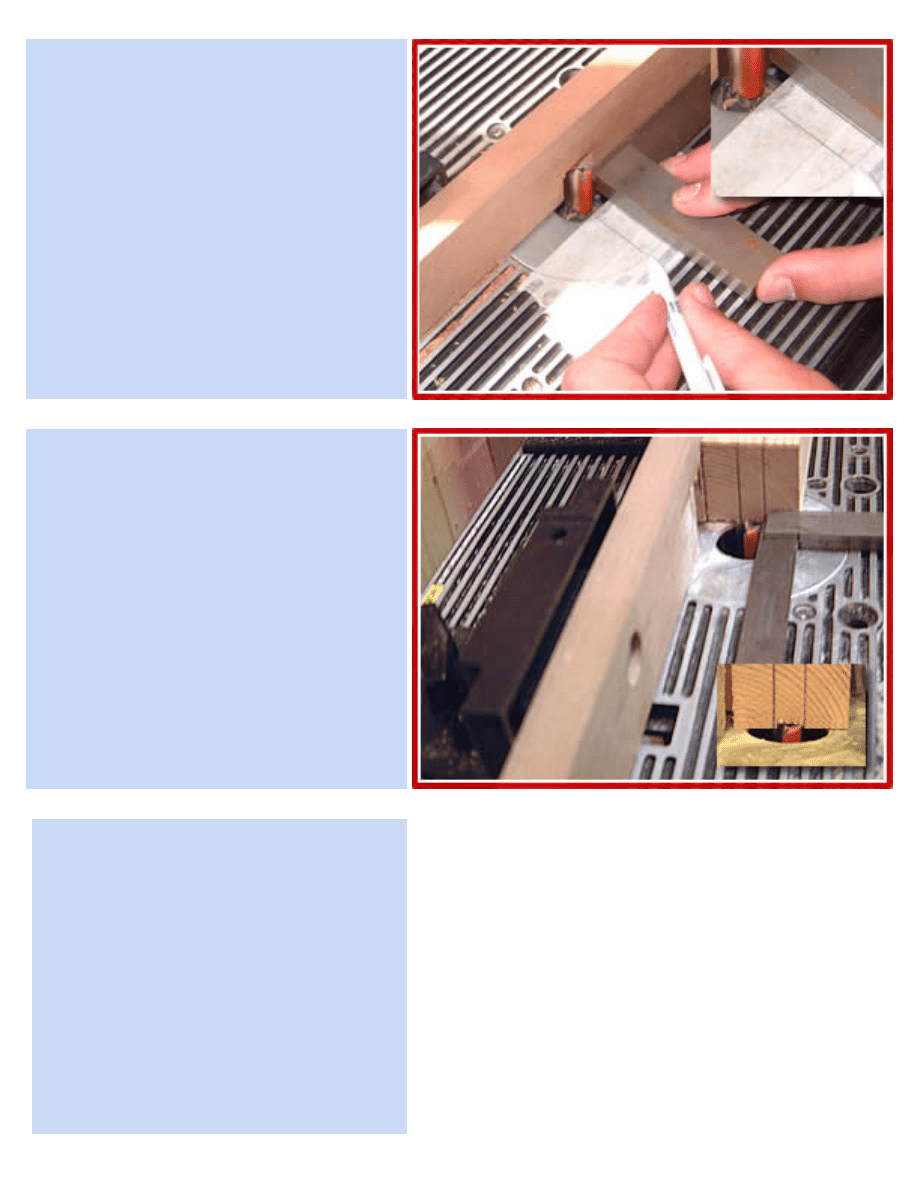
Insert a 12mm straight router bit
into the router table. We're using a
1/4" shank CMT cutter. Stick a
couple bits of masking tape infront of
the router bit. Using a pencil and a
square you need to mark the two
edges from where the cutter starts to
where the cutter stops on the
masking tape (as shown in the
picture to your right).
http://www.ukworkshop.co.uk/projects/planter/index.php (4 of 6)17/03/2005 22:30:48
UKWorkshop - Garden Planters Project
Next, using the rail piece that you've
marked the tenon on, set the fence
so the cutter is inbetween the two
lines on the rail piece. Judge it by
eye then use a square to check.
The final depth for the groove needs
to be 11mm deep but we don't want
to cut that all in one pass so for the
first pass, set the router bit height to
around 5mm.
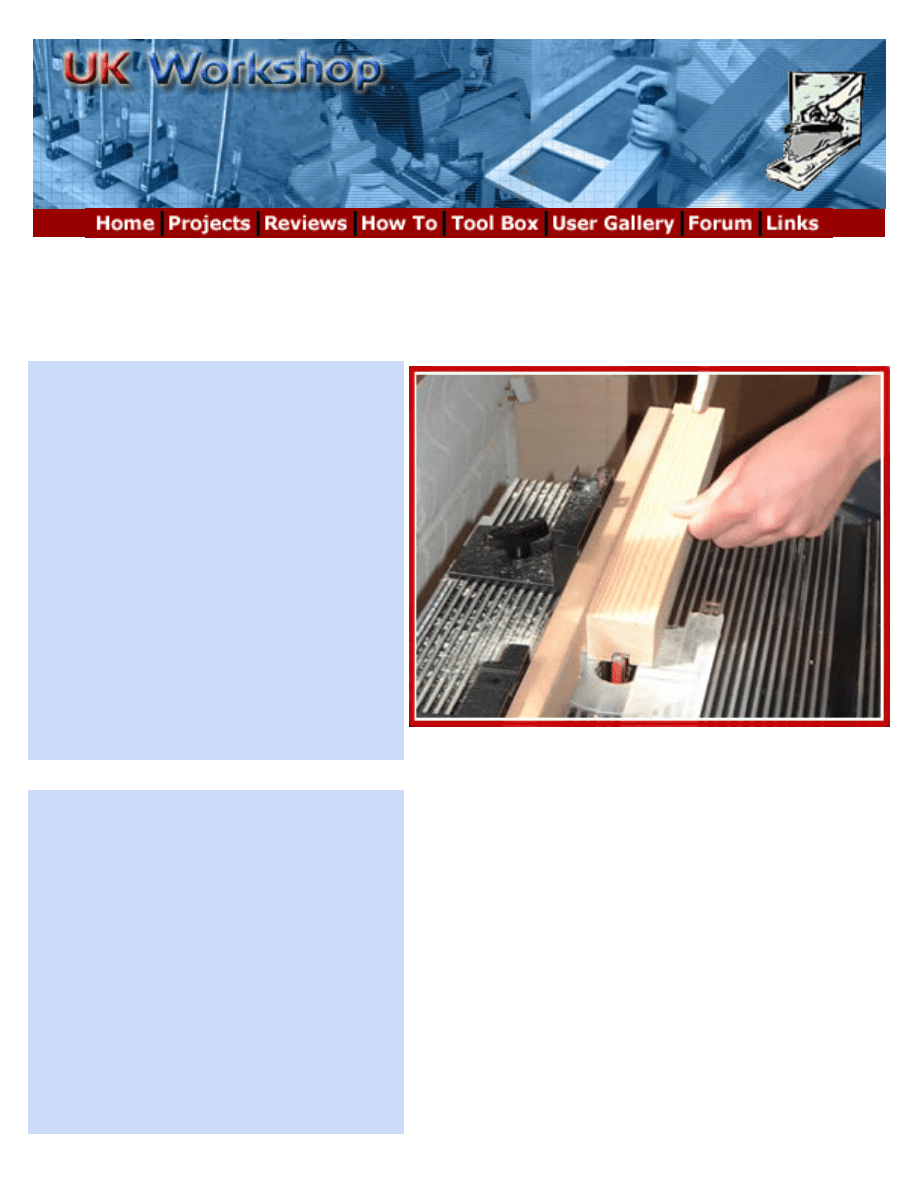
The stopped grooves need to be cut
now, in two sides on all four posts.
By using the fence as a support and
carefully lowering the piece over the
router bit - making sure the layout
line on the post is slightly after (to
the left) of the 'left hand' pencil line
on the router table. You need to hold
the piece firmly and move it slowly
using a steady & even pressure. Just
before the 'right hand' side pencil
http://www.ukworkshop.co.uk/projects/planter/index.php (5 of 6)17/03/2005 22:30:48
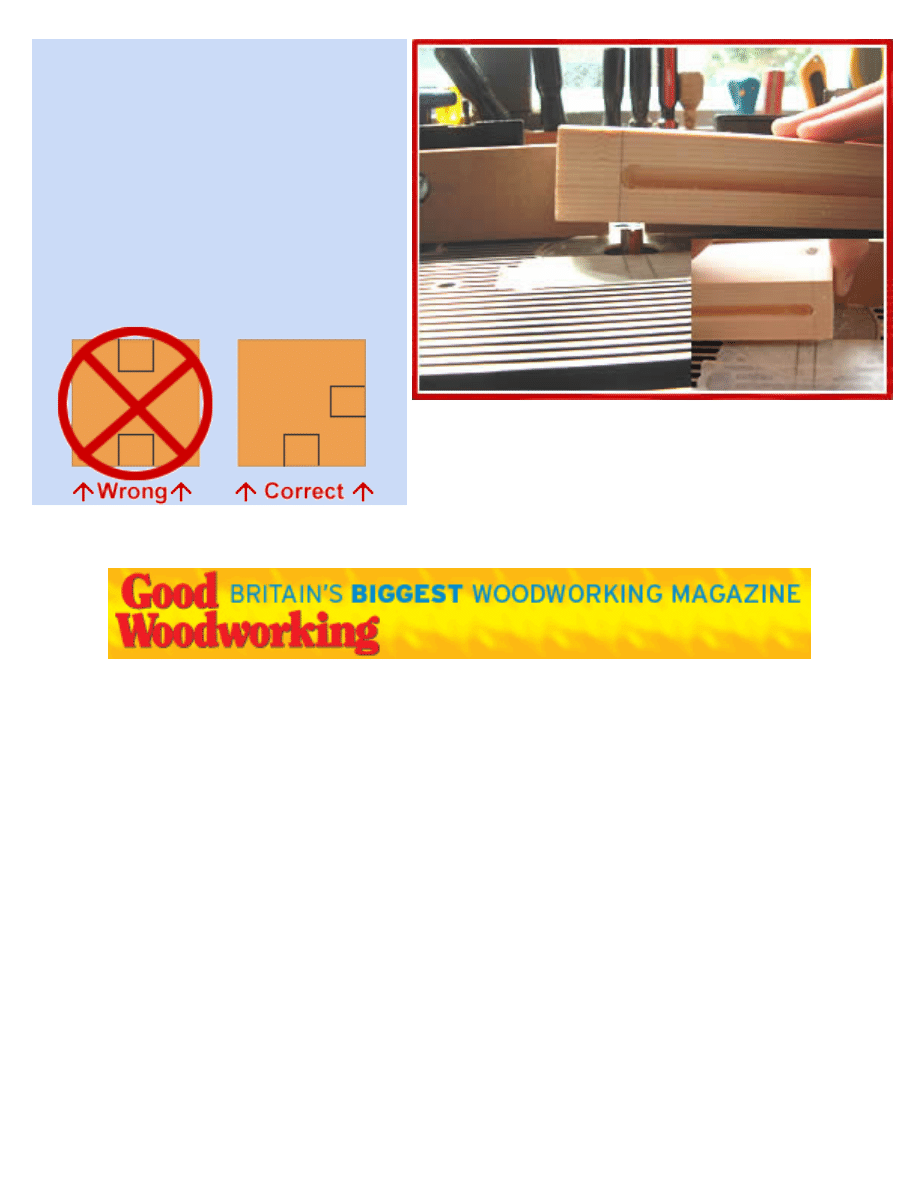
UKWorkshop - Garden Planters Project
line on the router table meets with
the other layout line hold the post
still against the fence and turn off
the router. When the router bit stops
spinning lift up the post and turn it
clockwise 90°. With the post clear of
the router bit, turn the router back
on and cut the second groove -
repeat this on the other three posts.
[
|
|
|
|
]
http://www.ukworkshop.co.uk/projects/planter/index.php (6 of 6)17/03/2005 22:30:48
UKWorkshop - Garden Planters Project - Page 2
Garden Planters - Page 2...
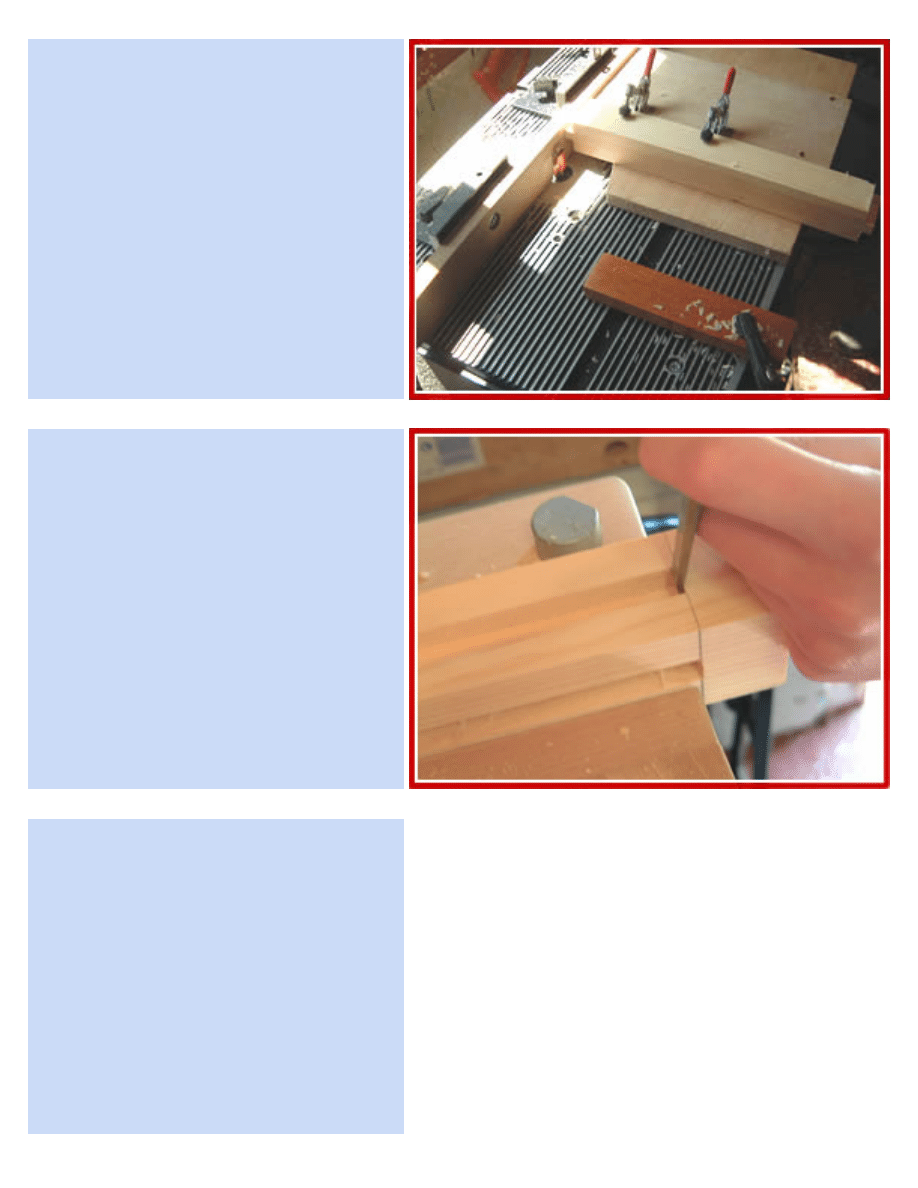
Next, run all eight rail pieces
through on one side only. There's
no need to lower these pieces over
the router bit as the groove runs
end to end.
We are using a push stick to aid the
work piece along the fence and our
free hand to keep the piece tight up
against the fence.
Raise the router cutter height to
11mm and run all the post & rail
pieces through again.
With all the grooves cut to their final
depth of 11mm, we unplugged the
router from the power and replaced
the router bit with a 18mm 1/2"
shank cutter. We used the
to cut the tenons on the rail pieces.
Use the rail piece with the tenon
layout (which you marked right at
the start) to help setup the router
bit height and fence. Don't try
cutting the full depth in one pass;
http://www.ukworkshop.co.uk/projects/planter/page2.php (1 of 6)17/03/2005 22:31:25
UKWorkshop - Garden Planters Project - Page 2
set the router bit height half the
way, run all the pieces through, then
raise the router bit up the the final
height. Running a test piece through
first is a good idea to make sure it's
all setup correctly
Once all the routing has been done
you need to square off the round
corners on all four of the posts with
a sharp bevel edge chisel.
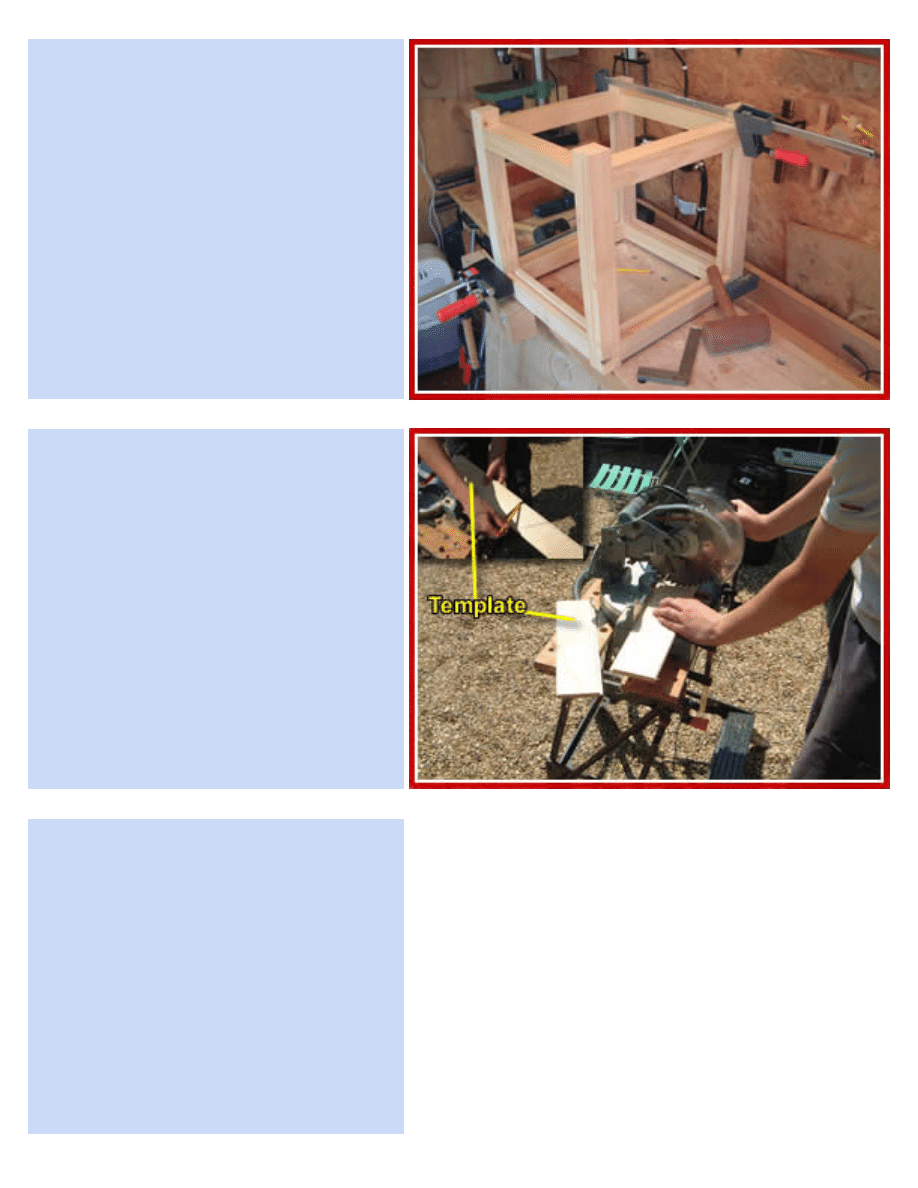
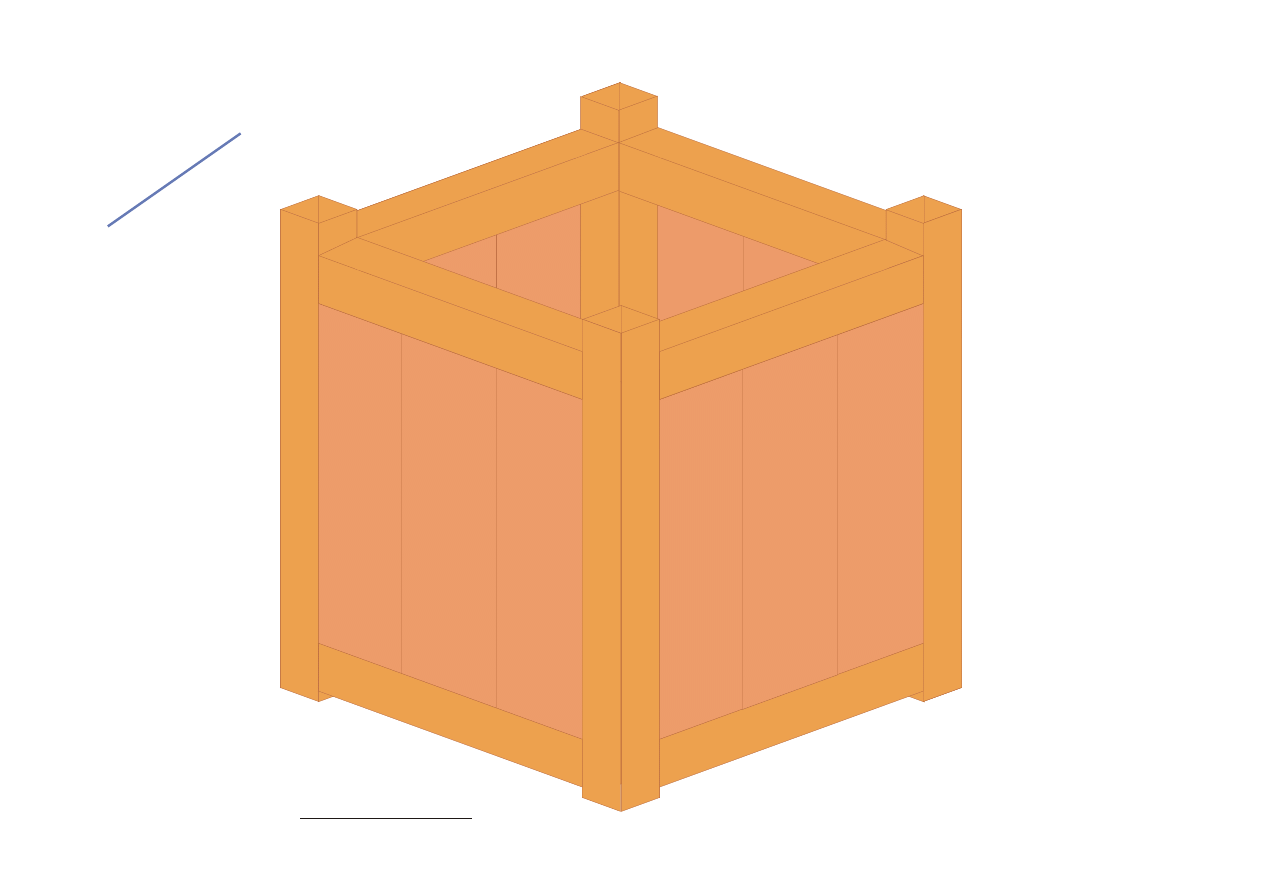
It's time for a dry assembly of the
frame. This is where you can see it
take shape. Make sure everything's
square and the joints all fit snugly.
Label every joint to help save time
and mistakes when gluing up i.e.
Where one end of the rail joins one
side of the post label them 'a' and
the next 'b' etc..
http://www.ukworkshop.co.uk/projects/planter/page2.php (2 of 6)17/03/2005 22:31:25
UKWorkshop - Garden Planters Project - Page 2
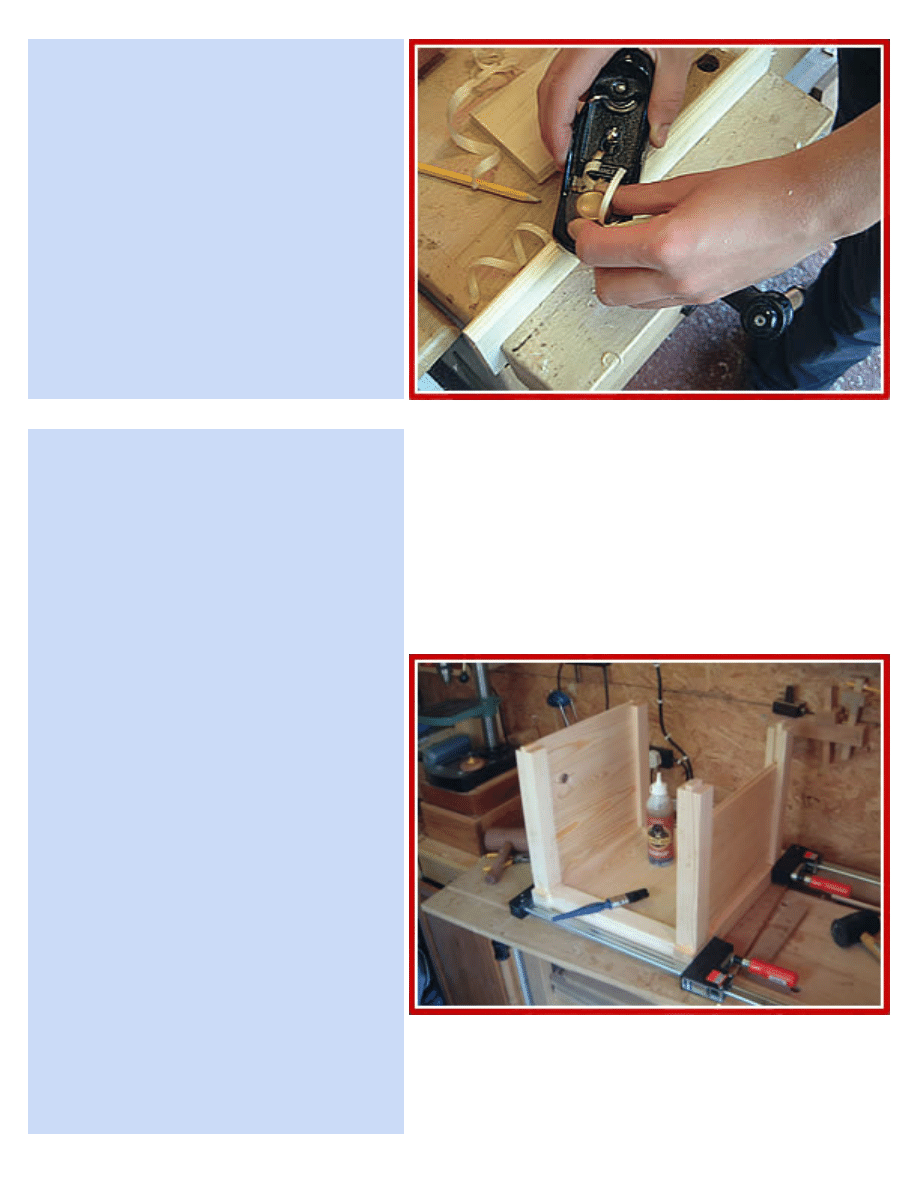
For the panels (sides) we're using
95mm x 12mm tongue & groove
that has a 'v' groove on only one
side. You need to cut 16 pieces
340mm long. We measured one, cut
it and used that as the template for
the rest.
We used four boards of T&G per side
but as they are 95mm wide each
(including the tongues), that makes
the total width 360mm and it needs
to be 350mm so we took off 5mm
on both of the end boards. On four
of the T&G pieces take 5mm off the
'tongue' side and on another 4 take
5mm of the 'groove' side.
You can use a table or bandsaw if
http://www.ukworkshop.co.uk/projects/planter/page2.php (3 of 6)17/03/2005 22:31:25
UKWorkshop - Garden Planters Project - Page 2
you have one, but it doesn't take
long with a block plane. If you use a
hand plane as we did, you can mark
how much needs to come off with a
pencil/marking gauge.
Glue up time! Glue up's can be a
nightmare, you have to be quick
enough so the glue doesn't start to
go off but when you rush things go
wrong! Layout every thing before
hand and plan what steps to take to
assemble.
We used a polyurethane glue which
cures in the presence of moisture,
claims to be 100% waterproof and is
very,very strong - so it's ideal for
our garden planters. Wear gloves as
if you get this stuff on your hands it
will be with you for a couple of days.
Apply glue to the tenons and
moisten the groove with a damp
cloth. Don't glue the T&G panels in
place as you want them to be able
to move about when the wood
expands/contracts.
We glued and clamped one side up
first, checked for square by
http://www.ukworkshop.co.uk/projects/planter/page2.php (4 of 6)17/03/2005 22:31:25
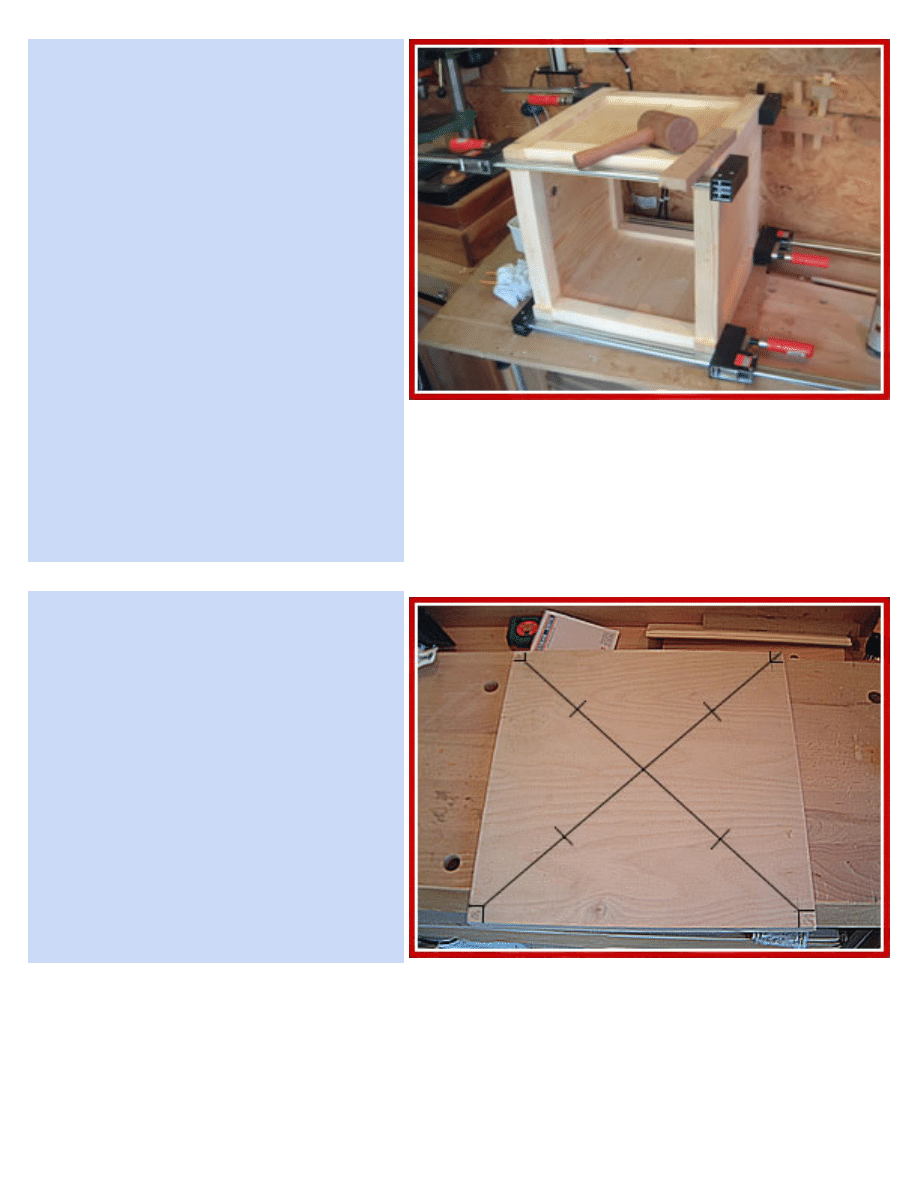
UKWorkshop - Garden Planters Project - Page 2
measuring the diagonals & then put
it to one side. We then did the same
with the opposite side, but layed it
down flat on the work bench with
inside facing upwards. We glued in
place the last four rails, inserted the
T&G panels & then placed the first
side we glued up, on top of the four
rails and aligned the tenons with the
grooves. Then, using a mallet and a
scrap piece of wood lightly tapped
everything into place and finally
added four more clamps and
measured the diagonals. We can
honestly say (beyond our
amazement) it was spot on.
Normally when we all work
togeather something goes wrong.
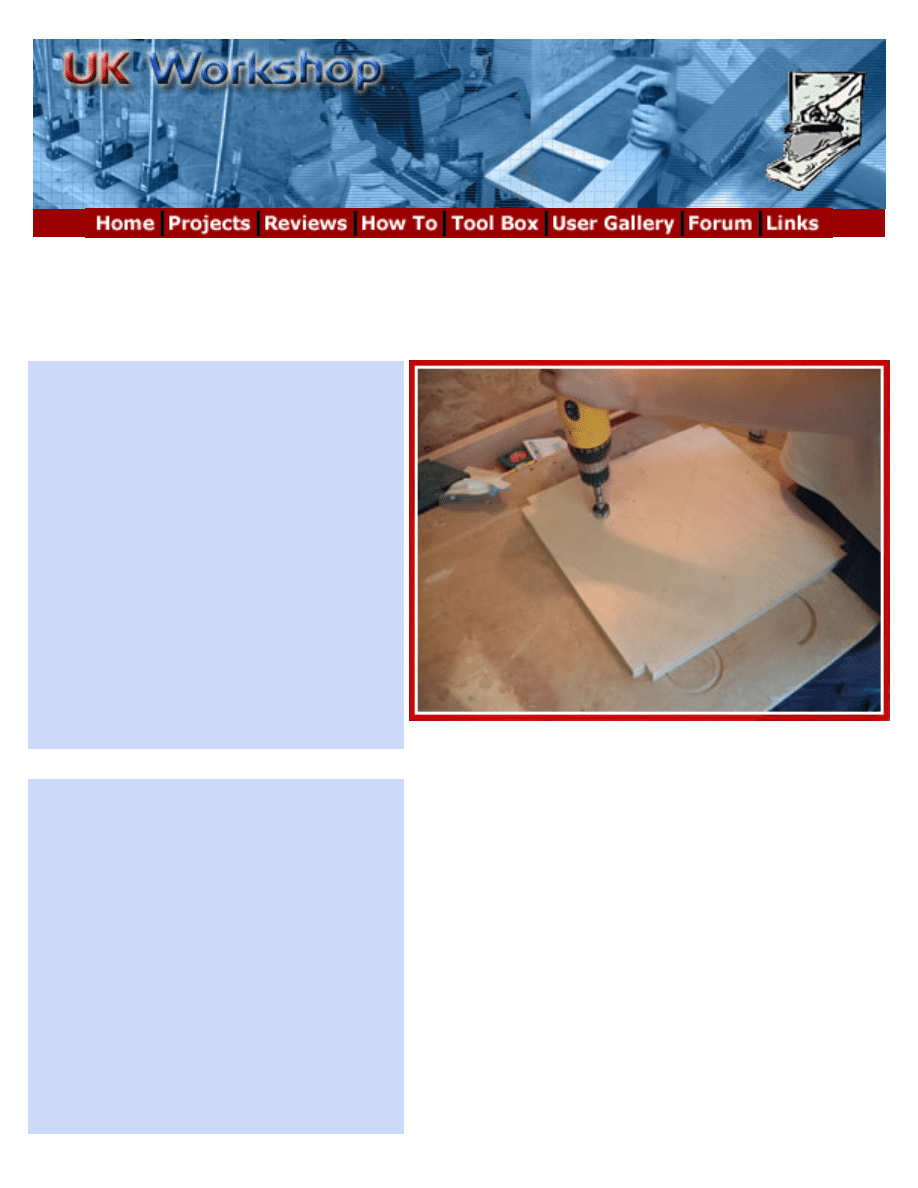
While you wait for the glue to cure
you can be making the bottom. Cut
a bit of plywood to 360mm x
360mm. With a ruler and pencil
draw a line diagonally from corner to
corner & then from the center point
mark four lines 120mm on the
diagonal line (as shown in the
picture) These marks are to show
were to drill the drainage holes.
Then on each corner mark a notch
17mm x 17mm.
http://www.ukworkshop.co.uk/projects/planter/page2.php (5 of 6)17/03/2005 22:31:25

UKWorkshop - Garden Planters Project - Page 2
Clamp the plywood bottom in your
bench vice or workmate and cut out
all four notches.
[
|
|
|
|
]
http://www.ukworkshop.co.uk/projects/planter/page2.php (6 of 6)17/03/2005 22:31:25
UKWorkshop - Garden Planters Project - Page3
Garden Planters - Page 3...
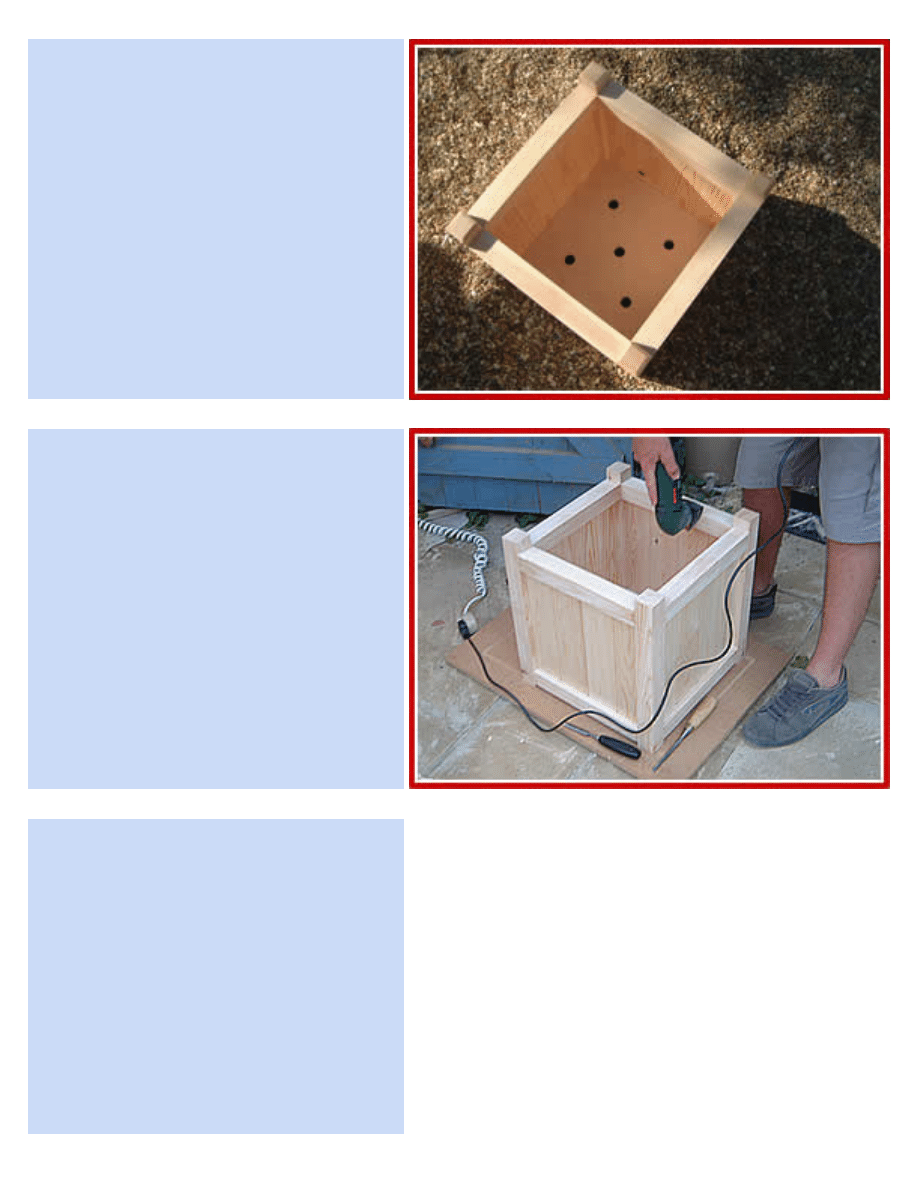
With the plywood bottom on top of a
scrap piece of wood, drill the 5
drainage holes with a 22mm forstner
or spade bit.
Once the glue has had chance to
cure (left over night is best) remove
the clamps and try the plywood
bottom in place! If it's too tight use
a block plane and you can use a
chisel to 'pare' the notch's.
http://www.ukworkshop.co.uk/projects/planter/page3.php (1 of 4)17/03/2005 22:31:59
UKWorkshop - Garden Planters Project - Page3
The polyurethane glue foams so we
need to carfully remove the foam
with a sharp bevel edge chisel.
Give the planter a good sand by
hand or with a power sander. A
sander like a delta is best as it can
get into the tight corners. We
started off with 80G (grit) sandpaper
then finished with 100G (a finer grit).
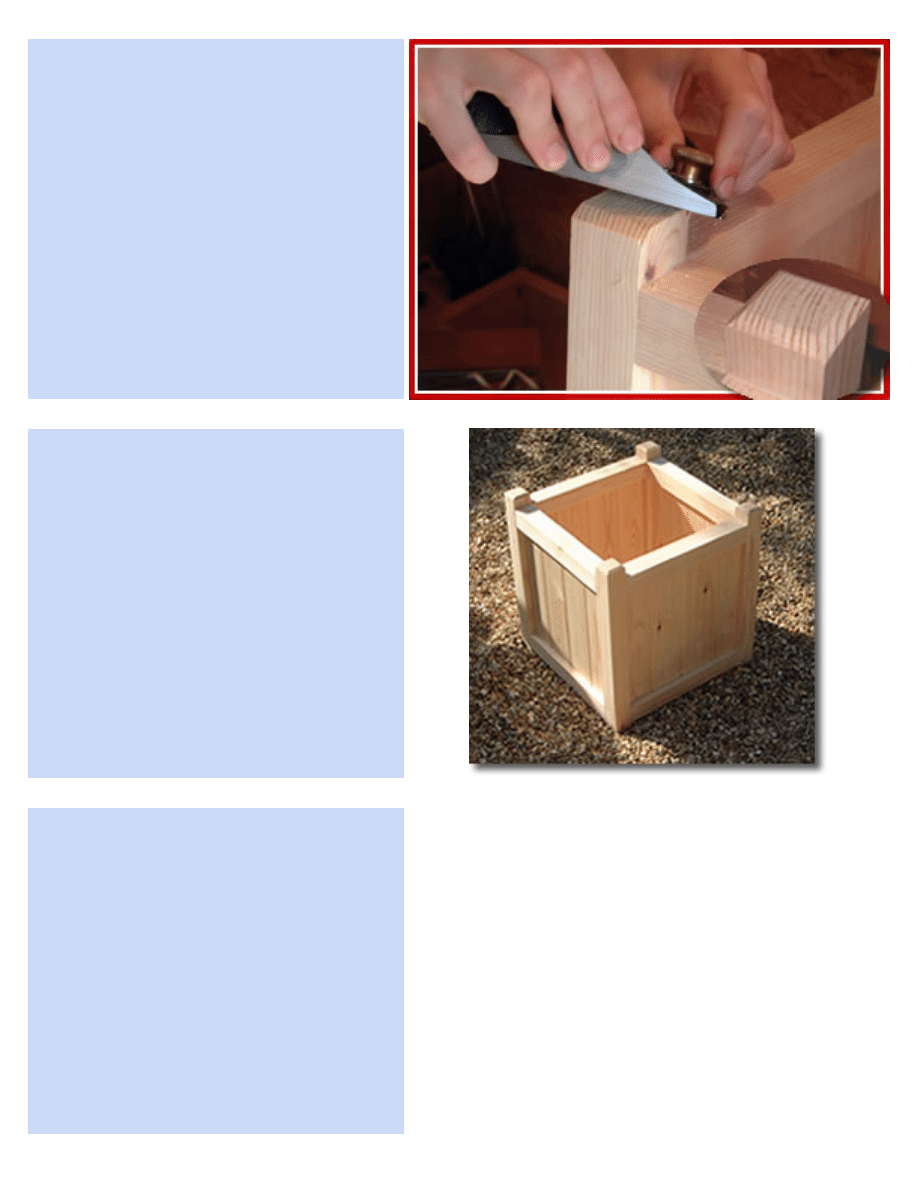
Using a block plane, chamfer all four
posts top and bottom. The bottom
ends only need a slight chamfer to
help prevent splitting if the planter is
ever dragged across the ground.
Hold the block plane at an angle and
plane across the grain first, then
with grain.
http://www.ukworkshop.co.uk/projects/planter/page3.php (2 of 4)17/03/2005 22:31:59
UKWorkshop - Garden Planters Project - Page3
That's all the woodwork done. We
haven't decided on a finish for them
yet but we're either going to oil or
paint them.
For this project we used the router &
router table for most of the
machining! Don't worry if you
haven't got a table, you can still
easily build the planter with the
router on its own with its guide
fence and a simple jig.
In the inset picture on your right
we're cutting the grooves with the
router and guide fence and have
http://www.ukworkshop.co.uk/projects/planter/page3.php (3 of 4)17/03/2005 22:31:59
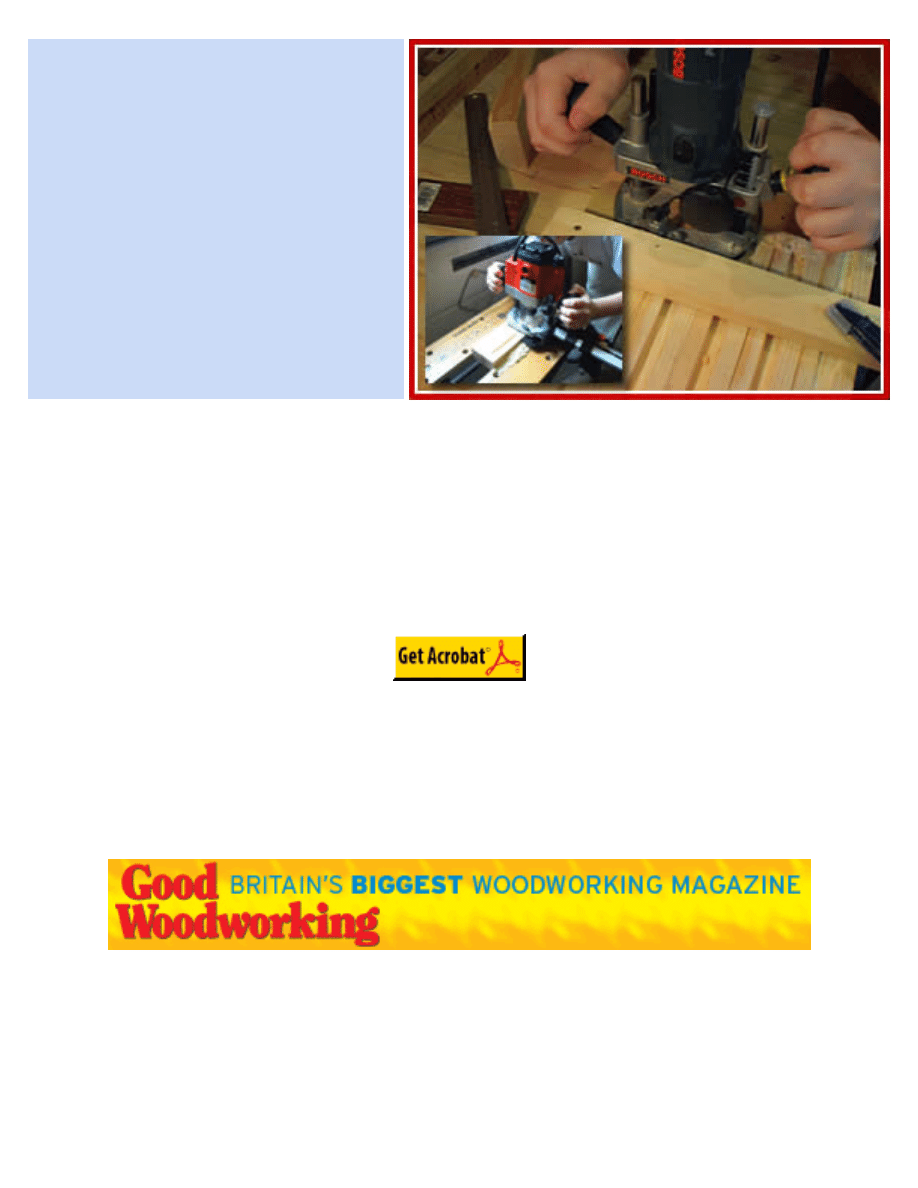
UKWorkshop - Garden Planters Project - Page3
clamped an extra post to help
support the router.
The main picture on your right we're
cutting the tenons with a router &
the help of a simple jig.
the plan for this project as a .PDF file containing all the measurements and drawings. You
need Adobe Acrobat version 3 or higher which is available FREE from Adobe's website
If you need any help with this project, please feel free to email:
The Planter plan and pictures are Copyright
Charley Fell
UK
Workshop 2001
!
[
|
|
|
|
]
http://www.ukworkshop.co.uk/projects/planter/page3.php (4 of 4)17/03/2005 22:31:59
Copyright UKworkshop 2001
Uk
Page 1
workshop.co.uk
Pla
nte
r
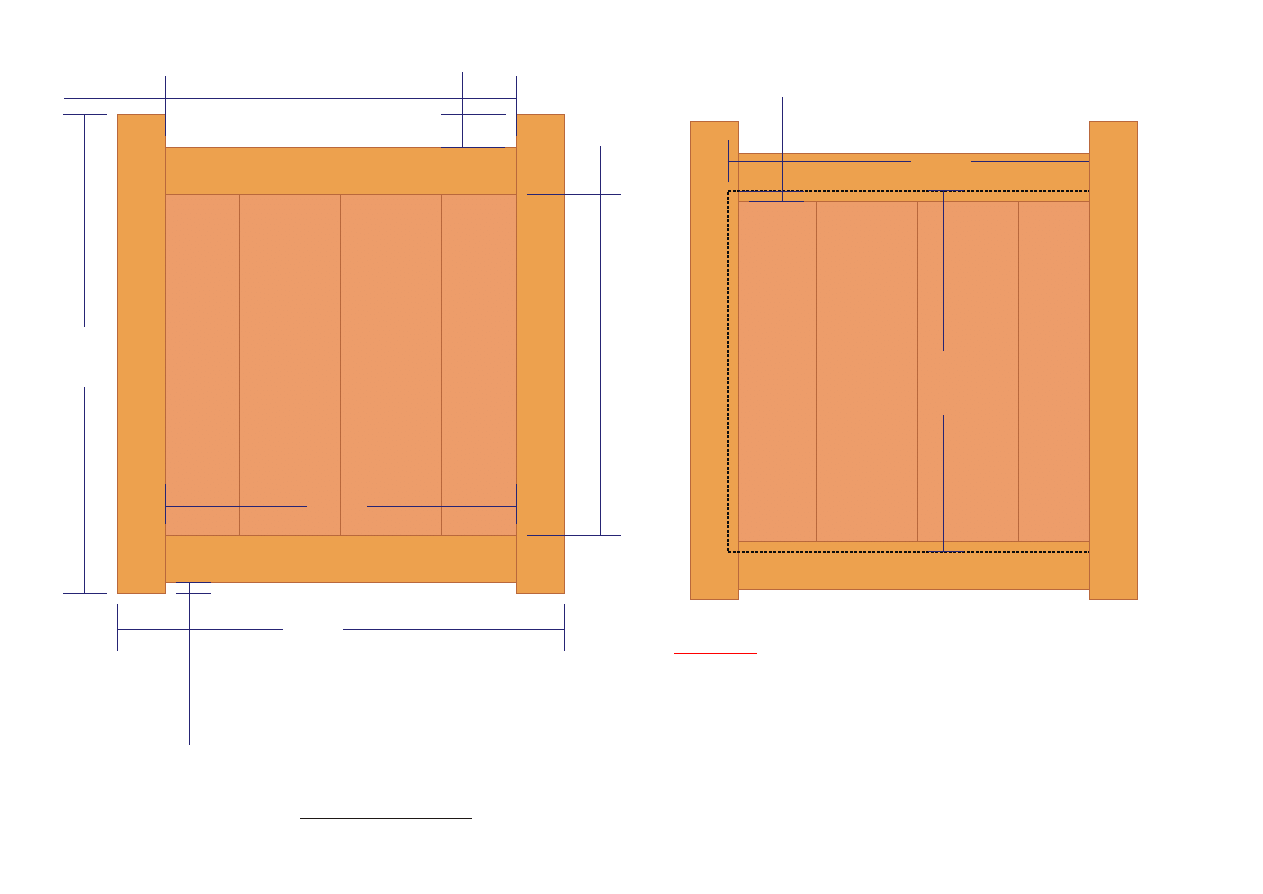
420 mm
420 mm
330 mm
330 mm
4
5
0
m
m
4
5
0
m
m
1
0
m
m
1
0
m
m
3
0
m
m
3
0
m
m
3
2
0
m
m
3
2
0
m
m
1
0
m
m
1
0
m
m
330 mm
330 mm
350 mm
350 mm
Cutting List
Job Title: Planter (all dimensions in mm)
Post
Pine
4 450 45 45
Rail
Pine
8 350 45 45
Sides
Pine TGV
16 340 95 12
Bottom
Ext Ply
1 360 360 18
Member
Material
Qty
Size
L W T
Copyright UKworkshop 2001
Uk
Page 2
workshop.co.uk
3
4
0
m
m
3
4
0
m
m

Uk
Page 3
workshop.co.uk
360 mm
3
6
0
m
m
1
7
m
m
Plywood Bottom
Post
4
5
m
m
450 mm
10 mm
1
2
m
m
1
6
.5
m
m
1
2
m
m
10 mm
Rail
30 mm
Copyright UKworkshop 2001
350 mm
Document Outline
- Garden Planters Project 1.pdf
- www.ukworkshop.co.uk
- Garden Planters Project 2.pdf
- www.ukworkshop.co.uk
- Garden Planters Project 3.pdf
- www.ukworkshop.co.uk
- Garden Planters Project 4.pdf
Wyszukiwarka
Podobne podstrony:
Mom s Garden Planter
OKŁADKA DVD ;Linkin Park Live From Madison Square Garden 201 1DVD Cover Front Low
Least squares estimation from Gauss to Kalman H W Sorenson
How To Mix A Pop Song From Scra jezar@dreampoint co uk id 20633
(gardening) Square Foot Gardening
How To Mix A Pop Song From Scratch jezar@dreampoint co uk
Secret garden Song From A Secret Garden(by Rolf Lovland)
Square Planter Box
(Gardening) What Is Square Foot Gardening
101 Recipes from God s Garden
Song from A Secret Garden(1)
(gardening) Growing From Seed
Old Madison Square Gardenfond reccollections of a true landm
A Silent Voice from the Garden
Song from A Secret Garden (Violin& piano)
(gardening) Protecting a Citrus Tree from Cold
Song from a secret garden 2
uk ad pokarmowy
MonikiKamica uk éadu moczowego
więcej podobnych podstron