EQUIPMENT
Lancet
Cleansing solution
Cotton balls or 2
× 2 sponges, sterile
Gloves, nonsterile
Adhesive bandage
Appropriate sample container
Labels
Completed laboratory requisition forms
GENERAL GUIDELINES FOR SPECIMEN
COLLECTION
1. Check physician’s order. Ensures appropriate specimen
obtained from the correct child.
2. Check child for allergies to any materials used, e.g.,
povidone-iodine.
3. Prepare child and family. Enhances cooperation/partici-
pation; reduces anxiety/fear.
NOTE: Have an assistant hold/comfort the child as nec-
essary and in accordance with agency policy.
4. Gather equipment. Promotes organization and effi-
ciency.
5. Wash hands. Don gloves. Reduces transmission of
microorganisms.
PROCEDURE
1. Steps 1–5 of General Guidelines.
2. Select site.
a. Heel: (Infants younger than 1 year of age): Plantar
surface beyond lateral and medial calcaneous. Avoids
arteries and veins; reduces risk of scar tissue forma-
tion, which may be painful when the infant begins to
walk.
b. Great toe: (children older than 1 year of age).
c. Finger: Side of ball of finger (3rd or 4th finger)
across the fingerprint. Avoids damage to nerve end-
ings and calloused areas of the skin. If stick made
along lines of fingerprint, blood will run down the
finger.
3. Apply moist compress to area for 5–15 minutes:
Facilitates blood supply to the area.
4. Put on nonsterile gloves. Reduces exposure to blood-
borne pathogens.
5. Remove compress and wash selected site with soap and
water or antiseptic solution as specified by agency pol-
icy. Reduces transmission of microorganisms.
NOTE: Use of alcohol for skin preparation may lead to
rapid hemolysis. Povidone-iodine interferes with read-
ings of Chemstrip and Dextrostix.
6. Let area dry completely before puncture. Damp area
may dilute blood sample or hemolyze it, causing dis-
torted values.
7. Gently massage base of finger or heel, stroking toward
selected puncture site. Do not touch the puncture site.
Massaging increases blood flow to the area. Excessive
squeezing causes bruising, produces a sample that con-
tains more plasma than cells, and can lead to hemolysis,
causing falsely elevated potassium levels.
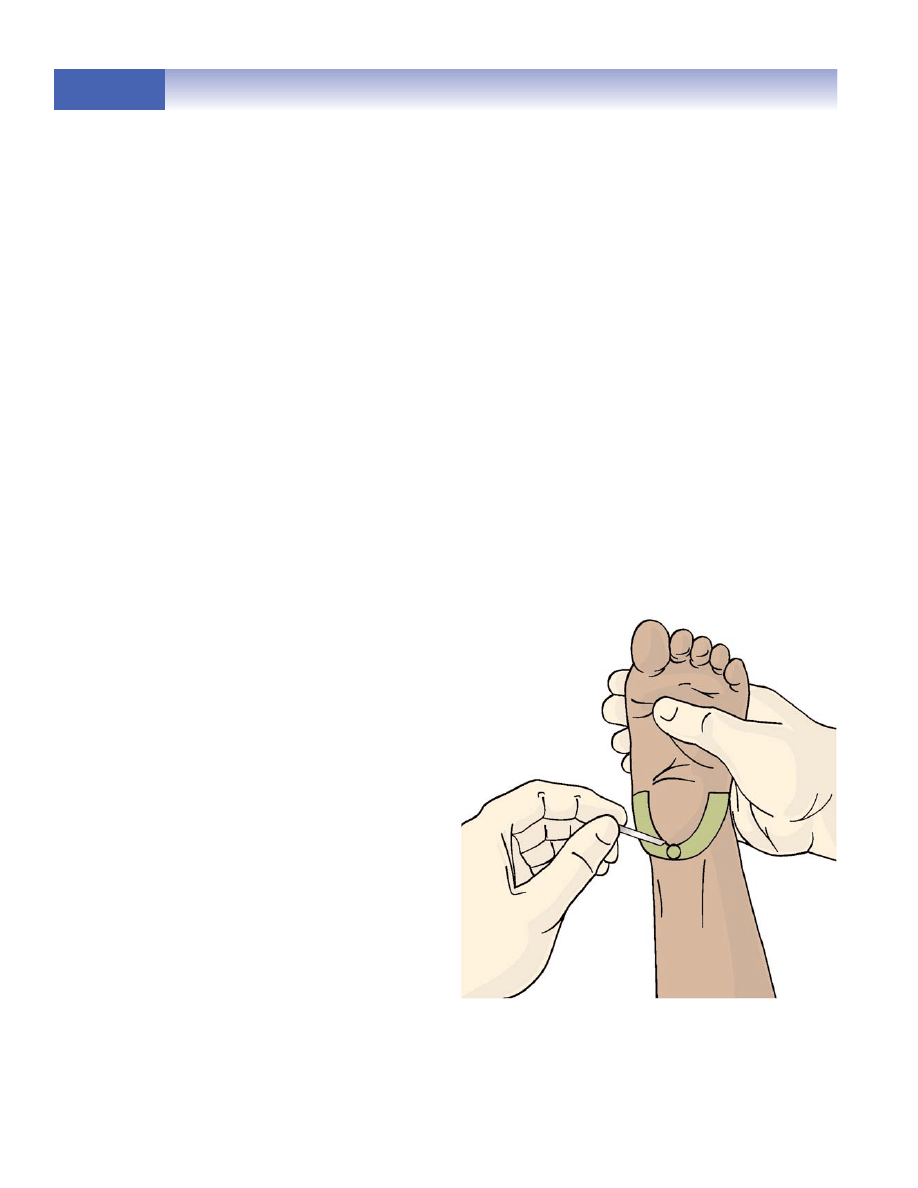
8. Isolate the puncture site using the nondominant hand to
hold the hand or foot. Hold the selected site in a depen-
dent position. Increases blood supply to the puncture
site. (Figures 9A and 9B)
a. Heel: Support dorsum of foot with thumb and ankle
with other fingers.
b. Toe: Grasp foot across dorsum, support toe with
thumb on plantar surface.
c. Finger: Keep finger to be used extended and pointed
downward.
24
Copyright © 2007 by Thomson Delmar Learning, a division of Thomson Learning, Inc. All rights reserved.
FIGURE 9A U-shaped area denotes area
to puncture with lancet.
continued
SKILL 6
SKILL 6
Capillary Blood Draw (Heel and Finger Stick)
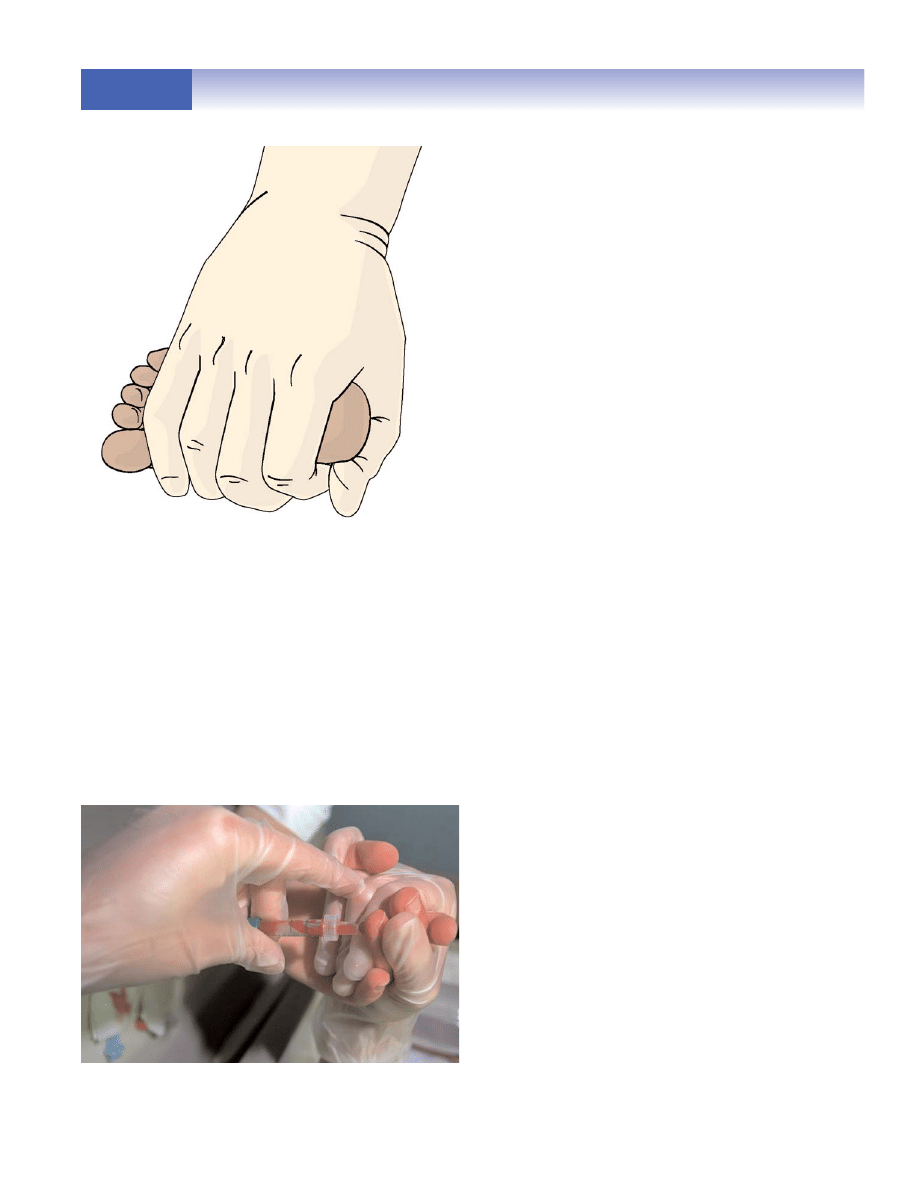
9. Using the dominant hand, puncture the site at a 90°
angle to the skin using a quick, forceful motion. Remove
the lancet immediately. Do not use a slashing motion.
Provides blood sample with minimal discomfort to the
child.
10. Wipe away the first drop of blood using a sterile cotton
ball or 2
× 2.
11. Allow blood to collect at puncture site.
12. Collect specimen allowing blood to flow into the collect-
ing tube. (Figure 10)
13. Wipe site with sterile cotton ball or 2
× 2 and apply
pressure for 2–3 minutes. Controls bleeding.
14. Apply bandage if appropriate.
NOTE: Use bandage with caution in infant and young
children. Child may aspirate or swallow the bandage.
15. Discard equipment in appropriate container. Consistent
with handling of body fluids.
16. Label specimen, place in appropriate bag or container
along with laboratory requisition slips. Ensures specimen
is properly identified and appropriate test performed.
17. Remove gloves. Wash hands. Reduces transmission of
microorganisms.
18. Send specimens to laboratory.
DOCUMENTATION
1. Time, source/site, specimen sent to lab (specify for what
test).
2. Record results of any test performed on the unit.
25
Copyright © 2007 by Thomson Delmar Learning, a division of Thomson Learning, Inc. All rights reserved.
FIGURE 9B Position that allows blood to
drip.
SKILL 6
SKILL 6
Capillary Blood Draw (Heel and Finger Stick)
continued
FIGURE 10 Position used when performing
needle stick.
Wyszukiwarka
Podobne podstrony:
Skill 08[1] Blood Draw from a Central Venous Catheter
Ellen Schreiber Vampire Kisses 06 Royal Blood
Skill 04[1] Blood Pressure
Janrae Frank Lycan Blood 06 Kady s Vengeance
Blair willing to pay blood price (06 09 2002)
PN Elrod [Vampire Files 06] Blood on the Water v1 1 (BD)
Stephani Hecht The Drone Vampire 01 Blood Lust rozdział 06
MT st w 06
Kosci, kregoslup 28[1][1][1] 10 06 dla studentow
06 Kwestia potencjalności Aid 6191 ppt
06 Podstawy syntezy polimerówid 6357 ppt
06
06 Psych zaburz z somatoformiczne i dysocjacyjne
GbpUsd analysis for July 06 Part 1
Probl inter i kard 06'03
06 K6Z4
więcej podobnych podstron