1
Basic Hydroponics System
by 'Buds'
Parts List:
1 bucket with lid - 3 Gallon or
larger
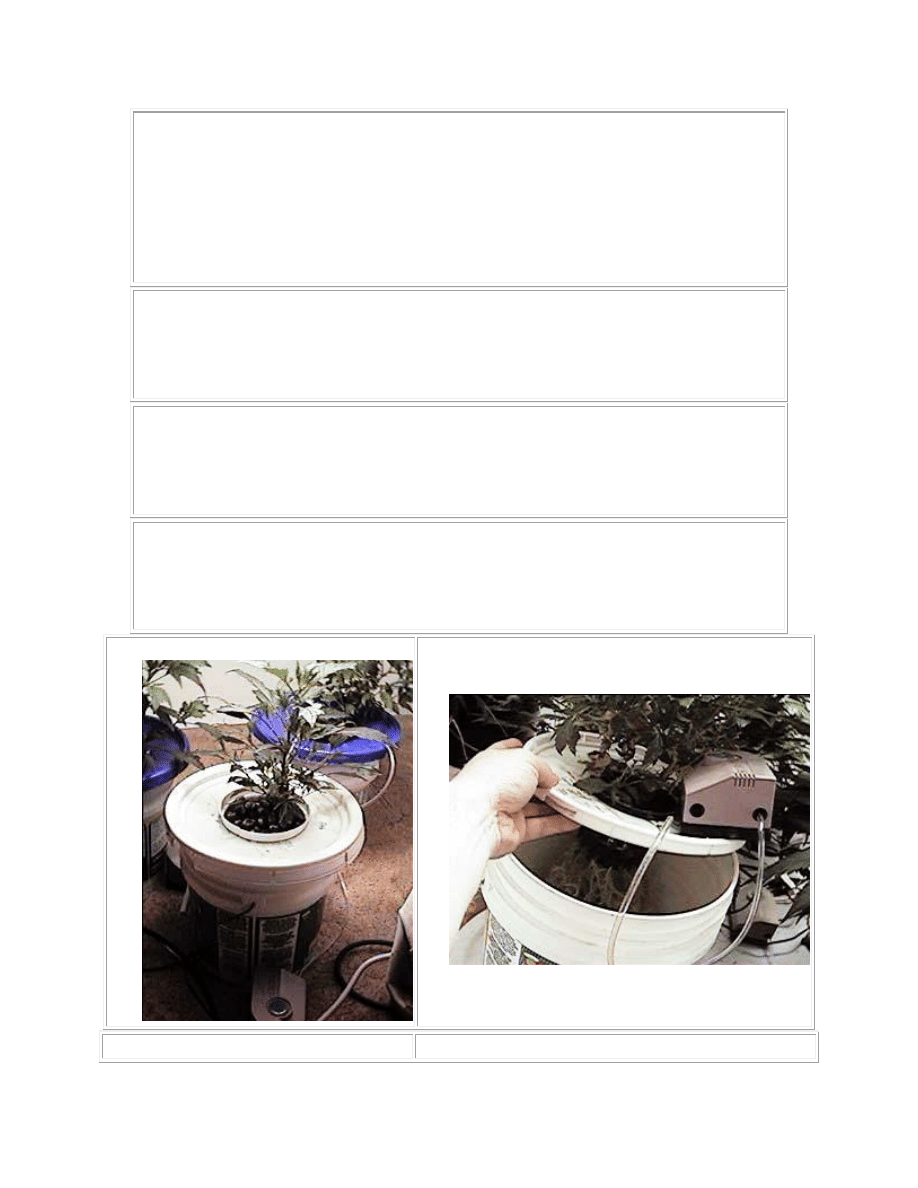
1 aquarium air pump - Elite 802
2 feet airline
1 air stone (4" or smaller)
1 3" or 4" plant pot
2 cups gro rock or Rockwood or
gravel (clean)
Hydro Nutrient (more on what
kind later)
OK, guys here it is. These instructions and details only apply to my conditions and
circumstances. So some tweaking and alterations to some things may need to be made to
make it work as well for you as it has for me.
In a nutshell - the plants basically hang in a nutrient rich solution with air pumps supplying
much needed air to the plants roots. I've made a few modifications to the system and they
make it really easy to set up.
The plants are started in the medium of your choice, rockwool (use small cubes), vermiculite,
peat, etc. and transferred later to the pots.
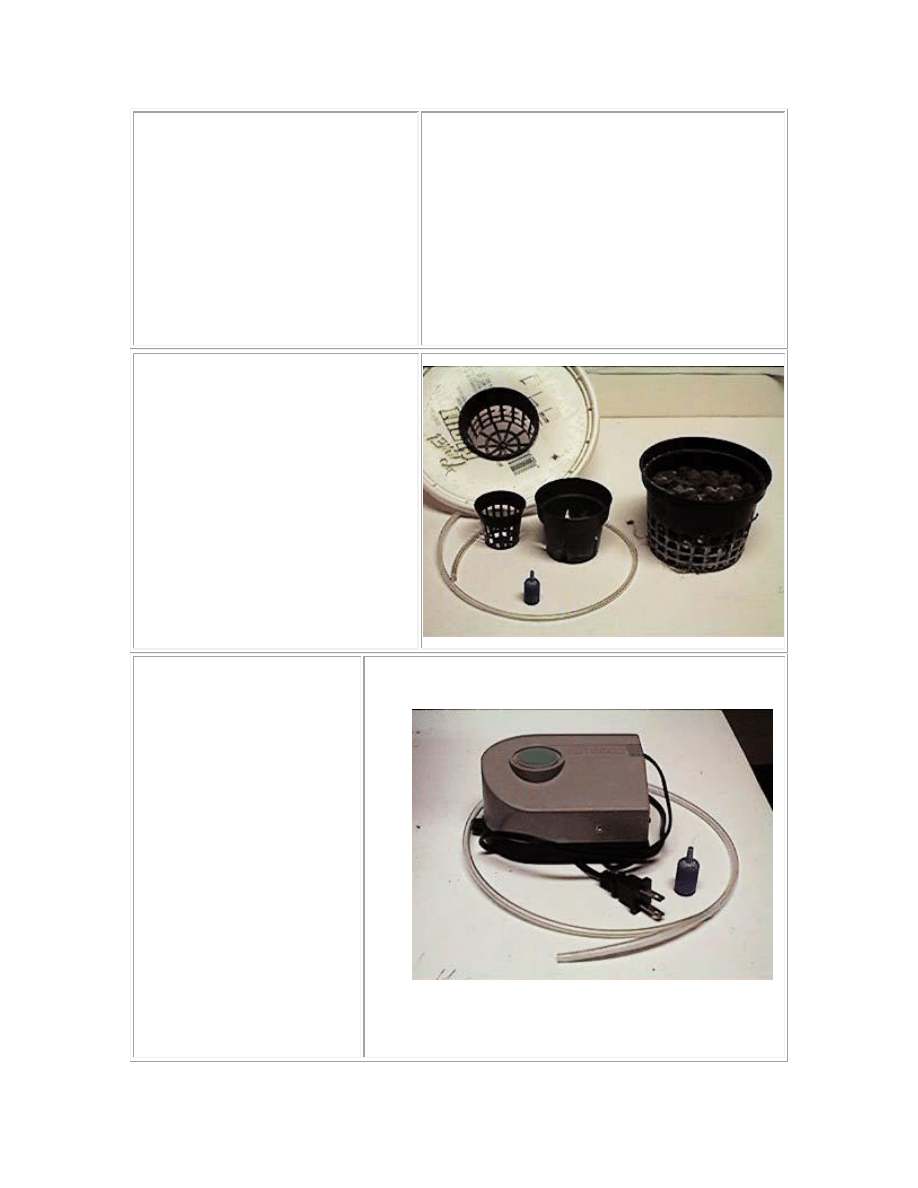
As you can see in pic 'buckets' we will
be using pails of various sizes and
shapes. We use the lids of the buckets
or you can cut one from plywood (not
treated wood, just plain old 1/4" or
thicker plywood). Almost any kind of
container can be used. We prefer to
use 3 gallon black buckets (purchased
at a grow-store) or 5 gallon (20 liter)
white buckets. You can use the 36 liter
Rubbermaid tubs too. Just use the lid
and cut 2 - 4 holes (two pots is best -
four plants are just a little too much if
you grow big plants). Other containers
will work, and we've even taken to using
smaller than 3 gallon pails for plants
2
that still often yield 2 oz each. So you
can experiment, just don't use anything
smaller than 3 gallons to start - after
your experience grows you can play.
Make sure the containers are very clean
and sterilize if possible. Bleach and
water works well. And don't use
transparent or see-thru ones, algae will
be a problem. With white buckets some
algae does build up but never enough to
notice or worry about.
Depending on the size of pots you will
use, you will need to cut a
corresponding hole in the lid to
accommodate the pot. It is probably
best to use 3" or larger pots (depending
on the size of plant you wish to grow).
You can purchase hydro pots at the
hydro store or just use regular green
plastic ones you can buy in hardware
store. You may want to cut a half dozen
or so slits in the pots to allow more
roots to come out, but it is not
necessary.
You will also need to drill or cut
a small hole for the airhose to
come through. Make it tight if
possible so that you can make
sure the airstone stays off the
bottom of the bucket.
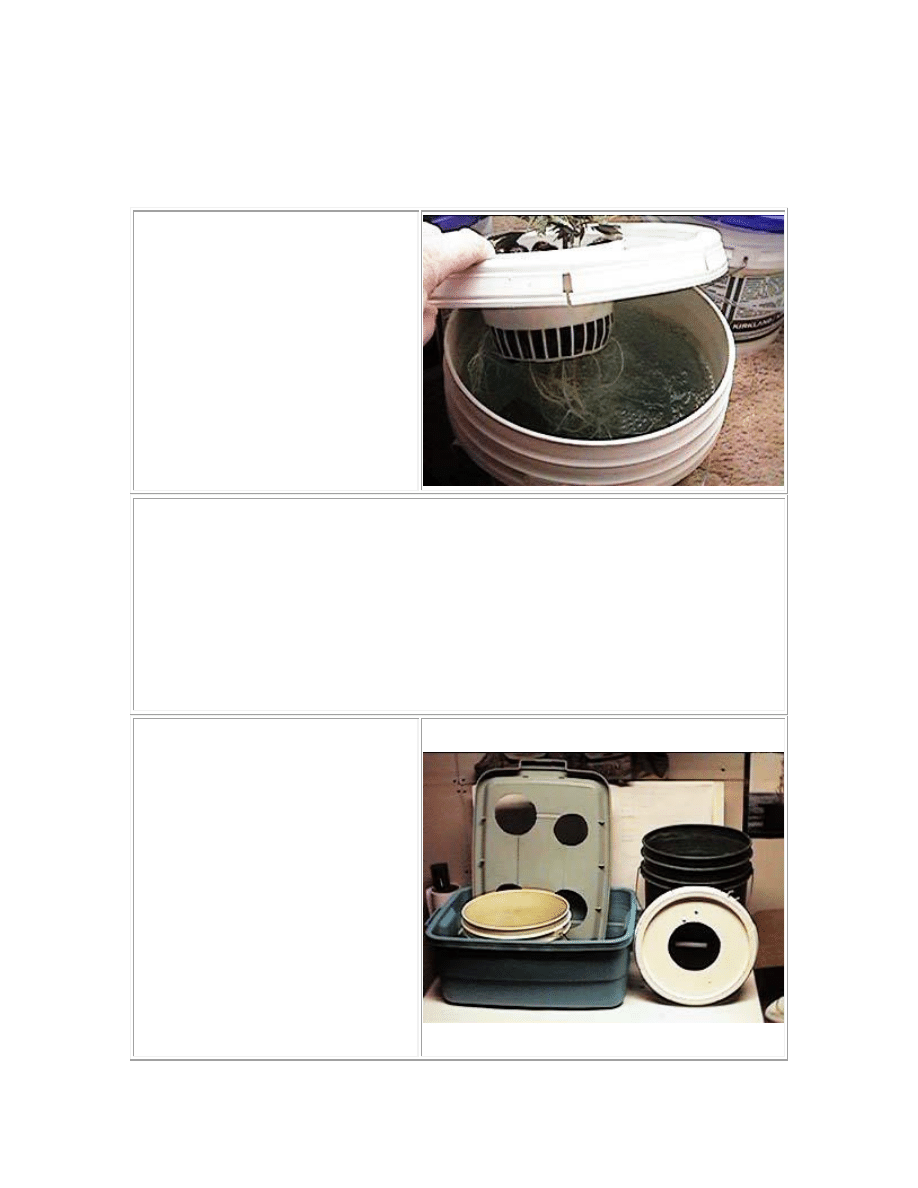
Once you have the lid done, you
can set it up. Put airline
through lid (keeping off
bottom) attach airstone and
airpump. Place lid on bucket.
and fill bucket with nutrient
solution (more later). Make sure
airpump is running and you
should see lots of bubbles
coming through solution.
Watch for bum airstones -
about the only maintenance
This is the kind of aquarium pump that is
used.
Elite 802 has two outputs to run two buckets, or one
Rubbermaid.

3
feature of this system that is
not perfect.
You are better off to start plants and have them either root-ready from cloning or a good
set of roots from seed than to just plant them in rockwool in this system. Plants should have
a well established root mass before placing in this system with full strength nutrient. Wait
for the time when you would transplant them (in soil) to a larger pot and you can transplant
your soil plants to hydro - just clean off the roots as well as possible (in lukewarm water)
and place in system.
Take your pot and put a layer of rockwool or gro-rock on bottom, and holding plant in one
hand so that roots just lay over rock, fill the pot with rock or rockwool to the top and make
sure plant stalk is in the middle of pot for better support.
This pot can now be placed in hole in bucket lid. Make sure that the nutrient level in the
bucket is at least 1" or 2" above bottom of pot, so that the roots you placed in the pot are
sitting in the nutrient (Very Important) Otherwise your plant will dry up and die. It is also a
good thing if you can position the airstone directly underneath the pot so all the bubbles hit
the roots directly (A good thing!).
You are off and running. The system needs very little care for the first 3-4 weeks. So you
can sit back and watch these babies grow. There are several small points that need to be
made now. One of them is nutrient. I simply use a store-bought Hydro Nutrient solution
that works for us. There are many different kinds, but I believe most of them will work. In
the past we have simply added nutrient-mixed solution to the bucket when it got low. When
you change your timer, or move the plants to the flower room, dump out the old Vegetative
nutrient and replace with a full bucket of fresh Flower nutrient. Keep adding Flower food
until about 2 weeks before harvest and replace with straight clean water. This works for us
and I make no claim that it will work for everyone. You should test the nutrient you use. If
it is a hydro nutrient, then you can start the plants out on a 50% solution and if all goes well
for the first week or so, you can probably boost it up to 75% and go from there. If you
could raise temp of water in buckets, yes it would definitely benefit the plant. I'm actually
not aware of the temperature of the nutrient in the individual buckets.
[{Note from Makka}- I find , with my limited but fairly successful experience, that root
zone temps do affect growth. I use submersible aquarium heaters set at 20 celcius (68F) in
hydro setups,. Or in winter only, heat mats under some pots. Another point of interest is
day/night air temp ratio. Try and keep dark temperature within 10 degrees of day (lights)
temp. Eg 20C (68F) celcius min. - 30C (86F) max. The closer these two temps, the shorter
the internodal distance, resulting in shorter bushier plants. Warming the water they grow in
will usually give better growth. Obviously real cold is not good. I guess it depends..is there a
foot of snow outside, I'd like my feet warm. But in the summer.... well... Anyway, thats just
my observation, although several of the best books, have similar opinion. Good Growing, keep
up the good work..... cheers... makka]
The other point is about airstones. They make your plant live and they can kill them too!
Check your airstone often, they will plug up and a dead airstone means a dead plant. Some
4
say "never use airstones" I've never not used them. I've been using this system for over 12
years now and have always used airstones. They give my plants a real nice diffused air and I
am not convinced that a airline from an airpump without an airstone will give the plant as
much air as it could use. It does however keep the nutrient from going bad, but the plants
love the thick blanket of air they get at the roots. So check them often!! One airstone is
usually enough for a 3-5 gallon bucket. The airpump is on all the time. this helps prevent
them from
plugging up and gives maximum air.
As for ph, ec, etc. I Do Not Check These! I don't have to! We use plain tap water. Can't
recommend this to everyone, but again, it works for us. For some reason, we've never had to
deal with ph etc. It just doesn't factor in here for some reason. I've grown at least a dozen
or more different strains using this system and never had a problem that was related to ph.
It was usually either giving plants too much or not enough nutrient that was the problem.
With this system it's better to flower the plants small. You can do really big plants, but
they require more maintenance and food as well. As an example, all plants grown in this
system yield about 2 oz each. I've personally had plants as big as 4 oz. in a 20 liter pail. And
Rubbermaid containers should yield at least 3-4 oz. Just my experience with our strains. No
I don't bull#$%@ either.
There is not much else I can say about this system except that it works! I didn't believe it
until I saw it. I had the idea in my head but had never seen it work. Till a friend turned me
on to it. First crop got 1 lb under 1000 watts MH. From 4 Rubbermaid’s. That convinced me.
So you can experiment, try a kiddies pool with a plywood lid - 6 to 8 plants and 6 airstones
and WOW. Or try 4 Rubbermaid’s under 1000 watts. Best of all just experiment.
Another look at the bucket with young
plant
This plant was just placed in flower two weeks
ago.
See roots hanging into bucket. Time to feed her.
Nice white roots. Just what you
OK, so here's a pic of one of the developing
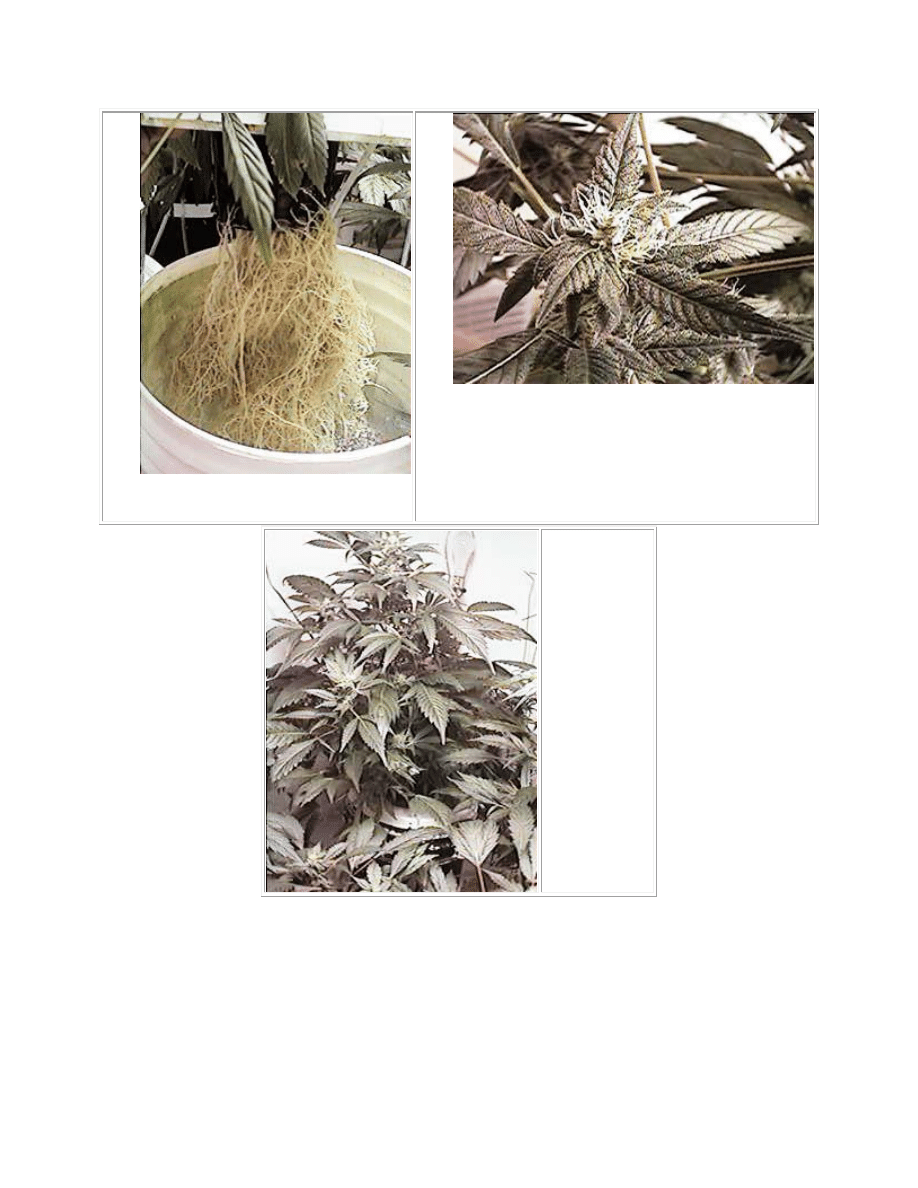
5
want!
Note small amount of algae on bucket.
Plant has been in flower for 4 weeks now.
buds.
It has been in flower for about 4 weeks now.
And ... here's
one of the
girls, she has
about 4 or 5
weeks left to
go. Wish my
digital cam was
better, for a
better detailed
photo.
Wyszukiwarka
Podobne podstrony:
Basic Hydroponics System
Basic Hydroponics System
hydroponika systemy
JAGS Basic Combat System
(energy) Small Hydropower Systems
System finansowy w Polsce 2
Systemy operacyjne
Systemy Baz Danych (cz 1 2)
Współczesne systemy polityczne X
System Warset na GPW w Warszawie
003 zmienne systemowe
elektryczna implementacja systemu binarnego
09 Architektura systemow rozproszonychid 8084 ppt
SYSTEMY EMERYTALNE
3 SYSTEMY LOGISTYCZNE
więcej podobnych podstron