© 2012 All Rights Reserved –
http://amazonmoneymachine.com
1
Getting Started – Creating An Amazon Seller Account
Purpose
This lesson is going to cover the creation of an Amazon Seller account. Before you can do the
kind of business this course teaches, you will require such an account.
NOTE: an Amazon Seller account is not intended for selling Kindle (non-physical) books. It is
intended for physical products (including physical books), regardless of which selling model you
are using; e.g. Drop-ship, Private Label, or Wholesale. The account you need to sell Kindle books
and how to set it up are included in the Kindle module.
Creating the Account
What You Will Need
There are two types of seller accounts in Amazon: "Individual" and "Professional". This training
course covers the use of the "Professional" account as it provides the features and functions
needed to apply the instructions in this course, so you don't even want to concern yourself with
the "Individual" option when registering for your new account.
The process of creating a Seller account is quite easy. However, before you do so, there are
certain pieces of information you will want to have available as it will be required for the sign-up
process:
Business Info – whether signing up as a personal or a business entity (e.g. LLC), you will
be required to provide basic information such as name, address, etc.
Bank Account Info – this is important as you want somewhere for Amazon to deposit
the money you will be making. The basic information you'll require is bank account #,
bank name and routing #.
Credit Card Info – this will be used to purchase your Pro account. It will also be used to
pay for your referral and closing fees on sold items.
For more information on these fees,
go to Amazon's "
" page.
Email Address – there are two reasons for an email address. One is for logging
into your Seller account and for Amazon to communicate with you. The other
reason is for customer service. It is recommended you use a second email
address for customer service, something that is especially useful if you have
someone else handling your customer service issues. You won't need that
customer service address to sign up for your Seller account but you may want to
create it now anyway so it is there when you're ready to use it.
© 2012 All Rights Reserved –
http://amazonmoneymachine.com
2
Note: you are able to use free email services for your email; e.g. gmail, yahoo,
etc.
Phone Number – Although it seems Amazon never uses this number, Amazon
requires you to provide it to verify your account as well as to enable them to
contact you if emailing you is not reasonable enough for the issue you're being
contacted about. You can use a personal phone number, business phone
number, forwarded number, or even a Google Voice number (free).
Seller Name – this is the name that is going to appear on your seller page. It is
possible to have multiple seller accounts, so the name you choose here can be
anything you want, such as personal, a business name or something more niche-
specific.
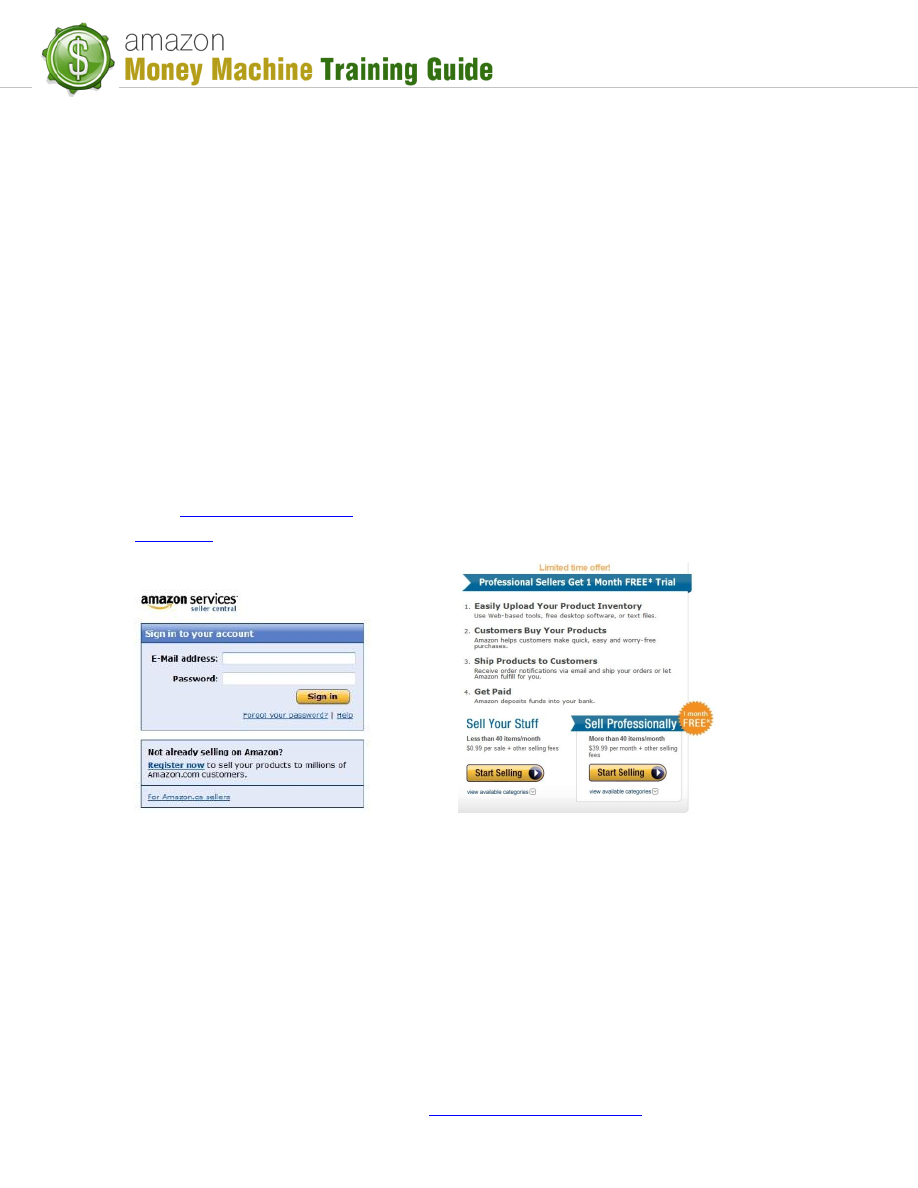
Registering Your Account
In order to sign up for a Seller account, you can either visit the Seller Central sign-in
page (
) and click the "Register now" button or go directly to the
Seller Central Sign-In
Registration Page
NOTE: At time of creating this PDF, Amazon was offering a 1 month free trial for the
"Professional" seller account. The registration page you come to may no longer show
that offer.
In order to register, click the "Start Selling" button under "Sell Professionally" and you'll
be able to begin entering your information. On the first screen you will see an option
list and some entry fields related to your sign-in (name, email address and password).
© 2012 All Rights Reserved –
http://amazonmoneymachine.com
3
NOTE: For those who are outside of the United States, it is recommended you read the
information at the top of the page. It is simple to go through and can prove helpful to
you.
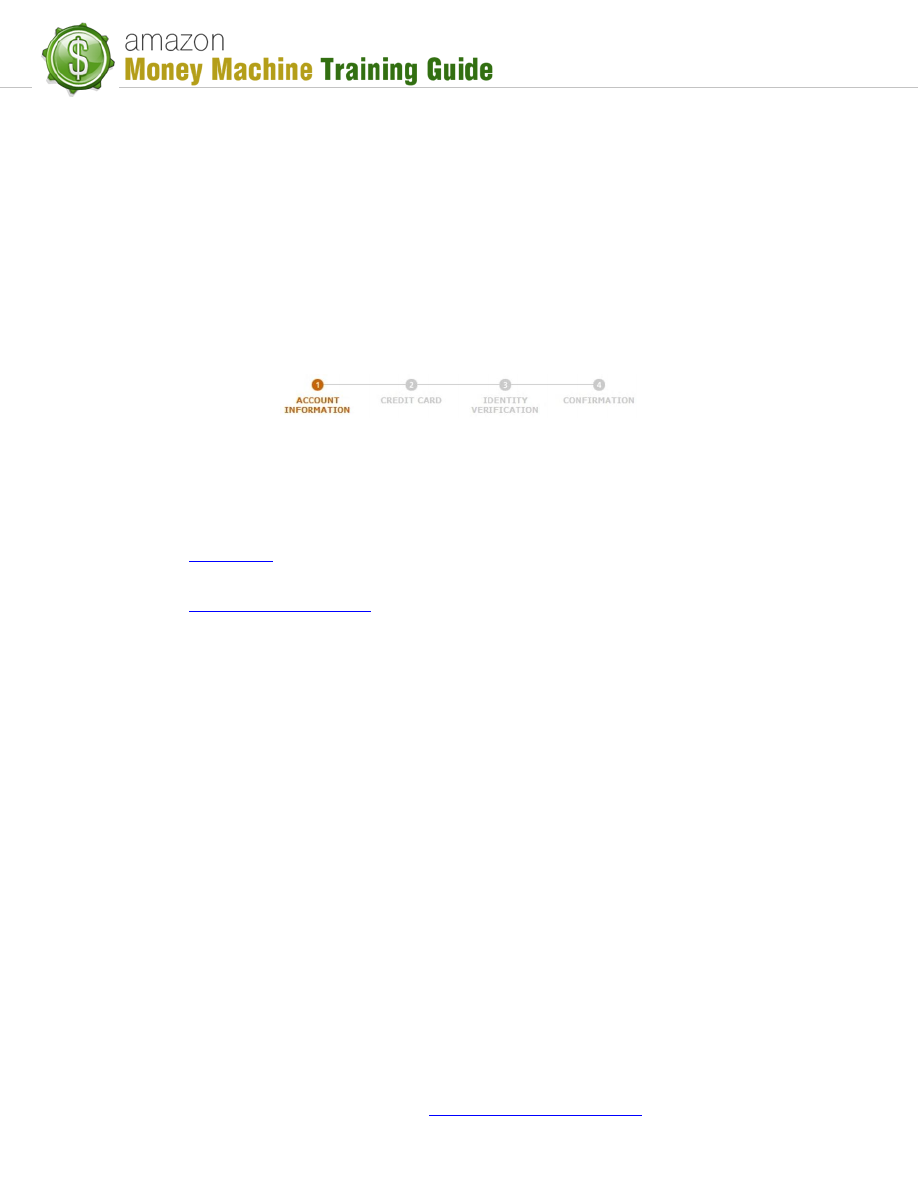
Select your desired account option ("Create new account…" recommended), enter the
appropriate information in the corresponding fields and then click "Continue".
When you click "Continue", you will be taken to the first of 4 pages where you will enter
the remainder of your information. You can note your progress through the registration
via the registration progress bar at the top of the page:
Step through each page of the registration process to complete your account setup.
Once done, you'll be able to continue to the next phase of this course.
Useful links:
1)
– Amazon help: includes individual/pro comparison, selling fees,
shipping fees, examples (already mentioned above in "Credit Card" bullet point)
2)
Wyszukiwarka
Podobne podstrony:
2b Amazon Money Machine Getting Started The Seller Account Dashboard
2c Amazon Money Machine Getting Started The First 28 Days
Getting Started
getting started IAOTAGZXANHHC6G Nieznany
(ebook pdf) Matlab Getting started
Part I Getting Started
1 3 Getting started with Data Studio Lab
Getting Started with PostHASTE
Packt Publishing Getting Started with Backbone Marionette (2014)
Getting Started
ANSYS Getting Started Tutorial Workbench
chinas southwest 3 getting started
1 2 Getting started (2)
Neuro Solutions 5 Getting Started Manual
mr zr getting started
Matlab Getting Started
01 GETTING STARTED
Part I Getting Started
więcej podobnych podstron