Project 19848EZ:
Breakfast Tray
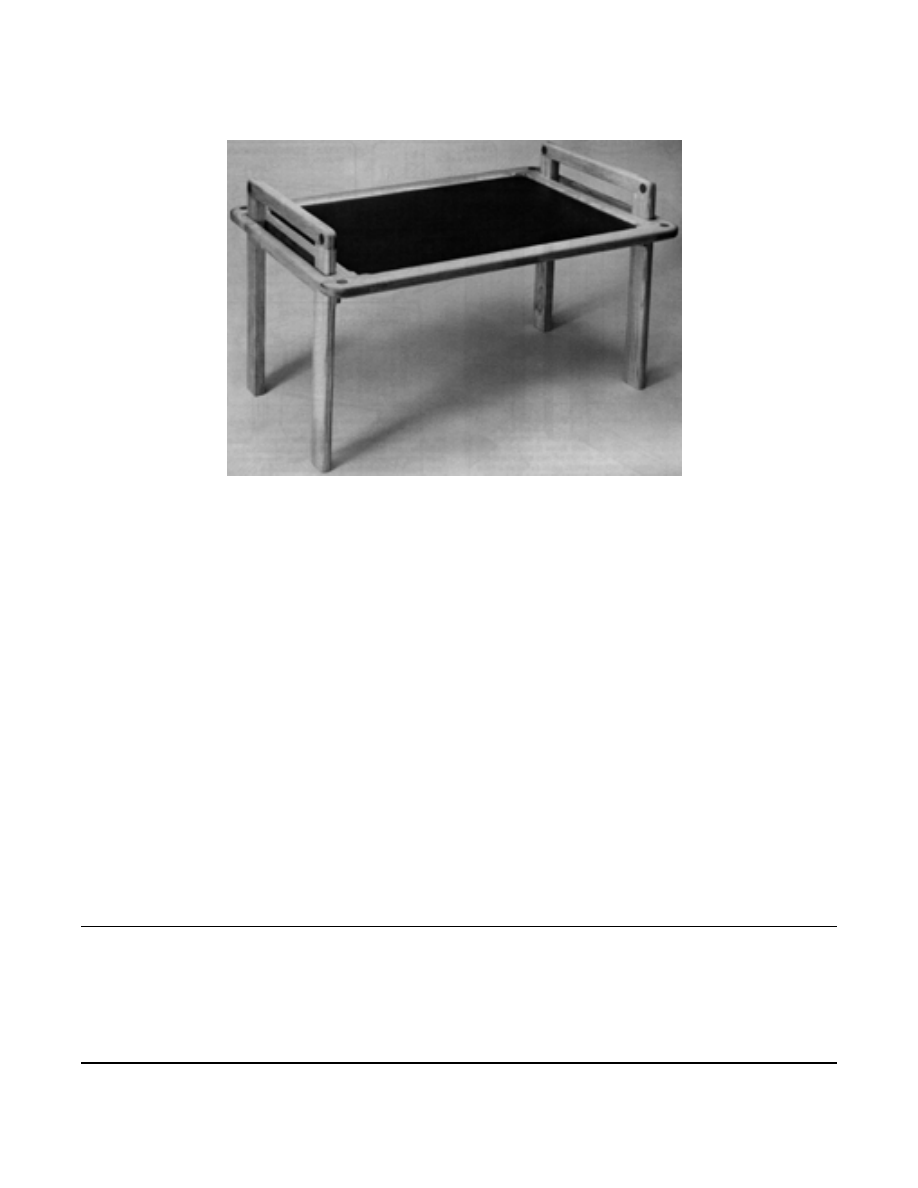
What a luxurious way to start the day - breakfast in bed. This attractive contemporary
styled serving tray features a Formica top and legs that pull out of the tray to permit
easy storage. Once disassembled, the three parts can be conveniently hung on a kitchen
wall or stored flat in a cabinet. Ours is made from ash, since this wood takes well to
washing and scrubbing, although we think oak would also look good with this piece. The
open mortise and tenon joints are both strong and attractive. A 5/8" diameter teak pin in
each joint adds further to the strength and appearance.
Breakfast Tray Materials List
Part
Description
Size
No. Req’d
A
Leg
3/4" x 1-1/2" x 14"
4
B
Handle
3/4" x 1" x 12"
2
C
Table Support
3/4" x 1" x 12"
2
D
Front and Back Frame
3/4" x 1-1/4" x 24"
2
E
Side Frame
3/4" x 2-1/4" x 16"
2
F
Tray
3/4" x 14-1/8" x 20-1/8"
1
G
Formica
As required.
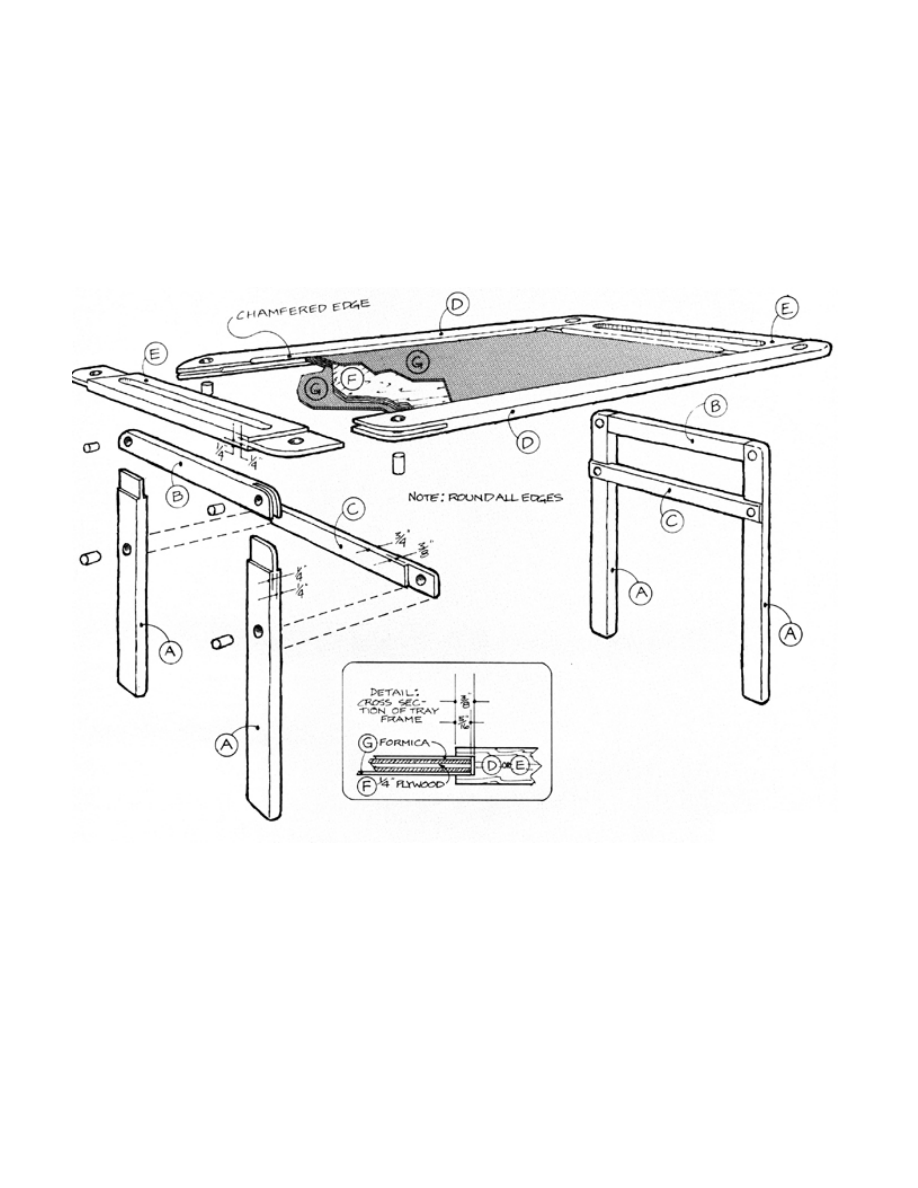
Breakfast Tray Complete Schematic
Breakfast Tray Step-by-Step Instructions
1. Cut each of the four legs (parts A) to 1-1/2" wide x 14" long.
2. Use a tenon jig in conjunction with the table saw to cut each leg tenon to a width
of 11/z inches and a length of 14 inches.
3. The through tenon can best be cut using a.
4. Adjust the saw blade for a 1" depth of cut.
5. Set the tenon jig to cut the 1/4" wide by 1" inch long tenon.
6. Cut the handle (part B) to length and width.
7. Use the tenon jig to carefully cut the open mortise, removing a little at a time, and
always checking the fit with the leg tenon.
8. Cut the tray support (part C), which serves to add strength to the unit while also
acting as a stop for the removable tray, to length and width.
9. Add the notch on each end.
10. Make the through mortises and tenons for the tray frame members, parts D and E,
in the same manner as parts A and B.
11. Make sure these joints are also well fitted.
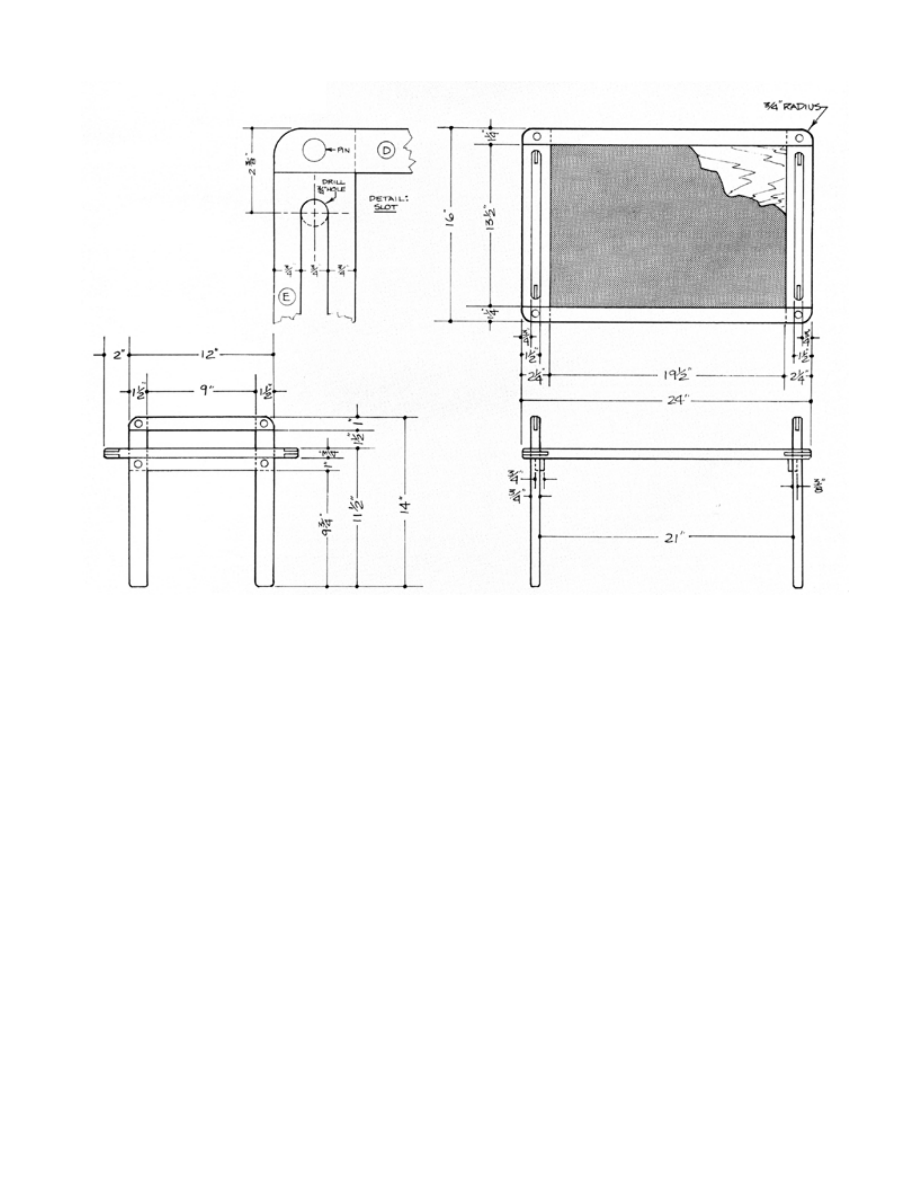
12. Drill a 3/4" diameter hole at a point centered 2-3/8" inches from each end of part E
to cut the slot.

13. Use a ruler to draw guide lines connecting the two holes.
14. Use a saber saw, and working carefully to make sure the cut is straight, cut out the
waste material. NOTE: If parts A and B are slightly thicker 3/4", the width of
the slot should be adjusted accordingly.
15. Use a round file to expand the hole if needed.
16. Select 1/4" birch plywood to make the tray (part F).
17. Cut the tray to length and width.
18. Apply Formica to both the top and bottom of the tray..
19. Use a router to cut the grooves in parts E and D, each 3/8" deep with a width that
allows for a slip fit of the Formica top and STOPPED ON EACH END.
20. Sand all parts (except the Formica top) before assembly.
21. Assemble by joining with glue and clamps.
22. Use a plug cutter to cut 1/2" diameter pins from a wood with a contrasting color.
23. Final sand all parts.
24. Assemble by slipping the leg unit (parts A, B, and C) easily into the slot in part E.
25. Try out the tray by sitting with it in bed. You may want to make height adjust-
ments.
26. Apply a coat of Watco Danish Oil to complete the project.
These plans were originally published in Volume 6, Issue 5 of The Woodworker’s Jour-
nal (Sept./Oct.
1982, page 28).
Wyszukiwarka
Podobne podstrony:
breakfast tray taca sniadaniowa do luzka
stawiam na sniadanie
Śniadanie w formie bufetu -jak walczyć z wynoszeniem jedzenia, Prace i ściągi, gastronomia
Manet Śniadanie na trawie
Gastronomia hotelowa - czyli śniadanie w hotelu, Prace i ściągi, gastronomia
ŚNIADA CERA BEZ SOLARIUM, Zdrowie
Śniadanie
Śniadanie maratończyka
Śniadanie
Taca ze swiezymi owocami
Szejk śniadaniowy 2
Śniadania
Sałatka chrzanowa na wielkanocne śniadanie
Zapiekanka śniadaniowa
Śniadanie na Dzień Matki
Przepisy, FAZA I śniadanie, FAZA I
Śniadania, Grzanki z szynką 1, Grzanki z szynką 1
Śniadania, Jaja po węgiersku, Jaja po węgiersku
Śniadania, Omlet z wiórkami kokosowymi, Omlet z wiórkami kokosowymi
więcej podobnych podstron