Translation of: Eagle building block library by Commend International
The board (leiterplatte) , trace (platine) and the placement of new building blocks must be considered in order
to come up with a sound mechnical design.
Technical Background:
In order to import mechanical dimensions of a building block from ECAD-system into MCAD, standards were
created in 1989:
IDF: Intermediate Data Format V1.0
The latest version: V4.0
Generating IDF files is supported by all professional ECAD systems (Mentor, Zuken, Targe, PADS, PCAD,...)
Milestones of IDF Standards:
Find standards under: :\\Eacoco\Projecte\CAD EEAGLE\DOKU eagle\
Solidworks 2006 SPx supports currently only IDF standard V3.0, meaning, the build blocs are limited:
1 hight information with 1 closed outside contour.
For an accuate design, build blocks data with only 1 contour and the max. height is sufficient.
Creation of an EAGLE library:
1) Building blocks:
A building block can be assembled out of as many height informations as you want. The various segment
heights can be assembled like Pyramids, however a “standing on its tip” Pyramid is not possible.
Expl:
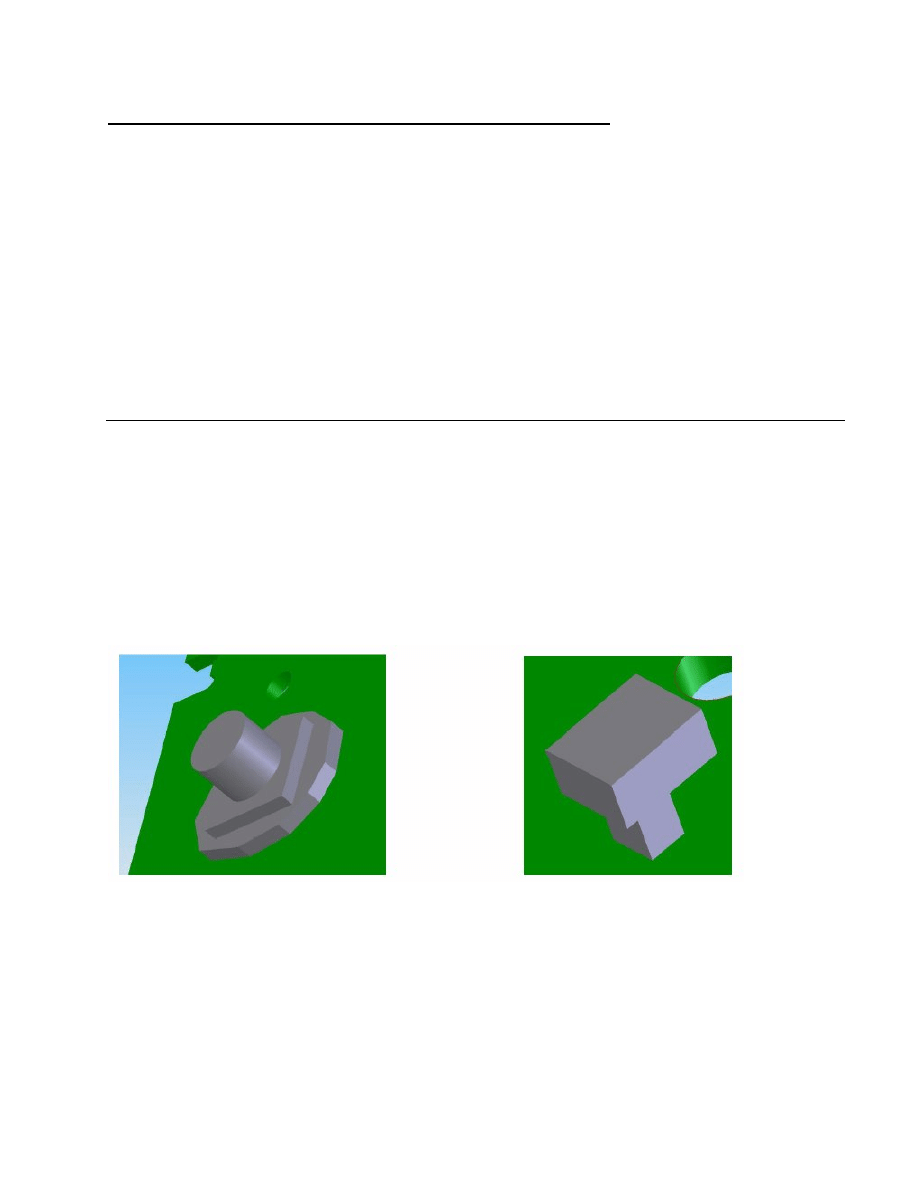
graph 1a) POSSIBLE
graph 1b): NOT POSSIBLE
A closed contour is of each height information is PARAMOUNT in order to extrude it.
Building block contour (R, L, C, IC, ...) is placed on Layer 57 (tCAD) and Layer 58 (bCAD).
Layer 57: planview of the building block (standard)
Layer 58: penetration of a building block through a trace (platine) i.e mechanical mounting, place on Layer 58

All building blocks are normally, exclusively drawn on Layer 57. View exceptions are connectors with
mechanical mounting, screws, solderable building block legs, which penetrate the print, protruding the bottom
side.
Line thickness of the contour relates to the building block height:
Building block height: Line thickness = building block height [mm] / 1000
(1mm = 1000mic)
(expl.: Building block height 12.6mm is drawn as 12.6 mic.)
Necessary milling (cut out), holes in building block -> line thickness = 0.0 [mic]
Expl.:
see pic.
1) Line thickness 8 mic = cylinder 8mm height
2) Line thickness 3 mic = rectangular 3mm height
3) Line thickness 1.6mic = polygon 1.6mm
result see graph 1a
Drills/holes do not have to be treated specially -> automatic recognition and incorporated into the board.
Expl.:
1)
Connector-building block 3.7mm -> line thichness = 3.7 [mic]
Connector-cut out for mechanical mounting: Polygon with 0.0 [mic]
Connector-hole as positioning support: hole diamter 2.1 [mm]
2)
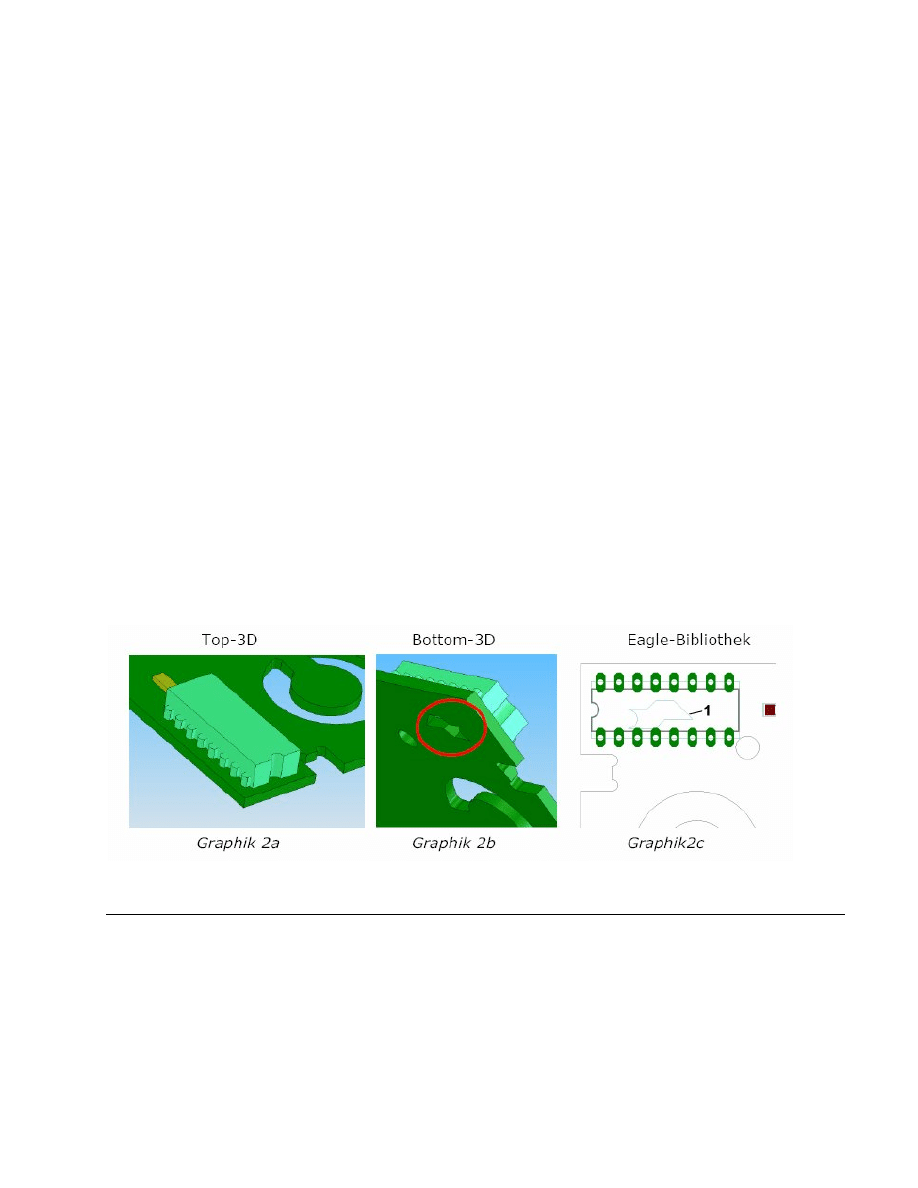
cut out beneath IC (see graph 2c (1))
graph 2a (Top 3D)
graph 2b ( Bottom 3D)
graph 2c (Eagle library)
2) Empty board:
Contour of empty boards on Layer 50
A closed contour is PARAMOUNT in order to extrude it later
Line thickness of outside contour is same as board thickness.
Trace (platine) height -> line thickness = building block height [mm] / 1000 (1mm = 1000mic)

Necessary cut out, holes of trace (platine) -> line thickness = 0.0 [mic]
Expl.:
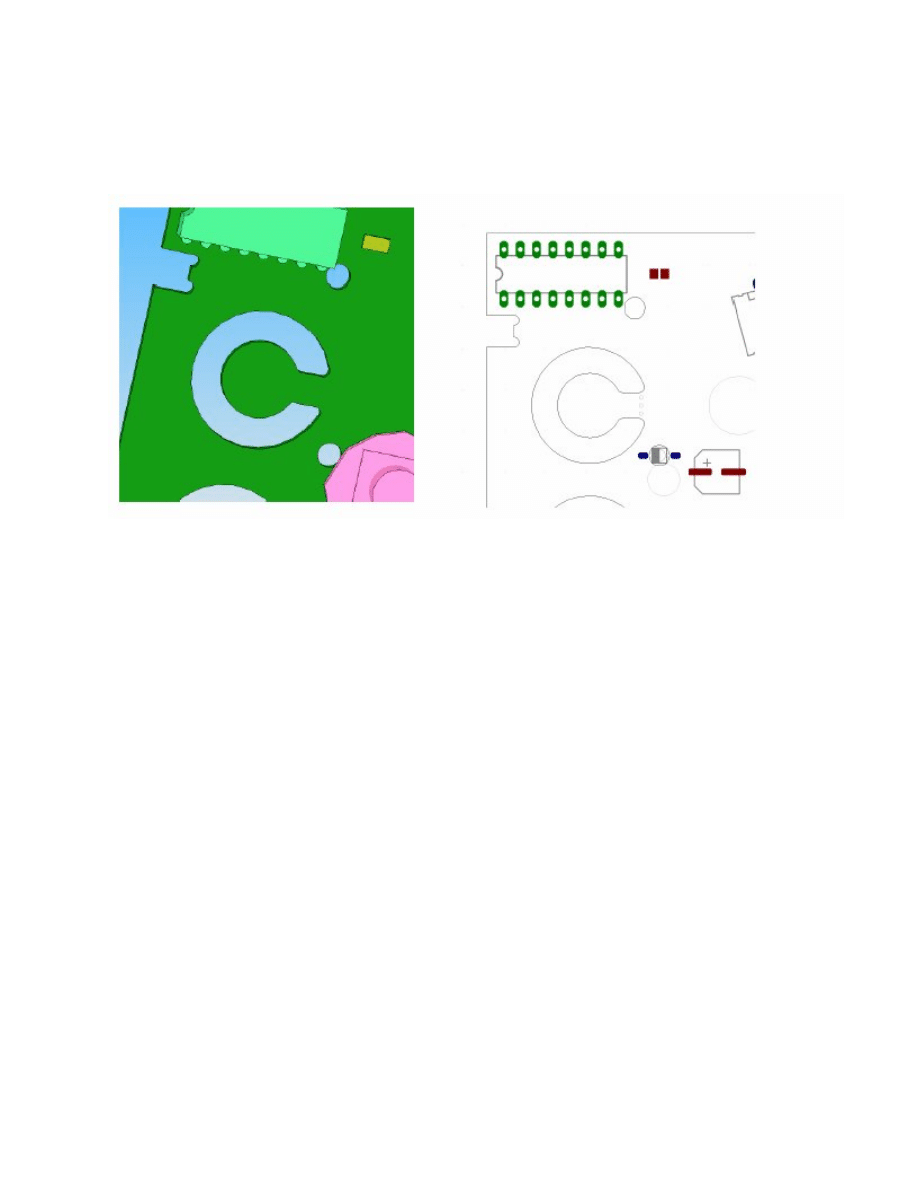
Line thickness board outside contour = 1.6 [mic], print cut out = 0.0 [mic]
graph 3a
graph 3b
Wyszukiwarka
Podobne podstrony:
P000827 C Eng General arrangement W0064
P000975 A Eng General arrangement W0065
P000827 C Eng General arrangement W0064
ENG DS 1 1414305 0 DATA SHEET 1
Przestrzenie 3D
chrystus jest zyciem mym ENG
15 Sieć Następnej Generacjiid 16074 ppt
3d i holografia
Solid Edge Generator kół zębatych
3d) Leishmania donovani
37 Generatory Energii Płynu ppt
Przegląd rozwiązań konstrukcyjnych wtryskarek (ENG)
CW2006EX Mill Turn data sheet web
Assembler ENG
40 0610 013 05 01 7 General arrangement
3 Data Plotting Using Tables to Post Process Results
więcej podobnych podstron