CHRISTMAS CARD SCENE
NOVEMBER 2005
PATTERNS AND INSTRUCTIONS
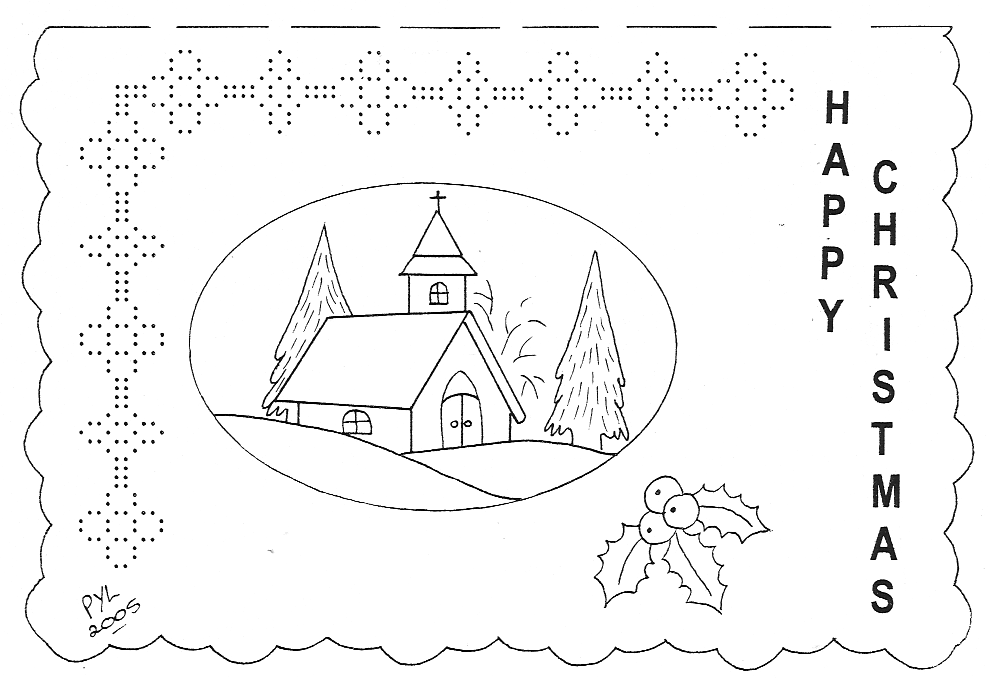
Instructions Card 1A:
TRACE: Fold line, outline of card, central oval, Christmas trees and holly leaves and greeting using white pencil. Outlines of Church using sepia graphic fine liner or mapping pen and ink. Trace the outlines of the holly berries using a red gel pen and then fill in the berries using the same gel pen. Using a ruler and white pencil, trace around the outlines of the lace design to form an “L” shaped box. The berries should be dry now so add a tiny black dot to each one using a black graphic fine liner pen.
EMBOSS: Central oval using Micro Sun tool. Church roof and Christmas trees using Mini Shader. Snow drifts using Soft Shader and around the boughs of the deciduous tree using Sun tool of choice. Use the Mini Shader and Scriber to emboss the holly leaves, the large ball tool to emboss the berries and the Micro ball tool to emboss the greeting.. Deeply emboss the outline of the card and very lightly emboss the fold line.
MICRODOT: Place the work, face down, onto the MicroDot template and hold in place using sticky tape. Ensure that you line up the traced outlines with either a row of holes or one of the straight lines on the template - you will need to work part of the design and then reposition the work as the template is not big enough so plan this carefully. Now, create a pattern of your choice using the Micro Ball tool to emboss over holes in the template. The holes that you don't emboss over can be perforated afterwards if desired. If perforating as well, remove the work, turn over and reposition, now, using a Uni Bold or a Scriber, perforate the rest of the design. Below is a very simple example.

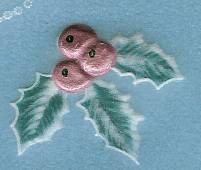
COLOUR: Using coloured pencils of your choice and the Argentinean style (see notes) colour the Christmas trees and the holly leaves. Colour the Church in the Brazilian style (see notes).

FOLD: Add insert of your choice and perforate out through all layers using Min StampEdge bold.
Instructions Card 1B:
TRACE: Fold line, central oval and all of design within the oval using white pencil. Outline of card and greeting using gold gel pen. Holly leaves using black graphic fine liner pen.
COLOUR: Using either gel pen or acrylic paint - colour the holly berries using bright red. Add a tiny black dot to each berry and a fine, curved, white line to highlight.
PERFORATE: Lace design using Quad Bold, Oct Bold and Leaf Bold.
Remove parchment from pattern

EMBOSS: Lightly emboss the fold line. Deeply emboss the card outline. Using a Small Ball tool, emboss tiny dots all around the central oval. Using the Mini Shader, Soft Shader and Scriber, emboss the design within the central oval.
Deeply emboss the holly berries. Use the Mini Shader to emboss the holly leaves. Use the Micro Ball tool to emboss the Greeting. Emboss design of your choice within the lace work. Example shown below.


COLOUR: Using coloured pencils of your choice and the Brazilian style (see notes) colour the holly leaves.
RE-PERFORATE: Lace design and cut design using parchment scissors - see example above.
FOLD: Add insert and perforate out through all layers.
Instructions Card 1C:
TRACE: Fold line and outline of card using white pencil. Use white pencil and a ruler to mark the centre lines of the vertical and horizontal lace work. Central church design, holly leaves and berries using black graphic fine liner. Use the fine liner also to trace the outer edges of the greeting to create “shadow” writing.
On spare parchment - trace the holly leaves and berries twice more using black graphic fine liner pen.
DIP-DOT: Around the central oval using coloured paint/ink of your choice.
WHITE LINE RULE: Perforate and/or emboss design along the vertical and horizontal lines.

EMBOSS: Lightly emboss the fold line. Deeply emboss the outline of the card using a Medium Ball tool. Emboss Church scene as you wish using Mini Shader. Emboss the holly and berries. Deeply emboss between the double outlines of the greeting using a Micro Ball tool.
COLOUR: The Church scene and the holly leaves and berries from both the front and the back of the parchment using coloured pencils of your choice. - Brazilian style.

FOLD: Add insert and perforate out through all layers using Mini StampEdge Bold
TO FINISH: Emboss the spare holly leaves and berries and colour them as on the main card. Perforate out all around the outer edges. Attach to main card using rubber silicone sealant. Add some sparkle using clear nail varnish and fine glitter dust OR Stickles Icicle (glitter glue)

Wyszukiwarka
Podobne podstrony:
The Normal Christian Church Life, Watchman Nee
The Role of Women in the Christian Church doc
(Ebook) Maccaffrey, James History Of The Catholic Church Vol 1 Renaissance To French Revolution (
The Church of Christ
wykład 6 instrukcje i informacje zwrotne
Instrumenty rynku kapitałowego VIII
05 Instrukcje warunkoweid 5533 ppt
Instrukcja Konwojowa
Christmas around the world
2 Instrumenty marketingu mix
Promocja jako instrument marketingowy 1
Promocja jako instrument marketingowy
więcej podobnych podstron