60c

Po rm~y\-«Li rves
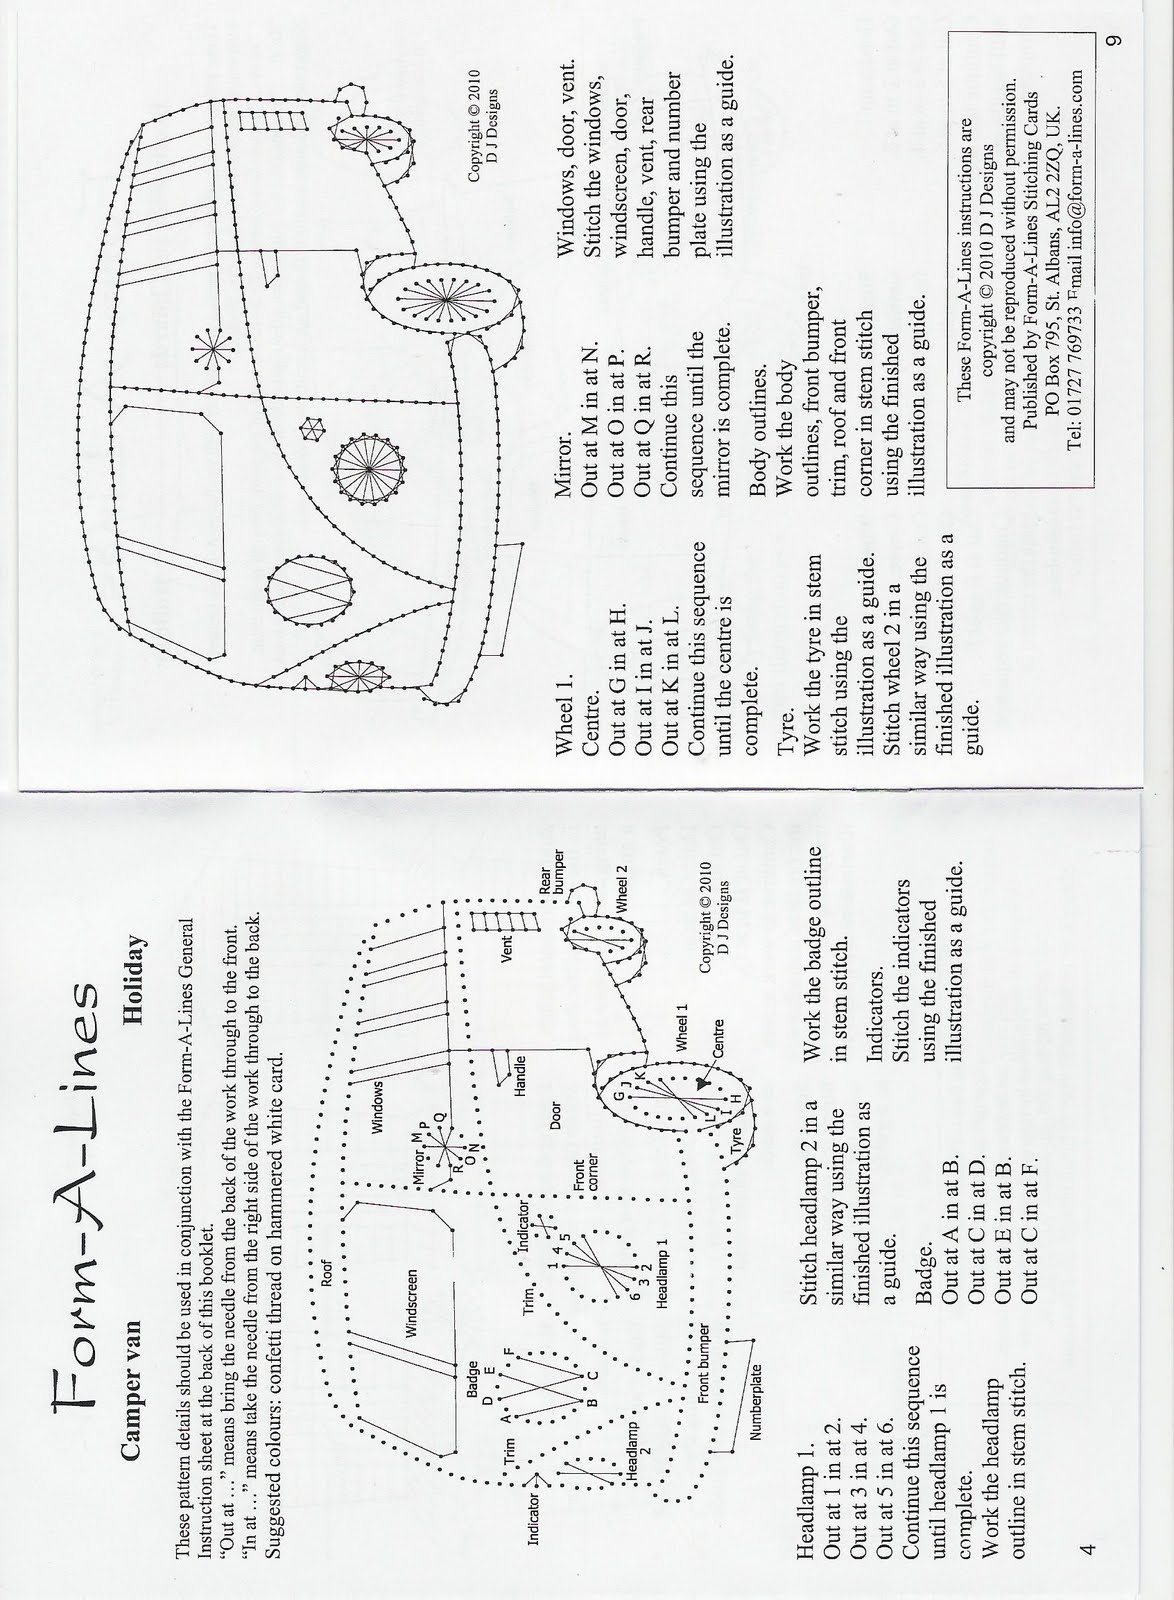
Campcr van Holiday
These pattern details should be used in conjunction with the Form-A-Lines General Instruction sheet at the back of this booklet.
“Out at..means bring the needle frora the back of the work through to the front. “In at..means take the needle from the right side of the work through to the back. Suggested colours: confetti thread on hammered white card.

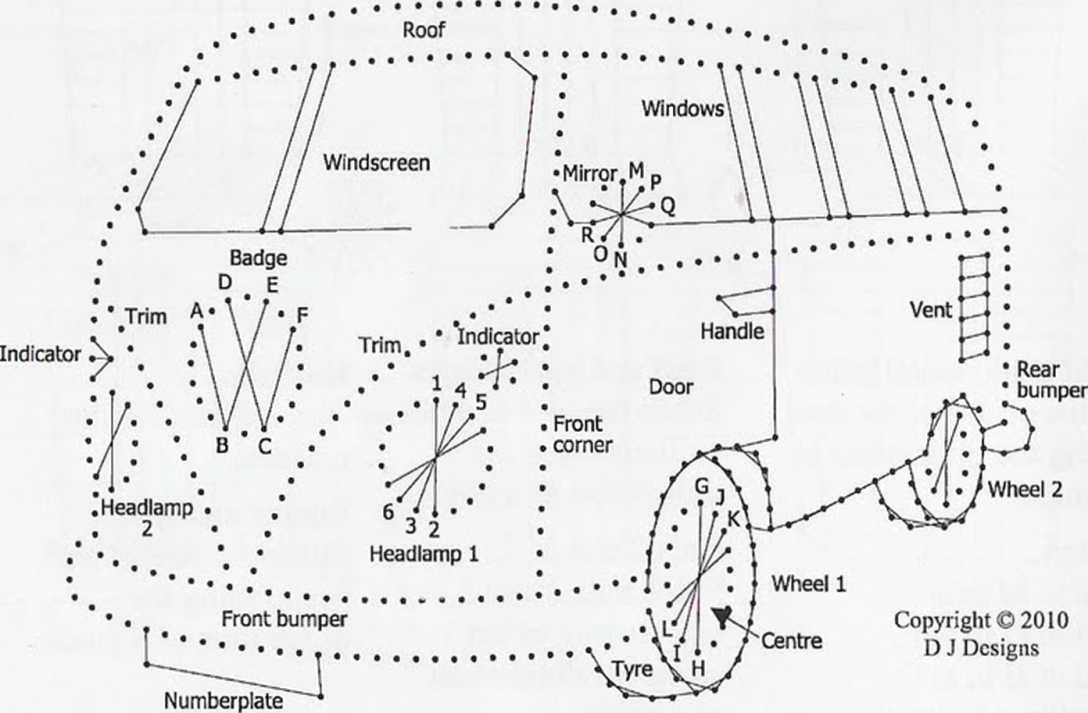
Headlamp 1.
Out at 1 in at 2.
Out at 3 in at 4.
Out at 5 in at 6. Continue this sequence until headlamp 1 is completc.
Work the headlamp outline in stem stitch.
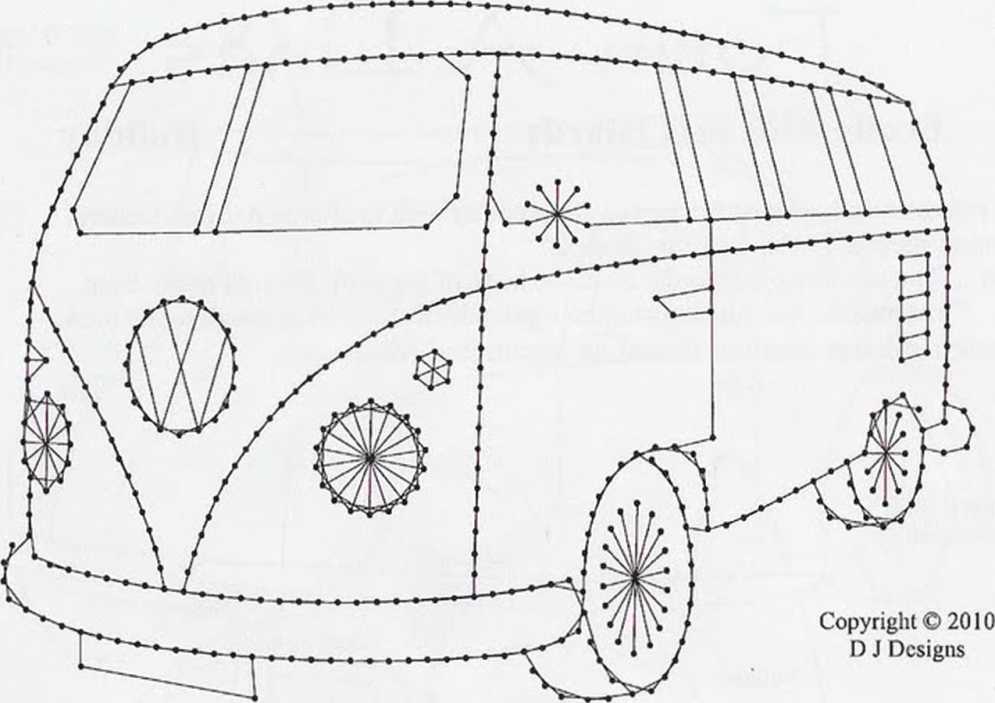
Stitch headlamp 2 in a similar way using the finished illustration as a guide.
Badge.
Out at A in at B.
Out at C in at D.
Out at E in at B.
Out at C in at F.
Work the badge outline in stem stitch.
Indicators.
Stitch the indicators using the finished illustration as a guide.

Wheel 1.
Centre.
Out at G in at H.
Out at I in at J.
Out at K in at L. Continue this seąuence until the centre is complete.
Tyre.
Work the tyre in stem stitch using the illustration as a guide. Stitch wheel 2 in a similar way using the finished illustration as a guide.
Mirror.
Out at M in at N.
Out at O in at P.
Out at Q in at R. Continue this seąuence until the mirror is complete.
Body outlines.
Work the body outlines, front bumper, trim, roof and front corner in stem stitch using the finished illustration as a guide.
Windows, door, vent. Stitch the Windows, windscreen, door, handle, vcnt, rear bumper and number piąte using the illustration as a guide.
Thesc Form-A-Lines instructions are copyright O 2010 D J Designs and may not be reproduced without permission. Published by Form-A-Lines Stitching Cards PO Box 795, St. Albans, AL2 2ZQ, UK.
Tel: 01727 769733 17 mail info@form-a-lines.com
9
Wyszukiwarka
Podobne podstrony:
60a Fo rm-;A-lJ KvesBeach huts Holiday These paltem details should be used in conj
Pond Life Kit Frogs Ho rm-jA-i-i nesFrogs Pond Life Kit These pattem details shoul
House (12) Po^m-^A-J-Pes HouseWillow Pattern Kit These pattern details should be used in conjunction
57d Fo rm-jA-lJ nesWindmiH Country Scenes These pattern details should be used in
58a Ir o Pm-jA-Li rvesFlowers in a vaseFolk Art Flowers These pattern details should be used in conj
Angel instructions Fo^m-A-Li nesAngel Christmas Kit 3 These pattem details should
67a 2 Ko rm-jA-Li nesCongratulations Flower Borders These pattem details should be
Christmas tree instructions mesPo rm-y-P Christmas TreeChristmas Kit 3 These pattem details should b
65c Po km-jA-Pi ne. sMistletoe Christmas 19 These pattera details should be used i
67b Form-yA-Li nesNew Home Flower Borders These pattem details should be used in c
53a Po rm-yA-L-i ve.sCleopatra Ancient Egypt These pattern details should be used
56d Fo rm-;A-Li rvesStar Christmas Bcads Kit These paltem details should be used i
car (8) Fo rvesCar Wedding Kit These pattem details should bc us
64a rO ^m-yA>-Li KćLSAcorns Autumn Tliese partem details should be used in conj
Bicycle Window Kit !=ro^m-yA--Li^vćiSBicycle Window Kit These partem details shoul
Couple lro^m-;A--Li resCouple Seaside Fun Kit These pattern dctails should be used
60b Po rm-jA-Li KiesBeetle with surf boards Holiday These patiem details should be
więcej podobnych podstron