SAMSUNG Proprietary-Contents may change without notice
11. Disassembly and Assembly Instructions
11-1
This Document can not be used without Samsung's authorization
11-1. Disassembly Instructions
1) SCREW Torque: 1.2 ~ 1.4kgf.cm
2) Make sure not to damage the rear and leave
scratch on it
1) Make sure not to damage the rear and leave
scratch on it
1) SCREW Torque: 1.2 ~ 1.4kgf.cm
2) please detach the shield-can vertically,
make sure not to damage clip.
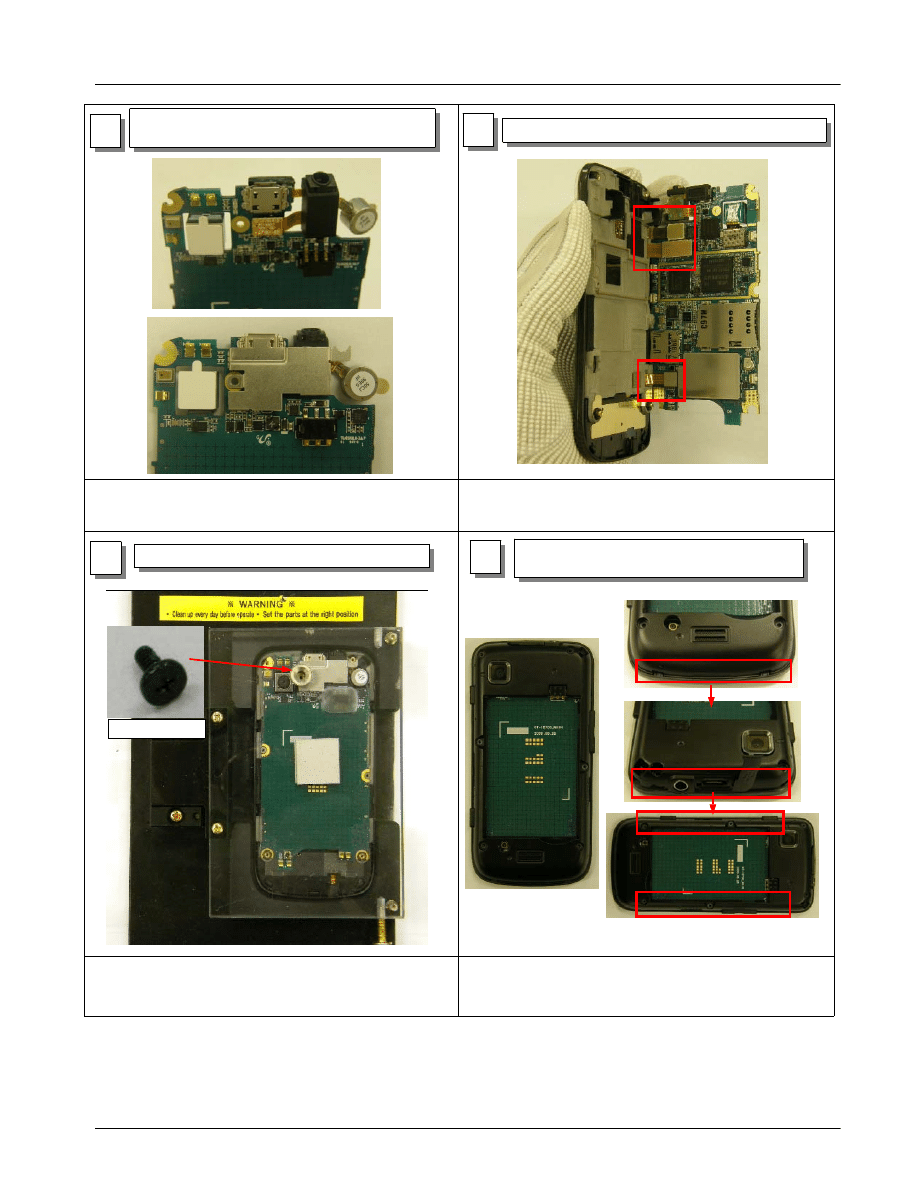
1) Make sure not to damage the connectors and
FPCB.
1
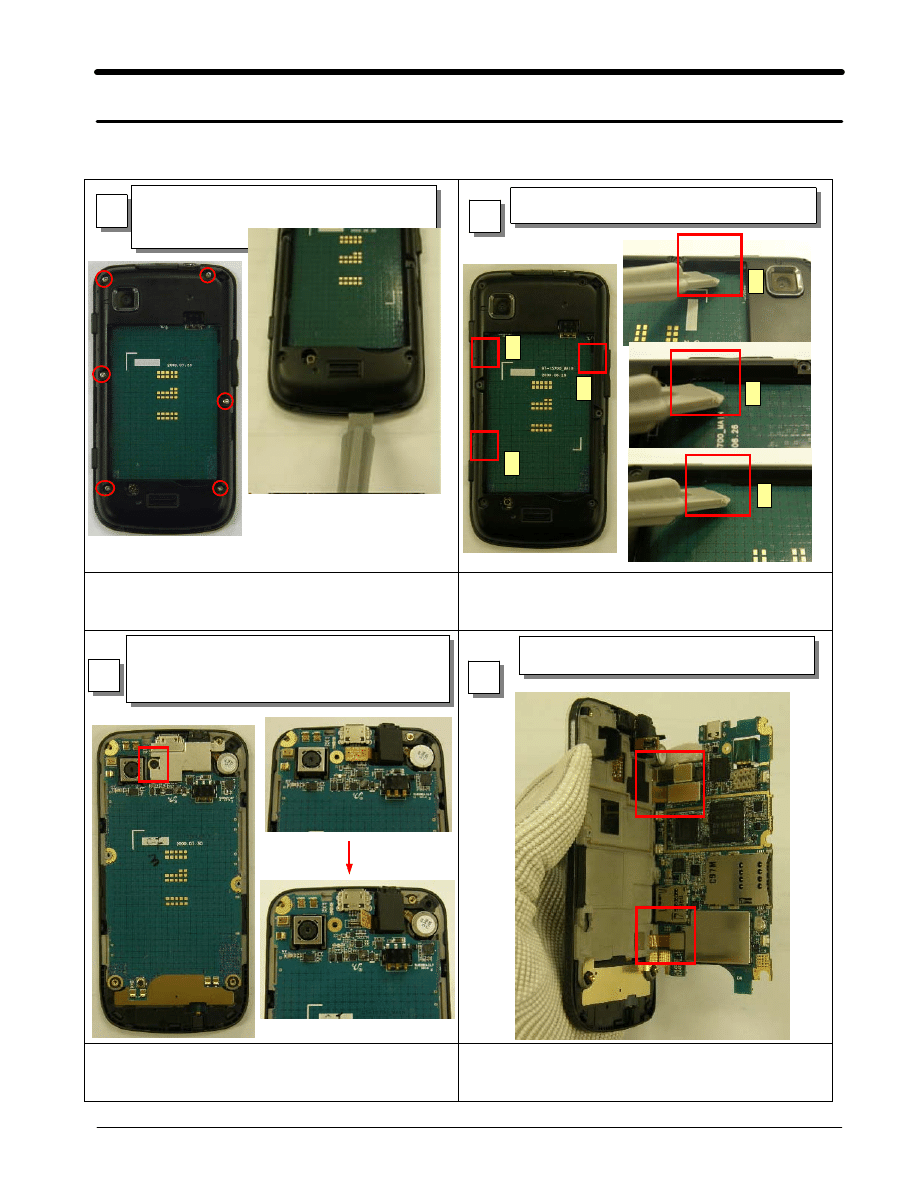
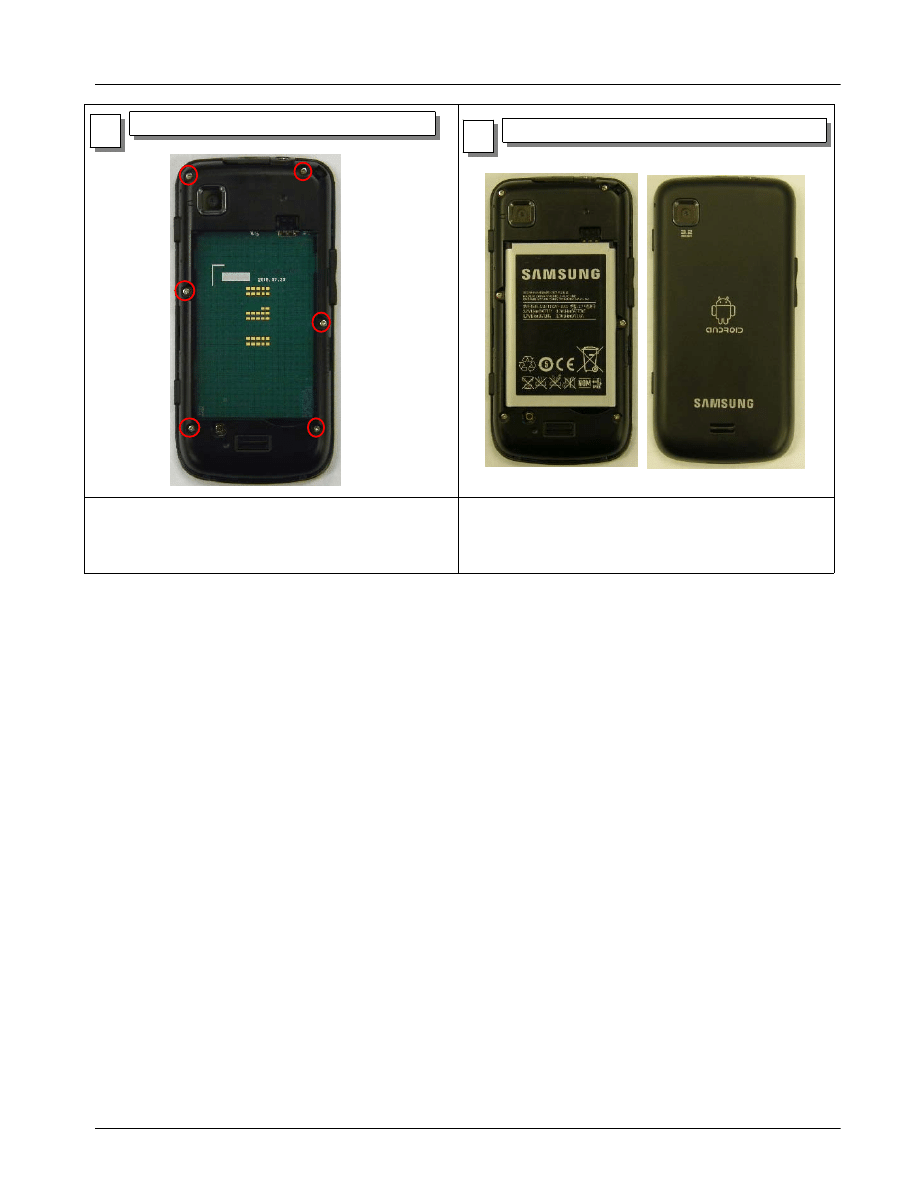
1)Remove the 'Rear' by unscrewing those 6
points on the picture. detach Rear case.
2)With the disassembly JIG unhook the rear
cover
1) Seperate the PBA from bracket.
2) Detach 3 connector form PBA.
2
4
1)With dissamembly JIG, Use the disassembly
hole(3Points)
1
2
3
1
2
3
1)Remove the SUS by unscrewing these 1
points on the below picture.
2)Take off the RCV Ass`y connector from
PBA
3
SAMSUNG Proprietary-Contents may change without notice
Disassembly and Assembly Instructions
11-2
This Document can not be used without Samsung's authorization
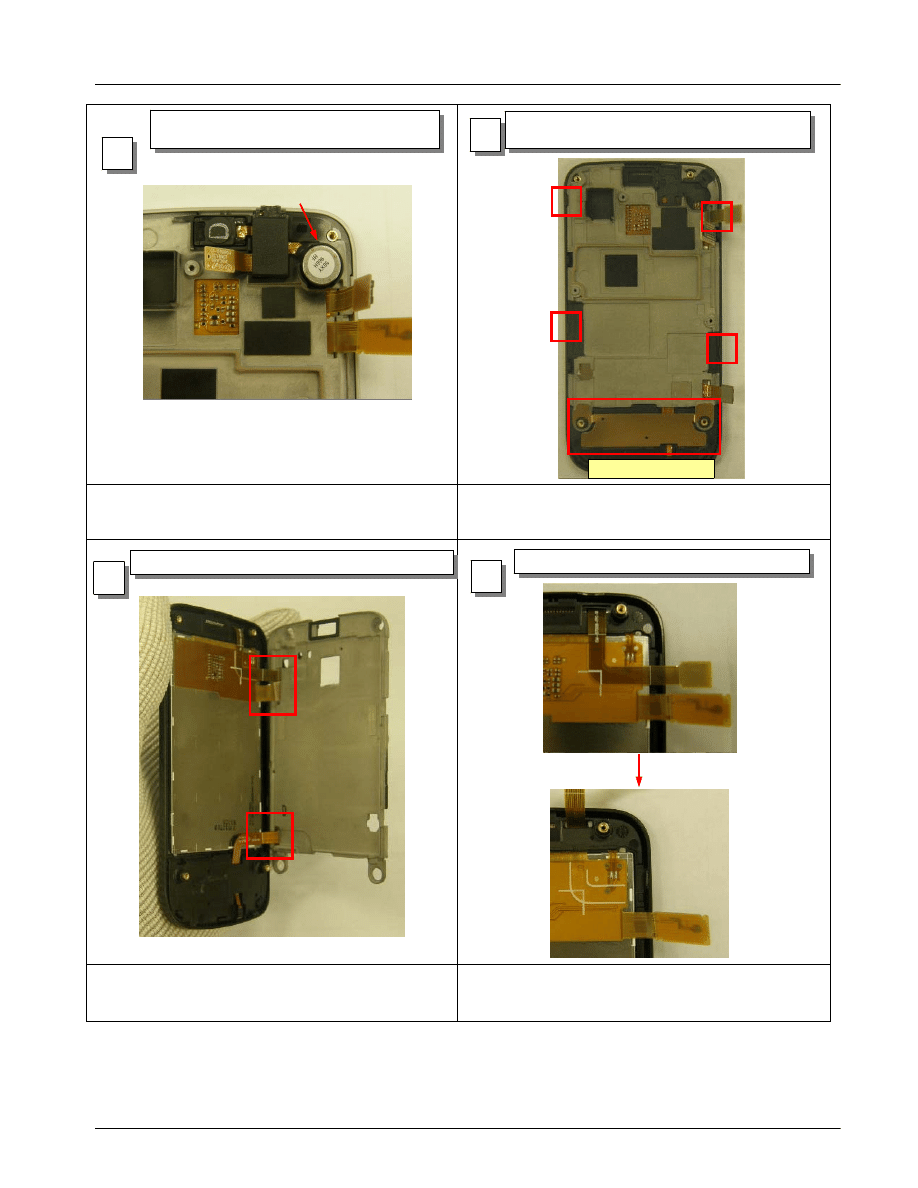
1) Be careful not to damage RCV Ass`y.
1) Be careful not to damage front.
1)Be careful not to damage connector FPCB.
1) Make sure not to damage the connectors and
FPCB.
6
1) Detach the shield-bracket.
2)
Unhook 4points of the bracket.
1) detach the bracket from front.
1) Detach the TSP FPCB.
7
8
1) Detach RCV Ass`y from the bracket.
Use the disassembly hole.
5
SHIELD-BRACKET
SAMSUNG Proprietary-Contents may change without notice
Disassembly and Assembly Instructions
11-3
This Document can not be used without Samsung's authorization
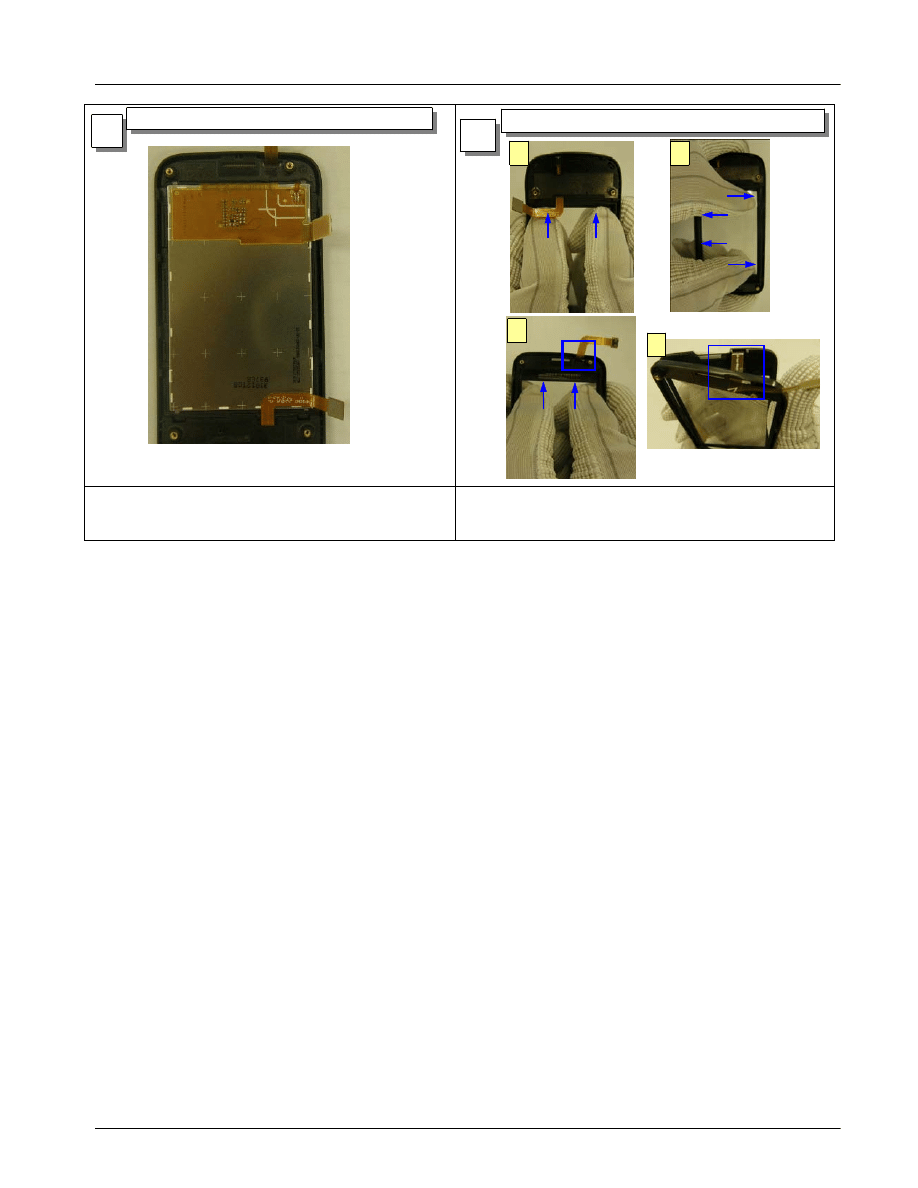
1) Please be careful not to damage LCD.
1) Please be careful not to damage TSP and FPCB.
9
1) Detach LCD from front case.
1) Follow below picture. A
→B→C→D
10
A
B
C
D

SAMSUNG Proprietary-Contents may change without notice
Disassembly and Assembly Instructions
11-4
This Document can not be used without Samsung's authorization
11-2. Disassembly Assembly
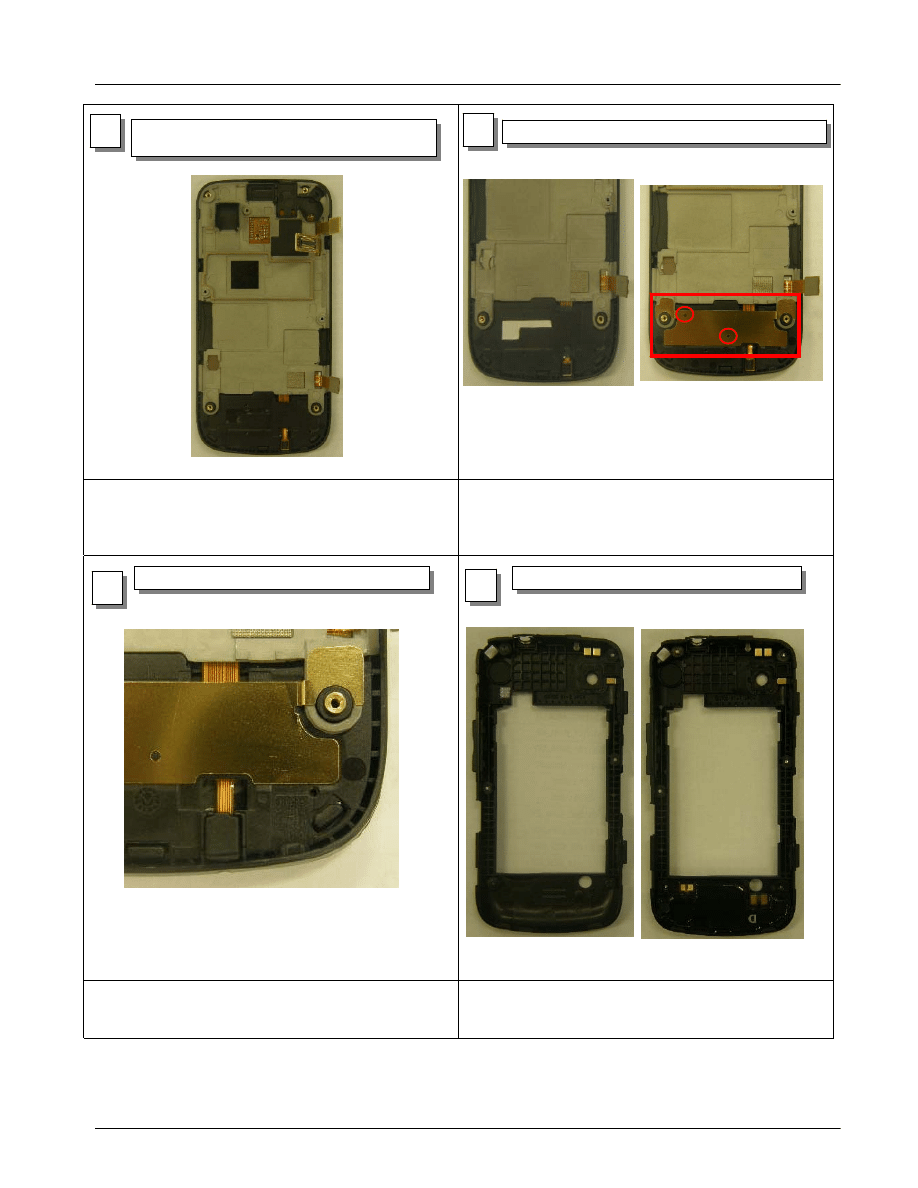
1) Attach the TSP up to the front.
1) Be careful not to damage LCD.
1) check the silk line(matching)
1) Be careful not to damage FPCB connector.
1
1
)Input the TSP FPCB in the front hole.
2)Attach the TSP from the top to the
bottom.
1) Detach the LCD to the front.
1) Attach the TSP FPCB in the silk line.
1) Attach the bracket to the front.
2
3
4
SAMSUNG Proprietary-Contents may change without notice
Disassembly and Assembly Instructions
11-5
This Document can not be used without Samsung's authorization
1)
Check the 4 points of hook.
1) Check the 2 point of standard.
1) Check the mic rubber shape.
Don`t attach upside down.
1) Do not damage to the intenna carrier.
5
1) Attach the shield-bracket
2)
Join the bracket to the front.
1) Attach the shield-bracket to the front.
1) Attach the mic rubber on the mic
1) Detach
intenna from rear.
6
7
8
SAMSUNG Proprietary-Contents may change without notice
Disassembly and Assembly Instructions
11-6
This Document can not be used without Samsung's authorization
1) Be careful not to damage clip.
1) Check the 3 points of FPCB connector.
1) SCREW Torque: 1.2 ~ 1.4kgf.cm
1) Do not scratch to the rear.
9
1)
Joint the RCV Ass`y.
2) Joint the shield-can.
1) Attach the FPCB connector.
1) Screw on the top.
1) Attach from bottom to top
2) Attach the side hook
10
11
12
Color: BLACK
SAMSUNG Proprietary-Contents may change without notice
Disassembly and Assembly Instructions
11-7
This Document can not be used without Samsung's authorization
1) SCREW Torque: 1.2 ~ 1.4kgf.cm
1) End
13
1)
Screw the 6 points.
1) Assembly the battary and battery cover.
14
Wyszukiwarka
Podobne podstrony:
ARTICLE SUSPENSION STRUT FRONT DISASSEMBLE REASSEMBLE
Disassembly & Reassembly
ARTICLE SUSPENSION STRUT REAR DISASSEMBLE REASSEMBLE
Disassembly & Reassembly
Disassembly & Reassembly
7 Disassembly & Reassembly
NP R60FE0A SER SM EN 20080602190217734 05 Disassembly and Reassembly
ARTICLE TRANNY AUTO REASSEMBLE PART1
ARTICLE MANUAL TRANSAXLE DISASSMEBLY
2 3 4 LAB complete disassembly
ARTICLE TRANNY AUTO DISASSEMBLE PART2
ARTICLE ELECTRICAL ALTERNATOR DISASSEMBLY
ARTICLE TRANNY AUTO REASSEMBLE PART2
ARTICLE TRANNY AUTO DISASSEMBLE PART1
Kap Disassembly
ARTICLE TRANNY AUTO REASSEMBLE PART3
więcej podobnych podstron