3D FOR THE REAL WORLD
CINEMA 4D Hints
20 Quick Tips
There are lots of ways to work that little bit faster in CINEMA 4D, such as using shortcut keys. But there are so many shortcuts in
a powerful application such as CINEMA 4D. So where do you begin? Here are twenty of the lesser known ones. We hope some of
these are useful to you!
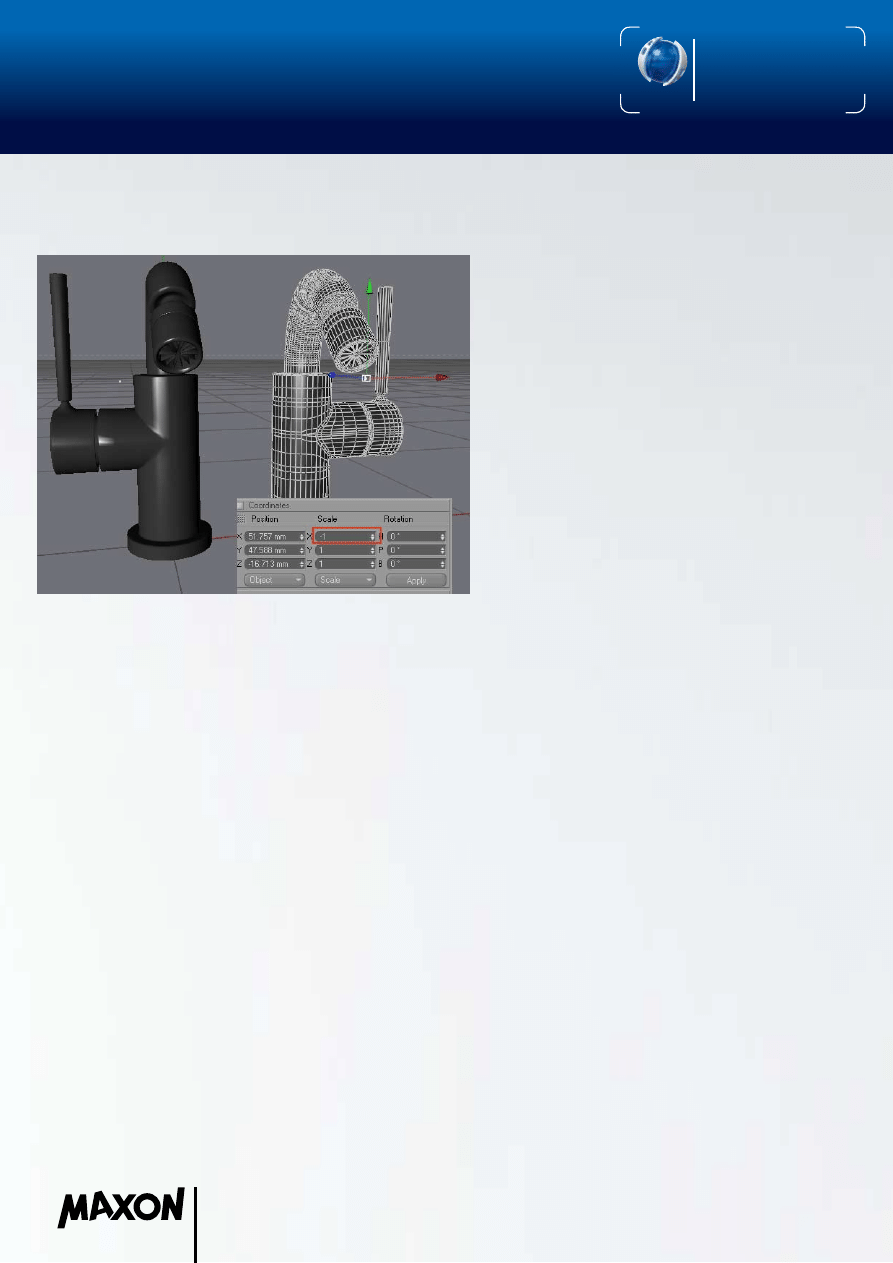
1) Mirror, Mirror
Perhaps the fastest way to create the mirrored version of an object is as follows: Select the object. In the Coordinate manager,
ensure that the middle drop-down menu is set to Scale. Depending on which axis you want the mirror plane to be on, set either X,
Y or Z in the middle column to -1 and click the Apply button.
2) Do The Timewarp
With the Timewarp, you scrub through the timeline without having to move to and then drag the timeslider. To use the Timewarp,
move the mouse pointer inside the 3D view, then hold down the ‘J’ key and left-drag the mouse to the left or right to move
backwards or forwards respectively in time. If you also hold down Ctrl at the same time, it will slow down the Timewarp so you can
move a single frame or two easily.
3) New Material to Go
The quickest way to create a new material is probably to double-click on an empty space within the Material manager.
4) Get to the Point
You can quickly switch to the points, edges or polygons tool by pressing the Enter key. Keep pressing Enter to toggle between points,
edges and polygons mode.
5) Convert Selection
Suppose you’ve selected some polygons, and you want to convert that selection into the equivalent point selection. Simply Ctrl-click
on the points tool, and it’s done.
6) The Select Few
Suppose you are in the middle of extruding some polygons. Now you want to select different polygons and also extrude those.
Instead of switching to the Live Selection tool, selecting the polys, then switching back to the Extrude tool, simply hold down the ‘9’
key and, keeping it held down, drag the mouse over the polys you want to select. Release the ‘9’ key, and immediately you are back
with the previous tool you were using (in this case, back to the Extrude tool). This gives you a fast way to use a tool repeatedly here
and there. The ‘8’ and ‘0’ keys work the same way except they give you the polygon lasso and rectangle selection respectively.
7) Hide the Axes
Sometimes when you are working, especially when you are creating splines, the axes can get in the way. No problem, though. One
solution is to hide them, by pressing Alt+’D’. To get the axes back again, it’s the same: Alt+’D’.
CINEMA 4D
RELEASE 10.5
www.maxon.net
3D FOR THE REAL WORLD
CINEMA 4D Hints
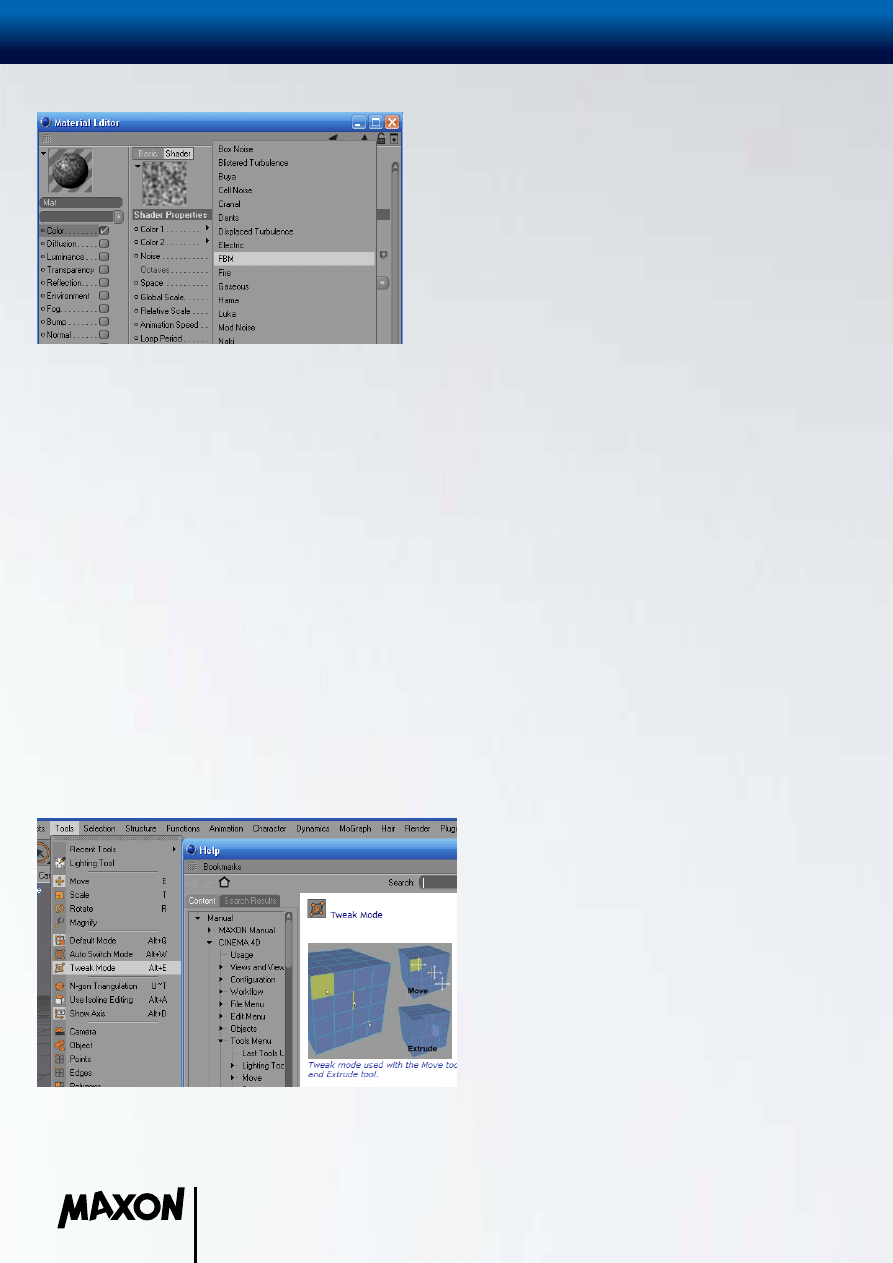
8) Dropdowns
In many places in CINEMA 4D where there is a dropdown menu, you can cycle through the options by pressing the up and down
cursor keys. To test this, create a new material, and click the Texture triangle and choose ‘Noise’ to add the Noise shader. Go into
the Noise shader settings, and choose a type of noise from the Noise dropdown. Now try pressing the up and down cursor keys to
change the type of noise. This shortcut is also really useful when trying out the various blending modes in BodyPaint 3D.
9) Get a Move on
Many 3D apps have the move, scale and rotate shortcuts somewhere on the QWERTY keys, and CINEMA 4D is no different. In the
case of CINEMA 4D, the keys ‘E’, ‘R’ and ‘T’ give you the move, rotate and scale tools respectively.
10) Number Cruncher
Did you know that you can type mathematical symbols into the numerical input boxes in CINEMA 4D? Suppose you want to move an
object up 12.7 units along the Y axis. In the Coordinate manager, type in “+12.5” after the existing Position Y value.
11) Instant Thickness
The problem: you‘ve modelled an object, but it‘s as flat as a pancake. How can you give it some instant thickness? The trick is to
add an Explosion FX deformer (Objects > Deformation > Explosion FX). Make this object a child of the object you want to have
thickness. On the Explosion FX deformer‘s Object tab, set Time to 0%. On the Cluster tab, set Thickness to the desired thickness.
One advantage of this method is that you can change the amount ot thickess easily at any time. Or easily remodel the object.
12) In Record Time
Did you know that you can record position, rotation and scale of an object by Ctrl-clicking on the time ruler?
13) Channel-Hopping
Suppose you‘ve used a Noise shader in the bump channel and now you want to load the same shader, with exactly the same settings,
into the diffusion channel. To do this: On the bump page, click the Texture triangle and choose Copy Channel. Now go to the diffusion
page, click the Texture triangle, and choose Paste Channel.
14) Help!
If you have installed the help system, you can look up any command quickly. To test this, suppose you want to look up the Tweak
Mode. Go to the Edit menu, and move the mouse pointer over the Tweak Mode item. Then press Ctrl+F1 (PC) or Cmd+F1 (Mac).
www.maxon.net
3D FOR THE REAL WORLD
CINEMA 4D Hints
15) The Big Screen
Ideal if you are working on a laptop, as is more and more common these days, you can maximize any CINEMA 4D window at any
time. So while you are modelling, you might look to put your 3D view into full screen mode to give you plenty of room to work in.
To enter full screen mode, move the mouse pointer inside the window you want to make full screen, then press Ctrl+Tab. Press the
same combination again to exit full screen mode.
16) Move Parent only
Ever wanted to move a parent object to a new position in the 3D world without moving its child objects as well? Hold down the Ctrl
key while you move the parent, and the child objects will stay where they are in the world.
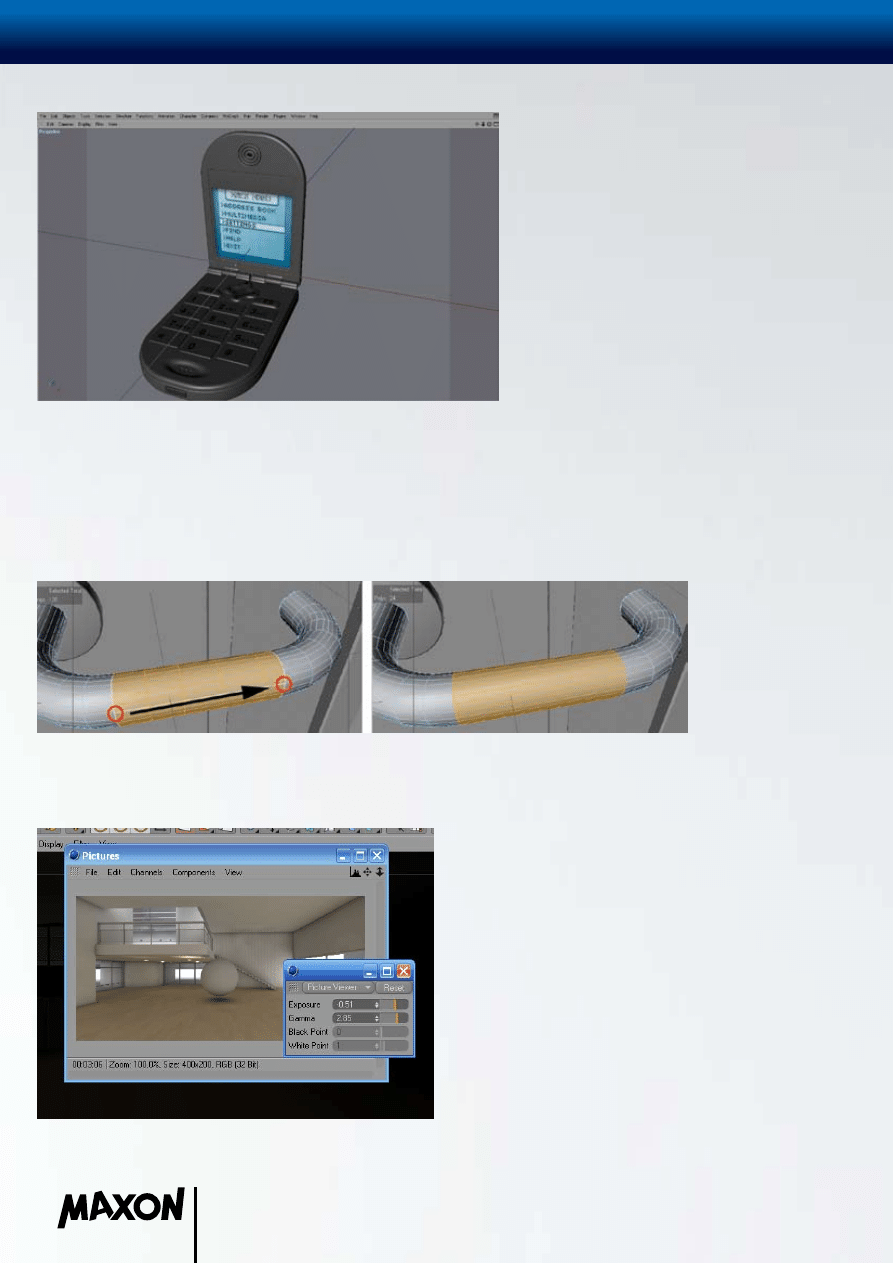
17) Cross that Bridge
The multi-purpose bridge tool is great for joining several polygon loops together. Select the polygons for the loops that you want to
merge into one loop. Then select the Bridge tool, and drag and drop from one side of the loop to the other side, as indicated in the
diagram.
18) 32-bit Rendering
If you haven‘t yet tried CINEMA 4D‘s 32-bit rendering, we recommend you give it a try. One benefit is that it can give you more
control in tweaking the brightness in the image. To activate 32-bit rendering, in the Rendering Settings, on the Save tab, set Depth
www.maxon.net

3D FOR THE REAL WORLD
CINEMA 4D Hints
to 32 Bit/Channel. You‘ll then have more flexibility with the lighting effects when you edit the image in editing software that supports
32-bit images. To test this, render a scene similar to the one pictured. In the Picture Viewer, choose View > 32-bit Preview Options.
You can now greatly change the balance of the lighting using the various sliders. Please note that these controls are for preview
purposes only. To apply permanent changes to the image, please use your 2D image editing software.
19) Render a Closed Scene!
CINEMA 4D’s render engine is renowned for being fast. But sometimes you can make it go ever faster, especially if you are working
with a very large scene file. To do this, start rendering to the Picture viewer, and once the rendering has started, close the scene.
The scene will still render, and you‘ll free up the memory that was being used by having the scene loaded.
20) On the Dot
Some useful extra controls for the visibility dots (highlighted above), which control editor visibilty (upper dot) and render visibility
(lower dot): Ctrl-clicking on a dot sets the dot not just for the object you clicked on but for its child objects as well (this is really
useful for making sure, for example, that all child objects are visible and are not set differently to the parent). Alt-clicking on a dot
sets both the upper and lower dot at the same time.
www.maxon.net
Wyszukiwarka
Podobne podstrony:
Lighting in Cinema 4D, Grafika, Cinema 4D, Tutoriale
Framing- Twoje Obrazy, Grafika, Cinema 4D, Tutoriale
Advanced render, Grafika, Cinema 4D, Tutoriale
scenawyjściowa do wszystkiego Mobile Anti, Grafika, Cinema 4D, Tutoriale
Boolean Modeling, Grafika, Cinema 4D, Tutoriale
akumulator do toyota auris t22 14 d 4d 20 d 4d 20 d 4d
akumulator do toyota avensis iii station wagon 20 d 4d 22 d 4
akumulator do toyota corolla verso zer zze 14 d 4d 20 d 4d
akumulator do toyota corolla e11 19 d 20 d 20 d 4d 22 td
akumulator do toyota avensis iii 20 d 4d 22 d 4d 22 d
akumulator do toyota avensis ii t25 20 d 4d 22 d 4d 22 d cat
akumulator do toyota corolla 14 d 4d 20 d 4d 22 d 4d
17550643 20 Toeic Tips
akumulator do toyota avensis ii station wagon t25 20 d 4d 22 d
akumulator do toyota rav 4 ii xa2 20 d 4d 4wd
akumulator do toyota corolla wagon e11 19 d 20 d 20 d 4d 22
akumulator do toyota avensis ii hatchabck t25 20 d 4d 22 d 4d
akumulator do toyota previa ii acr3 20 d 4d
więcej podobnych podstron