
8.7.14b
8.7.14b Creating a Title
(Premiere)

1-2
Fundamentals of Web Design 1.2—-Lab 8.7.14b
Copyright
2002, Adobe Systems, Inc.
8.7.14b Creating a Title (Premiere)
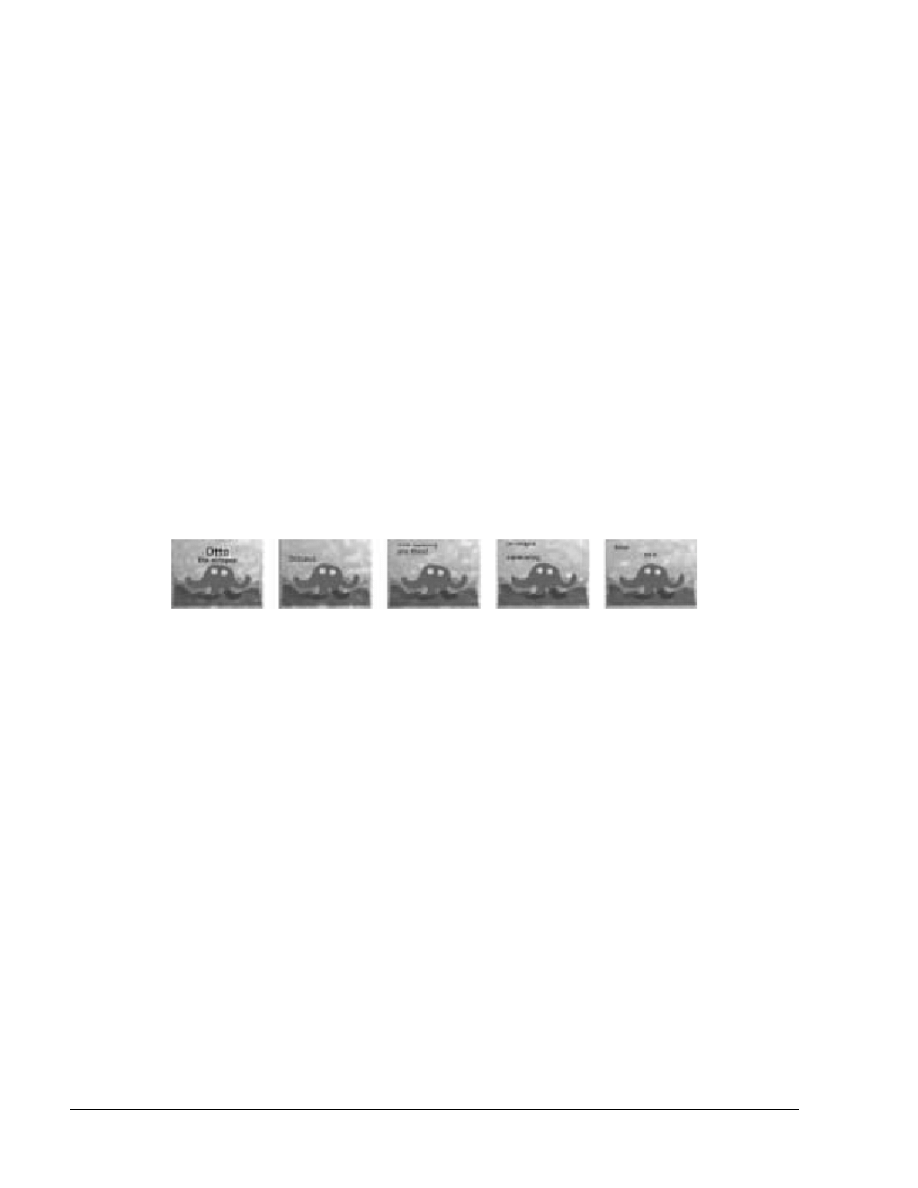
In this lab you’ll use Premiere’s Title window to create a 14-second cartoon for a
children’s educational Web site. You’ll create three different titles using text,
rolling text, and graphic tools, then you’ll superimpose them over a movie clip in
Premiere’s Timeline. Specifically you’ll learn how to do the following:
•
Enter text and change text attributes.
•
Kern text.
•
Add shadows and color.
•
Create graphics.
•
Apply opacity to graphics and text.
•
Create and preview rolling type.
•
Add titles to a project.
•
Superimpose a title over a video clip.
•
Edit titles.
Getting started
1. Start
Premiere.
2. Select Window > Workspace > Single-Track Editing. As you know, this
is used for more advanced editing techniques and for work with the
Video 1 track as a single track.
3. Choose Project > Settings> Viewer to observe the settings for the
project.
4. Click
OK.
5. Double-click 08Lesson.ppj in the 8_7_14/b folder to start Premiere and
open the project.
6.
When the project opens, choose File > Save As. If necessary, open the
appropriate lesson folder on your hard disk and type Cartoon.ppj. Press
Save (Windows) or Return (Mac OS).
About titles
Adobe Premiere’s Title window lets you create text and simple graphic image
files, called titles, that can be used only in Premiere. To use the Title window,
you do not need to open an existing project or create a new project.
Let’s open the Title window and review the basics.
Choose File > New > Title to open the Title window.
Copyright
2002, Adobe Systems, Inc.
Fundamentals of Web Design 1.2—Lab 8.7.14b
1-3
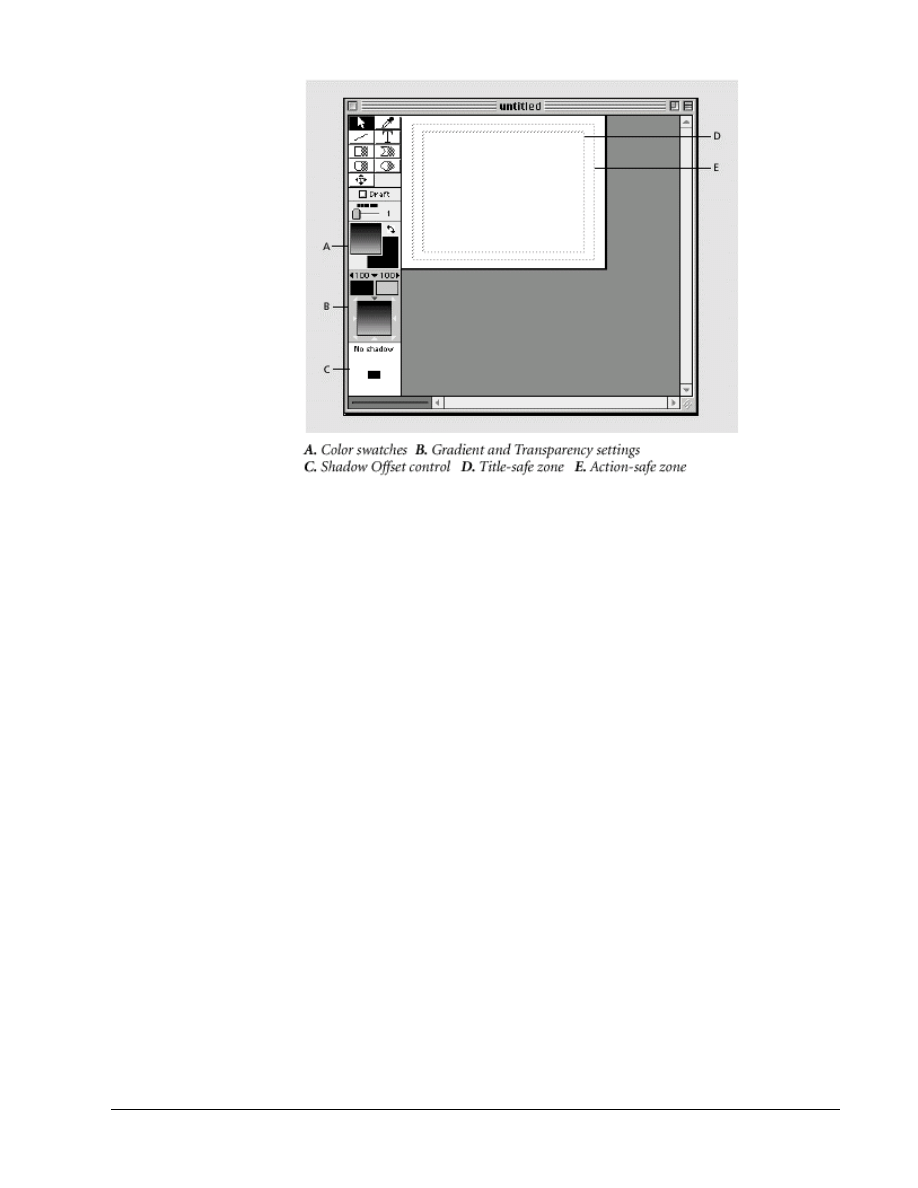
When you open the Title window, Premiere adds the Title menu to the menu bar.
This menu contains all of the Title window’s commands and options. You can
also access these options by right-clicking (Windows) or Control-clicking (Mac
OS) in the Title window.
However, if you want to change the window size or background color, you need
to open the Title Window Options dialog box by either choosing the Window
menu or by right-clicking (Windows) or Control-clicking (Mac OS) the Title
window title bar.
The Title window contains two dotted-line boxes. The inner box represents the
title-safe zone and the outer box represents the action-safe zone. If you draw
graphic images outside of the action-safe zone, they may not be visible on some
NTSC monitors. Text outside the title-safe zone may appear blurry or distorted
on an NTSC monitor.

1-4
Fundamentals of Web Design 1.2—-Lab 8.7.14b
Copyright
2002, Adobe Systems, Inc.
Importing graphics and titles
You can import graphics to be used in titles from other software such as Adobe
Photoshop (3.0 or later) and Adobe Illustrator. Also, you can import entire title
sequences created in other software, such as Adobe After Effects. You can also
import an individual layer from a multilayer Photoshop file. Premiere does not
support 16-bit TIFF images created in Photoshop or other graphic applications.
An alpha channel is a fourth channel in an RGB image that defines what parts of
the image are transparent or semitransparent. Many programs, such as Adobe
Illustrator and Photoshop, use alpha channels so that you can specify
transparent regions in an image. Premiere preserves the alpha channel.
•
Use the Alpha Channel key on clips that contain a straight alpha channel, such
as images created in Adobe Photoshop, Adobe Illustrator, and Adobe After
Effects,
•
Select the Use Clip's Alpha option in the Motion Settings dialog box when you
use the Alpha Channel key with a clip to which you have applied or plan to
apply motion. If this setting is not selected, the clip's bounding box will appear
when the clip moves.
You can use the Edit Original command in Premiere to open a clip in its original
application, such as Adobe After Effects, so that you can edit it and then have
those changes automatically incorporated into the current project without
exiting Premiere or replacing files.
1.
Select a clip in either the Project Window or the Source View of the Monitor
Window.
2.
Choose Edit > Edit Original.
–For information, see Chapter 3, “Editing Video” and Chapter 7, “Superimposing and Compositing” in the Adobe
Premiere 6.0 User Guide.
Creating a simple title
Here you’ll create a simple, text-only title. You will add a sample frame to the
Title window, add text, change the text attributes, add a shadow, and kern the
text.
Adding a sample frame for reference
Before you enter text, you’ll add a sample background frame to the Title
window. This sample frame will help you determine the best complementary
colors to use for the title text. Sample frames are only for reference and do not
become part of the title. When you save and close the title, the reference frame is
not saved with the file.
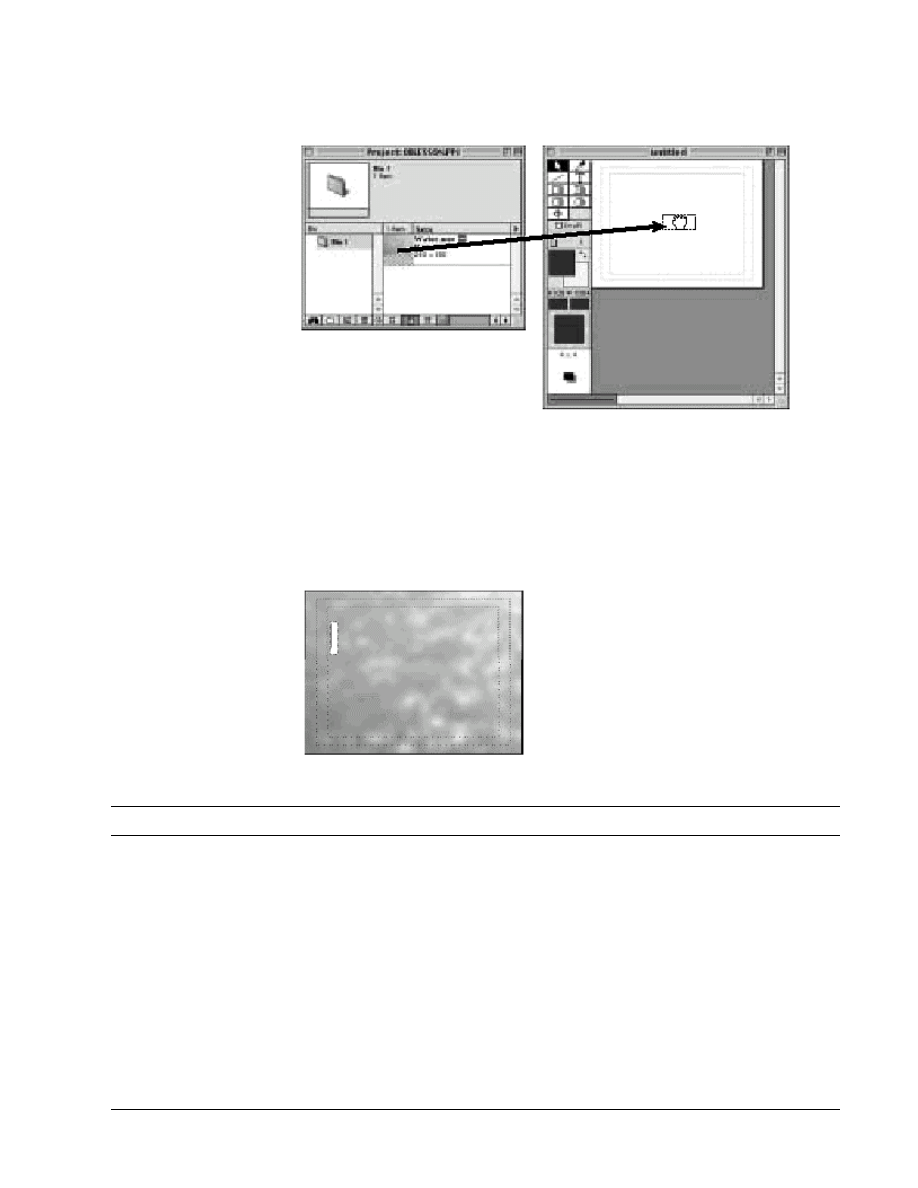
1. Move the Title window so that is not overlapping the Project window.
Notice that Water.mov is already in the Project window. You’ll use this movie as
a background reference frame for your title.
Copyright
2002, Adobe Systems, Inc.
Fundamentals of Web Design 1.2—Lab 8.7.14b
1-5
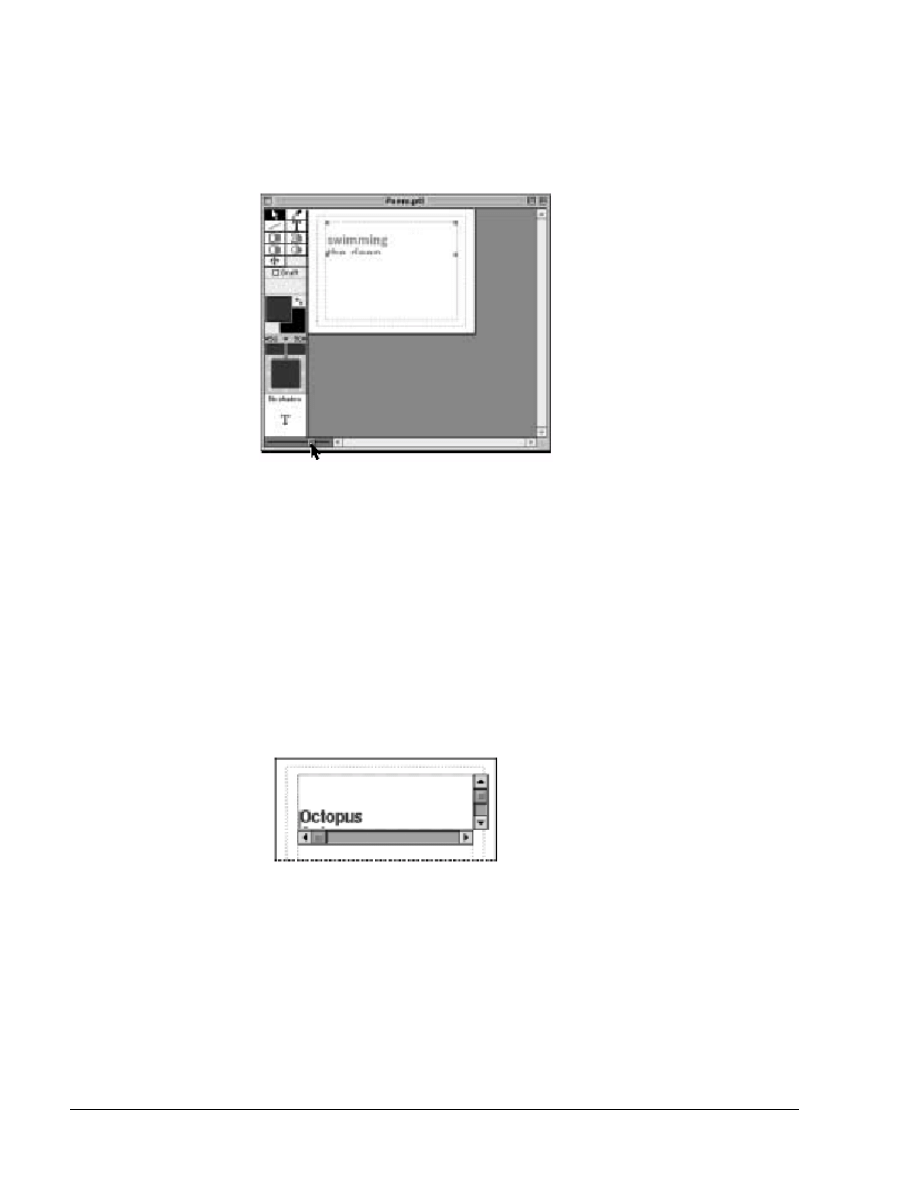
2. Drag the Water.mov icon from the Project window to the Title window
and release the mouse. The background of the Title window is now the
first frame from Water.mov.
Creating text and changing text attributes
Premiere lets you change the text attributes of words and individual characters
within a word using any font available to your operating system.
1. Select the Type tool and click the top left corner of the Title window
within the title-safe zone (innermost dotted line).
As a general rule for video, use fonts that are at least 16 points. Anything smaller may not be visible on a TV monitor.
2. Change the font using the method appropriate for your operating system:
•
In Mac OS, choose Title > Font and select News Gothic Bold. If this font is not
available to you, choose another Sans Serif font. Then choose Title > Size, select
Other, and type 30 in the text box.
•
In Windows, choose Title > Font, select News Gothic for the Font, Bold for the
Font Style, and type 30 in the Size text box. Click OK. If this font is not
available to you, choose another Sans Serif font
3. Type
Otto.
1-6
Fundamentals of Web Design 1.2—-Lab 8.7.14b
Copyright
2002, Adobe Systems, Inc.
4. Choose File > Save, open the 8_7_14/b folder if necessary, and then type
Otto.ptl for the name, and click Save.
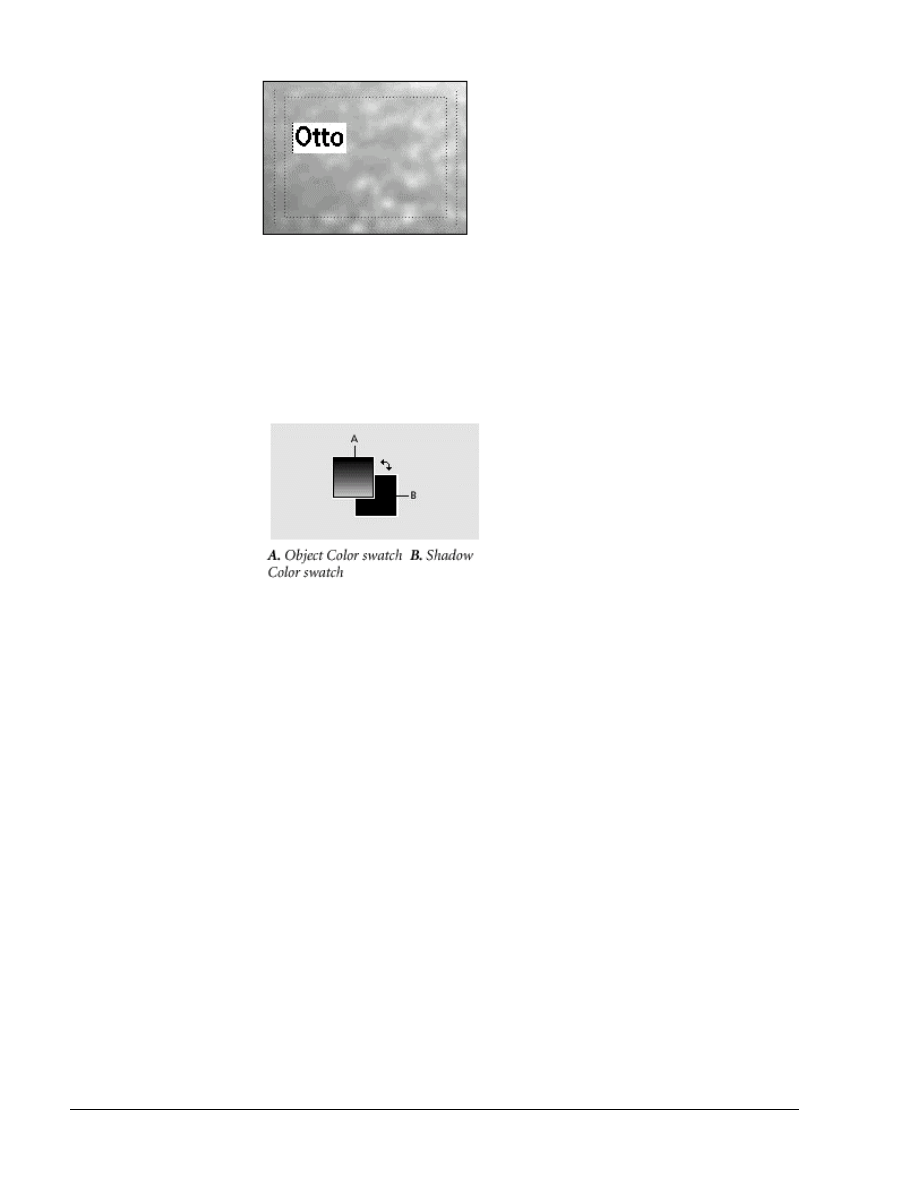
Changing the text color
The Object Color swatch in the Title window displays the color of the currently
selected object.
The shadow color is determined by the color of the Shadow Color swatch, which
is located to the right of the Object Color swatch. To switch the object and
shadow colors, click the arrow between the swatches.
Clicking a swatch opens Premiere’s Color Picker. You can choose colors in the
Color Picker by simply clicking on the color in the color box, or by entering
values in the Red, Green, and Blue text boxes. The black, white, and gray values
are located along the left side of the color box.
Let’s change the color of the word “Otto.”
1. Using the selection tool, select “Otto,” if not already selected. If it is
selected, a small box or handle appears on each of the four corners of the
bounding box.
2. Click the Object Color swatch.
Premiere’s Color Picker appears with a default color of black.
Copyright
2002, Adobe Systems, Inc.
Fundamentals of Web Design 1.2—Lab 8.7.14b
1-7
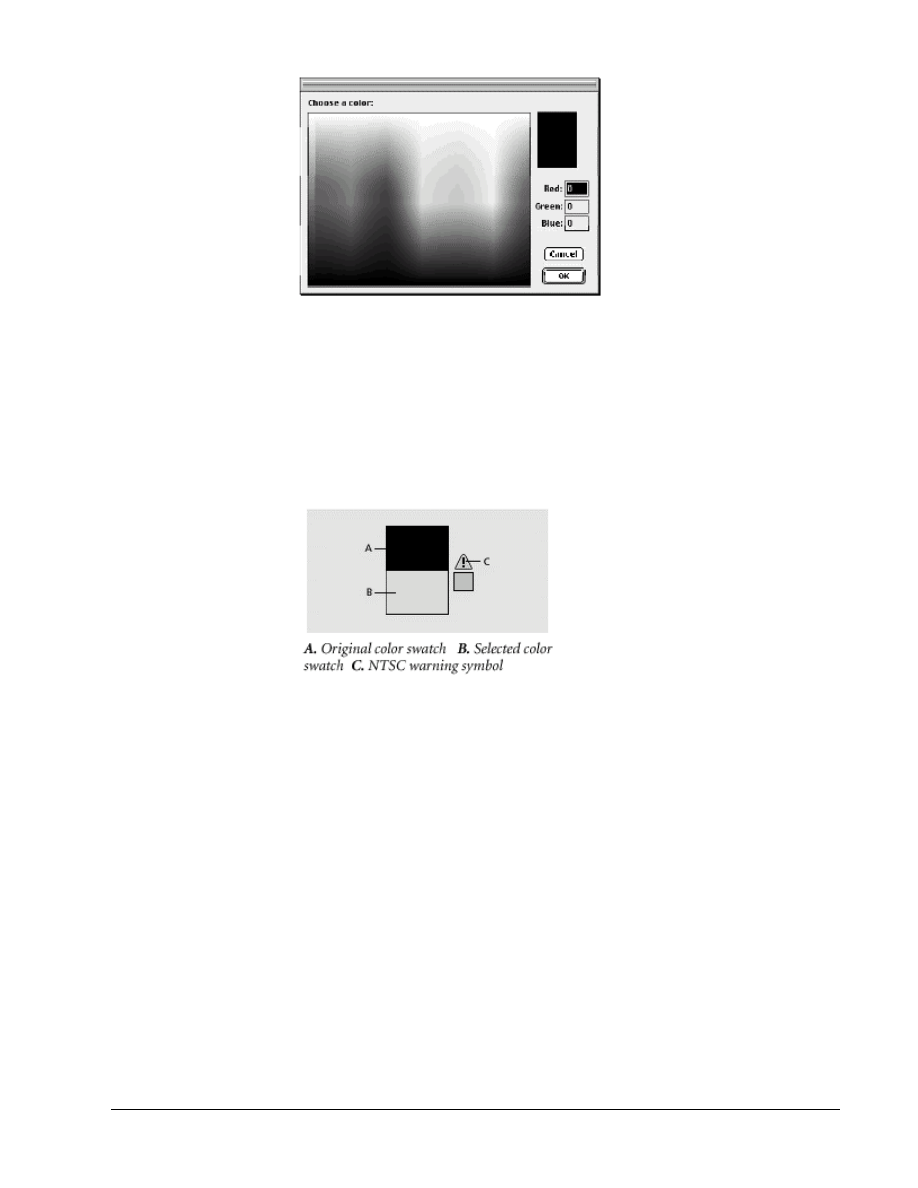
3. Click in the color box to select a deep blue.
If an exclamation point appears next to the color swatch in the upper right corner
of the Color Picker, the color you chose is not NTSC-safe. Such colors may
bleed or blur when displayed on an NTSC monitor. Because the movie you are
creating now will only be played on a computer monitor, you do not need to be
concerned with the NTSC-safe warning. However, if you were creating a movie
that would ultimately be played from an NTSC monitor, you would need to make
sure all your colors were NTSC-safe.
4. If you want to use the same color we used for our text, type 51 for Red, 0
for Green, and 176 for Blue. Click OK to close the Color Picker.
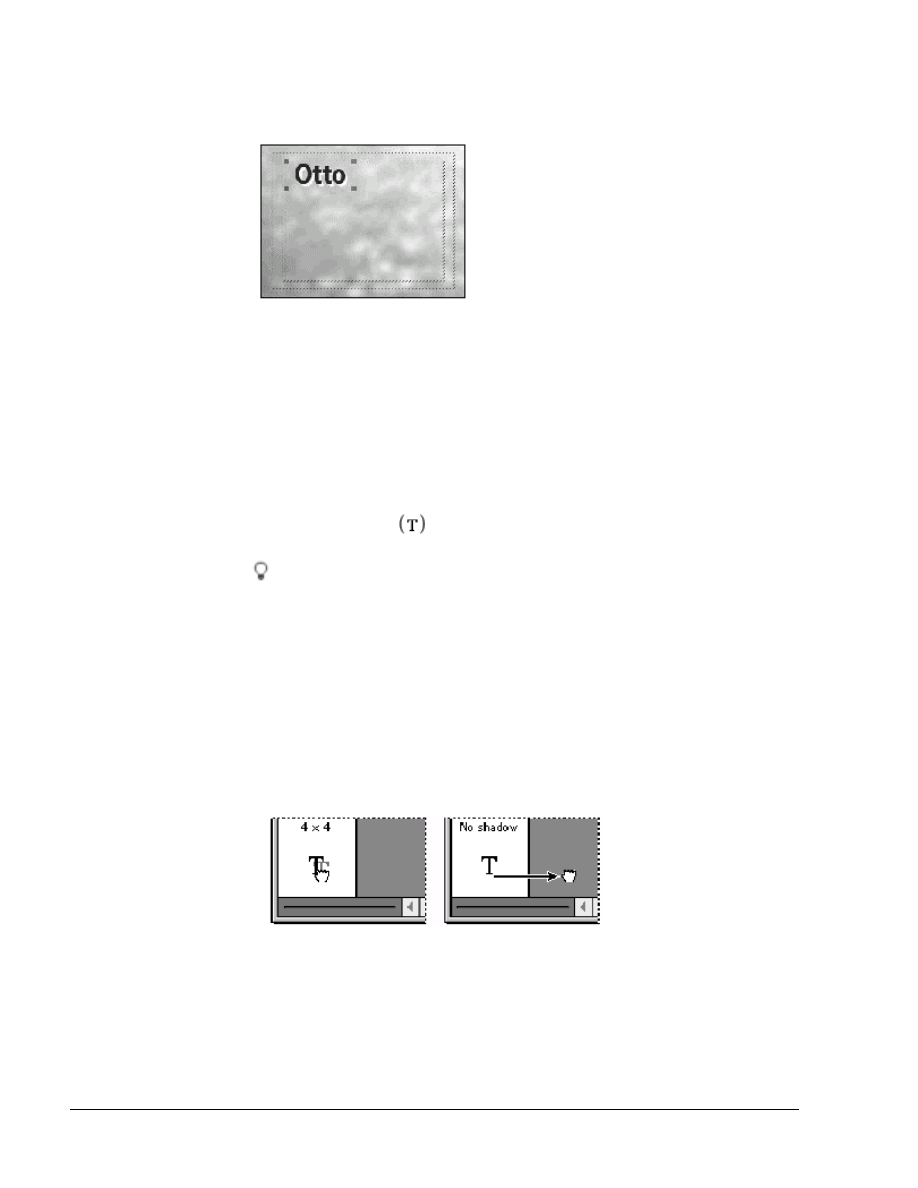
Adding a shadow
You can add a shadow to any image or text object in the Title window by simply
selecting the object and then moving the Shadow Offset control.
Here you’ll create a shadow and then change its color afterward. You can change
the color of an object or shadow at any time by selecting the object and clicking
the color swatch.
1. With the word “Otto” still selected, drag the Shadow Offset control
down and to the right until the shadow value shown above the control is
about 4 x 4.

1-8
Fundamentals of Web Design 1.2—-Lab 8.7.14b
Copyright
2002, Adobe Systems, Inc.
The default color of the shadow is gray. Let’s change it to yellow.
2. While the word “Otto” is still selected, click (Windows) or click (Mac
OS) the Shadow Color swatch to open the Color Picker.
3. Pick a light yellow. To use the same color we used, type 242 for Red,
255 for Green, and 176 for Blue, and then click OK.
By default, Premiere creates soft shadows. You’ll change the shadow to a solid
shadow, making it more prominent against the aqua-colored background.
4. With the text still selected, choose Title > Shadow > Solid.
5. Click anywhere in the Title window to deselect the text.
6. Save the title.
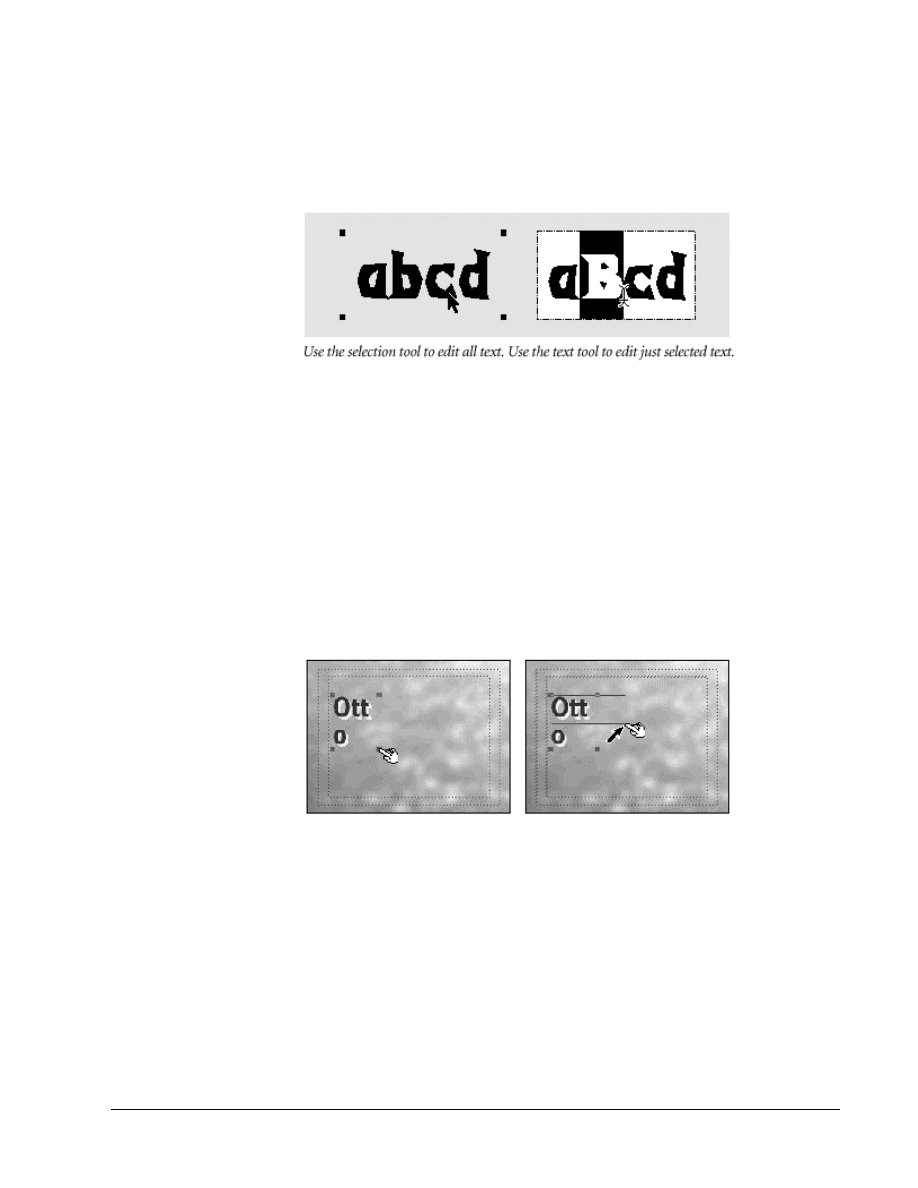
Kerning text
Kerning means changing the distance between two characters in a word. To kern
text in Premiere’s Title window, use the text tool to either highlight the two
adjacent letters you want to kern or place the text tool icon between the two
letters you want to kern, and then click a kerning button.
The left kerning button decreases the distance between two letters and the right
kerning button increases the distance.
Copyright
2002, Adobe Systems, Inc.
Fundamentals of Web Design 1.2—Lab 8.7.14b
1-9
You must use the Type tool, not the selection tool, to access the kerning buttons.
When you use the Type tool, you can kern and edit text, or highlight individual
characters to change their font or font attributes.
When you use the selection tool to select text, you select everything within the
text’s bounding box. If you change the font, color, opacity, shadow, or gradient
while the bounding box is selected, all of the text is affected.
1. Select the Type tool and then click between the two Ts in the word
“Otto.”
2. Click the right kerning button twice to widen the space between the
letters.
Because kerning changes letter spacing, it may cause the line to break, splitting
the word over two lines. If this happens, you can simply resize the word’s
bounding box by dragging any of the four corner handles.
3. If kerning caused the word “Otto” to split over two lines in your Title
window, click the selection tool, then drag the lower right corner handle
of the bounding box up and to the right. When you release the mouse,
the two sections of the word reunite on one line.
Aligning text
You can align text two ways in Premiere’s Title window. You can align the text
inside its own bounding box, and you can align the text’s bounding box inside
the window. Here you’ll align the word “Otto” using both alignment methods.
First you’ll align the text within the bounding box. This will be especially
noticeable if you resized the box in the last exercise.
1. With the word “Otto” still selected, choose Title > Justify > Center.
Notice how the word shifts to the center of the bounding box.
Now, before you center the bounding box, let’s move it to the top of the window.
1-10
Fundamentals of Web Design 1.2—-Lab 8.7.14b
Copyright
2002, Adobe Systems, Inc.
2. Using the selection tool, drag the word “Otto” to the top of the window,
so the letters are just inside the title-safe zone. You can also use the
arrow keys to reposition the word in the Title window.
Now you can center the bounding box in the window.
3. With the word “Otto” still selected, choose Title > Center Horizontally.
Notice how the whole bounding box shifts to the center of the window.
4. Save the title.
Adding more text
Now you’ll add more text to the title.
1. Select the Type tool and click just below the word “Otto.” If you
accidentally open the text box for the word “Otto,” click lower in the
window.
To use a Title window tool one time and then revert to the selection tool, click
it once to select it. If you want to use it repeatedly, double-click it. If you don’t
double-click the tool, it changes back to the selection tool after one use.
2. Choose Title > Size >18.
3. Type
the octopus, and then click the selection tool.
Notice the text has a shadow. This text doesn’t require a shadow, so you’ll
remove it.
4. With “the octopus” still selected, drag the Shadow Offset control out of
the Shadow area to return the shadow setting to No Shadow.
5. Using the selection tool, move the text so that it is positioned in the top
one- third of the Title window, directly under the word “Otto.” You can
also move selected text (or a selected image) by pressing the arrow keys.
6. Choose Title > Center Horizontally.
7. Save the title.
Copyright
2002, Adobe Systems, Inc.
Fundamentals of Web Design 1.2—Lab 8.7.14b
1-11
Creating a graphic image in the Title window
Premiere’s Title window lets you create simple graphics. You can use the
drawing tools to create rectangles, squares, rounded squares, circles, ovals, lines,
and polygons.
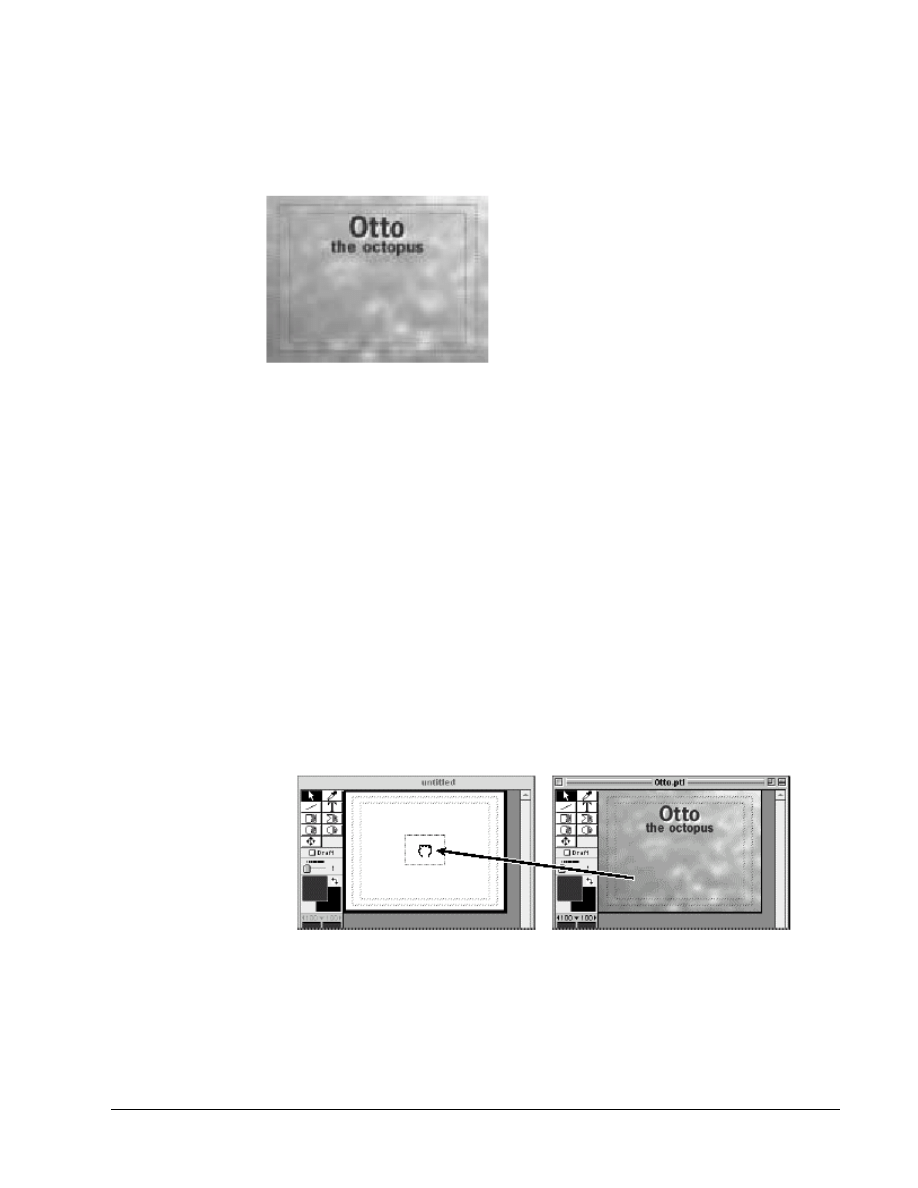
Adding a title as a background frame
Before you start drawing the graphic, you’ll import the title you just created as
the sample frame for this new title. The sample frame will provide a reference of
exactly where the Otto title text is located so that you don’t draw over the top of
it.
1. Choose File > New > Title.
2. Move the new Title window to the side of the Otto.ptl Title window so
that you can see both windows.
3. Drag the center of the Otto.ptl Title window to the center of the new
Title window.
The Otto title appears as a background for your new title. The water background
does not transfer to your new title because it is only a sample frame, not a saved
component of the Otto.ptl file.
4. Click the new Title window’s title bar to make it the active window, and
then choose File > Save As.
1-12
Fundamentals of Web Design 1.2—-Lab 8.7.14b
Copyright
2002, Adobe Systems, Inc.
5. Make sure the 8_7_14/b folder is open, and then type Octopus.ptl for
the name, and click Save.
6. Close
Otto.ptl.
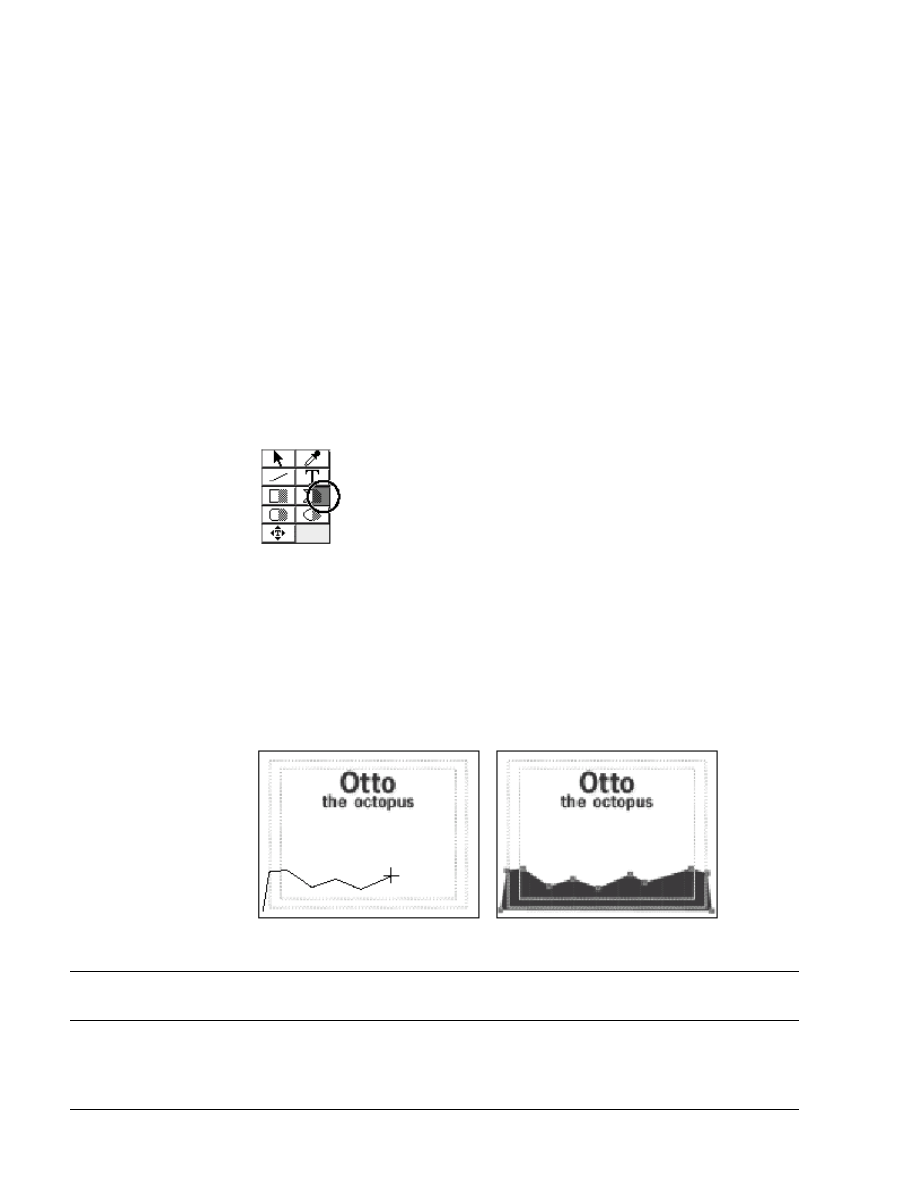
Drawing an image using the polygon tool
The polygon tool lets you create random shapes by moving the tool in any
direction and clicking to create new end points for each line. To close the
polygon tool, either click the first point you created, or double-click where you
want your last line to end. If you’re using the filled tool, as you’ll use in this
exercise, you can double-click your last point to automatically connect the last
point with the first point.
Now you’ll draw a wave using the polygon tool.
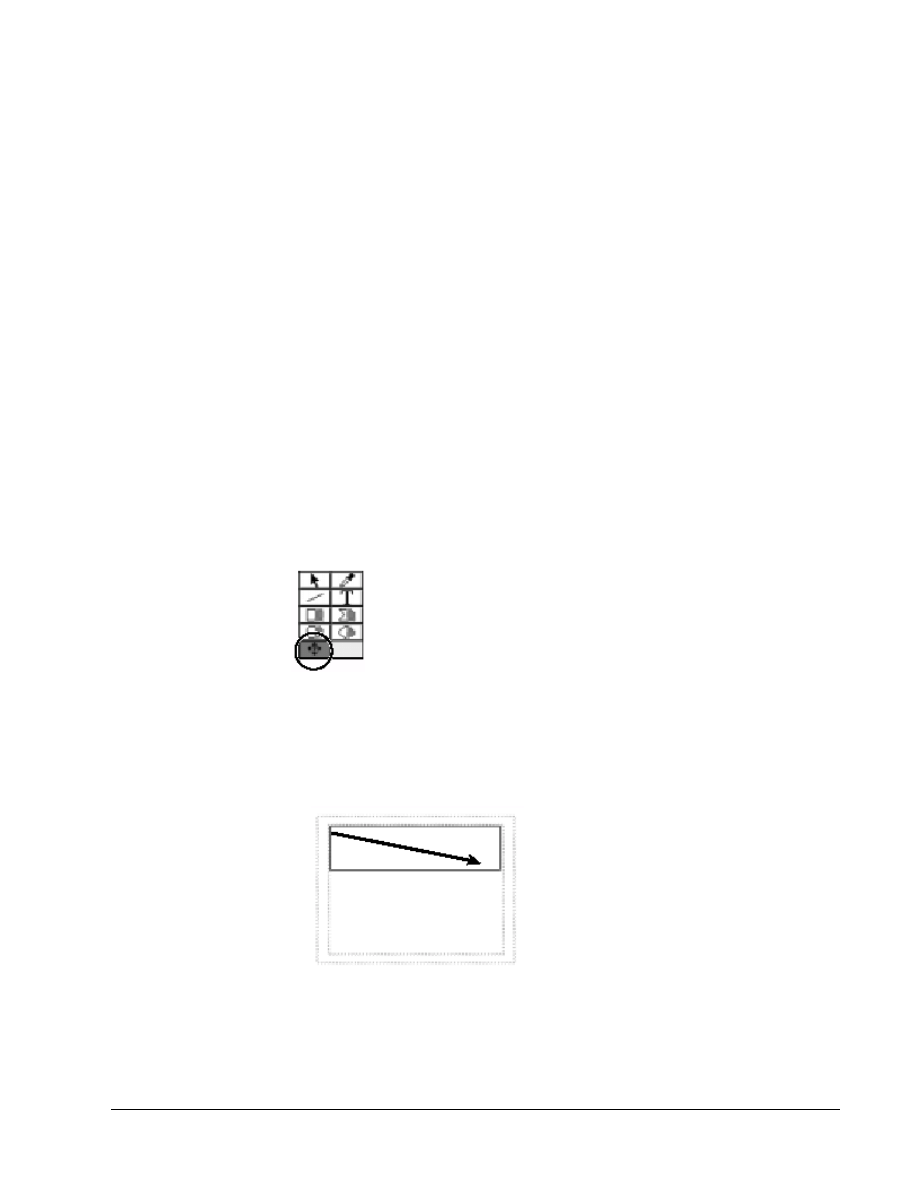
1. Select the filled (right) side of the polygon tool.
The right side of the drawing tools represents the filled tool. If you select the
filled tool, your drawing will result in a solid graphic. If you select the outlined
tool, or the left side of the tool, your drawing will result in an outline only.
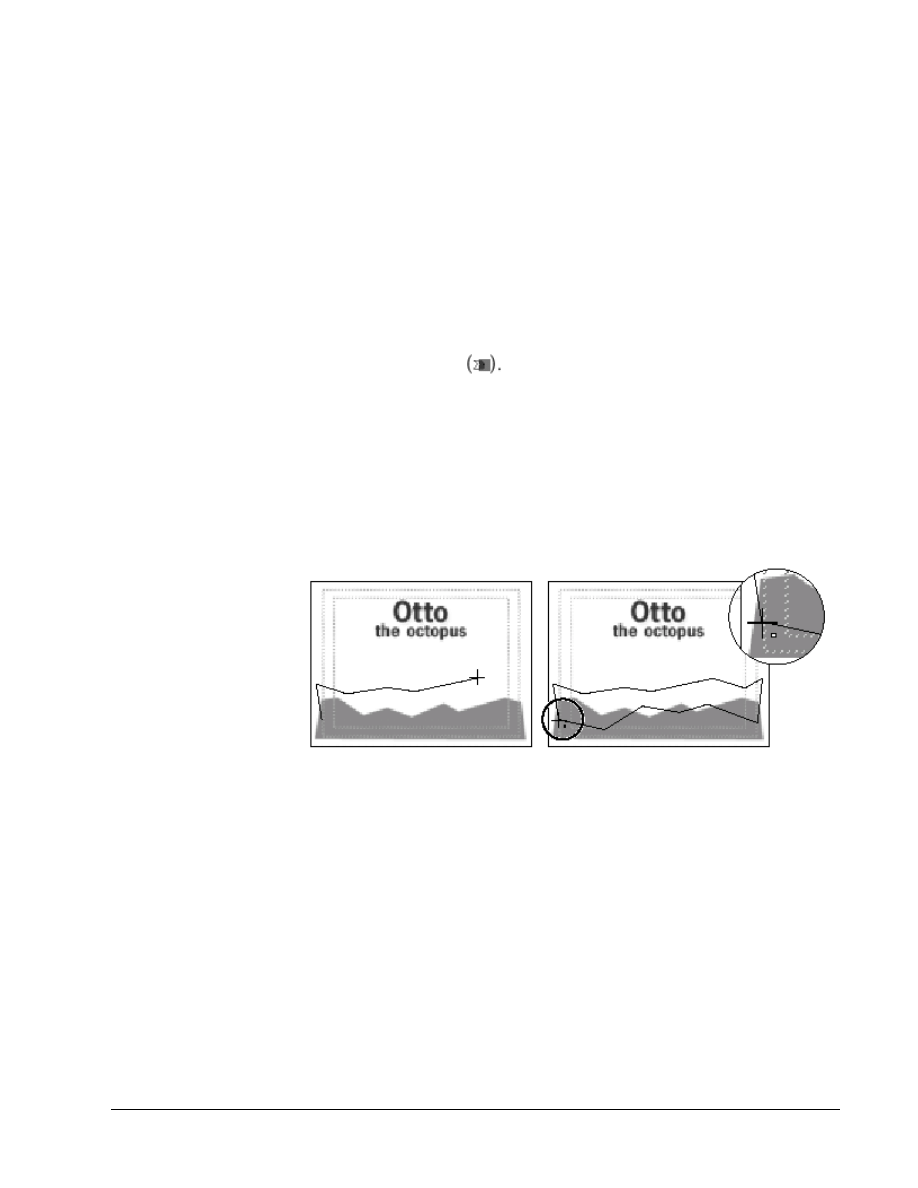
2. Position the cursor in the lower left corner of the Title window, outside
the action-safe zone, and click to make the first point.
3. Move the cursor about one-third of the way up the left side of the
window and click to make your second point.
4. Continue to click up and down across the lower third section of the Title
window to make a wave effect. You can use the graphic below as a
guide.
If you make a mistake, you can double-click to close the tool and then press Delete to delete all your points, or you can
finish drawing your image and then use the selection tool to adjust individual points.
5. When you reach the right side of the window, double-click anywhere in
the lower right corner to close the polygon.
Copyright
2002, Adobe Systems, Inc.
Fundamentals of Web Design 1.2—Lab 8.7.14b
1-13
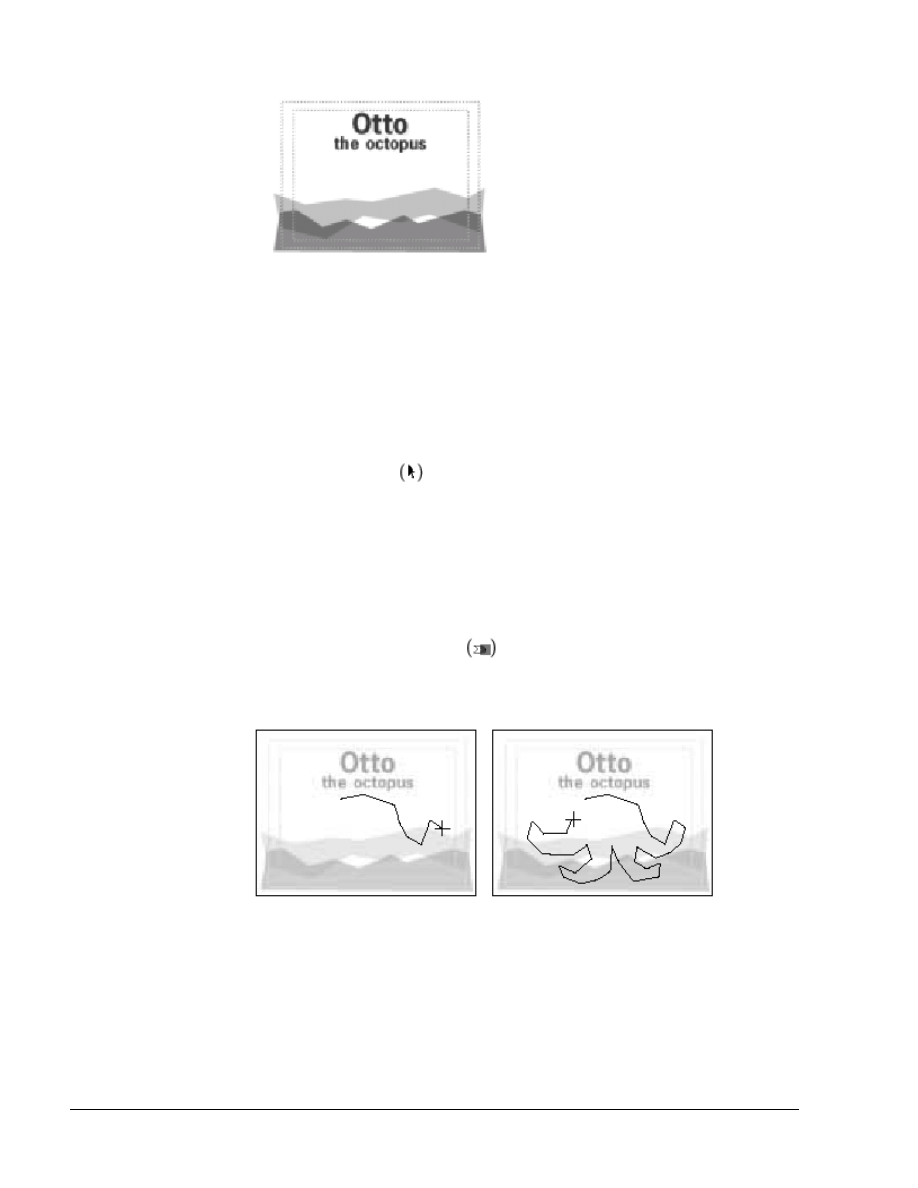
Premiere automatically adds a line from the last point to the first point, closing
the image and filling it with blue.
6. With the image still selected, drag the Overall Transparency arrow to
50%.
7. Click anywhere in the Title window, outside the image, to deselect
everything, then save the title.
Repositioning objects
You can reposition text and images in the Title window by bringing them to the
front or sending them to the back. Here you’ll draw another wave with a
different opacity setting, and then send it to the back.
1. Select the filled polygon tool
2. Click the left line of the action-safe zone about halfway up the first wave
to create a point.
3. Click to make the second point above the first wave but still in the lower
half of the window. You can use the graphic below as a guide.
4. Continue making points up and down across the window as you did with
the first wave. This time, instead of a flat bottom, draw waves along the
bottom of the graphic. Make this wave a little smaller than the first
wave.
5. When you reach the left side again, close the shape by connecting the
last point to the first point. You’ll know you’re clicking on the first point
when you see the “o” next to the pointer.
6. With the second wave selected, set Overall Transparency to 25%.
7. Choose Title > Send to Back. The second wave now sits behind the first
wave and shows through slightly.
1-14
Fundamentals of Web Design 1.2—-Lab 8.7.14b
Copyright
2002, Adobe Systems, Inc.
8. Save the title.
Creating a smooth polygon
Now you’ll use the polygon tool to draw an octopus. This time you’ll smooth the
lines because octopuses are round, not pointy.
Before drawing the octopus, let’s change the color to orange. To ensure you
don’t change the color of the objects you just drew, you’ll make sure nothing is
selected.
1. Using the selection tool , click anywhere inside the Title window
(but outside of the waves) to deselect everything.
2. Click the Object Color swatch.
3. Pick a rich orange color from the right side of the color box. To use the
exact color we used, type 245 for Red, 42 for Green, and 10 for Blue.
Click OK.
4. Drag the opacity slider to 100% to remove transparency.
5. Select the filled polygon tool and click under the words “the
octopus” to make your first point for the top left corner of the octopus’s
head. Then, using the image below as a guide, draw your own octopus in
the lower two-thirds of the window, making sure not to draw over the
text.
6. Close the shape by clicking your first point. Remember to look for the
“o” before clicking your final point to ensure your cursor is directly
above the first point.
7. With the octopus selected, choose Title > Smooth Polygon.
8. Save the title.
Copyright
2002, Adobe Systems, Inc.
Fundamentals of Web Design 1.2—Lab 8.7.14b
1-15
If you want to adjust any of your images, select the object using the selection
tool and drag individual points to reposition them.
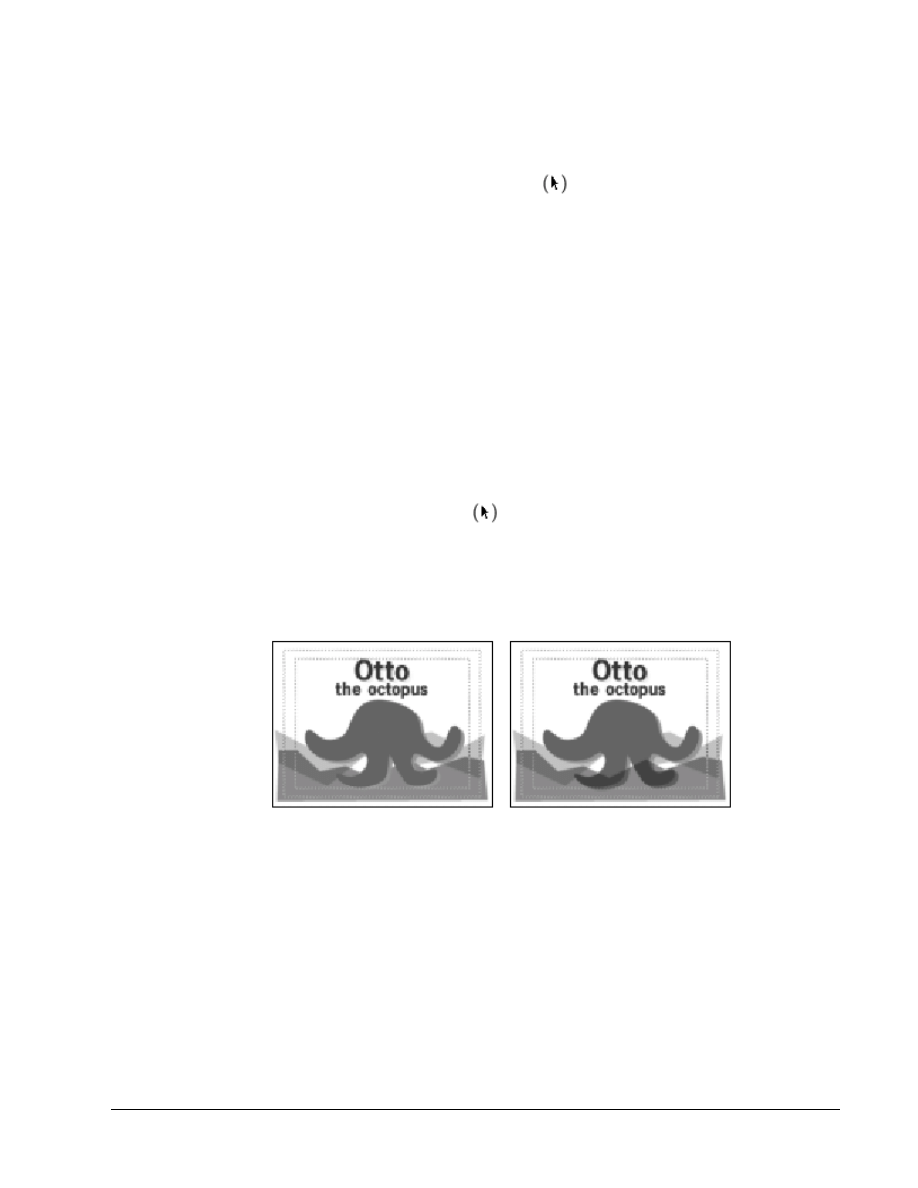
Adding an octopus shadow
Now you’ll add a light pink shadow to the octopus.
1. If necessary, use the selection tool to select the octopus image.
2. Drag the Shadow Offset control down and to the right so the dimensions
are about 4 x 3.
3. Double-click (Windows) or click (Mac OS) the Shadow Color swatch to
open the Color Picker.
4. Click a light pink color between the blues and the reds in the color box.
To use the exact color we used, type 255 for Red, 118 for Green, and
174 for Blue. Cclick OK.
5. Choose Title > Shadow > Single to remove the shadow’s soft edges and
create a basic drop shadow that is more apparent against the blue waves.
Repositioning the waves
Now let’s move the first wave you drew to the front so that the octopus appears
to be floating between the two waves. Because you added transparency to the
wave, you’ll be able to see the octopus through it.
1. Using the selection tool , select the first wave you drew. To
ensure you selected the first wave, check the Transparency
settings in the Title window—they should be 50%. If they’re at
25%, select the other wave.
2. Choose Title > Bring to Front.
3. To see the shadow effect without the selection points, click an
empty area of the Title window to deselect everything.
4. Save the title.
Using the oval tool
Use the oval tool to draw ovals and circles of any size. To make a circle
using the oval tool, constrain the tool by pressing the Shift key while
drawing. You can also make squares, rounded squares, and 45-degree
lines by pressing the Shift key while using the rectangle, rounded
rectangle, or line tools.
Before you draw the circles, let’s change the object color to green.
1-16
Fundamentals of Web Design 1.2—-Lab 8.7.14b
Copyright
2002, Adobe Systems, Inc.
1. To ensure you don’t change the currently selected object’s color,
click an empty area of the window, and then click the Object
Color swatch to open the Color Picker.
2. Pick a bright green color in the color box. To use the same color
we used, type 64 for Red, 255 for Green, and 131 for Blue. Click
OK.
3. Drag the opacity slider to 100%.
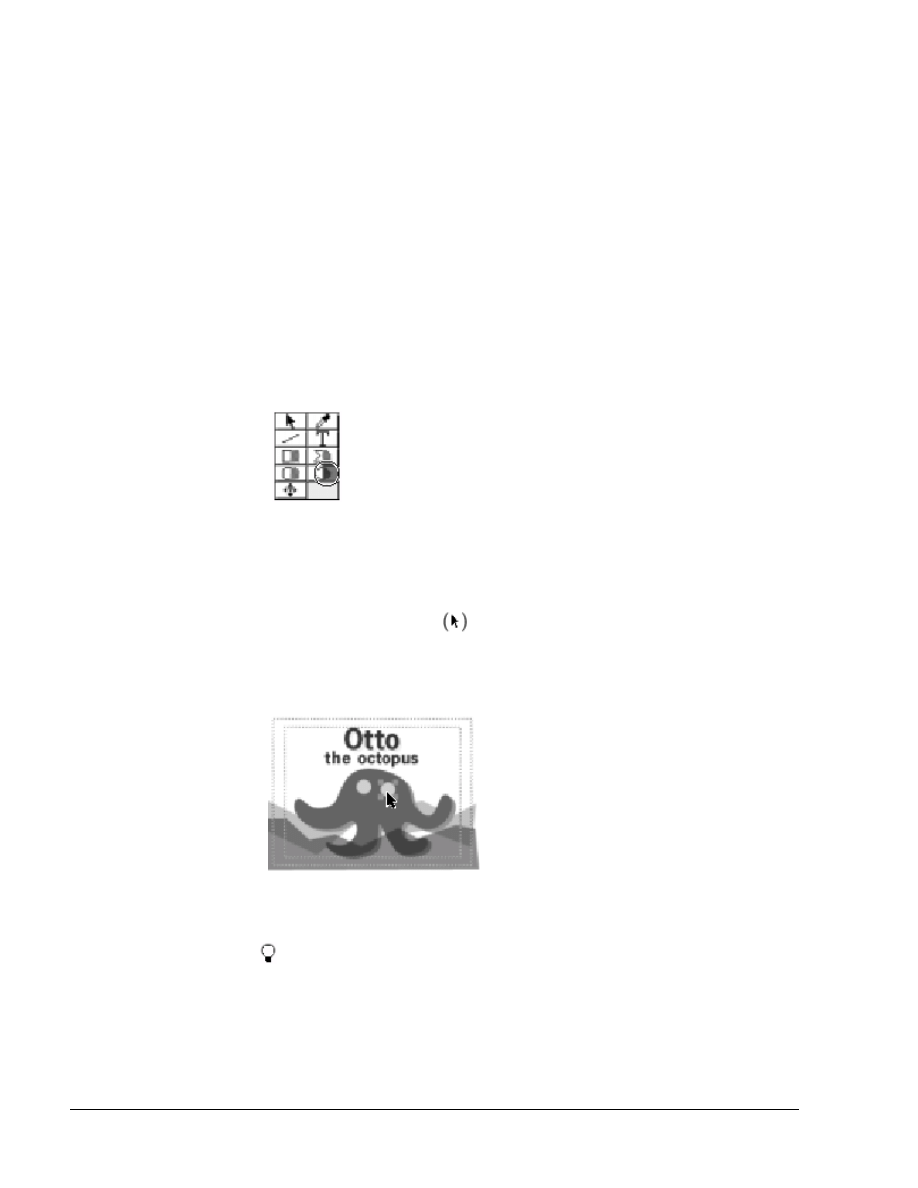
4. Now you’ll draw one octopus eye, and then copy and paste it to
create a second eye.
5. Select the filled oval tool.
6. Press Shift and draw a small circle on the octopus’s head.
7. Choose Edit > Copy and then Edit > Paste. Premiere pastes a
copy of the circle directly on top of the original.
8. Position the selection tool over the eye, making sure the icon
is a pointer, not a finger icon, and then drag the center of the new
circle beside the first circle.
If you accidentally stretch the circle instead of move it, choose Edit >
Undo, and then deselect and reselect the circle and use the arrow keys to
move it.
9. Click any empty space in the Title window to deselect
everything.
10. Save the title.
Copyright
2002, Adobe Systems, Inc.
Fundamentals of Web Design 1.2—Lab 8.7.14b
1-17
Leave Octopus.ptl open in the background. You’ll be using it again soon.
Creating rolling titles
Using Premiere’s rolling titles feature you can create text that rolls onto
and off of the screen. You can make text roll up or down, or you can
make it crawl across the screen from left to right or from right to left. In
this lesson you’ll create text that rolls up the screen.
To create rolling titles, you must use the rolling title tool and enter text in
a rolling title scroll box.
First you’ll open a new title and set the default color to the same deep
blue as the text in Otto.ptl.
1. Choose File > New > Title.
2. Click the Object Color swatch.
3. The default color should be the blue you used earlier for the word
Otto. If it isn’t, type 51 for Red, 0 for Green, and 176 for Blue,
and then click OK.
4. If a shadow value is selected, drag the Shadow Offset control out
of the Shadow area so no shadow is selected.
Now you’re ready to create the rolling title.
5. Select the rolling title tool.
6. Staying within the title-safe zone, drag to define a box from the
upper left corner down and to the right about one-third of the
way down the window.
The rolling title scroll box appears with a blinking text cursor at the
top. In this box you enter the text you want to roll or crawl across
the screen.
7. Change the font size by choosing Title > Size > 18.

1-18
Fundamentals of Web Design 1.2—-Lab 8.7.14b
Copyright
2002, Adobe Systems, Inc.
The text is still center-justified from the last title you created, so
let’s left justify it.
8. Choose Title > Justify > Left.
Now you’ll enter the poem text.
9. Type
Octopus, and then press Enter (Windows) or Return
(Mac OS) twice.
10. Type Octopus, again, and press Enter/Return twice.
11. Type the remaining text and press Enter/Return once at the
end of each line and twice where the larger spaces appear.
how squishy
are thee!
With your
eyes
so bright,
and tentacles
of might,
swimming
the deep
blue
sea.
12. Highlight the word “sea” to select it and choose Title >
Justify > Center.
13. Choose Title > Rolling Title Options and make sure
Direction is set to Move Up, then click OK.
14. Choose File > Save, open the 8_7_14/b folder if necessary,
and then type Poem.ptl for the name and click Save.

Copyright
2002, Adobe Systems, Inc.
Fundamentals of Web Design 1.2—Lab 8.7.14b
1-19
Creating crawling titles
You can make text crawl (move horizontally left or right). When you add the title
to a program, the speed of moving text is determined by the duration you specify
for the title in the Timeline. For example, if you originally specified a duration
of 20 seconds for a rolling title, and then you change the duration to ten
seconds, the title must roll twice as fast to move the same number of lines across
the screen in half the time.
1. Select the rolling title tool.
2. Drag to specify the size of the text object that will contain the rolling title.
3. Type the text you want in the title.
Note: To make the text crawl, you must type enough text to overfill the text box.
If you don't have enough text, overfill the box using blank spaces. To create
blank spaces for crawling text, press the spacebar.
4. With the rolling title still selected, choose Title > Rolling Title Options.
5. In the Direction section, select the direction in which you want the type to
move.
6. Select Enable Special Timings if you want more control over crawling motion.
Then specify the following values as needed and click OK:
• For Pre Roll, specify how many frames you want to appear motionless (starting
with the title clip In point to the frame in which the title starts moving).
• For Ramp Up, specify how many frames the clip should use to accelerate to
normal speed. Type 0 (zero) to start moving the title at normal speed. To
accelerate more gradually, specify more frames.
• For Ramp Down, specify how many frames the clip should use to decelerate to
a halt. For faster deceleration, specify fewer frames. Type 0 (zero) to stop the
title immediately. To decelerate more gradually, specify more frames.
• For Post Roll, specify how many frames you want the title to appear motionless
(starting with the frame in which the title stops to the title Out point).
Previewing the rolling and crawling titles
You can preview the rolling or crawling text by dragging the
preview slider bar at the bottom of the Title window’s toolbox.
1. Using the selection tool , click to select the rolling title
bounding box.
2. Click the preview slider button on the slider bar, located at
the bottom left corner of the Title window, and drag to the
right.
1-20
Fundamentals of Web Design 1.2—-Lab 8.7.14b
Copyright
2002, Adobe Systems, Inc.
Note: This slider does not preview special timings. Special timings
depend on the clip duration in frames, which is determined by the
Timeline. To preview special timings, add the title to a project
Timeline and preview the Timeline.
Premiere plays back all rolling or crawling text objects in the Title
window. What you see is what will display in your movie. Notice
how the text is on the screen at the beginning of the roll and rolls
until the last word appears at the bottom.
To make the text roll onto the screen you’ll insert extra carriage
returns at the beginning of the text. You can also add extra carriage
returns to the end of the text if you want the text to roll all the way
off screen before stopping. For this lesson you want the text to stop
on screen.
3. Select the Type tool and click anywhere in the text area.
4. Scroll to the top of the text and make an insertion point
before the first letter of the first word.
5. Press Enter (Windows) or Return (Mac OS) three times.
Note: Even though it doesn’t appear to move the text off the screen,
the carriage returns will create the desired effect when you preview.
6. Click anywhere in the Title window to deselect the text box,
and then preview the changes by dragging the preview slider
bar.
7. Save the title.
Copyright
2002, Adobe Systems, Inc.
Fundamentals of Web Design 1.2—Lab 8.7.14b
1-21
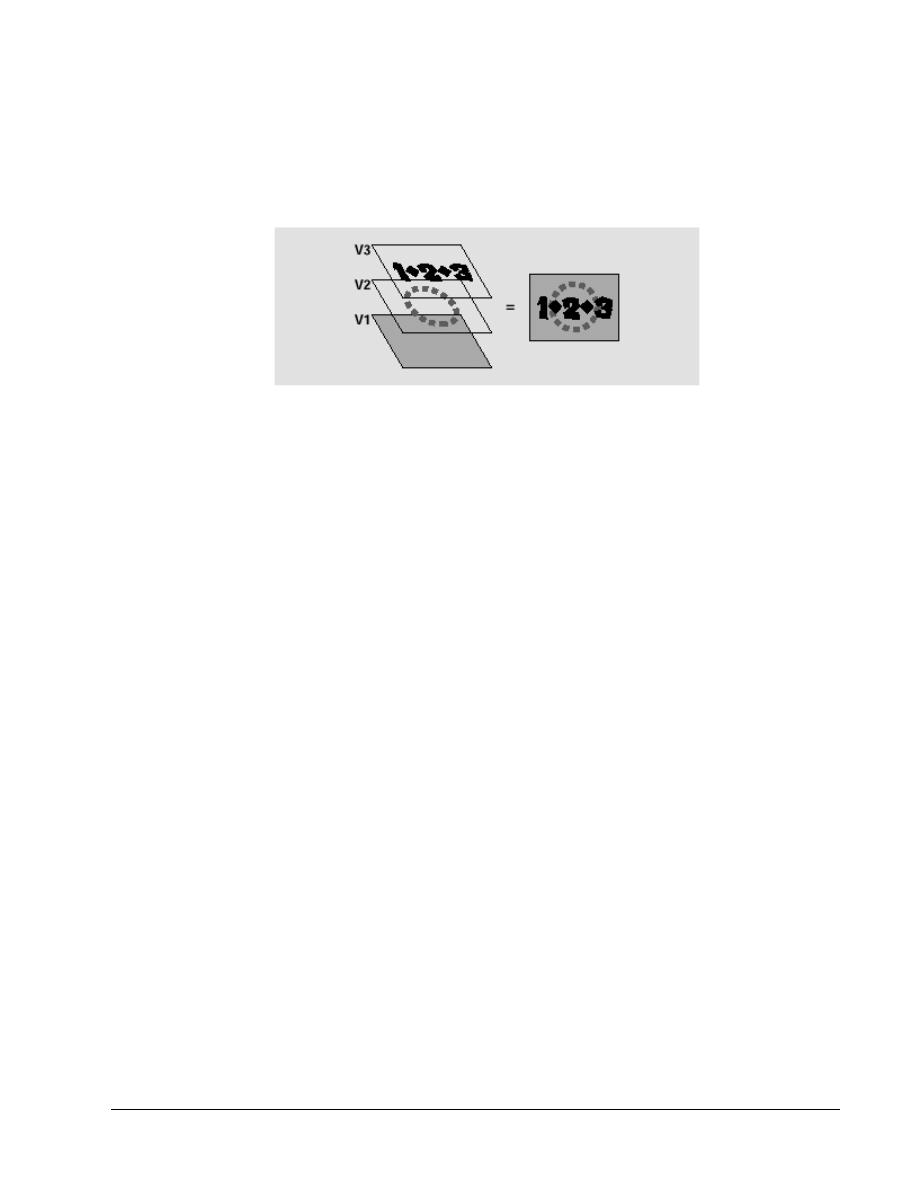
Using titles in a Premiere project
Now you’ll add the titles to a simple project, and then place them in
the Timeline and superimpose them over a video clip. Superimpose
means playing a clip, such as a title, still, or video clip, on top of
another clip. To superimpose clips in Premiere, you add them to the
superimpose tracks (Video 2 track and higher) in the Timeline. Clips
in superimpose tracks play over the clips in the lower tracks.
When using titles, Premiere automatically assigns transparency, so
clips on the lower tracks display through the title’s background.
You’ll learn more about superimpose tracks and transparency in the
next lesson.
You can add a title to a Premiere project in three ways:
• If both the project and the title are already open, you can simply
drag the title to the Project window.
• If your windows are obscured, making dragging and dropping
difficult, you can choose Add This Clip from the Project menu.
• If the title is not open at the time you want to add it, you can
import it to your project the same way you import other clips, by
choosing File > Import > File.
Adding titles to a project
Here you’ll add the titles you just created.
1. If necessary, move the Title windows on the desktop so they
do not overlap each other or the Project window.
2. Click the Poem Title window to make it active, then drag
the title to the Project window and release the mouse. You
can drag from anywhere in the Title window, except the title
bar or the tool bar.
The title file, Poem.ptl, now appears in the Project window.
3. Close the Poem.ptl Title window.
Now you’ll add the Octopus title to the project using the menu
option.
4. Click the Octopus.ptl Title window to activate it.
5. Choose Project > Add This Clip. The Octopus.ptl title now
appears in the Project window.
1-22
Fundamentals of Web Design 1.2—-Lab 8.7.14b
Copyright
2002, Adobe Systems, Inc.
6. Close the Octopus.ptl Title window.
Because you closed Otto.ptl earlier, you’ll have to import it the way
you import other video clips.
7. Choose File > Import > File.
8. Select Otto.ptl from the 8_7_14/b folder; then click Open
(Windows) or OK (Mac OS). Otto.ptl now appears in the
Project window.
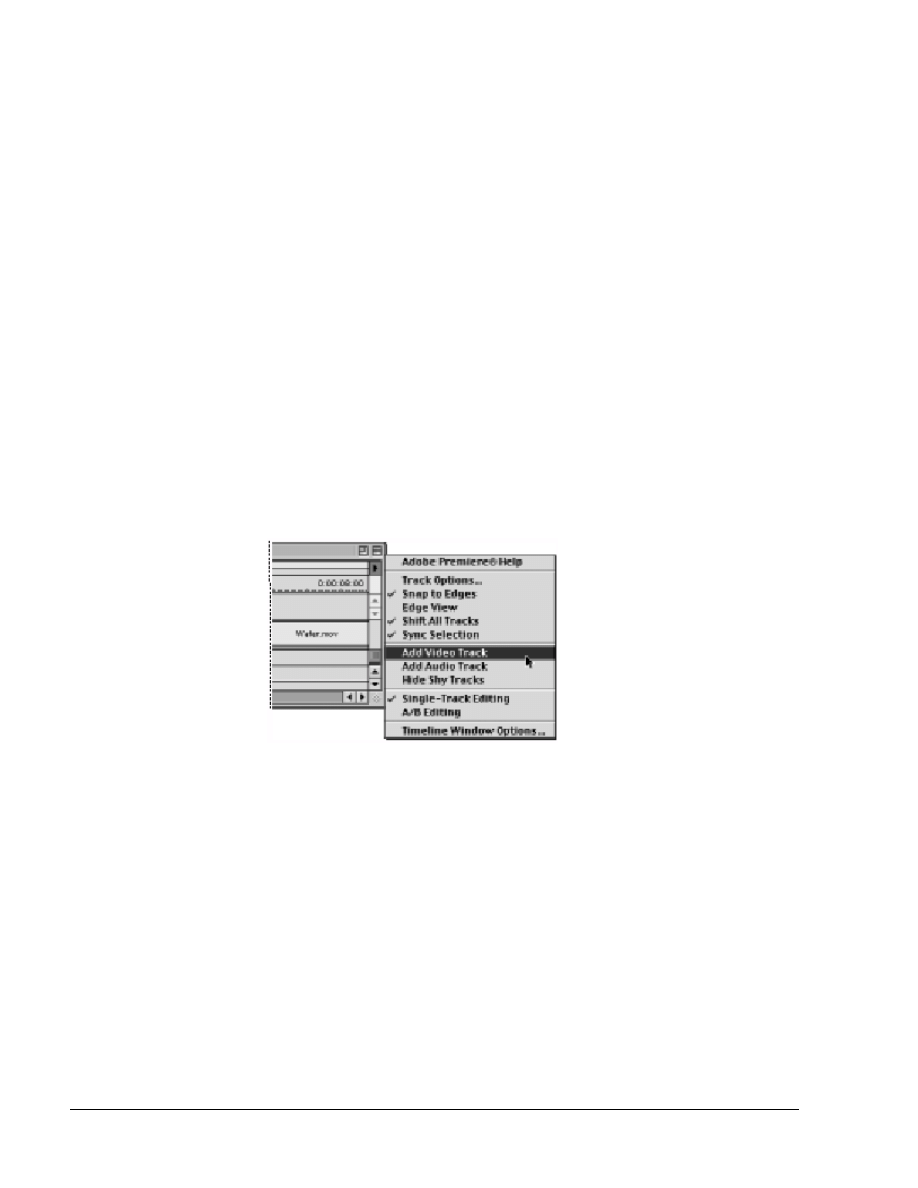
Adding tracks to the Timeline
To superimpose two titles over the Water.mov video clip, you’ll
need to add another superimpose track to the Timeline. You can
have up to 98 superimpose tracks to the Timeline, but you’ll just be
adding one now. You can add or remove tracks at any time, except
for the Video 1, Video 2, Transition, Audio 1, Audio 2, and Audio 3
tracks, which cannot be deleted. New video tracks appear on top of
existing video tracks, and new audio tracks appear below existing
audio tracks.
1. In the Timeline window menu, choose Add Video Track or
Add Audio Track.
A new track, Video 3, now appears on the Timeline.
Note: To add multiple tracks at once, choose Track Options in the
Timeline window menu, or click the Track Options Dialog button at
the bottom of the Timeline window. Click Add, then type a value for
Add _ Video Tracks and/or a value for Add _ Audio Tracks as
desired, and click OK. Click OK again to exit the Track Options
dialog box.
Adding titles to the Timeline
Titles are still images with a default duration of one second. You
can change the duration by dragging either edge of the clip using the
selection tool in the Timeline or by choosing Clip > Duration and
entering a new duration
Copyright
2002, Adobe Systems, Inc.
Fundamentals of Web Design 1.2—Lab 8.7.14b
1-23
1. Drag Octopus.ptl from the Project window to the beginning
of the Video 2 track.
2. Choose Window > Show Info to display the Info palette.
You’ll need to refer to this palette when editing the size of
the clips in this exercise.
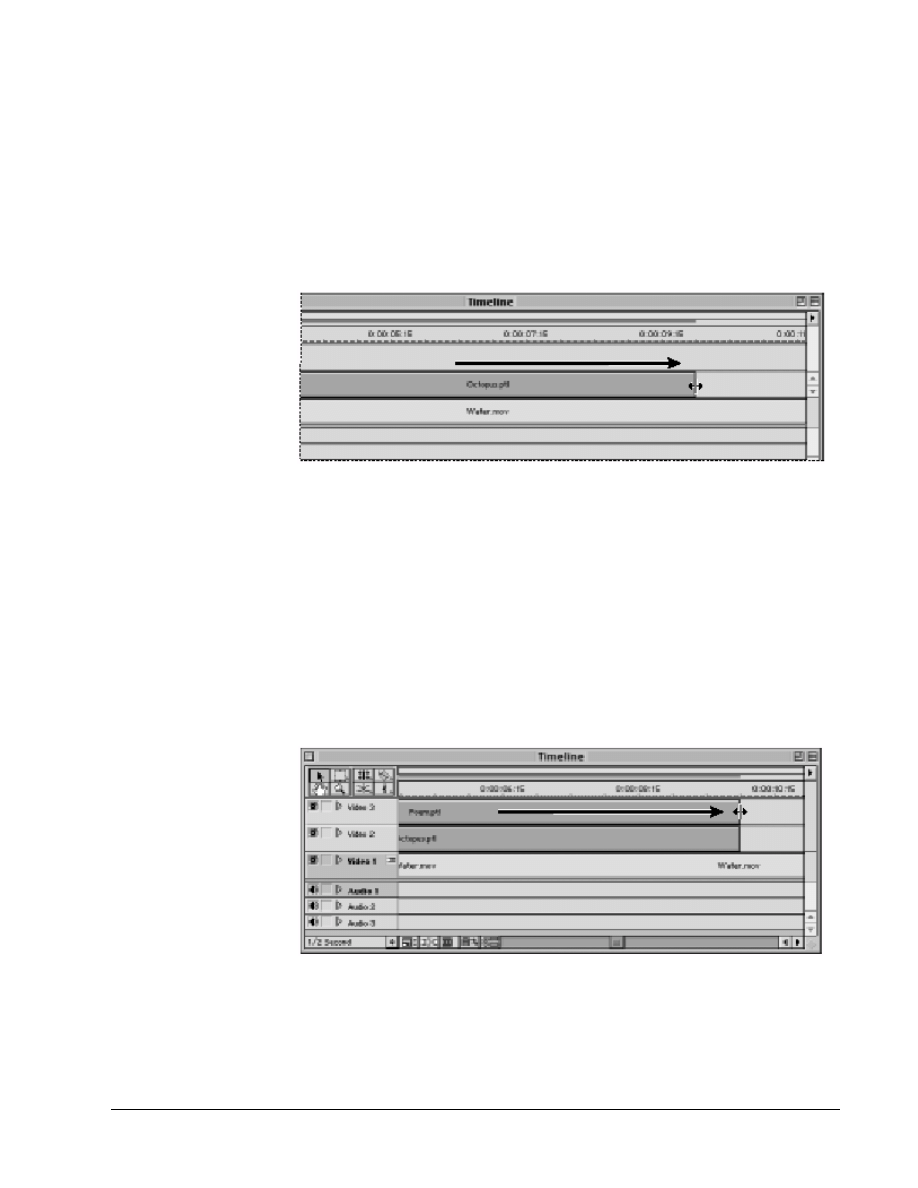
3. Position the selection tool icon on the right edge of the
Octopus.ptl clip so it turns into a trim tool
4. Drag the edge to the right and, using the Info palette as a
guide, extend the Out point to 10 seconds (00:00:10:00).
5. Drag Otto.ptl from the Project window to the beginning of
the Video 3 track.
6. Select Otto.ptl, and choose Clip > Duration.
7. Type
200 for the new duration and click OK. Otto.ptl is now
two seconds long.
8. Drag Poem.ptl from the Project window to the Video 3
track, immediately following Otto.ptl. It should snap to the
end of the Otto.ptl clip.
9. Using the selection tool, drag the right edge of Poem.ptl so
its Out point is at 10 seconds. It should snap to the end of
Octopus.ptl.
Because titles created in Premiere are automatically transparent, you
don’t need to apply transparency. So let’s build a preview and view
the results.
1-24
Fundamentals of Web Design 1.2—-Lab 8.7.14b
Copyright
2002, Adobe Systems, Inc.
10. Save the project.
11. Do one of the following to set the area to be previewed (the
work area):
• Drag the work area bar over the section you want to preview.
• Drag the work area markers to specify the beginning and ending of
the work area.
• Press Alt (Windows) or Option (Mac OS) as you click in the work
area band above the series of clips you want to preview. This sets
the work area to preview a continuous series of clips. The work area
stops at the first gap detected between clips to the left and right of
where you click.
• Double-click the work area band to preview only the section of the
Timeline that is visible in the Timeline window.
12. Do one of the following to build a preview file and preview
it in the Monitor window.
• Press Enter (Windows) or Return (Mac OS).
• Hold down Alt (Windows) or Option (Mac OS). When the cursor
becomes a downward pointing arrow, render-scrub within the
Timeline window's time ruler.
Next, you’ll check the title safe zones settings. Safe zones are useful
when editing for NTSC broadcast and videotape, because most
NTSC consumer television sets cut off some portion of the outer
edges of the picture. This process, called overscan, permits the
center of the picture to be enlarged. The amount of overscan is not
consistent across all televisions, so it is best to keep titles within the
title-safe zone and important subjects within the action-safe zone.
The Title window options include an option to display NTSC title-
safe and action-safe zones.
13. With the Title window open, choose Window > Window
Options > Title Window Options, or right-click (Windows)
or Control-click (Mac OS) in the Title window and choose
Title Window Options from the context menu.
14. Check that the Show Safe Titles setting is checked selected
in order to display NTSC title-safe and action-safe zones,
and click OK.
For more information on viewing and adjusting safe zones, see
Chapter 3, “Editing Video” in the Adobe Premiere 6.0 User Guide.
Copyright
2002, Adobe Systems, Inc.
Fundamentals of Web Design 1.2—Lab 8.7.14b
1-25
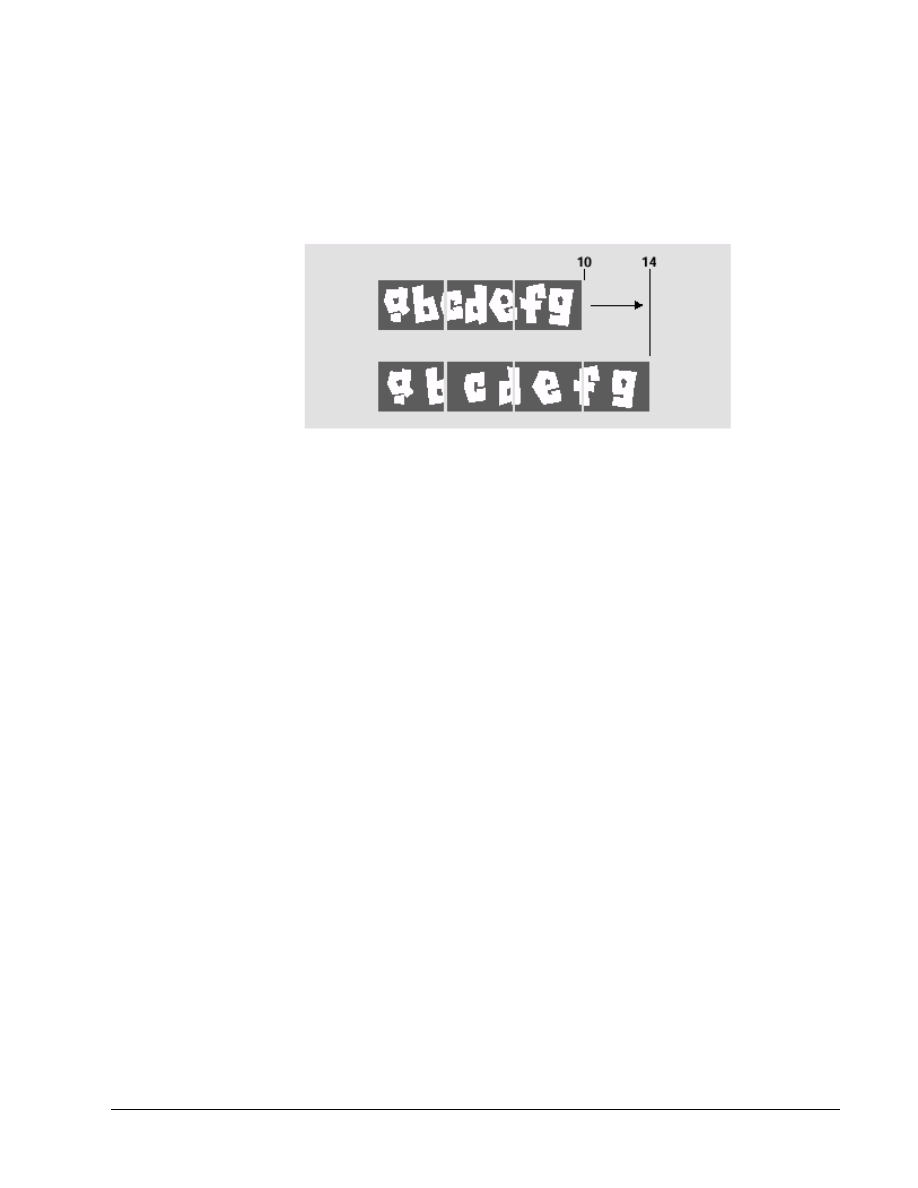
Changing the speed of a rolling title in the Timeline
You can change the speed of a rolling title by changing its duration.
The shorter the duration, the faster the title plays. The longer the
duration, the slower the title plays.
When you preview the rolling title script, you may notice that it
plays rather quickly. To make it play slower, you’ll increase the
duration of the clip.
1. Drag the right side Poem.ptl in the Timeline to 14 seconds
so that it snaps to the end of Water.mov.
2. Drag the right side of Octopus.ptl to 14 seconds so that it
also snaps to the end of Water.mov.
3. Press Enter (Windows) or Return (Mac OS) to preview the
project again. Now the title scrolls much slower and is
easier to read.
Updating a title in the Title window
You can open the Title window and update a title by double-clicking
the title in either the Timeline or Project window. As soon as you
save your changes to the title, Premiere updates all the references to
it in your project.
Here you will adjust the rolling text of the Poem title so that it
doesn’t overlap the octopus graphic. To make this adjustment, you’ll
open Poem.ptl and adjust the size of the rolling text window using
the selection tool.
1. Double-click Poem.ptl in the Timeline.
When the Title window opens, nothing appears in the window
because you entered carriage returns at the beginning of the text. To
see the bounding box, click in the top third of the window.
1-26
Fundamentals of Web Design 1.2—-Lab 8.7.14b
Copyright
2002, Adobe Systems, Inc.
Because you need to make an edit that relies on the position of an
object in Octopus.ptl, you’ll first import a sample frame to the Title
window and use it as a reference.
2. Move the Title window so that it is not obscuring the
Project window.
3. Drag Octopus.ptl from the Project window to the Title
window. The Octopus title now appears as the background
for the Poem title.
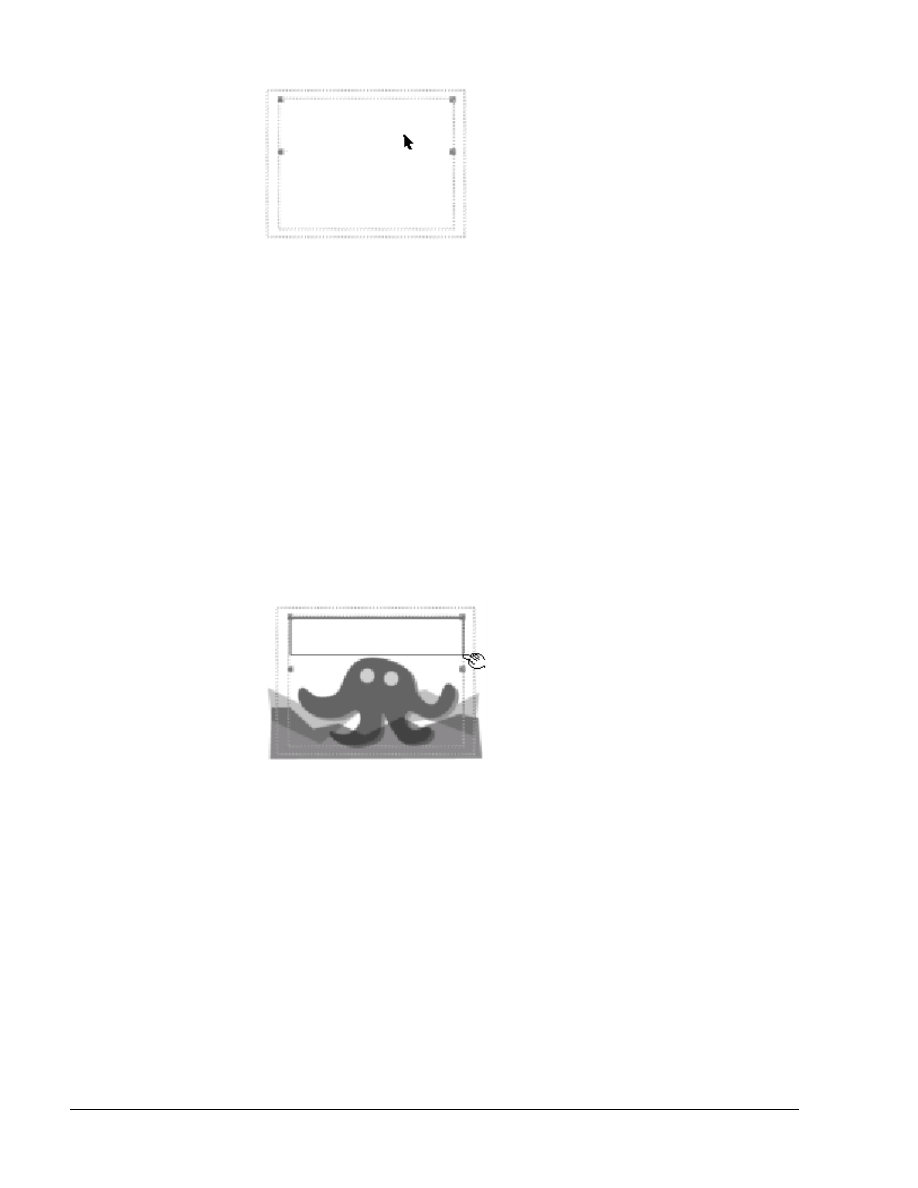
Now you can see exactly how high up in the Title window you need
to move the Poem title bounding box.
4. Using the selection tool, select one of the lower handles on
the poem bounding box and move it up just a little so it
doesn’t touch the octopus’ head.
5. Choose File > Save and then close the Title window.
6. Press Enter (Windows) or Return (Mac OS) to preview the
project.
7. Save the project.
Exporting the movie
Now let’s export the project into a movie for Web viewing. The
Save for Web export option (from Terran Media Cleaner) provides
several different web output formats.
1. Click the Timeline title bar to activate it.
2. Choose File > Export Timeline > Save for Web. The Save
for Web dialog box appears.

Copyright
2002, Adobe Systems, Inc.
Fundamentals of Web Design 1.2—Lab 8.7.14b
1-27
3. Click Settings and select a preset to export to a variety of
formats including: QuickTime hinted and streaming video,
Real Media Sure Stream video, ASF Intelligent Streaming
video, MPEG-1 video, and MP3 audio.
Note: In general, because Internet video is constrained by delivery
data rates that are even lower than those used for CD-ROM
playback, it is important to choose a delivery option (such as 28K
modem, 56K modem, ISDN, or Broadband/LAN) that best represents
the viewing capabilities of your audience.
For more information on selecting the appropriate format setting,
see your plug-in's online Help, PDF documentation, or click on
Learn More in the Save for Web dialog box.
4. Make sure that Entire Project is selected for Export.
5. Click
Start.
Document Outline
- 8.7.14b Creating a Title (Premiere)
- 8.7.14b Creating a Title (Premiere)
-
- Getting started
- About titles
- Creating a simple title
- Adding a sample frame for reference
- Creating text and changing text attributes
- Changing the text color
- Adding a shadow
- Kerning text
- Aligning text
- Adding more text
- Creating a graphic image in the Title window
- Adding a title as a background frame
- Drawing an image using the polygon tool
- Repositioning objects
- Using the oval tool
- Creating rolling titles
- Previewing the rolling and crawling titles
- Using titles in a Premiere project
- Adding titles to a project
- Adding tracks to the Timeline
- Adding titles to the Timeline
- Changing the speed of a rolling title in the Timeline
- Updating a title in the Title window
- Exporting the movie
-
- 8.7.14b Creating a Title (Premiere)
Wyszukiwarka
Podobne podstrony:
Fizyka 14b, AGH, agh, programinski, Laborki, Laborki, Lab, FIZYKA - Laboratorium, fiz lab, franko
4 14b
Ankieta Mp 14b
KOLOSY, Kolokwium-4, odpA: 1c,2a,3d,4a,5b,6a,7a,8b,9c,10c,11a,12c,13b,14b,15a
w 14b
14B (2), Mieszanka WIŚ, Fizyka Wiś Iś
opracowanie ćw 14b, Onedrive całość, Rok I, II sem, Psychologia emocji i motywacji, Streszczenia
materialy 14b
14b
F2 14B Metastabilność przerzutników
14B
Programowanie robota SCORA-ER 14b, DEFP PK1
Ćwiczenie 14B
Matura Repetytorium PR Quick Test 14B
wykład 14b
Marura Repetytorium PR Quick Test 14B key
14b Węglowodory alifatyczne alkany i cykloalkany
KWPL test rozwiązany 14b,15c
więcej podobnych podstron