
3.3.7a
3.3.7a Exploring a
Vector Graphics
Application (Illustrator)
3.3.7a Exploring a Vector Graphics
Application (Illustrator)
Open Illustrator
To open the program to use in this lab, open your Illustrator program using your
start menu or a shortcut on your desktop.
Viewing artwork
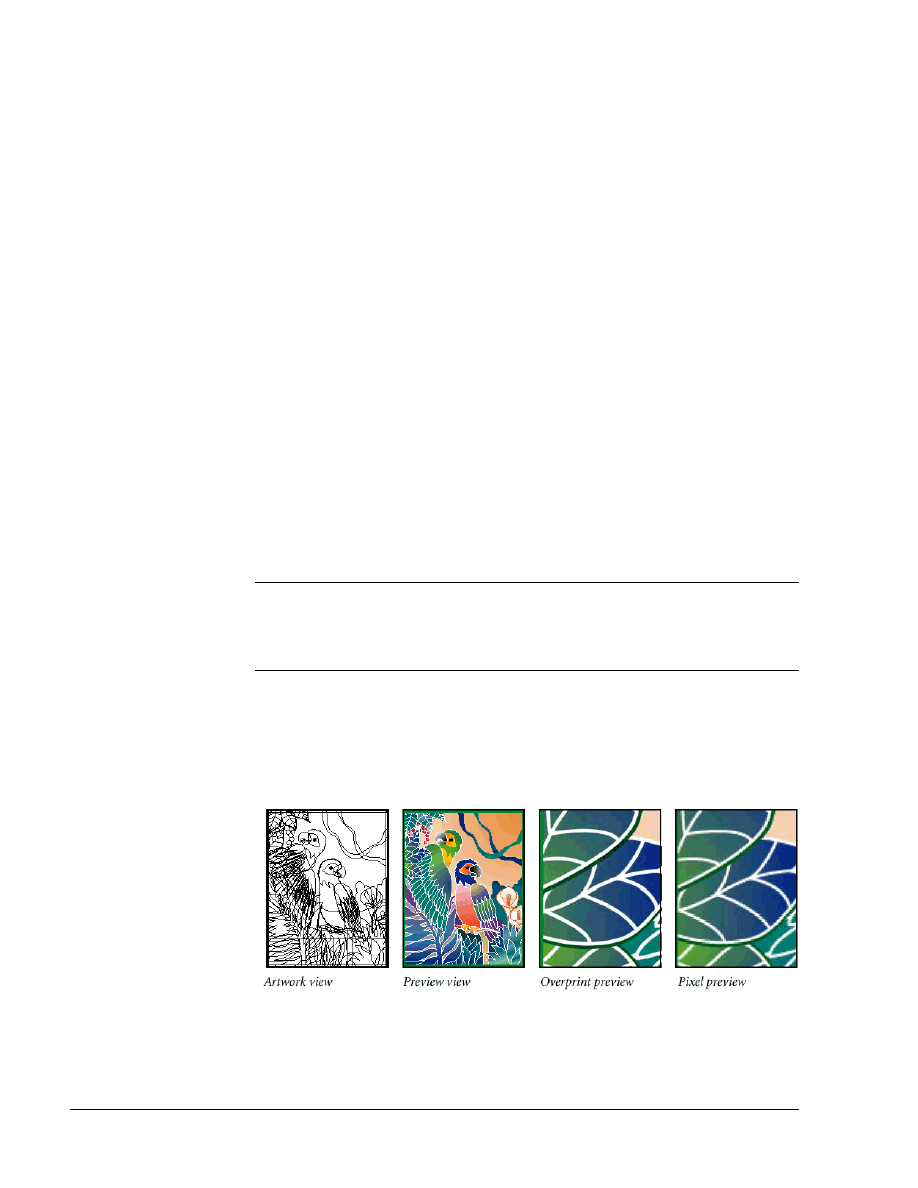
When you open a file, it is displayed in Preview view, which displays artwork
the way it will print. When you’re working with large or complex illustrations,
you may want to view only the outlines, or wireframes, of objects in your
artwork, so that the screen doesn’t have to redraw the artwork each time you
make a change.
1. Choose File > Open, and open the Parrots.ai file. The path to the file is
3_3_7/a/Start/Parrots.ai.
2. Choose View > Outline. Only the outlines of the objects are displayed.
3. Choose View > Preview to see all the attributes of the artwork.
4. Choose View > Overprint•Pixel Closeup to zoom in to a preset area of the
image. This custom view was added to the document.
Note To save time when working with large or complex documents, you can create your
own custom views within a document to quickly jump to specific areas and zoom
levels. You set up the view that you want to save and then choose View > New
View. Name the view. It is saved with the document.
5. Choose View > Overprint Preview to view any lines or shapes that are set to
overprint.
6. Choose View > Pixel Preview to view how the artwork will look when it is
rasterized and viewed on-screen in a Web browser.
For more information on tiling, see “Tiling artwork and adjusting page
boundaries” in online Help.
1-2
Fundamentals of Web Design 1.2—-Lab 3.3.7a
Copyright
2002, Adobe Systems, Inc.

Using the Illustrator tools
The Illustrator toolbox contains selection tools, drawing and painting tools,
editing tools, viewing tools, and the Fill and Stroke color selection boxes. As you
work through the lessons, you’ll learn about each tool’s specific function.
1. To select a tool, either click the tool in the toolbox or press the tool’s
keyboard shortcut. For example, you can press M to select the rectangle tool
from the keyboard. Selected tools remain active until you click a different
tool.
2. If you don’t know the keyboard shortcut for a tool, position the pointer over
the tool to display the tool’s name and shortcut. (All keyboard shortcuts are
also listed in the Quick Reference section in online Help. You’ll learn to use
online Help later in this lesson.)
Copyright
2002, Adobe Systems, Inc.
Fundamentals of Web Design 1.2—Lab 3.3.7a
1-3
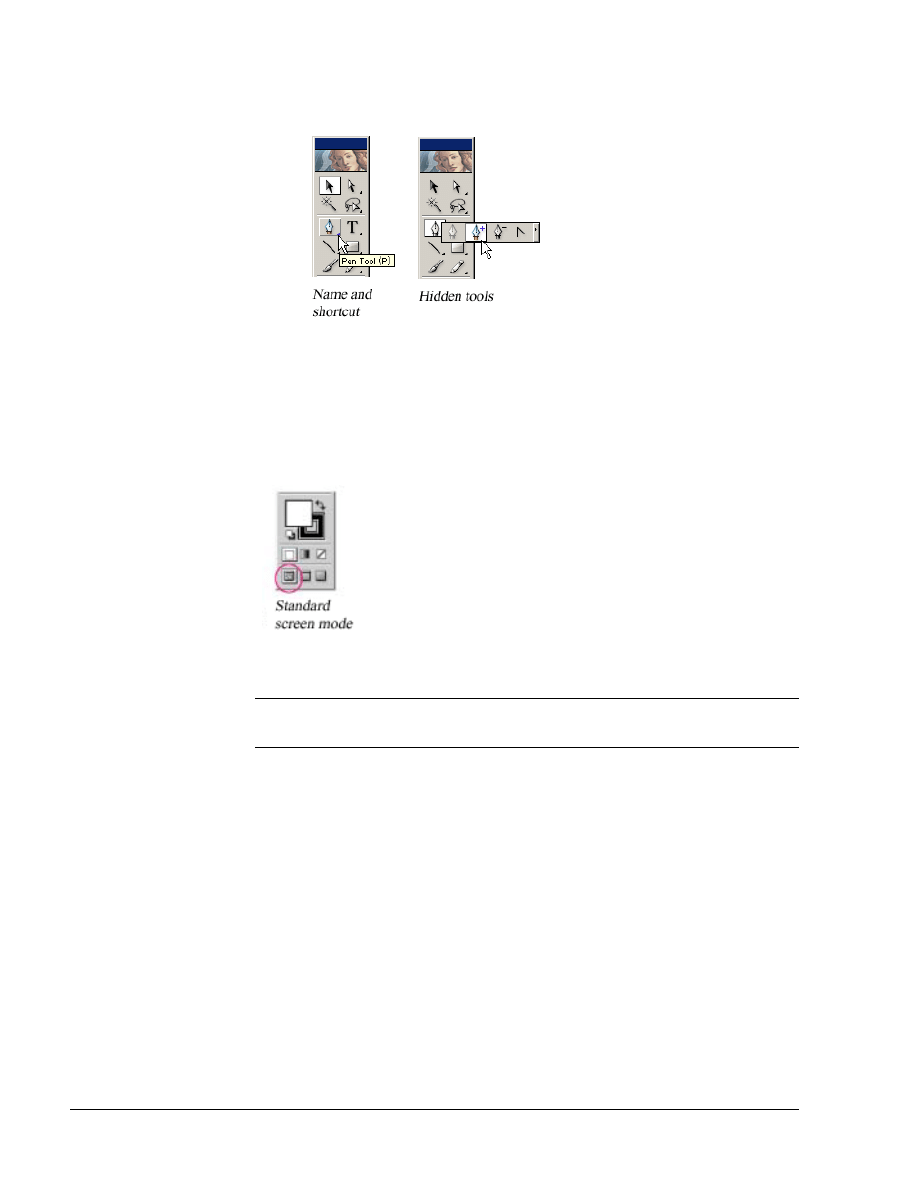
Some of the tools in the toolbox display a small triangle at the bottom right
corner, indicating the presence of additional hidden tools.
3. Select hidden tools in either of the following ways:
• Click and hold down the mouse button on a tool that has additional hidden
tools, then drag to the desired tool, and release the mouse button.
• Hold down Alt (Windows) or Option (Mac OS), and click the tool in the
toolbox. Each click selects the next hidden tool in the hidden tool sequence.
Note When you click a viewing tool to change the screen display of a document, you
must return to the Standard screen mode to see the default work area displayed.
Changing the view of artwork
You can reduce or enlarge the view of artwork at any magnification level from
3.13% to 6400%. Adobe Illustrator displays the percentage of the artwork’s
actual size in the title bar, next to the filename, and at the lower left corner of the
Adobe Illustrator window. Using any of the viewing tools and commands affects
only the display of the artwork, not the actual size of the artwork.
Using the View commands
To enlarge or reduce the view of artwork using the View menu, do one of the
following:
• Choose View > Zoom In to enlarge the display of the Parrots.ai artwork.
• Choose View > Zoom Out to reduce the view of the Parrots.ai artwork.
1-4
Fundamentals of Web Design 1.2—-Lab 3.3.7a
Copyright
2002, Adobe Systems, Inc.
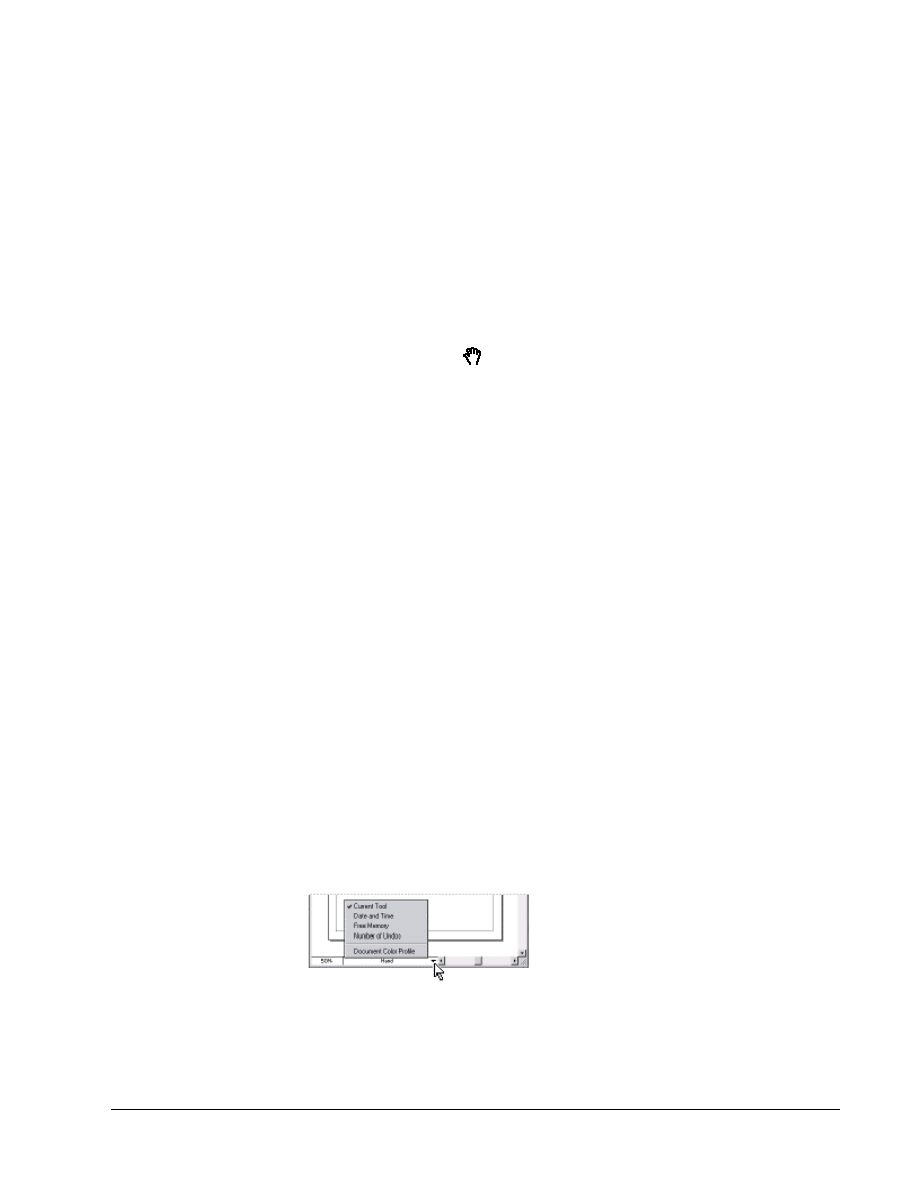
Each time you choose a Zoom command, the view of the artwork is resized.
Additional viewing options appear at the lower left corner of the window in a
hidden menu, indicated by a triangle next to the percentage.
You can also use the View menu to fit the artwork to your screen.
1. Choose View > Fit in Window. A reduced view of the entire document is
displayed in the window.
2. To display artwork at actual size, choose View > Actual Size. The artwork is
displayed at 100%. (The actual size of your artwork determines how much of
it can be viewed on-screen at 100%.)
3. Choose View > Fit in Window before continuing to the next section.
Scrolling through a document
You use the hand tool to scroll to different areas of a document.
1. Click the hand tool (
) in the toolbox.
2. Drag downward in the document window. As you drag, the artwork moves
with the hand.
As with the zoom tool, you can select the hand tool from the keyboard without
deselecting the active tool.
3. Before selecting the hand tool from the keyboard, click any other tool in the
toolbox and move the pointer into the document window.
4. Hold down the spacebar to select the hand tool from the keyboard, and then
drag to bring the artwork back into view.
You can also use the hand tool as a shortcut to fit all the artwork in the window.
5. Double-click the hand tool to fit the document in the window.
Using the status bar
At the bottom left edge of the Illustrator window is the status bar. The status bar
can display information about any of the following topics:
• The current tool in use.
• The date and time.
• The amount of virtual memory (Windows) or free RAM memory (Mac OS)
available for your open file.
• The number of undos and redos available.
• The document’s color profile.
To specify the type of information you want to display in the status line, do the
following:
Copyright
2002, Adobe Systems, Inc.
Fundamentals of Web Design 1.2—Lab 3.3.7a
1-5
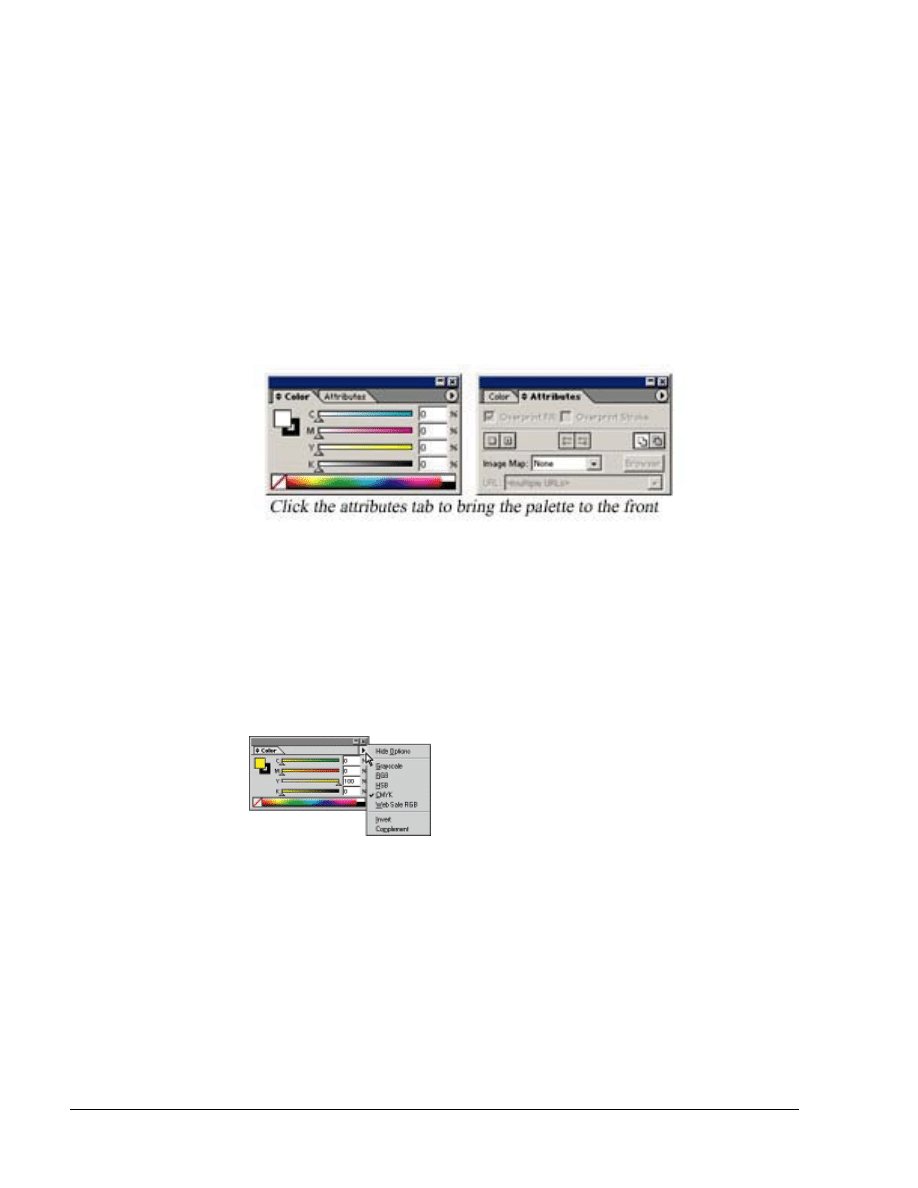
1. Position the pointer over the triangle in the status bar, and hold down the
mouse button.
2. Drag to choose the type of information you want from the pop-up menu.
Working with palettes
Palettes help you monitor and modify artwork. By default, they appear in stacked
groups. To show or hide a palette as you work, choose the appropriatepalette
name under the Window menu. A checkmark will be shown to the left of each
visible palette. You can reorganize your work space in various ways. Try these
techniques:
• To hide or display all open palettes and the toolbox, press Tab. To hide or
display the palettes only, press Shift+Tab.
• To make a palette appear at the front of its group, click the palette’s tab.
• To move an entire palette group, drag its title bar.
• To rearrange or separate a palette group, drag a palette’s tab. Dragging a
palette outside of an existing group creates a new group.
• To move a palette to another group, drag the palette’s tab to that group.
• To display a palette menu, position the pointer on the triangle in the upper
right corner of the palette, and hold down the mouse button.
• To change the height of a palette (except the Align, Attributes, Color, Info,
Options, Pathfinder, or Transform palette), drag its lower right corner.
1-6
Fundamentals of Web Design 1.2—-Lab 3.3.7a
Copyright
2002, Adobe Systems, Inc.
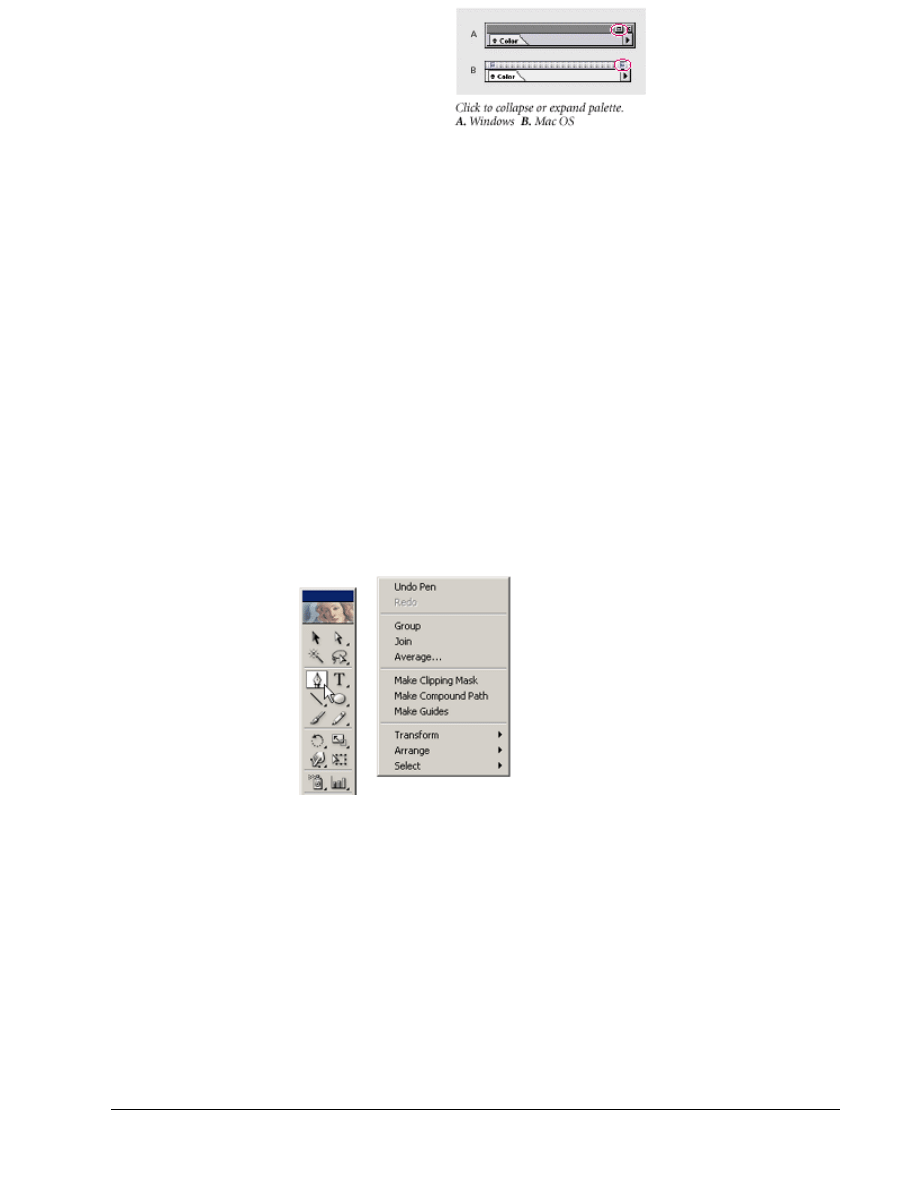
• To collapse a group to palette titles only, click the minimize/maximize box
(Windows) or the resize box (Mac OS); click the box again to expand the
palette group.
• To cycle through the available sizes for a palette, double-click a palette’s tab
or single- click on the double triangles to the left of the palette name. You
can still access the menu of a collapsed palette.
Using context menus
In addition to the menus at the top of your screen, context-sensitive menus
display commands relevant to the active tool, selection, or palette.
To display context-sensitive menus, position the pointer over the artwork or over
an item in a palette list, then click with the right mouse button (Windows) or
press Ctrl and hold down the mouse button (Mac OS). (In Windows, you can also
use context-sensitive Help.)
Here we’ve used the pen tool. Options for the pen tool are displayed in the tool’s
context-sensitive menu. (You access these same options by selecting the Edit or
Object menu.)
Calibrating your monitor
Whether preparing artwork for print or online use, you should begin by
calibrating your monitor. This will ensure the closest possible match between
your colors on-screen and those produced by a printer, a video display, or a
different computer monitor, and also between your colors in Adobe Illustrator
and in other software applications. If your monitor isn’t calibrated, the resulting
colors may not even be close to what you originally saw on it.
To calibrate your monitor with Adobe Gamma, do the following:
1. Make sure that your monitor has been turned on for at least a half hour to
stabilize the monitor display.
2. Set the room lighting at the level you plan to maintain.
Copyright
2002, Adobe Systems, Inc.
Fundamentals of Web Design 1.2—Lab 3.3.7a
1-7

3. Turn off any desktop patterns and change the background color on your
monitor to a neutral gray. This prevents the background color from interfering
with your color perception and helps you adjust the display to a neutral gray.
(For more on how to do this, refer to the manual for your operating system.)
4. Set your monitor to display thousands of colors or more.
5. Launch the Adobe Gamma utility:
• In Windows, double-click Adobe Gamma in Program Files > Common Files
> Adobe > Calibration.
• In Mac OS, from the Apple® Menu, choose Control Panels > Adobe
Gamma.
6. Click to reflect one of the following options:
• Step by Step (Assistant) and click Next for a version of the utility that will
guide you through each step of the process. This version is recommended if
you’re inexperienced creating color profiles. If you choose this option,
follow the instructions described in the utility.
• Control Panel and click Next for a version of the utility that is contained in a
single dialog box. This version is recommended if you have experience
creating color profiles.
1-8
Fundamentals of Web Design 1.2—-Lab 3.3.7a
Copyright
2002, Adobe Systems, Inc.
Document Outline
Wyszukiwarka
Podobne podstrony:
7a) Sarcoptes scabei
zestaw 7a
7a Organizowanie jako funkcja z Nieznany (2)
Language and Skills Test 7A Units 13 14
Matura Repetytorium PR Quick Test 7A key
7a Plan komunikacji ok
7a. Ewidencja kosztów wytwarzania produktów na kontach zespołu 4 - zadania, Licencjat UE, rachunkowo
LTM, LASER 7a, POLITECHNIKA ˙WI˙TOKRZYSKA
7a. Loo
IZOL 19 07 2012 GR 7A
7A
wyklady z GONu na drugiego kolosa, WYKúAD 7a, GOSPODARKA NIERUCHOMOŚCIAMI - sem
KOLOSY, Kolokwium-4, odpA: 1c,2a,3d,4a,5b,6a,7a,8b,9c,10c,11a,12c,13b,14b,15a
ŚrodkiTransportu Dalekiego wykład 7a
Geometria CWICZENIA 7a
KOLOKWIUM 7a
Mikro II W 7a Ł
więcej podobnych podstron