
Create a bootable USB drive from the files of the Restored HBCD
proteuss@sdf.lonestar.org
Introduction
We describe how the files of the restored/extended Hiren’s BootCD (HBCD) can be transferred to a USB
memory stick (flash drive) and how the later can be made bootable using exclusively tools provided by the
HBCD. The quickest and most accurate method is to use Linux command line tools, however Windows can
be also used with equally good results. The restored edition of Hiren’s Boot CD employs a combination of
the bootloaders syslinux and grub4dos; so the method described in Hiren’s web page
1
does not work for the
restored edition. If your computer does not have an optical drive read the relevant section below.
Linux Method
• Insert Hiren’s Restored BootCD, boot the computer from it and select Parted Magic Linux (the 5th
option of the main menu).
• Insert a 4GB (or larger) USB stick.
2
Warning: All data on the USB stick will be erased.
• Open a console window (e.g. LXTerminal) and type the following commands exactly as they appear in
the list bellow after you replace the xx’s with what is appropriate for your USB flash drive e.g. sdb1
or sdc1.
3
Warning: If you get xx wrong you may erase your hard disk.
Command
Explanation
In case the stick has been
already automounted,
umount /dev/sdxx
unmount it first.
mkfs.vfat -F32 -n HBCD /dev/sdxx
Format the stick.
mkdir /mnt/cdrom
Create a CD mountpoint.
mount /dev/sdxx /mnt/usb
Mount the stick.
mount /dev/sr0 /mnt/cdrom
Mount the CD.
Copy files to the stick,
cp -Rfv /mnt/cdrom/* /mnt/usb/
and wait for some time...
syslinux -i -d isolinux /dev/sdxx
Install the bootloader.
dd if=/usr/share/syslinux/mbr.bin of=/dev/sdx
Install the bootloader’s MBR.
parted /dev/sdx set 1 boot on
Make the stick active, i.e. bootable.
sync
Flush any pending buffered data.
• Note: In the last two commands before sync, sdx must be a device e.g., sdb or sdc, and not a
partition sdb1 or sdc1.
• Reboot the computer and test the stick for booting.
1
http://www.hiren.info/pages/bootcd-on-usb-disk
2
The actual capacity needed for HBCD is 2.8 GB. The spare capacity is available to store other files.
3
You can determine the correct device letters with the command: “fsarchiver probe” or “fdisk -l”.
Windows Method
• Insert Hiren’s Restored BootCD, boot the computer from it and select Mini Windows XP.
• Insert a 4GB (or larger) USB stick.
1
Warning: All data on the USB stick will be erased.
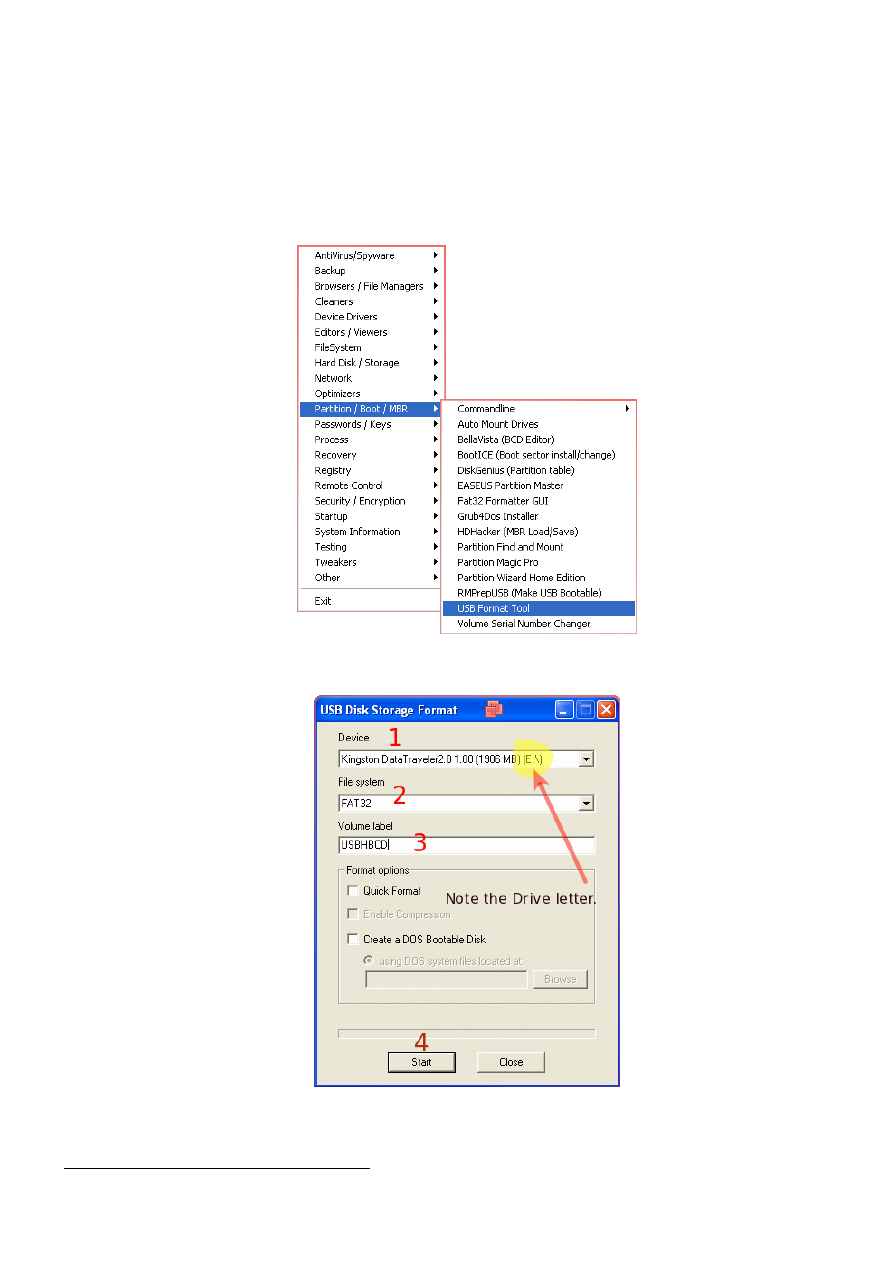
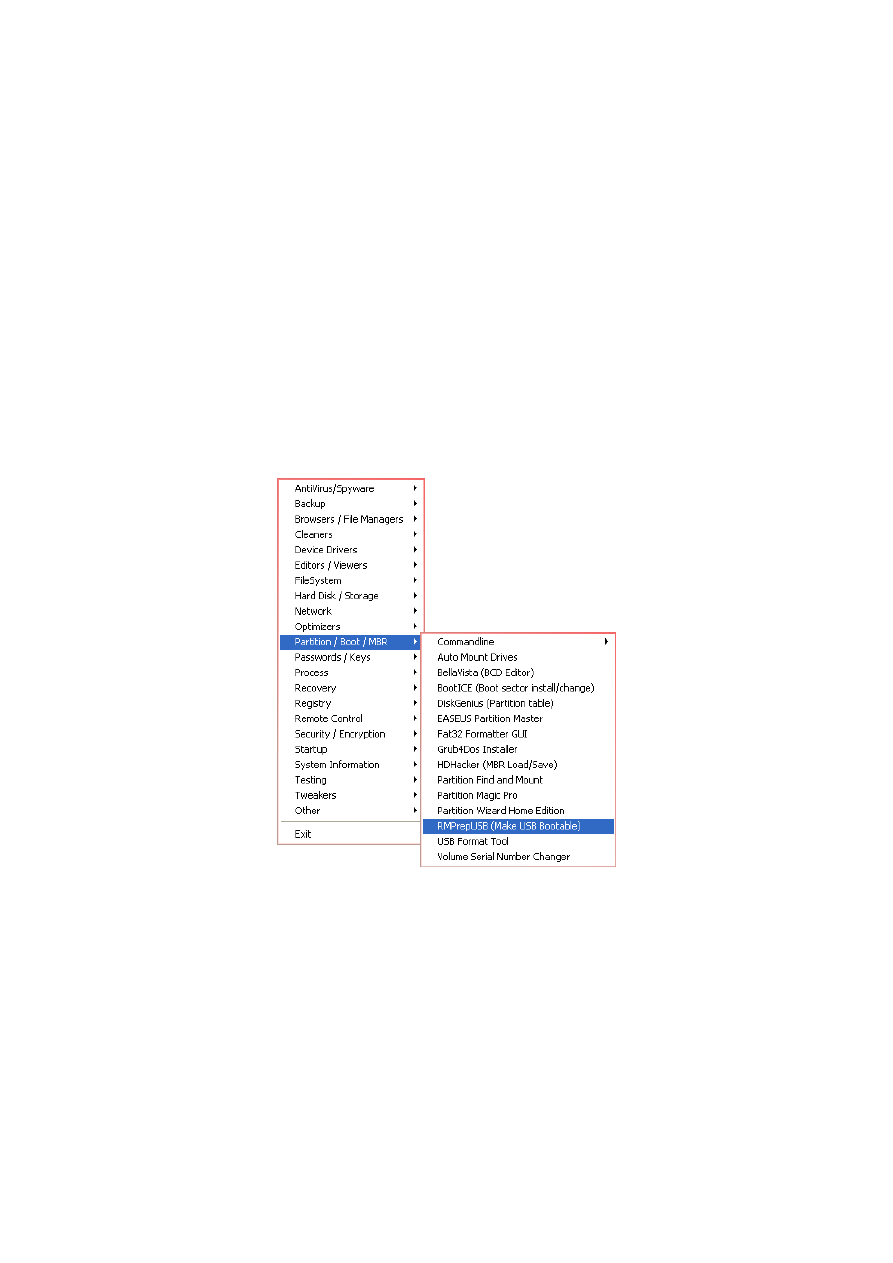
• Run the USB Format Tool, found in the HBCD Program Launcher, under the item Programs - Parti-
tion/Boot/MBR,
• Format the stick as shown.
• Determine the letters of the CD and USB drives (Look in My Computer).
1
The actual capacity needed by HBCD is 2.8 GB. The spare capacity is available to store other files.
• Copy all the files from CD to USB. For this you may “Drag-and-Drop”(slow) or use one of the
utilities found in the HBCD menu, like FastCopy or TeraCopy (look for them under Backup) or Total
Commander, or even use the dos command: xcopy X:\*.* Y:\ /E, where X and Y are CD and USB
letters respectively.
• Go to My Computer, find the CD, right click on the bootprog subfolder and then ’Command Promt
Here’.
• In the console window type the command:
syslinux.exe -maf -d isolinux Y:
where Y: is the USB drive. This command installs the bootloader, the MBR and activates the USB
for booting.
• Safely remove the stick and test for booting.
Alternative Windows Method
The utility RMPepUSB (found in Partition/Boot/MBR of the HBCD program launcher menu) can format,
copy the files, and install the bootloader in one go. However it takes a very long time to copy the files.
• Set the utility’s options as shown below and click Prepare Drive. Unless you are familiar with this
utility do not meddle with any of the other settings.
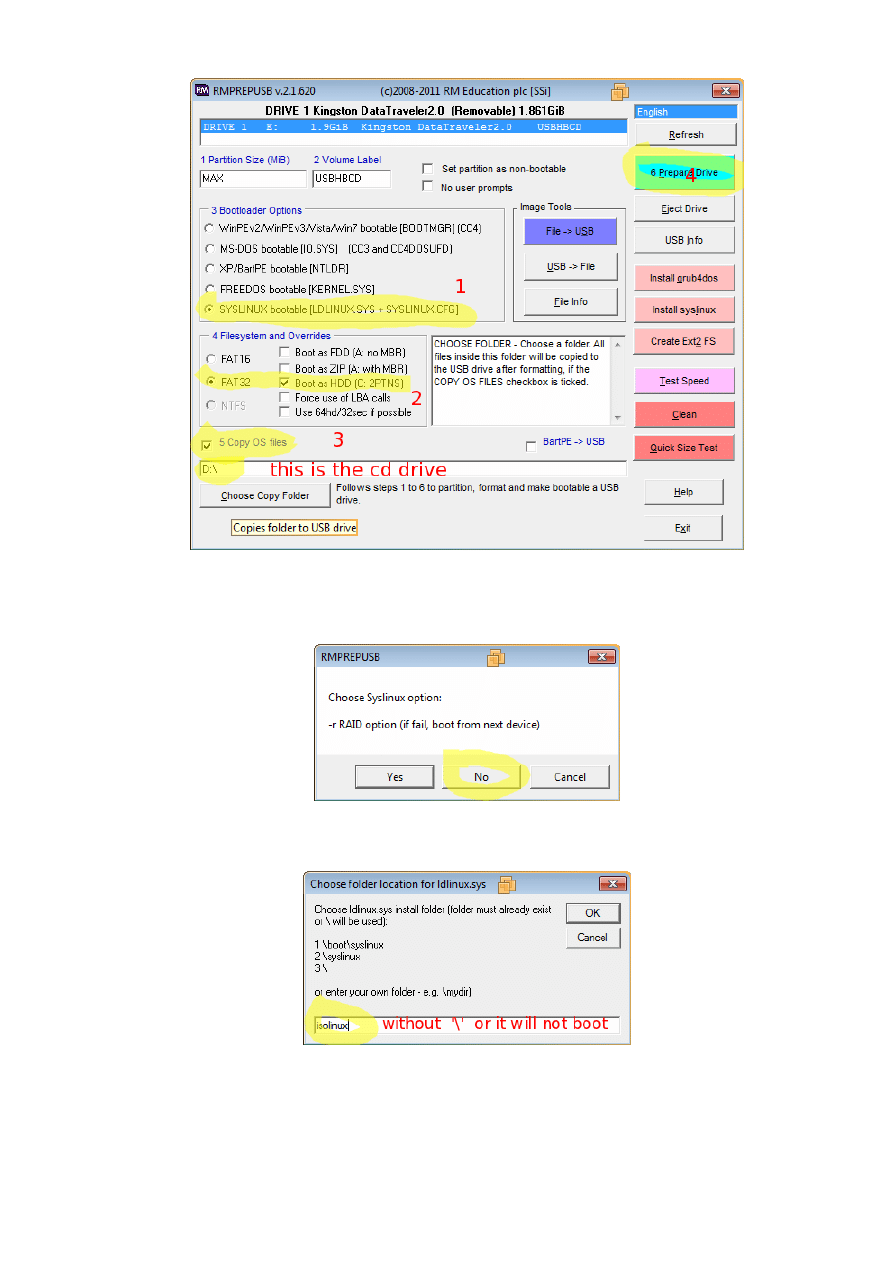
• Wait (copying the files takes a long time with this utility; so be patient) and, when prompted, answer
the two questions as indicated in the screenshots shown below:
• When asked type the bootloader folder name: isolinux (without backslash).

Computers without optical drive
If your computer has no optical drive and has Windows XP or Windows 7 installed you have the following
options:
• Use a CD emulator such as Alcohol 120% or Daemon Tools to mount the .iso, start the HBCD Program
Launcher and run the the utilities from the emulated optical drive, as described above. The utilities
are portable and work with all Windows versions.
• Use Virtual PC software such as VMware Workstation, VirtualBox or Qemu to create a virtual PC in
your computer and boot the .iso directly. In this case any of the 3 above methods are possible.
If the computer has only Linux, then you need to have the partition editor parted and the bootloader syslinux
installed. Test their availability with:
parted --version
and
syslinux --version (need >4.0).
If not available install them from your distro’s repositories.
Then follow the instuctions as above, but instead of the cdrom, mount the .iso with a command like:
mount -o loop,user <path-to-iso-file.iso> /mnt/cdrom
Wyszukiwarka
Podobne podstrony:
01 Montaż instalacji zimnej wody i ciepłej wody użytkowej
00 usb instalation
Jak utworzyć startowy Windows 7 na USB instalacja
01 samouczek instalacji
cw 01 linux instalacja
XP USB Installer
usb instalation
systemy operacyjne cw 01 linux instalacja
00 usb instalation
Universal USB Installer – Easy as 1 2 3
01 Montaż instalacji zimnej wody i ciepłej wody użytkowej
Cwiczenie 01 Instalowanie systemu Windows 2003
88 Nw 01 Instalacje antenowe
Gotowy Windows do instalacji na zewnętrznym dysku USB
15 DHCP i wykrywanie usterek NT, 01 Instalowanie serwera DHCP, Zarządzanie użytkownikami i grupami
Instrukcja-2-instalaja prztwornika USB, Opis instalacji programu:
kombi siedzenie naprawa stuck rear seat 01 wagon removing installing pull cable rear backrest
więcej podobnych podstron