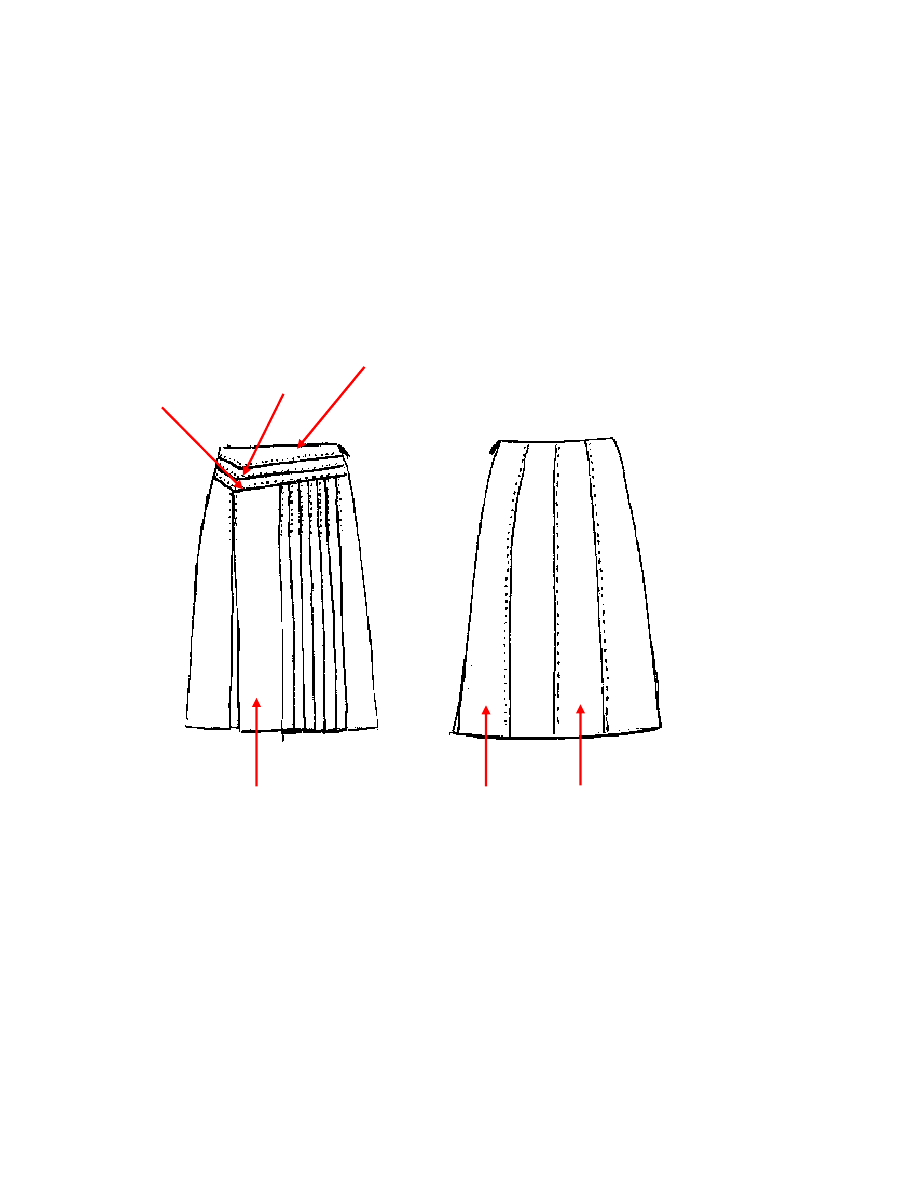
5+1 Pleats Skirt by AnaJan
Instructions
A skirt with one double-folded pleat on the left thigh, and five pleats on the right thigh.
Size 40 (waist 76cm, hips 100cm).
Note: the technical drawing shows six pleats on the right, while the pattern actually includes five
pleats. Also, while I was sewing the skirt, I noticed that the front skirt panel is approx. 2cm
longer than it is supposed to be, sorry for that. You can crop the extra length after you sew the
pieces together.
Notions:
• Light-weight wool, or any fabric that drapes well (1.30m x 1.40m)
• Lining (0.60m x 1.40m)
• Interfacing
• Invisible zipper
• Thread
• Topstitch thread
2. Top front yoke
3. Middle front yoke
4. Bottom front yoke
6. Back central godet
1. Front skirt panel
5. Back side godet
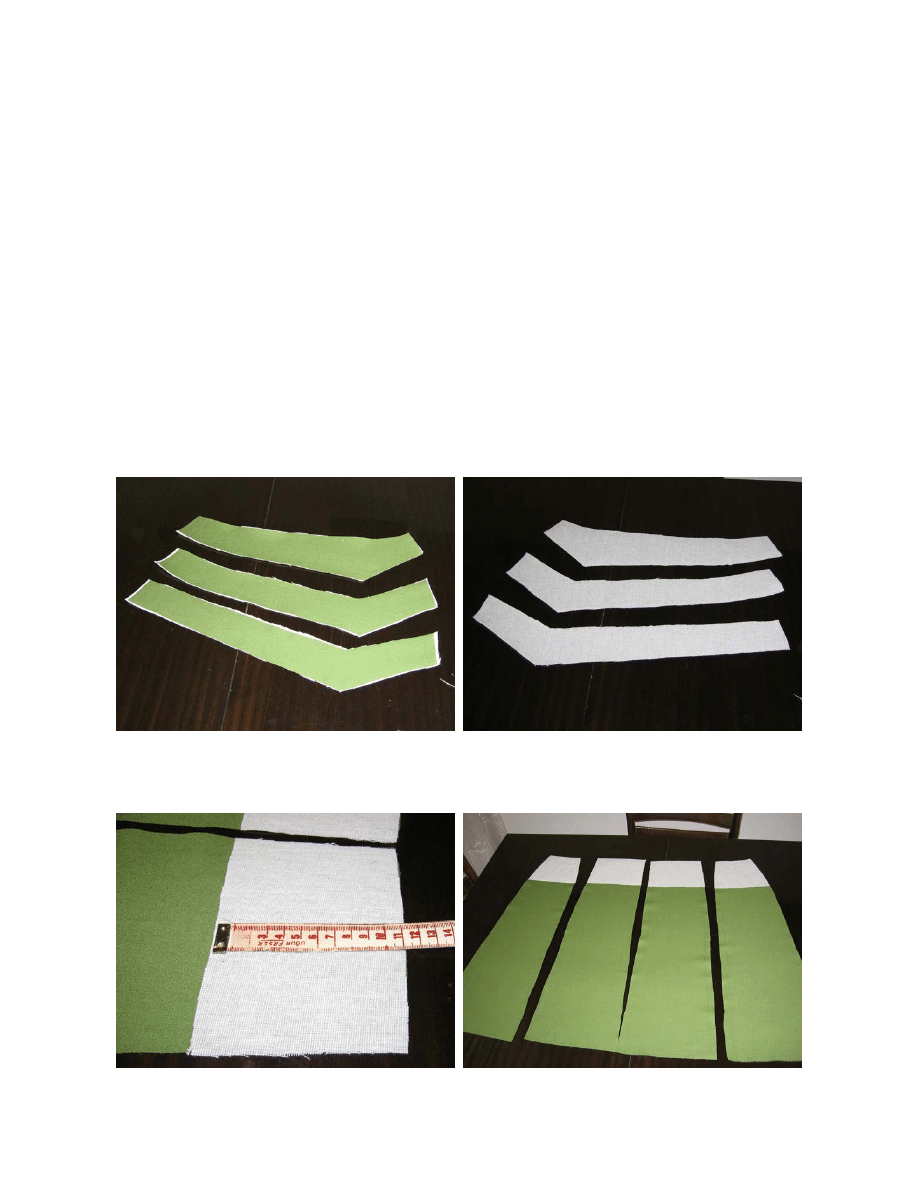
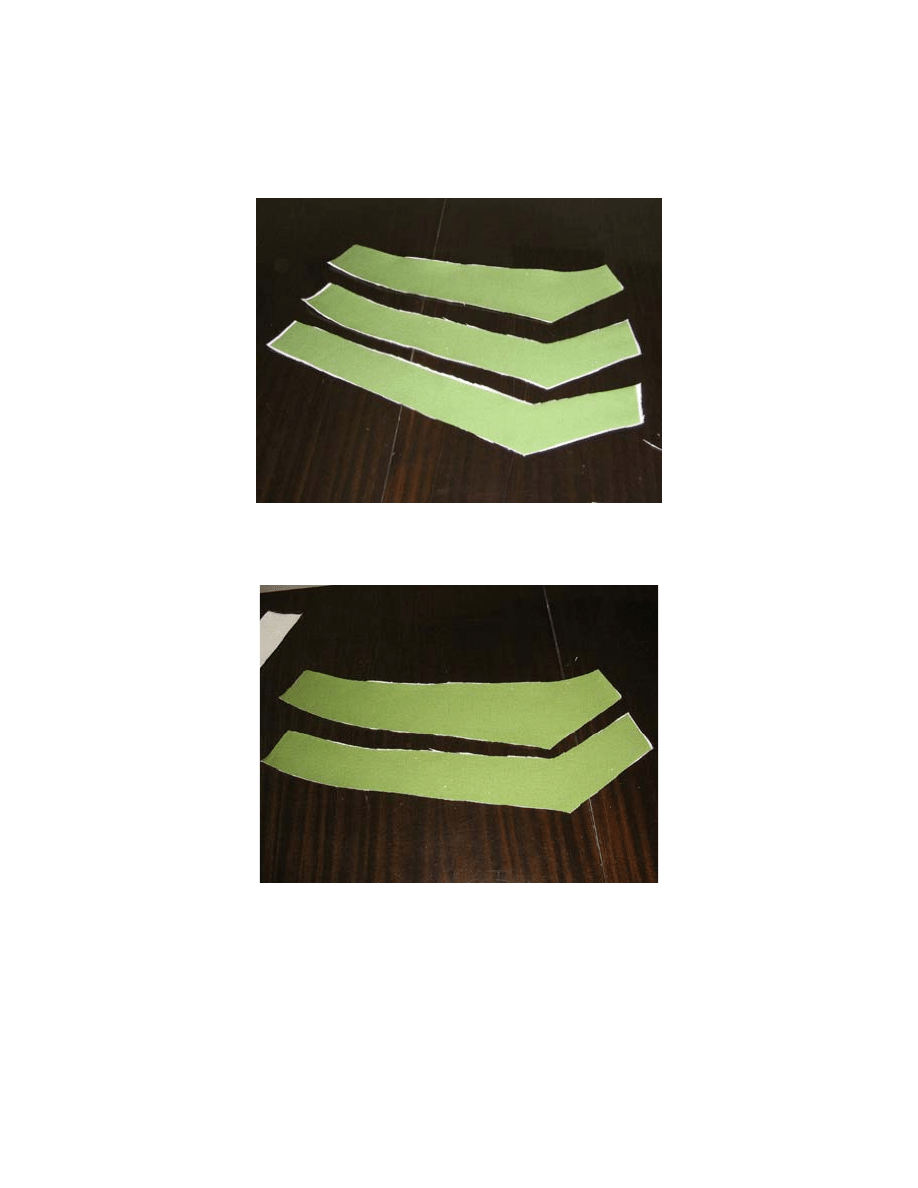
Cutting pieces – fashion fabric
The pattern does not include seam allowances. Before cutting the fabric, add 1.5cm wide seam
allowances (2cm for the bottom hem).
• Front skirt panel, cut once.
• Top front yoke, cut once
• Middle front yoke, cut once
• Bottom front yoke, cut once
• Back side godet, cut twice
• Back central godet, cut twice
Interfacing the pieces
The front yoke pieces and the back godet pieces need interfacing.
The front yoke pieces should be completely interfaced, as displayed on the images bellow. The
interfacing is applied to the wrong side of the fashion fabric.
The back pieces of fashion fabric should be interfaced in the waist area, as displayed on the
images bellow.
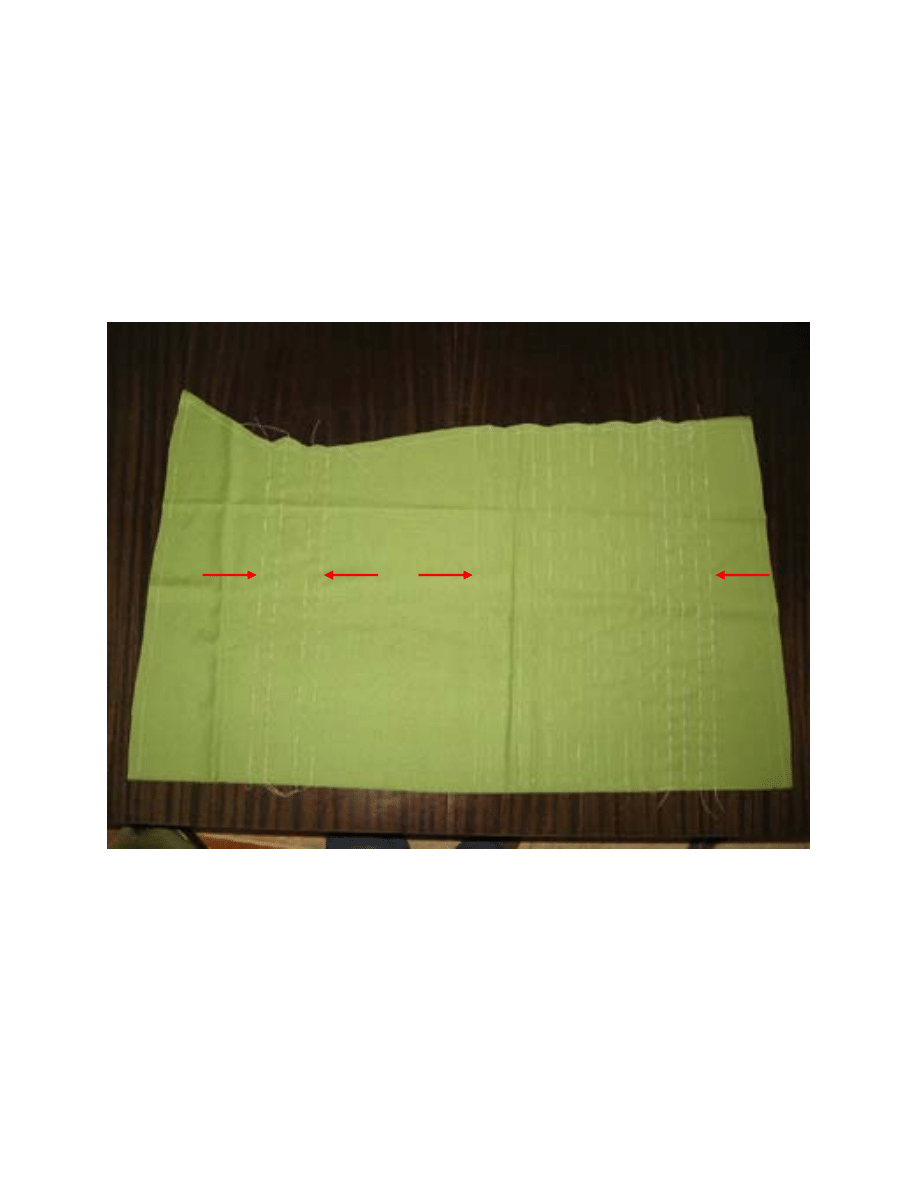
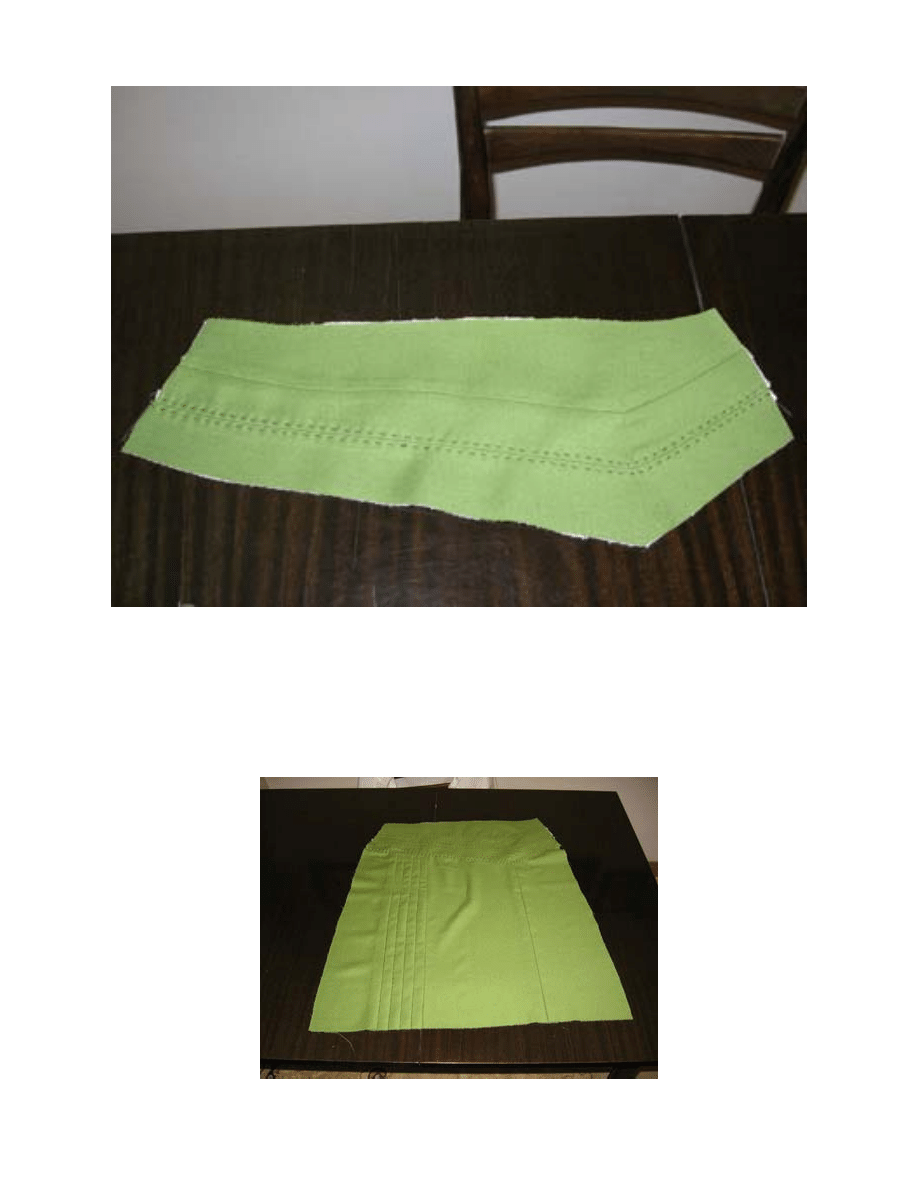
Pleats
When transferring the front panel pattern to the fashion fabric, make sure you transfer all the
pleat lines as well. You should have 4 pleat lines on the left and 17 pleat lines on the right side of
the font panel.
The image bellow displays front skirt’s panel wit pleat lines markings on it. Note that pleat lines
on the left will be referenced as LL1 – LL4 (left line) in the further text, starting from left to
right. The pleat lines on the right side of the panel will be referenced as RL1 – RL17 (right line)
in the further text, starting from right to left.
LL1
LL4
RL17
RL1
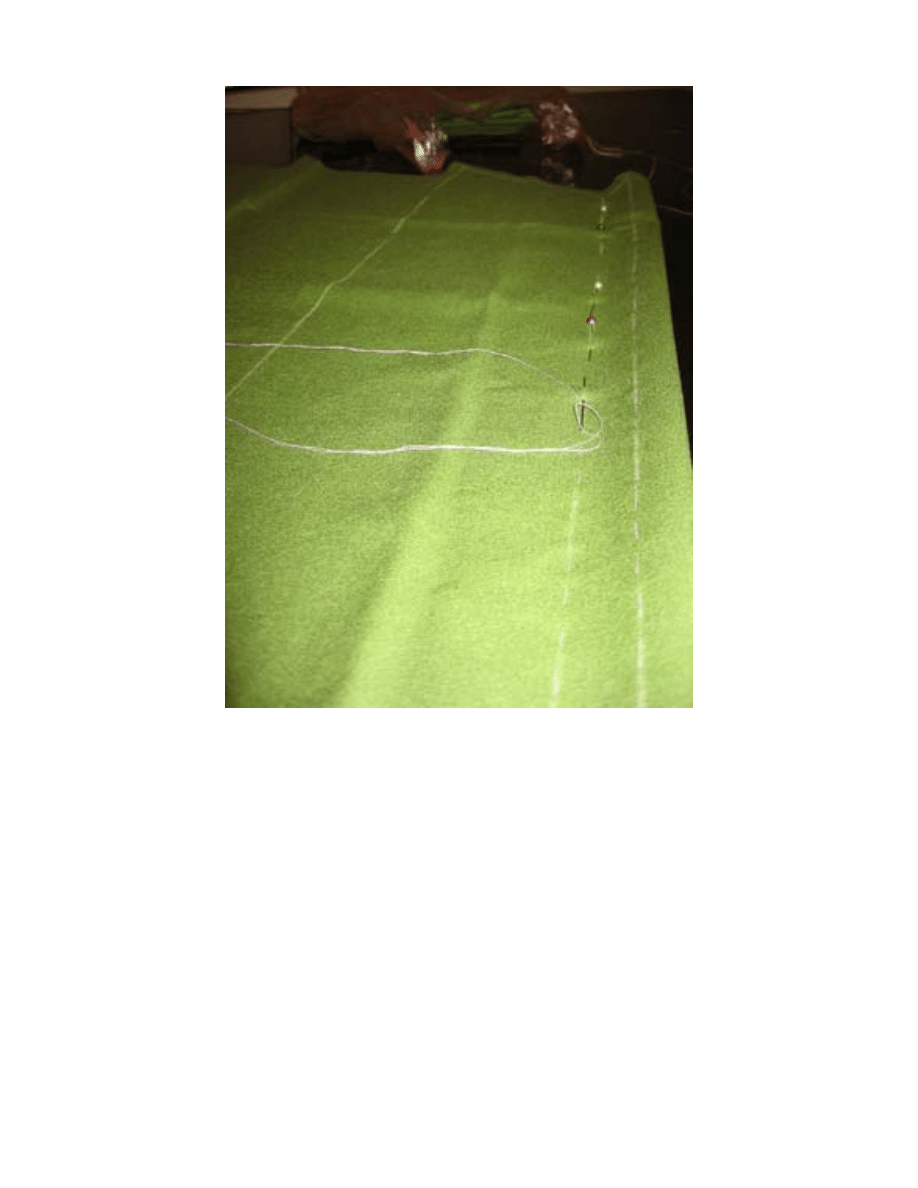
The left pleat
Fold the fabric, with right sides together, and hand baste it, running your stitches through lines
LL1 and LL4. It is important to perfectly match the LL1 and LL4 lines. Make short stitches,
approximately 5mm long, and secure the beginning and the end of the stitch line so that it won’t
get loosen.
Tip: pin the fabric in place first, and then hand - baste it. Start from the skirt’s hem line and baste
towards the waist line.
The pleats on the right
Fold the fabric, with right sides together, and hand baste it, matching the lines RL2 and RL4. For
all five pleats, match the following lines:
• RL2 – RL4
• RL5 – RL7
• RL8 – RL10
• RL11 – RL13
• RL14 – RL15
After you have finished the hand – basting process, your front panel should look as on the picture
bellow.
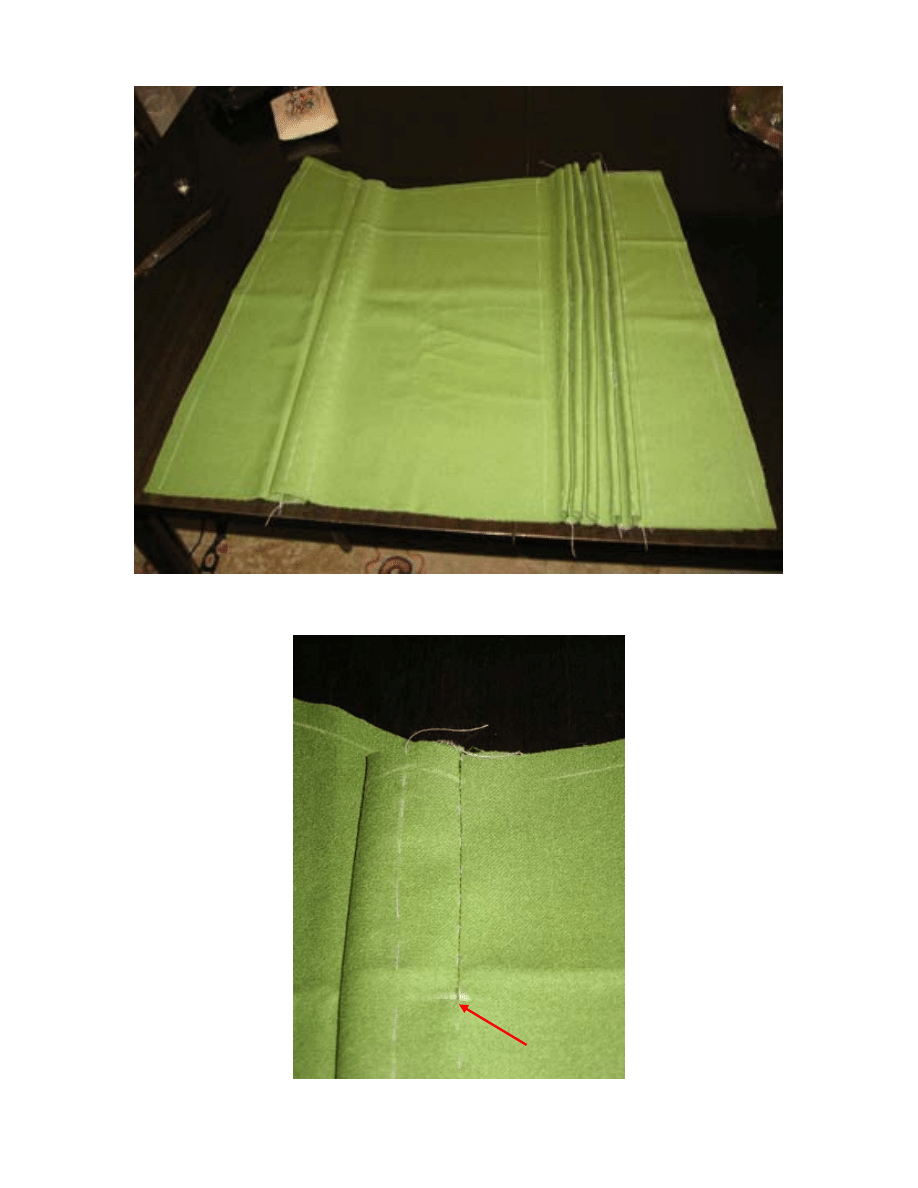
Stitch every pleat, starting from the top of the skirt panel to the pleat stitch notch.
Pleat stitch notch
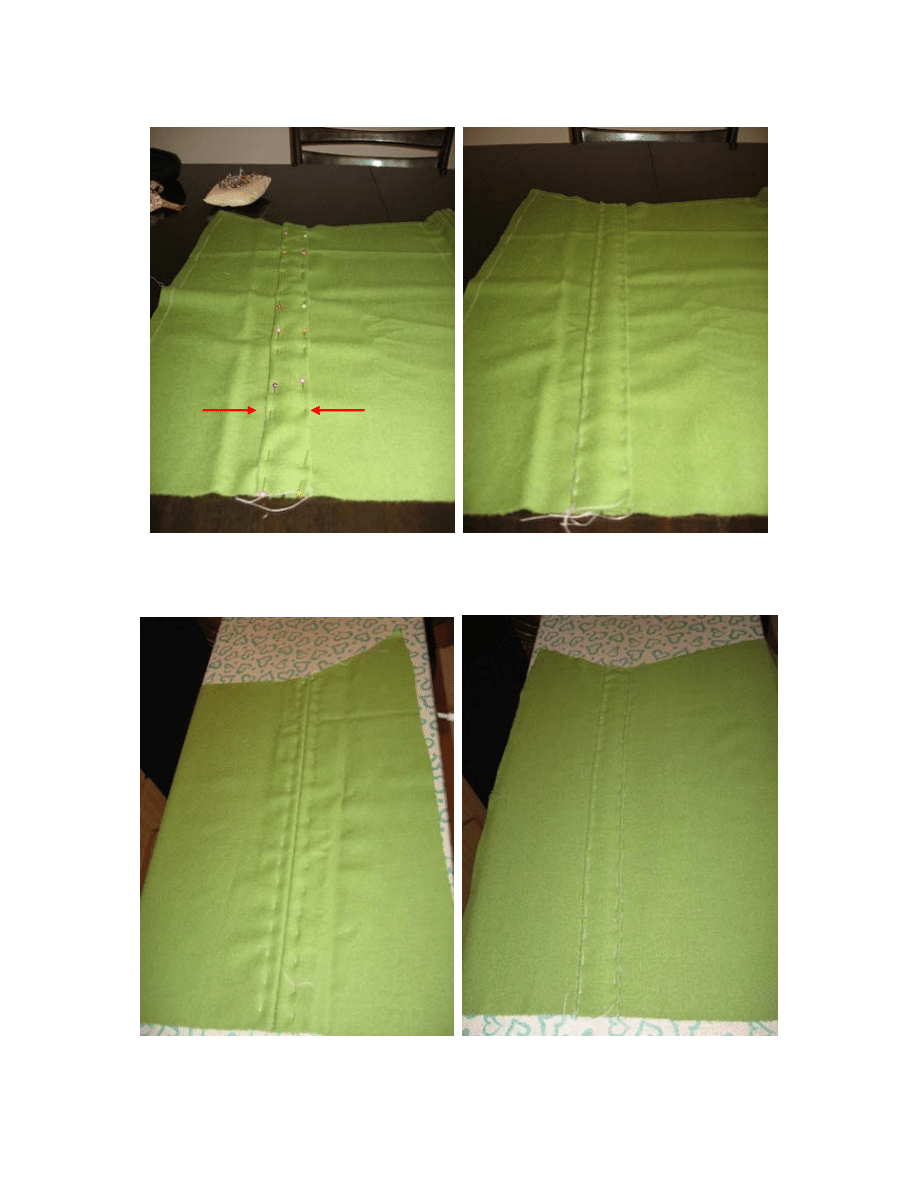
After stitching the pleats, hand – baste the left pleat following the LL2 and LL3 pleat lines.
LL2
LL3
Press the pleats
The left pleat, before and after pressing.
The pleats on the right side of the panel should be pressed one by one. Fold the fabric so that the
pleat lays flat on the pressing board and press the pleat. Repeat the process for every pleat.
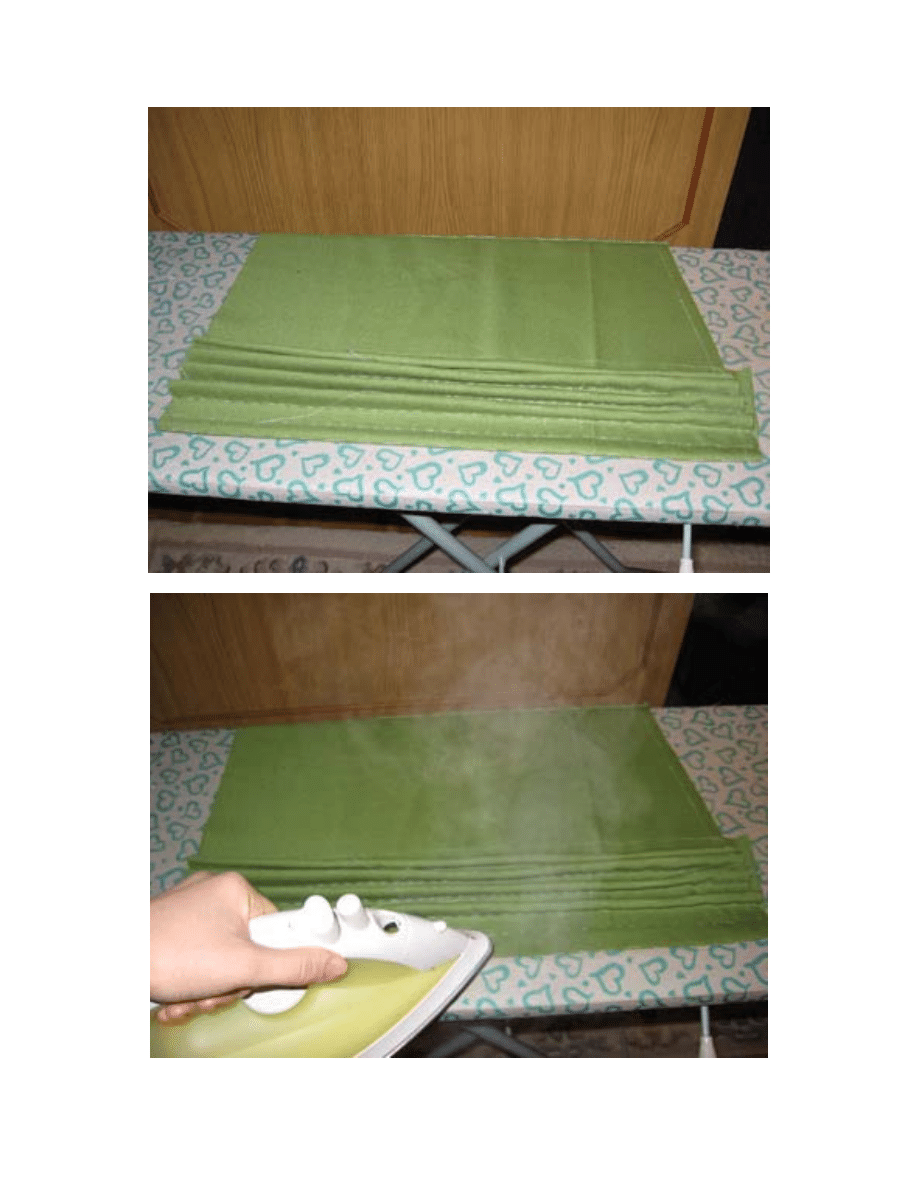
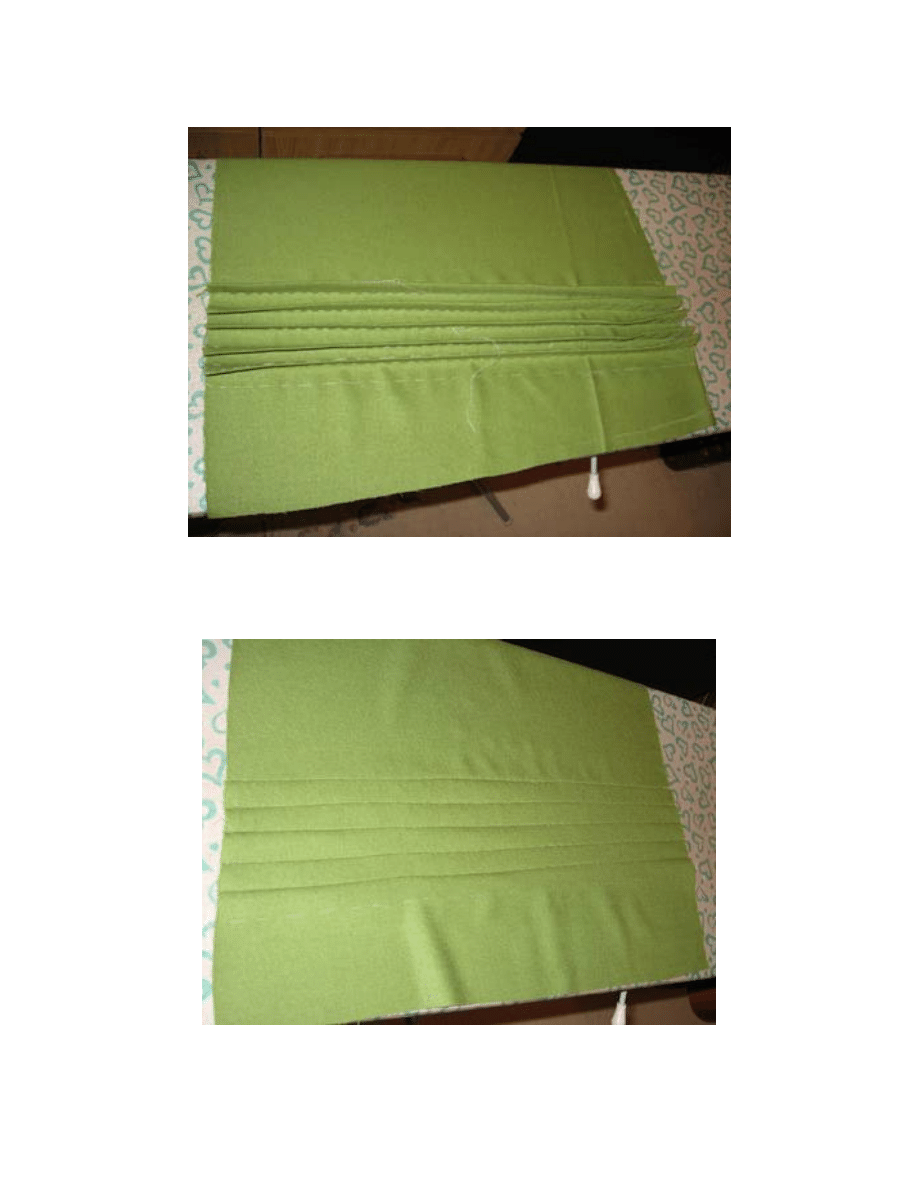
This is how your pleats should look like after the pressing process.
Place your fabric on the pressing board with the right side up. Turn the inner pleats to the right
(the basted stitches should be positioned to the left of the pleats). Starting from the left to the
right press each pleat, flattening the basting line. After pressing, your panel should look as on the
picture bellow.
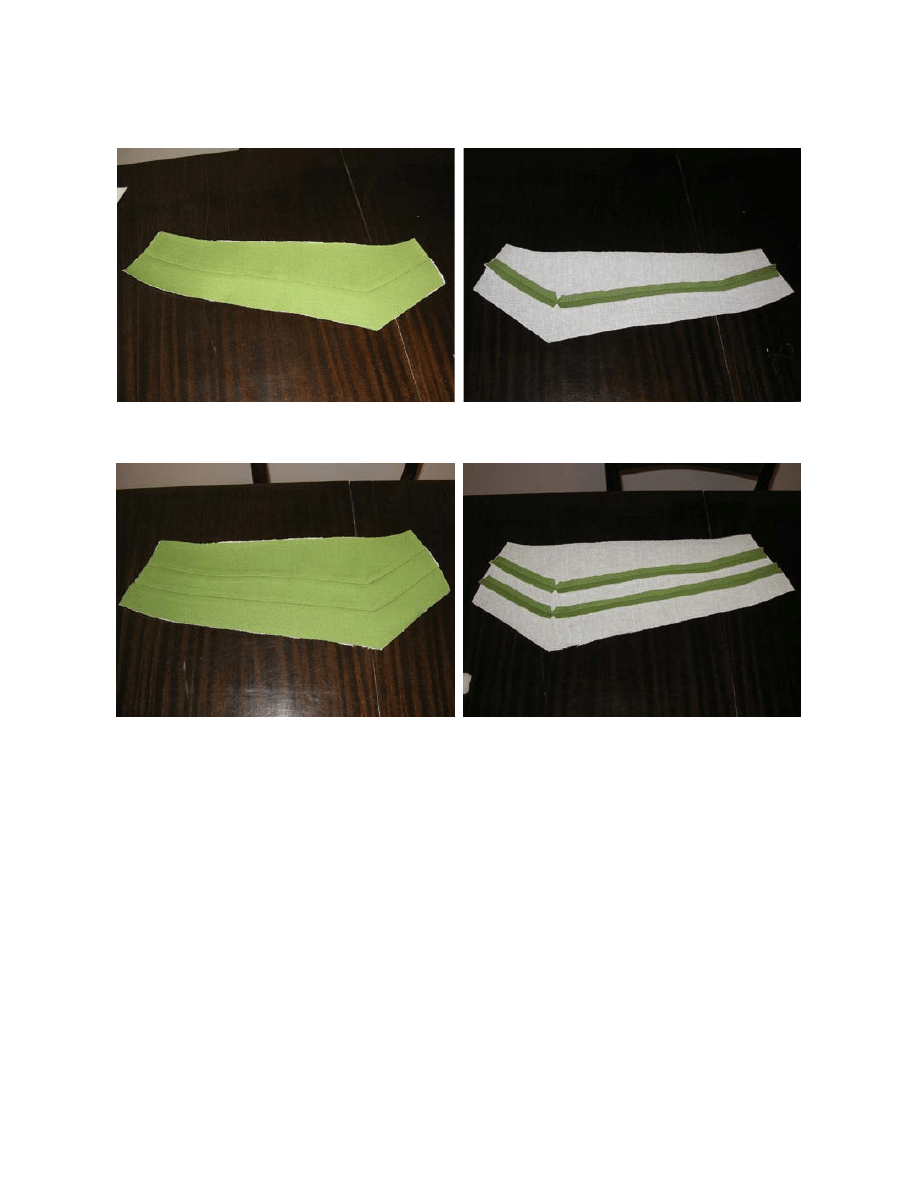
Front Yoke
Front yoke is consisted of 3 yoke parts.
Start by sewing the Top yoke to the Middle yoke. The yoke pieces have pointy corner. You have
to prepare the upper and lower yoke pieces for sewing.
On the lower yoke piece, cut the fabric to make a scotch. Scotch should be cut near the sewing
line, but should not cut the sewing line. On the upper yoke piece, cut of the corner point. Again,
the cut should end up near the sewing line, but should not actually cut the sewing line.
Tip: Use scissors with very sharp points. If you don’t have them, you can use the manicure
scissors as well.
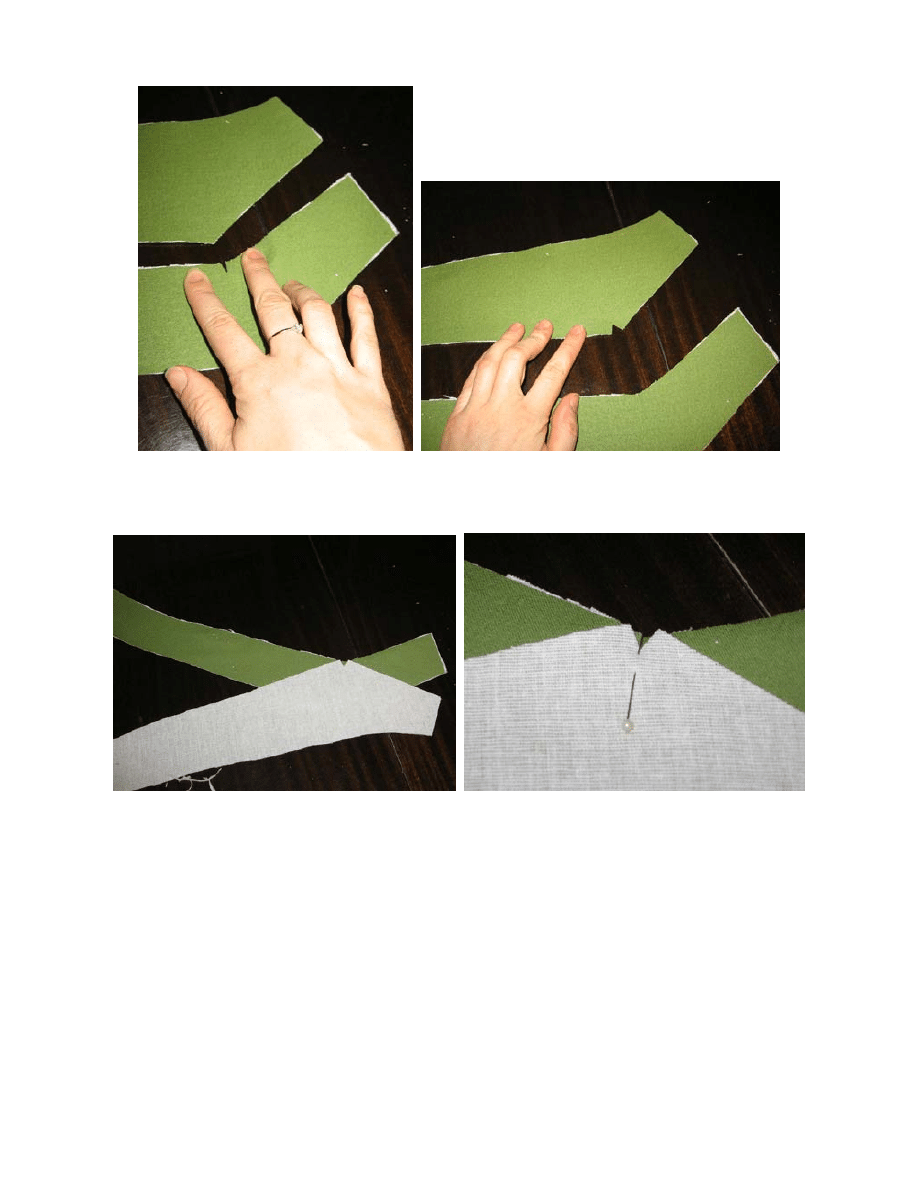
With right sides together, position the upper yoke piece over the lower yoke as shown on the
pictures. Scotch points should match. Pin the scotches.
Starting from the shorter side, pin the fabrics together. Pin the longer sides together. The longer
sides of the yoke are bit curvy. You will have to slightly gather the seam of the lower yoke part.
Make sure you didn’t make the ruffle while gathering the fabric.
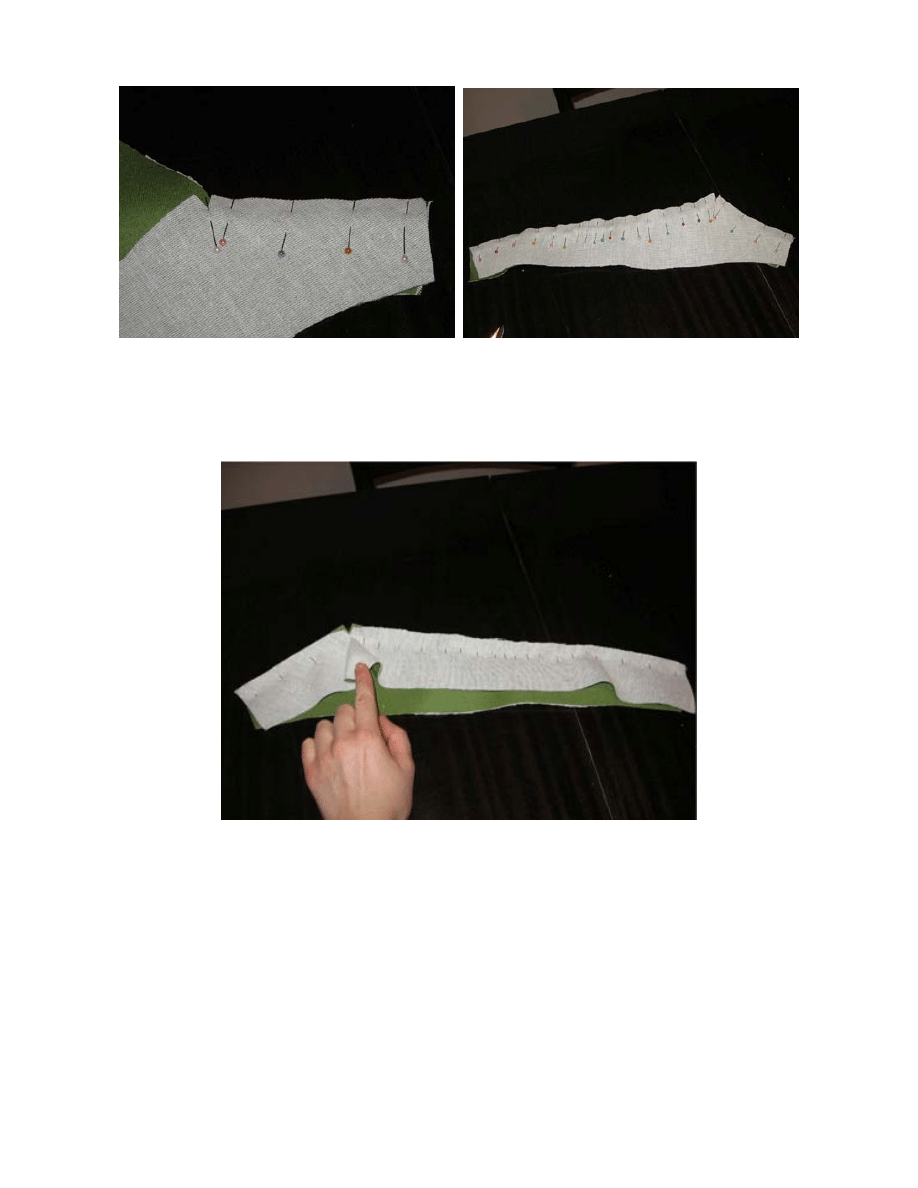
The image bellow displays the yoke pieces flipped over so that the upper yoke piece stands next
to the table. Note how much bulk the lower yoke piece creates. Sew the yoke pieces having them
positioned as displayed on the image (with upper yoke piece down). This way you will have
more control over the bulk.
After sewing, press seams open. To reduce bulk, clip the extra fabric you have at the corner
point.
Repeating the described procedure, sew the Middle yoke piece to the Bottom yoke piece.
Top stitching
After you have sewn the yoke pieces together, you can topstitch the yoke. Use the topstitching
thread that is much thicker than the sewing thread. Keeping a small and constant distance from
the seam line and making short stitches (approx. 4mm long), topstitch the yoke by hand.
Tip: I didn’t have the topstitching thread, so I threaded the needle with 4 threads of sewing
thread.
Front skirt’s panel
Repeating the process described under the Front Yoke chapter, sew the front yoke to the front
panel. Clip corners to reduce bulk and press seams open. Topstitch the seam line. Remove the
basting thread from the pleats. Topstitch the pleats’ seam lines.
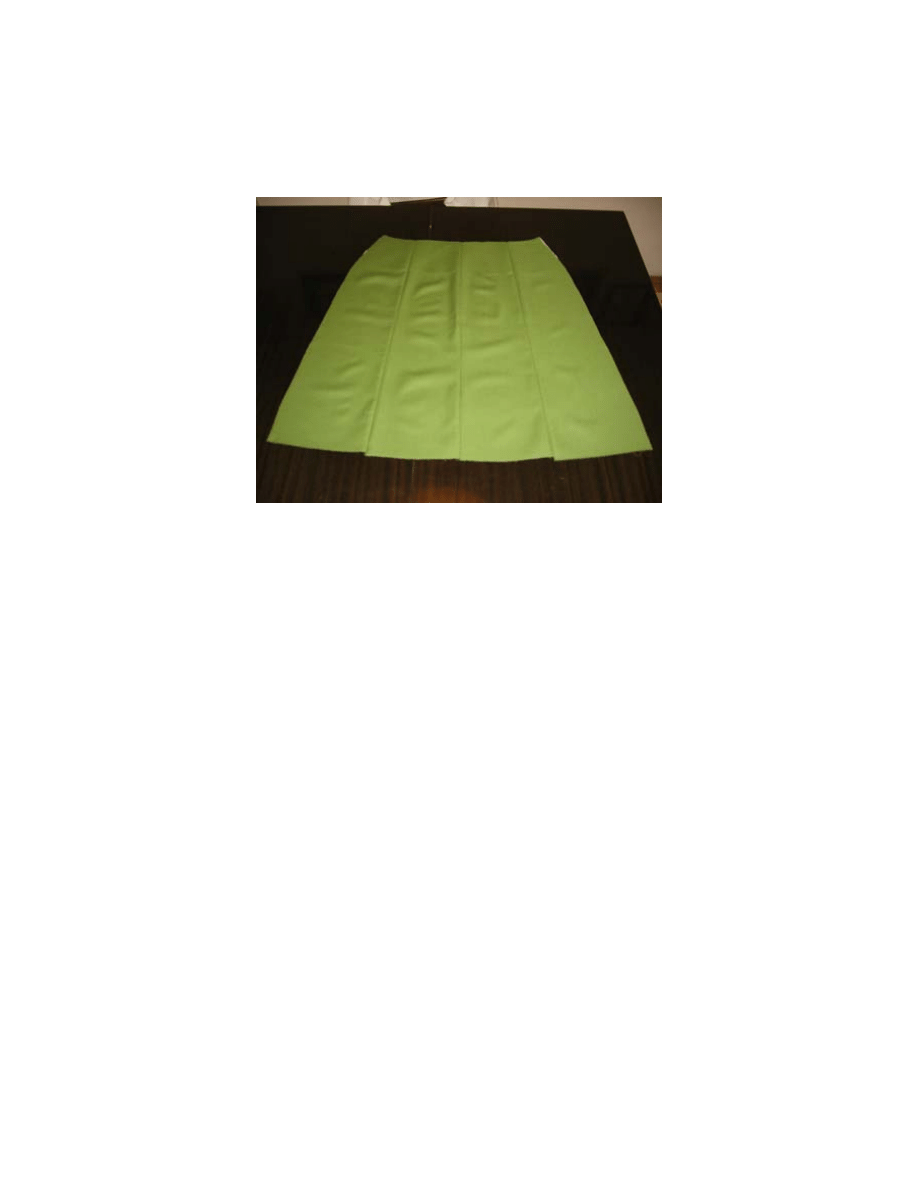
Back skirt’s panel
Sew the central godets together. To each side of the sewed godets sew the back side godets.
Press seams open.
The lining and inside yoke
Note: When drafting the pattern, I forgot to draft separate lining pieces, as I usually draft the
lining directly from the skirt panels. So, I’ll show you the way to draft the lining. The lining
should have a simple shape (pleats and godets are unnecessary).
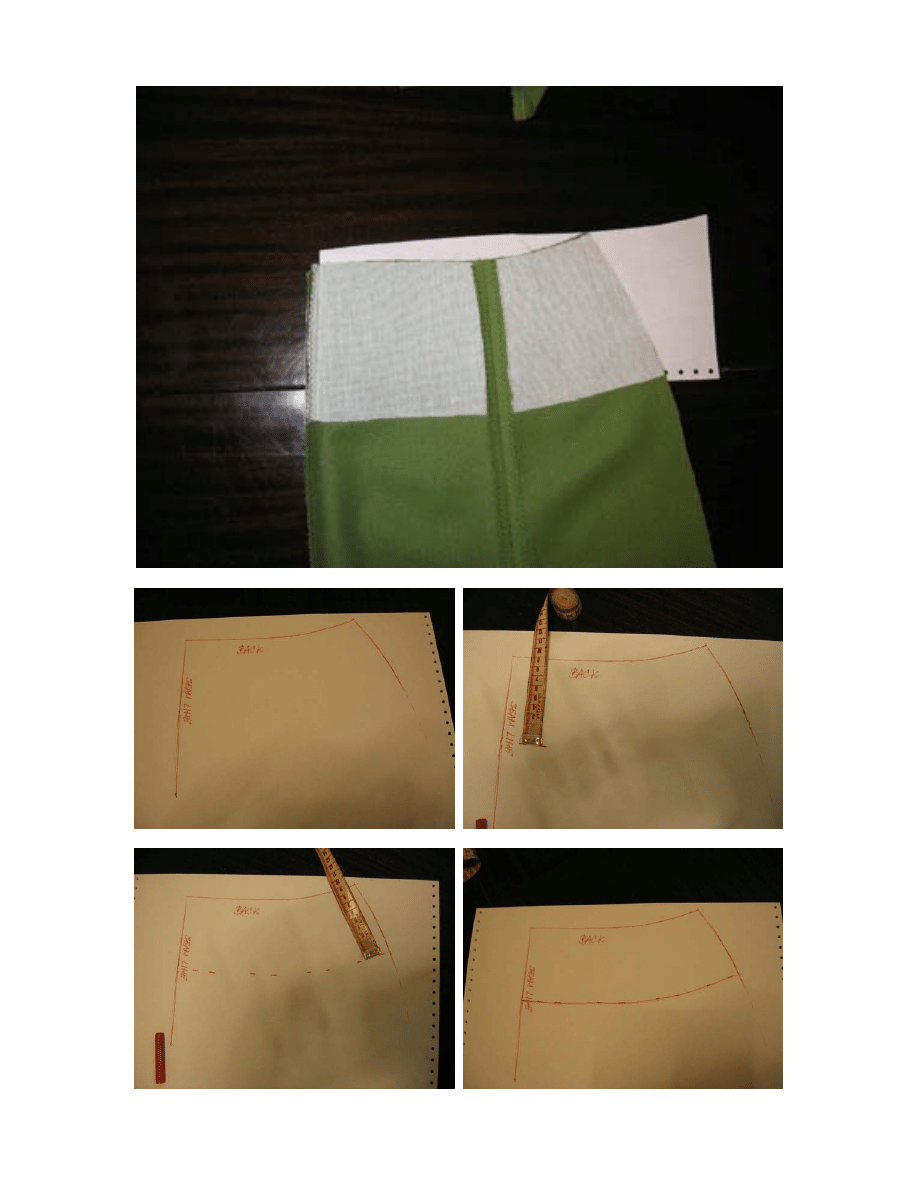
Drafting the inside yoke
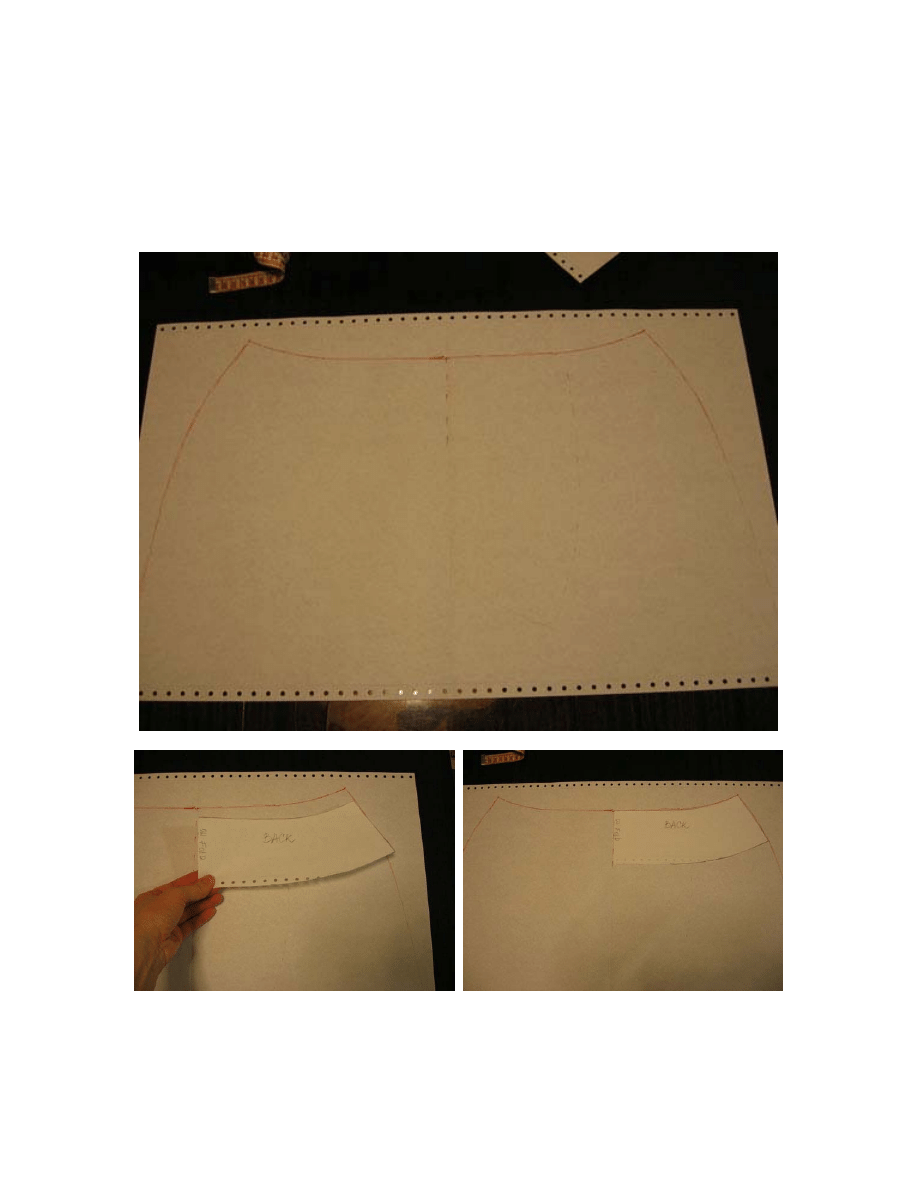
With the right sides together, fold the back panel following the central godet seam. Take a piece
of paper and place it under the fabric. The waist area is of interest, so trace the panel’s shape –
top seam, side seam, and central seam. Using your top edge as a reference, mark a 9cm distance
from the top. Make several marks, along the top line’s length.
Repeat the process for the front panel. Now you have the inside yoke pieces.
Note: The yoke pieces are drafted with seam allowances on top and side. The bottom line of the
yoke represents the seam line, so when cutting the fabric, add 1.5cm seam allowance to the
bottom line.
Cut your fabric to make the yoke.
Interface the yoke pieces.
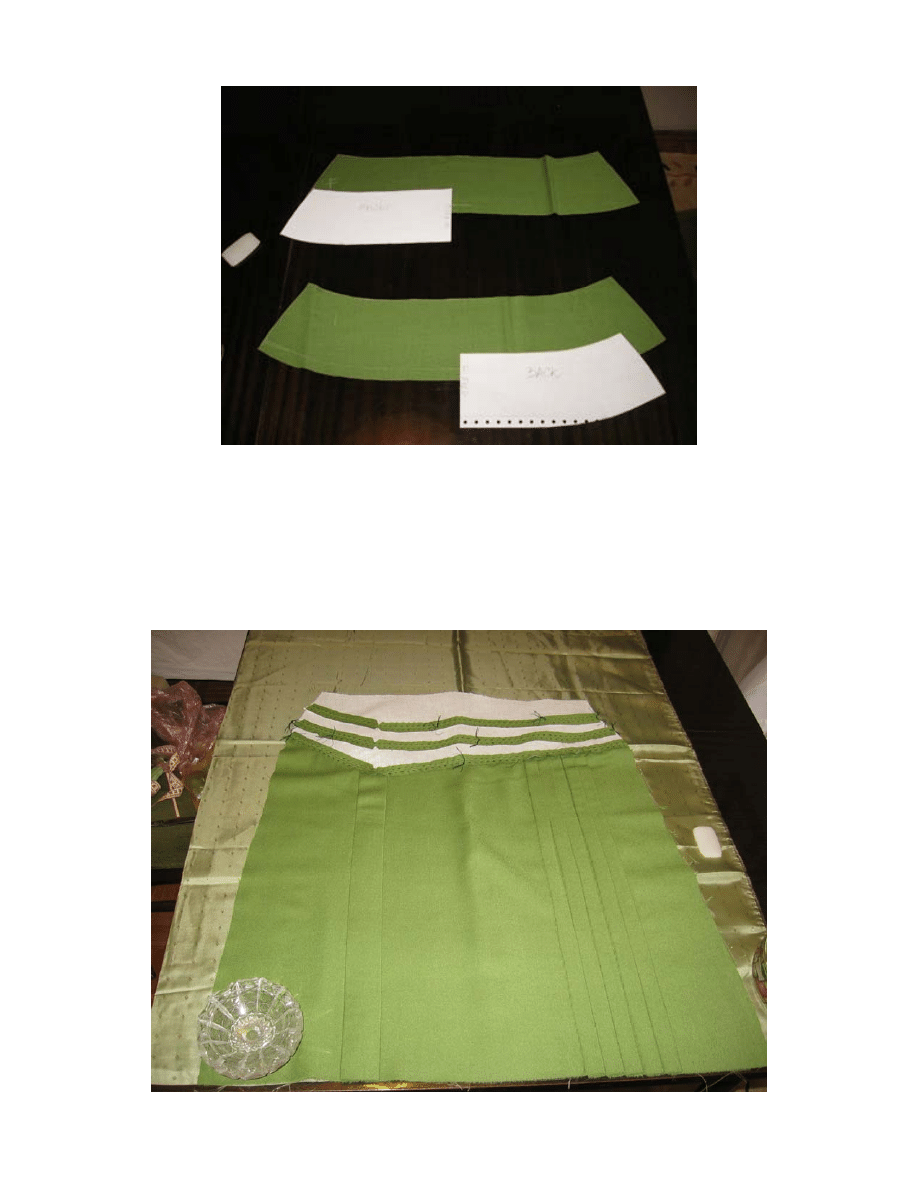
Drafting the lining
Put your lining fabric on the table. Do not fold the lining fabric vertically. Place your front panel
open over the lining fabric. Make sure your pleats are closed and the panel is flattened. The
lining should be few centimeters shorter than skirt, but for the sake of easiness, match the bottom
line of the front panel with the lining edge (you can cut the extra length afterwards). Trace the
shape of your panel on the lining fabric.
Using your front yoke pattern piece, match the top line of the yoke with the top line of the traced
panel’s shape on the lining. Trace the yoke’s bottom line to the lining fabric. This line will be the
top seam of the lining. Add 1.5cm wide seam allowance above the seam line. Note that side
seams of the lining already include seam allowances. I made an example on paper, since the
drawing lines are more visible. You can do the same and save the paper pattern as a lining
pattern.
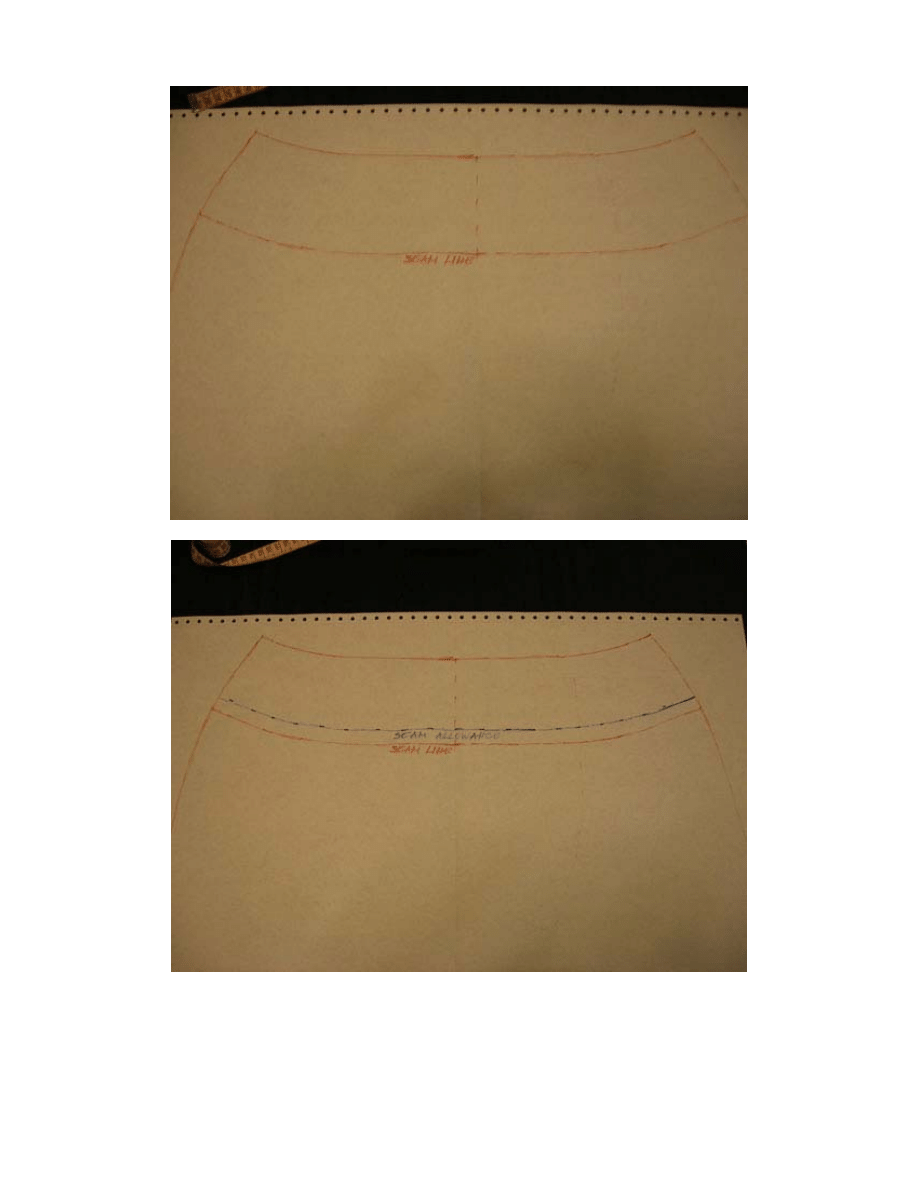
Cut the front lining piece (the blue line in the picture above represents a cutting line).
Repeat the process for the back lining piece.

Sew the front yoke piece to the front lining piece. Repeat the process for the back parts. Sew the
right side seam. Note that the lining’s seams are inverted comparing to the fashion fabric’s
seams. Sew the left side seam, leaving the slit for the zipper. Press seams open.
Finishing the skirt
Sew the right side seam of the skirt. Sew the left side seam, leaving the slit for the zipper. Insert
the zipper. Press seams open.
Attach the lining to the skirt. Press the waist seam.
Hem the skirt.
Document Outline
Wyszukiwarka
Podobne podstrony:
5 1PleatsSkirt ByAnaJan Pattern
Dots Invasion Dress ByAnaJan Instructions
wykład 6 instrukcje i informacje zwrotne
Instrumenty rynku kapitałowego VIII
05 Instrukcje warunkoweid 5533 ppt
Instrukcja Konwojowa
2 Instrumenty marketingu mix
Promocja jako instrument marketingowy 1
Promocja jako instrument marketingowy
Instrukcja do zad proj 13 Uklad sterowania schodow ruchom
Instrukca 6 2
instrukcja bhp przy magazynowaniu i stosowaniu chloru w oczyszczalni sciekow i stacji uzdatniania wo
więcej podobnych podstron