T
hank
Y
ou
!
You have successfully downloaded your
Woodsmith project plan.
We'll show you how to cut and shape table legs on a band saw—a technique
you can use on any woodworking project.
Get More from Your Band Saw
...
at PlansNOW.com
Download Today at PlansNOW.com...$9.95
Build this Elegant Hall Table Using Your Band Saw
Build stunning furniture that's
both functional and beautiful.
You Can Build It
...
at PlansNOW.com
The table creates a large work surface that's about three times the size of the cast
iron table your band saw came with.
Download Today at PlansNOW.com...$5.95
Build a Table and Fence for Your Band Saw
© 2007 August Home Publishing Co.
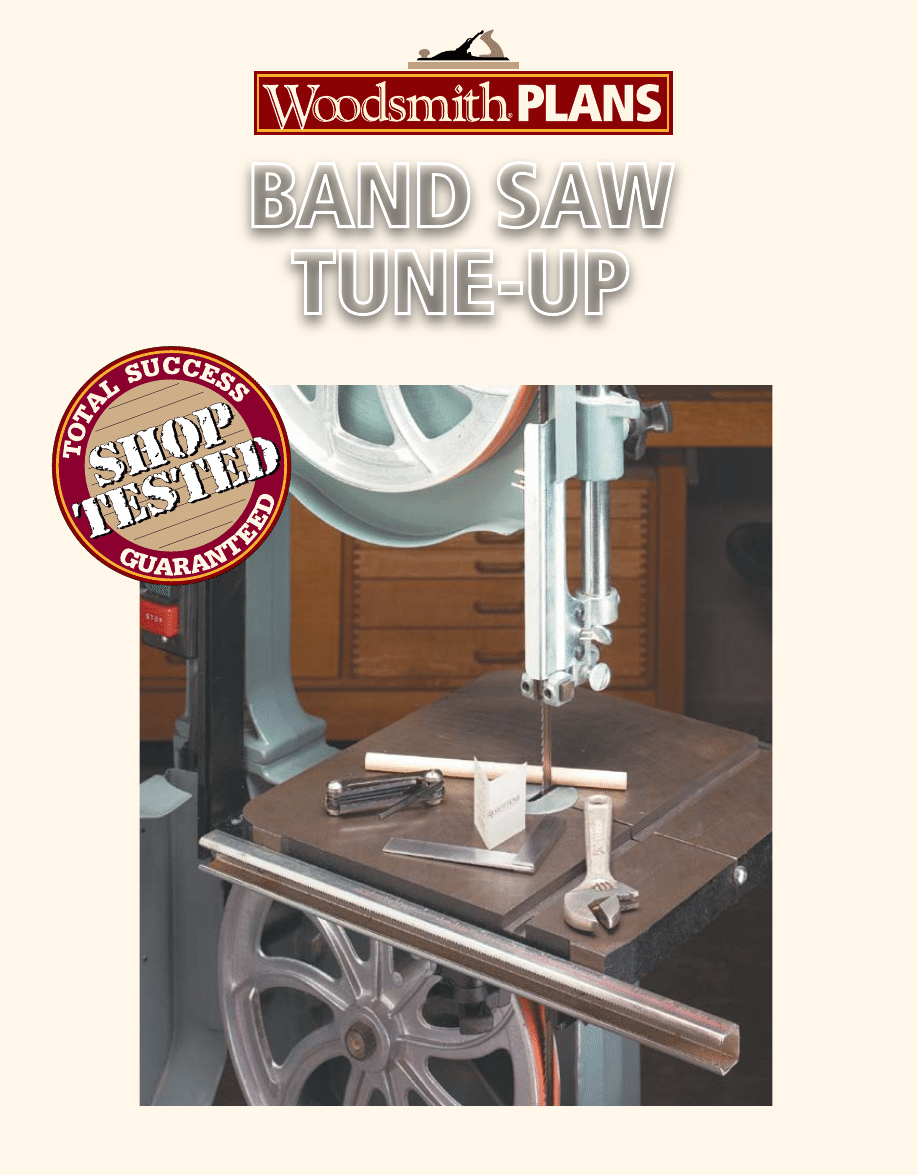
BAND SAW
TUNE-UP
TIPS FROM
OUR SHOP
B
and
S
aw
T
Une
-U
P
Slice thin veneers, make intricate scroll cuts, even cut accurate
joints — with just one tool. You can turn your band saw into an
all-purpose, precision workhorse. All you need are some simple
tools and a few minutes of time.
1
www.Woodsmith.com
© 2007 August Home Publishing Co. All Rights Reserved.
{
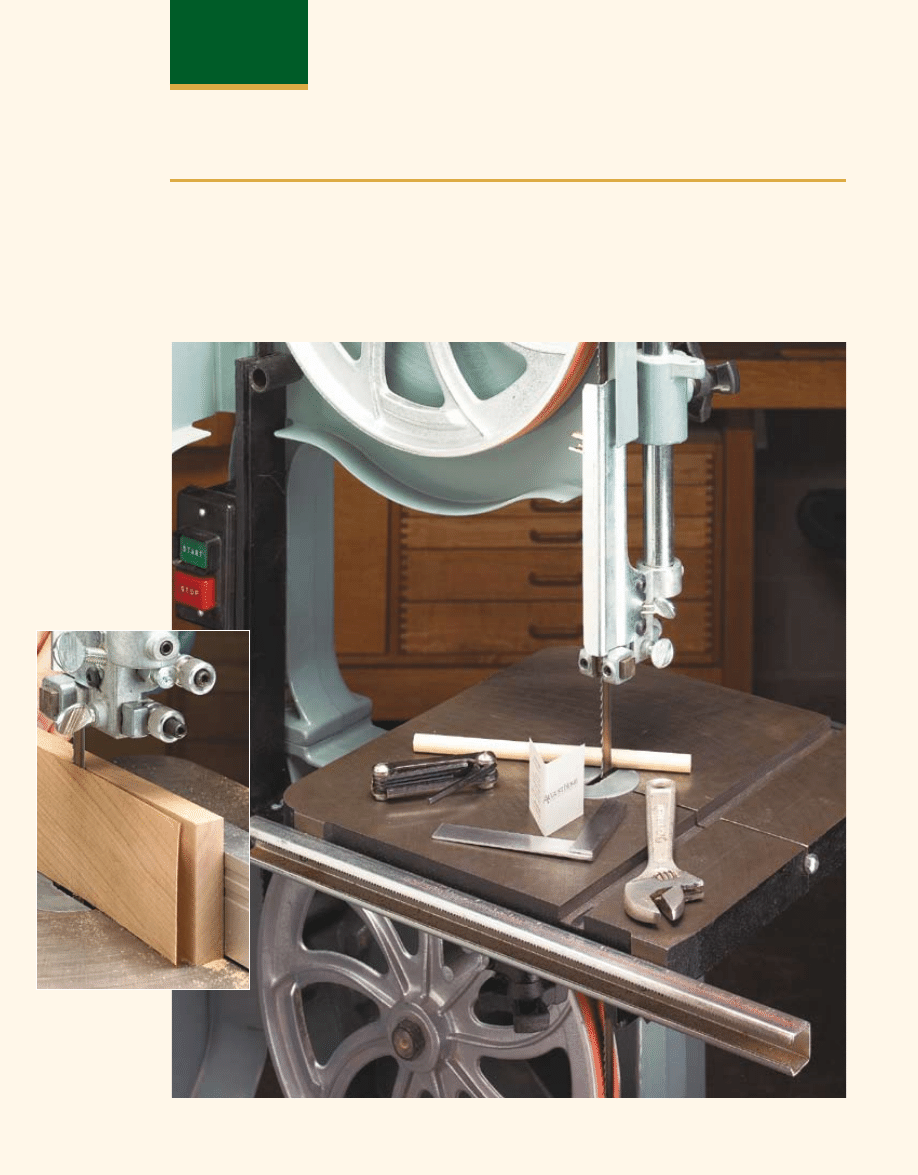
Accurate Cuts.
You can make
precise cuts like
this on your band
saw. We’ll show
you how.
2
www.Woodsmith.com
© 2007 August Home Publishing Co. All Rights Reserved.
b.
The first few adjustments
only need to be made occa-
sionally, but they’re still
very important. So, how
do you know when to do it?
Personally, I like to give my
saw a good once over every
time I make a blade change
or every few months,
depending on how much
I’ve been using it.
Safety firSt.
It goes without
saying that before you check
or adjust anything on the
band saw, always unplug it.
Never rely on the “on/off”
switch for protection. Now
is also a good time for you to
take the blade off the wheels.
Look it over.
With the covers
open, it’s a good idea to take
a few minutes to look for any
cracks in the frame, loose
bolts, or other structural
problems. Before moving
on you might also want to
clean out any sawdust build-
up. This can interfere with
the function of the blade and
wheels of the saw.
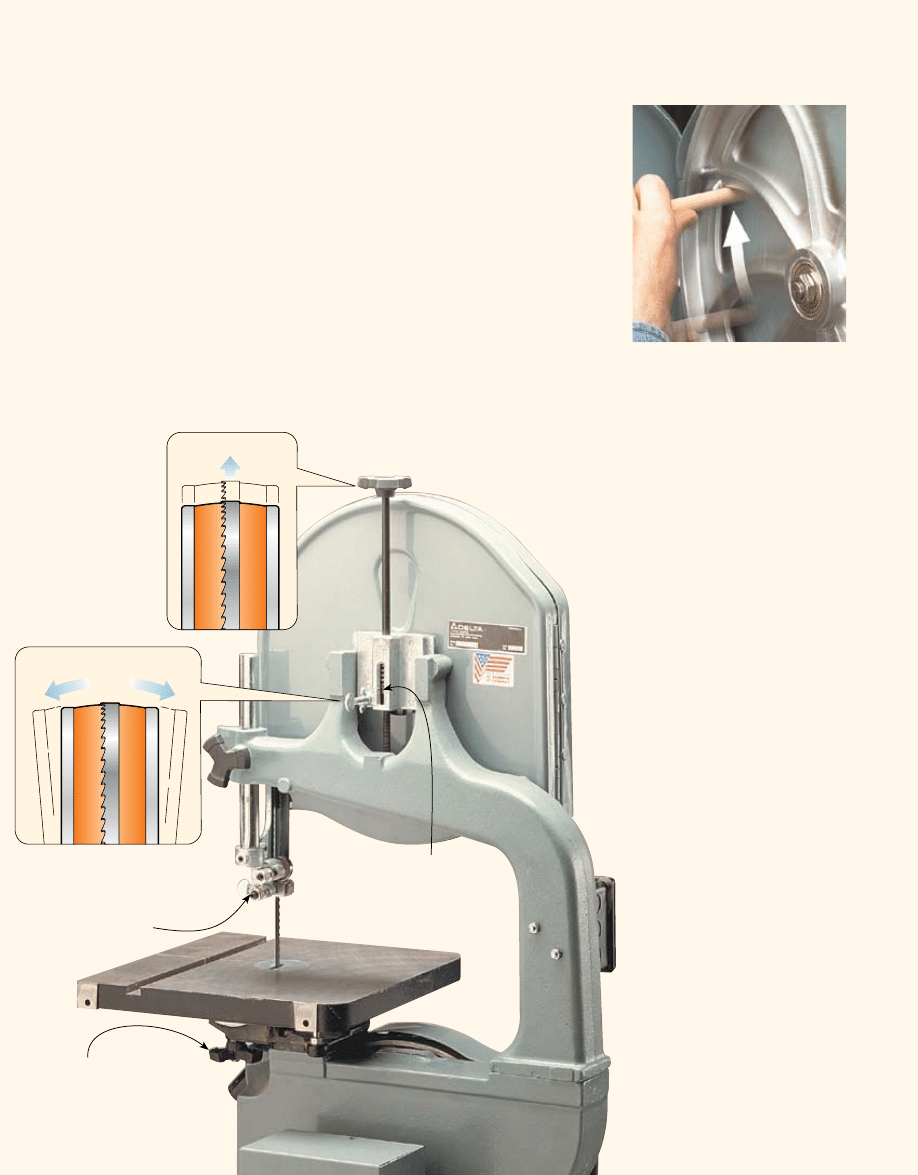
TIRES AND WHEELS
Once the blade is off, the next
thing to do is to clean the tires. You
can easily do this by rotating the
wheels and holding an old tooth-
brush against the tire to clean off
any accumulated sawdust or debris.
This gives you the chance to inspect
the tires for cracks and wear. Worn
tires make it difficult to keep the
blade tracking on the wheels (see
photo in margin at right).
If your tire is bad, don’t hesitate
to replace it. Whenever you replace
one of the tires, it’s best to replace
the other one at the same time.
WheeL BaLance.
It’s easy to overlook
the importance of having the wheels
balanced and properly aligned. Out
of balance wheels will cause the
blade to wander. This will make it
difficult for you to make consistently
straight and accurate cuts.
There’s a simple way to determine
the balance of the wheels. Just mark
a spot on one of the wheels and then
give it a good spin. Note the position
that it stops and then spin it several
more times. If the mark on the wheel
continues to stop in the same place,
your wheel is out of balance.
Rebalancing your wheels can be
kind of tricky. Refer to your man-
ufacturer’s recommendation for
rebalancing the wheels or take it to
someone who can do this for you.
If the wheel is significantly out of
balance, you may want to consider
replacing it with a new one.
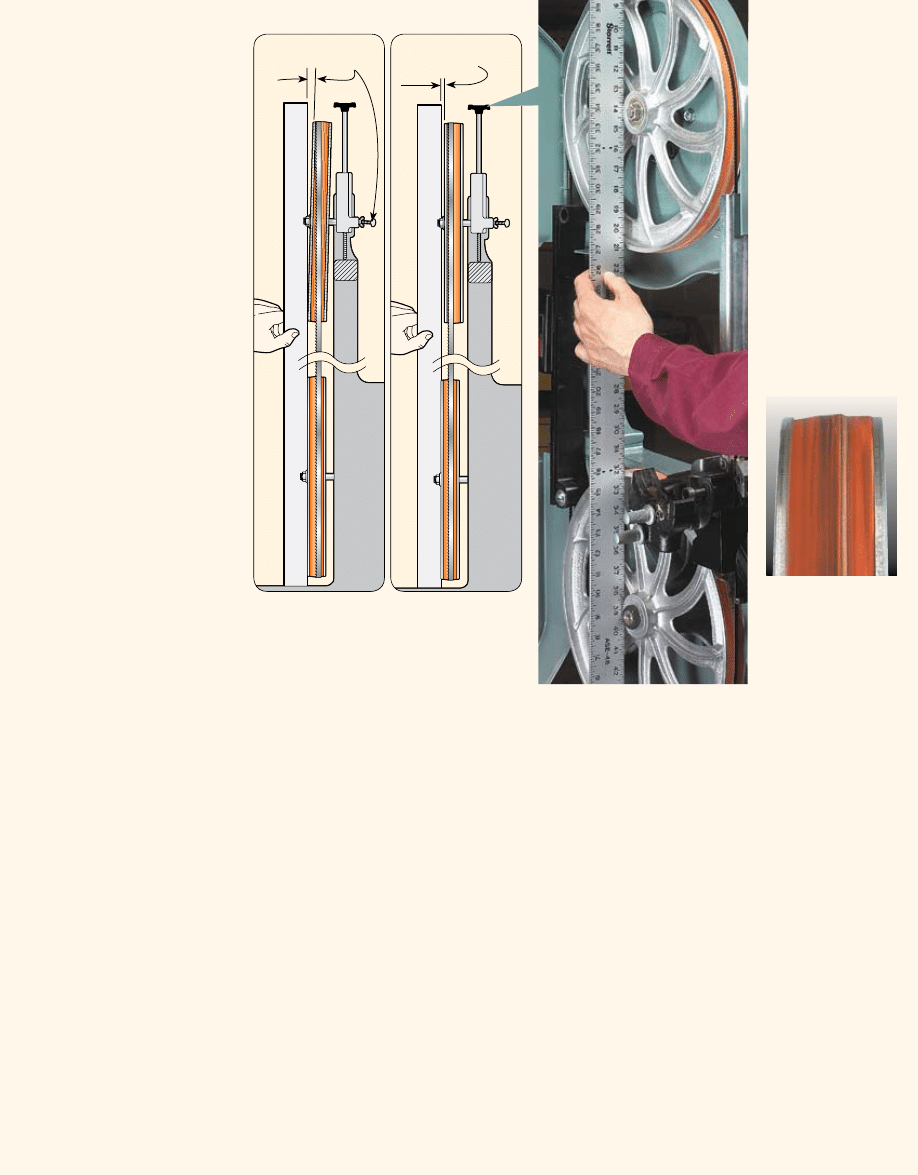
WheeL aLignment.
The other thing
you’ll want to check is the align-
ment of one wheel in relation to
the other. Before you do this, you’ll
need to put the blade back on and
tension it properly.
You’ll find that blade tension
affects the wheel alignment and
making a change to one thing
makes a change to all the others.
Checking the alignment of the
wheels is easy, but you may need to
remove the table. Place a straight-
edge across the top and bottom of
both wheels (photo above). If the
straightedge touches both edges
at the same time, the wheels are in
proper alignment (co-planar).
You won’t always find perfect
alignment of the wheels when you
check them. But you’ll want to
see the wheel rims within about
1
⁄
16
" of the straightedge.
If the straightedge doesn’t touch
both edges, tilt the top wheel by
adjusting the tracking knob until
the straightedge just barely touches
the lower wheel (see detail ‘a’).
And if the wheels are still not
aligned, you many need to use washers
or another type of shim to reposition
one of the wheels (see detail ‘b’).
a.
ADJUST TILT OF
WHEEL WITH KNOB
ADD SHIMS TO TOP
WHEEL IF THERE'S
A GAP
<
Vertical Wheel
Alignment. A long
straightedge placed
across the top and
bottom wheel makes
it easy to check the
alignment of the
wheels.
{
Tire Wear. The
ridge on this tire
was caused by
setting the blade
tension too high.
{
Wheel Alignment. Adjust the wheels either
by tilting the top wheel (detail ‘a’) or by
repositioning one of the wheels (detail ‘b’).
Blade and Guides
TABLE TOP QUARTER PATTERN
3
www.Woodsmith.com
© 2007 August Home Publishing Co. All Rights Reserved.
Once the tires and wheels are in
good shape, you can move on to a
few other adjustments that you’ll
need to make more often.
BLADE TENSION AND TRACKING
I start by taking a look at the blade
tension and tracking. Tension refers
to the tightness of the blade on the
saw. Tracking is the path the blade
takes on the wheels. These two set-
tings can be adjusted by a pair of
knobs on the back of the saw, as
shown in the photo below.
BLade tenSion.
To keep the band
saw cutting straight and true, the
flexible blade needs to be pulled
tight. The tension knob does this
by moving the wheels farther apart.
Different width blades require dif-
ferent tensions. When there’s not
enough tension on the blade, it can
wander and leave a “cupped” cut in
the workpiece.
You may have heard that
increasing the tension is an easy
way to solve your cutting prob-
lems. But doing this puts a lot of
stress on the frame of the saw and
will shorten the life of the wheel
bearings and blades.
Most saws have a tension gauge
as a reference for tensioning dif-
ferent blade sizes (see photo below).
I’ve found that it’s not very accurate,
but it will get you close.
To get the tension set
correctly, I do a
simple push
test.
First, raise the blade guide to its
highest position. Now push on the
side of the blade. Narrow blades (less
than
1
⁄
2
") will deflect about
3
⁄
8
" when
properly tensioned. The wider blades
should deflect no more than
1
⁄
4
".
BLade tracking.
If your wheels are
properly aligned and balanced and
you have the right tension on the
blade, getting the blade to track
properly should only take a minor
adjustment. What you’re looking
for is to have the blade run near the
center of the tire.
To check the tracking, unplug the
saw and open the door. Then with
a short piece of dowel, rotate the
upper wheel several times, as illus-
trated in the photo above. If needed,
turn the tracking knob or screw
until the blade stays in the middle of
the wheel as it is turned.
Remember to take it slow when
adjusting the tracking. If you turn
the screw too much, the blade can
run off the edge of the wheel and
you’ll need to start over.
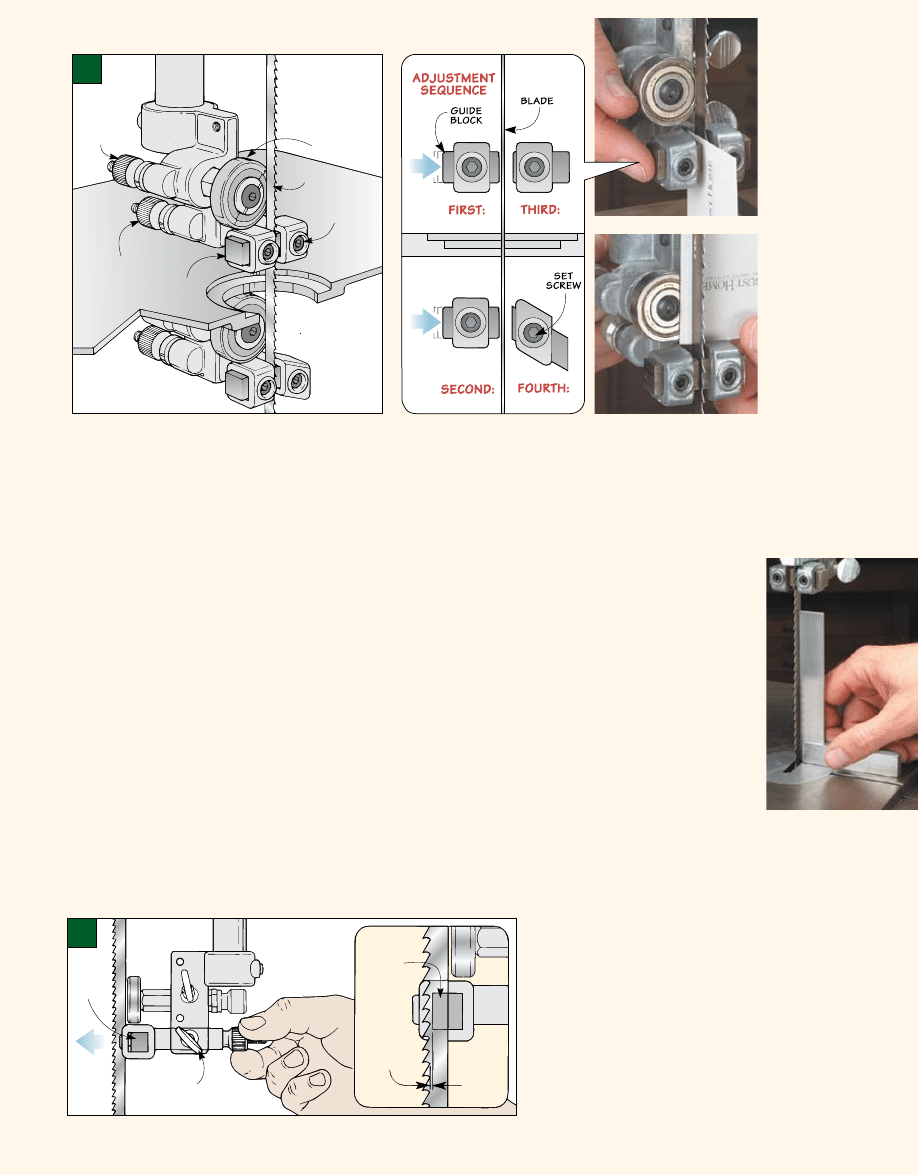
GUIDES AND THRUST BEARINGS
With the tension and tracking set,
there are just a few steps left before
you’re ready to go.
The next things to check are the
two guide assemblies. One is located
above the table and one below the
table, as illustrated in Figure 1 on
the following page.
TENSION KNOB
TRACKING KNOB
BLADE TENSION GAUGE
SHOWS PROPER TENSION
BASED ON BLADE WIDTH
UPPER GUIDE ASSEMBLY
CONTROLS BLADE
MOVEMENT, SEE FIGURE 1
ON PAGE 4.
TABLE ADJUSTMENT KNOB
{
Safety Tip. To prevent catching
your fingers in the wheel, use a short
dowel to spin the wheel by hand with
the saw unplugged.
4
www.Woodsmith.com
© 2007 August Home Publishing Co. All Rights Reserved.
Each guide assembly consists of
a pair of guide blocks and a thrust
bearing located behind the blade.
The purpose of the guides and bear-
ings is to keep the flexible blade
running straight and true. If they’re
not set right, the blade can end up
twisting and get pushed off the
wheel or even break.
You’ll need to make two dif-
ferent adjustments — one for the
guide assembly and the second to
each of the guide blocks.
guide aSSemBLy.
Before adjusting
the guide assembly, it’s a good idea
to loosen the guide blocks and back
them away from the blade. Don’t
take them all the way out because
you will need them as a reference
for the next adjustment.
Next, loosen the thumbscrew and
slowly move the guide blocks either
forward or backward on the blade,
as shown in Figure 2.
The guide blocks should be
positioned just behind the gullets
on the blade, as illustrated in
Figure 2a. After setting the upper
guide assembly, set the guide
assembly below the table.
guide BLockS.
With the guide
assemblies set, you can adjust the
guide blocks. As I mentioned before,
they straddle the blade and keep it
on track. They should be positioned
close to, but not touching, the blade.
I use a business card to set the
spacing, as shown in the upper
right photo. The drawing above
shows the sequence for setting
the blocks. Here I set the blocks
on one side of the blade then the
other to prevent the blade from
being misaligned.
Just place the card between the
blade and the guide block, and move
the guide block until it rests snug
against the card. Then just tighten
the adjustment screw.
Once all four adjustments have
been made, you’ll want to turn
the wheels (by hand) a couple
of times to be sure that there is
adequate clearance for the blade.
thruSt BearingS.
There’s one more
part to be adjusted on the guide
assemblies — the thrust bearing.
It supports the blade from the back
when cutting. If the thrust bearing
is not supporting the back, the blade
won’t give you square cuts and may
even get pushed off the wheels.
You can use your business card
again. This time, fold it in half and
place it between the back of the
blade and the thrust bearing, as
shown in the lower photo above.
Position the thrust bearing against
the card and tighten the thumb-
screw to hold the bearing in place.
SQUARE UP THE TABLE
Once the guides and thrust bear-
ings are set, you can make the final
adjustment. That is to check that the
table is square to the blade. If it’s not,
your cuts won’t be perpendicular.
Just raise the upper guide assembly
and place a small square on the table
against the blade, as you can see in
the photo at right. If the table isn’t
square, loosen the table adjustment
knob and tilt the table into position.
Then retighten the knob.
It’s all too easy to put off these
simple adjustments. But it only takes
few minutes to run through them.
With your saw tuned, you’ll turn to
it more often and get better results
in your woodworking projects.
UPPER GUIDE
ASSEMBLY
THRUST
BEARING
ADJUST-
MENT KNOB
GUIDE BLOCK
ADJUSTMENT KNOB
TABLE
LOWER GUIDE
ASSEMBLY
GUIDE
BLOCK
GUIDE BLOCK
SET SCREW
BLADE
THRUST
BEARING
GUIDE
BLOCK
FIRST:
LOOSEN GUIDE
ASSEMBLY THUMBSCREW
SECOND:
TURN
ADJUSTMENT KNOB
TO POSITION
GUIDE BLOCKS
GUIDE
BLOCK
POSITION
GUIDE
BLOCKS
" BEHIND
GULLETS OF
SAW BLADE
!/32
‹
Guide Blocks. A
business card helps
position the guide
blocks. Adjust the
blocks on one side
and then the other
(sequence at left).
‹
Thrust Bearing.
Use a business card
folded in half to set
the position of the
thrust bearing.
{
Square the
Table to the
Blade. Using
a small square,
make sure the
blade is 90° to
the table.
a.
1
2
Wyszukiwarka
Podobne podstrony:
klucz avg tune up
Terry O Reilly Tune Up
ARRL QST Magazine Clean up Signals with Band Pass Filters (part 1) (1998) WW
Strike Up The Band
S up prezentacja 1 dobˇr przekroju
105 polecenie RD
105 Łuk swobodnie podparty obciążony prostopadle do swojej płaszczyzny
highwaycode pol c20 sygnaly policjii innych (str 104,105)
All Flesh Must Be Eaten Two Rotted Thumbs Up
Budowa samolotow PL up by dunaj2
BAND 1 22
Jak korzystać ze zdolności parapsychicznych [up by Esi]
105 15 Czynniki cyrkulacyjne ks Nieznany (2)
105 - Kod ramki, RAMKI NA CHOMIKA, Miłego dnia
Doniczkowe zestawy, Ogrodnictwo UP Lbn, ROŚLINY OZDOBNE, ozdobne 5 semestr, Doniczkowe
Województwa (1), Turystyka i rekreacja ( UP), krajo
rębnie (2), Leśnictwo UP POZNAŃ 2013, THL
fizjo - wyk+éady, Leśnictwo UP POZNAŃ 2013, Fizjologia roślin drzewiastych
więcej podobnych podstron