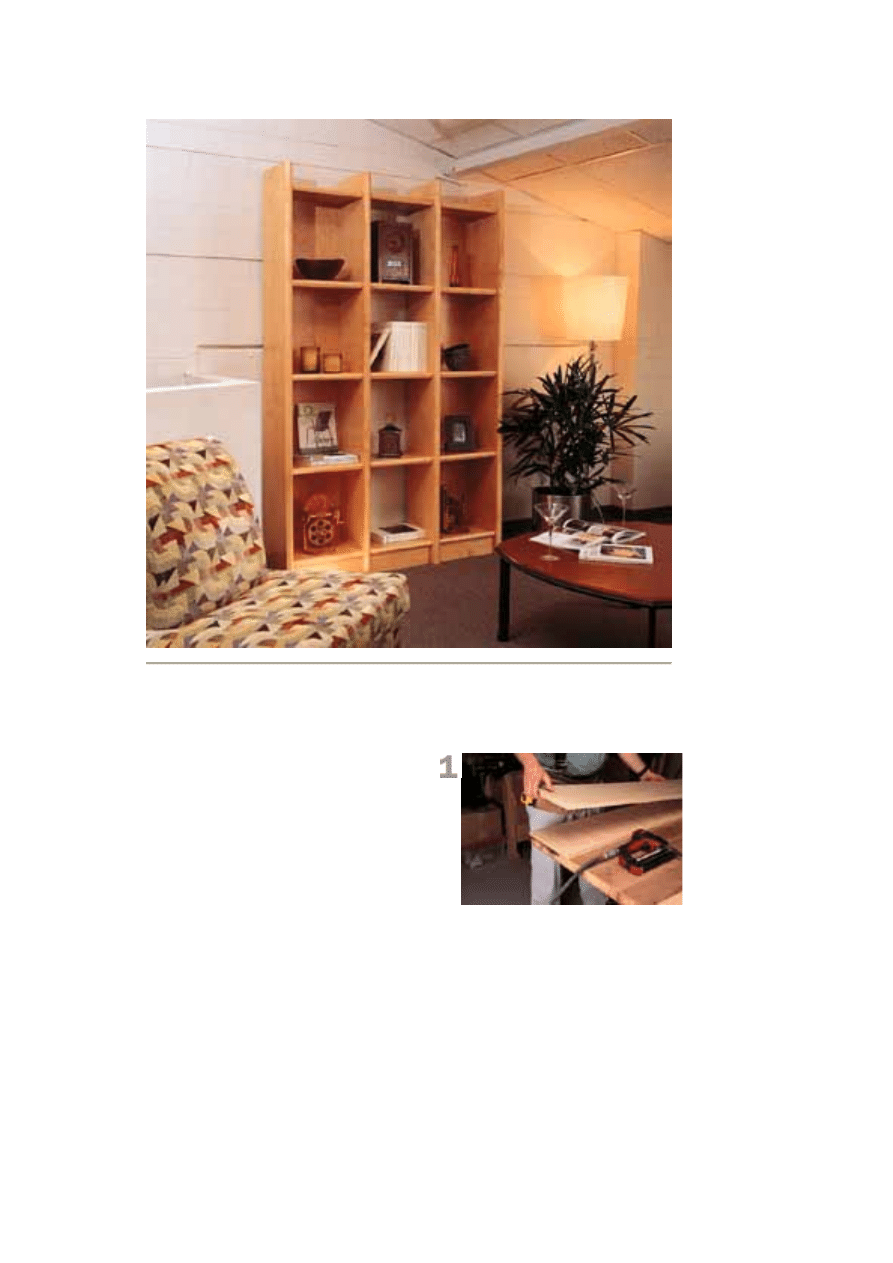
Contemporary Shelves
It's rare that bookshelves look as
interesting as the objects you display on
them. After all, how much can you
decorate the edges of your shelves and
sides? This unit is unusual because the
shelves and sides are beefier than you
would normally see, and the two bevel
cuts on the front edges give these shelves
nice visual interest. Best of all, perhaps, is
that this piece is simple and quick to build.
Dividers and Shelves
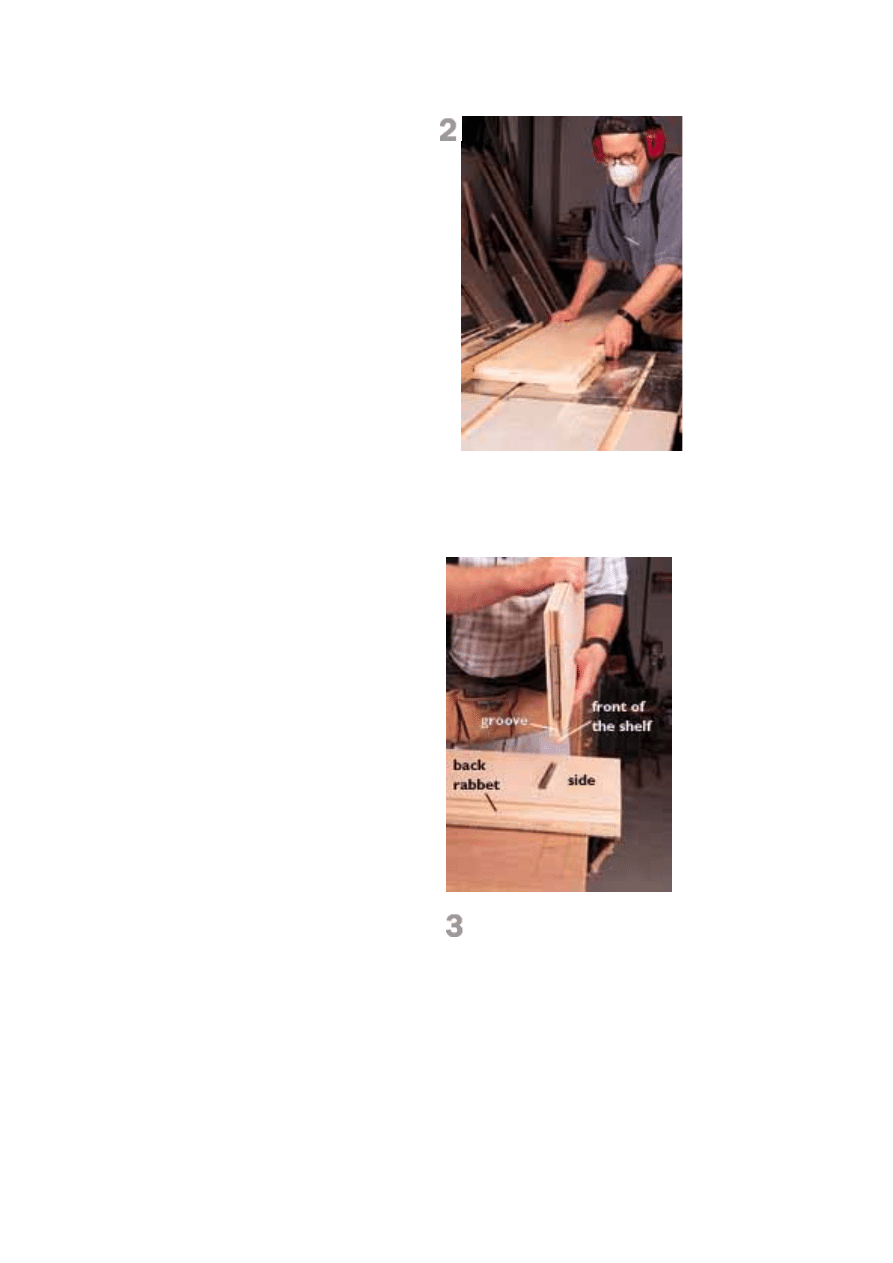
Start by cutting out the sides and shelves.
The 1-1/2"-thick sides are made by gluing
two pieces of 3/4"-thick plywood together.
The 1-1/4"-thick shelves are made by
gluing 3/4"-thick plywood to a 1/2"-thick
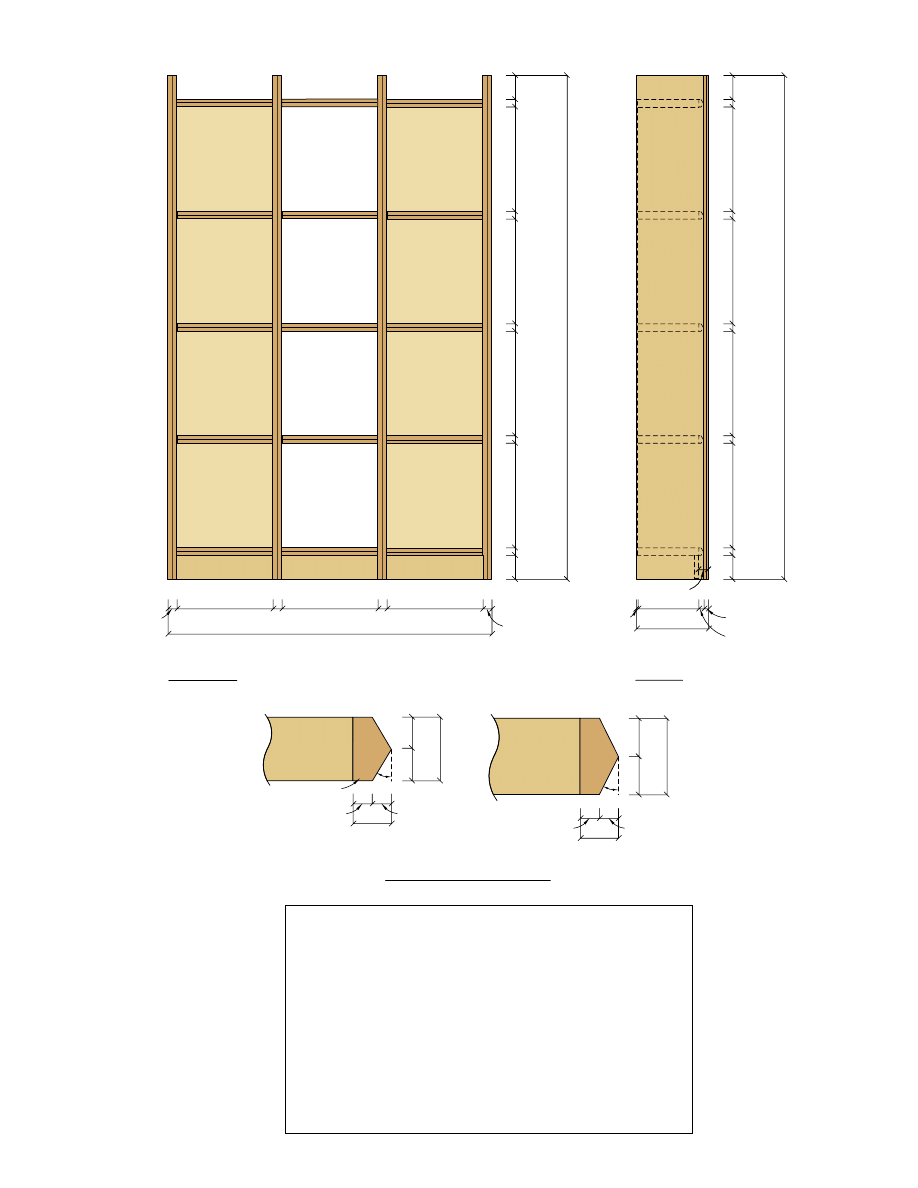
piece. Note that the finished sides have a
3/4" x 1/4" rabbet for the back that's
formed by gluing a narrower piece to a
wider one. The adjustable and fixed
shelves in the side openings are all the
Face-Glue the Parts: Once you've got your
parts cut to size, glue and nail them together
leaving the rabbet at the back. Set and putty
the nails, then rip the dividers to their final
width.
same width. The center shelves are 1/4"
wider to account for the lack of a back.
To cut the sides, crosscut a whole sheet
of plywood to the length of the sides first,
then rip them to width (11" and 11-1/4").
Cut the sides a little wide (1/16"), initially,
to give yourself a little room to saw off a
square straight edge. This will give you a
clean edge for attaching a piece of maple
later. Now nail and glue the dividers
together, remembering to offset the back
edge for the rabbet. Place your nails so
the shelves will hide them.
Here's an easy way to cut the shelves. Rip
them to width from a full piece of plywood,
then nail and glue up a length of shelving.
Then crosscut the shelves to length from
the long pieces. You can get five 16"
shelves out of a 96" rip. For even less
work, cut the shelves to length after
attaching the edging.
Edges and Angles
The edges for the bookshelves are solid
maple. Because the thickness of 3/4" and
1/2" plywood is considered "nominal," you
will end up with finished thicknesses about
1/16" less. Rip your edging stock a little
wide and attach it with biscuits and glue.
With a flush-cut bearing bit in a router, trim
the edging flush to the sides and shelves,
then clean up your work with a plane or
scraper.
The last step is to bevel the edging. The
photo shows how I did this on the table
saw. Remember that the setup must
change for the different width pieces.
Making it a Stand-Up Unit
The next step is to mill stopped grooves in
the topmost and bottommost shelves to
accept the tapered sliding connectors that
attach the sides together. The grooves in
the ends of the shelves are 3/4" wide by
approximately 3/8" deep, and milled with a
dado set on the table saw. It helps to
make a practice joint because the depth of
the groove is critical to a snug fit using this
style of connector.
Installing the Shelves
After cutting the slots in the shelves, lay
out and mount the small part of the
tapered connector to the side. The large
Profile: The bevels on the edges are
basically a "V" shape on the entire edge.
See the diagram at right for the details and
cutting angles. Clean up your saw marks
with a plane.
Mount Knockdown Hardware: Use a
dado stack to cut a 3/4" x 3/8" groove
from
the joint where the edge attaches to the
shelf to the back of the shelf. The
knockdown hardware is mounted in about
the middle of the shelf. It pulls together pretty
tightly, so you might want to sand any bumps
or ridges off the ends of the shelves to keep
from scratching the sides.

connector will mount to the shelf groove
with the wide end towards the shelf front.
Do a test fit on the shelves. The shelves in
the side units should be flush to the rabbet
in the back edge of the sides. The center
shelves should be flush with the back.
The next step is to cut the stopped
grooves in the rest of the shelves for the
hidden wire shelf supports. If your blade is
too narrow, take two cuts to get the 1/8"
groove necessary to slide the shelf onto
the wire supports. Some drill and chisel
work will be necessary to lengthen the kerf
to accept the entire 9-3/4" length of the
shelf wire. This requires drilling and
chiselling into the end of the front edge.
Lay out and drill the locations for the wire
supports in the side and center sections
so the shelf heights will match across the
bookcase.
Now it's time for all the parts come
together. Begin by assembling the two
outside units of the bookcase. Tip them
onto their backs and attach the aprons to
the bottom shelf using cleats and screws.
Next attach the side units together forming
the center section. The best way to do this
is to assemble with the front facing up.
Use a handscrew clamp to hold up the
sides while you're assembling. The apron
on the center bottom can be screwed onto
the shelf and braced with corner blocks
prior to assembly. Push the lower shelf
into place and mark the location of the
apron, also called a "kick" or a base. Then
remove the shelf and add two stop blocks
to the sides to support the center apron
from behind.
When you're happy with the fit of the
parts, disassemble the bookcase and
finish. I applied a coat of light stain to give
the maple an aged appearance. (I used
about two ounces of linseed oil and
colored it with Olympic stains, one-half
Early American #41552, and one-half Red
Oak #41567. 1/4 teaspoon of each.) Wipe
on an even coat of oil. Wipe off the excess
and let it dry for 24 hours.The next day,
lightly sand the surfaces and clean them
with a tack rag. Finish with two or three
coats of a clear finish. PW
Magic Wire: After cutting the 1/8" grooves in
the shelf sides, assemble the case. Tap the
wire shelf supports in and slide the loose
shelves in place.

1
/
4
"
10
1
/
8
"
7
/
8
"
3
/
4
"
12"
4"
1
1
/
4
"
17
7
/
16
"
1
1
/
4
"
1
1
/
4
"
1
1
/
4
"
1
1
/
4
"
17
7
/
16
"
17
7
/
16
"
17
7
/
16
"
4"
84"
Profile
1
5
/
8
"
1
1
/
2
"
16"
1
1
/
2
"
16"
1
1
/
2
"
1
1
/
2
"
16"
54"
4"
1
1
/
4
"
17
7
/
16
"
1
1
/
4
"
1
1
/
4
"
1
1
/
4
"
1
1
/
4
"
17
7
/
16
"
17
7
/
16
"
17
7
/
16
"
4"
84"
Elevation
Plywood shelf
lamination
31
°
Solid
maple
3
/
8
"
3
/
8
"
3
/
4
"
1
1
/
4
"
5
/
8
"
5
/
8
"
1
1
/
2
"
Solid
3
/
4
"
27
°
3
/
4
"
3
/
8
"
maple
Plywood
side
lamination
3
/
8
"
3
/
4
"
Detail of bevel profiles
Schedule of Materials: Contemporary Shelves
No. Item
Dimensions T W L
Material
4
Sides
3
⁄
4
" x 11
1
⁄
4
" x 84"
Plywood
4
Sides
3
⁄
4
" x 11" x 84"
Plywood
10
Outr. shelf tops
3
⁄
4
" x 10
1
⁄
8
" x 16"
Plywood
10
Outr. shelf bottoms
1
⁄
2
" x 10
1
⁄
8
" x 16"
Plywood
5
Cntr. shelf tops
3
⁄
4
" x 10
3
⁄
8
" x 16"
Plywood
5
Cntr. shelf bottoms
1
⁄
2
" x 10
3
⁄
8
" x 16"
Plywood
2
Backs
1
⁄
4
" x 17
1
⁄
2
" x 76"
Plywood
3
Aprons
3
⁄
4
" x 4" x 16"
Plywood
4
Side edging
3
⁄
4
" x 1
1
⁄
2
" x 84"
Maple
15
Shelf edging
3
⁄
4
" x 1
1
⁄
4
" x 16"
Maple
Supplies: Woodworkers’ Supply (800-645-9292), 12 6" taper
connectors, # 928273 $4.95/pkg. of four. 18 wire shelf supports, # 826028,
$1.45 apiece for 10+.
Wyszukiwarka
Podobne podstrony:
Shelf pine shelves
contemporary shelves
4 Les références philosophiques? la littérature contemporaine FR
The Four Preliminary Contemplations
Gilded Scroll Shelf
Adjustable Plant Shelves
italiano arcaico e contemporaneo
00 Why Learn Modern Greek Contemporary Socratic Dialogue
New World Orders in Contemporary Children's Literature
Samantabhadra Contemplation Sutra
Bathroom Shelf
Pegged Display Shelf
Plant Shelf
Indice?l Libro? las Contemplaciones
4 Les références philosophiques? la littérature contemporaine FR
adjustable plant shelf polka na kwiaty
Roberta Modugno Crocetta Murray Rothbard’s anarcho capitalism in the contemporary debate A critical
więcej podobnych podstron