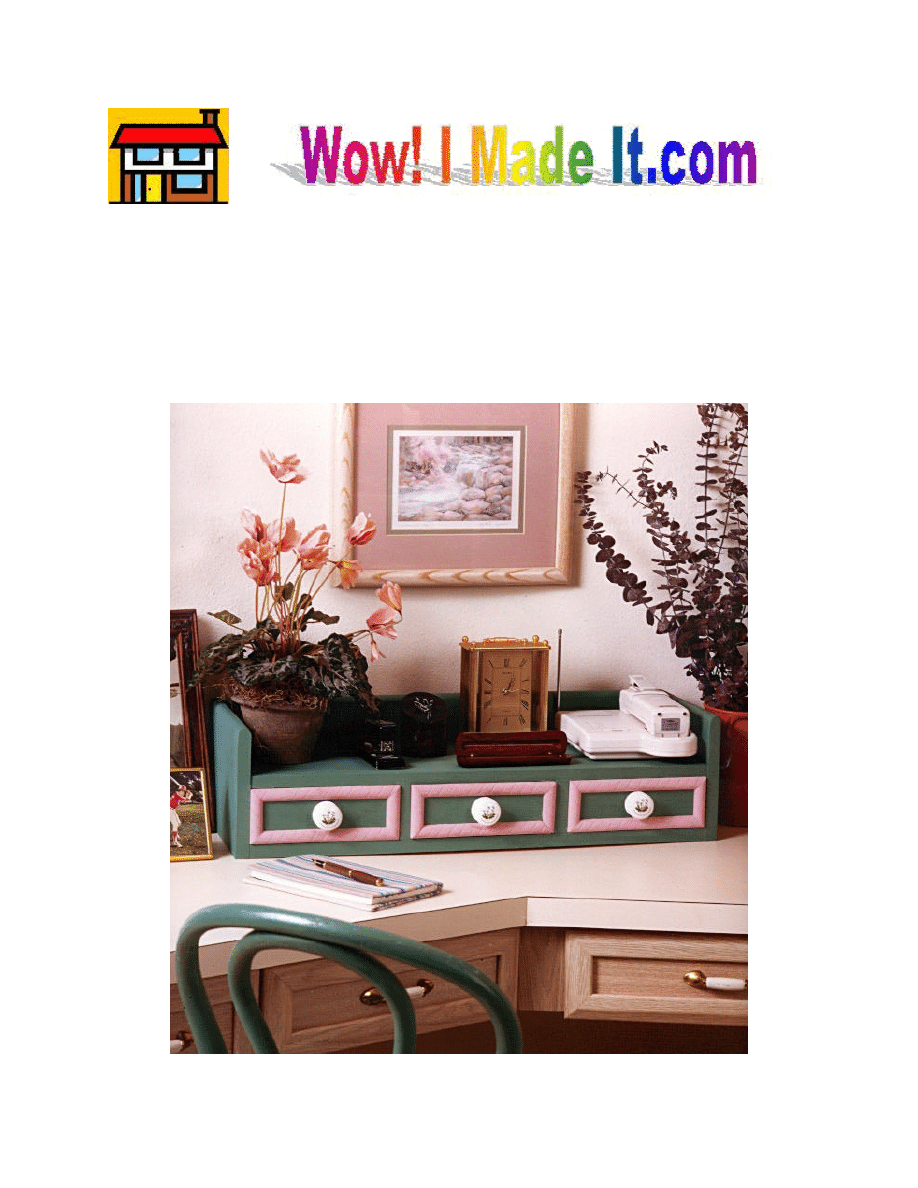
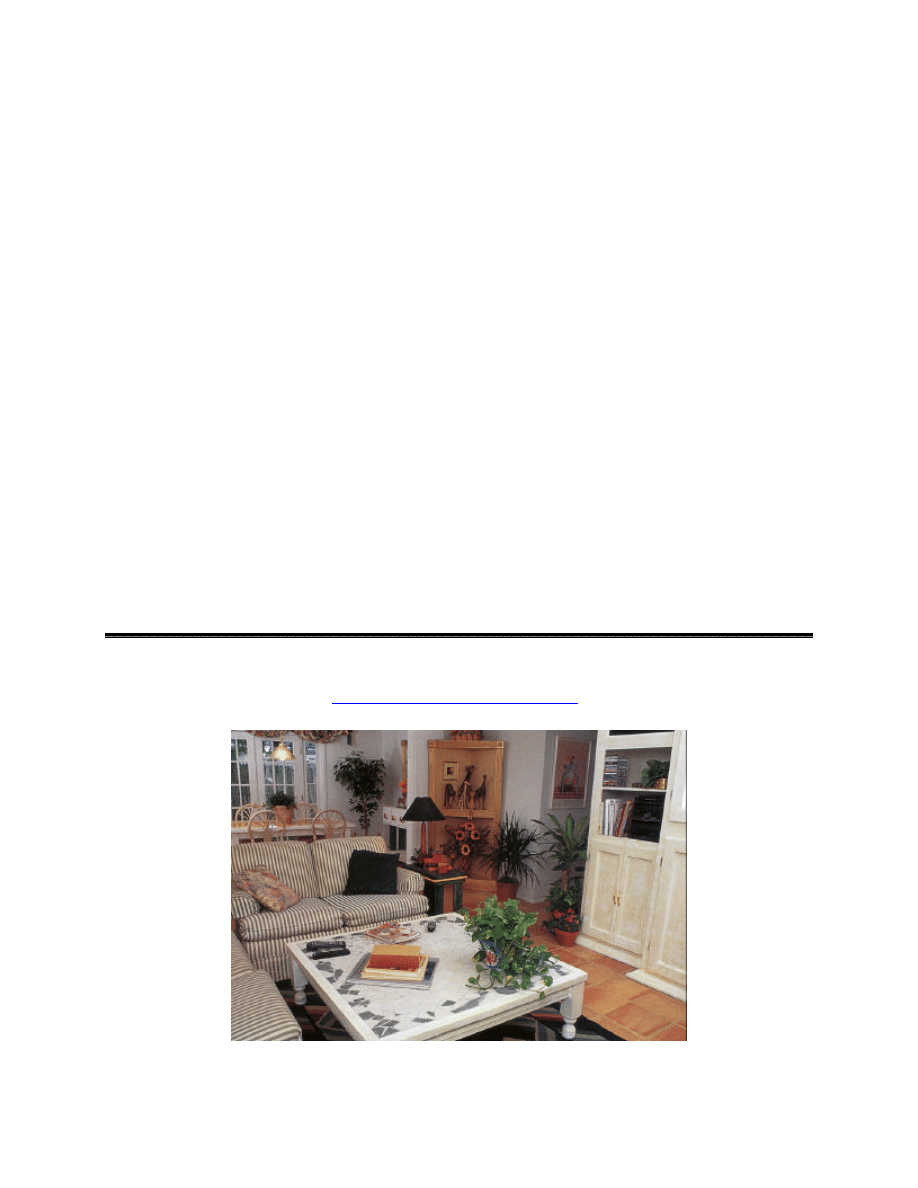
esk Organizer
It’s always the small things in life that drive me right over the edge—like hunting for a
pencil and paper to write down an address or telephone number. After fumbling through every
desk drawer, I used to record important information with a magenta crayon stub on the back of
my water bill, but all that has changed since I made this desk organizer. It has three drawers for
note pads, pens, and pencils, and a shelf large enough to hold my phone.
D
Special Tools and Techniques
•
Router and roundover bit (optional)
•
Mitering
Materials and Supplies
•
8 linear feet of 1 x 4 pine
•
4 linear feet of 1 x 8 pine
•
6 linear feet of 1 x 10 pine
•
1 piece of ¼”-thick plywood, 14” x 16”
Hardware
•
Approximately 50 #6 x ¼” flathead wood screws
•
Approximately 50 3d finishing nails
•
1 small box of wire brads
•
3 decorative drawer pulls
Cutting List
Code
Description
Qty.
Material
Dimensions
A
Top/Bottom
2
1 x 10 pine
26-1/4” long
B
Inner Divider
2
1 x 10 pine
3-5/8” long
C
Side
2
1 x 8 pine
9-1/4” long
D
Back
1
1 x 8 pine
27-3/4”long
E
Drawer Front/Back
6
1 x 4 pine
8” long
F
Drawer Side
6
1 x 4 pine
7-1/2” long
G
Drawer Bottom
3
¼” plywood
6-3/4” x 7-3/4”
Notes on Materials
Before you shop for the necessary materials for this project, check your workshop for scrap
pieces and compare what you might find with the pieces in the “Cutting List.” Most of the wood
you need may be lying around on your workshop floor!
Making the Frame
1. Cut two 26-1/4”-long top/bottom pieces (A) form 1 x 10 pine.
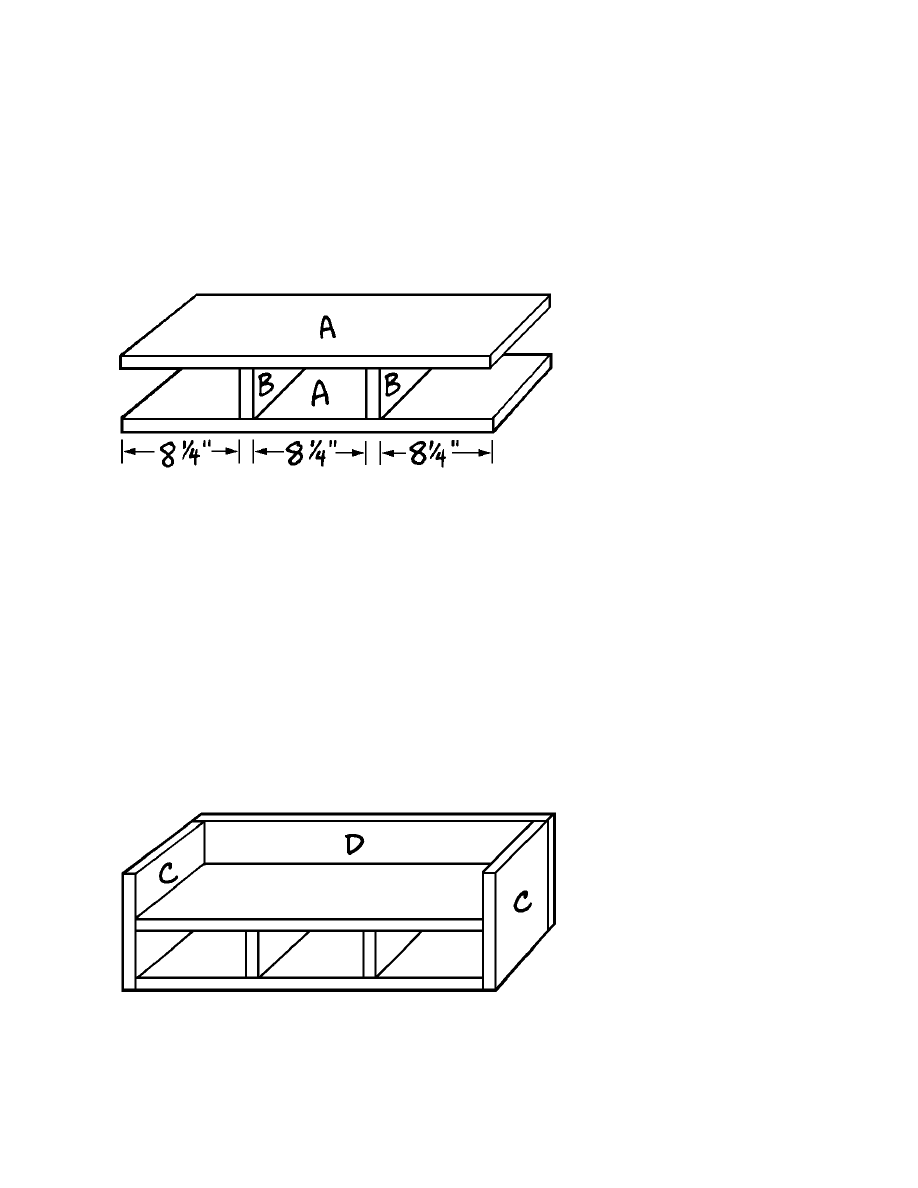
2. Cut two 3-5/8”-long inner dividers (B) from 1 x 10 pine.
3. Place the top/bottom pieces (A) on a level surface, parallel to each other, on edge, and 3-
5/8” apart. Fit the two inner dividers (B) between the two top/bottom pieces (A), spacing
them 8-1/4” from each other and from the ends, as shown in Figure 1. Glue the inner
dividers (B) in place and drive three evenly spaced 1-1/4” screws through the top/bottom
pieces (A) and into the edges of the inner dividers (B) at each joint.
4. From 1 x 8 pine, cut two 9-1/4”-long sides (C).
5. Position the sides (C) on the assembly as shown in Figure 2. Note that the sides (C) are
flush at the front, back, and bottom of the assembly, but extend above the top face. Glue
the sides (C) onto the ends of both of the top/bottom pieces (A) and secure them in place
with three 1-1/4” screws at each joint.
6. Cut one 27-3/4”-long back (D) from 1 x 8 pine.
7. Attach the back (D) to the assembly, as shown in Figure 2. Note that the back (D) is flush
with the assembly at the bottom and at the sides, but extends above the top/bottom piece
(A). Glue the back (D) to the edges of the top/bottom pieces (A) and to the ends of both
sides (C). Drive three 1-1/4” screws through the back (D) at each joint.
8. If you own a router and roundover bit, use them to round the upper edges of the sides (C)
and back (D). If you don’t own a router, simply sand the edges with very rough sandpaper
and then finish with increasingly fine grades of sandpaper.
Figure 1
Figure 2
Making the Drawers
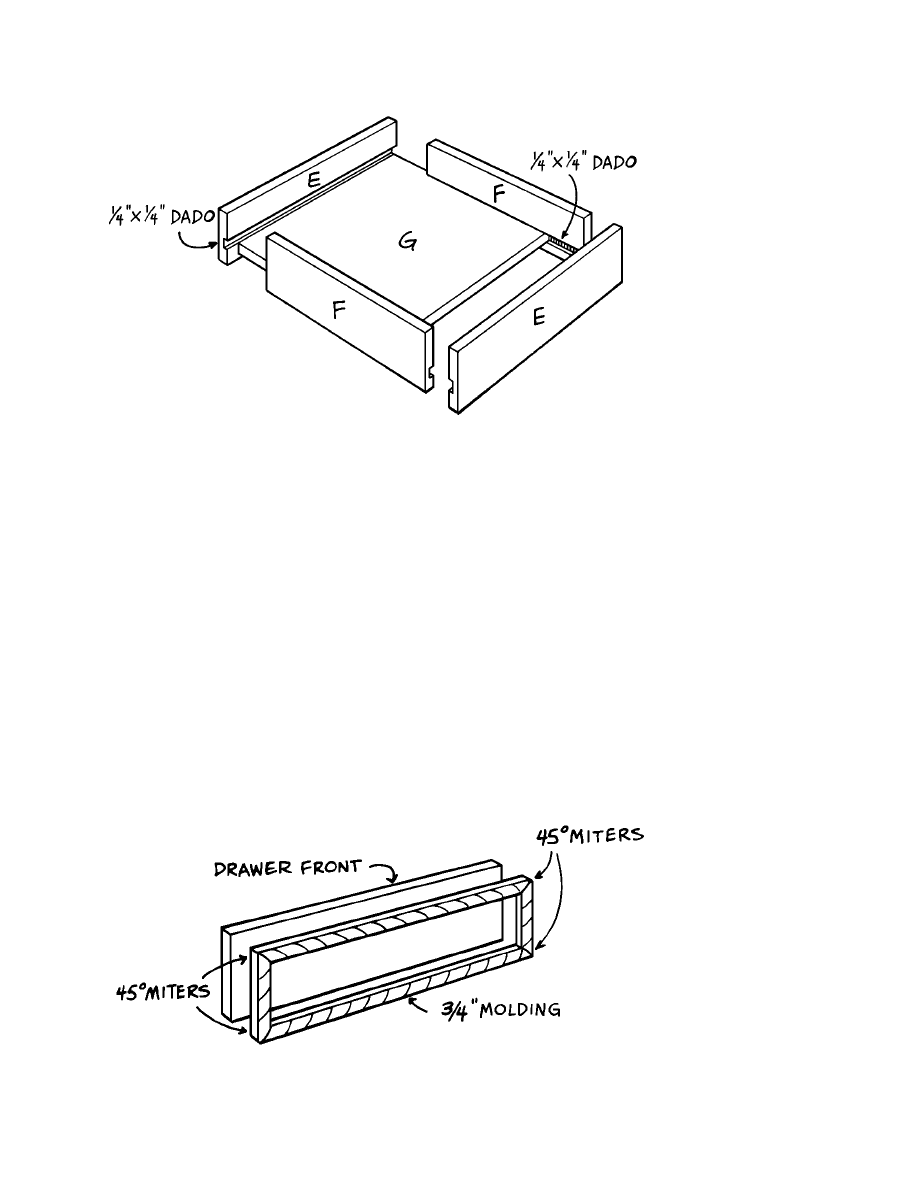
1. The three identical drawers for this organizer are constructed as shown in Figure 3. From 1
x 4 pine, cut six 8”-long drawer front/back pieces (E) and six 7-1/’2”-long drawer sides (F).
2. To accommodate the plywood drawer bottoms (G), cut a ¼” x ¼” dado on the inside of
every drawer piece (E and F), ¾” from its lower edge.
3. Cut three 6-3/4” x 7-3/4” drawer bottoms (G) from ¼”-thick plywood.
4. Assembly one drawer as shown in Figure 3. Note that the drawer front/back pieces (E)
overlap the ends of the drawer sides (F). Use glue and 3d finishing nails at each end of the
overlapping boards.
5. Repeat Step 4 two more times to assemble the remaining two drawers.
Figure 3
Figure 4
Adding the Drawer Trim
1. Each of the drawer fronts (E) is trimmed with ¾”-wide decorative molding. To trim the
first drawer front, cut and fit pieces of molding, mitering the ends so that they fit perfectly
flush with the outer edges of the drawer front (E), as shown in Figure 4.
2. Glue the molding in place and use a tack hammer to drive tiny wire brads through the
molding and into the drawer front (E). Recess the nails with a nail set.
3. Repeat Steps 1 and 2 twice more to trim the fronts of the remaining drawers with molding.
Finishing
1. Fill any holes or crevices with wood filler.
2. Sand all surfaces of the complete drawers and frame thoroughly.
3. Paint or stain the completed desk organizer the colors of your choice. I chose pale green
and mauve to match the colors in the room where my organizer makes its home.
4. Follow the manufacturer’s instructions to install a drawer pull in the center of each drawer
front.
5. Insert the drawers into the frame and begin organizing!
Build many other exciting indoor and outdoor projects from
www.wowimadeit.com
!
Wyszukiwarka
Podobne podstrony:
desk organizer polka na biurko
Desk Organizer 1
9 Ch organiczna WĘGLOWODANY
organizacja i metodyka pracy sluzby bhp
Jedność budowy organizmów żywych1
Organizacja kąpieliska
Losy leków w organizmie
Zachowania w organizacji
Socjologia wyklad 12 Organizacja i zarzadzanie
Caritas Diecezji Kieleckiej organizacje ppt
4 6 Organizacja geodezji w Polsce ppt
organiz
Zasady organizowania stanowisk pracy
sroda teoria organizacji i zarzadzania
W 2 Prawno organiz pp97
więcej podobnych podstron