Installing a new Solo 1400 hard drive
Installing a new Solo 1400 hard drive
This package includes a new hard drive for your Solo 1400 notebook
computer and these printed instructions.
Tools you need
You will need a small Phillips screwdriver to install the hard drive.
Preventing static electricity discharge
The components inside your computer are extremely sensitive to static
electricity, also known as electrostatic discharge (ESD).
Caution
ESD can permanently damage electrostatic discharge-
sensitive components in the computer. Prevent ESD
damage by following ESD guidelines every time you open
the computer case.
Warning
To avoid exposure to dangerous electrical voltages and
moving parts, turn off your computer and unplug the
power cord and modem and network cables before
opening the case.
Before installing the hard drive, follow these guidelines:
Turn off the computer
power.
Wear a grounding wrist strap (available at most electronics stores)
and attach it to a bare metal part of the computer.
Warning
To prevent risk of electric shock, do not insert any object
into the vent holes of the notebook.
http://support.gateway.com/s/Manuals/Mobile/8508514/8508514.htm (1 of 5)7/28/2004 8:04:26 AM
Thank you for purchasing this Factory Service
Manual CD/DVD from servicemanuals4u.com.
Please check out our eBay auctions for more great
deals on Factory Service Manuals:
Installing a new Solo 1400 hard drive
Touch a bare metal surface on the back of the
computer.
Unplug the power cord and modem and network
cables.
Remove the
battery.
Before working with computer components, follow these guidelines:
Avoid static-causing surfaces such as carpeted floors, plastic, and
packing foam.
Remove components from their antistatic bags only when you are
ready to use them. Do not lay components on the outside of antistatic
bags because only the inside of the bags provide electrostatic
protection.
Installing the hard drive
To install the hard drive:
1.
Follow the instructions under
"Preventing static electricity discharge"
for important precautions.
2.
Shut down your notebook, then disconnect the power adapter and
modem and network cables.
3.
Turn the notebook over, then remove the battery. For more
information, see your user guide.
Warning
Disconnect the power
adapter, disconnect the
modem and network
cables, and remove the
battery before you remove
the hard drive. Replace
the hard drive before you
restore power or
reconnect the modem and
network cables.
http://support.gateway.com/s/Manuals/Mobile/8508514/8508514.htm (2 of 5)7/28/2004 8:04:26 AM
Installing a new Solo 1400 hard drive
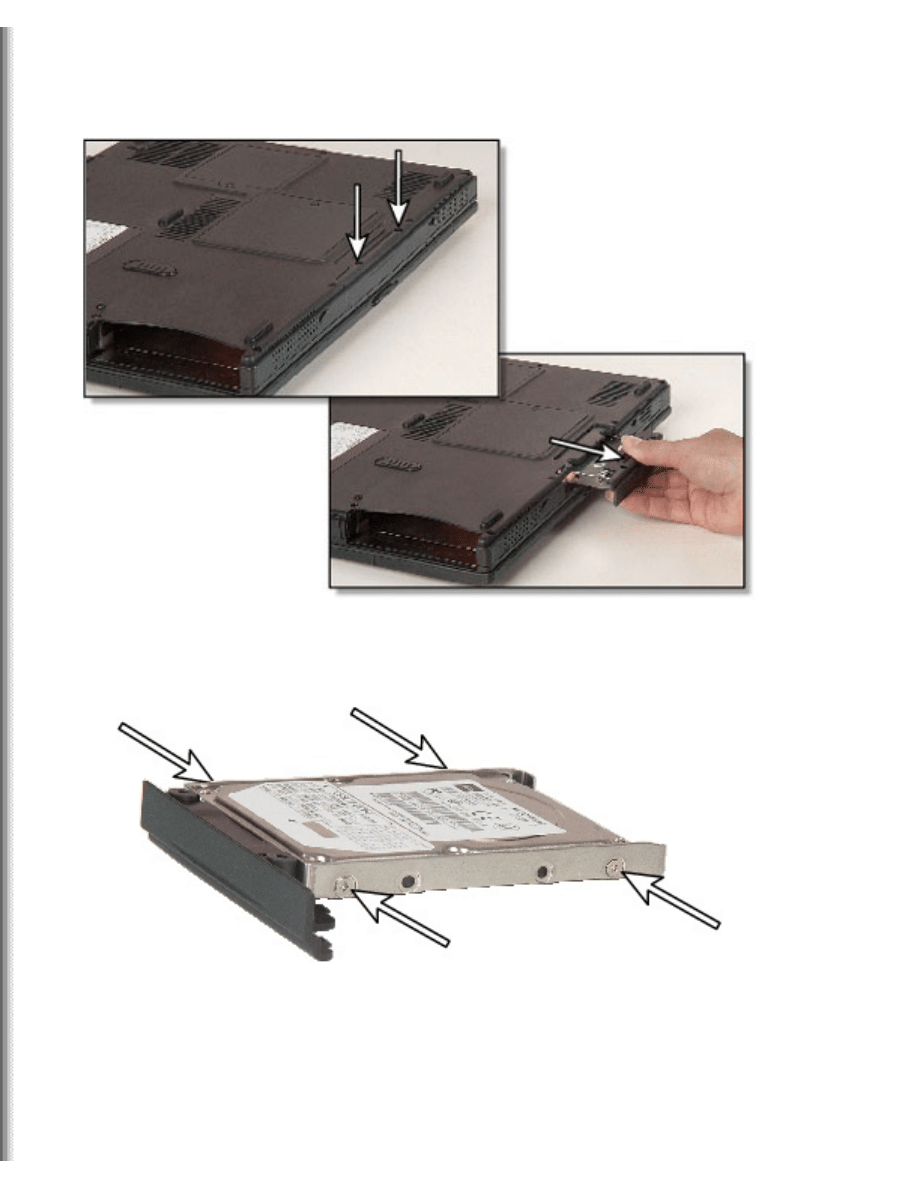
4.
Remove the hard drive screws, then pull the drive kit straight out
from the notebook.
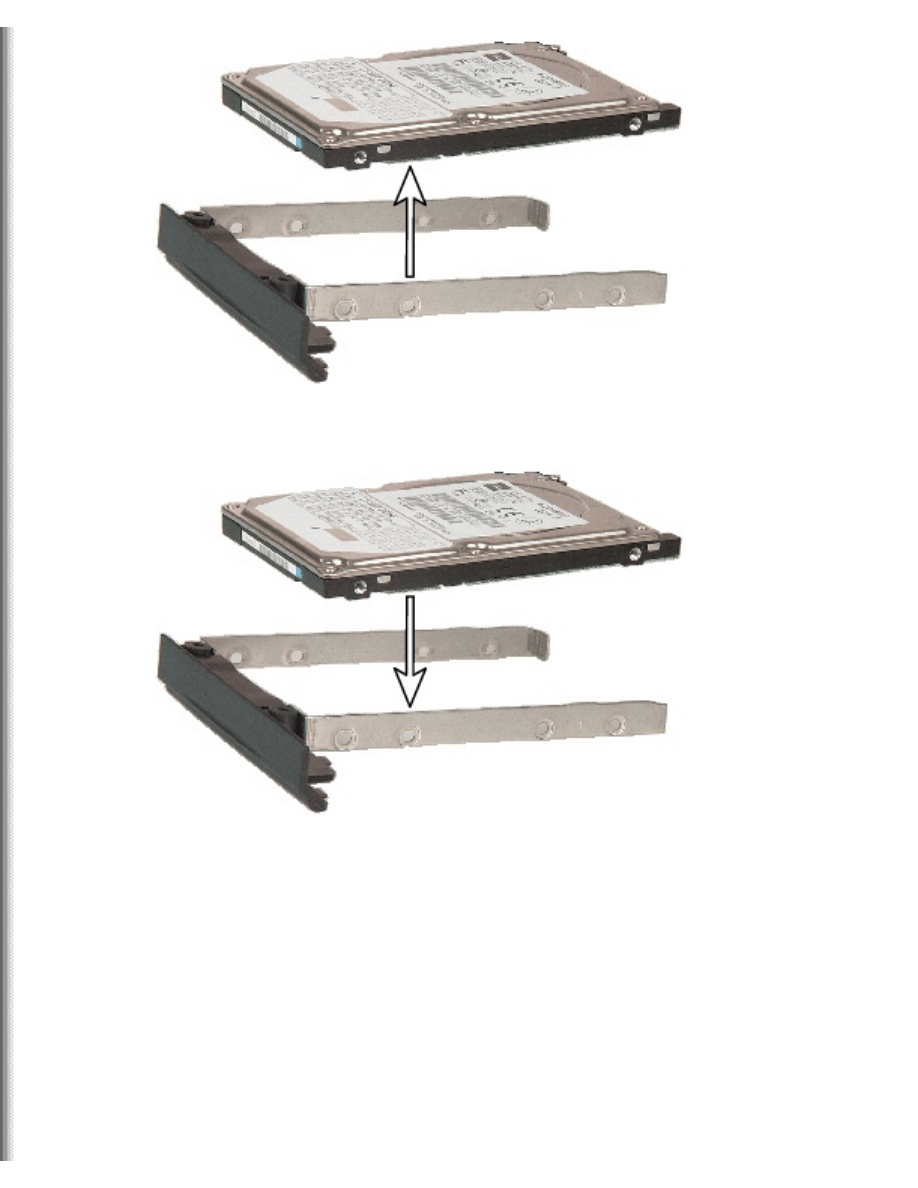
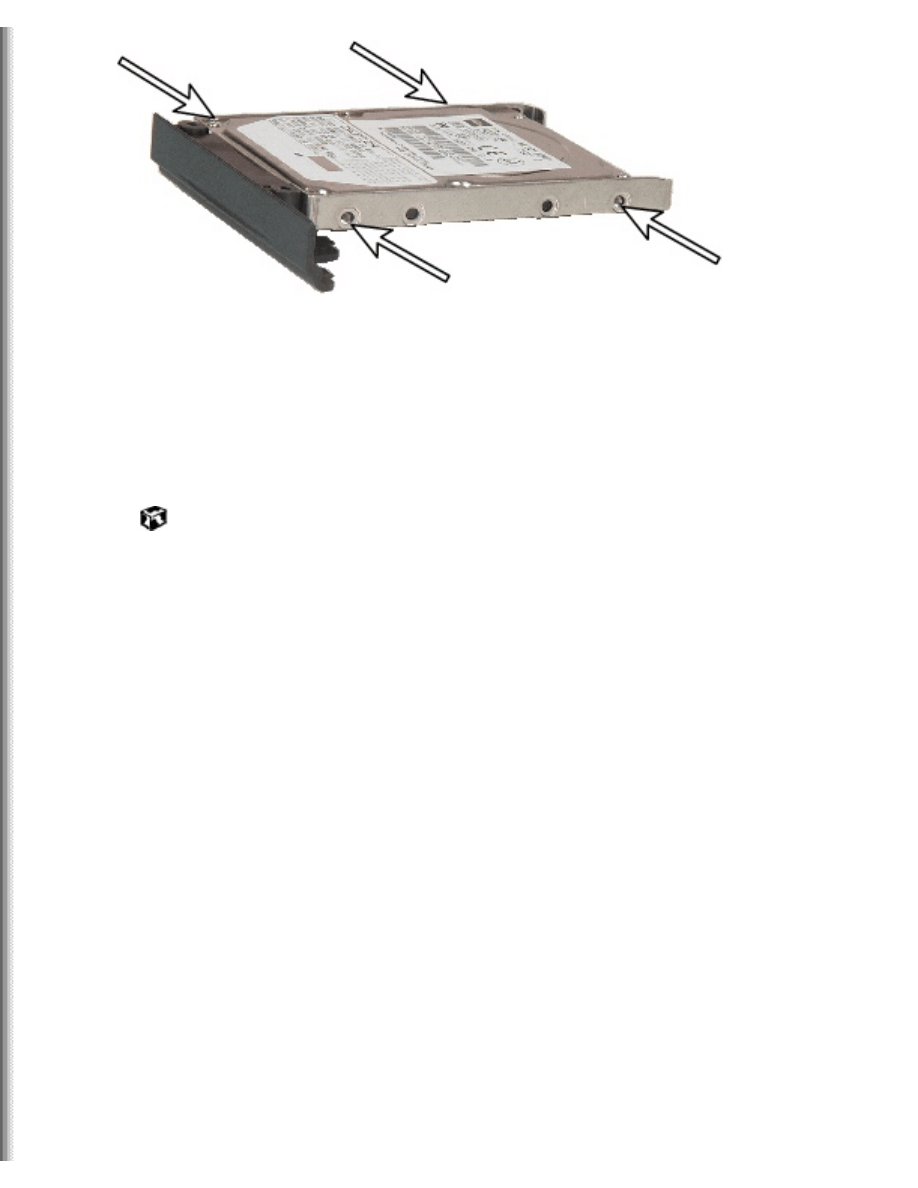
5.
Remove the four screws that attach the hard drive to the hard drive
tray.
6.
Remove the hard drive from the tray.
http://support.gateway.com/s/Manuals/Mobile/8508514/8508514.htm (3 of 5)7/28/2004 8:04:26 AM
Installing a new Solo 1400 hard drive
7.
Place the new hard drive on the tray.
8.
Replace the four screws.
http://support.gateway.com/s/Manuals/Mobile/8508514/8508514.htm (4 of 5)7/28/2004 8:04:26 AM
Installing a new Solo 1400 hard drive
9.
Place the new hard drive kit in the bay and slide it into the slot.
10.
Replace the screws that secure the hard drive kit to the notebook.
11.
Insert the battery, then connect the AC adapter, modem, and
network cables, and turn on your notebook.
Safety, Regulatory, and Legal Information
Refer to your user's guide for important safety, regulatory, and legal
information.
© 2002 Gateway, Inc. All rights reserved. Gateway, Gateway Country, the
Gateway stylized logo, and the black-and-white spot design are
trademarks or registered trademarks of Gateway, Inc. in the United States
and other countries. All other brands and product names are trademarks
or registered trademarks of their respective companies.
http://support.gateway.com/s/Manuals/Mobile/8508514/8508514.htm (5 of 5)7/28/2004 8:04:26 AM
Document Outline
- gateway.com
Wyszukiwarka
Podobne podstrony:
SOLO 3350 REMOVE REPLACE HARD DRIVE
SOLO 1200 REMOVE REPLACE HARD DRIVE
SOLO 1150 REMOVE REPLACE HARD DRIVE
SOLO 5300 5350 REMOVE REPLACE HARD DRIVE
TABLET PC REMOVE REPLACE HARD DRIVE
M405 REMOVE REPLACE OPTICAL DRIVE
M305 REMOVE REPLACE OPTICAL DRIVE
M320 REMOVE REPLACE OPTICAL DRIVE
M520 REMOVE REPLACE OPTICAL DRIVE
400VTX REMOVE REPLACE DVD DRIVE
M350 REMOVE REPLACE OPTICAL DRIVE
SOLO 5300 5350 REMOVE REPLACE KEYBOARD
200 Ways To Recover Revive Your Hard Drive
Popular Mechanics Replacing Front Drive Axles
!!Introduction to Hard drive technologies guide
M500 M505 REMOVE REPLACE KEYBOARD
400VTX REMOVE REPLACE KEYBOARD
M305 REMOVE REPLACE KEYBOARD
więcej podobnych podstron