13
BEADED AMULET PURSES • PROJECT TWO 1J
Sectlons to read before beginning:
• Fiat Peyote Stitch — Odd-Count (page 44)
• Decreasing at the sides (page 45)
• Fringe (page 51)
• Threads, Knots and Bead Graphs (page 52)
• To begin fiat peyote stitch (page 53)
• How lo read fiat peyote stitch graphs (page 56)
Materials used:
• Miyuki delica seed beads. See the graph on page 15 for a color key.
• Beads for the pendant on the triangular flap.
• Twisted bugles for the fringe.
• Size 4 or 5 bugle beads to decorate the side seams of the bag.
• Assorted beads for the strap, including:
• Austrian crystals, Czech molded glass beads, Japanese twisted bugles and delicas.
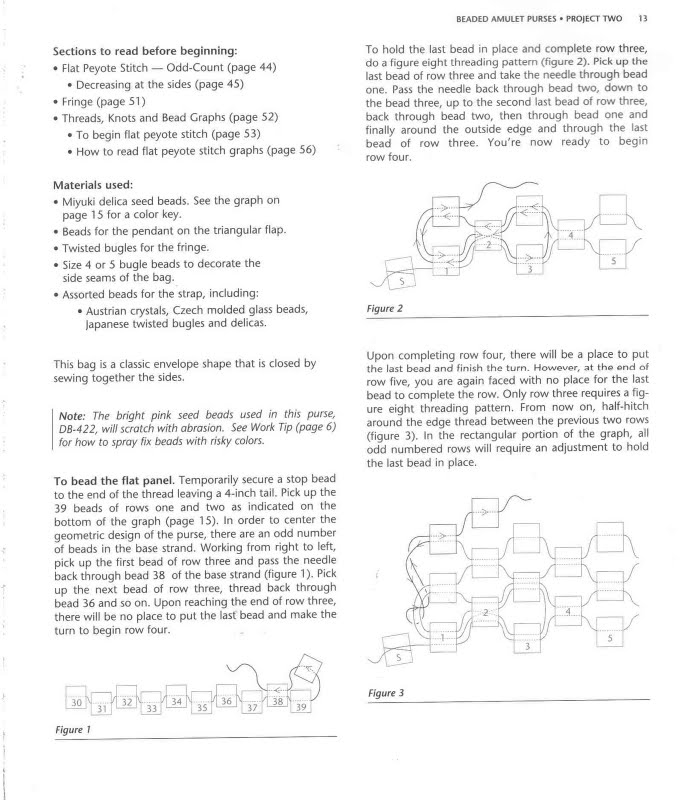
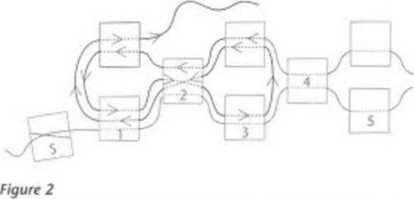
To hołd the last bead in place and complete row three, do a figurę eight threading pattem (figurę 2). Pick up the last bead of row three and take the needle through bead one. Pass the needle back through bead two, down to the bead three, up to the second last bead of row three, back through bead two, then through bead one and finally around the outside edge and through the last bead of row three. You're now ready to begin row four.
This bag is a classic envelope shape that is closed by sewing together the sides.
Notę: The bright pink seed beads used in this purse,
DB-422, will scratch with abrasion. See Work Tip (page 6)
for how to spray fix beads with risky colors.
To bead the fiat panel. Temporarily secure a stop bead to the end of the thread leaving a 4-inch taił. Pick up the 39 beads of rows one and two as indicated on the bottom of the graph (page 15). In order to center the geometrie design of the purse, there are an odd number of beads in the base strand. Working from right to left, pick up the first bead of row three and pass the needle back through bead 38 of the base strand (figurę 1). Pick up the next bead of row three, thread back through bead 36 and so on. Upon reaching the end of row three, there will be no place to put the last bead and make the turn to begin row four.
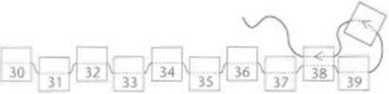
Figurę 1
Upon completing row four, there will be a place to put the last bead and finish the turn. However, at the end of row five, you are again faced with no place for the last bead to complete the row. Only row three reąuires a figurę eight threading paltem. From now on, half-hitch around the edge thread between the previous two rows (figurę 3). In the rectangular portion of the graph, all odd numbered rows will require an adjustment to hołd the last bead in place.
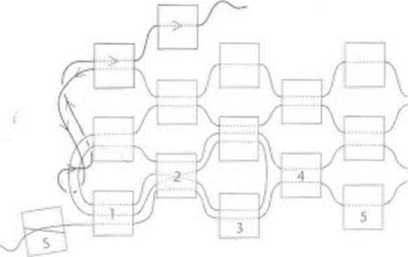
Figurę 3
Wyszukiwarka
Podobne podstrony:
BEADED AMULET PURSES • PROJECT SIX 31 Sections to read before beginning: •
BIADED AMULET PURSES • PROIECT SEVEN J7 Sections to read before beginning: • Tubul
BEADED AMULET PURSES • PROJECT FOUR 21 Sections to bo read before beginning: • Tub
BEADED AMULET PURSES • PROJECT SIX 33 To add the fringes to the edges. Add two-bead fringes between
BEADED AMULET PURSES • PROJECT ONE 11 To make the strap. Think oł the strap as a necklace. Choose th
BEADED AMULET PURSES • PROJECT ONE 9 BEADED AMULET PURSES • PROJECT ONE 9 Sections to be read before
BEADED AMULET PURSES • PROJECT FIVE 27 To create the fringe. Take the thread out through the top out
BEADED AMULET PURSES • PROIECT THREE 17 Sections to be read before beginning: • Tu
BEADED AMULET PURSES • PROJECT SEVENHHŁ jLJLJMBBULlUBaBCBBDCUBUBUBaJ
więcej podobnych podstron