Introduction
The video game world can be succinctly divided into two categories: Madden fans and Madden haters. Well haters, you
don't have many options this year. Since EA bought the exclusive NFL license, it looks like you're stuck with the big, big
man. Welcome. It'll be fun.
EA has implemented several big changes this year, so it's an even playing field for everyone. Vision and precision
passing will change the way you play Madden forever. Whether you're a reluctant convert to Madden NFL 06 or you've
been playing this series for years, this guide has the strategies to help you win. Deep down, we all know that it doesn't
matter which game of football you play, it matters how much you win by. With our help, you'll be knocking the helmets off
of everyone all across the country.
In this Madden NFL 06 strategy guide, you'll find:
Offense:
The new Vision and Precision features drastically change the game. Read here to learn how to use
them to your advantage. How to pass, run, and call the right plays are all here.
Defense:
Strategy and descriptions of the best ways to get the ball back.
Franchise:
Make a dynasty. We've got a detailed explanation of how to do it.
Guide by: Erik Brudvig
With info and strategy by: Chris Carle and Mike Rappaport
This PDF Guide is property of IGN Entertainment. Any unlawful duplication or posting of this document without the consent of IGN Entertainment will result in legal
action.
Offense
Formations
If you need some help understanding the different sets used in football, take a look at our
Offensive Formations
section to get the low-down. Experienced fans and Madden vets can probably skip this lesson, but it's valuable for those
who don't know exactly what all the lingo means.
New Features
Quite a few additions have been made to the offensive gameplay in Madden 06. Read below to learn more about them
and how to use them to improve your game.
Vision and Precision
Perhaps the most hotly contested addition to a Madden game in years is that of Vision and Precision passing. Each QB
in the game has a cone that indicates what part of the field he can see. Different QB's have larger or smaller cones
based on their field awareness. Thus, a player such as Peyton Manning has a very large field of vision, whereas those
who are still learning the game have a much smaller vision (We're looking at you Eli.).
Each play has a primary receiver. This receiver's route will be highlighted in orange and the QB's vision cone will stay
focused on him, unless it is moved by using the right thumbstick. Prior to the snap, you can switch who the primary
receiver is and your vision cone will follow someone else. Alternatively, you can remove the lock entirely and be
responsible for moving the vision to the receiver of your choice manually. The controls for this vary by system, but you
can easily check them by pausing the game and reading the "New Features" screen.
So, what does mean for you? A lot actually. First of all, if you don't have your vision cone centered on the receiver
before you throw the ball to him, the pass will be off target and the result will be an incomplete pass or an interception.
Secondly, it makes it very difficult to switch targets while scrambling. If your QB has very bad awareness, it is best to
stay locked on to your primary target. Trying to switch between targets while the defense is blitzing will result in you
getting hit hard.
If you're playing against a human opponent, you'll want to keep your vision off of the lock on mode as much as possible.
This will prevent your opponent from moving players over to double team your target. Start with the cone in manual
mode and switch it to your target after it is too late for the defense to adjust. The only reasons you would want it to stay
trained on your primary target is if you're trying to draw defenders towards your receivers so that you can open up the
field for a run, or if your QB's vision is so bad that you can't properly focus on a receiver manually.
The vision cone means that you'll have to be much more aware of what your play is before you snap the ball. If you
spend too much time trying to figure out who to pass the ball to and then try to move your vision to that player, you're
going to get snapped. The blitz is more effective than ever because it is harder to choose a receiver. If you don't see
anything developing, don't be afraid to throw the ball away. Running the ball and connecting on short passes are more
important this year because you'll be able to counter a quick blitz without worrying about the vision cone.
The Vision feature makes passing more difficult, so what did they add to make up for that? Precision is your savior. Now
you can throw the ball away from the receiver and have him run into the pass. You can lead the receiver, throw it behind
him, and throw a low or high pass. To do so, you'll need to point the left thumbstick in the desired direction as you press
the button to pass. You should use this whenever your receiver is running a slant or cross route. Leading the ball in front
of your target (unless there is someone in front of him) will keep the ball away from the defenders. Additionally, you'll be
able to keep your momentum and gain some extra yards after the pass. Likewise, if a player is running a streaks route
and has beaten the last defender, try throwing the ball high and allow him to jump for it to keep the ball above the hands
of the defense.
Smart Routes
If you just want to make it to the first down marker, select a player as you would for a Hot Route, and then press down.
This will make him run his route and then stop at the first down line. Make sure that you throw the ball before the
defense can react to this change. Otherwise, your receiver will become useless.
Truck Stick/Back Juke
Last year, Madden gave the defense the ability to hit the guy with the ball hard and try to knock the ball loose. This year,
the running backs get their revenge. By pressing up on the right stick as a defender tries to tackle you, you can attempt
to run him over. This works best when your player has a high break tackle rating. Beware of doing this with a weak
player. A strong defender can hit him hard enough to knock the ball loose and cause a fumble. Likewise, you can pull
back on the stick to stall your run while a defender flies by you.
Shifting Your Line
The defensive line has been able to shift their formations for some time. Now, you can do the same with your offensive
line. There are several reasons why you would want to do this. If you see that a blitz is coming from one, shift your line
over there to provide extra time for your QB. If you see the blitz coming through the center, collapse the line to prevent
the linebackers or safeties from sneaking through. Or, you might want to shift the line to provide extra protection for a
running back that is making a move to the outside.
The Passing Game
Throwing the Streak Route/Jump Catching
There are two times that you can throw a streak route. You can throw a quick streak when your receiver is underneath
coverage, and you can throw it long when the receiver beats the defense deep. The former is much more likely to
happen and also much harder to catch, so that's what we'll be explaining.
When you call plays with streak routes, or if you decide to hot route a receiver to a streak you need to make only a few
very important reads as soon as you snap the ball. The first should be the safety closest to your receiver. If he starts
over towards your receiver, then there's double coverage coming. If you throw into double coverage and your receiver
catches it, it'll be complete luck. So, unless you're Ryan Leaf and don't care who catches it, I would keep the ball away
from such situations. The second read you need to make is whether your opponent is in man or zone. If the D is in zone,
when you first snap the ball, you'll see the defensive backs backing up, but still facing up to you. Otherwise, that
defensive back is in man coverage.
The ideal time to throw a quick streak is when your opponent is in zone coverage, and there is only one defensive player
in the area of your intended receiver. The timing for this pass is key. You can't just lob it up there real early, and if you
wait too long, there will be a lot of time for the defensive player to recover. You need to throw the ball after the defender
turns around, and takes about two or three steps. Also, you need to throw a bullet-pass, rather than a lob or touch pass.
Once you throw the ball, you need to take control of the intended receiver and position yourself between the quarterback
and the nearest defender, cutting off the angle just a little bit. In other words, don't just run to the circle where the ball will
land, run a yard or two in front of the circle and jump for the ball. There may be certain situations where you, as the
receiver, will have to stop entirely to get position to catch the ball. You just need to remember to keep yourself between
the ball and the defender at all times.
Other Situations for Jump Catching
The streak is not the only route that you should be jump catching. Other routes include the corner and post routes. Once
again, you should be cutting off the angle of the throw and getting underneath your defender in order to make the catch.
Hottest Routes
After you get the hang of manually catching the ball on offense, you can focus on diversifying your offense, hitting
receivers on different routes. Here are a few pass routes to get you started, what defenses they are most effective
against, and when to throw them.
The Running Game
The Art of Pounding the Rock
A fourth down and inches is definitely not a given, with the defense's ability to blitz all eleven defenders. It is important to
not only follow your blockers, but also take what you are given. If you have a guaranteed three or four yards up the
middle, you should take it because the longer you wait for that big hole to open, the greater the chance that you'll be
dropped for a loss.
The Circle Route
The circle route looks kind of like a semi-circle. The receiver will start towards the middle of the field, then cut parallel
to the sideline, and finally will go towards the corner.
When to throw the ball: This depends on how the defender reacts. If the defender stays to the outside, then it is best
to throw it right as the receiver starts upfield, parallel to the sideline. If the defender takes the inside, then you should
wait until the receiver starts to go towards the corner.
How to catch it: You are going to want to jump catch the circle route. It's rare to get this route completely uncovered,
so you're going to have to battle a bit with a defender for the ball.
The Hitch
In this route, the receiver starts going straight upfield for about ten yards and then turns around and comes back to the
quarter back.
When to throw the ball: Throw the ball right after the receiver stops and starts coming back towards the quarterback.
If the defensive player closest sticks to one side of the receiver or the other, then you will want to lead the pass away
from the defender. A reception here guarantees at least ten yards.
How to catch it: Let the computer catch it.
The Corner Route
The corner route is one of the harder routes in the game to defend. It roasts man coverage, and will be even more
deadly against a cover two.
When to throw the ball: It is best to throw the ball right after the receiver makes his break towards the corner. If the D
is in man coverage, you will want to lead the receiver to the outside. This will help to create some room for the receiver
to catch the ball.
How to catch it: If the D is in man coverage, just lead the pass to the outside and let the computer catch it. If the D is
in zone, then you will probably have to battle with a defender, so you will want to jump catch the ball.
Following your Blocks
When you're running the ball, you need to stay inside of your blocks. If you go to the outside when a blocker is on the
inside, the defender will rip off the blocker and then annihilate you. The blockers also don't pick up defenders as quickly.
When you are running in the open field, using the playmaker to control blockers in front of you is a very effective
strategy.
There are a few things you can do to strengthen your run blocking on a given run play. The first is to use motion. In
Madden 2006, you can send any receiver, tight end, or running back (unless they are going to run the ball) in motion.
This means that you can motion a blocker in front of you, basically giving you a second fullback to pick up that extra
defender. The second way is to use the formation shift. You can use the formation shift to spread the defense. For
example, you can formation shift from a I-form big set to a singleback three wide receiver set. Against many coverages,
the defense will have to spread out to cover the tight end and fullback who are then converted into wide receivers. You
can also use the formation shift to strengthen blocking. If you have a big, strong wide receiver, like Terrell Owens or
David Boston, you can formation shift from a regular I-form set to an I-form big set. This adds another tight end to the
formation, making it stronger up the middle.
Run with Power
Returning from Madden 2005 is the tuck move. The hurdle is gone for good. Instead, you have a power move where the
back will cover up the ball with both arms and put his head down. When you do this, your odds of breaking a tackle are
greatly increased and your odds of fumbling are greatly decreased. You should do this when you expect your opponent
to use the hit stick on you, or when you are running through traffic. Use this if your HB has a low Break Tackle Rating. It
will make you less likely to fumble than using the Truck Stick.
Spin Away from Trouble
In older versions of Madden, you could run, and then stop, allowing the defense to overrun you, while you quickly turned
the other way and darted for a big gain. This was called stop and go running, but it doesn't work anymore. The only way
to use defenders' momentum against them now is by using the spin move. You should spin away from the defender
when he has over pursued you to a point.
Try Them All
There is a time and a place for every type of run in this game. Sweeps and tosses can be very effective when the
defense does not expect them. You should try to use a lot of leads with a fullback blocking in front of you. If you have a
good fullback, this can be a great way to get sprung for a huge gain. Counters are not nearly as effective as in years
past. The defense reacts way too quickly and busts them up in the backfield a lot. The more you mix up your runs and
keep your defenders on their heels, the more yards you will be able to collect with your back.
Running With the QB
Running with the QB is a different animal. For one, running with your QB opens him up to a lot more injuries than staying
in the pocket. Also, running on a play that isn't designed as a rushing play also exposes the QB to much more fumbling.
But there are serious advantages to running. If everyone drops deep into coverage, you can sometimes pick up 10-15
yards in the open field if your QB is mobile. To run, simply hold down the sprint button. You can drop your vision cone if
you want, but it is not required. It's a little tougher to run with the QB, but it can happen. Just look for blocks as you do
when you're a halfback.
What usually works a little more effectively is rolling out and trying to pick up yardage once you're outside. This also
affords you the opportunity to burn the defense with a throw should they come up to play you.
When running with the QB, you're protected by the rules. If you have gained enough yardage, and want to go down, hit
the Dive button to do a QB slide, and the defense can't touch you. If they do, it's 15 yards.
Play Calling
Diversify Your Playbook
The days of running two or three plays over and over again may finally be through. You will need to diversify your
offensive playbook. If the defense knows what's coming, they'll be able to stop it. Mix it up. Throw some curl routes and
slants to set up your deep ball. It's still possible to run a potent offense, but you just need to pick and choose where and
when to use your money plays.
Mike Martz and Madden
No, they're not lovers, we're talking about the Rams' offensive style. If you've watched them play, you'll notice that they
change their formations a lot during games. You can do the same in Madden. You can strengthen a side of the line
before a run by changing from a regular I-form to a big I-form with two tight ends.
When you change your formation on a passing play, the routes stay the same, but the players move. For example, if you
take a play from shotgun normal and formation shift to the shotgun two-back, then the player from the slot wide receiver
position becomes the fullback. If he is running a post on the original play, then the route actually becomes a halfback
corner route. This can do a lot to confuse the defense, especially if they are in man coverage.
Eat Your Heart Out, Bill Belichick
Knowing your team and game planning for your opponents, otherwise known as good coaching, is more important in this
game than ever before. You can make your own custom packages for different sets on offense and defense. In these
packages, you can sub players for others of similar or same positions. For example, you can put a running back at wide
receiver or a tight end at fullback. If you have a speedy backup quarterback, like Seneca Wallace on Seattle, you can
have special packages for him that take advantage of his speed.
Using Packages
When choosing plays, another way you can cross up the D is by substituting different packages in that change the
personnel on the fly. Here's a sampling of some of our favorite packages you can select before choosing a specific play:
HB Slot: The halfback leaves the backfield and heads to the slot. If your wideout is a good receiver, this isn't a

bad call. Send him on slants across the middle, and watch him chew up yardage downfield.
HB Wideout: Taking it one step further, the halfback lines up as a receiver, creating confusion in the defense.
Unless he's faster than your current receiver, he probably isn't much of a deep threat, but sent on crossing
routes, he can be quite effective.
WR Swap: To mix things up and make match-up problems for the defense, switch your receivers to opposite
sides of the field. Switch your tall receiver to run a route on a short corner, or get your marquee guy against a
slightly less skilled corner.
TE Slot: Instead of a slot receiver, put your tight end there. This can be helpful in the running game, as he can
serve as a solid blocker on outside running plays.
Spell HB: Give your halfback a one-play rest and bring in his backup to give him and opportunity to catch his
breath.
Big: On Trips plays, sub in the Big package, and then run to that side. The blocking is so much better this way.
All WR: In trips packages, make sure everyone in the cluster has wheels, and look for the fastest one coming
out of the scrum.
Before the Snap
Before the ball is snapped, there is plenty to do to assess whether the play you called will be successful. The first thing
you should do is take a look at the Coach's Cam for an overview of the entire field, as well as how you match up with the
defense that's been called. Things to look for:
Are there receivers lined up with no one covering them? This often happens when a blitz is called, or when
the defense has too few people in pass coverage. If you see this, you might want to snap quickly and get the
ball to a receiver fast. Or, if you had called a run play, audible to the pass and zip the ball to the uncovered
receiver.
Is the defense in zone or single coverage? Zone coverage usually means that not every defender is lined up
directly across from an offensive player. If you cannot tell if it's zone or man coverage, send a receiver in motion.
If a man follows him across the field, it's likely that man coverage is called.
Are the defensive backs in press or loose coverage? If they're in press coverage, they will be lined up very
close to your receivers. This may screw up timing patterns, so if you're looking for a quick release, you may
want to audible to something else, or send the pressed receivers on Hot Routes.
Is the defense stacked against the run? This is easy to see. If there are lots of guys along the line, and the
linebackers are packed close to the line as well, the defense is keying on the run. If you have something called
to go up the middle, you may want to rethink your decision.
Are there defenders blitzing? You can see a defender who means to blitz because he will usually walk up to
the line (or behind the line, if he's a linebacker) slowly before the snap. Identifying bliters will help you see what
parts of the field will be open if you can quickly deliver a ball. Or, it might show you where you need to put extra
blockers.
Once you have surveyed the field, it's time to determine whether you want to tweak anything before the snap, or whether
you're satisfied and just want to go with the play as called. If the defense has clearly keyed in on what you're doing, and
seems to have everything covered, it's often wise to audible to something else.
If you choose not to audible, there are a couple of other things to do to tweak things before the snap. We'll talk in more
detail about a couple of them in more detail in the sections below (Hot Routes and Playmaker control). One thing you
can do to further understand the defense that's been called is to put players in motion. This serves two purposes. If you
have a run called, you can put a tight end in motion to the side you're running to in order to gain another blocker. Or, you
can put a receiver in motion on a run play to take one more defender away from the side of the field that you're running
to.
On pass plays, you can expose man coverage by putting a receiver in motion. If you see that there's man coverage on,
you may want to try to get the ball to the best receiver on your squad. If you see that there's zone coverage, you'll want
to try to overload the zone by putting your receiver in motion to the side of the field where there are less defenders. That
way, you can throw a quick pass before the D has a chance to adjust.
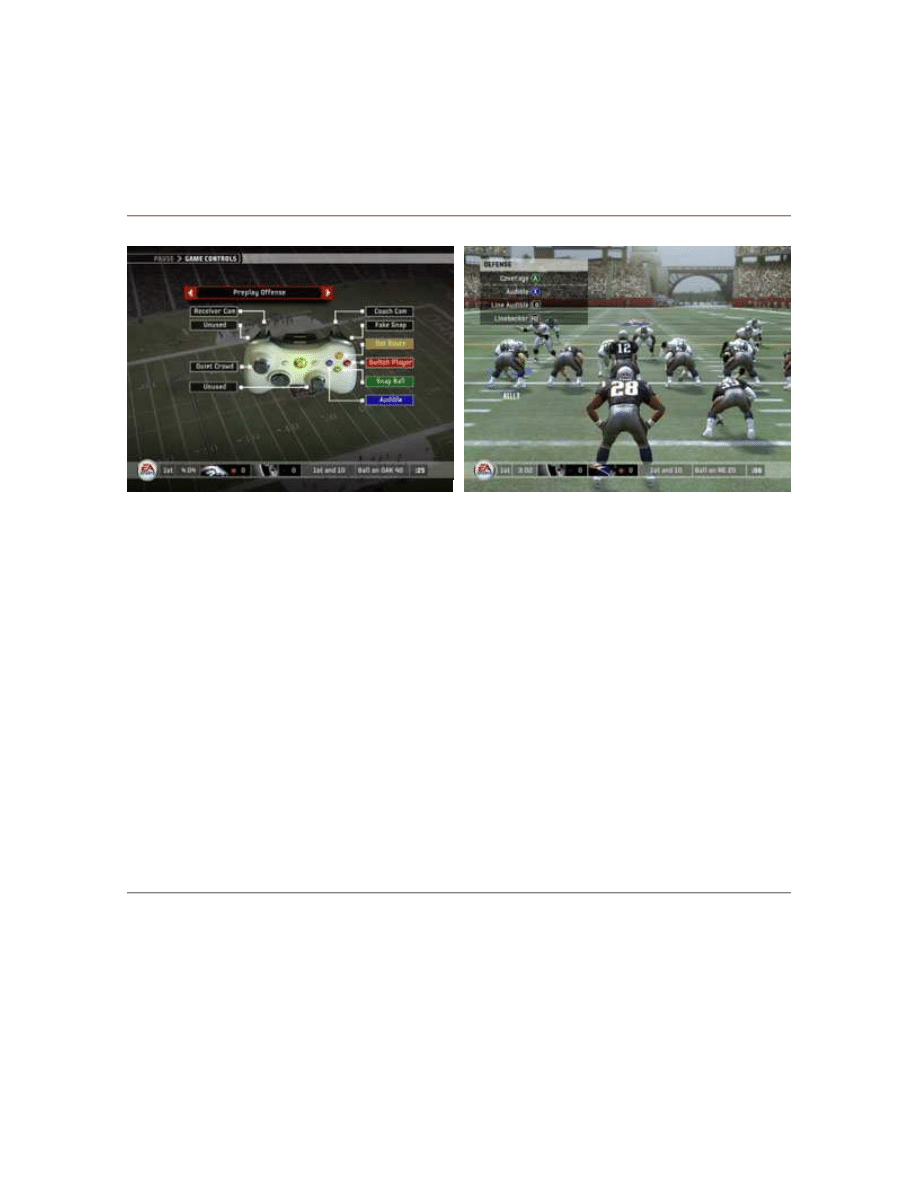
Hot Routes
Hot Routes are another way to take advantage of a defense. Think of a Hot Route as an audible for an individual player.
To call a Hot Route, hit the Hot Route button, then press the button corresponding to the icon of the receiver whose
route you want to change. Then press UP for a fly route, RIGHT or LEFT for an in or out route, and face buttons for
slants (check the manual or watch the Advanced Gameplay tutorial for your console's individual controls). You can also
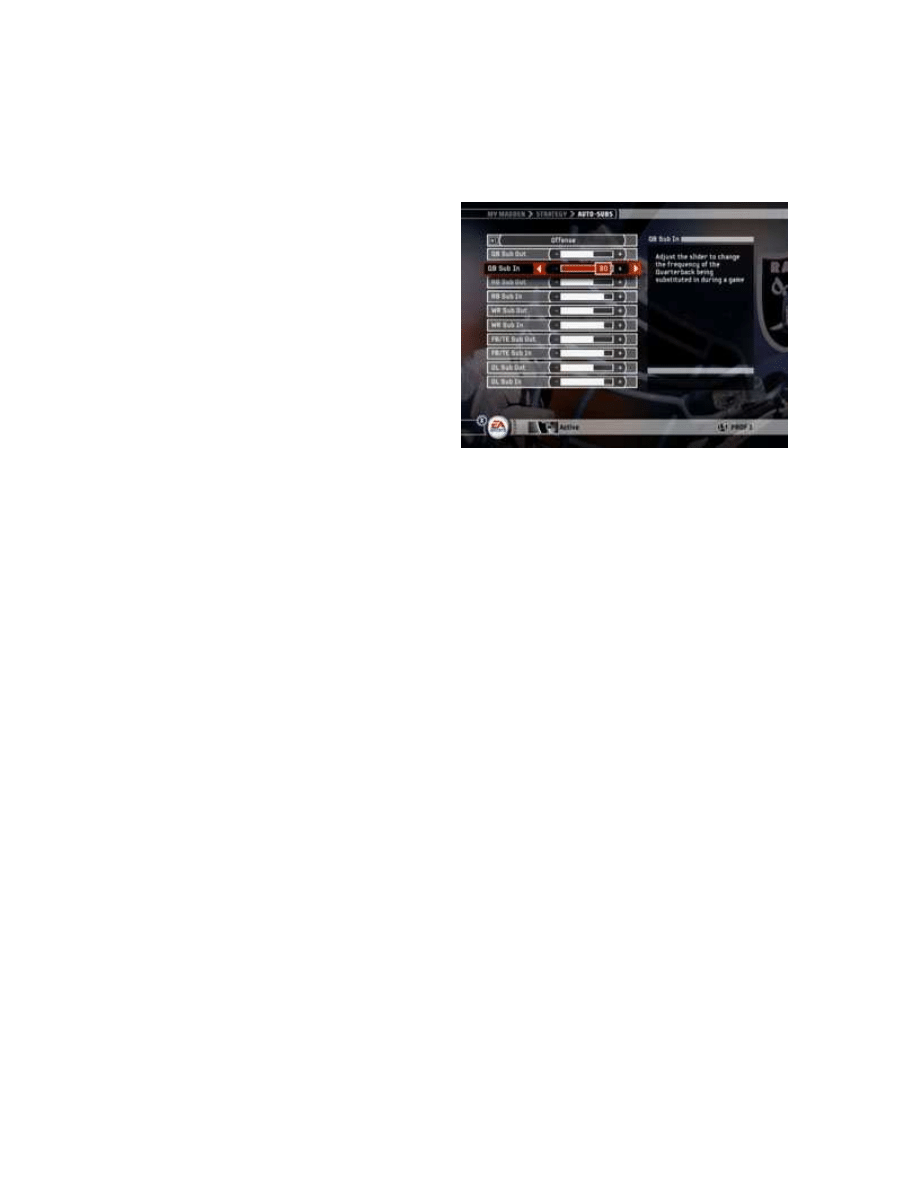
set your own Custom Hot Routes by going to My Madden, and selecting the Coaching Strategy item.
You should use Hot Routes whenever you see either a mismatch or open part of the field, or coverage that you can
exploit. For instance, if you notice your opponent has opted for bump and run coverage on your best receiver, and he's
currently running a mere hook route, you may to consider changing his route to a fly. If he beats the press coverage, he
could be wide open deep. Or, if you see that a defender has lined up on the blitz, and won't be covering a specific
receiver, you can change his route to move to the open space that will be vacated by the blitzing player.
If you're looking to toss to someone out of the backfield, you may want to send any receiver on his side of the field on a
fly pattern, to clear the defense fully out of the area. This can lead to long gains on passes to your halfback.
You can also use hot routes to set up blocking assignments to give your QB a little extra time to throw. It uses the same
button interface to run, which is helpful because it disguises what kind of hot route you're calling. Use blocking routes to
pick up blitzing players (usually with your backs). This can give you that extra split second you'll need to complete a
pass.
Using Playmaker
As on defense, there are two ways to use Playmaker--before or after the snap. Before the snap, you can use it to
change where a run will go, or do an automatic hot route for your primary receiver. To determine who your primary
receiver is, check out the play calling screen. Whoever's route is in orange is that primary target, and whose route you'll
affect with a before-the-snap Playmaker tweak. Press UP for a fly route, DOWN for a hook, and LEFT or RIGHT for outs
or ins. Use Playmaker in the same situations we discussed using Hot Routes above.
When running, you can use Playmaker to change the direction you'd like to run before the snap. If you notice that the
defense has stacked play to one side, just flick the right stick in the opposite direction and your play will now go to a
more fortuitous location. Using this in concert with motion can prove to be a tough combination to slow down.
After the snap, Playmaker control can also be used. If you're running the ball, use the right stick to point at a man you'd
like blocked, and the nearest logical player will come over and try to spring you for a big gain. This works better in the
open field than close to the line.
If you're passing, but no one is open, you can instruct your receivers to run to open spots when the play is breaking
down. This is most effectively used on a roll-out type play. It can be the difference between an incomplete or intercepted
pass or a long gain.
To make a receiver go deep, press toward the area downfield where you want the receiver (the guy who's looking at
you) to go with the right stick. The QB will point, and the receiver will head to that spot. If you want a receiver to come
back to the ball, pull back on the right stick to bring him back closer to you. You can also use this for your receiver to cut
into space, or to break toward the sideline. Just point where you want him to go, and it will be done.
Protecting a Lead
If you've built up a healthy lead, and don't want to see it go away, the name of the game is keeping the ball away from
the opposition. This means ball control and milking the clock for all it's worth. If you have a quality halfback, this
proposition is much easier. Line up in a run package and pound the ball with Blast-type plays, or something of the sort.
Mix your runs up, sometimes going left, and sometimes heading right. Don't always run to the wide side of the field, as
that's predictable.
If you don't have a good running back, you can still control the clock with high percentage completions. Pass to the flats
(watch out for lurking linebackers) and on short drag and hook routes. Make sure you're always setting your feet and
never throw into double coverage. As long as you melt a lot of time off the clock, it doesn't matter whether you punt or
score. Always take as much time off the clock before snapping as possible. Although it might be irksome to a human
opponent, it will ensure victory. Don't snap until the play clock goes under five, and all will be golden.

Coming From Behind/ The No-Huddle
Coming from behind requires precise management of the clock, coupled with a lot of big plays. When we say precise
clock management, that doesn't mean use your time outs as quickly as possible. Often, it's just the opposite. You'll need
to preserve your timeouts to stop the opposing team from running the clock out on you.
Rather, what you'll want to do is get used to running the no-huddle, and get comfortable with calling time-saving audibles
like the automatic spike. In addition, you'll need to make adjustments at the line to put your team in better position to win
on every play.
Don't think that just because you're behind that you need to score on every play. As long as you are quick at getting to
the line of scrimmage and calling a play, you can continue to throw across the middle, rather than always looking to the
sidelines. Of course, if you're able to throw consistently and get out of bounds, that's always ideal.
Offense: Formations
If you aren't familiar with the game of football, take a gander at the formation information below. It will help you to learn
what sets to use in given situations, and provide an overview of the line setups you're presented with in America's game.
I-Form
In this formation, the halfback and fullback line up directly behind the quarterback, forming an "I." Normally, there is one
wide out on either side and one tight end. The I-Form is great for running inside, as the fullback usually provides a lead
block for the halfback.
Singleback
The singleback formation is balanced for the run and pass. One back (usually the halfback) lines up five yards behind
the QB. This leaves one tight end and several receivers to catch passes. The single back formation is versatile, but what
you do with it depends on your personnel and the version of it you select. If you have a speedy back, you may want to
run sweep and toss running plays out of this formation, because one of its main characteristics is that it spreads the
field. If your back doesn't have the wheels, keep him in the backfield to protect the QB as he passes.
Pro
The Pro or Split Pro is one of the most versatile sets in the game. Two running backs are in a split formation in the
backfield. A receiver lines up in the slot to the right, along with a tight end. One wide out lines up on the left. Run or pass
out of this formation, according to your team's strengths. If you have speedy receivers, heave it up top. If you have a
quick back, run outside.
Shotgun
The shotgun formation is primarily used for passing. The QB takes a couple of steps back off the line and the ball is
snapped back to him. The extra distance gives him a chance to survey the field and read the defense before dishing the
ball.
Goal Line
Goal line formations are designed for short yardage. More often than not, you'll be running this formation when you need
to pick up a couple of inches or maybe a yard. There is massive run support and protection, with two tight ends, a
fullback and only one receiver.
Defense
Formations
If you need some help understanding the different sets used on the defensive side of the ball, take a look at our
Defensive Formations
section to get the low-down. Experienced fans and Madden vets can probably skip this lesson,
but it's valuable for those who don't know exactly what all the lingo means.
New Features
While most of the gameplay additions have been made to the offense this year, the defense does have a few new tricks
up its sleeve. Read below to find out more about them and how to make the most out of them.
Viewing an Individual Assignment
If you want to see exactly who one player is defending without disclosing your entire defensive plan to the other player,
highlight the player you want and press the View Individual Assignment button (it is different on each system, so check
your manual). If you don't like what you see, make a quick adjustment.
Adjusting the Zone Coverage
A good play caller can eat up a zone defense. It is going to be your job to adjust your zone to what the opponent has on
the field. This year, you can quickly switch to a different zone defense prior to the snap. You can switch a deep zone to a
short zone or a flat zone to a hook zone. Also, you can make your zone coverage focus on the sidelines or the middle of
the field. If your opponent likes calling the same plays and you see one coming, adjust your coverage to go for the pick.
Shading Coverage
As a defender, you always want to stay in a position of power. Now you can shade a receiver's shoulder to insure that
you're in the prime position to knock the ball away. You don't want to be on his outside shoulder as he cuts across the
field or you'll be left in the dust as he catches the ball ahead of you and sprints to the end zone. Be careful using this, if
you choose to shade a shoulder and he cuts the opposite way, you could be way out of position. The reward is there
though. Choosing right will make you much more likely to intercept the ball.
Play Calling
If you aren't all that familiar with football, take a glance at the formation section above to get better acquainted with some
of the general ideas behind each of the packages you can choose on defense. For those who are more football literate,
you may want to skip this section.
The key to calling a play is to know the situation. Instead of trying to explain the myriad possibilities you may encounter
throughout the course of the game, we've deconstructed it by individual down situations. By no means do these tell you
exactly what to call; that depends on the team you're playing with, who you're playing against, etc. But these can serve
as general guidelines to help you get into the right defensive frame of mind.
First Down: First down is a fresh slate. Your opponent can and will do anything, so you need maximum
flexibility. This is the down where you want to call something kind of general, and make plays with your
individual players. The 4-3 DE Contain is a good first down play, as it accounts for many different scenarios,
including a running QB.
Second and Long: If it's second and seven or more, you should put a Nickel defense in to ensure that you've
got the maximum number of targets covered. Just be vigilant at the snap and make sure you're also covered
short, should they try to surprise you with a run.

Second and Short: Second and short can be problematic. If it's really short (like inches), you can almost be
certain that a team is going to give the pass a try, because they have nothing to lose. This is what makes
second and short the toughest playcalling situation in football. Usually, sticking with some sort of man coverage
in a 4-3 is the best bet. But leave a safety back in case the offense decides to go long.
Third and Long: Third and long is a passing down. For this, you can feel confident about calling a Dime
package. However, in this set, you'll have to control one of the inside linebackers and cover anything across the
middle, or coming out of the backfield.
Third and Short: If it's under three yards, it's likely that the opponent will attempt a run... but not always.
Therefore, sticking with a 4-3 and collapsing the line would be a good idea. If you are confident there's going to
be a run, you can line up in a Goalline and really make things cramped.
Any Down and Very Long: If a team is trying to pick up twenty+ yards, you'll want to switch to a defense that
covers deep. The Dime is a good start, but you may want to go as far as a Prevent, which is designed to keep
the play in front of you. The worst thing you can do on a long-yardage situation is crowd the line and allow the
offense to go over the top.
When should you blitz? In Madden it pays to blitz more often than it does in the NFL. Getting to the quarterback disrupts
the play, resulting in more turnovers and incompletions. If the QB doesn't have the time to make decisions, he may
make the wrong one. Also, if you get in on the QB right away, there may be no time for the play to develop, and he'll be
forced to go to a different option, or throw the ball away.
Blitzing on first down is almost never a bad option, but make sure that most of the rest of the field is covered. Blitz a
single linebacker and see if you can disrupt play that way. On running downs, don't feel bashful about bringing a lot of
guys on the blitz, either.
Against teams with a lot of speed who like to throw all the time (like the Rams), or late in the game when a team is trying
to make huge gains, you might want to switch to the Quarter Defense. If you do this, make sure you collapse the line
(Line Shift, then press DOWN) before the snap to take away any possible inside run.
Against teams that are completely committed to the run, you may want to think about going with a Goalline defense,
even when they're nowhere near the goalline. Be careful, though. If you do this, and they get through, they'll scorch you
for tons of yardage.
In Madden 06, we like to blitz on almost every down. The new vision feature makes it so the QB will have to take just a
little bit longer before he can unload the pass. This may be just enough time for you to get there and sack him. If the QB
has bad vision, keep the pressure on him constantly. He'll make mistakes and end up getting sacked for major losses.
Zone D
The disadvantages to running zone defense in Madden are the same as they are in the NFL. A smart offensive player
will flood a zone, putting more people in an area than the defense can handle. Also, receivers will settle down in a hole
in the zone and stay there for an easy reception.
Disguise your D
You have the option of turning man lock on or off. What this means is that when you are on D and running a man
coverage, your defensive backs will not follow the wide receivers when they are sent in motion. This basically gives your
opponent the illusion of zone defense when you're really running man. A lot of the time, this will scare your opponent,
keeping them from throwing a quick button hook.
Custom Defensive Packages
On defense, you can set your best corner to cover your opponent's best wide receiver at all times. This will keep your
opponents from creating unfair mismatches, like having Randy Moss on a linebacker. Watch out, however, if your
opponent comes out in a set that doesn't match up very well with your defense, there is a chance that some players will
be left completely uncovered. For example: In a three-wide set, if you package in your number one receiver in the slot
and the defense comes out in a man zone where only the top two receivers are man covered, and if you've put your
number one defensive back and put him on the number one receiver, then the third receiver on the far side of the field
will be left uncovered.
The offense at this time should hot route to a fade or a streak and he'll be open. If you call anything across the middle,
then the safety will have time to recover.

What to Do Before the Snap
The time before the snap is your only opportunity to make adjustments to the play you called. The very first thing you
should do (when playing a game alone... multiplayer games have their own rules) is check the Coach's Cam to see how
your defensive players stack up against the offense.
If you guessed drastically wrong what the defense called, you can change your D to an entirely different play quickly by
calling an audible. If you notice that you do not have enough defenders to cover all of the receivers in the formation, that
can be a problem. If you see that the offense has most of their guys on the line, you're probably looking at an upcoming
run. Either use an audible, or adjust other things to cover each situation.
When you're out in the Coach's Cam mode, take a look to see if there is a receiver lined up with no one on him. If so,
change players and draw one of your defenders nearer to him. If it's a wide receiver, bring a safety up to cover him. If it's
a back or TE, scoot a linebacker out to cover him.
When you are satisfied that you have all receivers covered, work on tweaking things according to positioning on the
field. If you're covering the wide side of the field, you may want to line shift over to take away that side. Likewise, if a
tight end goes in motion, line shift the direction he goes to take away the strong side run. Be wary, though. Tight end
motion can mean that the offense is trying to draw your defense over to make a run to the weak side easier.
If you're confident a run is going to go up the middle, use a line shift and collapse the line (Line Shift button, then press
DOWN on the left stick). If a run is probably going to the outside, but you don't know which way, or you want to be
prepared to cover passes in the flat, spread the line by pressing the Line Shift button, then pressing UP. Doing this may
also make is easier for you to play as a defensive end and get around the corner. However, you want to avoid spreading
your line if the offense burns you up the middle. And you almost never want to spread out when facing a mobile QB,
unless your middle linebacker is a stud.
You can also shift the linebackers around pre-snap. This doesn't have as drastic an effect, but it can provide a little extra
help if you need it. Like the line, backers can be shifted to the left and right. Use this if you are pretty sure play is going
to flow to one side of the field. On a left pitch, for instance, you'll want to shift left. To make the linebackers more of a
compact unit, and seriously clog the middle, press the shift button, then DOWN. To spread them out (and flatten to the
line), press linebacker shift, then UP. The latter maneuver is good if you want a linebacker to blitz from an outside
position.
If you are really sure a play is going a specific direction, you can actually cheat both your linebackers and your line in
that direction. Or, if you want to gang up on an inside run, but leave some room for error, collapse your linemen and
spread out your linebackers. You can also manipulate the DBs, but we'll cover that in the section below...
Coverage Audibles
There is another adjustment you can make on D before the snap. You can instruct your DBs what to do. There are a few
ways to go with this: play bump and run or back off. To play bump and run, hit the Coverage Audible button and press
DOWN, and to drop back, hit the button, then press UP.
There are advantages to each scenario, depending on the play you already called. If you're in single coverage and fear
that the quarterback is going to make a quick release on a crossing pattern, get up and play press coverage. This will
(hopefully) disrupt the receivers' patterns off the line, and make it difficult for the QB to complete a pass. This is a good
thing to call in concert with a blitz, as the QB will likely feel pressure and need to unload it quickly, but his receivers won't
be where they should be.
You don't want to call press coverage against big, physical receivers like Terrell Owens and Keyshawn Johnson, or they
might leave your corner out of position and be open for a huge gain. Use discretion when pressing.
If you want to keep play in front of you, back off from the receivers. This is especially effective at the end of the half,
when all you need to do is prevent the big play. It's also a decent strategy on third and long, as you can allow the
receiver to catch the ball, then move up and attack him as he tries to bring it in and run.
Using Playmaker
As on offense, Playmaker control can be used before and after the snap to further tweak the defense. Before the snap,
you can adjust your zone coverage or safeties to cheat to a particularly dangerous side of the field. For instance, if
you're facing Marvin Harrison, you may want to cheat the safeties towards him, simply because he is an explosive

threat. Or, if you suspect a run is going to the right, cheat your safeties to the right to ensure that they will have less
distance to cover should the running back break through the line.
After the snap, you can use Playmaker control to key the defense to a particular style of play. You should be ready with
this on every single play from scrimmage. That means if the ball is snapped, and the QB makes a motion to hand off,
flick the right stick DOWN to commit to the run. This will make all of your defenders intent on tackling the runner, where
previously they may have been focusing on other assignments.
If you sense that a play is going to be a pass, flick the right stick UP, and every player on your team will key to the pass.
Playmaker after the snap makes a huge difference in how your players fly to the ball, so be prepared to use it. If you
suspect a certain type of play is coming, cheat that way. Keep your finger on the right stick right before the snap, and be
prepared to flick it, so that you can get ready for the next defensive challenge.
Line Play: After the Snap
There are certain situations where it makes sense to control a defensive lineman at the beginning of a play. For
instance, if you're sending a linebacker on a blitz, you may want to control a lineman to help create space for the backer
to get through. Or, if you're trying to play the inside run, taking charge of a lineman can help collapse the pocket and
make getting out of the backfield a challenge.
If you want to penetrate the line to disrupt the play, use the bullrush, spin and rip moves, in addition to the turbo for best
results. It also helps to try to pick a direction to go and stick to it. For instance, if you are lined up somewhat left of the
offensive lineman, you'd want to move further left while performing a rip move. But don't always expect to get through.
Playing as a lineman can be a thankless job, and sometimes will yield no significant play (aside from a few run tackles)
all game.
One thing you can do to disrupt plays is jump up to get your hand in the passing lane. When it seems like the QB is
going to throw, leap up and try to block the pass. Getting a hand on the ball will likely lead to either an incompletion or
interception, both of which are favorable outcomes.
Linebacker Play: After the Snap
Linebackers are the safety valves and playmakers on videogame defense. Using a linebacker effectively can help
fix play-calling mistakes, but you have to know what to do with him. Most times, you'll want to select the linebacker that
does not have an assignment as the one to control (to see who this is, check out the Coach's Cam before the play).
Your primary responsibility is the center of the field, so you don't want to leave it prematurely. Watch for receivers and
tight ends cutting across the center, and cover them by getting between them and the QB. Often, especially in
multiplayer, you can sit in the middle of the field and wait for an errant pass to swipe. When an offensive player gets
locked into a receiver, he/she often won't see a lingering linebacker, and that's your opportunity to jump the route and
make a big play.
Linebackers are also good at coming up to stop the run. On running downs, you should concentrate on anything to the
outside of the defensive line. The line will usually bottle up inside runs pretty well, but have a tough time getting to some
of the outside runs. You have to be able to recognize where a run is going, and then sprint over to stop the back before
he gets going.
You can also manually blitz as a linebacker. Just be sure you don't pull your guy too far out of position and leave an
easy completion or run open. When blitzing, you have a couple of options. You can take an outside linebacker and try to
cruise around the corner, but that is often too time-intensive. What works for us is to blitz between the tackle and the
guard and accelerate through the hole. To spread the defense wider, use a defensive line shift, and open everything up.
Then head through the open space and try to get in on the quarterback. Even if you don't reach him, often your blitz will
draw attention away from other players who can step up and make a play.
Tackling Tips
So the opposition caught the ball and is running with it. No sweat. If you're a good tackling player you 'll save yourself a
considerable amount of grief down the stretch. The number one rule of tackling is be square to the offensive player. That
means face him with your whole body and strike him with as much of yourself as possible. To help with this, you can use
the "face forward" control as someone is approaching.
Use turbo when tackling to make a bigger hit, but make sure you don't just glance off of the person you're trying to
tackle. Again, being square to the guy is most important. You don't want to take a bad angle and try to tackle from the
back or side, or he may slough you off.
As you approach, try to think about where the player is going to be rather than where he is. Too many Madden players
commit to the spot where the offensive player is at, rather than judging where he's going to end up. This results in
haphazard tackling attempts, or, even worse, completely missed tackles.
Don't dive! Diving is okay at the line of scrimmage, but after that, you really don't want to give yourself up like that. If you
do, you may miss and the opponent could be off to the races. Instead, just power into the guy and let the animation take
over.
If you're trailing a player and trying to catch up, stay on the turbo button until you get within a couple of steps, or catch
up completely. Again, don't dive. That should be the absolute last resort. It is better to give up ten yards of field catching
up to a guy than diving at his ankles and missing while he scampers to the end zone.
The Hit Stick
This puppy allows you to unload on an offensive player and
possibly jar the ball loose. The Hit Stick is a gamble, and
must be timed properly, or it could leave your defense
exposed.
Like we've already said in the tackling section above, the
prime tackling position is square to the ball-carrier, facing
him. It is unwise to even attempt to use the Hit Stick
function if you are not. The ideal situation is to hold the
sprint button and approach from several steps away, then
tap the right analog stick in the direction of the runner at
about two steps' distance. Your player will launch into the
air and deliver a massive blow, and in some cases, knock
the pigskin loose.
If you think that the runner might change direction right
before the impact, try to predict it and switch direction quickly right as you unleash the Hit Stick move. If you guess
wrong, the player will blaze by you, so don't attempt this maneuver unless you are either desperate or other players are
in the area to wrap up.
Defending the Pass
A cover two scheme is really an effective way to cover the pass in Madden 2006. If you are strictly interested in
coverage, then you can take a play like the 4-3 Buzz Cover 4, which covers corner all of the routes we mentioned above
except for the hitch, then send both of your defensive ends on flat zones to cover the hitch. However, you will be leaving
yourself susceptible to the run and also a scramble with the QB.
Blitzes work pretty effectively in the game, so you should mix in some blitzes with your coverage plays. Also, the manual
speed rush (where you take control of an end and manually rush around the offensive line) with a defensive end is
extremely effective on pass plays. Fast defensive ends like Dwight Freeney and Jevon Kearse have an easy time with
opposing tackles.
Playing Specific Routes
Circle: A cover four scheme will shut this route down. If you know it's coming, I would recommend a
dime zone, like the safe.
Hitch: If you're running man coverage, then bumping the receiver should hurt the effectiveness of the
route. Also, you can hot route a defensive end to the flats.
Corner: You can double team the receiver by setting a safety to help out on coverage. If you do this in
a zone, then it's almost impossible to hit the receiver.
Be Aggressive
Madden 2006 is slightly more touchy than last year when it comes to pass interference calls, but you can still get away

with more than you'd be able to in real life. Big, strong wide receivers like Terrell Owens and physical corners like Troy
Vincent and Lenny Walls really have been given the advantage as they can use their body to get position to catch a
pass. They won't flag you if you bump your opponent a little bit, if you are trying to get position to catch a pass, that is.
The Ball Swat
The swat button will be an integral part of any halfway-decent player's strategy. Going for the interception is still a viable
option, but for some reason, going for the pick in this game gives offensive players the advantage in getting the ball. The
swat is the defensive player's main weapon. Pressing the swat button at the right time will produce an animation that has
the defensive back way up in the air, keeping the ball from the receiver.
Defensive Catching
Ultimately, it is much easier to catch the ball on offense than it is on defense. For that reason, when you are on defense,
you will not want to go for the interception nearly as much. So the question is, When should I go for the interception?
The answer to that question is not a simple one. I would recommend testing your defensive players' limits. Get
comfortable with how high they can jump and how big they are. That will be your answer for most situations.
When your opponent throws the ball to a streaking receiver, it is very important that you take control of the nearest
defender as soon as possible. If the receiver is over the top and past your defenders, I would recommend trying to swat
the ball. If you go for the pick, then there is a good chance that the defender will miss the ball entirely, giving up a big
play.
If you are side-by-side with the receiver, this may be a good situation for a pick. All you need to do here is keep yourself
between the ball and the receiver and you should at least be able to knock the ball down. If the defender is over the top
of the receiver, what you need to do to keep the ball from the receiver is fairly unorthodox and pretty counter-intuitive.
First, you need to strafe backwards a few steps (the counter-intuitive part). This will face the defender up to the ball and
get him ready for the interception. All you need to do now is press the catch button at the right time and you should have
an extra offensive possession.
Defense: Formations
4-3
The 4-3 is the standard defense employed by most teams in the NFL. In it, four defensive tackles line up against the
offensive front. These guys try to stuff the run and get in on the quarterback on passing plays. They are flanked by three
linebackers, who bottle up the running lanes or drop into pass coverage, depending on the play that is called. In the
secondary, you have two safeties: a free safety and a strong safety. These players assist with the run, help double cover
receivers or pick up tight ends or backs out of the backfield. On the outside are two cornerbacks (on opposite sides of
the field). They cover the primary and secondary receivers, and help to shut down the outside run.
The 4-3 offense is very flexible. It is a good running D simply because there are so many players near the line. Four
tackles help to collapse the holes in the line, while the linebackers fill any space opened by the offensive line's push.
You can apply pressure on the quarterback with linebacker or safety blitzes (these players will explode through the line
and attempt to hurry or sack the QB or stop the runner).
The 4-3 is a good first down defense. It's less effective in third and long, and against teams that routinely use three and
four wide receiver sets, since linebackers covering wideouts tends to be outmatched.
3-4
The 3-4 is the opposite of the 4-3. Three linemen stack up against the offense, and four linebackers back them up. This
is a good defense to use against a team with little running threat, as it provides maximum coverage in the middle of the
field. It also allows for different blitzing lanes, simply because the blocking schemes up front are different. A linebacker
can blitz in the hole made by a penetrating tackle, or shoot around the outside of the line as it's sealed on the interior.
One significant thing you gain by using a 3-4 is more team speed. Trading up linemen for linebackers improves the
quickness of your team. Of course, you give up size, which might not be good on running downs. A 3-4 is perfect on
medium passing downs (second or third and 5-8).
This is the wrong defense to use in short yardage situations.

46-Bear
The 46 defense was invented by Buddy Ryan, and it took the 1985 Chicago Bears to the Super Bowl. The scheme relies
on stacking eight men in the box, and using multiple blitz schemes that attack from every angle, even dropping
defensive linemen back into coverage while a linebacker or defensive back blitzes. The key to running a 46 is knowing
when blitz and how to mix up your blitzes, so the offense doesn't know who to block on any given play.
The 46 is effective against the run, against scrambling quarterbacks, and against third and short situations. It's less
effective against a wide-open passing game, and you must have good corners to run it, since they're going to be left in
man-to-man coverage a lot. It's a risky defense with a high potential for getting burned, but with the talented players, it
can be very disruptive and force some turnovers.
Nickel
Nickel defenses are designed to protect against the pass. Also good on medium range pass plays, Nickel sets allow for
great versatility on defense. The reason for the Nickel name is that five DBs patrol in the secondary. Again, this bumps
up the team speed, but leaves your defense susceptible to the run. To guard against this, use a safety (or the remaining
linebacker) to keep an eye on the rush.
One good thing about the Nickel is that four linemen are still squared off against the O-line. If you have a superior
defensive line but weak linebackers, you may want to consider running the Nickel D more often than not.
Dime
The Dime maximizes coverage and should be used on long passing downs or against superior passing teams with little
rushing threat. Even more speed in this set assures that you won't be smoked for a big gain. Dime packages work well
to double up speedy receivers or guard against the deep ball. Like the 3-4, the Dime is quite versatile. Dime defenses
are vulnerable to the run, since you have so many defensive backs on the field and everyone dropping back into
coverage.
Quarter
The Quarter is the most extreme pass defense coverage in the game. It's like the dime, except one defensive lineman
comes out and is replaced by a third safety, giving you a total of seven defensive backs altogether. This gives you
excellent pass defense, but reduces your overall pass rush, giving the quarterback more time to through. This formation
should never be used against the run. It's best use is probably late in the half as a Prevent defense formation, when
you're willing to give up yardage but trying to prevent the deep score.
Goal Line
Goal Line defense primarily stacks up against the run. The linebackers camp out right behind the D-line and the DBs
suck up next to the line. By creating a wall of bodies, the defense is hoping to turn back penetration by the opposing
team's offensive line and running backs.
If a team has an exceptional back, you might want to consider blitzing to the strong side of the line (or the side they've
been running to most). Don't commit to a goal line blitz too often, however, as the team could run a pass play. Instead,
stay in a Base coverage. This leaves the safeties and an odd linebacker to drop out and cover should they pass.
Franchise
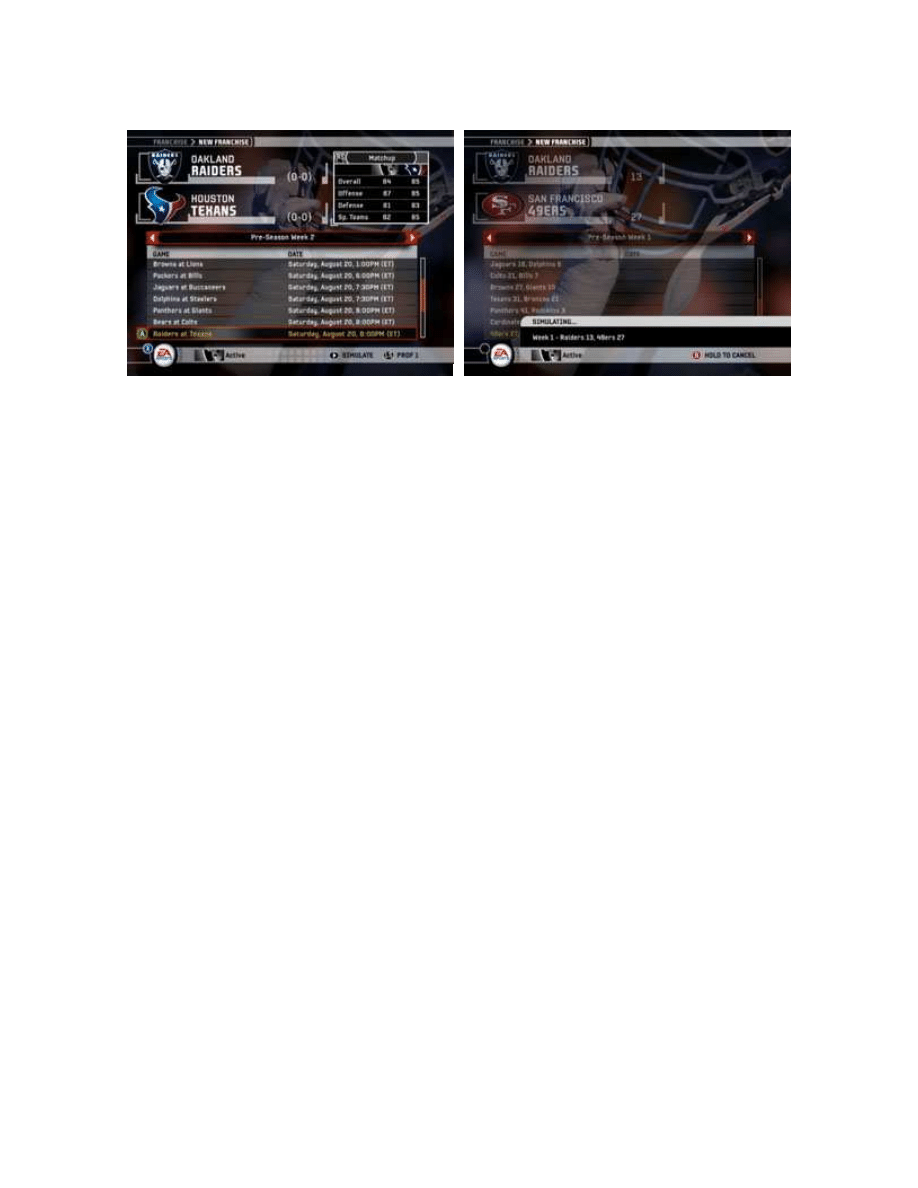
Preseason Games
Play Week allows you to play through the preseason schedule. If you don't wish to play your preseason games, go to
the Team Schedule tab on the Play Week menu and deselect all of the selected games. Then simulate them all (you can
choose to stop it midway through if you wish).
During the Preseason, you can look to sign any free agents
you think might be able to fill in holes in your team. When
you finish with the Preseason, it's on to the regular season,
and a whole new world of management and sports action.
Off-Season Schedule
1. Retired Players
See who's ready to call it quits. The menu defaults to
everyone in the NFL, but you can toggle through the
choices until you reach your particular team. This is a look
but don't touch portion of the offseason adventure. Satisfy
your curiosity and move on.
2. Restricted Free Agents
To keep these guys around, you'll need to make a
qualifying offer that other franchises can also bid on. If there
is a guy who is really important to your team, and you want to make sure that you make the offer worth his while. Look at
what he's looking for and offer a bit more. Once you sign a guy in this area, you can still renegotiate his salary later, but
it's important that you get him coming back.
3. Re-Sign Players
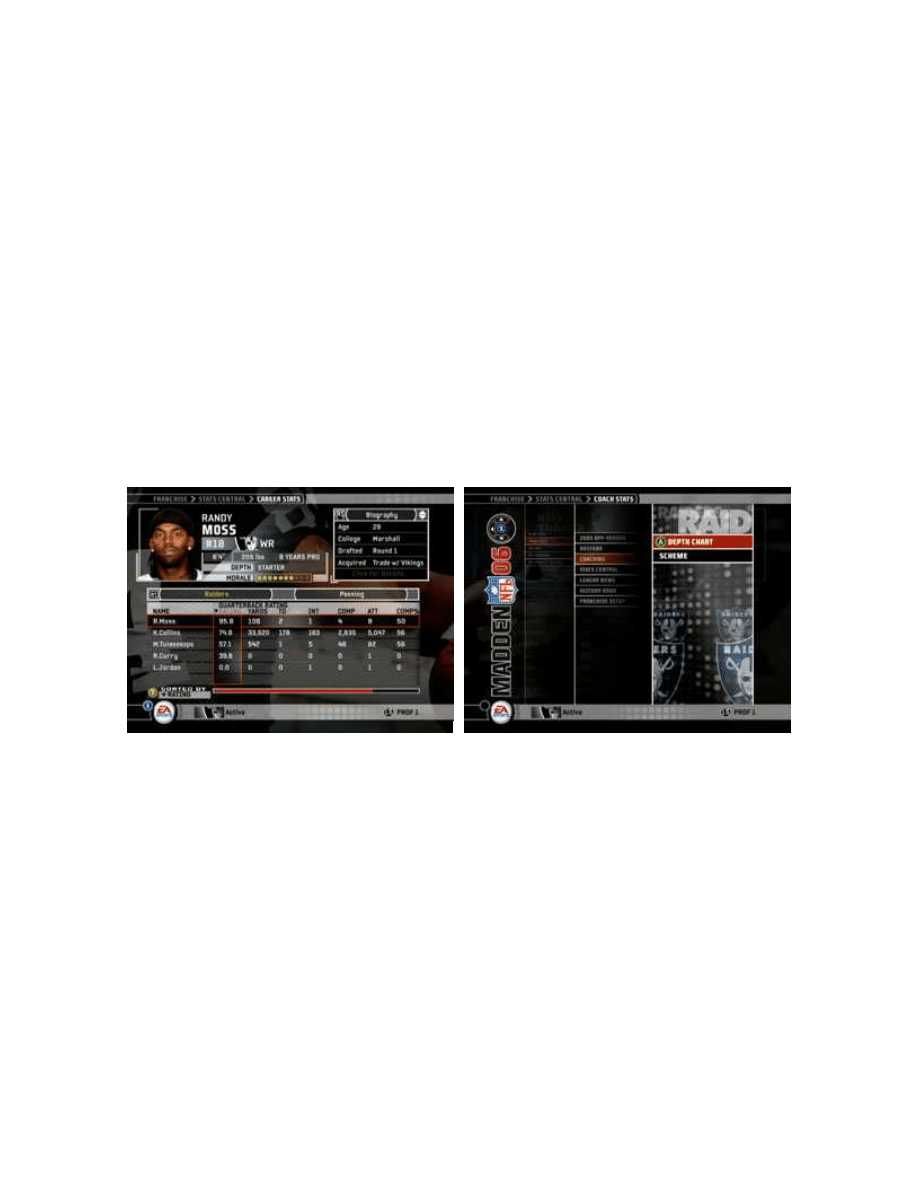
Select a player and you will be taken to his Player Management screen. Info at the bottom will tell you how the player is
feeling at the moment. From this screen, you can scroll through several options:
Re-Sign Player: We'll go into this below.
Trade Player: Self-explanatory.
Apply Franchise Tag: If you want to lock a player into your system and guarantee he has to deal with your front
office before he can even consider leaving, assign the Franchise tag to him.
Edit Player: You can change info on appearance here, but not tweak abilities.
On the Player Management screen, you can also scroll through tons of player info on the PDA. Check out his ratings
and other players' salaries at his position in order to help make the decision of what amount to offer him in the contract.
Remember, if you are down money in your Franchise, cutting salary will help your bottom line. But you have to weigh
what's going to help you. Cutting Brett Favre will not improve your attendance. But dropping an overpaid corner might
not be such a bad thing. You'll clear cap room to sign other players, and might even leave some cash in the bank. To cut
a player, you have to leave the re-signing menu... or you can just leave him unsigned. Be aware that releasing players
carries a cap penalty. If it's a pittance ($100,000 and below), don't worry about it. But if it's a big number, you have to
think hard about your decision.
The first priority is to sign those guys who have 0 years left on their contract. If there are particular players you really
want to hold onto, however, and they still have 1-2 years left on their deal, you may want to renegotiate their contracts
right away before they explode, turn into megastars and demand much more than you can pay them.
To re-sign a player, click on Re-Sign. This will take you to a sub-menu showing you this guy's wanted salary, the
contract length he wants, and his signing bonus (spaced out over the entirety of his contract). or the money-crunchers
out there, there is a year-by-year breakdown of how exactly the monies will be paid (check out the Yearly Breakdown).
You'll also be able to take a look at the Player's Interests and see exactly what you can change to make him want to
stick around. This will also show you what goes into a player's Interest bar.
When manipulating the total salary and signing bonus fields, watch what it does to the Cap Room field above. Since
salaries are counted over several years, the change per year is not huge... but remember, you need to keep everyone
signed, and bring aboard your pricey draft picks as well.
Most players are willing to come down a bit from what they're asking for, so try to lower the total salary if at all possible.
You can always spruce up the signing bonus as an incentive, or play with the years of the contract. Just don't lowball a
guy too much, or he may end up asking for a lot more.
When re-signing players (or signing anybody for that matter), think about how long you're going to play or sim Madden. If
you aren't going to play past a couple of years, load up on two-year contracts and make your Super Bowl run!
4. Rookie Scouting
Take a look at the Breakdown screen in the Roster menu to see what you need to focus your scouting on. Anything in
gray on this screen is a need that should be addressed. If you already have four QBs, you probably don't need a fifth.
Instead, look for that tight end that would shore up the running game, or an extra CB for the Dime. You may want to
write down on a scrap of paper how many of what you need so you don't have to flip back and forth between menus.
Then return to the scouting screen and take a look at what the upcoming draft has to offer.
At the Rookie Scouting screen, toggle through the categories of players you are looking for. If you have five positions to
fill, select three of each per round to take a look at. You want to spread the Rookies you scout out. Select one from the
1st round, one from the 2nd, and one in the 3rd-4th range. You can scout up to 15 players per round, so make your
selections count.
Once you've selected your first fifteen, advance to the Scouting Combine for another chance to look at the young men
you picked. The ones you've already looked at will appear as yellow. At this point, check out their Rookie Report (the
control for doing so is listed at the bottom of the screen). This will show you your kid's combine stats, as well as some
cursory info about the prospect. If you don't like what you're seeing in a player, scout someone else. If you are still
interested in one of your Targets, scout him again for more info. Select a new 15 based on the information you've gained
and press START again to go to the Scouting Workout.
At the Scouting Workout, it's the same drill. Check out their stats, and be sure to read any Notes on a recruit to see if
he's going to fit into your plans. For instance, if you're looking for a big, bruising halfback for your offense, and you read
that a kid is terrible at breaking tackles, scout someone else. This scouting info is all you'll have to go on when it comes
time to draft, so you want to have a broad spectrum of candidates in mind, as well as a couple standouts who you can
for sure take early.
Scout one last time, and you're done. Take one last look at your Targets and check out each of their Rookie Reports.
Decide, based on the projected round info, three guys who you might want to take in the first round, three for the
second, etc. You want to be somewhat prepared with a list of hopefuls when you go in.
5. NFL Draft
The Draft is not as confusing as it would be if you hadn't done all your homework above. Make sure you take frequent
glances at your Breakdown to see how well you're filling in the open positions. From the main menu, you can also see
where you fall in the Order, and get a Preview of the festivities. You can also Trade Players from the NFL Draft menu,
allowing you to do some last-minute bargaining for talent and draft position.
To begin the festivities, select NFL Draft from the menu. When you get to the Draft room, you will be in control of
the clock. You can actually slow down the Draft Speed, so do that if you need some time to think. Crank it up to see
everyone else's picks go by at hyper-speed.
When it's your turn, you'll be confronted with a screen of all the eligible draftees. The top possible selection will be at the
top of this list. However, if you don't need a player at the positions at the top of this list, scroll to the categories that will
meet your needs. It's pretty likely that you'll have scouted a player at the top of these lists. What you need to determine
is which player do you need most--a cover corner or solid backup QB? There's a lot of wisdom in selecting the best
possible player among the positions you need.
In the first round, make sure you select someone who is projected to go in the first round, as you won't have another
shot at him. Even a guy who is 1st-2nd might be around when you make your second pick. Take the best player. Repeat
this in the next round, taking someone 1st-2nd if possible (of the players you need, remember).
If you don't have a pick in a particular round, the CPU will skip you. As you get near the lower rounds, you may be able
to pick up some diamonds in the rough... guys who were scouted much higher who slipped to lower rounds. For
instance, in the 4th and even 5th rounds, we were sometimes able to grab guys who were projected for the 2nd-3rd.
Pick those guys up late and make a steal!
In the dregs of the draft, don't be bashful about picking up guys you haven't scouted. Just look for the top player in a
position you need, check out his Rookie Report, and if it satisfies you, draft him. The 6th and 7th rounds are full of
enigmatic pickups, but they can turn into great players down the line in your Franchise. Or you don't have to sign them if
you don't need to. But the option is always good.
6. Sign Draft Picks
There are some informational selections from the Sign Draft Picks menus that are of interest. The Draft Recap will show
everything that transpired, the Draft Grades selection will rate how all the NFL teams did picking their guys, and the
Breakdown will show the positions you're still looking to fill.
Similar to re-signing your talent, you want to focus on your top draft picks first and spend the most money on them
(they'll ask for it anyway). Placate them with nice signing bonuses, and try to drive the total salary down to keep your cap
flexible. Once you sign a guy, his overall rating will be revealed. It's pretty rare to pick up anyone much more than an 80,
but it happens... and when it does, it's magic.
Don't feel bad if you don't sign everyone. But try to fill the vacancies in your roster as best you can. Rookies don't often
play, but it's nice to have them on the bench to fill in the required positions, and get better just by experience.
7. Free Agent Signing
This plays out much like signing coaches. The guys you want, you'll have to go at with the big guns first. Give someone
a big enough offer right off the bat, and they might sign with you right off the bat. Otherwise, you could get into a bidding
war and drive their price over its actual value.
Again, make sure you look at the Breakdown to see what you need. This time, though, since you can look at ratings, see
if you can improve any of your positions with a good pick-up here. If you have a 90 QB, but backups in the 40-60 range,
you might want to sign a pseudo-marquee guy to fill in the backup role.
Pay close attention to the guy's Interests, and try to get a guy who is a good fit for what you're offering. Make sure you
scroll through on the PDA to find comparable players in the league, and see what they're making, so you have an idea of
the kind of price you should be looking for.
When you have made all of your offers, you can advance time by pressing START. You can advance any number of
days, or zoom through the whole free agent signing period at once. You'll be alerted to players who sign with you, and
they'll begin counting against the cap. If you leave the game sit, it will naturally move through the days.
8. Re-Order Depth Charts
Shuffle your new rooks into the lineup, change up your kick returners and supplant the starting QB with the upcoming
hellion. Organize your team to your tastes, and get some new blood into the mix. You'll notice on the Depth Chart that
certain stats are yellow. These are the ratings that changed during the offseason.

9. Start New Season
See how you did in the Off-Season, and get to it!
One Last Thing...
When the new season begins, you'll get a chance to set your Preseason schedule. Although it flies in the face of what
the NFL normally does, you might want to schedule all of your games against the toughest opponents you'll face that
year. That way, you can scout their tendencies and know what kind of plays they're going to be running when you meet
them later. Try it out!
Wyszukiwarka
Podobne podstrony:
kk, ART 42 KK, V KK 360/06 - wyrok z dnia 4 grudnia 2006 r
Madden 08 ign
MT st w 06
Kosci, kregoslup 28[1][1][1] 10 06 dla studentow
06 Kwestia potencjalności Aid 6191 ppt
06 Podstawy syntezy polimerówid 6357 ppt
06
06 Psych zaburz z somatoformiczne i dysocjacyjne
GbpUsd analysis for July 06 Part 1
Probl inter i kard 06'03
06 K6Z4
06 pamięć proceduralna schematy, skrypty, ramyid 6150 ppt
więcej podobnych podstron