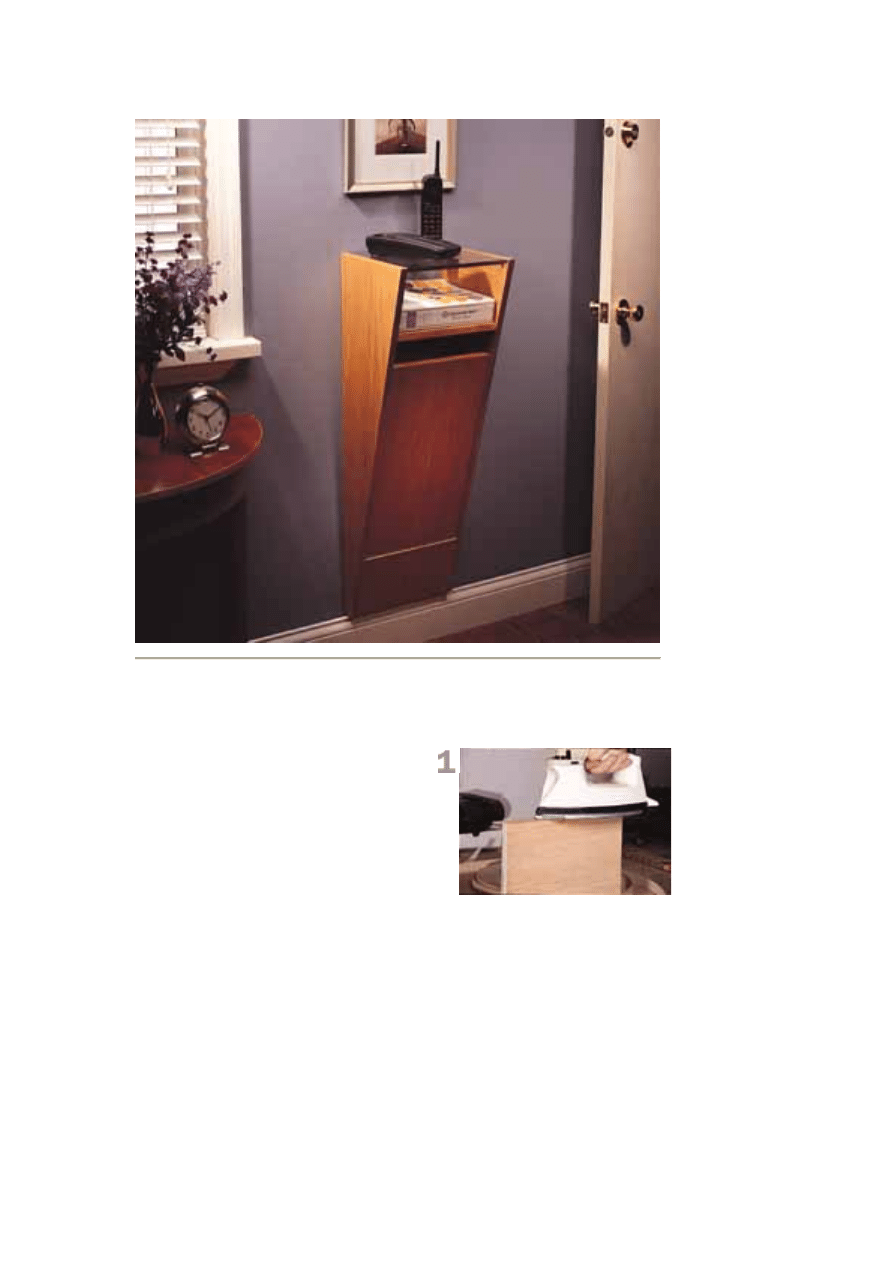
European Telephone Console
Keep your phone, phone books, keys
and other small items in order.
Being worldly woodworkers, the Popular
Woodworking staff spends time checking
out woodworking ideas from Britain,
Australia and even Germany. It was in a
German woodworking magazine called
Selbst that we saw a similar entry hall
stand. Its clean lines and utilitarian
efficiency caught our eye, so we decided to
give it a little American schooling and share
it with our readers.
Two Triangles
I was able to get all the necessary parts
(except the back) out of a 4' x 4' piece of
cherry plywood. Start construction by
ripping two 12½"-wide pieces from the
sheet of plywood, then crosscut the pieces
These first six photos show the sidebar
"Iron-on Wood" below. Start with a piece of
tape that’s about 2" longer than the edge
you are covering. Your iron should be on a
cotton setting, with the steam turned off.
Make sure the tape overhangs the edge
evenly, then start ironing. Make long
passes over the edge, not stopping in any
one place for any length of time, applying
heat evenly. The tape will start to curl up a
little as the glue melts.
to 38" long. Next, strike a pencil line from
one corner, 12" from what will be the back
edge, and connect it to a point on the
opposite corner, 1½" from the same back
edge. Mark both pieces, making sure you
have left- and right-facing pieces.
Head to the band saw with the two pieces
and cut along the pencil line, leaving about
an 1/8" wide of the line. Then take the two
pieces to the jointer and trim the angled
edge straight and fairly close (1/16") to the
line. To make the two pieces identical,
clamp them together, flushing up the back
and top edges. Using a sharp bench plane I
made a few passes on the angled edge to
even up the pieces.
Parts for the Middle
Grab what’s left of your plywood sheet and
rip an 11"-wide strip from it. From this 11" x
48"-long piece you’ll be able to get the door,
the kick, the two cleats and the shelf.
Crosscut all the pieces except the shelf to
size. The piece that is left is enough to
make the shelf, but I turned the shelf so the
grain would run longways to better match
the veneer tape. Go ahead and cut the
shelf to size now.
lots
Now it’s time to disguise the plywood as
solid wood. The front and top edges of both
sides receive iron-on veneer tape, as well
as the front edge of the shelf, the top edge
of the kick and the top edge of the lower
cleat. Don’t tape the door edges until the
case is assembled. If it’s your first time
using veneer tape, see the instructions on
the next page.
Put it All Together
There are a couple of joinery methods you
could use to join the pieces together, but I
chose biscuits. Start by marking the
location of the shelf on the two sides and
cut those biscuit slots. Then mark the
location of the upper cleat to biscuit it to the
underside of the shelf and into the two
sides. The lower cleat is biscuited flush to
the back edge and bottom of the sides,
while the front kick is flush to the bottom
edge, but held in 1/8" from the front edge to
add shadow lines and to keep you from
having to align the door perfectly with the
edge of the cabinet. With all the biscuit s
cut, sand the inside faces, add some glue
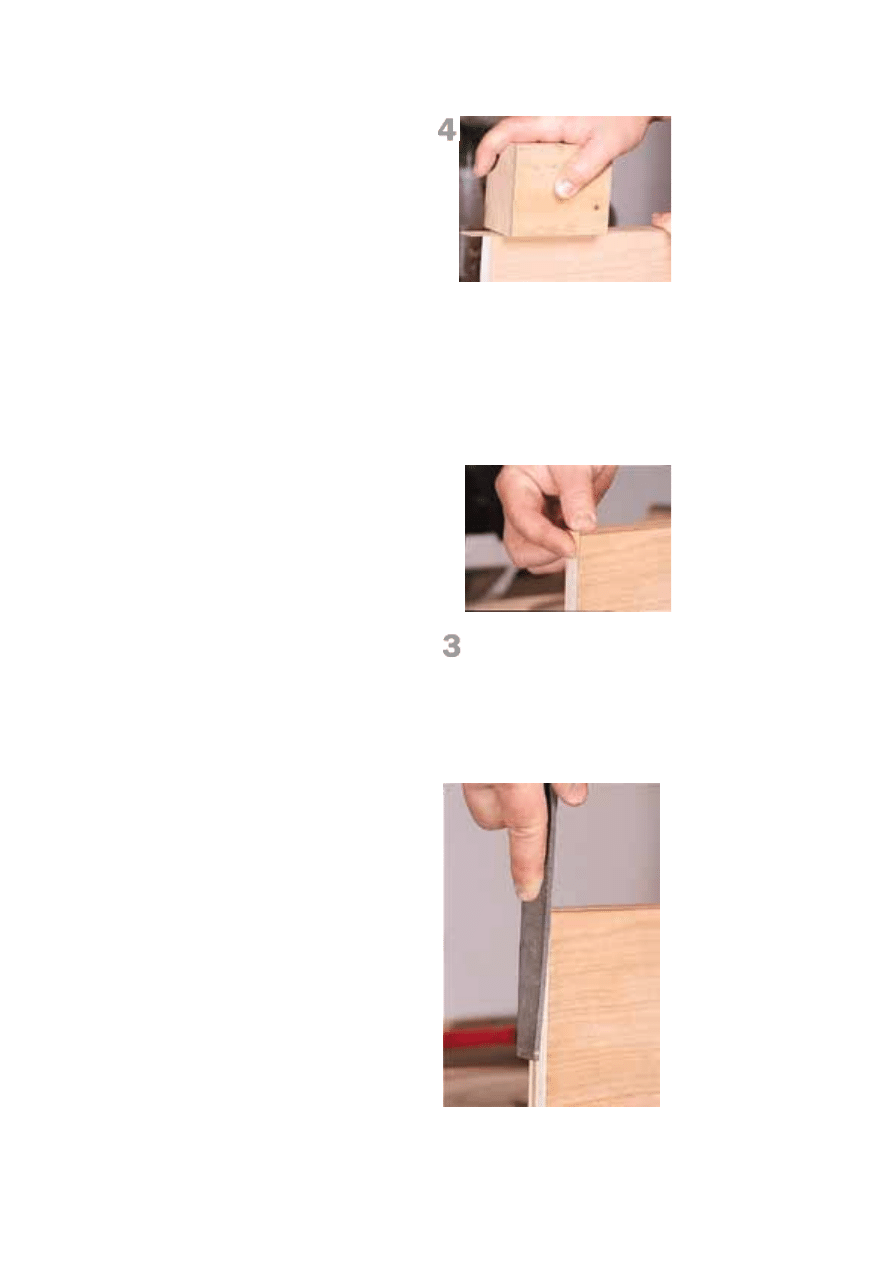
Since trying to use the iron to hold the tape
in place as the glue dries just re-heats the
glue, switch to a simple block of wood. The
chunk of poplar shown here works great.
The bottom surface is sanded smooth and
the edges are broken to avoid snagging or
scratching. Simply apply pressure and
make long passes over the edge for about
30 seconds. If you have a few pieces to
veneer, set the first piece aside for now to
let the glue cool.
To trim the edge, start by carefully
bending over the ends until the veneer
breaks. Make sure you apply pressure to
the end of the attached veneer so it doesn’t
splinter back onto the visible edge. Then
pull the “dangling chad” of veneer
downward to tear it free. By the way, if
you’re doing four edges of a board, do two
opposite edges first, trim the edges, then
apply the other two edges.
To trim the long edges of the veneer tape,
and clamp the piece together. Though
there’s little chance of the piece racking,
check it for square.
in
and fit the door, then veneer all four edges.
ar Top
and the Right Hardware
ch
on
d
t
eld in
place using a brass lid support and a
ow
"
resentable, file the edges flat, then
sand through 360 grit to a near-perfect
convenient place to
hang keys, phone books or any other “near-
roke
ove
After the glue is dry, remove the clamps
and roll the piece onto its face. Chuck a
rabbeting bit into a router and cut a 3/8" x
3/8" rabbet in the back edge of the sides
and in the top and bottom cleat. Cut a ¼"
back to fit the space and round the corners
to let it drop into place. Don’t put the back
yet as it’s easier to finish and mount the
door hardware with the back off. Go ahead
Finishing Touches: A Cle
The door is held in place using a
continuous hinge mounted to the kick. You
should be able to catch six holes in the
hinge. Start by mounting the hinge to the
kick, then use the two center holes to atta
the door. Check to see if the hinge locati
allows proper clearance. If not, back out
your first two screws and use two other
holes to scooch the door one way or the
other. When you’ve got it right, plug the
misaligned hinge holes with a toothpick an
some glue, then redrill the pilot hole and pu
the screws back in. The door is h
magnetic catch.
The clear acrylic top is the last construction
step, and it’s fairly easy to install. Simply
drill four shelf pin holes in the sides to all
a 3/8"-thick piece of acrylic to rest 1/16
below the top edge. The acrylic piece is
available as a 12" x 12" piece from a
number of catalogs as a router-table insert.
Cut the piece close to finished size on the
table saw, then sand the piece to a press fit
a little at a time. To make the two visible
edges p
edge.
Two coats of clear finish will protect the
wood, and the piece is ready to hang. The
upper cleat works great as a mounting point
using a couple of molleys in the wall. Add a
few simple cup hooks to the backside of the
door, and you’ve got a
the-door” items. PW
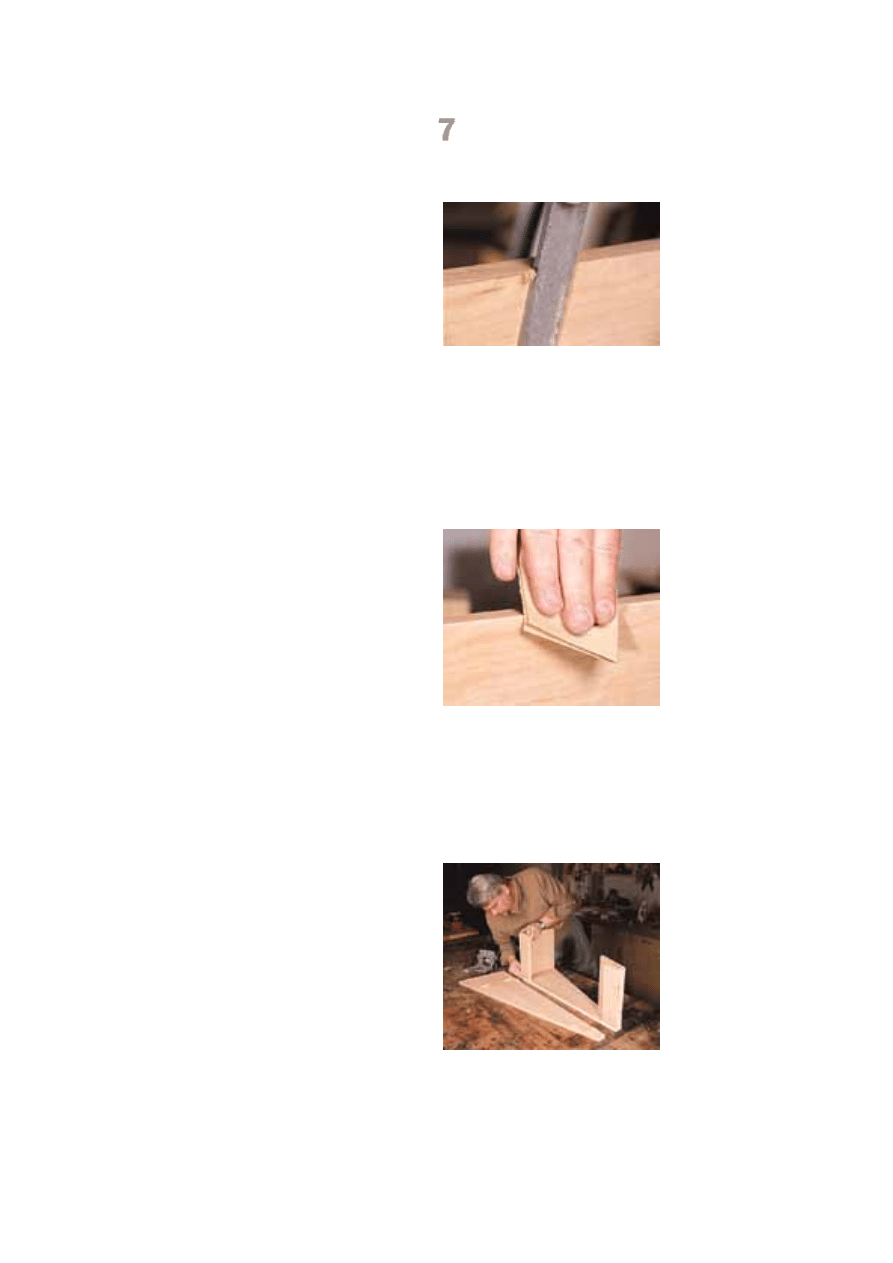
the tool of choice is a mill bastard file.
Start by flushing the ends you just b
r, keeping the file flat to the side, and
using only a pushing stroke. It should only
take a couple strokes to flush up the end.
To trim the tape edges, use the file again,
er
e
working right to left against the edge. The
best method is to start the file at the end of
the tape and push lightly against the
overhanging edge to start a curl of vene
breaking away from the edge. Continue
rolling the curl along the piece, keeping th
file angled forward and at a slight bevel to
the veneer tape. Once the curl is knocked
off, lightly file the bevel again to remove
any excess.
TThe file is too aggressive for a finished
edge.
edge, so trade it in for some 220-grit
sandpaper and finish cleaning up the
You’ll find some of the adhesive is stuck to
the face of the board. This can be lightly
sanded off, but proceed carefully to avoid
sanding through the face veneer. That’s all
there is to it, but don’t go using the clothes
iron, buy your own for the shop!
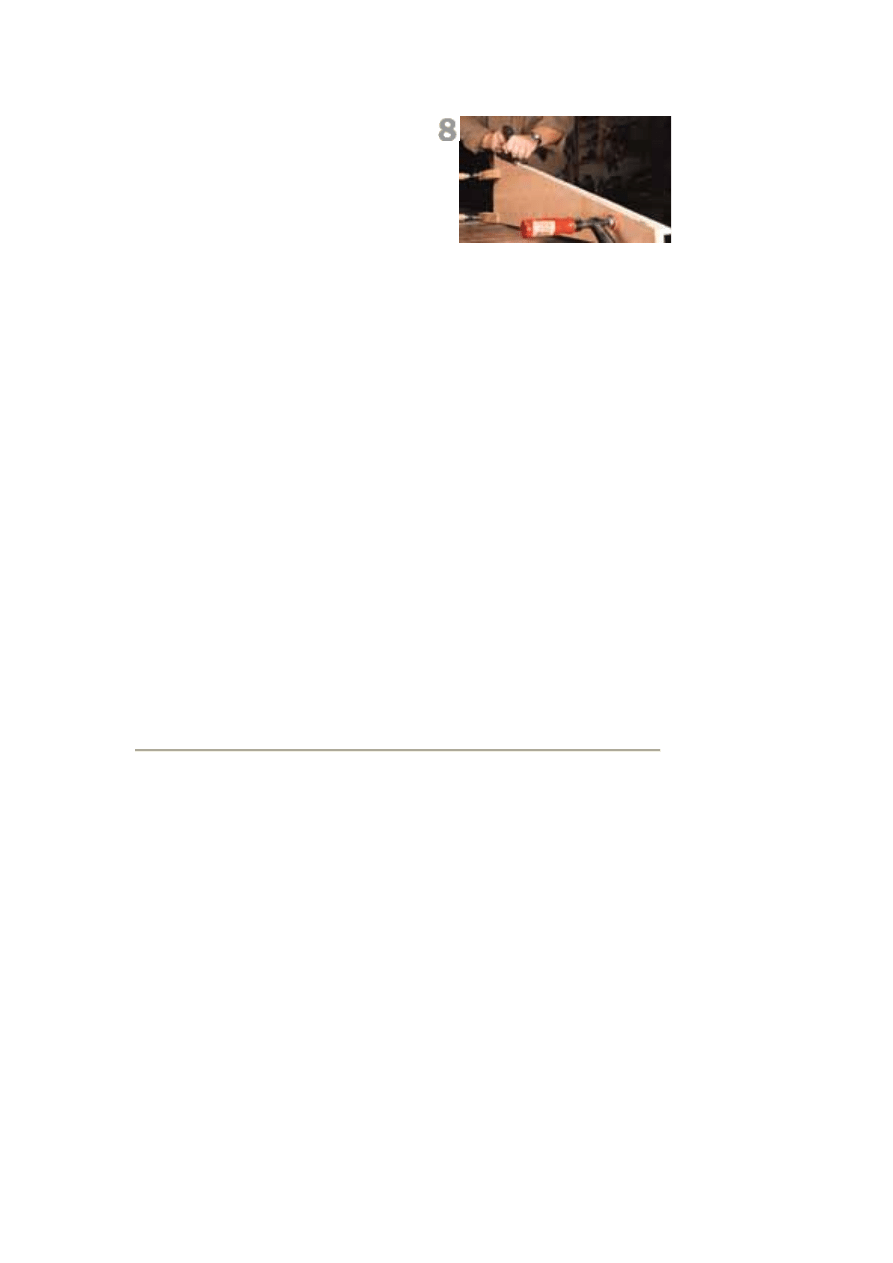
With all the cross members cut, the biscuit
e
joiner makes it possible to pull the project
together. This photo also shows the two
cleats in place at the top and bottom of th
case.
Sidebar: Iron-On Wood see first six
photos
There are lots of reasons to use plywood in
a project. Cost, weight, wood movement
and even environmental considerations. But
just because you aren’t using solid wood,
you don’t need to give up the look of solid
wood.
Iron-on veneer tape has been around
ck.
a simple household iron
iece
durability of
ollow the steps below for some tips to
etting the best results from your veneer
for a long while, but it has sort of a “cheap”
reputation. I’m here to tell you it’s worth a
look.
Available in a wide variety of wood species,
veneer tape is actual wood veneer with a
heat-sensitive adhesive applied to the ba
With the heat of
and a few simple tools you can turn a p
of plywood into a finished and attractive
piece of wood.
I’ve been asked about the
veneer tape. I can’t honestly think of any
application for solid wood where tape
wouldn’t hold up as well.
F
g
tape.
Once the two side wedges are cut to rough
size, trim them a little closer to accurate on
the jointer. Once you’re within about 1/16"
of the finished line, clamp the boards
together and get out a bench plane. With a
little hand work the pieces will match up
perfectly.
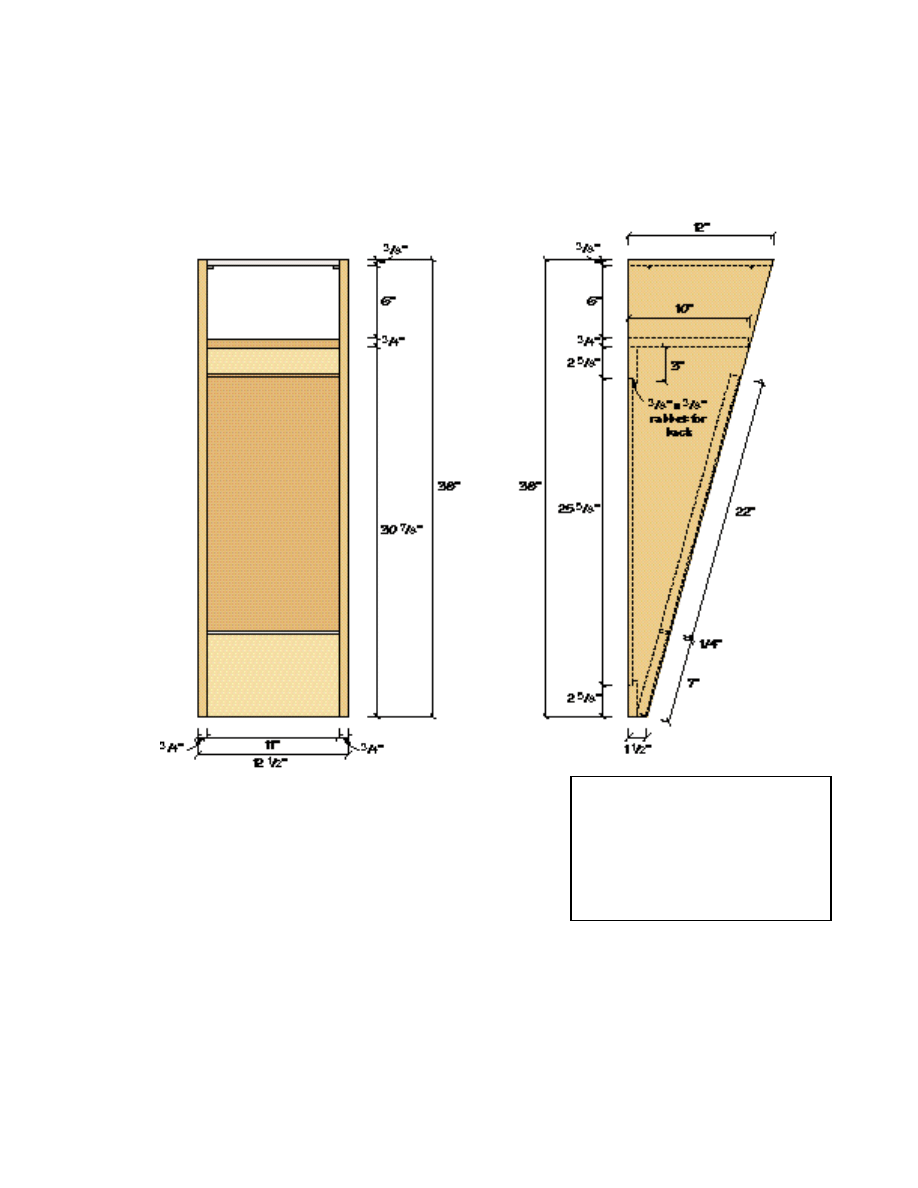
European Telephone Console
No. Item
Dimensions T W L
Material
2
Sides
3
⁄
4
" x 12" x 38"
Cherry ply
1
Shelf
3
⁄
4
" x 10" x 11"
Cherry ply
2
Cleats
3
⁄
4
" x 3" x 11"
Cherry ply
1
Kick
3
⁄
4
" x 11" x 7"
Cherry ply
1
Door
3
⁄
4
" x 11" x 22"
Cherry ply
1
Back
1
⁄
4
" x 11
3
⁄
4
" x 25
5
⁄
8
" Cherry ply
1
Top
3
⁄
8
" x 11" x 12"
Acrylic
Wyszukiwarka
Podobne podstrony:
Console Table
Table Telephone Table (Wall Mounted)
Table Shaker Console Table
EUROPEJSKA WSPÓLNOTA GOSPODARCZA
Unia Europejska 2
OPIEKA DLUGOTERMINOWA W KRAJACH UNII EUROPEJSKIEJ
download Prawo PrawoAW Prawo A W sem I rok akadem 2008 2009 Prezentacja prawo europejskie, A W ppt
europejski system energetyczny doc
Europejski Bank Centralny
LOBBING W UNII EUROPEJSKIEJ
Integracja europejska geneza i rozwoj
Turcja a Unia Europejska
Ćwiczenie 2 Polska w europejskim systemie bezpieczeństwa
prawo europejskie (EWSPA uslugi)
Problemy zrównoważonego rozwoju w Polsce i Unii Europejskiej
więcej podobnych podstron