83 6f6936accc

m


4-13
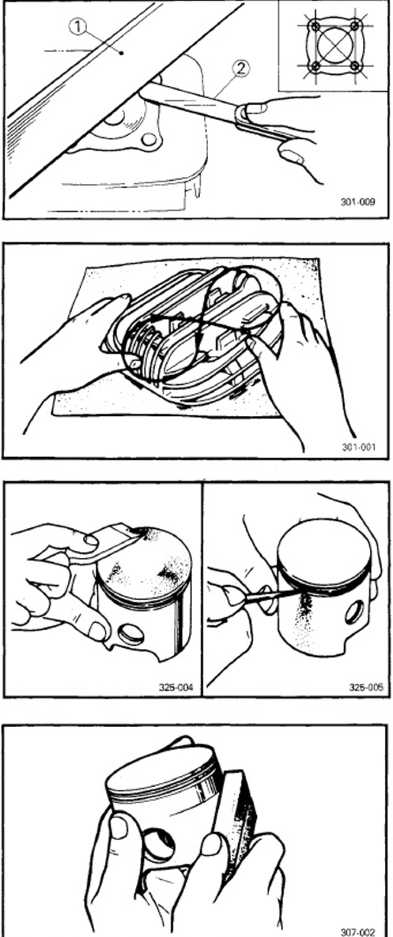
Warpage measurement and resurface-ment steps:
•Attach a straight edge (J) and a thickness gauge (2) on the cylinder head.
• Measure the warpage.
• If the warpage is out of specification, resur-face the cylinder head.
•Place a 400 -600 grit wet sandpaper on the surface piąte, and resurface the head using a figure-eight sanding pattern.
NOTĘ: _
Rotate the head several times to avoid remov-ing too much materiał from one side.
INSPECTION AND REPAIR
CYLINDER HEAD
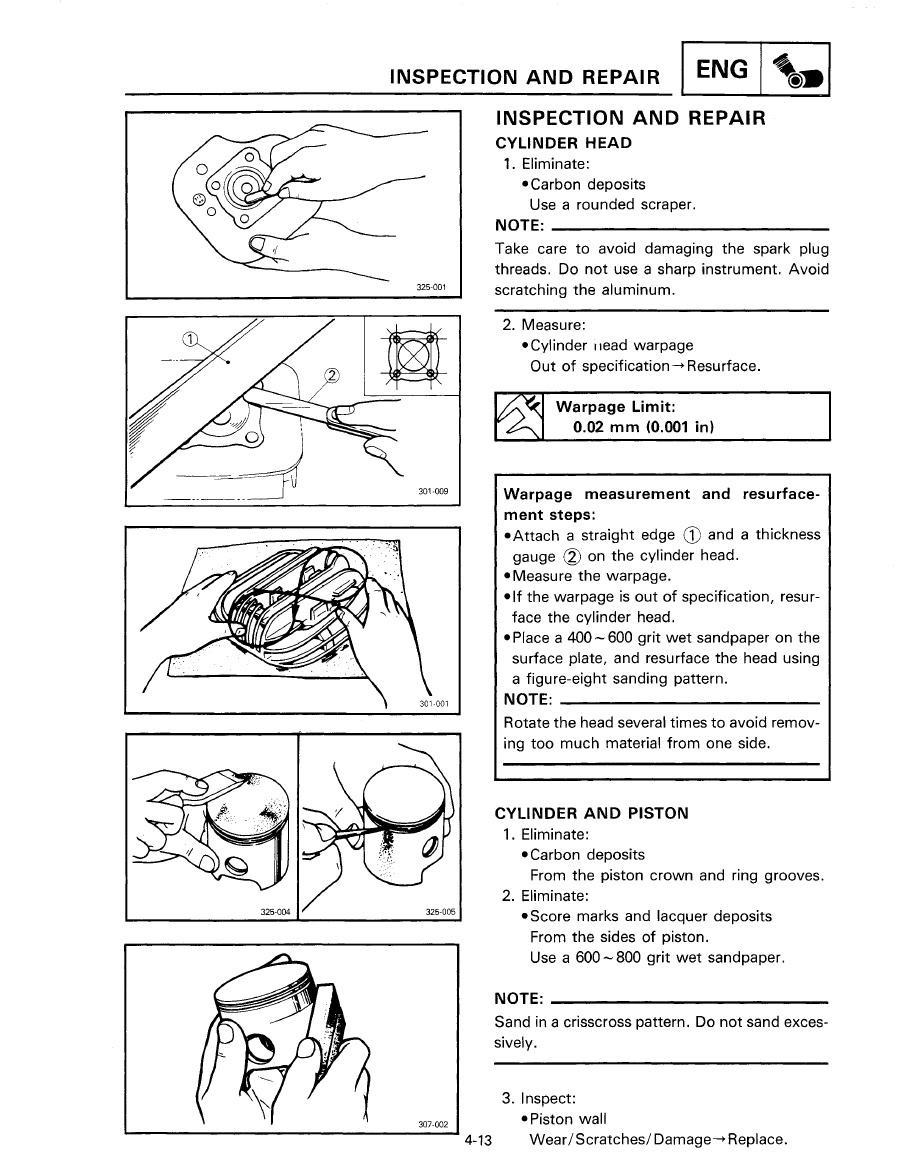
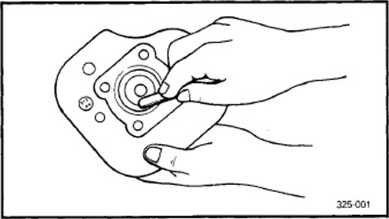
1. Eliminate:
•Carbon deposits Use a rounded scraper.
NOTĘ: _
Take care to avoid damaging the spark pług threads. Do not use a sharp instrument. Avoid scratching the aluminum.
2. Measure:
• Cylinder nead warpage Out of specification-»Resurface.

Warpage Limit:
0.02 mm (0.001 in)
CYLINDER AND PISTON
1. Eliminate:
•Carbon deposits
From the piston crown and ring grooves.
2. Eliminate:
• Score marks and lacquer deposits From the sides of piston.
Use a 600-800 grit wet sandpaper.
NOTĘ: _
Sand in a crisscross pattern. Do not sand exces-sively.
3. Inspect:
•Piston wali
Wear/Scratches/ Damage^ Replace.
Wyszukiwarka
Podobne podstrony:
84 5c90f6ee81 INSPECTIOIM AND REPAIR 5. Measure: •Piston-to-cylinder clearance Pisto
88 1a78f80731 INSPECTION AND REPAIRENG m Clutch Spring Minimum Length: 26.2 mm (1.03 in) 6. Measure:
85 ec002ba75d INSPECTION AND REPAIRENG § Piston size P Standard 39.96 - 39.98 mm (1.573-1.574
86 4c6f346dff INSPECTION AND REPAIRENG m 0.15-0.35 mm (0.006 - 0.014 in) 2. Instal
87 1160047f2c INSPECTIOIM AND REPAIR 5. Check: • Free play (when the piston pin is
92 eaef762dcf INSPECTION AND REPAIRENG
109 R1KEN Accel Próg. Rep. 24 (1990)IH-5-13. Field Measurements of the SMART Magnets Y. Tajima, K. H
20214 s&h 083 83 STHKXC!TH AND HEALTH ditions infiuitely morę unfarorable tliau tliose with wliieh l
43079 IMG 83 (4) Poły meric and secretory immunoglobulin A B.PolylgAconsistsof twomlgAmolecules
46705 Suzuki RM250 PERIODIC MAINTENANCE 2-9TRANSMISSION OIL TRANSMISSION OIL LEVEL INSPECTION
65 56e95422d8 INSP ■C3 ADJ mtm CABLE INSPECTION AND LUBRICATION/LEVER AND PEDAŁ LUBRICATION/SIDESTA
67 (83) Krzyżówka 1 2 3 4 5 6 7 8 9 10 11 12 13 Zajrzyj koniecznie do interesujących
7 94078f0582 CHAPTER 3.PERIODIC INSPECTION AND
The highest value of Shannon index has the site 2 m 2009 (H =2.83; Hmax=3.26 and e=0.87), whereas th
SERVICE DATA AND SPECIFICATIONS (S.D.S.)Inspection and Adjustment (Cont d)VALVE Unit: mm (in)Valve s
Valve seatSERVICE DATA AND SPECIFICATIONS (S.D.S.)_Inspection and Adjustment (Cont d)_ INTAKE 1.5
SERVICE DATA AND SPECIFICATIONS (S.D.S.)__Inspection and Adjustment (Cont d)- Main journal inner
więcej podobnych podstron